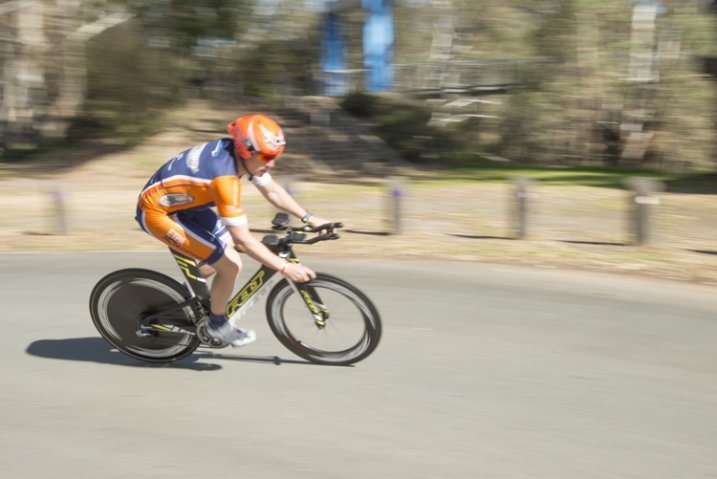
In this article you will see how to deal with fast moving objects. For me shooting action is the most fun you can have with your photography. You can freeze that instant split second that the human eye couldn’t even comprehend, and capture it in an image for all time.

1/6400, f/6.3. ISO 800
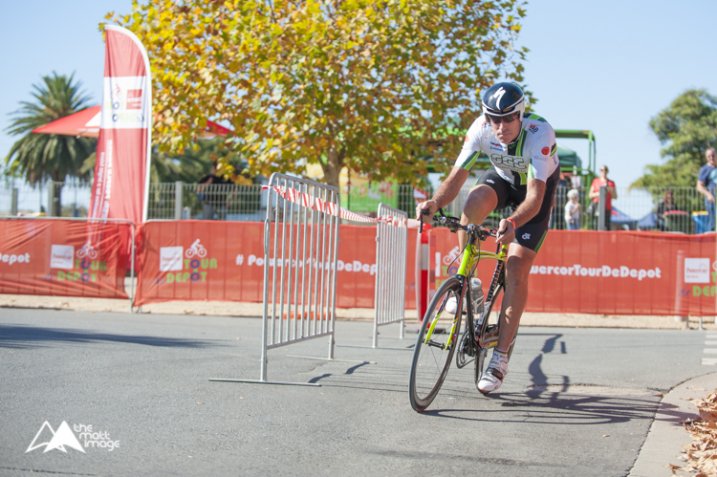
Last weekend I was lucky enough to shoot a bicycle charity event in the countryside. The sun was out, the birds were singing and there was enough distractions for me to completely leave my imagination at home.
As I was shooting fast moving road cyclists I had two lenses that I used. One which is the bread and butter lens of most photographers, the 70-200mm f/2.8. On a full frame body it has a good focal length that can capture subjects at a medium distances and the fast aperture allows for shooting in quite low light conditions. The second lens was a wide angle, for capturing some different looking shots. You don’t want to have a memory card with all the same style of shots, boring for you, and if this is for work, definitely not what the client wants to see.
Shutter speed: 1/50th, f/16, ISO 200
Although I just listed pro lenses, honestly you can do this with any kit zoom lens, a 55-200mm variable aperture or a 70-300mm like the Nikon VR which is a great value for money zoom lens.
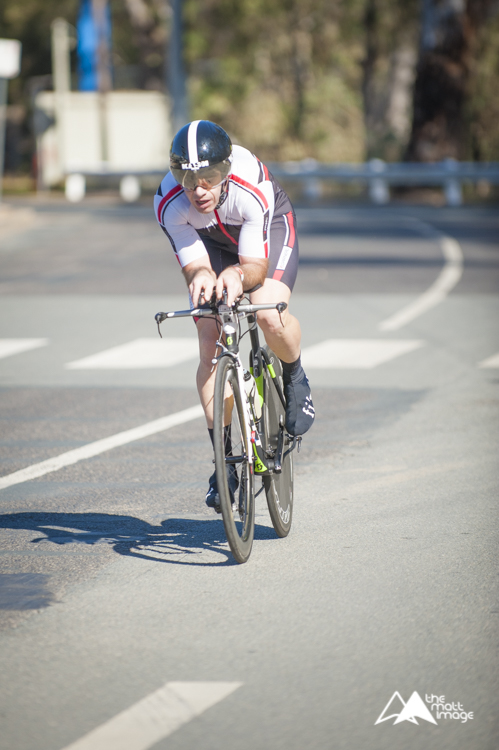
As with most shoots I make sure I get the classic shots that I KNOW I can nail first. For me this is frozen action, nice background, and the subject at approximately a 45 degree angle.

1/2500, f/3.2, ISO 200
As you can see in this image, it’s not mind blowing, however it has all the ingredients for a nice photograph that meets the criteria of what you are trying to capture. To create this type image, shoot with your zoom lens using the following settings as a rough starting point:
- Camera mode: Aperture Priority (Av in Canon, A in Nikon and most other brands)
- Aperture: As you want to freeze the action you need as much light entering the camera as possible, so choose a large aperture setting. With most kit lenses go down as low as possible, at this focal length that may be f/5.6.
- Shutter speed: No need to worry about this as the camera will adjust this automatically in this mode.
- ISO: If it is a sunny day like above, then ISO 100 or 200 is fine. However, if it is a little bit gloomy you may have to increase your ISO, I’ll talk about this in a minute.
- Focus: Set your camera for on Continuous or Servo focus depending on your brand. This means that while your shutter button is held halfway down, or your AF on button is pressed, the camera will continue to adjust its focus, which is what you need when tracking moving objects.
Your camera is now setup and ready to go. Get yourself in a position where the subject, in this case the cyclist, will be at approximately 45 degrees to you. Full side-on image and straight-on images can seem a bit odd unless it’s the style you are going for; at this angle you can see most of the rider and it’s more flattering.
Smoothly follow the rider with your camera; this might be easier in a crouch or if you have a monopod, utilize it. Once they are in a good position click off a shot or two. With any luck you have a nice photo of the rider, somewhat frozen in time.

1/1600, f/3.2, ISO 200
It didn’t work? Okay, there are two main things that could trip you up here, firstly the shutter speed wasn’t fast enough and the rider is blurry (??? and secondly???). As you are using Aperture Priority (which means you set how much light is allowed in the camera and the camera adjusts the amount of time the shutter is open automatically) it’s possible that there just isn’t enough light. So the camera has slowed the shutter speed way down to let more light in to exposure your photo properly, which has caused blurring of the subject.
When looking through your viewfinder. check your shutter speed down the bottom. You should be aiming for at least around 1/500th of a second. If it is slower than that, it’s time to bump your ISO up to compensate. Your ISO is how sensitive your camera sensor is to light. As a general rule you always want to keep this as low as possible to guarantee grain and noise-free images. However, it is a tool to be used, and on modern DSLRs shooting at ISO 800 yields incredible results over the older generation digital.
1/4000, f/3.2, ISO 400
Adjust your ISO up to 400 and try again. If you are still experiencing motion blur bump it up to 800. Unless it’s a very dark and gloomy day this should give you a crisp clear image with a fast shutter speed.
The next issue you might encounter is that the focus isn’t right. Maybe the rear wheel of the bike is in focus, but the riders face isn’t. Or even worse, the background is sharp and the rider is way out of focus. This is a simple fix.
All DSLRs give you the ability to change focus points, the square which the autofocus uses to target the focal point. Move this point to where the riders head will be in your frame. You may have to change your focus mode to Single Point Focus, as many cameras have the ability to change which focus point they use automatically, depending on the situation. You will have to consult your manual to find out where this is located in your menu system.
1/3200, f/3.5, ISO 400
Now when your rider is in frame, and you are focusing, it will focus on the rider’s face. Honestly, as long as their face is in focus the rest could be a blur, it doesn’t matter, faces are the most import thing in nearly all photos.
These guide lines should give you most of the info you need to shoot this type of photo. However, as with all photography, it’s trial and error to get things right and to get it looking the way YOU want.
Practice this week. Get your kids out on their bikes, go to the park and try to get some photos of dogs running around (this is fantastic practice for tracking subjects) or head down your local racetrack and take photos of cars, motorbikes or horses!

1/2500, f/7.1, ISO 500
Once you get this dialled in. it can be moved to many other subjects and situations, the photos of a skier (above) and snowboarder (top of article) were shot using exactly the same technique.
Do not dismay if things aren’t working out straight away. A lot of learning photography is trial and error and practice. Any entry level, or higher DSLR setup, can do this. Learn your gear and practice, you will be surprised at the caliber of photos you can get from even the least expensive setup.
Thank you for reading, I hope this helps you on your photography quest this week. Please post up your photos and practice shots, if you have any questions I will try to answer them all and get you on the right track to photography perfection. Happy snapping!
googletag.cmd.push(function() {
tablet_slots.push( googletag.defineSlot( “/1005424/_dPSv4_tab-all-article-bottom_(300×250)”, [300, 250], “pb-ad-78623” ).addService( googletag.pubads() ) ); } );
googletag.cmd.push(function() {
mobile_slots.push( googletag.defineSlot( “/1005424/_dPSv4_mob-all-article-bottom_(300×250)”, [300, 250], “pb-ad-78158” ).addService( googletag.pubads() ) ); } );
The post Shooting Fast Moving Subjects – How to Stop the Blur by Matt Hull appeared first on Digital Photography School.

Digital Photography School


You must be logged in to post a comment.