One of the nice things about mobile phones is that virtually all of them have cameras built in, which means almost anyone can be a photographer and has at their disposal quite an advanced piece of technology, capable of creating stunning images with the tap of a button. Some people prefer dedicated cameras like a DSLR or mirrorless model, and others like to carry a small point-and-shoot or even use good old-fashioned film. However, good photography has much less to do with the gear and is more about the person taking the image.
With that in mind, here are four questions to ask yourself the next time you take out your camera and start snapping away. If you stop and think about these, it will help improve your photography and you will take better photos:
- What is the purpose of the picture?
- What do I want my viewers to see or feel?
- How can I use my surroundings to create the image I want?
- How can I control my camera to get the image I want?
You could stop reading right now after seeing those questions and get to work on improving your photos, but I want to dig a little deeper into each one, to see how answering them can help you improve as a photographer and artist.
1 – What is the purpose of the picture?
Think back to the last time you sat scrolling through images on Instagram, Facebook, Flickr, or another image sharing site. Perhaps you just looked through some pictures at random, and maybe you even gave a precious few the much-coveted like, double-tap, or star rating. What was it about those photos that caught your eye and made you pause for a second or two? Recently a study carried out by Microsoft found that, thanks to smartphones and the rapid pace of our modern tech-infused lifestyles, people have an average attention span of only eight seconds. That’s shorter than a goldfish! A similar study carried out in the year 2000 found that attention spans then were roughly 12 seconds, which means things are only getting worse as we become more and more connected via technology.
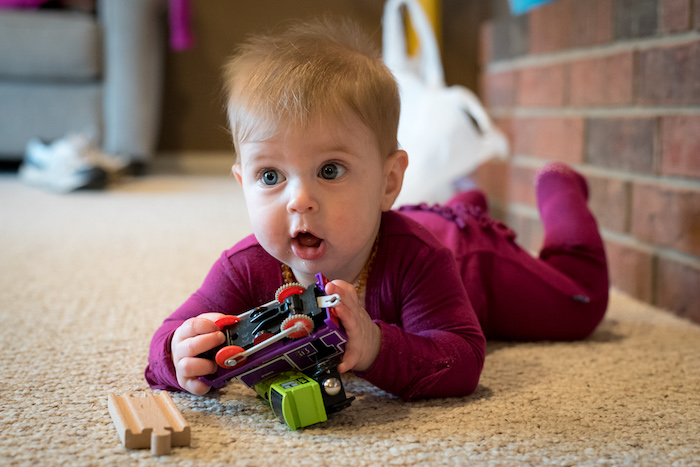
You might very well have a shorter attention span than this infant, and it’s a good bet your audience does too.
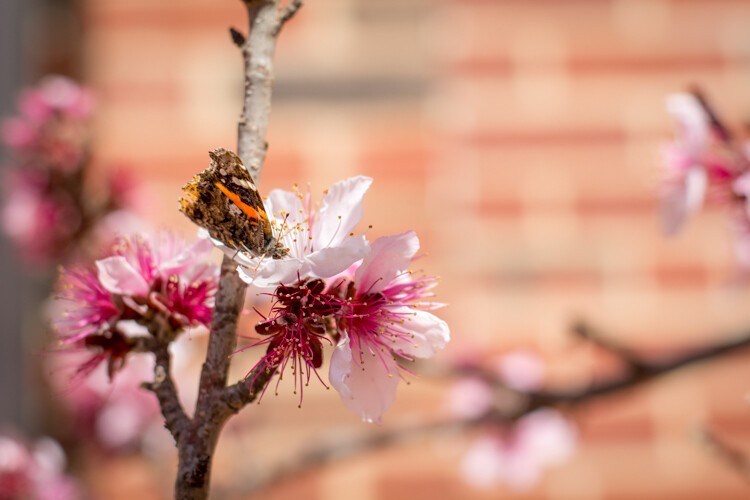
This has profound implications for photographers because it means that in the already-crowded landscape of digital pictures, your photos are not only vying for attention among thousands or millions of other images, but you have even less time to grab the viewer’s attention than ever before. To combat this, you need to make it abundantly clear to your viewers just what precisely is the point, of any given picture you take. In other words, your photos should have a clear subject – whether it’s a person or people, a flower, a kitten, a plane, a train, or even an automobile.
Look through your own pictures and ask yourself, “What’s the point?” If you can’t answer that question, then chances are that the photos won’t mean much to anyone else who sees them either. When I first got into photography I took all kinds of pictures of things that I thought might be interesting at the time, but looking back on them I honestly can’t tell you what is the purpose of many of those images. If I had taken the time to make sure the images had a clear purpose, instead of just pointing my camera at whatever I thought might look cool, I would have more important photos and much richer memories too.
I shot this photo about 10 years ago, and while I’m sure I had some kind of purpose, I honestly can’t remember what the point of it was supposed to be.
2 – What do I want my viewers to see or feel?
So now you have a clear subject in mind for your picture, and you’re all ready to snap the shutter on your DSLR, mirrorless, or even mobile phone. But wait, there’s more to consider before you start eating up that memory card, and flooding your favorite social networks with more photos. Now that you know what the purpose of your photo is, take the concept one step further and ask yourself what feelings, symbols, or other elements you want to impart on your viewers.
Do you want them to feel happy, sad, curious, introspective, or nostalgic? Do you want to stir them up so as to take action for a particular cause? Do you want them to notice things other than what might be the main subject of the image, and spend time digesting and interpreting your photos to gain a deeper understanding of the world around them?
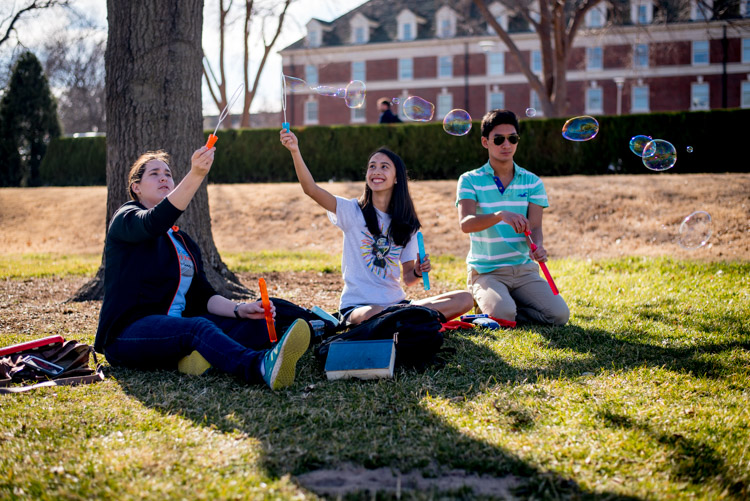
I didn’t just want those who saw this picture to think “Oh, some students playing with bubbles.” I wanted people to smile and feel the same sense of delight as the girl in the middle.
Humans are visual creatures, and as a photographer you are in the unique position of using a visual artistic medium to transmit thoughts and emotions. In this sense, photography is a form of one-way communication as you invite your viewers to engage with your images, and take something away from them. For example, here’s what might appear to be a rather mundane picture of a plastic duck:
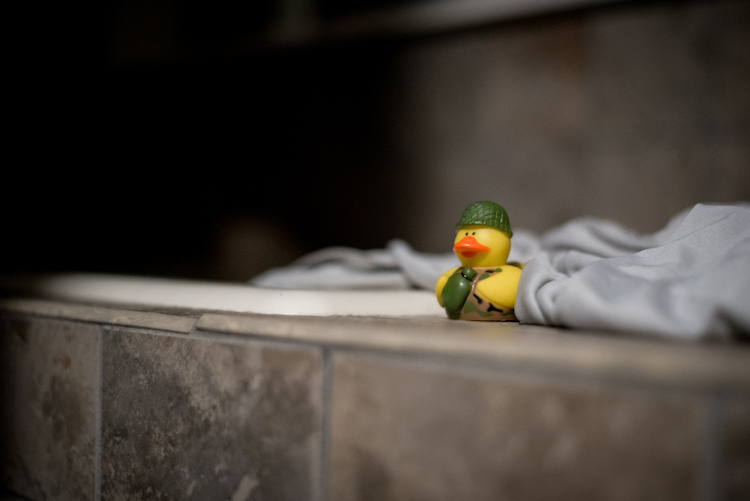
Is it a duck…or is it something more?
My goal in taking that picture was to have my viewers see more than just a basic rubber duckie. I specifically chose the time of day, angle of my camera, foreground and background elements, and exposure settings (i.e. f/1.8 aperture) to create this image, so that my viewers might see more than a kid’s bath toy. Perhaps they would think back to their own childhood, or maybe even invent a fantasy backstory for this duck standing guard at the edge of a precipice. It might seem like a simple image, but to me there was a lot more going on here, and by asking myself some deeper questions before I took the picture I got a better image as a result.
The same lesson applies to photography in general, and you have a powerful image-capturing tool at your disposal, to not just make snapshots, but tell stories and communicate with your audience. Going through some of these questions might seem like a lot of work when all you want to do is just pull out your camera and snap a few photos. But, as you work on doing this more and more, it will soon become second nature and you will see a noticeable increase in the quality of even your most mundane images.
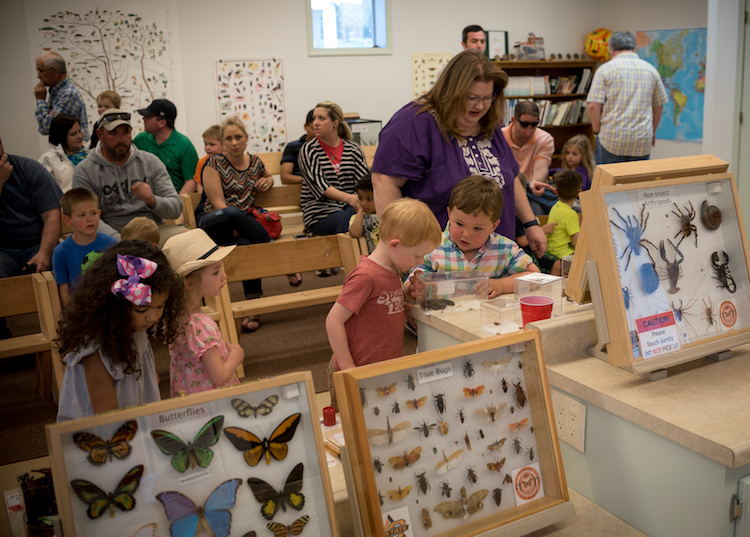
This picture is just a quick snapshot that’s not going to win any awards, but I specifically took it in such a way so as to provide context, invite the viewer to feel slightly squirmy, and hopefully see more than just some kids in a room.
3 – How can I use my surroundings to create a better photo?
One of the easiest ways to create a more compelling, interesting, and visually appealing photograph is to take a few seconds and examine the context in which the picture is being taken. Then try to position yourself, your subject, or even just your camera in such a way as to create maximum visual impact, and help you get precisely the photo you are trying to capture.
As an illustration of this take a look at the photo below. When I took it, I made several quick decisions with regard to my surrounds in order to get a better picture, than if I had just settled for a quick snapshot. As the child was walking down the street I followed from a short distance in order to get a photo of him, and adjusted my viewpoint so the sailboats would occupy the left side of the frame. I crouched down low to get a better angle, and positioned myself so that the boy’s head and shoulders were above the horizon and showing through a clear portion of sky instead of a tree or building. I also scooted over so the white paint line was leading towards the center of the picture, rather than off to the side. All this was done in a matter of seconds, since I knew this particular moment would be quite fleeting.

The result is a picture that, in my opinion, is elevated several notches above what otherwise might be a quite ordinary picture of a kid walking down the street. It also provides clear answers to the two previous questions:
- What is the purpose of the picture? To show a child walking down the street.
- What do I want my viewers to see or feel? A bit of nostalgia, a connection to the boy, perhaps a bit of hopefulness for the future.
Recently I had the privilege of photographing four generations of one family, so I chose a location that would evoke feelings of a certain time period and place my subjects in a very specific context. What you see below is the direct result of me choosing to use the environment to elevate the impact of the photo. In order to create a sense that the couple had a long and rich history together, I placed them a few meters in front of a white fence, with an old farmhouse occupying the top-left portion of the frame. I could have taken the picture from many other angles, with very different scenery around them, but what you see here is the result of a very specific artistic choice on my part, in order to get precisely the photo I wanted.

You can do the same thing, and it doesn’t require any special equipment or educational training. All you need is to keep your eyes open, examine the world around you when you take photographs, and use the environment to give your images a richer sense of time, place, and context.
4 – How can I control my camera to get the image I want?
Many people take great pictures without ever straying from the Auto option on their camera dial, and if you have a mobile phone or point-and-shoot you may not have any other options besides Auto. I know from personal experience how scary it can be to move away from Auto. For years I wondered why I would ever bother leaving that safe little green option when it did a pretty good job – especially since every time I ventured into another mode such as Aperture Priority, Shutter Priority, or (gasp!) full Manual, I never seemed to get the results I was looking for. What you may not realize if you stick with Auto, is that a whole new world of photography wonder is right in front of you, just waiting to be discovered if you can learn how to control your camera a bit more.
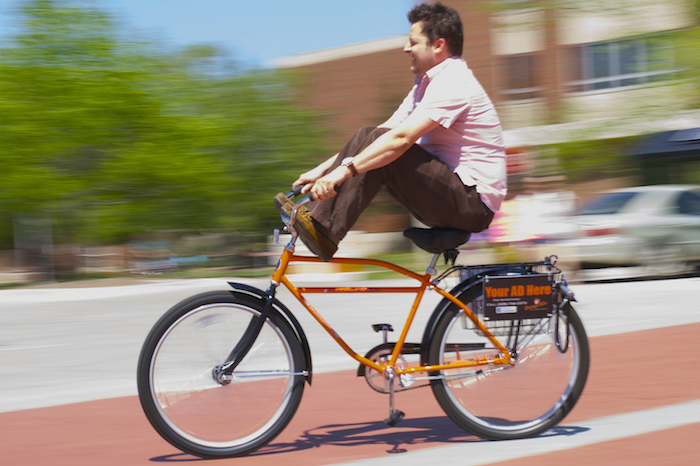
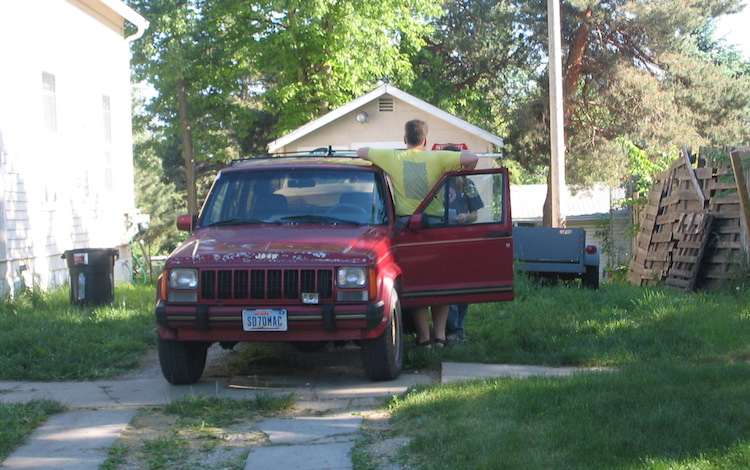
It’s virtually impossible to get pictures like this using the Auto mode.
Learning to control the aperture of your lens, the shutter speed of your camera, and the ISO sensitivity of your image sensor can make all the difference between a forgettable snapshot, and a wall-worthy masterpiece. It takes a little while to learn the fundamentals, but once you get the hang of it you will find yourself asking technical questions in order to solve artistic problems. I am constantly pressing buttons and flipping dials when I take pictures (even if it’s just my kids in the back yard) so I can get exactly the image that’s in my head, and not the picture that my camera thinks I want to take.
If this sounds hopelessly complicated, look down at the keyboard the next time you are at a computer. Remember when it took you agonizing minutes just to peck out a few words or sentences? Now you probably don’t look at the keyboard at all, and typing isn’t something you really think about anymore. You think of the words you want to appear onscreen, and your fingers naturally move to the right letters on the keys. The same thing happens with practice when you learn to use other modes on your camera, and your pictures will be much improved as a result. The bottom line is that if you, not your camera, decide which aperture, shutter speed, and ISO to use, you will get better pictures.
Now that you have read my four questions, I’m curious to know your side of things too. Are there any tips you have found that work well for you to get better images? What are some of the best practices you have learned over the years? Share your thoughts in the comments below.
googletag.cmd.push(function() {
tablet_slots.push( googletag.defineSlot( “/1005424/_dPSv4_tab-all-article-bottom_(300×250)”, [300, 250], “pb-ad-78623” ).addService( googletag.pubads() ) ); } );
googletag.cmd.push(function() {
mobile_slots.push( googletag.defineSlot( “/1005424/_dPSv4_mob-all-article-bottom_(300×250)”, [300, 250], “pb-ad-78158” ).addService( googletag.pubads() ) ); } );
The post 4 Questions to Ask Yourself Before You Shoot to Help Improve Your Photography by Simon Ringsmuth appeared first on Digital Photography School.

Digital Photography School

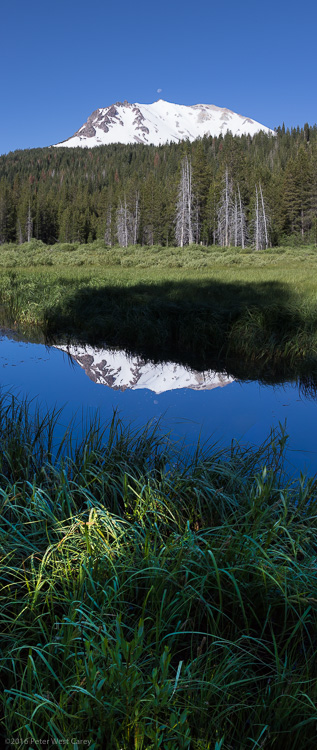
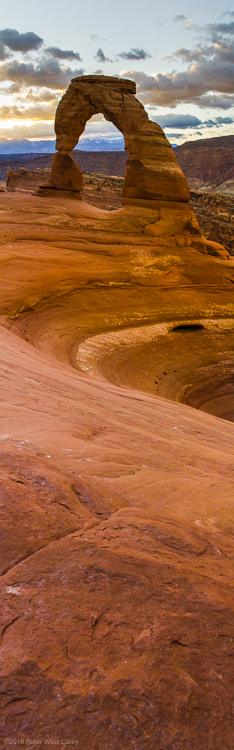
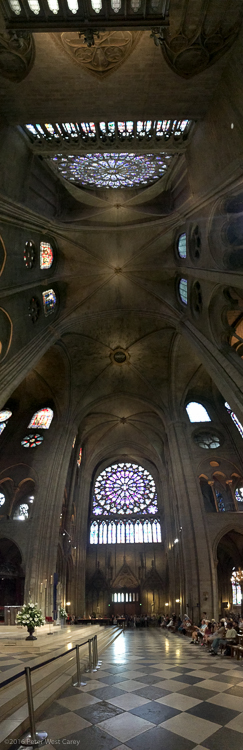
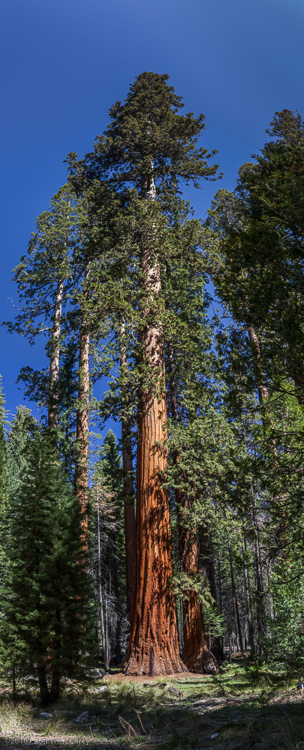
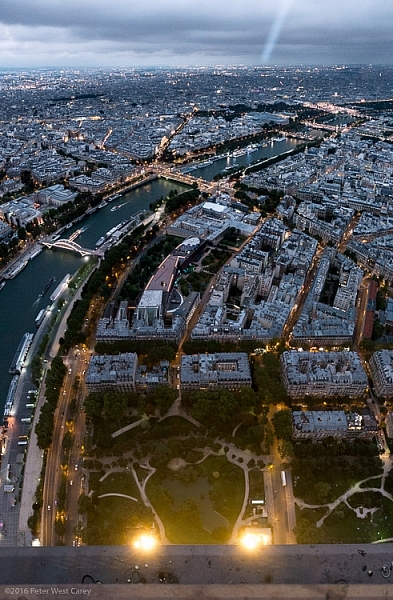
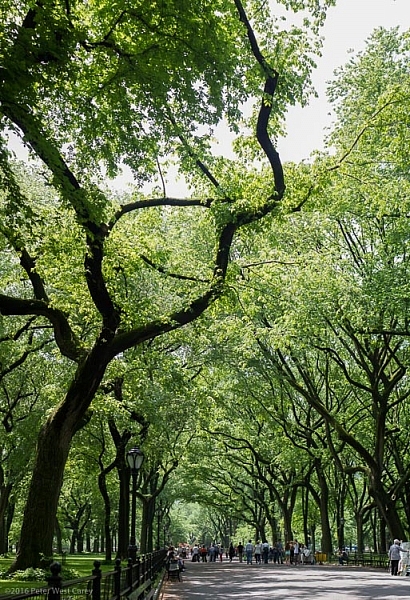
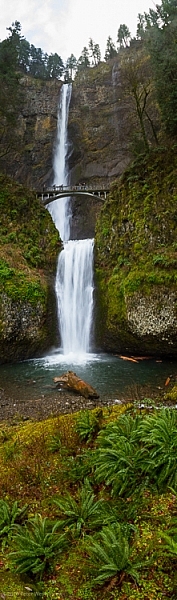 The Eiffel Tower. The Statue of Liberty. Redwood trees. Not all the world fits into our horizontal frame of it. Some of it climbs up and up! For those images you need to learn a new technique; vertical panoramas, or vertoramas as they are known.


 Marcin Tyszka
 Greg Kadel
 Mood Boards: Communicate Your Ideas To Your Creative Team
 Shooting With Your Creative Team & Post Production
 Working With A Creative Team
 Reaching Out To Modeling Agencies
 Concept To Creation: Turn Inspiration Into Concept
 Concept To Creation: How Professional Photographers Do It
 Vapour With Greg Cunningham
 Concept To Creation: Finding Inspiration


You must be logged in to post a comment.