RSS
 

Posts Tagged ‘Shoot’

5 Quick Tips to Help You Make a Fashion Photography Shoot Like a Pro

15 Nov

It might be the fabulous pages of magazines or it might just be that urge to create something chic. Either way, we are now living in this digital era where fashionable shoots are just around the corner. Hashtag #OOTD (outfit of the day). But that’s where the similarity ends. Planning and executing a fashion photography shoot takes more than that.

Fashion shoot photography

I hate to break it to you, but placing all your good looking friends in front of your camera, and purchasing the latest mirrorless technology probably won’t make you the next Guy Bourdin. From my personal story as a fashion photographer for over five years now, your biggest learning experience comes from learning through your own team, fellow creatives, photographers, stylists, models, and make-up artists. So, here are some tips I’ve learned through my years of trials and tribulations on how to produce a fashion shoot like a pro.

1. Inspirations 101

“Nothing of me is original. I am the combined effort of everyone I’ve ever known.” or so the saying goes. Nowadays, let’s challenge the concept of people stating there’s no such thing as originality anymore. Is that true? But truthfully, the best ideas may not be the first ones.

Find Inspiration fashion shoot

Creativity is a limitless concept. You can always start developing your ideas by sourcing inspirations from practically anywhere. When you start noticing the littlest things in your life, it will do wonders as your source of inspiration. This is fundamental because it is the ground work before every shoot. To develop a concept that is strong and authentically yours is the key to the next step of creating the perfect frame in a fashion photo shoot.

Find Inspiration fashion shoot 2

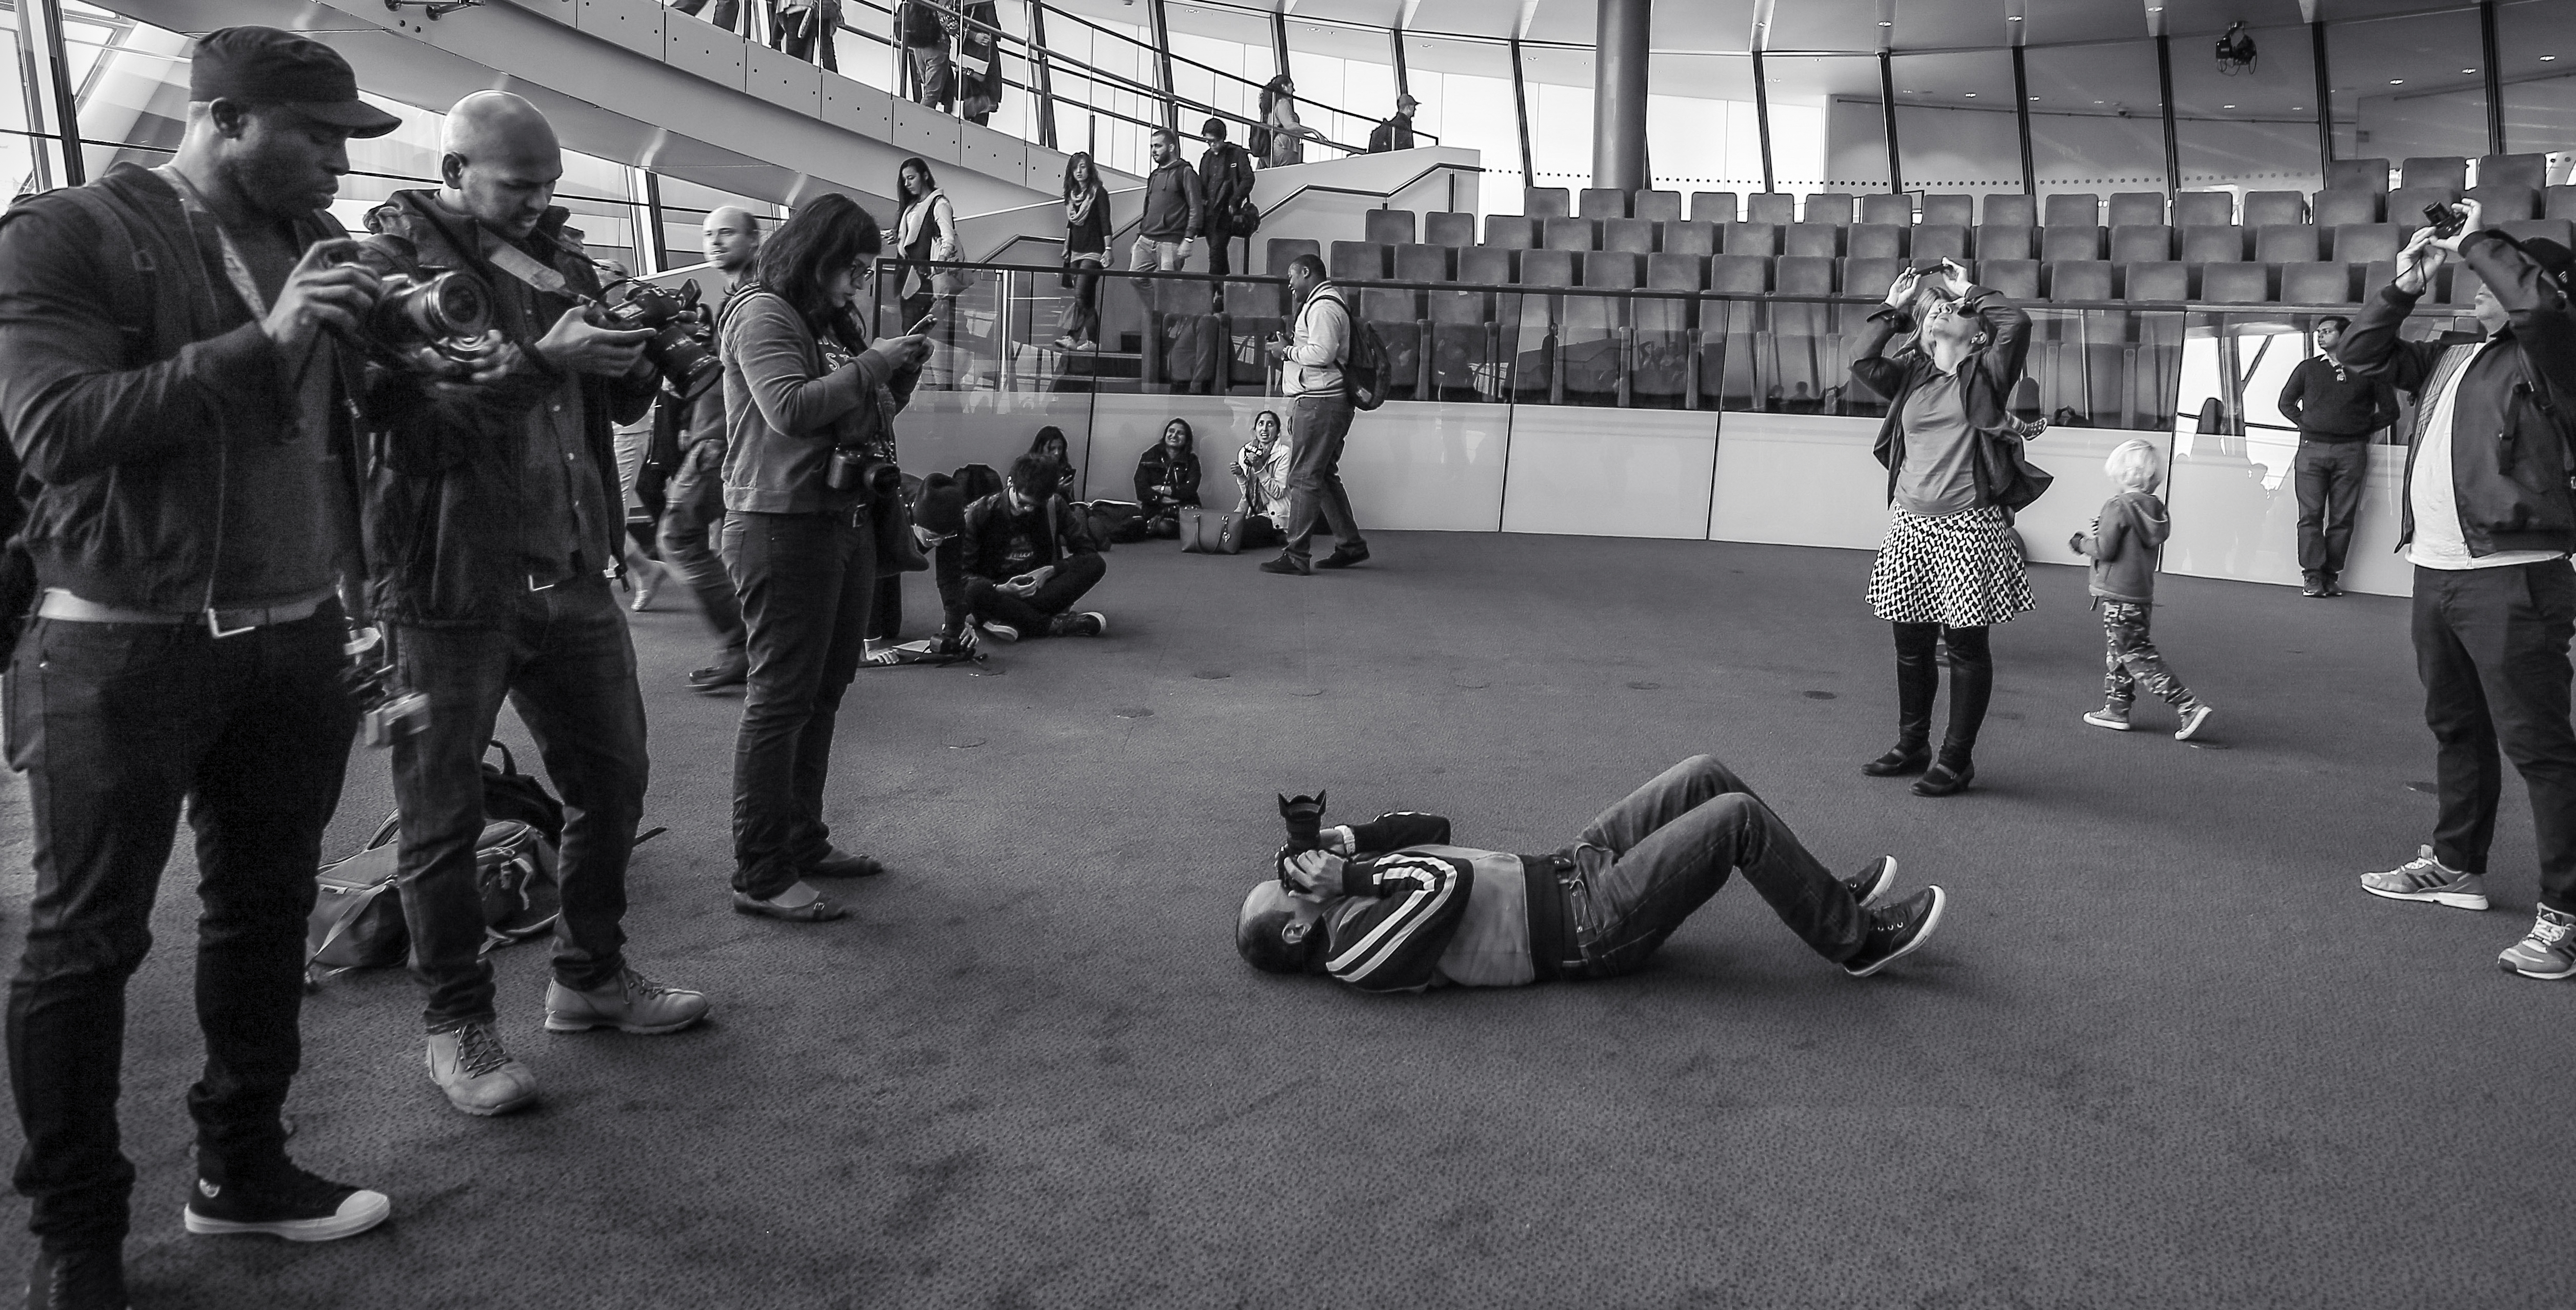
2. Team Work is Everything

Create your perfect squad. When you meet someone you are comfortable working with, continue to develop a great relationship with them. Because at the end of the day, the perfect frame is not just in the hands of the photographer. Everyone needs to be equally involved and the greater the chemistry ultimately leads to the perfect picture.

Make sure you succeed in getting everyone on the team on the same page, from the vision for the shoot to work ethics. A solid team of creatives that gel well together is really ideal because in the end, it’s all about teamwork.
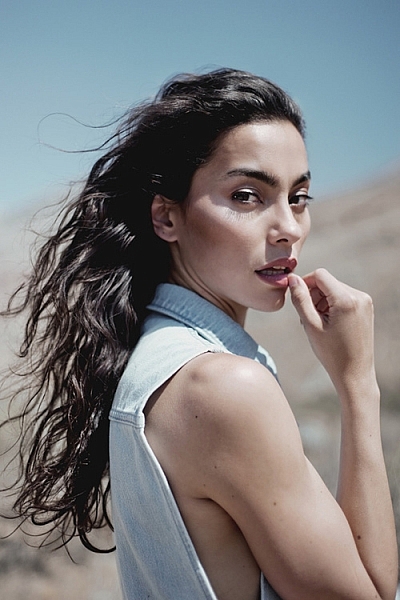
Team Work fashion shoot 02

Team Work fashion shooot

3. The Look

A fashion shoot is never complete without the right model. You need to find a model who has the right look for the concept. Whether it’s height, hair color, skin tone, eye shape, etc. Bonus points if you get to know the model first beforehand. Good chemistry between the photographer and model is also very important to create a comfortable shooting environment.

When you are shooting, there’s only the photographer, the model, and a camera. Putting on a music that’s enjoyable to everyone can also help the model get into character.

result-fashion-shoot

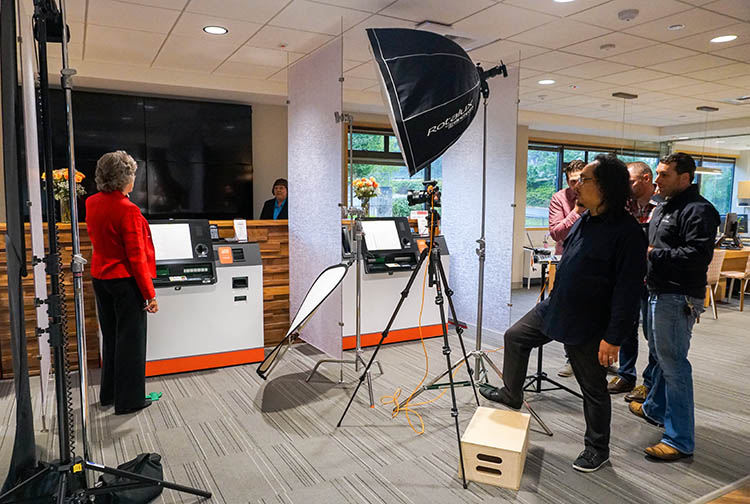
4. Scouting Locations

Outdoors or indoors, it’s crucial to prepare everything beforehand. You don’t want to be stressed out on the big day right? When it comes to studios, the physical environment has to be a positive working environment. Think about how much space you need, equipment, facilities, etc. An outdoor fashion shoot are tad trickier. Always double check if you need to have permission beforehand if it is a private area, and always, always check the weather! The sun can be your best friend or your enemy in this case.

Location Scout fashion shoot

Locations Locations fashion photography

5. Hair, Makeup and Wardrobe

This is where the good team work really shows. I personally think it is important to get everyone on the same page for the vision and mood of the shoot. Also, don’t be afraid to voice your opinion if something can be altered. Such as the hair is too big, the model needs more mascara, the button’s falling off, etc. Don’t be afraid to speak up, it’s team work after all.

Make Up fashion photos

Hair Make Up fashion shoot

Lastly, never forget to have fun! It’s always a blessing to be able to work passionately. Enjoy your ride along the way, stay curious, and bring positive vibes. Good luck.

Please share your fashion photography tips and photos in the comments below.

googletag.cmd.push(function() {
tablet_slots.push( googletag.defineSlot( “/1005424/_dPSv4_tab-all-article-bottom_(300×250)”, [300, 250], “pb-ad-78623” ).addService( googletag.pubads() ) ); } );

googletag.cmd.push(function() {
mobile_slots.push( googletag.defineSlot( “/1005424/_dPSv4_mob-all-article-bottom_(300×250)”, [300, 250], “pb-ad-78158” ).addService( googletag.pubads() ) ); } );

The post 5 Quick Tips to Help You Make a Fashion Photography Shoot Like a Pro by Sally Ann and Emily May appeared first on Digital Photography School.


Digital Photography School

 
Comments Off on 5 Quick Tips to Help You Make a Fashion Photography Shoot Like a Pro

Posted in Photography


Photographer’s Dress Code – What to Wear to a Photo Shoot

10 Nov

As a budding photographer, one of the biggest questions that will eventually come to mind is, “What should I wear to a photo shoot? Is there a photographer’s dress code?” The answer varies widely depending on the type of photo shoot you’re conducting, the specific client you’re working with, your overall style and brand as a photographer, and the culture of the region where you’re shooting.

A portrait photographer, for example, may have more flexibility in how he or she dresses compared to a corporate event photographer. Similarly, a photographer shooting in the West Coast of America will likely be able to dress more casually than an East Coast photographer. All variations aside, here are some general photographer dress code guidelines to start off with.

Michael Broad

By Michael Broad

1. Invest in a solid, comfortable pair of shoes

Regardless of what kind of photo shoot you’ll be conducting, start with shoes. Consider that you’ll likely be standing for hours on end, so comfort and ergonomics are key. Also, think about the terrain you might encounter during your shoot, and the seasonal weather. Will there be grassy fields, sandy shores, or other outdoor elements you might be venturing into to get unique angles? If so, shoes that can take a light beating and still look good will be of utmost importance.

As a female photographer who shoots mainly for corporate clients, I generally opt for black leather flats during the warm season, black leather boots for colder weather, or dressy black leather sneakers for extra long shoots with outdoor elements. In any case, it’s generally a good idea to stay away from sandals, high heels, and flip flops.

Laura Thorne

By Laura Thorne

2. Cover up

As a creative photographer in constant search of creative angles, consider the possible physical maneuvers such as bending, stooping, and squatting that you might be pulling off during a shoot. Dress accordingly, making sure to wear an outfit that will allow you to be physically flexible without giving your clients an eyeful, or worse yet, causing a wardrobe malfunction. Ladies, this means avoiding low-cut tops, ultra short skirts and dresses, and skimpy outfits. At the very least, bring a blazer or sweater to cover up. Gentlemen, don’t forget a belt and a longer shirt that can be tucked in.

3. Dress in all black

This is a contestable point, as it can also be argued that dressing according to your brand is a better strategy. However, it’s a general rule of thumb that wearing all black is best for being as invisible as possible at a photo shoot. That way you won’t stand out and take attention away from the main photo subject. Not to mention, dressing in all black makes you look more official, like a staff member which can potentially be helpful in navigating around a venue.

Personally, I opt for the all-black rule for all of my photo shoots, simply because it’s one less thing to worry about when I have a pre-assembled uniform to fall back on. For me, this uniform consists of mixing and matching from the following selection; one pair of black skinny jeans, one pair of black slacks, a black leather belt, several button-down black blouses, several black polo shirts, and a black blazer. Whenever possible, I also try to buy my black clothing in lightweight, moisture resistant fabrics rather than cotton, to avoid sweat absorption.

what-to-wear-as-a-photographer-01

4. Add a personal touch

Some photographers might contest the above point of dressing in all black with the argument that it’s important to dress according to your brand. This is something I definitely believe in as well, but having brand elements infused in your style of dress can also be done while still wearing all black. As an example, I always make sure to wear a few pieces of statement jewelry to accent my outfit and also serve as a conversation starter. I have a couple pairs of unique earrings, necklaces, and watches that almost always attract comments or questions, but they are also subtle in size so they don’t stand out too much.

Another idea is to custom order black clothing that has your logo on it, such as a polo shirt with a subtle branding element. A photography colleague of mine has done this with huge success as it further reinforces his brand, while also making him look and appear more official at photo shoots.

what-to-wear-as-a-photographer-01

5. When in doubt, ask

If you’re truly stumped on what to wear to a photo shoot, ask your client if they have any preferences. This is likely less important if you’re doing an intimate portrait session, but for event photographers, in particular, it never hurts to ask the client. I once had a corporate photography client who forgot to send over their two-page document detailing their dress code for photographers, which I would never have received had I not asked. At the very least, it’s important to find out if the dress code for your shoot is formal, semi-formal, or casual, and what exactly those terms mean to the client.

Jpellgen

By jpellgen

Over to you

To some photographers, what you wear to a photo shoot may not seem like a big deal. But I firmly believe how you dress is a reflection of your brand, so considering every element of your outfit is crucial.

What do you wear when you’re conducting photo shoots? Let me know in the comments below!

googletag.cmd.push(function() {
tablet_slots.push( googletag.defineSlot( “/1005424/_dPSv4_tab-all-article-bottom_(300×250)”, [300, 250], “pb-ad-78623” ).addService( googletag.pubads() ) ); } );

googletag.cmd.push(function() {
mobile_slots.push( googletag.defineSlot( “/1005424/_dPSv4_mob-all-article-bottom_(300×250)”, [300, 250], “pb-ad-78158” ).addService( googletag.pubads() ) ); } );

The post Photographer’s Dress Code – What to Wear to a Photo Shoot by Suzi Pratt appeared first on Digital Photography School.


Digital Photography School

 
Comments Off on Photographer’s Dress Code – What to Wear to a Photo Shoot

Posted in Photography


6 Tips for How to Build a Story and Shoot a Photo Project

04 Nov

I’m a strong believer that setting yourself photo projects is the best way to improve your photography skills. Projects give you focus and help you build a cohesive body of work. A photo project can last for years, and set a theme that helps you find new people and subjects to photograph.

Of course, you may be wondering what sort of project you could set yourself that would achieve these aims. A project can be simple, like photographing flowers in your back yard, or it can be more complex, such as travelling to a foreign country and photographing the people you find there.

storytelling-projects-22

Getting ideas for a photo project

You’ll find lots of inspiration at websites like Feature Shoot that regularly publish photo projects.

I’m going to give you some advice on tackling a project by giving you some examples from a project that I undertook to photograph artists and craftspeople. I have learned a number of things from this project.

Here are some of the most important:

  • Meeting new people and learning about their crafts is interesting. I like meeting and talking to new people and learning about their lives. The brief window I have during the shoot is a chance to connect and talk about art and creativity, as well as the work of the artist or craftsperson. Some of those people have become friends. This project has rewarded me on a personal level as well as on a photographic one.
  • It helps me find something interesting to photograph. For example, 18 months ago I spent three days in Raglan, a small town on the west coast of New Zealand’s North Island. Before I went, I contacted two local craftspeople and asked if I could drop by and take some photos. Both said yes – and I made my most interesting photos on the trip during those two shoots.
  • The project grows by itself. I send photos to the people I photograph, then ask them if they know of anybody else who may be interested. These personal introductions and recommendations help me find new artists and craftspeople to photograph.
  • My portraiture skills have improved. Practice makes perfect, and every shoot means I get a little better at this documentary style of portraiture.

Here’s a portrait I made of artist Chris Meek, one of the artists I photographed in Raglan. We had a great conversation about art, creativity, and life. I’d never have had this experience if I hadn’t embarked on the project.

storytelling-projects-20

So, once you’ve decided on a project, how do you make it a success? These ideas will help.

1. Shoot a variety of images

This is important because it adds interest and variety to the photos you get from the shoot. But I’d like to add a proviso, because I think in general there are two ways to approach a project shoot.

Firstly, is to concentrate all your resources on getting one great photo. The second is to create a set of varied photos that collectively give a better interpretation and tell a story.

My suggestion is to combine these two approaches. Aim to create a variety of photos, but give each photo your best effort. In other words, when you see the possibility of an image, give it your full attention and make it as good as you can before you move on to the next.

storytelling-projects-17

How do you create variety? Here are two ways:

1. Vary your viewpoint. Get closer to your subject, or farther away. Take photos from below, or from above. Of course, the best viewpoint depends a lot on the subject of your project, the light, and the lenses you are using. But the key is to always be thinking about how you can add variety by moving around and taking photos from different angles.

2. Take scene setting shots and close-ups. You could start with a scene-setting photo that captures everything, then move on and create a variety of photos from closer viewpoints showing details.

This works well for projects like mine, where you can take a photo of the artist or craftsperson at work in their studio, along with a series of tighter images and close-ups that show them at work. In this example, you can also take photos of the product the craftsperson makes as well as photos of the craftsperson themselves.

These two photos show Todd, a flute maker, working in his garage. Both were taken with the same lens, but I got a lot closer to make the second image.

Story telling and doing a creative photo project

This also applies to more static subjects like landscapes. If you have a landscape related project, you can create variety with photos that show the entire scene, mixed with some that show close-ups of details that you noticed within the scene.

2. Tell a story

It’s often hard to a story with a single image, but it’s much easier with a sequence of photos because you can show different aspects of the same story in each one.

For example, with my photos of craftsmen I like to show images taken at different stages of the creation process. Put together they show how a certain item was made. That’s the story. These three photos show different stages in the creation of an artwork by Chris Meek.

storytelling-projects-6

storytelling-projects-5 storytelling-projects-7

You can also tell a story by paying attention to detail. While taking photos of Eoin, a glass blower, I noticed that his hands gave away a lot about his profession. So I made sure that I took photos like this, that shows the dirt on his hands and the tattoo on his thumb.

Story telling and doing a creative photo project

3. Find commonalities that link the photos

While photo stories need variety amongst the images to create interest, it is helpful if the photos are also linked in some way. For example, you could process all the photos from a shoot in black and white. Or they could be processed in a similar style, perhaps by using the same Lightroom Develop Preset as the basis for the processing.

Or, if you have a project that involves portraits, you could use light to link the photos. Using the same lighting setup for each portrait is one way to to do that.

These photos of Jasmin, a weaver who makes hats, are linked by the lighting and the processing. Each is lit by natural light coming through a window in her home, and given the same color treatment in Lightroom.

storytelling-projects-9

storytelling-projects-21

4. Show genuine interest in people

If your project involves people it is important to be genuinely interested in them and what they are doing. Let’s say, for example, you undertake a project taking portraits of surfers. You’ll get the best results if you are genuinely interested in surfing and enjoy talking with surfers.

It’s all about authenticity. If you’re genuinely interested in people, you will have plenty in common and find it easy to talk with them. But, if you’re not, then you won’t make the connection that is essential for good portraiture.

5. Give it time

Give your projects time to evolve and mature. For example, if you have a project photographing your local landscape, giving it time lets you create a series of photos that show the variation created by weather and seasons. Showing the changes that happen over a period of time is also another way of telling a story.

6. Compare and evolve

The reason why projects are such a good learning experience is because they give you the opportunity to compare your current work with your earlier photos. You will see how your ideas and techniques have evolved over time. You’ll also benefit by building a body of work and learning to edit a portfolio by selecting the strong images that work together.

Story telling and doing a creative photo project

Your turn

Have you undertaken any photography projects? Did they help you become a better photographer? Please share your thoughts and project in the comments below.


The Creative Image

If you found this article interesting then please download my free ebook, The Creative Image for 10 brilliant ideas for creative photography projects you can do.

googletag.cmd.push(function() {
tablet_slots.push( googletag.defineSlot( “/1005424/_dPSv4_tab-all-article-bottom_(300×250)”, [300, 250], “pb-ad-78623” ).addService( googletag.pubads() ) ); } );

googletag.cmd.push(function() {
mobile_slots.push( googletag.defineSlot( “/1005424/_dPSv4_mob-all-article-bottom_(300×250)”, [300, 250], “pb-ad-78158” ).addService( googletag.pubads() ) ); } );

The post 6 Tips for How to Build a Story and Shoot a Photo Project by Andrew S. Gibson appeared first on Digital Photography School.


Digital Photography School

 
Comments Off on 6 Tips for How to Build a Story and Shoot a Photo Project

Posted in Photography


Chronos 1.4 is a $2500 camera that can shoot at 21,650 fps

27 Oct

Late last month, a homemade camera dubbed Chronos surfaced alongside the claim that it can shoot at speeds up to 21,650 fps. The camera was notable not only for its ultra-high-speed shooting capabilities, but also its comparitively affordable $ 2500 price tag. The camera was the subject of a recent YouTube video showing off its various features and functionalities.

Chronos 1.4 is the brainchild of engineer David Kronstein, who first demonstrated the camera’s hardware and recording capabilities with a production-level prototype under his YouTube handle ‘tesla500.’ The camera can record 1,057 fps at 1280 x 1024, and up to 21,650 fps at lower resolutions. Kronstein lists the pre-production camera features as the following:

  • 1.4 Gigapixel per second throughput
  • 1280 x 1024 at 1050 fps
  • Lower resolutions at higher speeds
  • 8, 16, or possibly 32GB RAM
  • Storage on SD card, USB drive, SATA hard drive
  • Raw video saving
  • No PC needed for operation
  • AC Adapter or battery (1.75 hour per charge)

You can see a full review of the camera in Taofledermaus’s new video below. Per his video, it seems the current plan is to launch the camera on GoFundMe rather than Kickstarter in the next month or so, but details on that are still slight at this time.

Via: PetaPixel

Articles: Digital Photography Review (dpreview.com)

 
Comments Off on Chronos 1.4 is a $2500 camera that can shoot at 21,650 fps

Posted in Uncategorized


Hot set: Benjamin Von Wong’s latest shoot features a model on lava flows

21 Oct

$ (document).ready(function() { SampleGalleryV2({“containerId”:”embeddedSampleGallery_4250438260″,”galleryId”:”4250438260″,”isEmbeddedWidget”:true,”standalone”:false,”selectedImageIndex”:0,”startInCommentsView”:false,”isMobile”:false}) });

Photographer Benjamin Von Wong, never one to shy away from extreme conditions to get a shot, has released a new set of images and behind the scenes information from his most recent shoot among the lava flows of Hawaii’s Big Island. Setting out at midnight, he and his crew trekked several miles through rough terrain to reach the glowing lava, where they set up to capture a model backlit with a battery-powered monolight. Using a Sony a7R II and FE 16-35mm F4, Von Wong worked quickly – the intense temperatures meant his model could only stand in position near the lava for very short periods of time. 

You can see some of the resulting images above. For more behind-the-scenes info, head to Von Wong’s blog. Images from the shoot are for sale, with profits benefiting victims of Hurricane Matthew. 

See Benjamin Von Wong’s PIX 2015 talk

Articles: Digital Photography Review (dpreview.com)

 
Comments Off on Hot set: Benjamin Von Wong’s latest shoot features a model on lava flows

Posted in Uncategorized


4 Tips to Help People Photographers Shoot Interior Spaces

18 Oct

As a people photographer, I am not a specialist in photographing still forms like architectural structures and interior spaces. However, because I photograph weddings, I often take photos of interiors and locations as part of the wedding photos I give my clients. This is essentially how I learned to develop an eye for detail, form and structure as part and parcel of my work.

4-tips-photographing-interiors-tutorial_0008

Let me share with you a few tips I have learned that will hopefully get you started in photographing interior spaces and architecture if you are a people photographer.

#1 Use natural light

One of the advantages of still photography is simply that – nothing moves. You can leverage this by playing with your settings, especially the shutter speed. With the camera rested on a tripod or a table, you can play around with very slow shutter speeds to maximize capturing ambient light even in very dark corners, limited light, or night interior photography. If there are lamps and lights that make up the overall ambiance of the room, include them and take advantage of slow shutter speeds and long exposures. You can also keep your ISO low this way and have the bonus of clean noiseless images.

It is important to remember that for interiors, you should aim for balanced lighting. Meaning there are no overly dark shadows or overly bright highlights. You want to see the detail in dark areas but not blow out the light areas altogether. Because we are talking about natural light, think about which times of the day which best feature the interior space. Early morning and late afternoon light are the softest. Overcast days produce soft light. Bright super sunny days produce harsher light especially midday and therefore you may want to take into consideration shadows produced in the interior from harsh outside light. In contrast to photographing people, I would normally use these shadows as an artistic element of the photo. Interior spaces however are different and this may not always be appropriate.

Early morning and late afternoon light are the softest. Overcast days produce soft light. Bright super sunny days produce harsher light, especially midday. Therefore you may want to take into consideration any shadows produced in the interior from harsh outside light. In contrast to photographing people, I would normally use these shadows as an artistic element of the photo. Interior spaces, however, are different and this may not always be appropriate.

4-tips-photographing-interiors-tutorial_0008

#2 Don’t forget your 50mm lens

Not only is the 50mm lens the closest lens that resembles the human eye (when using a full frame camera), it is also the perfect lens to separate some areas and details of the space without going in too close. In a way, it is an excellent “portrait” lens for spaces, whereas my 85mm is my choice of portrait lens for people.

When using wider lenses, I find I have to correct quite a lot of distortion on the edges of the frame. With the 50mm this is hardly an issue. The results are pleasing to the eye and it evokes a very natural look, making you feel like you are within the actual space yourself.

4-tips-photographing-interiors-tutorial_0008

#3 Get the white balance right

This is tricky and the nemesis of many photographers. Most non-photographers are oblivious to white balance. This is especially obvious in weddings where the bride’s dress looks blue and people’s faces register as magenta, yet hardly anyone notices.

When I sold my house a few years back, the real estate agents who boasted of great property photography sent a photographer to my house to take some professional pictures. She arrived with a camera on the tripod and a flash head pointed slightly upwards. The lens used was very wide – I guessed around 10mm or 14mm. It took many days before the photos were up online, when finally I saw them, they were all very blue. My home felt so cold and not homely. One of the reasons for that was the incorrect white balance.

Personally, I prefer a warm feel to all my photos so I tend to edit towards that side. But do be careful that the whites still look white and not yellow or cream. Remember that what often draws people to an image is a feeling or emotion. Your image becomes all the more powerful if it reminds the viewer of a sentiment, experience, or something that resonates with them. White balance is key in helping achieve this kind of engagement with your viewer.

4-tips-photographing-interiors-tutorial_0008

#4 Remember to go close, not just wide

Nowadays, when you browse through interior design catalogues or blogs, you will come across many interior details, arrangements and vignettes that do not show the entire space. Everyone is doing it from high street department stores to high end interior designers. There must be a good reason for it. In order to reinforce engagement and a connection to your audience, details are essential.

Imagine walking into a space, or that you are viewing a house for the first time. Before you walk though the door, you survey the outside look of the property and its surroundings. You do the same as you walk in, surveying the overall scene before your eyes. But when you are inside you get closer and see the details.

You may want to touch and feel the walls, flip some switches on if they work, or sit on the sofa with fluffy scatter cushions. You want to get close, touch and feel things. It is not only a visual connection then, it becomes physical. This is the sense you want to achieve with your images when the viewer is not physically in the space. That is why close up shots and details are important.

4-tips-photographing-interiors-tutorial_0008

Conclusion

With photography, aim to connect with your viewers not only by using visual senses but also with the power of emotion. If you can add a virtual physical touch to this engagement, all the better. When viewers look at your images and say, “I feel like I was actually there.” take that as one of the highest compliments.

I hope you enjoyed this little beginner’s journey into interior photography. Of course there are many more tips like straightening horizons and shooting through doors. If you have any other awesome tips, do share them here in the comments below.

googletag.cmd.push(function() {
tablet_slots.push( googletag.defineSlot( “/1005424/_dPSv4_tab-all-article-bottom_(300×250)”, [300, 250], “pb-ad-78623” ).addService( googletag.pubads() ) ); } );

googletag.cmd.push(function() {
mobile_slots.push( googletag.defineSlot( “/1005424/_dPSv4_mob-all-article-bottom_(300×250)”, [300, 250], “pb-ad-78158” ).addService( googletag.pubads() ) ); } );

The post 4 Tips to Help People Photographers Shoot Interior Spaces by Lily Sawyer appeared first on Digital Photography School.


Digital Photography School

 
Comments Off on 4 Tips to Help People Photographers Shoot Interior Spaces

Posted in Photography


Winter is Coming: Here are some tips on what and where to shoot when it gets cold

10 Oct

Winter is Coming

Winter is only a month or two away and many photographers will find it challenging to press on through the dreary winter months; especially those of us that live in Seattle or other areas where wind, rain, sleet and snow pound the region for months on end.

In this article I’ve outlined some tips to keep your landscape photography fresh when the weather starts to head south.

Photograph Transitions

The transition between fall and winter offers up a unique opportunity to photograph fall color under a fresh dusting of snow. If the forecast is calling for snow toward the end of fall, head out and see what you can find!

The warmer colors of the fall leaves and foliage will be presented in stark contrast against the cold tones of the snow and can make for very interesting and dynamic images. The above image was taken in the central Cascade mountains of Washington state at the end of Fall.

Head to the Desert

This may sound like a weird tip, but if you have any sort of opportunity to visit the desert or the canyon lands of any kind during the winter, do it! Places like Bryce Canyon in Utah (pictured above) and the Grand Canyon in Arizona offer very unique conditions and compositions that the average tourist won’t get to see during the summer months.

Snow can add a nice color contrast to the desert landscape and can also add soft textures to the arid environment. As an added bonus you won’t have to deal with the crazy crowds and 100 degree temperatures.

Icy Waterfalls

Shooting waterfalls during the winter months can often times make even popular and well shot locations look refreshing and new. Multnomah falls is one of the most recognizable waterfalls in Oregon and even it can take on a different appearance during the winter.

The frozen spray from the falls can add some really nice textures and visual elements to your images. The snow can also contrast well with the icy blue water flowing over the falls.

  • If you plan to shoot waterfalls or any sort of moving water during the winter definitely invest in a good set of micro-spikes (for traction) to give you an extra edge for hiking and climbing.
  • Trekking poles (your tripod can work in a pinch) are also a great idea to help with stability and balance while transversing icy terrain. 
  • If your tripod comes with metal spikes or feet it’s always good idea to bring them along as they may work better (or worse) depending upon conditions.
  • Hip-waders and Gortex can definitely help keep you dry and comfortable.

Let’s face it, slipping and falling into a river or on a rocky slope isn’t something you really want to do in cold weather.

The Mountains are Calling

Snow and the winter weather that comes with it can really add depth and layers to your images. Heading to the mountains with a longer focal length lens can really help to emphasize winter weather conditions such as fresh snow, low clouds and fog. 

When the weather looks to be heading south I love to head up to the mountains to check out how the conditions are shaping up for sunset and sunrise.

  • Bring waterproof and breathable layers, snow shoes and any other supplies that you may need when you find yourself hiking in cold conditions.
  • Packing a Jet Boil (or another source of heat) and some instant meals can be a lifesaver if you’re in a pinch.
  • A GPS can be your best friend if your tracks get covered by fresh snow.
  • Check the weather forecasts often and do some research to ensure that you don’t find yourself in the wrong place at the wrong time.

Chase the Storms

The sunsets that often follow winter storms can offer some of the most intense and gorgeous light that you can capture. To really take advantage of this try heading to the coast just as a low pressure system has begun to move on shore. It takes a bit of planning but the sunset/sunrise conditions on the back edge of the storm can be absolutely spectacular! The above image was taken in late winter at Cape Kiwanda on the Oregon Coast.

  • Check the weather forecasts hourly when planning a trip like this.
  • The National Weather Service here in the US is a great place to track weather and believe it or not the Weather Channel website offers some of the most accurate forecasts you can find on the internet. 
  • The NOAA Hi-Def radar smartphone App can give you a great deal of insight into minute by minute precipitation and cloud cover forecasts.

As an added bonus you won’t have to deal with that pesky marine layer that often plagues the west coast of the US during the summer months. 

Stay Close to Home

If the conditions are just too dangerous or you just don’t have time to plan a trip, look to areas near you for unique vantage points and compositions that can offer up very different photographic results during the winter months. This was taken near my home in Snoqualmie, WA. 

Get creative in your surroundings! This shot was taken with my Canon 70-300mm F4-5.6L IS lens. Using longer focal lengths in your area can really open up new and exciting compositional opportunities. 

Articles: Digital Photography Review (dpreview.com)

 
Comments Off on Winter is Coming: Here are some tips on what and where to shoot when it gets cold

Posted in Uncategorized


Step by Step Tutorial for How to Shoot Tethered

04 Oct

Tethered shooting is a photography technique that has been practiced by many professional photographers for years. In short, tethering allows you to connect your camera to a computer or tablet and almost instantly view your digital images on the device within seconds after it is captured. Due to expense and accessibility, tethered-shooting was generally reserved for photographers who do a lot of studio work and high-end commercial photo shoots. However, as tethering technology became significantly cheaper and easier to use, tethered shooting as been practiced by professionals and enthusiasts alike.

If you’ve ever been curious about tethered shooting, this article will give a brief overview of the process as well as some steps to easily get started.

Tyler Ingram

By Tyler Ingram

What is tethered shooting?

Tethered photography is the process of connecting your camera to a computer, tablet, or even a smartphone using either a cable or wireless app. After a successful connection between the devices, any new image captured by the camera is then passed directly to the computer and saved in a pre-designated folder. You’re then able to see the image fully displayed on the computer screen and even do some post-processing to the image.

Benefits of tethered shooting

The main benefit of tethered shooting is the ability to quickly preview the image on a large monitor within seconds of capturing it with your camera. This allows both you and a client to scrutinize your images on a big screen, allowing you to make adjustments to the photo shoot as it’s taking place. Depending on the tethering software you’re using, you might even be able to do quick edits to the photo on-site. Both you and the client can see exactly what’s being photographed and can make sure your visions for the shoot are in alignment. Overall, this type of collaboration should lead to a better result.

Photographer

By Photographer

Downsides of tethered shooting

The ability to almost instantly preview photos as they’re being captured does come with a few downsides.

First, either you or your client could get too caught up in little details while inspecting the photos, and this can stall a photo shoot. Thus, it’s important to set expectations with your client and be able to push forward without focusing too much on details. Second, tethering can suck the battery life out of both your camera and your connected computer. If your tethered photo shoot may take longer than an hour, you’ll want to have extra batteries on hand and be shooting near a wall socket in case you need to plug in. Lastly, tethering software can be notoriously finicky and is prone to not working for no apparent reason, so you’ll want to have a backup plan in case of an outage.

What you need for tethered shooting

The traditional and most reliable way to connect your camera to a computer or another device is by using a cable. There are a variety of different cables and ports available, so which cable you use will depend on your exact devices. Some DSLRs with built-in Wi-Fi even offer wireless tethering or remote shooting, but this is typically limited to being used on a tablet or mobile device only, not a laptop computer.

In this particular instance, we’ll assume the camera is a DSLR and the connected device a laptop computer, as this is a very common tethered shooting setup. In this case, you’ll need:

  • An extra long (ie. 15 feet) USB cable to connect your camera to your laptop
  • Tethering software, such as Adobe Lightroom or Canon EOS Utility 3
  • Optional – a portable table to hold your laptop such as Tether Tools’ Aero Table
  • Optional – a JerkStopper to prevent accidentally yanking your USB cable from your camera
Tether Table Aero for tethered shooting

Tether Table Aero is a lightweight, durable aluminum platform that attaches to almost any tripod or light stand, turning it into a handy utility table for holding a laptop or extra camera gear.

Tether Table Aero for tethered shooting

To be clear, there are many tethered shooting programs available, but this article will highlight two low-cost, simple methods in particular: Adobe Lightroom and EOS Utility 3.

Simple tethered shooting with Lightroom

The quickest and arguably the easiest way to start tethered shooting is by using Adobe Lightroom’s Tethered Capture feature. Follow these steps to set it up:

Step 1 – Connect the camera to the laptop

Connect your DSLR to your laptop with a USB cable. Then turn the camera on.

Step 2 – Start Tethered Capture in Lightroom

Open Lightroom and navigate to File > Tethered Capture > Start Tethered Capture

Step 3 – choose tethered settings

In the Tethered Capture Settings dialogue box, you have the option of choosing a Session Name (e.g., “Tethered Shooting Test,” specifying the photo names, choosing a destination for your photos, and adding metadata and keywords. Be sure to pay particular attention to where the photos will be saved so you can find them later. After setting your options, click OK.

If all goes well, the screen below will pop up, giving you a narrow control panel (outlined in red below) for some light remote shooting options, and a Library in which photos captured via the tethered shooting connection will populate.

tethered-03b

However, it’s not uncommon for Lightroom to have difficulty detecting the connected camera. If you follow the above steps and still see this screen below, try troubleshooting by first making sure your version of Lightroom and your camera’s firmware are both updated. Also, check compatibility to ensure your camera can tether capture with Lightroom. Note: there are third party plugins available for other non-compatible cameras such as the Fuji X-T1, do a search for your camera model and you may find a solution (Pentax here, Sony here.

Finally, try rotating through several different USB cables to make sure they’re working well. But if you’re looking for a more consistent way to tether shoot, check out the other option below.

tethered-04b


Reliable Tethered Shooting with EOS Utility 3

If you shoot with a Canon DSLR, whip out that CD that came with your camera and install the EOS Utility 3 onto your computer. When your Canon DSLR is connected to your computer, you’ll be able to use this program to control your camera remotely and shoot tethered. This method is much more reliable and consistent than using Lightroom’s tethered capture option.

Steps for using EOS Utility 3 for tethering:

  1. Start by downloading the EOS Utility 3 and opening it on your computer. Click on the “Remote shooting” option.Tethered shooting
  2. Selecting that option will display the following interface. The display gives you the ability to alter some settings such as white balance or drive mode on your camera directly from this interface, but there are still some functions, such as lens zooming, that you’ll have to do manually.Tethered 05
  3. While still in the Remote Shooting setting of EOS Utility 3, set your camera to Live View mode, and tethered shooting will be enabled. In this case, Live View will appear directly on your computer screen so you will see exactly what your camera sees. When you take a photo in tethered shooting mode, the captured photo will appear on your desktop.Tethered 09

Over to you

These are just two of many options available for tethered shooting. Do you frequently shoot tethered? If so, what types of programs do you use for reliable results? Please let us know your tethered shooting tips and tricks in the comments below.

googletag.cmd.push(function() {
tablet_slots.push( googletag.defineSlot( “/1005424/_dPSv4_tab-all-article-bottom_(300×250)”, [300, 250], “pb-ad-78623” ).addService( googletag.pubads() ) ); } );

googletag.cmd.push(function() {
mobile_slots.push( googletag.defineSlot( “/1005424/_dPSv4_mob-all-article-bottom_(300×250)”, [300, 250], “pb-ad-78158” ).addService( googletag.pubads() ) ); } );

The post Step by Step Tutorial for How to Shoot Tethered by Suzi Pratt appeared first on Digital Photography School.


Digital Photography School

 
Comments Off on Step by Step Tutorial for How to Shoot Tethered

Posted in Photography


How to Shoot a Sequence of Photos That Capture a Story

27 Sep

As a photographer, you’ll often concentrate on perfecting your art at taking one perfect photo. However, there are many occasions where you’ll need to string together a sequence of photos with differing styles. Whether you’re shooting a magazine article or making a personal project, knowing how to produce photos that show details, people, and the whole scene is a skill worth having.

Shooting a sequence of photos

In the example you’re going to see in this article, a traditional puppet show will be used to produce this sequence of photos, but any number of other scenarios could apply. There is always plenty to photograph and although my example shows detail, portrait, and scene-setting images, there are other photos that could also have been taken from the same event.

In the image below you can see the area’s that are boxed. They contain the photos you’d be aiming to get from a scene such as this. Let’s talk about each of these shots and why they’re all important.

Overall image

The scene-setting photo

This is the big picture that shows your audience what’s going on, you’ll likely be using a wide-angle lens here to get as much story into your scene as you can.

The image from the puppet show below is the scene-setting photo. In this photo, the viewer can see the stage, audience, and the performers. In this case, a 50mm lens was sufficient to get the entire story needed from this scene. The aim here is not to go in too close, but to tell the whole story. The photo should capture the scale involved, and often it is helpful to do this shoot from an angle above or overhead

sequence tells a story - scene setter

This photo is the scene setter, you can see the stage and the audience watching the performance.

You’ll notice the image is almost identical to the image used to set out the example at the beginning. The left portion of the frame was a distracting element that wasn’t needed to show the action happening in front of the camera. It’s important to remember that although you want to capture a large canvas when telling your story, too much could detract from the specific story you intend the scene setter to display.

The portrait photos

Portrait photos are a real mainstay of any sequence that seeks to tell a narrative, it’s the people and their story you’re looking to show. There are many types of portraits, though, from ones that just show the face, to those that explore more of the scene around the person (often called environmental portraits).

When photographing a stage production you want to explore as much as you can, that means photographs of the stage, and if possible backstage as well. If the production is small, getting backstage may be as simple as asking the performers on the night of the event. But for large productions or things like music gigs, getting permission to shoot backstage ahead of time is advised. A lot of this work can and should be carried out with lenses best suited to portrait work, which means using primes lens in the range of 35mm to 135mm.

Sequence of photos

The layers created by a shallow depth of field act to give this photo impact, with the main focus on the puppet.

In the scene, you see photographs C (above) and D (below) are of the stage. In photograph C the image needed some compression to fit both the puppet and the puppeteer into the frame. To achieve that you’ll need to use a longer focal length, in this case, a 135mm lens was used. When using prime lenses like the 135mm f/2 you have a lot of control over the depth of field, making it possible to make your subject sharp while the background is blurred.

sequence of photos

In this photo, the interaction on stage between the puppeteers is captured.

In this case featuring the puppet, but contextualizing the image with the puppeteer in soft focus, gave the image more story, and hence more impact. Photograph D (above) shows more interaction between puppeteers and more of the stage in general. This time, the image was shot with a 50mm lens allowing for a wide part of the scene to be shown. Once again, focus is on the puppets, and the rest of the scene is softer because a large aperture of f/3.5 was used.

The photograph taken from location A shows musicians performing backstage (below). In this case, some tarpaulin was used to frame the image and give context to the photo. The woman was playing the gong as part of the music that goes with the puppet show. So although the live audience can hear this music, in terms of photography this aspect of the show can only be shown by going backstage to photograph musicians playing their instruments.

sequence of photos

This photo shows the backstage area of the puppet show. The tarpaulin background and the area being a little too cluttered for the stage can deduce this.

The detail photos

On their own detail photos can look nice, but don’t show your audience what’s happening. When added to a set of photos they can be a vital component that complements the scene setting and portrait shots. These photos are best taken with lenses that can get close to the subject, in other words, macro. You might only include details, or you could show detail but allow some background into the frame for context as well

sequence of photos

Here a line of puppets awaits use. Lines work well in detail photos, as do patterns.

sequence of photos - details

The puppets are full of intricate details, as this photo shows. The use of a macro lens at closer quarters would have enhanced this photo.

In the puppet show detail photos were taken on stage as shown in picture E (below), and backstage with two pictures taken from location B (above). At location B detail photos of the puppet were taken using a 135mm lens. Usually shooting with a macro would be better. However, walking around backstage wasn’t possible, so getting close to the subject was also not possible. The first shot shows a photo where the face of the puppet is prominent, taken in a similar manner to a portrait. The second image shows the puppets where they rest backstage between performances.

sequence of photos

Here is a detail photo that shows context.

Picture E (above) is a detail shot of one of the puppets, but with a bit more context as you can see how the puppet is being used. The shot has a minimalist feel to it, which makes it ideal for adding text above the puppet’s face. The strong light on the subject allowed me to expose for the puppet, and make the background much darker, which gave this shot its minimal tone.

How this set could be expanded on

Okay, so above there are a set of seven photos combining a number of different photos of differing styles into the one grouping that shows a puppet show. This is a snapshot of a show during a performance, could this be expanded on though? Yes, of course, it could. You could also get images of the puppeteers preparing before the show begins, you could ask if they’d let you photograph the puppets in a much more staged manner where you use lighting and select a background that would compliment the puppets. Then there could also be some staged portraits of the puppeteers with their puppets to add to the mixture of images taken during the show itself.

Other scenarios

The list of other scenarios that you could shoot to create a sequence of images is endless; it could be a rock concert, a wedding ,or a sports event. In the next example scenario, you’ll see another set of photos how a green tea field can be captured.

1
The scene-setting photo of the green tea fields, taken from a wide vantage point. On the left you can see some white bags, this is the area you’ll find portraits of the plantation workers. The field also has lots of lines and patterns that are ideal for detail photos

sequence of photos details

The fields are ideal for taking detail photos. In this case, a macro lens wasn’t needed to capture the lines and details, as the tea field required a wider lens.

sequence of photos

An environmental portrait shows a plantation worker at work, now you can see how those white bags are used.

sequence of photos portrait

Another portrait photo shows a plantation worker with his basket.

Your turn

If you have any scenario’s you’d like tips on capturing in the way described in this article please add those and any other comments in the comment section below.

googletag.cmd.push(function() {
tablet_slots.push( googletag.defineSlot( “/1005424/_dPSv4_tab-all-article-bottom_(300×250)”, [300, 250], “pb-ad-78623” ).addService( googletag.pubads() ) ); } );

googletag.cmd.push(function() {
mobile_slots.push( googletag.defineSlot( “/1005424/_dPSv4_mob-all-article-bottom_(300×250)”, [300, 250], “pb-ad-78158” ).addService( googletag.pubads() ) ); } );

The post How to Shoot a Sequence of Photos That Capture a Story by Simon Bond appeared first on Digital Photography School.


Digital Photography School

 
Comments Off on How to Shoot a Sequence of Photos That Capture a Story

Posted in Photography


6 Tips for Planning the Perfect Landscape Photo Shoot

15 Sep

How many times have you shown your pictures to someone and said, ”You should have seen that sunset in person to understand how magic it was!” We can make many excuses as to why the photo doesn’t look the same, complaining about our equipment, settings or post-production, but let’s face reality, maybe there was something wrong with our landscape photo!

Before you open Photoshop, and even before you press the shutter button, you need to plan the kind of image you want to create. Planning plays a key role in landscape photography. Here are some things that are useful to think about if you want to capture the perfect light and transmit some feelings with your images.

Tip 1: Check the weather forecast

landscape photography

Calton Hill – Edinburgh, Scotland

Landscape photography is one of the most difficult genres, or at least among the most unpredictable, as you don’t have any control over the weather at the scene.

What kind of atmosphere do you want to create with your image? The weather can completely transform a landscape, so think carefully about what mood you want to evoke. If you want to create a bright, cheerful image you might already know that a blue sky with fluffy white clouds would be better than a flat blue sky, or even worse a grey one.

So, before you drive for two hours and you arrive to see is a dull landscape, use the only weapon at your disposal: the weather forecast.

Tip 2: Choose the right time of the day and year

The perfect weather condition alone is useless without proper light. In landscape photography, the light is given by the position of the sun in the sky in relation to your subject. Fortunately, this is something more predictable than the weather. Calculate where the sun will be at particular times of day, and it will be easier for you to foresee how the scene will be illuminated. Again, think about the atmosphere you want to create. Light and peaceful? Dark and moody? Are there any particular landmarks you want to highlight? The answer to these questions will inform where you want your light to be, and consequently what time of day to shoot.

landscape photograph Groningen, Netherlands

Groningen, Netherlands

Bear in mind that the sun’s position doesn’t change only during the day, but also throughout the year. As a result, in one year there are many different lighting conditions for the same place. It would be a shame not to use them to your advantage. You can use many websites and apps for this; the one that I use the most is PhotoPills, which is very well outlined in this article.

Tip 3: Be inspired by other photographers

When you plan your holiday, after booking the tickets and the hotel, you may buy a travel guide with detailed information about the location. Like where to go and what to eat, to make sure you won’t miss anything. Or you might just ask some friends who have been there before. In both cases, you’re relying on someone who went there before you, and who therefore knows what’s worthwhile to visit, or what’s a good typical (local) dish to try.

Even if you can’t do exactly the same thing with photography, you can get pretty close, thanks to the multitude of photography websites and social networks full of pictures from all over the world. The ones I personally use most of the time are; Google Images, 500px, Instagram, Flickr, and Pinterest. Obviously, the list doesn’t end here.

Feel free to use whatever sites you want, as long as you do it. It doesn’t matter if the picture isn’t the best quality, after all, you don’t want to copy it, but you’re just looking for some inspiration

landscape photograph Zaanse Schaans, Netherlands

Zaanse Schaans, Netherlands

Tip 4: Enjoy the place and get familiar with it

When arriving somewhere, especially if it’s for the first time, it’s really tempting to take your camera and shoot whatever you see! This isn’t wrong in itself, but remember you’ll probably take dozens of nice pictures and lose the opportunity to take that single outstanding one. Because when the moment comes you’ll be tired of taking other pictures, or even worse, the battery is dead. (By the way, do you have a spare battery, don’t you?)

It’s better to be patient and spend more time exploring your location and the surrounding area. This way you are more likely to discover some interesting spots, hopefully different from the classic ones. You can use your smartphone for your normal tourist pictures, so don’t worry about anything but composition. This way, you can enjoy the place where you are, instead of spending all the time behind your camera. After all, landscape photography should be the happy ending of a good day outside, not the only reason for being there.

landscape photograph Land’s end - Cornwall, England

Land’s end – Cornwall, England

Tip 5: Use both golden and blue hours wisely

I’m sure you already know what the golden hour is: the time of the day around dawn and dusk when the sun gives its best warm light and long soft shadows. Hence the adjective golden. Many photographers, including me for a while, consider it as solely the right moment for obtaining good photos. This is wrong, because there is another one, called blue hour, which occurs just before the golden hour at sunrise, and just after sunset.

As you can imagine from the name, its particularity is in the blue colour of the sky, not warm anymore and not totally dark like in the middle of the night. It is very effective for urban landscapes, because it emphasizes artificial lights that wouldn’t be as visible during the golden hour. Furthermore, since the sky is not totally dark, you’ll have a better contrast with the warmer colours of the city, which will add drama to your picture.

landscape photography Manarola - Liguria, Italy

Manarola – Liguria, Italy

Tip 6: Take location related issues into account

So, you’ve planned your shoot by choosing the right day, with good weather and explored the place properly. Is that all?

Almost… There’s still something to be considered and it depends on the place. For example, in the case that you want to photograph a coastline, you will need to consider tides. It can be useful for composition purposes, but most importantly it’s for your personal safety. Tides in the ocean are really rapid and wide, and in some cases, it could be difficult (if not impossible) to escape from the waves if you decided to shoot from the rocks along the shore, with a rocky wall behind you.

In the case of very famous landmarks, a common issue is that it will be full of other photographers and tourists that want the same shot as you. This can obviously create problems for your composition, or you won’t have enough space for your tripod. So, try to be in that place before it gets too busy. This not only reduces the risk of finding other photographers who have decided to photograph from your same spot, it also permits you to slow down and avoid making mistakes.

landscape photography London, England

London, England

Conclusions

When I started taking pictures several years ago, I didn’t have anything in my mind other than to take pictures of what I liked. But looking at other photographer’s work I realized that I was missing something. In my opinion, proper planning is the most important thing that I could have learned.

Obviously learning new techniques is useful, but it’s the most obvious. Planning is often underestimated, but it can really help you to go somewhere already having a picture in mind. If this isn’t the case, remember again: landscape photography is just the happy ending, you can still enjoy the place!

Do you have any other tips for planning your landscape photography shoots? I’d love if you shared them in the comments below as well as your images.

googletag.cmd.push(function() {
tablet_slots.push( googletag.defineSlot( “/1005424/_dPSv4_tab-all-article-bottom_(300×250)”, [300, 250], “pb-ad-78623” ).addService( googletag.pubads() ) ); } );

googletag.cmd.push(function() {
mobile_slots.push( googletag.defineSlot( “/1005424/_dPSv4_mob-all-article-bottom_(300×250)”, [300, 250], “pb-ad-78158” ).addService( googletag.pubads() ) ); } );

The post 6 Tips for Planning the Perfect Landscape Photo Shoot by Luigi Trevisi appeared first on Digital Photography School.


Digital Photography School

 
Comments Off on 6 Tips for Planning the Perfect Landscape Photo Shoot

Posted in Photography