RSS
 

Posts Tagged ‘Right’

Tips for Starting a Photography Business the Right Way

07 Sep

Are you ready to make the switch from a hobbyist to full-time professional photographer? That,s great, congratulations on your decision. It’s a great profession to be in, one that gets your creative juices flowing every time you pick up a camera. But along with the desire to start your own photography business, there are a few necessary steps that you need to take to make sure you start off on the right note!

Memorable Jaunts Starting a business Article for Digital Photography School-20

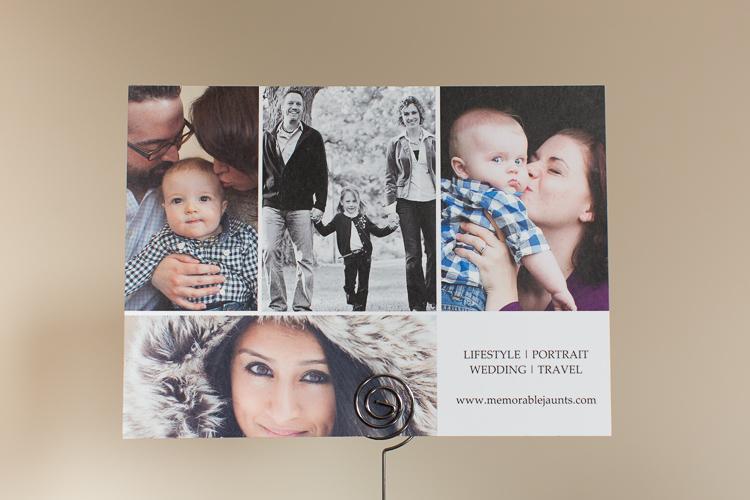
Define who you are as a photographer and what is your business all about.

Get all the necessary legal paperwork in place

As per wikipedia, a professional is a member of a profession, or any person who earns their living from a specified professional activity.

The fact that you are charging money to clients in exchange for photos means you also need to document said money, and pay appropriate taxes. In most parts of the world, this means registering your business with the local governing body, reporting income accurately ,and paying appropriate taxes. Make sure you research what the legal requirements are where you live, and follow them.

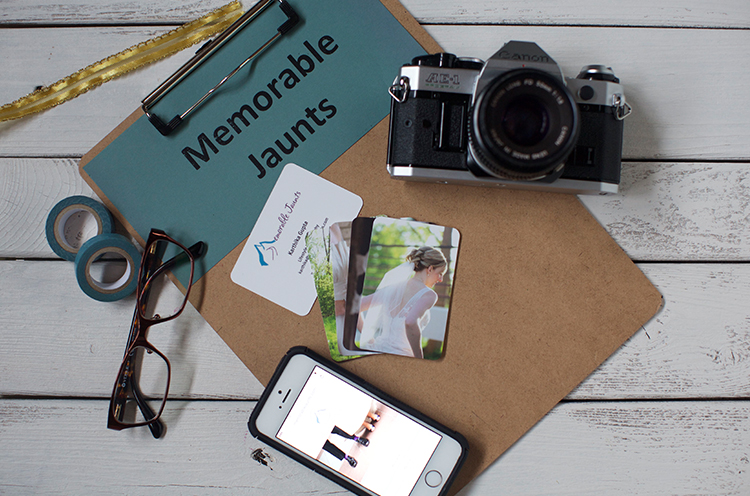
You don’t want to get into trouble with the government at a later stage. Part of the registration process may require you to have a business name, as well as get a tax id. Many photographers pick their own name for their business, while others like me, choose a generic name to represent their brand. There is no right or wrong way, just pick one that works for you.

Memorable Jaunts DPS Article about starting a business

Maintain an online presence for your photography business

The important thing to maintaining an online presence is have a way to represent your body of work, i.e., your portfolio. Luckily, there are many free options for uploading your images to the Internet. Sites like WordPress and Blogger (previously called Blogspot) offer a way to create a blog. Flickr and 500px are other options to upload and host your images.

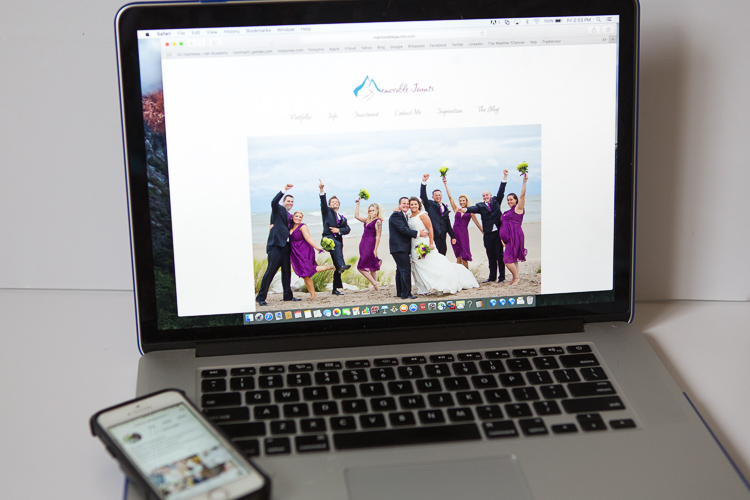
Getting a custom website, with a custom URL (in most cases your business name) takes it up a notch in terms of creating brand awareness (you can look at low cost options like Square Space). It is much easier to tell a client that your portfolio can be found at (for example) “www.memorablejaunts.com”, rather than saying “memorablejaunts.blogspot.com”. Depending on your business name this can be a mouthful and difficult to remember.

As you think about your online presence also consider social media. There are many options to choose from to be socially engaged with your clients, and more importantly, your potential clients. With so many social media platforms out there, it’s very easy to get overwhelmed. So my advice would be to pick two to three, and actively engage with your audience there. In the initial part of my career, I focused on Facebook, then added Twitter and Instagram to my social media strategy. As you create your own social media strategy, remember to be consistent across the board. Let your website and social media tools speak the same language, and showcase your style consistently.

Memorable Jaunts Urban Photography Article for Digital Photography School-20

Be social online AND offline

The internet has been a blessing in disguise for most small businesses. The world is no longer just limited to who we know, and our friends. It is very easy to find like-minded peers and colleagues all over the world. Reach out and form genuine connections. Don’t worry about what they can do for you. Instead focus on how you can help them.

Often times it is just being a positive voice – encourage them, congratulate them, and be genuinely happy for their success. Don’t be fake, being pretentious is a complete put-off. On that same note, make an effort to engage with local peers and colleagues. Take them out for lunch or just a cup of coffee – take the time to listen to their story and acknowledge their success. This is basic common courtesy, but you will be surprised at how many new and experienced photographers don’t seem to get this respect. It always pays to have a friend or a listening ear in the business!

Memorable Jaunts Starting a business Article for Digital Photography School-22

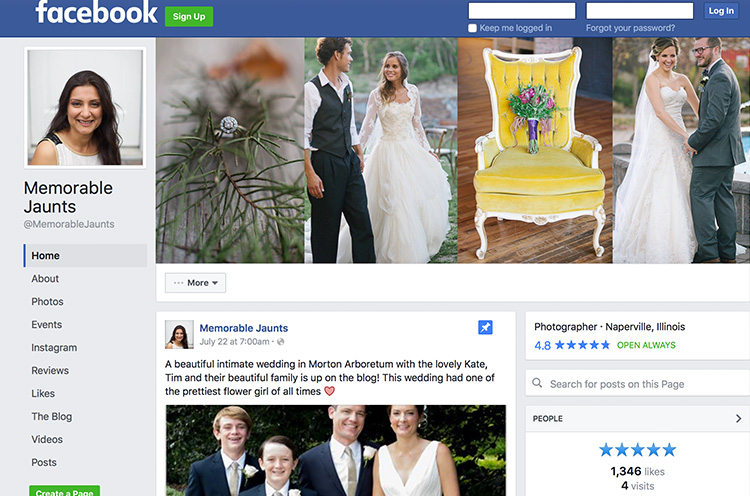
My Facebook Business Page speaks the same language as my website and Instagram business account – the look, the feel, as well as something as simple as a profile picture – they are consistent across all platforms.

Memorable Jaunts Starting a business Article for Digital Photography School-23

I have been more active on Instagram over the past six months and have met some really interesting people all over the world – it is such a perfect visual medium for photographers

Some sites that have communities of photographers (all various levels)

  • Meetup.com
  • Instagram – there are many photography related hashtags as well as geotags that you can search on to find other photographers, groups and peers.
  • Facebook – there are several public groups where photographers are welcome to join to ask questions, showcase their work, and get feedback
  • Local camera stores and community colleges – check your local camera store or community college to see if they have any groups that meet regularly. If not, don’t be afraid to start one.

Accurately track your income and expenses

I say this from experience! It is very painful, and time-consuming, to back-track and look through credit card receipts to tally expenses. The better and more sensible option is to spend one day every week to tally income and expenses. This will give you an idea on where you are financially at any given point of time.

Believe me, when you are just starting, expenses can add up very quickly. Before you know it, you can rack up a sizeable amount of debt that can be hard to get out of and handle.

Memorable Jaunts Starting a business Article for Digital Photography School-24

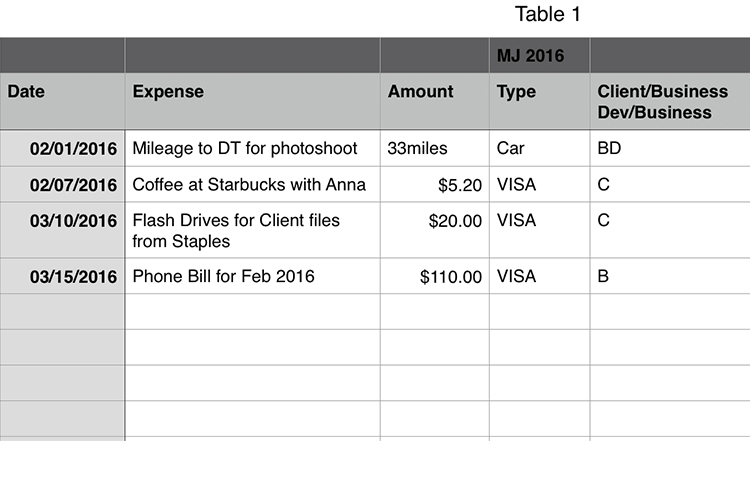
Keep it simple…I use a daily planner that has all items related to my business (to do tasks, as well as daily expenses). Once a week, I update a spreadsheet similar to this with all expenses, to keep a running tab of where I am financially.

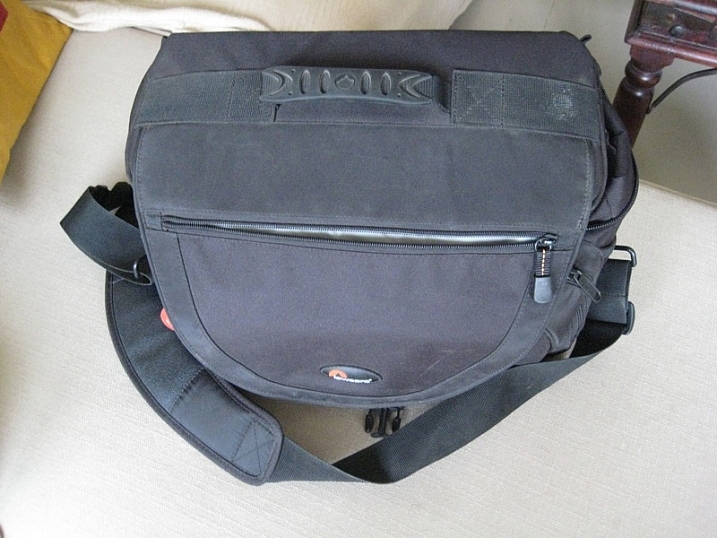
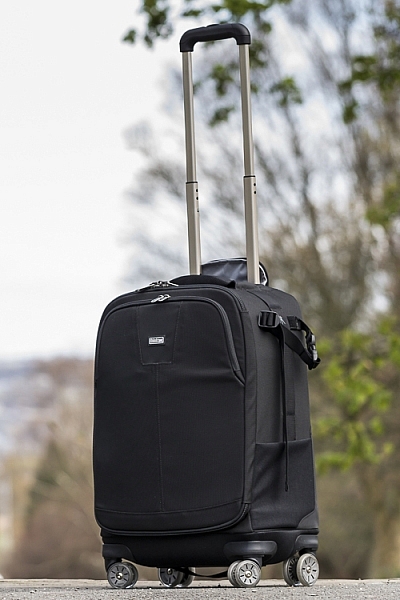
Gear – need versus wants

This one is a hard one to control. It is human nature to want to have the best of everything, especially when you are starting something new. We have self-perpetuated this fantasy that having the best and latest/greatest, is essential to our success.

Gear, especially photographic gear, is very expensive and becomes obsolete very quickly. Really think through what you need to be successful in your job, and have a game plan on how to build up your gear. The first two years of my business I survived on a Canon 5D MarkII and Canon 24-70L 2.8 lens. My backup camera was an old Canon 10D whose battery life was less than two hours. But it was my backup, and I was really careful with my gear. If I needed another lens, I just rented it.

Once I started photographing weddings, for more than a year I rented the 70-200mmL 2.8 and a speedlight, before I saved up money to purchase them for myself. Also remember that there are other things that you will need to have a successful photography business like: a computer, editing software, and as well as business insurance. It is better to invest in those upfront (and they are needed to run a successful business) rather than just on camera gear!

Memorable Jaunts Starting a business Article for Digital Photography School-21

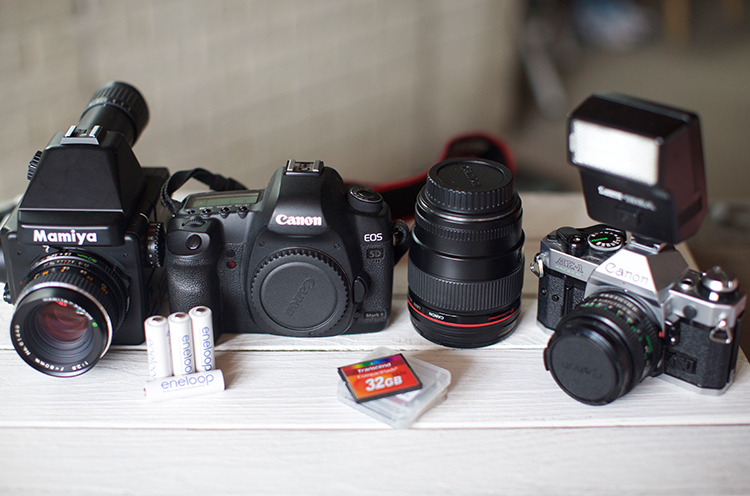
I shoot digital for client work and a mix of film and digital for personal work.

I hope all this did not scare you! Being a professional photographer is a hard thing to do, but it is incredibility satisfying. You can achieve a lot of success in this field if you are willing to put in the long hours and do what it takes to be successful.

Remember this is a business, one that you have willingly chosen to undertake. Give it your best, but also have fun. Don’t get too bogged down with all the mistakes you think you are making. They are not mistakes, they are learning opportunities, and they will make you a better photographer and better business owner in the long run.

googletag.cmd.push(function() {
tablet_slots.push( googletag.defineSlot( “/1005424/_dPSv4_tab-all-article-bottom_(300×250)”, [300, 250], “pb-ad-78623” ).addService( googletag.pubads() ) ); } );

googletag.cmd.push(function() {
mobile_slots.push( googletag.defineSlot( “/1005424/_dPSv4_mob-all-article-bottom_(300×250)”, [300, 250], “pb-ad-78158” ).addService( googletag.pubads() ) ); } );

The post Tips for Starting a Photography Business the Right Way by Karthika Gupta appeared first on Digital Photography School.


Digital Photography School

 
Comments Off on Tips for Starting a Photography Business the Right Way

Posted in Photography


Nikon D500 versus D750: Which one is right for you?

25 Jul

Nikon D500 versus D750: Which one is right for you?

The Nikon D500 and D750 scored 91% and 90% respectively when we reviewed them. They both received gold awards. They’re about the same size, pretty much the same weight and currently, they both cost about the same amount of money, too. So if you’re a Nikon shooter looking to upgrade your camera, which one is right for you?

Join us, as we take a look at the main differences between the D500 and D750.

Sensor size

The largest difference – no pun intended – between the Nikon D750 and the D500 is in terms of sensor size. There’s a small disparity in resolution (the D750 offers 24MP whereas the D500 lags a little, at 21MP) but more significant is the fact that the D750’s sensor is full-frame. The D500, by contrast, is built around a smaller, DX format (APS-C) sensor, which introduces a 1.5X crop factor, meaning that a 50mm lens on the D500 offers a field of view equivalent to a 75mm lens on the D750.

Leaving aside the effect of the crop factor, typically, we’d expect full-frame sensors to offer better image quality in poor light, at high ISO sensitivity settings, and broader dynamic range, compared to APS-C and smaller sensors. The D500’s sensor is very good, but physics is physics, and at any given ISO sensitivity, the D750′ noise performance is about one stop better than the D500.

In terms of dynamic range, the D750 offers around 0.8EV more dynamic range at base ISO than the D500, which might not seem like a lot, but it’s enough to make a difference in some shooting scenarios (like the scene above, which was exposed in Raw mode for highlights, with shadows and mid-tones brightened in post). On the flip side, the D500 provides an electronic first curtain shutter option, which allows landscape photographers to ensure vibration-free images – something that can be a challenge with the D750. 


Verdict: Both cameras offer excellent image quality, but if you need the extra dynamic range, the D750 is the best choice.

Crop factor

We’ve already mentioned the crop factor inherent to shooting with the DX-format D500, but there are other consequences of the smaller sensor. For one thing, it’s slightly harder to achieve shallow depth of field with APS-C sensors compared to full frame (you would need a 16mm F1.2 lens to achieve the same DoF as Rishi’s 24mm F1.8 FF shot above).

This is because an F1.4 lens on APS-C is equivalent in DoF terms to an F2.1 lens on full-frame (and so on – F2.8 becomes equivalent to F4.2, F4 becomes equivalent to F6…). This might not matter much in everyday shooting, but if you’re a fan of very shallow depth of field portraiture, the effect is both easier and cheaper to achieve on full-frame, if you consider the typical price (and size) difference between F1.4 primes and F1.8 equivalents. 

This is the reason why lens manufacturer Sigma introduced its 18-35mm and 50-100mm F1.8 zoom lenses – they’re intended to provide a fast maximum aperture for APS-C users equivalent to the unofficial professional standard F2.8 on full-frame. 

There is a plus side to shooting on a DX-format camera though – the 1.5X increase in effective focal length is very handy for telephoto shooting. 


Verdict: If you need shallow DoF, go for the D750, if you want extra reach, the D500 is a better choice.

Lens choice (part 2)

Still on the topic of lenses, another thing to consider when weighing the D500 against the D750 is the fact that lenses designed specifically for the smaller APS-C format of the D500 won’t work very well on full-frame. Nikon’s DX and FX lens ranges are technically cross-compatible with all FX and DX format Nikon DSLRs, but most DX lenses vignette heavily on full-frame, greatly reducing the usable image area.

Also bear in mind that Nikon has a considerably better developed range of FX lenses than DX, and we strongly suspect that this won’t change any time soon. As such, given that FX lenses can be used without any technical limitations on DX, if you’re inclined towards the D500, you might still be better off investing in FX lenses – especially if you think you might move up to full-frame in future. The downside is that you might start off with some weird equivalent focal lengths (i.e., a 24-70mm will behave like a 36-105mm).


Verdict: We’re calling this one a draw.

Speed

When it comes to speed, the D500 is a clear winner. In many respects a scaled-down D5, the D500 is significantly faster than the D750 and much better equipped to cope with the demands of action photography. A maximum frame rate of 10fps and seemingly infinite buffer (200 Raws) leaves the D750 in the dust.

It’s not just about frame rate though. The D500 (pictured above) can also accept faster XQD memory cards, capable of data transfer rates up to 8 Gbit/s.

 A USB 3.0 interface and 1/8000sec maximum shutter speed (compared to USB 2.0 and 1/4000 respectively) cement the D500’s action-shooting credentials.


Verdict: D500 wins, by a mile.

Autofocus

It’s a similar story with autofocus. While the D750’s 51-point AF system is extremely capable, and more than a match for pretty much any competitor in the sub-pro full-frame market segment (including the D810), the D500’s AF system is in a different league.

The D500’s AF system features 153 AF points, of which 99 are cross-type. Of this total of 153, 55 points can be manually selected, and the center point is sensitive down to -4EV. The D500’s smaller sensor actually benefits its AF system, because it means that frame coverage is much broader than the D750 (and any other Nikon full-frame DSLR).

Combine an AF array that covers almost the entire imaging area with a huge degree of AF customization and 3D AF tracking (the D500’s 180,000-pixel RGB metering sensor significantly boosts the performance of an already market-leading system) and you get an autofocus powerhouse.


Verdit: D500 wins.

Video

On paper, the D500 roundly beats the D750 in terms of video specification, thanks to the addition of 4K video – a feature that Nikon only offers on two DSLRs (the other being the flagship D5). But as good as the D500’s 4K output is, using this mode does come with one big limitation.

In 4K video mode, the D500’s crop factor increases from 1.5X to 2.25X. This is pretty limiting when shooting anything that requires a wide field of view, purely from the standpoint of finding a wide enough lens. Even Nikon’s super-wide 10-24mm DX format zoom becomes an pretty standard 23-55mm equiv. (with a maximum aperture equivalent to F8-10 in depth of field terms). In HD video mode, there’s not much to separate the two cameras. The D500 and D750 offer an extremely similar specification and deliver similar-looking video footage. The addition of a touchscreen on the D500 makes AF point positioning easier, but that’s about it (and bear in mind that AF in video mode is pretty poor on both cameras, so you might find that you don’t make use of this function much anyway), 


Verdict: If you need 4K, go for the D500 – just make sure you have a wide enough lens.

Flash

Nikon is pitching the D500 as a ‘professional’ DSLR, despite its sub full-frame sensor. As such, like the flagship D5, it lacks a built-in flash. This cuts down on weight, and also means a theoretically increased resistance to dust and water incursion. The downside is – well, there’s no built-in flash.

We actually really like the small built-in flashes on cameras like the D750 and D810, not because they’re particularly useful as flashes, but because they can be used to wirelessly trigger groups of Speedlites off-camera. That’s conventional optical triggering, but unlike the D500, the D750 is not compatible with Nikon’s WR-A10 wireless controller ($ 200), which allows off-camera flashes to be radio triggered (important when line-of-sight won’t cut it).


Verdict: D750’s built-in flash offers greater versatility (unless you need radio control), at the expense of reduced environmental sealing.

Ergonomics

Ergonomics and handling are pretty subjective. One person’s ideal control system might be maddeningly complex to someone else. Some people really like touchscreens, some people can’t see the point of them. Some members of the DPReview editorial team (who shall remain anonymous) actually like Olympus menu systems.

The point being – ergonomically, which of these two cameras is better depends on your personal preferences. Their basic control layout is extremely similar, but they do feel somewhat different in the hand. Despite its smaller sensor, the D500 is actually the larger, heavier (by more than 100g) of the two cameras. The D750 is surprisingly svelte for a full-frame camera, but the D500 feels like it could be used to bang in a few nails.

The D500 provides many more options for customization than the D750, available via a dedicated custom settings GUI. This makes it more versatile for a professional moving between different shooting scenarios.

It also offers a couple of other pretty major features that the D750 doesn’t: a touchscreen, and backlit controls. We’ve found the D500’s touchscreen invaluable for things like AF point positioning in live view (especially from awkward low angles) and backlit controls are a huge benefit if you do a lot of shooting at night. 


Verdict: D500 offers more. A touchscreen, more customization and backlit buttons.

Nikon D500 versus D750: Which one is right for you?

So if you’ve got a couple of thousand dollars burning a hole in your pocket, which camera should you buy? 

The Nikon D750 (above) is one of our favorite DSLRs – ever. Its combination of refined handling, a highly capable autofocus system, a surprisingly small and light body and excellent image quality make it fantastic camera for everyday use. The D750 is one of those cameras that we consistently recommend to friends and family, and for most Nikon photographers, there are very few reasons to spend more on the D810.

But then along came the D500. It’s an APS-C format camera, but not only is it more ‘pro’ than any previous DX format DSLR from Nikon, but it outperforms most of the company’s full-frame DSLRs, too. The D500 is designed for heavy professional use, with an emphasis on speed and reliability. As we’d expect from a camera that shares so much with the flagship D5, the D500 is a real workhorse, and in many respects (shooting speed, autofocus, video spec, to name just the obvious things) it outmatches the D750, sometimes very significantly.

The D500 also offers 4K video, of course, but unless you really need it, we wouldn’t recommend deciding between these cameras purely on the basis of this feature. The aggressive 2.25X crop in 4K mode is pretty limiting, apart from anything else. 

Final verdict

At the end of the day, if it were our money, we’d probably recommend the D500 over the D750. For a photographer interested in capturing sports or fast-moving action it’s a no-brainer. The sheer speed and focus of the camera, combined with the telephoto-boosting 1.5X crop factor make it a superb tool for this kind of photography. And of course, if you can live with some awkward effective focal lengths, the D500 is fully compatible with all of Nikon’s current lenses. 

If you’re not a keen sports photographer, you don’t need 4K video, and you don’t mind not having quite the latest and greatest AF system – go for the D750. You won’t be disappointed.

  • Read our full Nikon D500 review
  • Read our full Nikon D750 review

Did we miss anything? Let us know in the comments.

Articles: Digital Photography Review (dpreview.com)

 
Comments Off on Nikon D500 versus D750: Which one is right for you?

Posted in Uncategorized


The price is right: Canon EOS Rebel T6 / 1300D Review

29 Jun

Key Features

  • 18MP APS-C CMOS sensor
  • 9-point autofocus system
  • 1080/30p video capture
  • Fixed 3″ 920k-dot LCD
  • ISO 100-6400, expandable to 12800
  • 3 fps burst shooting
  • Wi-Fi with NFC

The Canon EOS Rebel T6 / 1300D is an entry-level DSLR targeted toward first-time ILC users and smartphone upgraders. Built around an 18MP APS-C sensor, the T6 offers Wi-Fi with NFC for easy photo sharing when you’re out-and-about, and adds a faster processor compared to its predecessor, the Rebel T5.

Its closest competitor in the category is the Nikon D3300, which was announced in January 2014 and is getting a little long in the tooth at this point.

As per Rebel tradition, the T6 packages up some tech borrowed from previous-generation higher end models, and that’s no bad thing. It offers a 9-point AF module, 1080/30p video and built-in Wi-Fi with NFC. Battery life is a very respectable 500 shots per charge, putting it near the top of its class in that respect. But one of the T6’s headline features isn’t on the inside of the camera at all, it’s written on the outside of the box: that sweet $ 500 price tag with lens.

The T6 is better tuned to a beginner’s needs and hits an aggressively low price point

Offering tech handed down from previous generations at a very reasonable price is what the Rebel line has traditionally done best. The original Digital Rebel is just about 13 years old, and was essentially a single-dial 10D in a plastic body, priced at $ 1000 with kit lens – a breakthrough price-point for DSLRs at the time. As well as being cheaper still, the T6 is a vastly more capable camera than that pioneering Rebel, and better tuned to a beginner’s needs. 

In short, with the T6, Canon has gathered up various components it had lying around on the shelf from Rebels past and put them together in an aggressively priced bundle. Smart business move for Canon, but is it the best way to spend your $ 500? Read on. 

Articles: Digital Photography Review (dpreview.com)

 
Comments Off on The price is right: Canon EOS Rebel T6 / 1300D Review

Posted in Uncategorized


Improve Your Photography by Getting the Right Feedback on Your Images

28 Jun

Have you ever felt that your photography isn’t improving as much as it once was? Do you feel that the level of your work is stagnating and not progressing much more?

Improve Your Photography

Yet you keep reading article after article, either on the web or in magazines. You hope that one of them will provide the next breakthrough for your work and help you rip through the barrier that will bring your photography to the next level. You show off your work to friends and family, and you hear the resounding praises of, “That’s a beautiful photograph” or, “You nailed it”, or any other form of overly positive, loving feedback. The people that you show your work to love it, but you feel that it’s just becoming a little boring, and the next image isn’t really any different from the last.

Justin

By Justin

Do this one thing to improve your photography

If this sounds like you, don’t panic; you’re very likely not alone! Even better, there is a very simple remedy for this. This remedy will not only help you now, but also continue to help you well into the future, and at all stages of your photographic journey. You won’t need to read anything extra for it, nor will you have to buy any equipment. To break through this barrier you need to do one thing: be more selective with the feedback you listen to.

The trouble with feedback from people like friends and family is that, unless they are photographers themselves, they won’t tell you want you need to hear. Rather, they will tell you what you want to hear – which is generally positive reinforcements – however, when you come to think of it, no one really wants to hear that their latest photo is rubbish!

But it’s this honest, yet brutal truth, that will ultimately help you take better photos. Sure, I’ll be the first to admit that it wasn’t the best feeling in the world when I was once told a collection of my photos weren’t that great. To make things worse, this came from a photographer whom I greatly admired and respected. It shook me up a little. It made me feel a little inadequate. It made me question if this was indeed the career for me, and if I actually had what it took to succeed.

Arileu

By arileu

But I needed to hear it. I needed to know what my work was actually like. Being continually told that my work was great and amazing wasn’t really helping with anything other than inflating my ego. I needed to hear exactly how a seasoned photographer viewed my work, and I needed to hear it honestly and clearly. This feedback set me on the direction that I needed to take to improve my game, and because it wasn’t sugar coated, I had no ambiguity about any of the feedback I had received.

Finding good feedback

This kind of feedback is not something that you will get from friends and family. You have to go out there and find a third party. A person that not only has no emotional connection with you, but also who knows one or two things about photography. By removing the emotional connection, you open the door for truth and honesty.

Quinn Dombrowski

By Quinn Dombrowski

How it’s delivered, however, is a variable you cannot control. This means you also need to bring something to the table; a thick skin. Some photographers, just like doctors, are fantastic at delivering bad news in a nice subtle, even positive, way. Others will tell you how it is, warts and all, without the sugar coatings. But where do you find this third party?

There are many avenues you can take to find the right third party for getting feedback on your work. Social media, such as Instagram and Facebook, can be great. Facebook in particular has many useful groups where you can seek feedback and critique on your work. But if keeping it in person and face-to-face is more your thing, looking around at camera clubs is another option. The feedback you get at camera clubs may not always be accurate, but it is a useful tool to network with other photographers.

S3aphotography

By s3aphotography

Just keep in mind exactly who your third party will be. You ideally would like your mentor to be involved in the genres you’re most interested in – there’s no point showing a wedding photographer, for example, a body of sport or landscape images. Also keep an open mind to having multiple people. This will help you smooth out any personal preferences each photographer may have, and find a more common denominator to look out for.

Being more selective with who you seek for feedback will help improve your photography immeasurably. It won’t always be easy to hear your work being torn apart, but if you keep at it and keep your chin up, you will come out the other side a stronger photographer and perhaps even a stronger person.

googletag.cmd.push(function() {
tablet_slots.push( googletag.defineSlot( “/1005424/_dPSv4_tab-all-article-bottom_(300×250)”, [300, 250], “pb-ad-78623” ).addService( googletag.pubads() ) ); } );

googletag.cmd.push(function() {
mobile_slots.push( googletag.defineSlot( “/1005424/_dPSv4_mob-all-article-bottom_(300×250)”, [300, 250], “pb-ad-78158” ).addService( googletag.pubads() ) ); } );

The post Improve Your Photography by Getting the Right Feedback on Your Images by Daniel Smith appeared first on Digital Photography School.


Digital Photography School

 
Comments Off on Improve Your Photography by Getting the Right Feedback on Your Images

Posted in Photography


Lane-Spanning Airbus to Drive Right Over Car Traffic in China

29 May

land airbus solution china

A Chinese transportation company behind a lane-straddling bus design (which passes over lanes rather than occupying them) is moving from scale to full-sized test models this summer. The plan is to introduced fully-functional models of these “land airbuses” to (or: above) the streets of Beijing over the next few years.

straddlingbus

retro landliner design

The inspiration for this seemingly-novel design dates back to a 1960s “Landliner” proposed for New York City that would likewise ride on side rails adjacent to roadways. Cars would simply pass beneath the buses uninterrupted, moving faster than the bus in high traffic and allowing the bus to move over traffic jams. Such a system would be a fraction of the cost and effort compared to subway systems or even raised railways.

landairbus

In China, these new buses would hold up to 1,400 passengers each and cruise at up to 40 miles per hour, which sounds slow until you consider they do not have to stop for traffic. Running on electricity, these designs would reduce the need for conventional buses and cut polluting emissions. As a cyberpunk bonus: cars passing beneath these vehicles will see digital simulations of the sky above.

landair transit stations

For now, Transit Explore Bus is constructing a life-size model in Changzhou. This will allow real-time testing with actual cars, intersections and infrastructure, facilitating further refinements and eventual street deployments. For a country with serious pollution and traffic problems, this kind of solution could be just what is needed – for each new super-bus, 40 ordinary buses can be taken off the roads.


WebUrbanist

 
Comments Off on Lane-Spanning Airbus to Drive Right Over Car Traffic in China

Posted in Creativity


Choosing the Right Camera Bag – and Why You May Need More than One

22 May

You’ve just bought yourself a new camera, or perhaps a new lens. Now you find yourself wanting to get a new bag for new purchases – after all, a good bag will protect your equipment, and can serve as an ideal place to store your photography gear when not in use.

camera bags

These are some of my bags. The two end ones are both roller bags. From left to right: ThinkTank Roller Derby; ThinkTank Airport Accelerator; ThinkTank Airport Security.

However, choosing a camera bag that’s right for you may not be as straight forward as it seems, but it is something that some thought should be given to. Choosing the right bag can make photography more enjoyable for you, as it can help carrying your equipment easier and more comfortable.

The days of buying the generic shoulder bag are gone! Now we are spoilt for choice with offerings of backpacks, shoulder bags, sling bags, belt packs, roller bags; the list goes on. But which one is right for you? Which one is the best fit for you and your equipment needs?

1. Camera Bag Size

This is my largest camera bag. I use this bag when I need to carry more equipment than normal.

This is my largest bag. I use this bag when I need to carry more equipment than normal.

How much equipment do you have, and will you want to carry all, or only some of it with you? This will help you decide on which size bag you need to look at. Also, think ahead; will you be buying more equipment such as additional lenses or camera bodies? Will you be adding a flash system, etc.?

All of these will obviously increase the size of your kit, and influence the size of the bag you purchase if you wish to use the bag for all of your stuff. But, do bare in mind that the more kit you carry with you, the heavier the bag will be. Also do be aware that if you use a pro-sized or gripped body, some bags may not fit your camera as the bag is not deep enough to accommodate such sizes. Generally, bag manufacturers will give a list of what can fit into a bag, and list so you can see if pro-sized or gripped DSLRs are suited to that particular bag.

2. Camea Bag Style – The Personal Part

camera bag backpack

Choosing the size of your bag is relatively easy. It’s choosing the style of bag that I think is the most challenging, and this is where most people can get a little stuck. There are just so many choices available, it really does come down to personal choice.

I take my backpack, the ThinkTank Airport Accelerator (left), to nearly every job I do. I use this bag to carry my laptop, laptop accessories (charger, internet hub, card reader, etc.) and any other bits and pieces I may need such as wet weather gear. If I need it, I also put my modular set (not pictured) inside this bag to use on site.

You may prefer to use a shoulder bag, where the next person may prefer to have a backpack. It’s important to consider just how much equipment you want to carry around in your bag, as this can influence the style of bag you end up purchasing. Below is a small table with a short list of pros and cons to each style of bag.

Let’s have a look at some of the pros and cons of the following bag types:

Backpacks

Backpack style camera bag

By ????? KhE ?

Pros:

  • Completely frees your hands, enabling you to use your phone, change lenses, etc.
  • Varying levels of carrying capacity.
  • Weight is moved from one shoulder (on a shoulder bag) to both shoulders, and your lower back.
  • Can be more comfortable that other options.
  • Can be ideal for storing equipment when not in use.

Cons:

  • Can be slow to access your equipment and/or change lenses etc
  • Bags can have the ability to carry too much equipment and become too heavy
  • Can become uncomfortable with sustained activities; especially in warmer climates

Roller Bags

Roller bag style camera bag

By See-ming Lee

Pros:

  • Can carry the largest volume of equipment easily.
  • Easy to transport equipment, as you are not required to carry anything; simply roll the bag along.
  • Perfect for keeping all of your gear in one bag, and storing equipment when not in use.

Cons:

  • Not well suited if you require more mobility whilst out photographing.
  • Require somewhere secure to be left when no longer needed on a shoot.

Modular Systems

modular camera bag system

Image courtesy Lowepro

Pros:

  • Ideal for photographers who want maximum mobility.
  • Smal pouches that attach via a belt sit on your waist, thereby removing the weight off your back and shoulders, and transferring it to your hips.
  • Ideal for carrying extra pieces of equipment without the need for a bag on your back.

Cons:

  • Not ideal for transportation as the pouches to not offer enough protection.
  • Each pouch has a very limited carrying capacity, so not suited to carry all of your equipment.
  • Not suited for storing equipment as each pouch can only hold a very limited number of items.

Sling Bags

Pros:

  • A hybrid of backpack and shoulder bag; these bags sit on your back via a single strap.
  • Can be more comfortable for prolonged use than a shoulder bag.
  • Quickly and easily access your equipment without take the bag off.
  • Perfect for storing smaller amounts of equipment.

Cons:

  • Generally have a lower carrying capacity than other bag styles.

Shoulder Bags

Thomas Wanhoff

By Thomas Wanhoff

Pros:

  • Easy access to equipment as it’s by your side.
  • Can look more casual, allowing you to blend in easier.
  • Varying levels of carrying capacity to suite your equipment.
  • Can be great to store equipment when not in use.

Cons:

  • Weight of equipment is on one shoulder and can cause discomfort.
  • Not ideal if you have larger lenses (greater than ~200mm for example).

3. Active or Passive Bag Concept

Personally, over the years I have used pretty much every style of bag around from backpacks, sling bags, shoulder bags, to roller bags and modular belt systems; you name it and I’ve most likely used it at some stage!

What I have learned from this experience is that one style of bag is no better than the next and that what works on one adventure, won’t necessarily work as well on another. I have also learned that generally, one bag will not fit every situation. This brings us to an interesting concept that I have called Active Bag and Passive Bag.

An Active Bag is a one that allows you to easily carry equipment with you and be more mobile; one that can go with you all the time. The styles of bag that are suited to this are: backpacks, sling bags, modular systems and shoulder bags.

This roller bag - the ThinkTank Roller Derby - is the bag that I take to pretty much every job I have. It's small enough to easily fit in the car, yet carries everything that I need on a job.

This roller bag – the ThinkTank Roller Derby – is the bag that I take to pretty much every job I have. It’s small enough to easily fit in the car, yet carries everything that I need on a job.

Passive Bags are great at transporting all your equipment to and from your shooting location and even providing a great storage solution for storing your kit whilst it’s not being used. But these bags are not ideal for the photographer who is constantly on the move. What I have found to work best is having a combination of both Active and Passive Bags with me. I use my roller bag to transport my kit to my shooting location and it provides great protection during the transport phase – not to mention a great portable desk to sit my laptop on! I then compliment this by using an Active Bag, usually a modular belt system or backpack, to carry the extra lens and flashes that I may need.

I already have two cameras over my shoulders, each with a lens, so the bags I have are there to carry what I cannot hold in my hands, or do not need right at that moment. It is a little more expensive, yes, but the benefits are great. This is something worth considering if you’re find yourself in a similar situation where you want/need to carry a larger amount of equipment, but do not need that bag once you are at your location.

Cable Lock

Some manufacturers also include a cable that is made in to the bag. This is ideal to lock the bag to an immovable object; perfect for Passive type bags.

4. Bag Quality

So you’ve decided on the size and style of bag you wish to purchase; but please do not overlook quality. You’ve spent a small fortune on your equipment, and the last thing you should do it cut corners on what protects it.

A good camera bag should have nicely padded, removable inserts inside. The removable inserts will allow you to customize the bag to best suit your equipment, and the padding will provide greater protection and help prevent your equipment from crashing into each other.

Generally, the first thing to fail in a camera bag are the zippers, so looking for a good feeling zipper (especially for the main camera compartment) is very important. A poor quality zipper can unexpectedly fail, and potentially cause your equipment to fall out and break.

You also want your bag to last, so make sure the exterior fabrics used are tough and wear resistant. Personally, I use ThinkTank Photo products and to be honest, I cannot fault them at all. They’re extremely well made and have withstood everything that I have thrown at them.

Zipper

A close up of the zipper on the main camera compartment on one of my bags. The zippers used on this bag are YKK Fuse zippers.

Lockable Zipper

Some bags also offer zippers that are lockable; ideal for that little bit of extra security.

Conclusion

Whilst this is an introduction into buying a bag for your camera, by no means is this exhaustive and you will still need to do a little research before you make a purchase. But, this article should offer some guidance on which bag may be right for you. You will find that most of your decisions will be based upon your own requirements. I would highly recommend you go in to a store, and bring your kit with you to try the various bags to help you find the best one.

I’d love to hear if you have anything else you want to add and offer some advice based on your own experiences. What kind of bags do you have?

googletag.cmd.push(function() {
tablet_slots.push( googletag.defineSlot( “/1005424/_dPSv4_tab-all-article-bottom_(300×250)”, [300, 250], “pb-ad-78623” ).addService( googletag.pubads() ) ); } );

googletag.cmd.push(function() {
mobile_slots.push( googletag.defineSlot( “/1005424/_dPSv4_mob-all-article-bottom_(300×250)”, [300, 250], “pb-ad-78158” ).addService( googletag.pubads() ) ); } );

The post Choosing the Right Camera Bag – and Why You May Need More than One by Daniel Smith appeared first on Digital Photography School.


Digital Photography School

 
Comments Off on Choosing the Right Camera Bag – and Why You May Need More than One

Posted in Photography


How to Choose the Right Digital Camera for a Specific Type of Photography

19 Apr

Are you overwhelmed with the many digital camera options available in the market? This article will help you determine the right camera for your specific photography need. Whether it’s portrait, landscape, travel, sports and adventure, or aerial photography that you want to get into, you can’t just settle for the most popular. So before you go checking out what the Continue Reading

The post How to Choose the Right Digital Camera for a Specific Type of Photography appeared first on Photodoto.


Photodoto

 
Comments Off on How to Choose the Right Digital Camera for a Specific Type of Photography

Posted in Photography


Exposure: Get it Right in Camera or Fix it Later?

16 Mar

Recently, I received a very interesting question from a dPS reader about exposure. The question was, “How much does it matter about getting the exposure right when the photo is taken, as opposed to fixing it later in Lightroom?” It is a really interesting question, and it became even more interesting to me the more I thought about it.

Toledo-Overlook

Options for achieving the best exposure

Let’s start off by looking at the possibilities here. There a few different ways you can approach this, and they each have their advantages:

#1 Get it right in camera:

The first way is to make absolutely sure you get it right in camera, without resorting to post-processing software, unless you absolutely have to. Historically, this is the way it was done, largely because changing exposure levels was much more difficult than it is today with digital photography. Any professional photographer worth their weight in salt, would tell you to get it right in camera.

Even today, however, there is still a lot to recommend this strategy. If you don’t use post-processing software, then obviously this is the only answer for you. Further, if you are someone that takes a lot of pictures, and do not want to spend all your time editing them, then this approach still has merit as well. There is just something that feels right about getting it correct in camera. It also avoids surprises later.

#2 Rely on Lightroom:

At the opposite end of the spectrum, is the idea that you should not worry about exposure so much while shooting, and instead get it right in Lightroom. When I say “not worry about it so much,” of course I do not mean you should just haphazardly twist dials to any exposure setting and blast away. Obviously, you need to get the exposure somewhat close to what you want. In addition, you cannot let your highlights get blown out, or your shadows turn pure black. But programs like Lightroom and Photoshop give you a lot of flexibility to deal with exposure settings later. As long as you get it close when you are shooting, you can take your time in front of a computer and get it exactly right.

#3 Do both:

Then, of course, there is a median way.  You can try very hard to get the exposure exactly right in camera, and then tweak it later in Lightroom, when you are in front of your computer. In this approach, basically you are just always trying to get it right. You are taking advantage of all your tools. You may get it right in camera, which avoids time in front of the computer later, and avoids any surprises. If not, you can take your time and tweak it later.

LR-controls-Graphic

To me, as I thought about it, the median way seemed like the right answer, I expect it did to you too. Except the more I thought about it, the more I realized I don’t really do that.

My approach to exposure

Instead, I tend more toward the “don’t worry about exposure so much” end of the spectrum. I tend to just get it close, knowing that I am going to fix it later in Lightroom. Am I just being lazy in the field? Maybe, but I don’t think so.

It is just that when I am out shooting, I am usually trying to focus all my attention on composition. I think that is ultimately what matters in creating great photos. For me at least, that topic requires virtually all my mental energy. You have everything from your choice of subject, to how you will be placing things within the frame, to the perspective you want to use, to making everything balance, etc. That’s not to mention shape, leading lines, and other compositional elements. There is just so much to think about. Therefore, the more I can eliminate distractions from anything but composition, the better. I try to keep exposure from intruding on that process too much when I am out shooting.

Further, this approach toward exposure just lends itself to my way of shooting. I’m not someone that sets up on a tripod and stays in one place for a long time. It seems like I’m always on the move, chasing the next shot. My time spent on each shot is pretty limited. Further, while I take a lot of pictures, I edit very few of them, so I don’t mind spending whatever time is necessary, tweaking exposures in Lightroom. I often bracket my pictures as well, which gives me a little leeway for my exposure settings, and means I won’t have an unpleasant surprise later.

Sometimes you are set up on a tripod facing a static scene with unchanging light - which means you can spend all the time you want making sure you have the exposure the way you want it.

Sometimes you are set up on a tripod facing a static scene with unchanging light – which means you can spend all the time you want making sure you have the exposure the way you want it.

Anyway, thinking about how my approach toward photography as a whole affected how I approach exposure, made me realize that your particular method or style of photography probably has a lot to do with your approach to exposure.

Which should you do?

So, how should you approach exposure – by getting it right in camera, or relying more on Lightroom? There is no right answer here, as far as I can tell. As mentioned above, I believe it depends a lot on how you approach photography.

For example, a street shooter who is always on the move, trying to capture fleeting emotions, might not have time to devote toward getting the exposure exactly right. On the other hand, someone who spends a lot of time in one place may have the time. There are a lot of other factors as well.

. . . and other times you have only a second to get a shot before conditions change or your subject walks away - in which case you might spend very little time thinking about exposure and just tweak it in Lightroom.

Other times you have only a second to get a shot before conditions change or your subject walks away – in which case you might spend very little time thinking about exposure and can tweak it in Lightroom later.

Therefore, I’ve started a little list of factors that would tend to put you in one camp or the other. Check it out and see which apply to you:

Factors that lean toward getting it right in camera:

  • You often stay in one place, and have sufficient time in the field to tweak exposure settings.
  • Your subject is fairly static.
  • You do not have post-processing software or just do not like to use it.
  • You shoot in high volume and the time needed to tweak exposure settings would be too much.

Factors that lean toward increased reliance on Lightroom

  • You are a consistent user of post-processing software to enhance your pictures.
  • You bracket your pictures.
  • Your subject is moving or the moment fleeting.
  • You do not edit large volumes of pictures.

Did I miss some factors? Do you have a different take? If so, let me know in the comments below, and tell me – which camp are you in?

googletag.cmd.push(function() {
tablet_slots.push( googletag.defineSlot( “/1005424/_dPSv4_tab-all-article-bottom_(300×250)”, [300, 250], “pb-ad-78623” ).addService( googletag.pubads() ) ); } );

googletag.cmd.push(function() {
mobile_slots.push( googletag.defineSlot( “/1005424/_dPSv4_mob-all-article-bottom_(300×250)”, [300, 250], “pb-ad-78158” ).addService( googletag.pubads() ) ); } );

The post Exposure: Get it Right in Camera or Fix it Later? by Jim Hamel appeared first on Digital Photography School.


Digital Photography School

 
Comments Off on Exposure: Get it Right in Camera or Fix it Later?

Posted in Photography


12-bit Versus 14-bit RAW – Which is Right for You?

24 Feb

So you’ve done the research, read the articles, browsed through your photos, and decided it’s time to make the leap from shooting in JPG to shooting in RAW, in order to get the most quality possible out of your photos. Congratulations, and welcome to the fold!

Things are nice over here in RAW land, we have cookies too. Now that you’ve firmly decided once and for all to shoot in RAW, you can stop thinking about file formats and get back to making beautiful images, right? Well, sort of. Turns out there’s yet another layer to this cake, that adds yet one more twist to the mix: RAW compression formats.

raw-formats-compared-sunrise-corrected

“What?!” I can hear you saying now. “What’s a compression format? And why does it matter? Can’t I just shoot in RAW and be done with it?” Well yes, and no.

For starters go grab your camera, caress it gently, and rest assured that you have in your hands a very capable imaging device, that would have been the envy of every photographer in the world 10, or even five years ago. You don’t have to understand everything about RAW, JPG, and other formats, as long as you’re getting out there and taking photos that you like. But, if you would like to know more about how all this works, then by all means, read on. You might want to sit down and grab a cup of coffee, because things are about to get a bit tricky.

How RAW format works

When you take a photo with any camera (DSLR, mirrorless, point-and-shoot, or even your smartphone) a massive amount of color information is captured by the camera’s image sensor, and sent to a computer chip that analyzes it, and ultimately saves it to your memory card as a picture. If you shoot in JPG, a great deal of that data is discarded to save storage space, and facilitate easier sharing. But, if you shoot in RAW, most of that color data is retained, which results in you having much more flexibility to edit each picture in a program like Lightroom or Photoshop, but also results in file sizes that can be quite large and not at all conducive to emailing or posting on social networks. Many cameras allow you to choose different types of RAW formats such as:

  • JPG – Every camera offers this format which stores 256 tonal values for each color, but compresses the file in such a way that a significant portion of the photo data is discarded. This format is ideal for photographers who do not do much editing in Photoshop or Lightroom, and the file sizes are much smaller than RAW, which makes them very easy to share.
  • 12-bit RAW lossy compressed – This format stores 4,096 tonal values for each color (red, green, and blue) per pixel, but then throws away some information it deems unnecessary, using an algorithm to compress the file, so it’s a bit smaller and takes up less space on your memory card. Most of the discarded data is on the right side of the histogram, which makes sense, since digital cameras typically capture much more information in the mid-tones and highlights to begin with. Thus, there is a great deal more leeway when performing a lossy compression algorithm, since it is removing some data from a part of the image where there is so much to begin with, that removing a little will not matter to most users.
  • 12-bit uncompressed – Also stores 4,096 tonal values for each color, but does not throw out any data to shrink the file size.
  • 14-bit lossy compressed – This format stores 16,384 tonal values for each color (way more than 12-bit – 12-bit mean:s 2 to the power of 12 or 2x2x2x2x2x2x2x2x2x2x2x2, 14-bit is 2 to the power of 14) but also discards some data it deems gratuitous, in order to compress the file so it’s a bit smaller.
  • 14-bit uncompressed – The best option most cameras offer (though some ultra-high-end models do have 16-bit RAW files, but they usually cost more than a new car) stores 16,384 tonal values for each color per pixel and does not throw any away, giving you the highest possible amount of information, to work with in post-production.
The original photo (left) was somewhat bland and flat, and shooting in RAW gave me the flexibility I needed to properly edit this into an image I really liked.

The original photo (left) was somewhat bland and flat, and shooting in RAW gave me the flexibility I needed to properly edit this into an image I really liked (right).

Looking at this data the answer seems clear, right? Just shoot in 14-bit uncompressed RAW because it’s obviously better! Well again, yes and no.

Due to the increase in the amount of data offered by a 14-bit file, the resulting RAW images take up much more space on your memory card and computer, and are much slower to load in a program like Lightroom or Photoshop. If you shoot with a high-megapixel camera like the Nikon D800, Sony A7Rii, or Canon 5DS, you can easily get RAW files approaching 100MB each. That is great when you need it, but can be quite a burden if you decide that all the extra data is not always worth the tradeoff in storage space.

Another issue that comes into play when comparing formats is whether the increased data actually does give you more flexibility when editing the image. Of course it does in theory, but in practice, having 16,384 tonal values for each color could be a bit of overkill for most people. If you generally get your exposure correct in camera, then you may not need the sheer quantity of data provided by a 14-bit uncompressed RAW format file.

Real-life examples

Some camera makers have other RAW formats, such as sRAW and mRAW, that actually decrease the pixel count of your images, while still giving you the flexibility of a RAW file. But, at the end of the day, one thing is clear – shooting in RAW will always give you significantly more freedom to edit your images than shooting in JPG. The question then becomes, which RAW format to use?

There are benefits and drawbacks to each one, but all RAW types allow you to have an extraordinary degree of flexibility in post-production, compared JPG. Like almost everything in photography, there is no single correct answer to the question, and it is largely dependent on your shooting style and needs as a photographer. To see how this plays out in a real-life scenario, here’s a picture I took, overlooking the Formal Gardens at Oklahoma State University.

f/4, 35mm, ISO 100

35mm, f/4, 1/350 second, ISO 100

I re-shot the same picture using massive over- and under-exposures using four different RAW formats, then corrected them in Lightroom. Shooting these photos as JPGs would have resulted in unusable images, but RAW gives you so much extra information, that you can often salvage parts of a picture that would have been entirely lost otherwise. RAW is useful for much more than fixing overexposed pictures, but it’s in extreme circumstances like this that the real differences between the 12-bit, 14-bit, compressed, and uncompressed formats, would be most likely to show up.

This first set of images has been intentionally overexposed by three stops, by leaving the aperture at f/4 and ISO at 100, but increasing the shutter speed to 1/30 second.

raw-formats-compared-garden-overexposure-compared

Overexposed intentionally by three stops, to test which format offers the most in terms of highlight recovery.

I then used Lightroom to bring the exposure values back down by three stops, for a correctly exposed image. Some data has been lost due to clipping, where things are so overexposed there is literally nothing left to recover, but for each picture I was able to get a decent image, useful for comparison purposes. I still wouldn’t use these in an actual production environment, but it does give you an idea of how flexible the RAW format really is.

raw-formats-compared-garden-overexpoure-fixed-compared

All images look virtually identical, but that’s not too unexpected given that these are minuscule thumbnails of 24-megapixel images. To get a better understanding of how the RAW compression formats compare, here is a 1:1 crop of the same section of each photo.

raw-formats-compared-garden-overexpoure-fixed-compared-crop

Upon close inspection, all four RAW formats appear to offer similar functionality when recovering highlight data.

Notice much of a difference? I don’t. That’s not to say there isn’t any difference, just not one that’s discernible to the human eye.

Since the initial 14-bit uncompressed file is more than 50% bigger than a 12-bit compressed image (39MB versus 25MB) there is clearly a lot more data to work with, but as this test illustrates much of that is not likely to matter a whole lot in practical terms. The biggest difference I can see is not due to lossy compression but bit rate, as both 14-bit files show just a few more clearly-defined bricks in the sidewalk, to the right of the planter.

However, keep in mind this is a 1:1 crop of a 24-megapixel image. You’re looking at about 94,000 pixels in each section above, out of nearly 25 million, or about .04% of the total image. If you have to zoom in this far to see any noticeable differences between 12-bit and 14-bit RAW files, that were overexposed by three whole stops to begin with, then to me it does not offer a significantly compelling reason to shoot 14-bit RAW most of the time.

To continue with the comparison, here’s the same picture underexposed by three stops in camera, by increasing the shutter speed to 1/3000 second.

raw-formats-compared-garden-underexposure-compared

Underexposed by three stops to test shadow recovery.

Since almost no data was clipped, which I could tell by looking at the histogram, adjusting the exposure by three stops in Lightroom results in an image that is virtually identical to the correct one at the top of this article. Taking another look at the 1:1 crops below, yields a similar result as the first test.

raw-formats-compared-garden-underexpoure-fixed-compared-crop

Once again, all four RAW formats appear to be on par with each other for recovering detail in the shadows.

The results here are remarkably similar to the overexposure test, and remember that these pictures have been severely underexposed before correcting them in post. The differences between the corrected images you see above are negligible, and the much smaller 12-bit compressed file gives results that are almost identical to the 14-bt uncompressed.

So, which format should you use?

While you can’t draw a universal conclusion from just one test, this example does illustrate that shooting in 12-bit compressed RAW still gives you plenty of data to work with, when editing your images. As I mentioned at the top of the article, some data is literally thrown away when shooting with a lossy compression format, but in most situations it’s nothing you are likely to notice. Only in extreme circumstances, such as when you want to do massive highlight or shadow recovery, or if a photo has been severely over or under-exposed, are you likely to notice any practical benefits from shooting in 14-bit RAW.

However, if you are the type of photographer who wants the most possible data in each picture, and continually pushes your camera to its limits, I would recommend capturing as much information as possible (i.e. shooting in 14-bit) and retaining every last chunk of it (shooting uncompressed).

Even when shooting for clients I use 12-bit RAW because it gives me more than enough color information to edit my shots.

Even when shooting for clients I use 12-bit RAW because it gives me more than enough color information to edit my shots. I could use 14-bit RAW, but for my purposes I have found that I simply don’t need to.

A notable caveat here is that the test I performed was just one example, and it’s entirely possible that a different scenario would have done a better job at illustrating the differences in terms of the different RAW formats. When doing this I tried to pick something that was generally representative of a typical photographic scenario, and not a situation that was far outside the realm of what most people would encounter when taking pictures. If I had over or under-exposed by four or five stops, or shot at higher ISO values, perhaps there would be some significant differences in terms of what each format has to offer, and I don’t want to draw any large-scale conclusions from just one small set of data.

What this test does illustrate is that even though 12-bit compressed RAW contains less photographic information than its higher bit rate counterparts, enough important data remains to give you plenty of wiggle room, if you need to do extreme corrections in post-production.

The original uncorrected version of the image at the top of this article, shot in 12-bit compressed RAW.

The original uncorrected version of the image at the top of this article, shot in 12-bit compressed RAW.

I generally don’t like to give advice when it comes to photography, life, jobs, or matters of the opposite sex, but I have shot with many types of RAW formats for a few years, and feel entirely comfortable shooting in 12-bit compressed. I do all my pictures this way, even paid jobs for clients, and have never had a circumstance in which a bad picture would have been salvageable if I had only shot in 14-bit uncompressed.

In my experience (which, I admit, is not the same as a professional photographer who makes his or her living taking pictures) there are plenty of other factors that matter just as much, such as: choosing the right lens, nailing your focus, composing your shot, knowing when and how to use external lights, and a host of other things that are more important than eating up your memory cards with 14-bit uncompressed RAW files. If your pictures regularly, and consistently, require the type of extreme editing that can only be saved by heavily editing a 14-bit uncompressed RAW file, I’m going to go out on a limb and say there are probably other things that you need to work on to improve your photography, besides choosing the right file format.

Even black and white photographers can get a lot of benefits from shooting in RAW.

Even black and white photography can benefit from using the RAW format due to the additional data available in each individual pixel.

Of course it should be noted that the RAW format is beneficial, not just for fixing images that are way too bright or dark. RAW files give you significant flexibility when editing the colors of an image, and allow you to bring out more natural skin tones, get the deep rich blues hidden in a dull gray sky, find the intricate details of a flower petal that would be lost in a JPG, and perform all sorts of other edits that have nothing to do with making a dark photo a little brighter. Any RAW format is better than none, if you’re the kind of person who likes to edit your images after you take them, but if you want a nice balance between having lots of data while still keeping file sizes down, 12-bit compressed will most likely suffice just fine.

What about you? I’m curious what your experiences have been with compressed and uncompressed RAW. Perhaps you’re the kind of photographer who shoots in JPG and doesn’t bother messing with processing afer the fact. I’d like to hear about your experiences in the comments below, especially if you have found times when shooting 14-bit uncompressed RAW has come in handy. The more information we have to work with, the better informed we will all be as photographers.

googletag.cmd.push(function() {
tablet_slots.push( googletag.defineSlot( “/1005424/_dPSv4_tab-all-article-bottom_(300×250)”, [300, 250], “pb-ad-78623” ).addService( googletag.pubads() ) ); } );

googletag.cmd.push(function() {
mobile_slots.push( googletag.defineSlot( “/1005424/_dPSv4_mob-all-article-bottom_(300×250)”, [300, 250], “pb-ad-78158” ).addService( googletag.pubads() ) ); } );

The post 12-bit Versus 14-bit RAW – Which is Right for You? by Simon Ringsmuth appeared first on Digital Photography School.


Digital Photography School

 
Comments Off on 12-bit Versus 14-bit RAW – Which is Right for You?

Posted in Photography


A Beginner’s Guide to Choosing the Right Post-Production Software

12 Jan

When it comes to choosing your first piece of post-production software you may find yourself spinning in circles. There’s so much to choose from, and the whole idea of learning to do something new can be intimidating. This article will cover a number of the most well known software options available, and hopefully lead you towards the right decision for you.

Adobe Photoshop CC

Over the years no one has truly been able to displace Adobe’s dominance of the photography software market. Both Lightroom and Photoshop are hugely popular pieces of software and regarded as the go to platforms for professionals. Let’s break down both Lightroom and Photoshop individually to see what makes them so popular.

Adobe Lightroom

LR

Lightroom is the most popular tool available for post-processing your images. It can be used as an all-in-one solution for post-processing, image storage, and printing. Due to this all-in-one nature, Lightroom becomes a convenient and powerful option for both new photographers and pros alike.

One of the biggest differentiating factors of Lightroom verses other post-production tools is that it is widely supported by third party developers. What this means is that you can find a number of plugins for Lightroom that will allow you to extend your workflow beyond the core program. You’ll also be able to find a number of Lightroom presets, which can help you speed up your workflow by saving time for tedious edits. On top of that, sites like Smugmug and Zenfolio allow you to hook right into Lightroom, enabling you to share your photographs directly from your Lightroom catalog to your website.

Finally, due to the popularity of Lightroom, there is no shortage of support for you on the web. If you have a question about something related to processing an image with Lightroom look no further than YouTube or the many eBooks written on a number of different aspects of Lightroom’s features (including Loving Landscapes, a dPS ebook about processing your landscape images in Lightroom).

This whole package of features, extendibility, and resources, is why I’d suggest Lightroom as the first program for any new photographer looking to get into post-production. Not only are you getting a very capable program for editing and organizing your images, but you have the ability to extend the core features as your skills develop. You also have an endless supply of help from the many tutorials written on the platform over the years.

Adobe Photoshop

PS

Lightroom may be the best place to start as a new photographer, but Photoshop is a close second. The only reason I place Photoshop second on this list is due to its complexity. You still get the same great community of professional photographers, which enables you to learn more quickly, and you’ll still find a wealth of Photoshop Actions to help you speed up your workflow, but the learning curve for Photoshop is quite a bit more challenging than that of Lightroom, making it harder to recommend to a total beginner.

Adobe’s Creative Cloud platform is a subscription based model, which gives you access to both Photoshop and Lightroom for $ 10/month. The reason to pay the premium for Adobe’s products, over the ones I’ll list below, is not because they will perform better edits, but rather because of the way they integrate with other pieces of software, and the availability of tutorials on the web.

Open Source Options

If you’re not ready to invest money into your post-production workflow just yet, then these open source platforms are where I’d direct your attention.

GIMP

wilber_painterGIMP is the most well known Photoshop alternative out there. It has been around for years, works on both PC and Mac, and will provide you with many of the same tools that Photoshop offers. Being open source it doesn’t have the polish that Photoshop does, and won’t offer nearly as many third party options or tutorials. However, as a budget friendly way of processing your images, this is by far the best way to go.

Darktable

darktableDarktable is what I’d recommend if you’re looking for a RAW developer to substitute for Lightroom. Like GIMP, this is an open source option, which offers a number of features that will give you complete control of your images, and truly does compete with Lightroom in that area. Again where it’ll fall flat is that you’ll have less extendibility, and not as many resources to help you along the way. Note: Darktable does not work on Windows.

Other Tools

When it comes to post-production there are a number of what I’d call, supplemental tools available. These tools are designed to work in conjunction with Photoshop and/or Lightroom, and help you further refine your style as a photographer.

TopazLabs

logo_smallThe TopazLabs line of products includes 17 different pieces of software, each one specifically designed for its own unique purpose. These tools are designed to help you enhance and speed up your post-production workflow, but not necessarily replace Photoshop or Lightroom, although some of Topaz’s programs, like Impression and Texture Effects, do offer some standalone functionality that will let you create very different types of images.

Nik Softwarenik-logo

Like TopazLabs, Google’s Nik collection is a set of tools that will help you enhance and speed up your workflow. There aren’t as many different tools, and Google has a recent track record of killing off products that weren’t working for them without warning. But, the Nik collection is powerful, and will give you some great functionality beyond just Lightroom’s basic toolset.

Photomatix

photomatixPhotomatix has been the leader of the HDR post-production world for quite some time. Their product continues to produce some of the best controlled tone mapped images, and would be a great addition to your set of tools if you wanted to get deep into HDR photography.

Aurora HDR

aurorahdrAs an alternative to Photomatix, Aurora HDR is a newly released product from Macphun, in partnership with Trey Ratcliff. At the moment Aurora HDR is only for Mac and is an early stage product, so there’s bound to be some growing pains. That said, with backing from Trey Ratcliff, who’s made his name on HDR photography, this product could eventually get to where it wants to be – which is an all-in-one HDR tool, that doesn’t require Lightroom or Photoshop to produce images.

Not a beginner? What else would you recommend?

If your favorite piece of software didn’t make this list let us know why you like it, and why you’d recommend it over the others in the comments below.

googletag.cmd.push(function() {
tablet_slots.push( googletag.defineSlot( “/1005424/_dPSv4_tab-all-article-bottom_(300×250)”, [300, 250], “pb-ad-78623” ).addService( googletag.pubads() ) ); } );

googletag.cmd.push(function() {
mobile_slots.push( googletag.defineSlot( “/1005424/_dPSv4_mob-all-article-bottom_(300×250)”, [300, 250], “pb-ad-78158” ).addService( googletag.pubads() ) ); } );

The post A Beginner’s Guide to Choosing the Right Post-Production Software by John Davenport appeared first on Digital Photography School.


Digital Photography School

 
Comments Off on A Beginner’s Guide to Choosing the Right Post-Production Software

Posted in Photography