RSS
 

Posts Tagged ‘REVIEW’

Dynamic range test added to Canon EOS 5DS R First Impressions Review

12 May

Canon’s EOS 5DS R tops anything we’ve seen in its class for resolution, but that’s only part of the image quality equation. We put its 50MP sensor to the test in our Raw dynamic range studio and real-world tests. Take a look at the kind of performance you might expect from the 5DS R’s (enormous) Raw files. Read more

Articles: Digital Photography Review (dpreview.com)

 
Comments Off on Dynamic range test added to Canon EOS 5DS R First Impressions Review

Posted in Uncategorized


Review: Flashpoint Zoom Li-on Flash

10 May

01 Packaging

Raise your hand if this sounds familiar: you’ve fallen in love with Speedlight flash photography, but you gripe at having to lug around lots of odds and ends for your remote triggers, not to mention boxes of backup AA batteries. Isn’t it time for flashes to catch up with DSLRs and be powered by rechargeable batteries, and have more discrete wireless triggers? It turns out that these features DO exist, but not with Speedlights made by major camera manufacturers.

Announced by Adorama earlier this year, the Flashpoint Zoom Li-on TTL Flash is a new and affordable system that has the key feature of being powered by a rechargeable Lithium Ion Polymer battery. This battery promises to power your flash longer than any other hot shoe mount Speedlight on the market, and it does so while keeping the flash unit at a relatively compact size. When paired with the Flashpoint Commander Transmitter and Receiver set, you have an intuitive, compact way of using the flash off-camera. Sound appealing? Read on for more specs and details.

What’s in the Boxes

02 In the Box

To be clear, the flash unit and the commander (transmitter and receiver) are two separate items that are sold separately. You don’t need to have the Commander set to use the flash unit on its own.

The Zoom Li-on unit, made specific for either Canon or Nikon, arrives in a nicely packaged box containing:

  • (1) Flashpoint Zoom Li-On TTL flash unit
  • (1) Lithium Ion Polymer battery pack
  • (1) Battery charger with cable
  • (1) Protective case for flash with a mini-stand unit

The Flashpoint Commander set arrives with a rather large transmitter (it’s about the size of a Pocket Wizard), and a much smaller receiver (about the size of a thumb drive). The transmitter runs on a pair of AA batteries.

Best Flash Feature: The Battery

Boasting more power than any AA battery, the lithium ion battery is the standout feature of the Zoom Li-on unit. It packs 11.1 volts and 200mAh, and a fully charged battery delivers up to 350 full power shots, with a recycle time of less than 1.5 seconds. You’ll need 2.5 hours to fully charge the battery, but it will function just fine on partial charges. On the unit’s display, there is also a battery icon in the upper right corner that will indicate how much power your battery has left. For longer shoots, it’s recommended that you purchase an extra backup battery, since the flash unit can’t be powered by any other means.

04 Charging

Other Flash Features: Comparable to Most Major Speedlights

Besides the rechargeable battery, the Zoom Li-on flash has all of the other functionality present in other Speedlights today. These features include standard TTL mode, Manual mode, Exposure Compensation, Front and Rear Curtain Sync, Laser Autofocus Assist, High-Speed Sync, group control, and Slave and Master optics, to name a few. This flash also has complete IR TTL control connectivity with Canon and Nikon flashes, meaning you don’t necessarily need to convert your entire Speedlight system. Other triggering modes for the flash include hotshoe, radio controller, 2.5mm sync port, and optical slave.

The flash head has a built-in wide angle diffuser and white bounce card. It also rotates 180 degrees in any direction and tilts over 90 degrees. It can also automatically or manually zoom from 24-105mm. Basically, if you’re familiar with the Nikon SB-900 or Canon 580EXII, the Zoom Li-on flash is similar in size and layout of its controls. Thanks to my familiarity with Canon Speedlites, I was able to unbox the unit and set it up intuitively without referring to the included instruction manual.

Flashpoint Commander Set: All About Convenience

The accompanying Flashpoint Commander set enters a crowded market full of all kinds of remote trigger options, but their main advantages are, an affordable price point and lots of power, packed into relatively small units. Using this set, you can view and change your flash output and trigger your flash remotely from 150+ feet away. There are also 16 channels and 16 groups of control so that you can handle multiple units of remote lighting. The newest version of the transmitter also comes with a 3.5mm sync port, allowing for a direct cable connection to the PC socket of your camera.

03 Details

The transmitter is slightly larger than a single Pocket Wizard Plus III and it sits nicely in your camera’s hot shoe mount. Unlike most other trigger systems, the receiver looks nothing like the transmitter, consisting of a flat unit that simply plugs into the side of the Zoom Li-on flash. After syncing channels and groups via manual switches on the transmitter and receiver, that’s all you need to do to set it up.

Two complaints: you’ll need slim fingernails or a tool to hit the switches on the channel sections of both units, and the group dials are a little too easy to turn, opening up room for possible syncing mistakes. On the whole, this Commander set is impressively compact and easy to set up, although you’ll want to keep an extra eye out for the tiny receiver as it seems very easy to misplace.

05 Umbrella

Flashpoint Zoom Li-On Flash and Commander Set in Practice

To test out the flash unit, I worked put it through three separate scenarios: table top food photography, on-the-fly event photography, and a posed portrait session.

For the food photography session below, the Zoom Li-On flash was paired with the transmitter and receiver and handheld to camera left. Shot in manual mode with no diffuser, the outcome was a soft, natural light that I’d expect from any speedlight.

07 Example Food

The on-the-fly event photography scenario was a quick red carpet photo op with Laila Ali. Fired in ETTL mode on-camera, the Zoom Li-on’s smooth rotating head feature plus fast recycle time came in extremely handy, and I was able to pull off the desired shots without turning to my Canon 580EXII, which I had mounted to a second body just in case.

06 Example Laila

Finally, the portrait session combined the Zoom Li-on flash, acting as the master, and a Canon 580EXII flash off-camera as the slave. Both flash units synced seamlessly, and thanks to similar control layouts, it was easy to figure out that the master/slave function on both units activates the same way (holding down the Zoom button).

08 Example KA

Overall, I declare the Zoom Li-on Flash a winner and a new staple to my camera bag thanks to its power, reliability, and the cost (and weight) savings of not having to haul tons of spare AA batteries. Are you inclined to give this flash a shot?

You can find the Flashpoint Zoom Li-on Flash at Adorama or on Amazon.com.

googletag.cmd.push(function() {
tablet_slots.push( googletag.defineSlot( “/1005424/_dPSv4_tab-all-article-bottom_(300×250)”, [300, 250], “pb-ad-78623” ).addService( googletag.pubads() ) ); } );

googletag.cmd.push(function() {
mobile_slots.push( googletag.defineSlot( “/1005424/_dPSv4_mob-all-article-bottom_(300×250)”, [300, 250], “pb-ad-78158” ).addService( googletag.pubads() ) ); } );

The post Review: Flashpoint Zoom Li-on Flash by Suzi Pratt appeared first on Digital Photography School.


Digital Photography School

 
Comments Off on Review: Flashpoint Zoom Li-on Flash

Posted in Photography


Metz mecablitz 26 AF-1 Quick Review

07 May

While plenty of DSLRs also have a built-in flash, the feature has been out of favor with mirrorless manufacturers, prioritizing miniaturization. This is where the Metz mecablitz 26 AF-1 digital steps in. Small compared to standard hotshoe flash units, it’s still a good deal larger than those that come in the box with most mirrorless cameras. Read review

Articles: Digital Photography Review (dpreview.com)

 
Comments Off on Metz mecablitz 26 AF-1 Quick Review

Posted in Uncategorized


DxOMark Mobile report added to our Samsung Galaxy Note 4 review

28 Apr

DxOMark has just released its test results for the Galaxy Note 4, putting it just behind Samsung’s Galaxy S6 but above Apple’s flagship iPhone 6 Plus. Our comprehensive review of the Note 4 and its 16MP BSI CMOS sensor, F2.2 lens and optical image stabilization has been updated with DxOMark’s findings. See how it stacks up against the competition. Read more

Articles: Digital Photography Review (dpreview.com)

 
Comments Off on DxOMark Mobile report added to our Samsung Galaxy Note 4 review

Posted in Uncategorized


The Ultimate On-Location Storage Solution – ioSafe Rugged Portable SSD Review

26 Apr

That’s a big call really, isn’t it? “Ultimate on-location storage” what does that even mean, and do you need it? Well, dear reader, read on and we’ll get to the bottom of this relatively new, bomb proof storage device from ioSafe.com

The aptly named Rugged Portable is an external solid state drive that connects to your computer via USB 3.0 to store all of your files – in my case, raw images photographed on location. We have the 1TB version on a trial and that’s going to be (much) more than enough for most photography adventures.

slideshow_rugged-portable_3

Transfer speeds via USB 3.0 are usually more than enough under the two circumstances I’ve used the drive. The first being to copy from my 32GB Sandisk Extreme Pro CF card via a Lexar USB3 card reader, through the Macbook Air and out the other side into the compact ioSafe drive. I also use a couple of Thunderbolt drives at home, and the noted difference between Thunderbolt and USB3 transfer speeds isn’t actually all that noticeable under real world conditions.

The second scenario was while shooting for an agency that’s recently hired me to be the photographer for a series of shoots. When tethered, and shooting on location, I find myself importing the images to my WD Passport Pro and running a second copy off to the ioSafe – Why? This client takes my CR2 files at the end of each shoot and the designer handles the processing and editing, so I unplug the WD and hand it to the producer and he takes it away with him until next shoot, the ioSafe comes with me. You’re still sitting there scratching your forehead?

Six of the shoots I’ve done so far for this client, four of them have been of scenarios I can’t recreate for one reason or another. If those images are lost by me between location (sometimes on set for two days, away from home and the comfort of backing up to my Promise R8 – yes, I love storage) and the client has a mishap – well, frankly, we’re stuffed. Obviously this is a worst case scenario, but these are the ones that we like to avoid!

s123

Sure, you find a way to work around it – you’re a professional, and that’s why I think it’s nice to not have to “get around it” and to take as much risk out of your shoot days as possible.

When I say “if those images are lost by me” I’m hoping to never have a catastrophic failure that involves my gear melting down, drowning or being driven over, but human error involves dropping drives, spilling a glass of wine on your laptop – the list goes on.

I can see this drive being the perfect storage and transport for destination wedding photographers, commercial photographers travelling to shoot, pretty much anyone that really cares about their, or their clients’ images, between shoot and final delivery.

The ioSafe Rugged portable has some pretty impressive statistics and while I’ve not tested these personally* I know the ioSafe crew are pretty serious about their gear and have a data recovery guarantee attached to their products (more on that after the stats).

slideshow_rugged-portable_2

  • Crush Protection up to 5,000 lbs.
  • Drop Protection up to 10 feet
  • Immersion protection up to 30′ for three days
  • USB 3.0 SuperSpeed (like Superman, you know)
  • Data Recovery Service up to $ 5,000/TB
  • World’s best warranty
  • Mac or PC

Like I said, pretty impressive… But then, it’s not really impressive unless I test some of this stuff, right? (This was an afterthought and, now *I have tried some of them!)

Enlisting the services of Filmmaker and Educator, Lee Herbet of Capturing Passion We’re going to try show you what makes the ioSafe Rugged Portable the little beast that it is.

So, for some examples! In most of these examples I was either tethered shooting to the drive (crush test) or it was at least plugged in and powered up (water and drop tests)

1. Crush test

I’m on set, shooting the OutdoorTech van (Thanks to Blonde Robot!) when one of the directors glides in silently in his Tesla S… Clearly the Tesla has a great rear facing camera, but this one doesn’t have a front facing camera and well, you can see how that played out!

2. Submersion test

We’re back shooting some images for a water conservation company here in Melbourne, thankfully not into 30′ of water, but you get the idea!

3. Drop test

I’d forgotten to simply use my CamRanger with the 7.3m (24′) tall Kupo LookOut stand while shooting a lifestyle image… Watching this back almost reminds me of a Mr Bean sketch!

So, even though the shooting situations above were staged, the drive really did get run over, dropped, and drowned multiple times to make these short films. The footage was also saved onto the drive and the films edited together on location at my favourite cafe right after we wrapped the final filming. You can even see the drive data light flashing in the Tesla video as I was shooting to it just before it was run over!

In closing , do you need the ultimate on-location storage solution? Only your business requirements can answer that question for you, but if you’re after an easily portable SSD external drive for your photography, that will look danger in the face and laugh – this is it.

This drive leaves me nothing to complain about and so I give it five gold stars.

Thanks for reading! Hope you enjoyed my take on the ioSafe Rugged Portable!  –Simon

googletag.cmd.push(function() {
tablet_slots.push( googletag.defineSlot( “/1005424/_dPSv4_tab-all-article-bottom_(300×250)”, [300, 250], “pb-ad-78623” ).addService( googletag.pubads() ) ); } );

googletag.cmd.push(function() {
mobile_slots.push( googletag.defineSlot( “/1005424/_dPSv4_mob-all-article-bottom_(300×250)”, [300, 250], “pb-ad-78158” ).addService( googletag.pubads() ) ); } );

The post The Ultimate On-Location Storage Solution – ioSafe Rugged Portable SSD Review by Sime appeared first on Digital Photography School.


Digital Photography School

 
Comments Off on The Ultimate On-Location Storage Solution – ioSafe Rugged Portable SSD Review

Posted in Photography


Speed boost: Sony SLT-A77 II review posted

25 Apr

The Sony SLT-A77 II uses that company’s translucent mirror technology in combination with an AF system that Sony claims is dramatically improved over its predecessor. It boasts 12fps continuous shooting with AF, not to mention a 24MP sensor, built-in Wi-Fi with NFC, 2.4M dot OLED viewfinder and a tiliting/swiveling LCD. We put its impressive AF claims to the test. Read review

Articles: Digital Photography Review (dpreview.com)

 
Comments Off on Speed boost: Sony SLT-A77 II review posted

Posted in Uncategorized


Accessory Review: Western Digital My Passport Wireless

21 Apr

Western Digital’s Wi-Fi enabled My Passport Wireless is a hard drive that features a built-in SD card reader. Alongside the drive, it offers a My Cloud app, allowing photo, video and audio files on the drive to be viewed wirelessly from a phone or tablet. With Wi-Fi hotspot capabilities it could be a very tempting device for roaming photographers who want photo backup without the burden of a laptop. Is it a travel photographer’s new best friend? Read review

Articles: Digital Photography Review (dpreview.com)

 
Comments Off on Accessory Review: Western Digital My Passport Wireless

Posted in Uncategorized


Street Re-View: Hacking Google with Theatrical Performances

16 Apr

[ By Steph in Art & Photography & Video. ]

Screen Shot 2015-04-15 at 3.34.39 PM

Mons, Belgium might just be the most interesting and artistic-looking city on the entirety of Google Street View, full of seemingly spontaneous dramatic scenes like chaotic clouds of floating white feathers, painters turning sidewalk crossings neon pink, and basketballs falling out of trees like fruit. The theatrical performances are timed to coincide with the arrival of Google’s camera-equipped van when it comes along to map out the area.

Screen Shot 2015-04-15 at 3.35.11 PM

Screen Shot 2015-04-15 at 3.34.58 PM

Screen Shot 2015-04-15 at 3.38.21 PM

Mons Street Review, spearheaded by artists Ludovic Nobileau and Antonia Taddei, is an initiative put on by the city as part of its agenda as a European culture capital. The scenes are curated by citizens, who transform the streets into urban theater sets and pose as the camera passes.

Screen Shot 2015-04-15 at 3.32.03 PM

Screen Shot 2015-04-15 at 3.32.47 PM

Screen Shot 2015-04-15 at 3.35.54 PM

The artists encouraged people to come up with their own ideas, create their own roles and costumes, and arrange props however they like. About 900 people participated on 42 streets, essentially hijacking Google’s service to promote themselves and their city.

Screen Shot 2015-04-15 at 3.37.50 PM

Screen Shot 2015-04-15 at 3.37.21 PM

Screen Shot 2015-04-15 at 3.35.54 PM

The aim is to present Mons the way the people see it, as a living place of culture and history rather than a series of static street view images. Says Nobileau, “It should be up to people, rather than Google, to represent cities.”

Share on Facebook


[ By Steph in Art & Photography & Video. ]

[ WebUrbanist | Archives | Galleries | Privacy | TOS ]


WebUrbanist

 
Comments Off on Street Re-View: Hacking Google with Theatrical Performances

Posted in Creativity


Review of the Mindshift Gear Rotation180° Professional Backpack

15 Apr

Screen Shot 2015-03-19 at 2.40.05 PMI thought the whole Rotation180 thing was a gimmick, and avoided the packs by Mindshift Gear because who needs a new gimmick, right? I wanted a useful pack and had it in the f-stop Gear Satori EXP that joined me trekking in Nepal more than once. That pack is amazing and fits all kinds of stuff for my longer trips in the backcountry.

The best way I can describe the Mindshift rotation180° Professional pack is that it’s more amazinger. The Satori EXP is an amazing pack and can take a beating, but I found the rotation180° Pro better suited to my style and shooting needs. But, it’s not for everyone. Instead of a boring, exhaustive review, let me point out the highlights that sealed the deal for me.

The Rotation Gimmick That is Actually Awesome

One of the biggest obstacles I find when I am out hiking with my camera is stopping to get it out my pack each time I want to use it. Not only that, but living in Washington half the time means hiking in inclement weather, which means leaving my camera on the outside is not much of an option. The same goes for trekking in the Himalayas; having a heavy camera around my neck or shoulder just doesn’t work for me.

The r180° Pro attempts to solve this problem by making the lower part of the bag into a huge waist pack that swings around when needed. It works quite well.

Peter-West-Carey-_PWC3982

The rotation feature requires that your hip belt is attached first, otherwise it won’t really work. The belt is nicely padded all the way around, and is as comfortable as I’d expect in a long distance pack. The clips in front are normal size, I found the adjustment straps a little more complex than they need to be, but they work.

On the right side of the pack is a quick release buckle.

Peter-West-Carey-IMG_7344

Peter-West-Carey-IMG_7345

The more I study it, the more I am impressed because the buckle can only be removed by sliding it down, yet it can be attached by simply placing both pieces close together and letting the magnetic, one-way buckle attach. This makes it remarkably easy to attach by sense of feel but still secure enough to keep things in place. It is very well thought out.

With the buckle detached, the entire waist pack section is free to rotate. There is a handle loop on the right side of the pack, as well as huge loops on the front of the belt to aid in rotation.

Peter-West-Carey-IMG_7340

You can see in the image above that a full size DSLR (Canon 7D with battery grip, in this case) will fit, even with a 28-300mm or 70-200mm lens attached. The compartment comes standard with those dividers you find in all the packs these days, and can easily accommodate a smaller DSLR or mirrorless camera, an extra lens and a flash.

Screen Shot 2015-03-19 at 2.36.25 PM

Peter-West-Carey-IMG_7341

Inside the compartment there is ample storage for the small things. Filters and cards have side and top pockets including one with a zipper and mesh to make finding articles easy.

The waist belt also comes with its own rain cover and pockets for spare batteries and cards on the belt, interior pockets for filters, and other items.

Peter-West-Carey-IMG_7342

Peter-West-Carey-IMG_7343

But Does it Work?

At its core, the rotation180° is all about the quick action of slipping the waist belt around to access your gear. So how well does it work? I tested the pack over the course of two months, on ten different hikes, covering over 52 miles, as well as seven airline flights.

To those ends, the pack works very well for the right audience. It’s not as easy to take through airports as a smaller bag, or a roller bag as I am accustomed to using. But on the trail, it is hands down the best pack for mixed use.

Peter-West-Carey-_PWC3984

By that I mean, when your goal is to cover some ground and also take some photos, especially in inclement weather. I found this pack extremely useful for taking photos while keeping up with other non-photographers in the group. Because the action of sliding the belt around, extracting my big old camera, taking a shot and returning it all in place is so easy, I take more pictures and fall behind less than when I have to remove my whole pack.

This action alone is what has made the rotation180° Pro my replacement pack for the f-stop Satori EXP.

A Technical Pack

Beyond the waist belt, the pack is a technical pack, meaning those who love options and comfort in their pack will be happy. There are dozens of attachment points for hiking, skiing, and photography gear. It comes with a rain cover and tripod attachment straps.

Peter-West-Carey-_PWC3993 Peter-West-Carey-_PWC3991

Peter-West-Carey-_PWC3989

The shoulder straps allow for a full range of adjustment for someone up to about 6’6″. Ice axe/trekking pole loops on the bottom match up with daisy chain loops on the back for the most adventurous. An outside stuff flap allows wet or oversized gear to remain away from precious camera gear.

Peter-West-Carey-_PWC3988

There are daisy chain loops on the bottom for affixing things like sleeping bags or pads. Compressions straps are also available to help hold the pack to your back.

Space!

The space in this pack! Inside the main compartment is a removable organizing bag. This is accessed from the part of the pack that goes against your back, which helps increase security while traveling. With this bag removed, as I often used the pack, there is ample room for a full day hike worth of food, clothes, first aid, etc.

Peter-West-Carey-_PWC3985

Screen Shot 2015-03-19 at 2.37.52 PM

While knocking around town I carry a few books, iPad, chocolate and other odds and ends in this space. There is also a large pouch on the back of the pack that fits flipflops or a larger map (pictured below on the right). Along the sides are large tube sleeves, one of which typically holds the raincover. On the left side the tube can hold a large water bottle or bladder (there is also a hydration hole to allow a bladder to remain inside the main compartment).

Peter-West-Carey-_PWC3987

Organization

This pack is not the best for carrying a home office, as I am often apt to do. There are zippered pockets on the outer top flap, inner top compartment, and inside the opening against your back. There are five pockets in all, that are perfect for filters, remote controls, card wallets and recharging cords. But it doesn’t have anything for pens or business cards or protection for a laptop/tablet.

Peter-West-Carey-_PWC3986

That being said, the rotation180° Pro Is not designed for the mobile worker. It does an excellent job of keeping your photo gear separated (the waist belt has pockets for cards, filters, and other small items as well). I’m quite happy with its ability in that case. It’s not the bag for you if you need a mobile office bag.

Thoughtfulness in Design

It’s the little things I keep finding, and appreciating on this bag, even two months later:

  • The back open sleeve is entirely removable.
  • There are straps to help balance the load of a tripod specifically.
  • There is a whistle in the sternum strap.
  • The big thumb loops to help rotate the waist belt (and to just hook your thumbs in while on long hikes).
  • Rubberized zipper covers to keep out the elements.
  • A hidden compression strap for even more gear on the back, or your tripod.
  • Loops on the waist belt, to attach water bottle holders or lens bags.
  • Velcro attachment on the rain covers so they don’t blow off, but can be removed to dry out.
  • Custom designed outer rain cover that works with the waist belt system flawlessly.
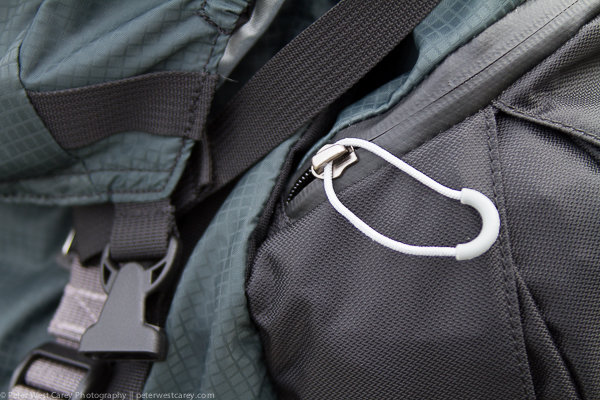
  • The waist belt magnetic clip.
  • It fits in overhead compartments of major airliners.
  • The waist belt is easy enough to remove when the pack is not on your back, but is harder than any other bag I’ve used.
  • Comfort.

All the zipper pulls have decent sized loops, and there are two zippers to make opening the main compartment easy. Inside there is enough room for a full size DSLR and longer lens (pictured is a Canon 7D with battery pack and 28-300mm lens, equivalent in size to a 70-200mm lens). The unit also comes with dividers for those with smaller cameras and multiple accessories.

Peter-West-Carey-_PWC3990

No pack is worth its weight if it is not comfortable to lug around. While the pack is not super light because of its substantial build quality, materials and stitching, the weight is carried well thanks to extra padding against your back and shoulders.

I would estimate that the pack has ridden on my back for about 60 hours. This includes city walks, forest hikes, snowshoeing, airports and just standing around waiting for transit. I have tested other packs for much shorter periods and that is because they didn’t feel right. I would not hesitate to take this pack on multi-week treks in the Himalayas, as I have done with the f-stop Satroi EXP.

What Doesn’t Work

The pack is not perfect, but it’s close. It really is not the right size pack to be schlepping through airports. While I have been doing it (so I can use the bag at my regular locations) I prefer the f-stop Guru instead, or the ThinkTank Aviator rollerbag.

Removing your camera when the pack is not on your back is not that hard but can make things dirtier than normal when on the trail, because you now have two pieces in the elements.

This may seems like a small thing, but I found that dog hair loves this pack and sticks quite easily. I know this is not normal review criteria, but this bag is more magnetic to dog hair (and probably llama, cat and zebra hair as well) than any pack I’ve used.

Conclusion

The Mindshift Gear rotation180° Pro is one heck of a great bag. It is also not cheap and retails for $ 389.99 USD. Thankfully that cost translates into care in design and a solid build (nothing on this bag feels cheap). A month after using the bag I was still finding helpful attachment loops and straps.

This bag is designed for the active photographer with any size camera, while noting it works well for large lenses. Mindshift also has smaller versions of this bag if you don’t need to carry so much gear.

Finally, if you have a family who has a mind of their own and tends to walk away even after you have muttered, “Hold on a sec, I need to get a photo of that!” for the 60th time during a trip, this bag is for you. I love the ability to quickly get my shot and return my camera to both a comfortable carrying position, and a safe spot out of the elements.

Disclaimer: Mindshift Gear furnished the author with a pack in order to review this product.

googletag.cmd.push(function() {
tablet_slots.push( googletag.defineSlot( “/1005424/_dPSv4_tab-all-article-bottom_(300×250)”, [300, 250], “pb-ad-78623” ).addService( googletag.pubads() ) ); } );

googletag.cmd.push(function() {
mobile_slots.push( googletag.defineSlot( “/1005424/_dPSv4_mob-all-article-bottom_(300×250)”, [300, 250], “pb-ad-78158” ).addService( googletag.pubads() ) ); } );

The post Review of the Mindshift Gear Rotation180° Professional Backpack by Peter West Carey appeared first on Digital Photography School.


Digital Photography School

 
Comments Off on Review of the Mindshift Gear Rotation180° Professional Backpack

Posted in Photography


Samsung Galaxy Note 4 camera review

14 Apr

The Note 4 is the latest iteration of Samsung’s top-end line of so-called ‘phablets’. In terms of design the new model is very close to its predecessor, the Galaxy Note 3, but under the hood, things have been upgraded significantly. A 1/2.6-inch 16MP BSI CMOS image sensor and F2.2 maximum aperture are shared with the Galaxy S5 but the Note 4 has gained an optical image stabilization system which makes it the first Samsung smartphone with this feature. Read our full review at connect.dpreview.com

Articles: Digital Photography Review (dpreview.com)

 
Comments Off on Samsung Galaxy Note 4 camera review

Posted in Uncategorized