RSS
 

Posts Tagged ‘REVIEW’

Tokina AT-X 11-16 Pro DX II Review: Best Value from Wide Angle

29 Jun

Tokina 11-16mm f2.8 is an ultra wide angle lens for crop sensor camera bodies (DX) with a moderately fast constant aperture of f2.8. It is Tokina’s top of the line lens (AT-X) with an internal focusing (IF) and Super-low Dispersion glass (SD). It is available in Canon, Nikon and Sony A mounts. Due to its focal length and fast aperture, Continue Reading

The post Tokina AT-X 11-16 Pro DX II Review: Best Value from Wide Angle appeared first on Photodoto.


Photodoto

 
Comments Off on Tokina AT-X 11-16 Pro DX II Review: Best Value from Wide Angle

Posted in Photography


App review: Full Frame is a quick, easy JPEG viewer, EXIF editor

28 Jun

Full Frame is a Mac-based image viewer, photo importer and metadata editor that centers around an incredibly clean and intuitive user interface. Released by California-based Inland Sea and available now in the App Store, its potential to speed up one’s workflow caught our attention.

Of course, there are a lot of different photo viewing, ingesting and sorting programs available on market, many of which are geared toward casual users. Full Frame, on the other hand, is targeting more toward high-end users like photo enthusiasts.

In Use

Having spent some time trying out using Full Frame in my own workflow, it seems its closest competitors are Photo Mechanic, a time-honored program with a cult-like following from photojournalists world-wide, as well as Adobe Bridge.

Unlike Adobe Bridge, which I find frustratingly sluggish and cluttered in design, Full Frame comes across as exceptionally lean in terms of speed (except when working with un-supported Raw files) and design. It has much more in common with Photo Mechanic like quick startup and image load times. Of course the spectrum of its functionality is much more limited than that of Adobe Bridge.

I took Full Frame for a spin while sorting images to post to one of my personal sites. Specifically,  I used it to move and rename selects from one drive, to a folder on another.

Once you have Full Frame fired up, users simply select the source folder and destination (assuming you are copying files) in the upper-left of the screen. The above screenshot represents the entire window when the program is open. There is literally nothing to get in your way of viewing images and deciding which to keep and which to trash.

To select an image to copy, simply click on it and a checkmark appears. Alternatively you can select all by hitting ‘Command A’ and uncheck the ones you don’t want. In the upper-left portion of the window you’ll find a slider to zoom in the grid view as well as options to view metadata and delete files from their source.

With your mouse hovering over an image, a small plus sign will appear in the upper left of the photo. Click on it to expand the view. Once in the single image viewer, users can use the slider at the top to zoom the image in and out, to check for critical focus. Unfortunately, when zooming in and out, there is no display of the percentage you are zoomed to, unlike in Photo Mechanic.

One of the best features of Full Frame is the metadata/EXIF viewer. It offers an incredibly detailed list that goes above and beyond what a lot of other programs show, including Photo Mechanic.

Users can also add EXIF info to any imported files from within the preferences panel. One thing I’ve always really liked about Photo Mechanic is how simple it is to add copyright warnings and contact info to my files. In Full Frame, it is just as painless. From within the preference panel users can also assign rules for renaming files on import, which is very handy. 

In many ways, Full frame comes across as a utilitarian program, built to accomplish several specific tasks related to moving and organizing images. However it also doubles as an outstanding way to show off your work to clients, friends or families. The grid view is frankly gorgeous, and once in the single image view, users can simple use the arrow keys to move from image to image. It also starts up very fast, which is a plus.

Things to consider

While I found a lot to like about Full Frame, there are some things to consider before purchasing it: First and foremost, despite the claims of Raw support, I found numerous files, from varying manufacturers, to be unsupported. For instance, Raw files from the Nikon D750 are unsupported, as are those from the Sony a7 II. However, if you have Raw+JPEG files, load times will slow significantly but you can at least view and import your images.

This is really quite unfortunate. Sure, app updates could bring about Raw support but who has time to wait around? On the other hand you could always covert to DNG first, but if the whole point of this program is to speed your workflow, that also makes little sense. Photo Mechanic on the other hand does not have this problem, it can display a JPEG rendering from any Raw file, and loads quickly regardless.

Another beef I have with Full Frame is that there is only one option for sorting/rating images. In Photo Mechanic and Bridge, there are numerous ways to rate and sort images. For instance, when choosing my selects, I first do an initial sweep and check mark all of the ones I like, I then assign color or star ratings until I’ve got the images sorted down to a manageable amount.  At that point I copy the selects to a separate drive to be imported into Lightroom for processing.

The Takeaway

Full Frame is not a program that can do it all, but the things it can do, it does well. If you need a quick, easy way to view JPEGs or edit/view EXIF info, it might be your cup of tea.

Full Frame is an outstanding option for photographers seeking a powerful EXIF viewer/editor or a quick and easy way to import and rename files. Its spotty Raw support is the main thing holding it back. But at $ 30, Full Frame is a major bargain compared to Photo Mechanic, which will set you back $ 150. It is also a much faster way to quickly view and sort JPEG files than Adobe Bridge.

What we like:

  • Intuitive user interface
  • Very clean, simple design
  • Powerful EXIF viewer and editor
  • JPEGs load very quickly
  • Can be used to import, sort, batch rename files
  • Support for video files

What we don’t:

  • Despite claims of Raw support, many Raw files not supported
  • No percentage shown on zoom slider
  • Not as many options for rating photos as competition

Rating:

Articles: Digital Photography Review (dpreview.com)

 
Comments Off on App review: Full Frame is a quick, easy JPEG viewer, EXIF editor

Posted in Uncategorized


All about that lens: Sony Cyber-shot RX10 III review

21 Jun

Introduction

The Sony DSC-RX10 III is an enthusiast-oriented bridge camera with a 24-600mm equivalent F2.4-4 lens and 20MP 1″-type stacked CMOS sensor. That sensor and the BIONZ X image processor are shared with the RX10 II and Sony RX100 IV, and offer great dynamic range and high ISO performance as well as 4K video and a range of high-speed video capture modes.

The RX-series has always been designed as much for video shooting as well as stills shooting in mind, and the RX10 III doesn’t change that. The real story of the RX10 III lies within its massive zoom lens. The RX10 III may look similar to the RX10 II when you look at them individually, but once you see them together, it’s immediately apparent just how much Sony tweaked the design of the III to accommodate the threefold increase in zoom power. The body and grip are ‘chunkier,’ and the weight has increased as well. Overall, the two are more siblings than twins.

Key Features

  • 20MP 1″-type stacked CMOS sensor
  • 24-600mm equivalent F2.4-4 Zeiss Vario-Sonnar T* lens
  • Bionz X processor
  • 4K video capture
  • Ultra slow-motion video capture
  • Tilting screen and high-resolution OLED electronic viewfinder with 2.35m dots
Straight-out-of-camera JPEG, cropped to taste. 124mm equivalent | F4 | 1/3200 sec | ISO 100. Photo by Carey Rose

There will be those people that buy the RX10 III straight away, simply because it zooms more than x camera. But it’s worth asking yourself if you really need 600mm of reach – because if you aren’t really sure you do, then you probably don’t. But as you’ll see later on, the RX10 III’s lens is so good that it might be worth it to you even if you only use the extreme reach occasionally.

Let’s also put that ‘extreme reach’ into some perspective here. The RX10 III’s 600mm zoom might seem to pale in comparison to a Nikon Coolpix P900, which packs a 24-2000mm zoom – but puts it in front of a much smaller sensor. The Sony and the Canon PowerShot G3 X attempt to strike a balance between image quality and size with their 1″-type sensors, and the image quality compared to smaller sensor solutions speaks for itself. Larger sensor = more light = better quality.

Straight-out-of-camera JPEG. 41mm equivalent | F5 | 1/1000 sec | ISO 100. Photo by Jeff Keller

Now, whether or not you want to use all this reach will vary greatly depending on the types of photography you enjoy. But it’s worth noting that long telephoto focal lengths, just like very short (wide angle) focal lengths, can take some practice to get good photographs with. Just because you can zoom closer in to an object doesn’t necessarily coincide with an increase in the quality of your photos or the video clips you capture.

With all that out of the way, let’s look a little closer at what this lens can do.

600mm

The RX10 III’s lens zooms in so far it’s almost amusing. It takes between three and four seconds for the lens to rack through the full zoom range. It also takes noticeably longer for all that glass to extend for power up than either the Panasonic FZ1000, which has less reach, and Canon G3 X, which has a much more compact lens at the expense of a slower maximum aperture.

Shooting at 600mm equivalent can offer up some interesting compositional choices, while the available 20MP make additional cropping a viable option if you could’ve used even more reach. But check out that heat haze, even early in the day! Processed and cropped to taste from Raw. 600mm equivalent | F4 | 1/1000 sec | ISO 250. Photo by Carey Rose

So while the lens makes the camera a little slow to start up and adds some bulk, in use it is very sharp throughout the zoom range, irrespective of distance to your subject (atmospheric conditions notwithstanding). Before using the RX10 III, I simply wouldn’t have thought images from a 1″-sensor superzoom camera could look this detailed. This model commands a $ 300 MSRP premium over the RX10 II, but in this case, it seems you get what you pay for.

The 72cm focus distance at maximum zoom won’t get you true super macro photos, but you’ll probably find that it focuses close enough. The lens also renders bokeh very nicely. Processed to taste from Raw. 600mm equivalent | F4 | 1/1000 sec | ISO 320. Photo by Carey Rose

Key features compared

  Sony RX10 II Sony RX10 III Panasonic FZ1000
MSRP $ 1199 $ 1499 $ 899
Sensor 20MP 1″-type stacked CMOS 20MP 1″-type stacked CMOS 20MP 1″-type CMOS
ISO range (native) 100-12800 100-12800 125-12800
Lens (35mm equivalent) 24-200mm F2.8 24-600mm F2.4-4 25-400mm F2.8-4
Built-in ND filter Yes No No
Min. focus distance 3cm 3cm 3cm
AF system Contrast detect Contrast detect Contrast detect
AF points 25-pt 25-pt 49-pt
EVF resolution 2.36m-dot 2.36m-dot 2.36m-dot
LCD 3″ 1.23M-dot tilting 3″ 1.23M-dot tilting 3″ 921k-dot fully articulated
Burst rate 14 fps 14 fps 12 fps
Video 4K/30p 4K/30p 4K/30p
Wi-Fi Yes, with NFC Yes, with NFC Yes
Battery life (CIPA) 400 shots 420 shots 360 shots
Weather sealing Yes Yes No
Dimensions 129 x 88 x 102mm 133 x 94 x 127mm 137 x 99 x 131mm
Weight 813 g 1051 g 831 g

As you can see, besides the lens and a modest increase in both size and battery life, the RX10 III is all but identical on the inside to the RX10 II. The older, less expensive Panasonic FZ1000 loses out in a few areas like battery life and weather sealing, but it is still a competitive machine in many ways (so long as you don’t need 600mm, that is).

While Sony touts the RX10 III’s lens as having a 9-bladed aperture for better out-of-focus renderings (compared to 7 blades on the Mark II), it lacks the built-in ND filter that was present on the previous model. This was especially helpful for shooting video under bright daylight. Of course, since the front of the lens is threaded, you can always add your own ND, but having the option at the press of a button would be a lot more convenient.

Because of the large-ish AF area the RX10 III defaults to, it will sometimes miss focus very slightly. Here, it backfocused onto the singer’s high-contrast hair instead of her face. But I’d have no problem using this for web publishing. Processed and cropped to taste from Raw. 600mm equivalent | F4 | 1/320 sec | ISO 6400. Photo by Carey Rose

Beyond that omission, the RX10 III offers all that made the RX10 II such a compelling camera. The sensor offers great performance, the 4K and high frame rate video is detailed and of good quality, and the body is weather-sealed. But unfortunately, the fact that the RX10 III shares so much with its predecessor also means that you get the standard Sony UI woes as well as a contrast detection-only autofocus system that works fine for static subjects, but struggles with low contrast subjects and at telephoto distances, where phase-detection would help the camera minimize hunting.

If you’re not shooting fast action all the time, the RX10 III has a lot of potential as a family vacation camera, an all-in-one photo and video solution for a journalist in a tightly staffed newsroom, or documentary photography where you can’t necessarily get close to your subject.

So without repeating everything that we’ve already covered on the RX10 II, let’s look chiefly at how the RX10 III differentiates itself by virtue of its optics.

Processed and cropped to taste from Raw. 375mm equivalent | F5.6 | 1/100 sec | ISO 200. Photo by Carey Rose

Sony RX10 III overview video

In case you missed it (or prefer video), here’s an overview video we produced at the launch of the RX10 III back in March, 2016.

Articles: Digital Photography Review (dpreview.com)

 
Comments Off on All about that lens: Sony Cyber-shot RX10 III review

Posted in Uncategorized


Review: Panasonic Lumix DMC-GX85 impresses with image quality, versatility

19 Jun

Key Features

  • 16MP Four Thirds MOS sensor
  • Electromagnetically driven shutter
  • Depth from Defocus AF
  • 2.76M-dot field sequential EVF
  • 1.04M-dot tilting touchscreen display
  • 4K video / photo
  • 5-axis image stabilization with Dual I.S.
  • Bouncable pop-up flash
  • Wi-Fi

The Panasonic Lumix DMC-GX85 is a mid-range interchangeable lens camera sporting a 16MP Four Thirds sensor and 4K video capability. In markets outside of North America the GX85 is sold as the GX80; in Japan it is sold as the GX7 Mark II.

Sliding in directly below the flagship GX8, the GX85 is targeted toward enthusiast photographers and videographers. It doesn’t use the new 20MP Four Thirds chip we saw in the GX8, instead it sticks with the familiar 16MP sensor used on many other Micro Four Thirds cameras. It also does not have the tilting EVF, weather-sealing or microphone input offered by the GX8. 

Still, the GX85 shares many of its big brother’s features like 4K photo mode, Post Focus, Depth from Defocus AF, and Dual I.S.. It also has a redesigned shutter mechanism. Shutter-induced blur (‘shutter shock’) was an issue we encountered on the GX8, which used a motor and spring arrangement in its shutter mechanisms. The new electromagnetic shutter found in the GX85 resolves this problem.

The GX85 also has no anti-aliasing filter, a first for Panasonic cameras. This should lead to better detail retention at the pixel level, but can also lead to moiré. However, Panasonic claims that the new Venus Engine image processor is specially tuned to combat moiré and false color and in use, we’ve found that it does so pretty well.

Like the GX8, the GX85 offers Dual I.S., combining sensor-based image stabilization with lens-based IS. But unlike the GX8, which has 4-axis sensor IS, the GX85 offers 5-axis sensor IS with rotation correction. Another advantage over its big bro: the GX85 can also use Dual IS during 4K video capture, something that the GX8 cannot.

Compared to its peers

  Panasonic GX85 Panasonic GX8 Panasonic GX7 Olympus PEN-F  Sony a6300
Sensor 16.0MP Four Thirds CMOS  20.3MP Four Thirds CMOS 16.0MP Four Thirds CMOS  20.3MP Four Thirds CMOS  24.0MP APS-C CMOS
Anti-aliasing filter  No  Yes Yes  No  Yes
Image stabilization Sensor-shift (5-axis) + Dual I.S.
Sensor-shift (4-axis) + Dual I.S. Sensor-shift (2-axis) Sensor-shift (5-axis) In-lens only
AF system  49-pt CDAF 49-pt CDAF 23-pt CDAF 81-pt CDAF Hybrid AF
(with 425 PDAF points)
Flash x-sync  1/160 sec  1/250 sec   1/320 sec 1/250 sec  1/160 sec
Burst rate
(with C-AF)
 6  fps   6 fps 5 fps 5 fps   11 fps
EVF res/type 2.76M-dot field sequential LCD 2.36M-dot tilting OLED 2.76M-dot tilting field sequential LCD 2.36M-dot fixed OLED 2.36M-dot fixed OLED
EVF magnification  0.7X 0.77x  0.7x 0.62x  0.7x
LCD type/res 3″ tilting touch 1.04M-dot LCD 3″ vari-angle touch
1.04M-dot OLED
3″ tilting touch
1.04M-dot LCD
3″ vari-angle touch
1.04M-dot LCD

3″ tilting
921.6k-Dot  LCD

Built-in flash  Yes  No  Yes No *  Yes
Video 2160/30p @ 100Mbps 2160/30p @ 100Mbps 1080/60p @ 28Mbps 1080/60p @ 77Mbps  2160/30p @ 100Mbps
Mic/headphone sockets No / No Yes / No No / No No / No Yes / No
Weather-sealing No Yes No No  Yes
Battery life  290 shots 330 shots 320 shots 330 shots 400 shots 
Dimensions 122 x 71 x 44 mm 133 x 78 x 63mm 123 x 71 x 55mm 125 x 72 x 37mm 120 x 67 x 49 mm
Weight (CIPA) 426 g 487 g 402 g  427 g 404 g
* External flash included in box 

It’s arguable whether the GX85 should be called the little brother of the GX8 or the true replacement to the GX7. And the different regional naming conventions for the GX85 only add to the confusion. The chart above seems to give support to both ways of looking at it: the GX85 uses the same field sequential EVF as the GX7 (although it doesn’t tilt), and what is presumably the same sensor (sans AA filter). And like the GX7, it lacks weather sealing and microphone/headphone ports but has a pop-up flash.

However, aside from its sensor and EVF, the GX85 also shares a lot of core components and specs with the GX8, such as its 49-point AF system, 4K video capture and 6 fps burst with AF. So whichever way you view the GX85, it certainly stacks up nicely to its Panasonic peers, as well as to the competition.

Part of the family: The GX85 (top) alongside its Lumix stablemates, the GX7 and GX8.

Pricing and availability 

Kitted with the collapsible 12-32mm F3.5-5.6 zoom lens, the GX85/GX80 will run you $ 799/£599/€699. In the UK and Europe it’s available body-only for £509/€599 and with both the 12-32mm F3.5-5.6 and a 35-100mm F4-5.6 for £729/€899.

Articles: Digital Photography Review (dpreview.com)

 
Comments Off on Review: Panasonic Lumix DMC-GX85 impresses with image quality, versatility

Posted in Uncategorized


Serious spec: HTC 10 camera review

17 Jun

$ (document).ready(function() { SampleGalleryV2({“containerId”:”embeddedSampleGallery_0316148631″,”galleryId”:”0316148631″,”isEmbeddedWidget”:true,”standalone”:false,”selectedImageIndex”:0,”startInCommentsView”:false,”isMobile”:false}) });

DPReview smartphone reviews are written with the needs of photographers in mind. We focus on camera features, performance, and image quality.

The 10 is HTC’s latest flagship model, and while its predecessors that we tested were frankly disappointing in the camera department, the new model’s imaging specs show the 10 has potential to turn things around for the Taiwanese manufacturer.

The main camera specification is centered around the same 1/2.3-inch 12MP sensor that we have seen on several recent top-end smartphones. Light is captured through a very fast F1.8 aperture and an optical image stabilization system keeps things steady in low light. The AF uses both contrast detection and a laser that measures the distance to the subject and for those who like optimizing images in post production the camera offers a 12-bit Raw mode. In video mode footage can be recorded in 4K resolution and the front camera is the first of its kind to come with optical image stabilization. At 1.34µm it also offers unusually large pixels and again a fast F1.8 aperture. 

All other specifications, including the 5.2-inch Quad-HD display and Snapdragon 820 chipset are in line with the current crop of flagship devices, making the HTC 10 a possible mobile photography alternative to devices like the Samsung Galaxy S7 or LG G5. Read the full review to find out how it performed in our test.  

Key Photographic / Video Specifications

  • 12MP 1/2.3-inch sensor with 1.55µm pixels
  • F1.8 aperture
  • OIS
  • 12-bit Raw
  • 4K video
  • 720p, 120fps slow-motion video
  • 5MP front camera with OIS, F1.8 aperture and 1.34µm pixel size

Other Specifications

  • 5.2-inch QHD screen
  • Qualcomm Snapdragon 820 chipset
  • 4GB RAM
  • 32 or 64GB storage
  • microSD slot
  • 3,000mAh battery with Quick Charge 3.0
  • Hi-Res audio

Articles: Digital Photography Review (dpreview.com)

 
Comments Off on Serious spec: HTC 10 camera review

Posted in Uncategorized


Pelican Air 1535 Rolling Hard Case with TrekPak Dividers Review

16 Jun

Pelican Air 1535 Rolling Case w/TrekPak Divider System
$ 315/£220 | www.pelican.com | Buy Now

For decades now, Pelican cases have been the go-to solution for anyone who needs maximum protection for their equipment. The company’s website is filled with user stories about explosions, lion attacks, shifting pack ice and airplane crashes where the gear inside the case survived. Recently, Pelican introduced the Air series of cases designed to be up to 40% lighter than their standard cases, with the same promises of extreme durability.

Many working photographers will factor in things like maximum comfort and gear accessibility when choosing a bag. But when you travel thousands of miles every month and your gear puts the food on your table, getting everything there and home in one piece becomes secondary to things like leather accents or ventilated shoulder straps. In and out of planes, taxis, luggage carts and TSA inspection checkpoints, whatever is carrying your cameras, lenses, and accessories has to do its job well or you won’t have your job much longer.

$ (document).ready(function() { SampleGalleryV2({“containerId”:”embeddedSampleGallery_4024174850″,”galleryId”:”4024174850″,”isEmbeddedWidget”:true,”standalone”:false,”selectedImageIndex”:0,”startInCommentsView”:false,”isMobile”:false}) });

It’s on those high standards that Pelican has built its reputation for being the ultimate in gear protection. I still remember being seeing promotional material showing a Pelican case being run over with a car and thinking that was pretty amazing. While I never had a case subjected to any of that sort of treatment, I did drop one off a chairlift back when I was doing snowboard filming. While I felt like an idiot, the miniDV camera inside survived just fine.

At the time of announcement, Pelican also said that the Air cases (along with a few others in the lineup) would have the option of coming with the TrekPak divider system instead of the standard pick ‘n pluck foam or padded divider inserts. I recently had a chance to run the rolling airline carry-on sized Pelican Air 1535 with the TrekPak system through its paces.

Specifications

  • Exterior 55.8 x 35.5 x 22.8 cm (21.96″ x 13.97″ x 8.98″)
  • Interior 51.8 x 28.4 x 18.3 cm (20.39″ x 11.20″ x 7.21″)
  • Weight 3.9 kg (8.69 lbs) without foam/inserts

By way of comparison, the similarly sized Pelican 1510 weighs 5.4 kg (11.99 lbs) without foam. Pelican says that the weight savings in the Air series comes from a newly developed generation of their HPX resin as well as hollowing out or honeycombing areas (the latch clasps and the extending roller handle for example) that were previously solid.

In Use

Hard cases are big and clunky and something of a pain to use if you are used to soft bags and packs. They bang into things, aren’t particularly ergonomic, and are a hassle to schlep long distances. That said, one of the best compliments I can give the Air 1535 is that using it is just like the 1500 series cases I have used in the past, but much lighter. It loads, latches, and generally seems just as tough as every other standard Pelican case I have ever used.

I would encourage anyone looking to get a hard case of this size to be sure to choose one with the roller option. Your back will thank you as you try to make it across a busy airport for a connecting flight. Even with the weight savings of the Air line, these things are still heavy loaded up. The 1535 loaded with the gear shown in the article images checked in at a beefy 11.3 kg/25 lbs.

That said, there are a few minor frustrations that remain. For some reason, Pelican chose not to use the easy pushbutton latches from their Storm Case series. Pelican’s standard double-throw latches work well and have been proven over the years. However, they are also loud as heck (particularly when closing) and can be a bit difficult for some people to use because they require a bit of force to operate.

‘You should not expect the 1535’s wheels to
easily go off-roading’

Also worth noting is that the wheels on the 1535 do not protrude very far from the bottom of the case. This makes it easy to stack cases without them rolling around on each other, but it also means that there is not much ground clearance. You should not expect the 1535’s wheels to easily go off-roading, rolling on ground much rougher than airport concourses will lead to some scraping and scratches.

Like most hard cases, the lid of the Air 1535 doesn’t open much past 90 degrees (straight up) and can easily flop shut when bumped or jostled. Just another reminder that these cases are for transport far more than for working out of.

One nice new feature is the card holder. It clips in and out easily with the lid open, but locks in once the lid is closed, and can be mounted on the side or end of the case. It can be used as a luggage tag when traveling or for an equipment list while on location or in storage.

TrekPak system dividers

If the Air 1535 is the steady performer who has hit the weight room in the off season and come back in better shape, then the TrekPak system may be the rookie superstar.

$ (document).ready(function() { SampleGalleryV2({“containerId”:”embeddedSampleGallery_7830013549″,”galleryId”:”7830013549″,”isEmbeddedWidget”:true,”standalone”:false,”selectedImageIndex”:0,”startInCommentsView”:false,”isMobile”:false}) });

Both the pick ‘n pluck foam and padded divider systems have taken care of camera gear for decades. The pick ‘n pluck foam is extremely protective and customizable to exactly the size and shape of the gear you are carrying, and the padded divider sets allow you to change the layout of your case for different gear and still protect quite well. But the foam is also fairly tedious to cut out correctly and doesn’t offer a way to use the same case for different gear without buying a whole new set of foam. Dealing with velcro can also be a hassle, and the more you change it, the more it breaks down. The TrekPak system claims to improve on both by offering a completely customizable system that not only protects but is easily modified.

The TrekPak dividers are corrugated plastic sandwiched with 3mm/0.125″ of dense foam on each side. This makes for a light yet protective divider in between each piece of gear. Setup was easy – I took the gear that I wanted to carry in the Air 1535 and laid it out in the case. Then I took a measurement for each divider and used the clever TrekPak cutter to trim the sections to fit. A U-shaped pin with a ribbon pull-tab holds the dividers together and allows for legitimately quick and easy repositioning.

‘I do admit to feeling somewhat uncomfortable making the cuts, as if perhaps I had made a decision that I was going to regret down the road’

All together, it took me around 30 minutes to get everything cut and laid out. And to be honest, a lot of that time was spent dithering about how I wanted to organize. I do admit to feeling somewhat uncomfortable making the cuts, as if perhaps I had made a decision that I was going to regret down the road. This is probably a point in favor of the padded dividers, if I’m being honest.

That said, you do get 80 inches of the TrekPak dividers (and 20 ‘U’ pins) to set up your case. Extra divider sections are available and are not terribly expensive, ranging from $ 3.50 to $ 15 depending on size.

What’s the bottom line?

Hard cases are bulky, less comfortable to carry and heavier than soft-sided bags. But when you need a hard case, there is no soft case that can do the same job. If you are looking for an airline carry-on sized hard case, there is every reason to consider the Pelican Air 1535. Significantly lighter but just as tough as the original 1500 series cases, the Air 1535 will protect your gear while giving you a much better shot at avoiding airline overweight fees.

While the older style pick ‘n pluck foam and padded divider systems certainly worked well enough, the TrekPak system is well ahead of the other options for anyone who thinks they might be carrying different gear regularly.

Overall, the 1535 with the TrekPak dividers would easily be my first choice if I were going to be doing a lot of traveling with my gear. These cases aren’t cheap, but neither is the gear they protect. I wholeheartedly trust the Air 1535 to get everything there and back in one piece; there’s not a lot more you can ask from a case like this.

What we like

  • Lighter weight than previous Pelican cases, still tough-as-nails
  • Conforms to carry-on sizing rules (check your specific airline)
  • TrekPak is easy to customize while still light and sturdy
  • Roller option is a back-saver
  • Clever card holder

What we don’t like

  • Expensive
  • Still heavy compared to typical bags/packs
  • Latches are loud and can be tough to use

Articles: Digital Photography Review (dpreview.com)

 
Comments Off on Pelican Air 1535 Rolling Hard Case with TrekPak Dividers Review

Posted in Uncategorized


DxOMark Mobile Report added to our LG G5 review

15 Jun

We have added DxOMark’s Mobile Report to our camera review of the LG G5. The report includes DxO Lab’s usual industrial-quality scientific measurements. Its imaging experts have analyzed 14 aspects of mobile imaging including detailed image quality assessment, flash performance, autofocus reliability and more to calculate a final score. Click below to read our LG G5 review and go to page 9 for the DxO Mark mobile report.

Articles: Digital Photography Review (dpreview.com)

 
Comments Off on DxOMark Mobile Report added to our LG G5 review

Posted in Uncategorized


Review: Fujifilm X-Pro2 Mirrorless Camera

15 Jun

Ever since Fujifilm unveiled their debut consumer camera in late 2010, the fixed-lens x100, the brand has become a favorite for professionals, and enthusiasts who seek an advanced digital camera experience, that still retains much of the look and quality of the classic film era.

Fujifilm’s very first mirrorless interchangeable-lens camera, the X-Pro1, was released in March 2012 to much praise from critics and users, and was recently replaced with its successor, the X-Pro2. Given the four year gap between camera models, there are many upgrades and improvements in the new X-Pro2, all achieved without adding significant weight or bulk to the camera. Prices are clearly a big differentiator at this point, with the older X-Pro1 going for as little as $ 799, and the X-Pro2 currently set at $ 1,699. But pricetag aside, just how many more features are packed into the X-Pro2, and is it worth it?

Fujifilm X-Pro2 Review

What’s in the Box

The Fuji X-Pro2 can be purchased body-only for $ 1,699; this basic kit comes with the following accessories in the box:

  • NP-W126 Li-Ion Battery Pack
  • BC-W126 Battery Charger
  • Body Cap
  • Shoulder Strap
  • Strap Clip
  • Clip Attaching Tool
  • Protective Cover

Recommended Accessories

While the X-Pro2 has a slightly better battery life than its predecessor, it’s still on the low side. As a result, it doesn’t hurt to have a spare NP-W126 Li-Ion Battery, or two, on you for longer shoots. Since the X-Pro2 has dual SD card slots, having one or two memory cards is also handy, although in testing I never fully maxed out a single 32GB SD card.

In terms of lenses, this X-Pro2 was tested specifically with the Fujifilm 35mm f/2 WR, a beautiful prime lens that equates to about 56mm on a crop sensor, and the Fujifilm 18-55mm f/2.8-4, a compact mid-range zoom that’s about 28-88mm on a crop sensor. Both lenses are relatively affordable ($ 399 and $ 699 respectively) and together made for a solid, compact, travel photography kit. Lens preference will, of course, depend on your shooting style, and Fujifilm has many other lens choices available.

Fujifilm X-Pro2 Review

Technical Specs

Sensor and Image Capture

First, let’s review the X-Pro2’s specs, which are vastly improved over its predecessor.

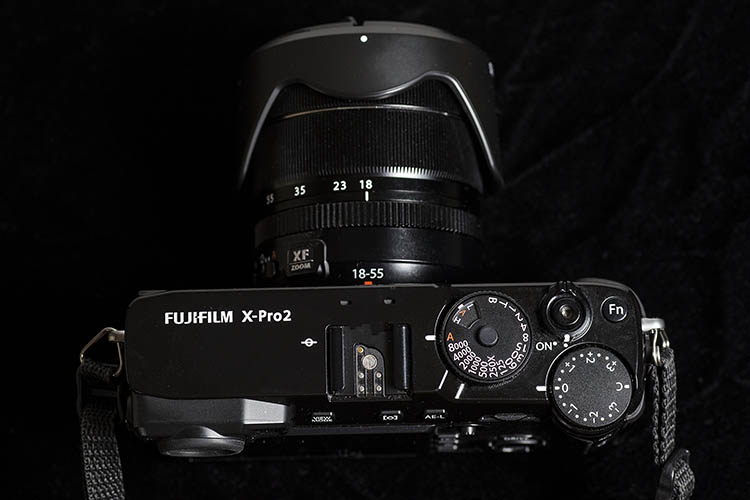
  • The X-Pro2 has an upgraded 24.3MP CMOS III APS-C sensor, giving it a significantly higher pixel count compared to the X-Pro1’s 16.3MP CMOS I sensor.
  • The processor is also the new X Processor Pro.
  • Native ISO range has also increased from 200-12800 (or 100-51200 in expanded mode).
  • Continuous shooting on the X-Pro2 is also slightly faster at 8fps, up from 6fps on the X-Pro1, and a continuous high buffer of up to 83 JPEG frames compared to 21 frames on the X-Pro1.
  • Metering is still 256 zone TTL, but besides Multi, Spot, and Average metering, the X-Pro2 adds Center-Weighted metering, which was absent on the X-Pro1.
Fujifilm X-Pro2 Review

Sample image shot at sunset. No tripod or extra lens filters.

Perhaps one of the biggest feature additions on the X-Pro2 is a shutter that allows for both mechanical and electronic capture; the latter allows for more flexibility. The mechanical shutter speed has increased to as high as 1/8000th, compared to 1/4000th on the X-Pro1. The X-Pro2 also enables the use of an electronic shutter speed with an even wider range of one second to 1/32,000. The X-Pro2 also includes Face and Eye Detection, meaning it will seek out faces and eyes when shooting. This is a very handy feature for photographing people, and it proved to be highly accurate during test shots.

Viewfinder and LCD

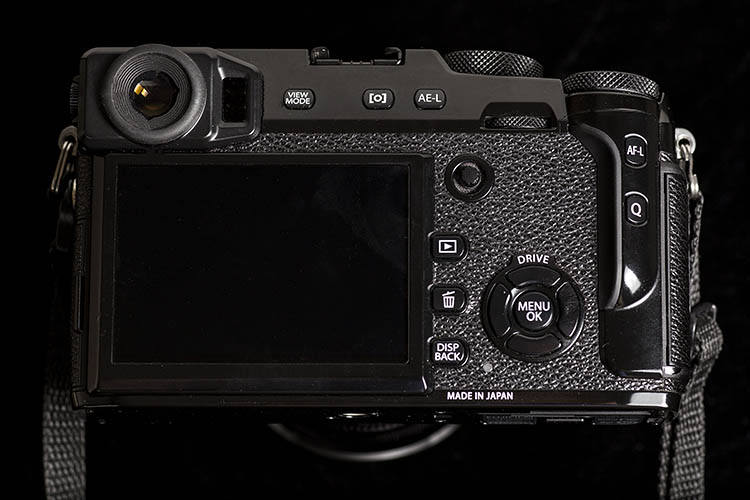
While both viewfinder and LCD sizes really didn’t change much in terms of physical size, both received a bump in resolution, and an updated User Interface in the X-Pro2. The viewfinder also finally allows for diopter adjustment, and the electronic viewfinder (EVF) has a wicked fast refresh rate of 85 frames per second. Still absent is a pop-out LCD screen.

Fujifilm X-Pro2 Review

Sample image. Shot handheld without a tripod.

Autofocus

The X-Pro2 has made some pretty giant leaps in the realm of autofocus. This camera now has 273 autofocus points, which is quite a bit more than 49 on X-Pro1. It also includes single, zone, wide/tracking autofocus modes, all of which were lacking on the X-Pro1. Finally, the X-Pro2 adds a physical feature that Canon DSLR users will find familiar: a mini joystick button which Fujifilm calls the focus lever. Besides acting as a button, the focus lever enables quick selection for all 273 autofocus points, and also helps you navigate through the menu.

Body and Handling

When it comes to the X-Pro2’s build, it is still comprised of a sleek, half matte black body, with a distinctly retro look. However, the build material is now magnesium-alloy versus aluminum for the X-Pro1. Despite using lighter material, the X-Pro2 is still slightly heavier than its predecessor, weighing in at 495 grams (17.5 oz.) versus 453 grams (16 oz.). In terms of dimensions, the X-Pro2 is a tiny bit wider and deeper, but it still looks about the same size as the X-Pro1.

The battery life on the X-Pro2 has been slightly improved, up to 380 frames, versus 300 frames on the X-Pro1. That’s still on the low side, so carrying a spare battery or two certainly won’t hurt. Camera startup time is a hair faster at 0.4 seconds, compared to 0.5 seconds. Also, the X-Pro2 now has dual SD card slots, which will certainly help with the increased size 24.3MP files. A built-in flash is still not included, but flash sync speed is now at 1/250 of a second, up from 1/180.

WiFi has been added to the X-Pro2 allowing for geotagging, wireless image transfer, and remote camera control. Finally, the X-Pro2 comes with improved weather sealing with 61 points of dust, water, and cold resistance. This doesn’t make the X-Pro2 waterproof, but it does allow for shooting in more diverse conditions.

Fujifilm X-Pro2 Review

Sample image shot with the Fujifilm 35mm f/2, handheld without a tripod.

Is It Worth It?

This is a difficult question to answer, given the plethora of vastly different digital camera options available today. Whether you go for the X-Pro2 or not, will really come down to your personal preferences and budget.

Personally, I loved the image quality of the X-Pro2, as well as its retro buttons and controls. With that said, the retro controls are unique to Fujifilm digital cameras, and can take some getting used to if you’ve been using a point and shoot, DSLR, or another brand of mirrorless camera. It’s also worth noting that while the X-Pro2 is definitely not as bulky and heavy as a professional DSLR, it’s not as compact and lightweight as other mirrorless cameras such as the Sony a6300, which has very similar technical specs, packed into a much smaller body.

Fujifilm X-Pro2 Review

Sample image shot outdoors, handheld with no extra filters.

Overall Thoughts

With higher shutter speeds of 1/8,000 or even 1/32,000 using the electronic viewfinder, higher ISO ranges, vastly improved autofocus, and enhanced weather sealing, the X-Pro2 has officially become a serious contender for professional photographers. If you’re looking to invest in a Fujifilm mirrorless interchangeable camera, it’s hard to go wrong with the X-Pro2. While deals can certainly be had with the older X-Pro1 model, the significant upgrades in the X-Pro2 make it a worthy investment if you have the money to spare.

googletag.cmd.push(function() {
tablet_slots.push( googletag.defineSlot( “/1005424/_dPSv4_tab-all-article-bottom_(300×250)”, [300, 250], “pb-ad-78623” ).addService( googletag.pubads() ) ); } );

googletag.cmd.push(function() {
mobile_slots.push( googletag.defineSlot( “/1005424/_dPSv4_mob-all-article-bottom_(300×250)”, [300, 250], “pb-ad-78158” ).addService( googletag.pubads() ) ); } );

The post Review: Fujifilm X-Pro2 Mirrorless Camera by Suzi Pratt appeared first on Digital Photography School.


Digital Photography School

 
Comments Off on Review: Fujifilm X-Pro2 Mirrorless Camera

Posted in Photography


Review: Panasonic Lumix DMC-GX85 impresses with image quality, versatility

14 Jun

Key Features

  • 16MP Four Thirds MOS sensor
  • Electromagnetically driven shutter
  • Depth from Defocus AF
  • 2.76M-dot field sequential EVF
  • 1.04M-dot tilting touchscreen display
  • 4K video / photo
  • 5-axis image stabilization with Dual I.S.
  • Bouncable pop-up flash
  • Wi-Fi

The Panasonic Lumix DMC-GX85 is a mid-range interchangeable lens camera sporting a 16MP Four Thirds sensor and 4K video capability. In markets outside of North America the GX85 is sold as the GX80; in Japan it is sold as the GX7 Mark II.

Sliding in directly below the flagship GX8, the GX85 is targeted toward enthusiast photographers and videographers. It doesn’t use the new 20MP Four Thirds chip we saw in the GX8, instead it sticks with the familiar 16MP sensor used on many other Micro Four Thirds cameras. It also does not have the tilting EVF, weather-sealing or microphone input offered by the GX8. 

Still, the GX85 shares many of its big brother’s features like 4K photo mode, Post Focus, Depth from Defocus AF, and Dual I.S.. It also has a redesigned shutter mechanism. Shutter-induced blur (‘shutter shock’) was an issue we encountered on the GX8, which used a motor and spring arrangement in its shutter mechanisms. The new electromagnetic shutter found in the GX8 resolves this problem.

The GX85 also has no anti-aliasing filter, a first for Panasonic cameras. This should lead to better detail retention at the pixel level, but can also lead to moiré. However, Panasonic claims that the new Venus Engine image processor is specially tuned to combat moiré and false color and in use, we’ve found that it does so pretty well.

Like the GX8, the GX85 offers Dual I.S., combining sensor-based image stabilization with lens-based IS. But unlike the GX8, which has 4-axis sensor IS, the GX85 offers 5-axis sensor IS with rotation correction. Another advantage over its big bro: the GX85 can also use Dual IS during 4K video capture, something that the GX8 cannot.

Compared to its peers

  Panasonic GX85 Panasonic GX8 Panasonic GX7 Olympus PEN-F  Sony a6300
Sensor 16.0MP Four Thirds CMOS  20.3MP Four Thirds CMOS 16.0MP Four Thirds CMOS  20.3MP Four Thirds CMOS  24.0MP APS-C CMOS
Anti-aliasing filter  No  Yes Yes  No  Yes
Image stabilization Sensor-shift (5-axis) + Dual I.S.
Sensor-shift (4-axis) + Dual I.S. Sensor-shift (2-axis) Sensor-shift (5-axis) In-lens only
AF system  49-pt CDAF 49-pt CDAF 23-pt CDAF 81-pt CDAF Hybrid AF
(with 425 PDAF points)
Flash x-sync  1/160 sec  1/250 sec   1/320 sec 1/250 sec  1/160 sec
Burst rate
(with C-AF)
 6  fps   6 fps 5 fps 5 fps   11 fps
EVF res/type 2.76M-dot field sequential LCD 2.36M-dot tilting OLED 2.76M-dot tilting field sequential LCD 2.36M-dot fixed OLED 2.36M-dot fixed OLED
EVF magnification  0.7X 0.77x  0.7x 1.23x  0.7x
LCD type/res 3″ tilting touch 1.04M-dot LCD 3″ vari-angle touch
1.04M-dot OLED
3″ tilting touch
1.04M-dot LCD
3″ vari-angle touch
1.04M-dot LCD

3″ tilting
921.6k-Dot  LCD

Built-in flash  Yes  No  Yes No *  Yes
Video 2160/30p @ 100MBps 2160/30p @ 100MBps 1080/60p @ 28MBps 1080/60p @ 77Mbps  2160/30p @ 100MBps
Mic/headphone sockets No / No Yes / No No / No No / No Yes / No
Weather-sealing No Yes No No  Yes
Battery life  290 shots 330 shots 320 shots 330 shots 400 shots 
Dimensions 122 x 71 x 44 mm 133 x 78 x 63mm 123 x 71 x 55mm 125 x 72 x 37mm 120 x 67 x 49 mm
Weight (CIPA) 426 g 487 g 402 g  427 g 404 g
* External flash included in box 

It’s arguable whether the GX85 should be called the little brother of the GX8 or the true replacement to the GX7. And the different regional naming conventions for the GX85 only add to the confusion. The chart above seems to give support to both ways of looking at it: the GX85 uses the same field sequential EVF as the GX7 (although it doesn’t tilt), and what is presumably the same sensor (sans AA filter). And like the GX7, it lacks weather sealing and microphone/headphone ports but has a pop-up flash.

However, aside from its sensor and EVF, the GX85 also shares a lot of core components and specs with the GX8, such as its 49-point AF system, 4K video capture and 6 fps burst with AF. So whichever way you view the GX85, it certainly stacks up nicely to its Panasonic peers, as well as to the competition.

Part of the family: The GX85 (top) alongside its Lumix stablemates, the GX7 and GX8.

Pricing and availability 

Kitted with the collapsible 12-32mm F3.5-5.6 zoom lens, the GX85/GX80 will run you $ 799/£599/€699. In the UK and Europe it’s available body-only for £509/€599 and with both the 12-32mm F3.5-5.6 and a 35-100mm F4-5.6 for £729/€899.

Articles: Digital Photography Review (dpreview.com)

 
Comments Off on Review: Panasonic Lumix DMC-GX85 impresses with image quality, versatility

Posted in Uncategorized


Review of the MindShift BackLight 26L Backpack

12 Jun

PWC-Mindshift-Backlight-26-5844
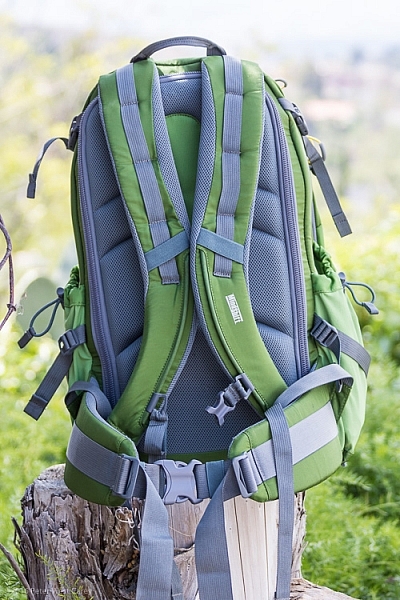
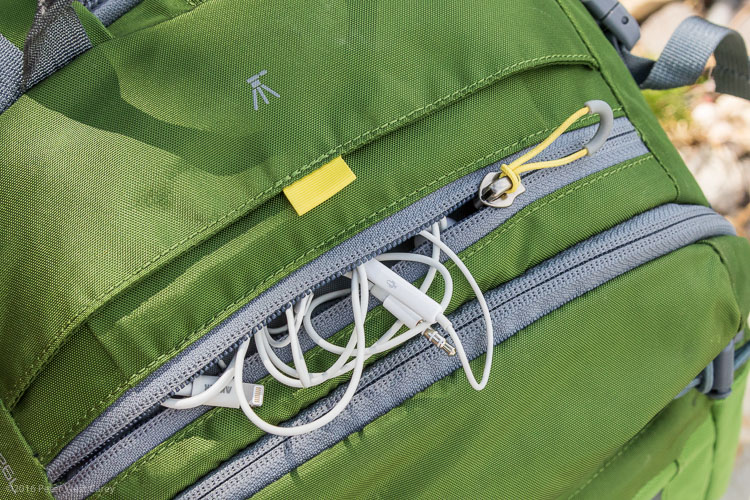
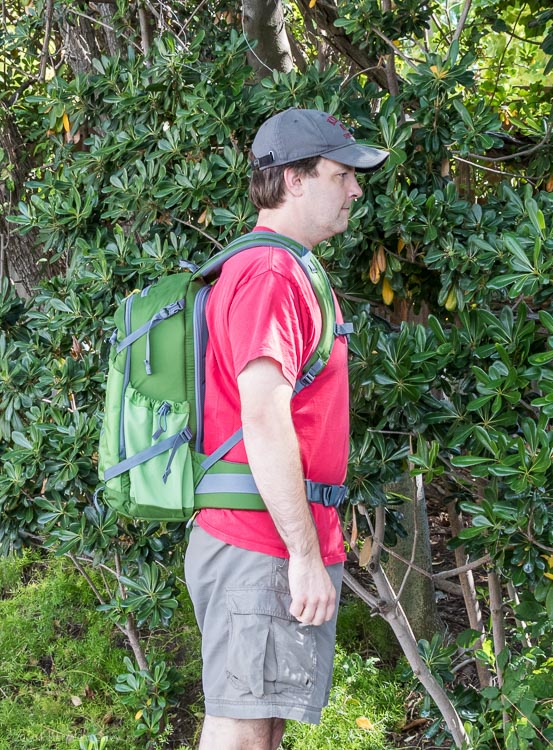
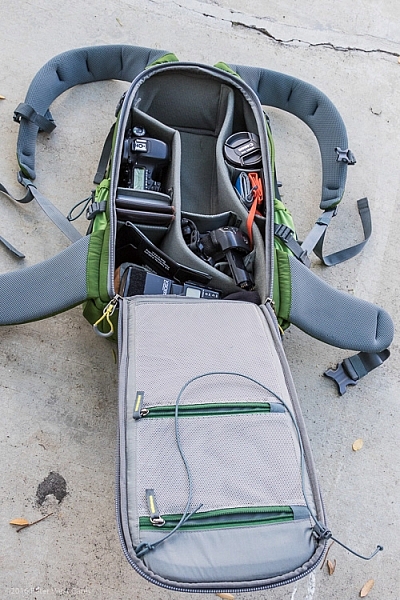
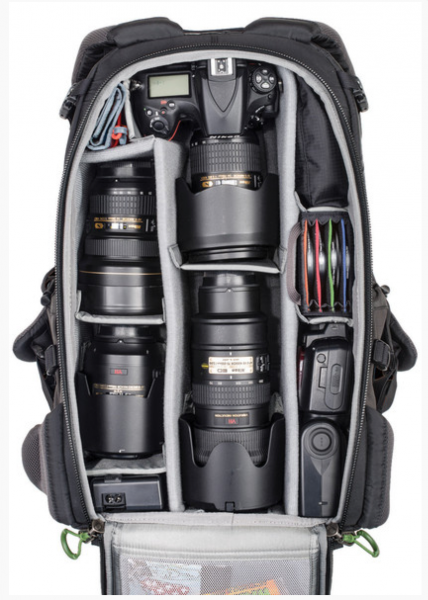
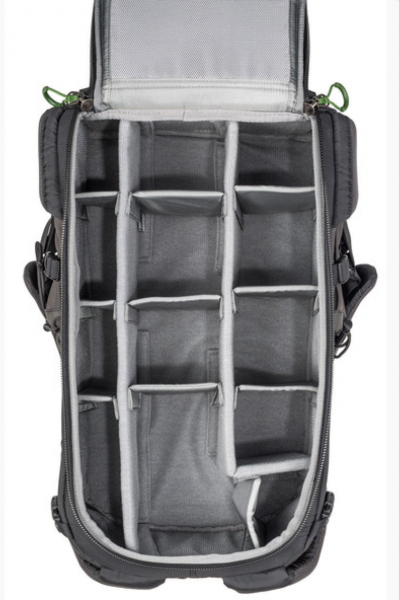
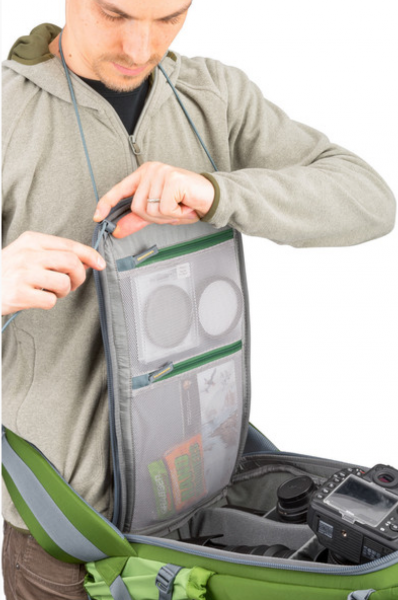
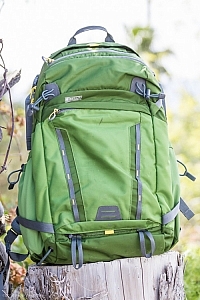
It sounded like another gimmick but I’ll give you the short of it: The MindShift Gear BackLight 26L works as a backpack that can rotate around your body, and give access to all your gear without getting muddy on the trail.
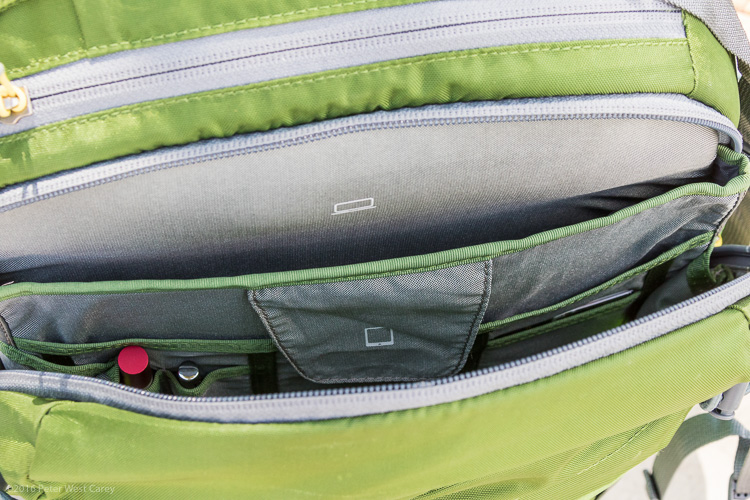
Mindshift has tried the rotating thing before (see my previous review of the Rotation 180 here on DPS) and this time they are trying to make the entire pack come all the way around your body for easy access. Sounds incredible, doesn’t it? Let me show you how it works, and some aspects that need attention.

An overview

The pack looks normal enough; side compression straps, just enough padding on the hip belt, zippers here and there, and good back support.

PWC-Mindshift-Backlight-26-5856

PWC-Mindshift-Backlight-26-5847

PWC-Mindshift-Backlight-26-5845

It has loops on the back for securing ice axes, trekking poles, and other miscellaneous whatnot. Inside the main compartment on the back is space for a laptop, a tablet, and even a book. Just not a thick book. There is an organizer for pens, cards, and the top section has a small pocket with a hook for car keys. Kind of the normal items we expect from a photography backpack.

PWC-Mindshift-Backlight-26-5850

But there is one key difference in the shoulder straps. They are attached, and cut in such a way, to enable full removal with the hip belt still attached. The pack is then rotated around so you can access all your goodies inside the camera compartment. You can see how it works in the sequence of photos below.

PWC-Mindshift-Backlight-26-5861 PWC-Mindshift-Backlight-26-5862

PWC-Mindshift-Backlight-26-5863

Inside you can store a fully gripped DSLR and big old 70-200mm lens. You will need to modify the highly customizable storage space, but as you can see, not only will the camera and lens fit, but there is room for a second body, secondary lens, all kinds of filters, batteries, flash, cards and even a hat.

PWC-Mindshift-Backlight-26-5867

My personal configuration above is meant for a DSLR with a grip. The standard images below from Mindshift are without a grip on the camera. You can technically fit the gripped camera upright, bit it will poke into your back a little.

Mindshift-Backlight26-22 Mindshift-Backlight26-21

The main flap has a loop on it, that I think is a little goofy, but I see why they added it. It is meant to go around your neck to hold the flap up and out of the way, as seen here.

Mindshift-Backlight26-20

Great in concept, but I found it annoying in practice.

What About the Other Features?

Some features I like on the pack:

  • Just the right amount of space for two DSLR bodies and my gear (as seen in the photos above).
  • Organizer inside has room for what I need: iPad, pens, business cards, note pad, dental floss.
  • Comes with a rain cover.
  • Ample attachment points.
  • Hipbelt is easy to adjust.
  • Deep water bottle holders.
  • Seven months of constant use shows little wear and tear. Zippers are great.
  • Fits under a typical airplane seat. Great for taking aerial shots on commercial flights.
  • The sternum strap goes low enough! This is a big one for me. It’s been a bane of most bags that for a taller torso, the sternum strap rides too high, sometimes at my neck. This strap goes extra low, or as I like to call it, just right.
PWC-Mindshift-Backlight-26-5849 PWC-Mindshift-Backlight-26-5859

Then there are some things I can see that need improving:

  • Just not enough space for a sandwich. Makes a day hike harder, as bananas and other squishables don’t work as well.
  • To get into the main back compartment fully, the compression straps need to be removed. Minor annoyance.
  • That neck loop thing used when opening the pack? It often sticks out and gets in the way of the zipper.
  • My wife doesn’t like the color, but I do (it also comes in charcoal, which hides even more dirt and use).
  • There is a mount for a tripod, but it hangs below the bottom of the pack. So it works (and is great how it hides away on the top and bottom of the pack) but it means you can’t easily set your pack down.

PWC-Mindshift-Backlight-26-5852

Mindshift-Backlight26-23

Testing it in real life

This has been my travel, and around town pack for the last seven months. This is why the pack you see in the photos here looks a little worked in. I’m trying to give more of my review items a solid, semi-lengthy test. How better to tell how a pack rides on your back than to wear it 50+ times?

One of my gripes with the pack is the overall amount of usable space inside. When I place my iPad in the sleeve, I can’t imagine fitting an actual laptop behind it. Even sliding in a legal pad of paper takes some pushing. I think it’s built for one or the other. A thin laptop could work, I suppose.

The same goes for fitting in a couple smaller books. Fitting one book in the very back pocket works just fine, but when I try to place a second book inside, I have to wiggle it in. This isn’t the end of the world, by any means, and it does keep the unit nice and compact for fitting under a plane seat. It’s something to be aware of if you normally carry lots of planners, books, and bulkier items.

Now then, about that spinning around thing this pack is built for.

PWC-Mindshift-Backlight-26-5863

I know, it looks goofy that way, but once you get accustomed to NOT taking off the hip belt to get to your stuff, the system works quite well. NOTE: If the pack is filled with lots of heavy glass, as in the stock photos above, it will tip far forward and feel odd in the wrong places for some of us.

I’ve mentioned in other reviews that I often travel with my family, and they are prone to leaving me behind when I stop to take a photo. This pack has seen me be left in the dust far less. Its ease of swinging around and getting into the pack, has me taking more shots than I would with a pack that I have to fully remove for my camera.

When swinging the pack to return to my back, I find my shirt tends to bunch up, but that’s a minor thing. On the dusty and wet hikes I have been on, I have greatly appreciated this pack’s ability to stay off the elements and keep my gear clean. It comes with a rain cover that does not need to be removed to get to your camera. Bonus!

I like the way the pack rides for my height (6’1″ or 1.8m). I also appreciate the dual water bottle holders of ample size, so an extra large bottle does not tip out easily.

PWC-Mindshift-Backlight-26-5860

Conclusion

I wouldn’t have kept testing the MindShift Gear BackLight 26L backpack for months on end if I didn’t like it. It’s a great size for two cameras and the essentials, while allowing me to carry the basics of my mobile office.

It’s not perfect for a day hike, in my opinion, because there isn’t enough space in the back to pack things like apples, bananas, or sandwiches, without them getting a little scrunched. If I don’t fill the main camera area with gear, I can fit food in there. So it can get the job done if you have space. There is space on the top for keys, headphones, and charging cables, which makes them easy to get to on a plane when the bag is under a seat.

The bag retails for $ 249.99 in the US and can be found on Amazon.

googletag.cmd.push(function() {
tablet_slots.push( googletag.defineSlot( “/1005424/_dPSv4_tab-all-article-bottom_(300×250)”, [300, 250], “pb-ad-78623” ).addService( googletag.pubads() ) ); } );

googletag.cmd.push(function() {
mobile_slots.push( googletag.defineSlot( “/1005424/_dPSv4_mob-all-article-bottom_(300×250)”, [300, 250], “pb-ad-78158” ).addService( googletag.pubads() ) ); } );

The post Review of the MindShift BackLight 26L Backpack by Peter West Carey appeared first on Digital Photography School.


Digital Photography School

 
Comments Off on Review of the MindShift BackLight 26L Backpack

Posted in Photography