For those who know me, they know that I have a slight obsession with camera bags. There are just so many varieties; roller bags, backpacks, shoulder bags, etc., so it gets a little hard to get bored of them!
Recently though, I’ve been using a ThinkTank Photo Roller Derby bag as my everyday roller. Now, using a roller bag may not be ideal for everyone. But for people like me who need to transport a lot of kit, they are lifesavers! This isn’t the only roller bag I have, though. I also have a ThinkTank Airport Security V2.0 which is absolutely fantastic, too.
But why did I jump to a slightly smaller bag? The answer to that is simple: the ThinkTank Photo Airport Roller Derby bag has four wheels, whereas the Airport Security only has two. This doesn’t seem like a big deal, but it makes moving the bag around that much easier.
So before we begin the review, let’s take a look at the Roller Derby’s features as from the ThinkTank website:
OVERVIEW
Materials: Exterior
|
|
Materials: Interior
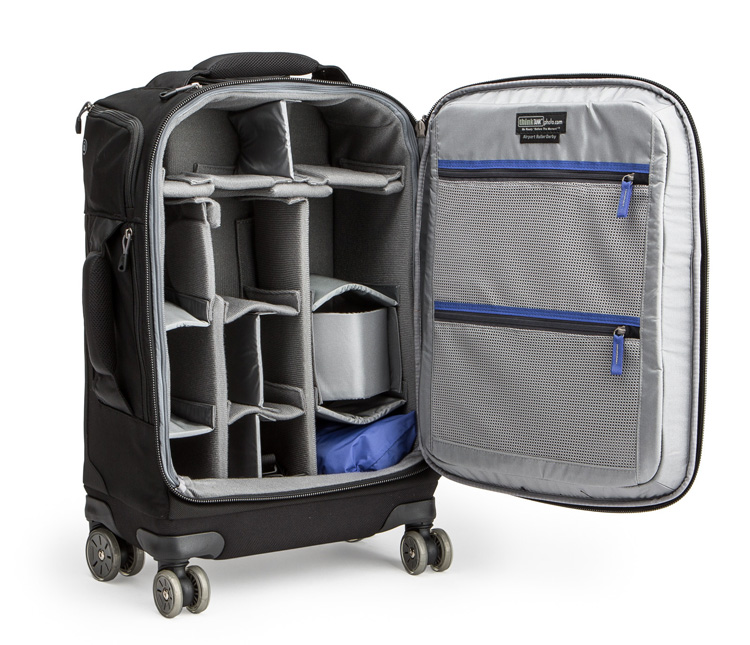
Image courtesy ThinkTank
- 210D silver-toned nylon
- Polyurethane backed velex liner & dividers
- 2x polyurethane coated nylon 210T seam-sealed rain cover
- Closed cell foam & PE board reinforced dividers
- Belly-O mesh pockets
- 3-ply bonded nylon thread
Specifications:
- Internal Dimensions: 12.6” W x 18.5” H x 5.5–7.5” D (32 × 47 × 14–19 cm)
- Exterior Dimensions: 14” W x 22” H x 9.0” D (35.6 × 55.9 × 22.9 cm)
- Tablet Compartment: 10.5” W x 10.3” H x 0.6” D (26.7 x 26.1 x 1.5 cm)
- Laptop Compartment: 10.5” W x 14.5” H x 1.0” D (26.7 x 36.8 x 2.5 cm)
- Weight: 9.5–11.5 lbs (4.3–5.2 kg) depending on accessories used.
Additional Features:
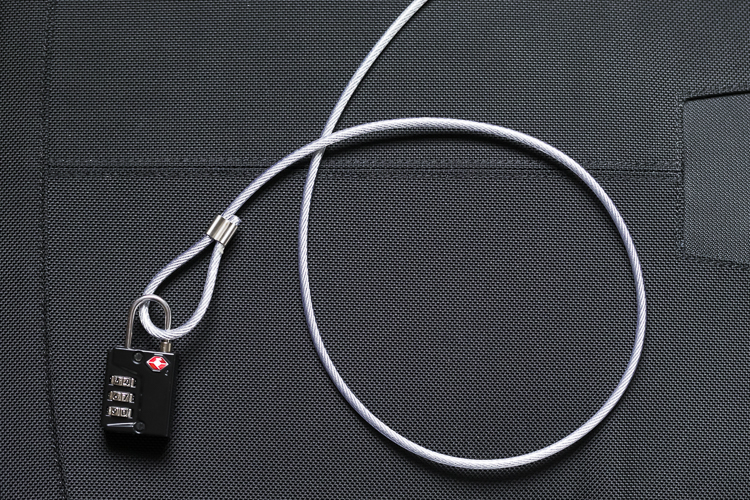
- Lock & cable to secure lockable zippers and tether the bag
 3-ways to roll: upright at your side, back wheel tilt, or side wheel tilt
- Seam-sealed rain cover included
- Bottom handle for easy over head lifting
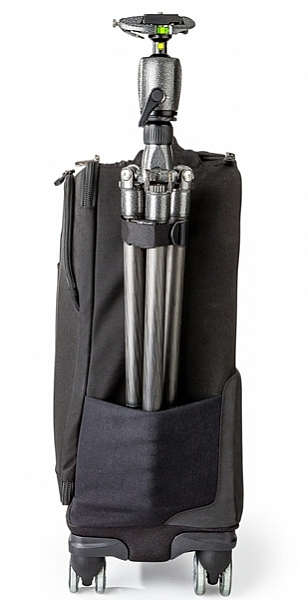
- Tripod mount and water bottle pocket on side
- 2-position locking handle extends to 39–42” for better ergonomics when pushing
- Interior zippered pockets for batteries, CF cards, filters and accessories
- Top zippered pocket for wallet or cell phone
- Rapid access side pocket for travel essentials
- Reinforced back panel for increased durability
- User replaceable wheels
- Seam sealed rain cover included
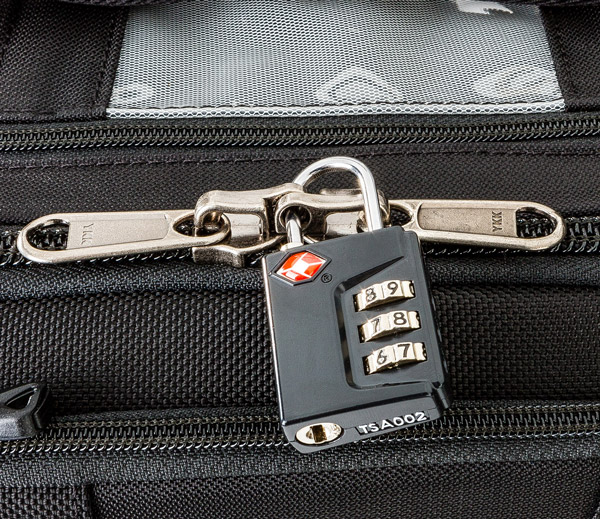
Image courtesy ThinkTank
BUILD QUALITY
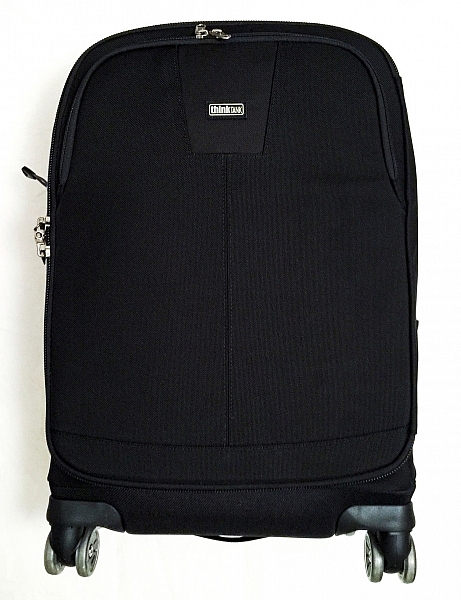
If you have used ThinkTank products in the past, you are most likely already familiar with the overall quality of their products. The ThinkTank Photo Airport Roller Derby bag is no exception. I have been using this bag almost everyday for the last eight weeks. It has been dragged through mud, wet grass, over gravel, been pulled in and out of my car, and been shoved around on public transport. Through all of this, not once have I had any issues with any of the wheels (they just keep going, no matter what!), and most importantly, my equipment has come out of it completely unharmed.
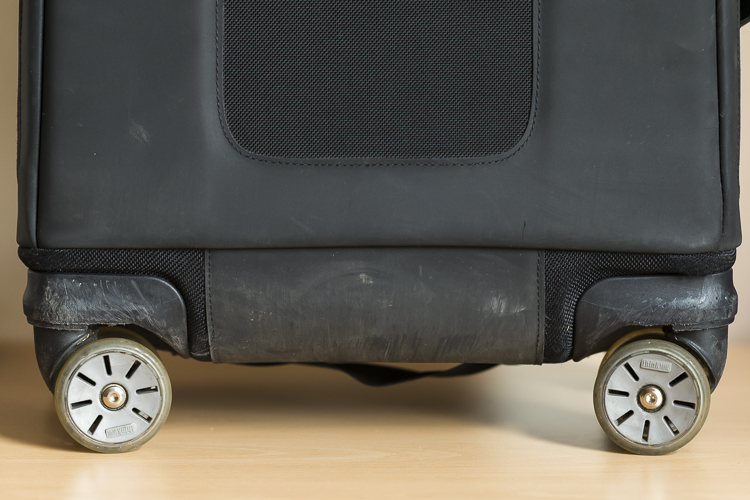
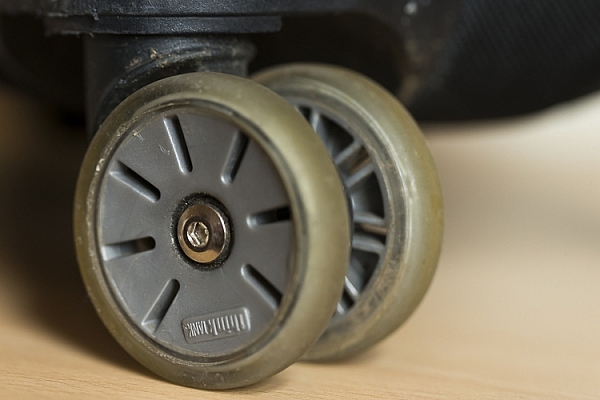
Wheels showing wear but mostly just scratches.
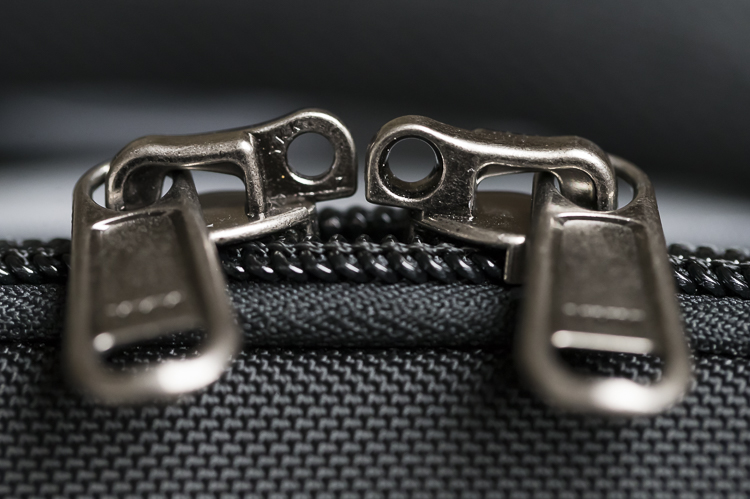
It’s been dragged a bit over concrete and other hard surfaces, and other than a few little scuff marks on its exterior, it’s perfectly fine and shows no sign of giving up any time soon. The telescopic handle feels more sturdy than the one on my other roller, and is easily pulled up and down for use. Most bags’ weakness appears first with the zippers; especially if you’re packing a lot of kit into the bag. However, the zippers used on this bag are no different to that of any other ThinkTank product. The zippers are easily opened and closed no matter how much equipment is packed in. In fact, I’ve yet to see any of the zippers across all my bags (yes, I have a few!) even begin to show any sign of strain.
At the base of the bag, extending up the back a little way, is a tougher nylon cover which is perfect for protecting the material of the bag as you pull along; such as when going down stairs or whatnot. Internally, the bag is no really different to any other ThinkTank bag. The removable inserts provide ample protection for all of my kit. The rollers on the bag have also proven to be very durable. I’ve taken my bag through puddles, mud, wet grass, gravel – you name it – and all without a single problem.
What really helps the wheels is that there are actually eight wheels in total; two wheels on each castor. This helps spread the weight of the bag and its contents out more effectively, thereby reducing the strain on each individual wheel.
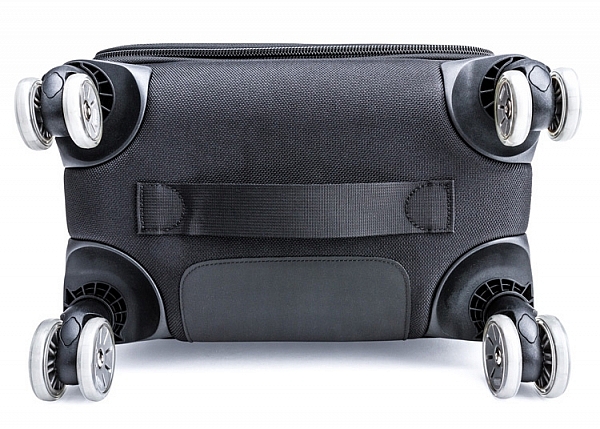
Image courtesy ThinkTank
DESIGN
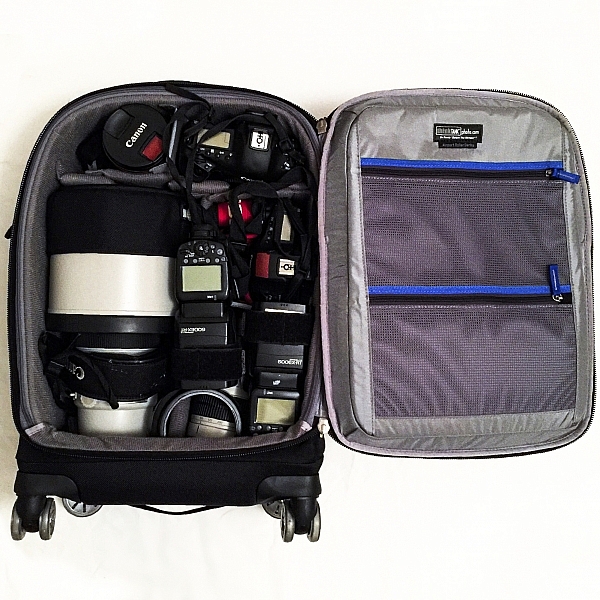
The design of the Roller Derby is very well thought out. The main camera compartment is easily accessible. The opening hinges across the bag, not up/down. This does make it easier to work with in smaller spaces, or out of the trunk of your car, as you don’t need much space to open it.
On the inside of the opening are three compartments where you can put extra items like memory cards, cleaning tools etc. On the front of the bag you’ll find there’s also a handy compartment to fit your laptop/tablet and other little bits and bobs too.
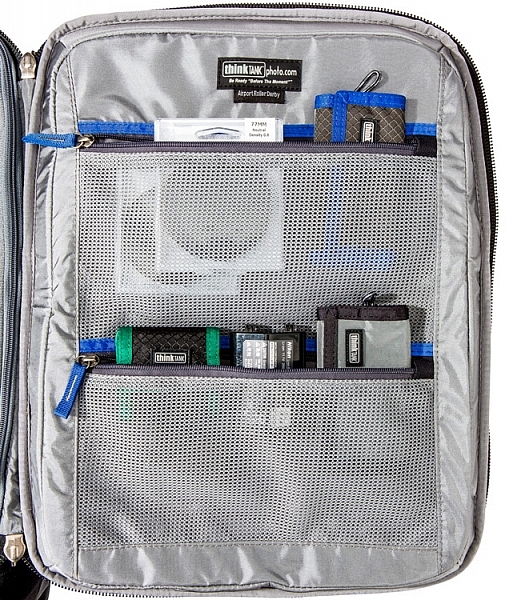
Image courtesy ThinkTank
If you need to leave your bag unattended, ThinkTank has you covered there, too. They have provided a cable, which is attached to the bag, and a lock which will enable you to lock the bag to an object so it’s more secure. The zippers to the main camera compartment are also lockable, so all your kit is safe; this is also perfect for air travel or public transport, for that little extra peace of mind.
The bag also ships with a rain cover which, I might add, is one of the easiest rain covers to put on bag! It covers the bag nicely and gives your equipment that extra level of protection from the elements.
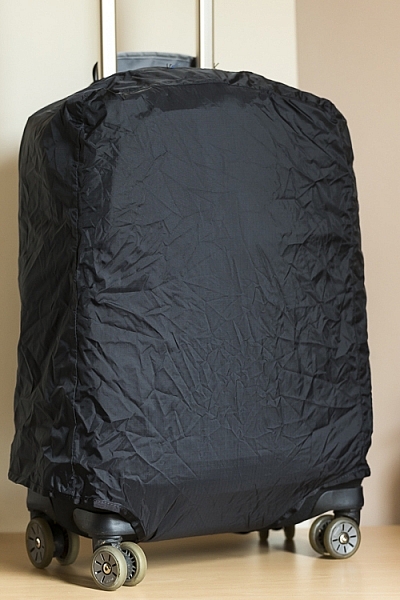
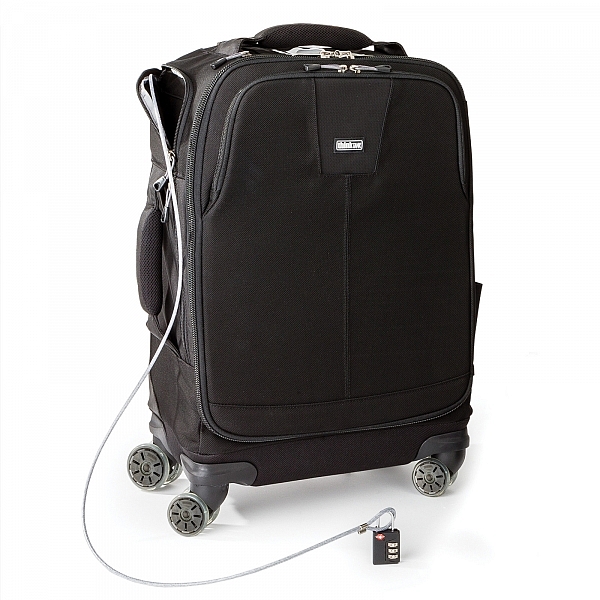
Image courtesy ThinkTank
IN USE
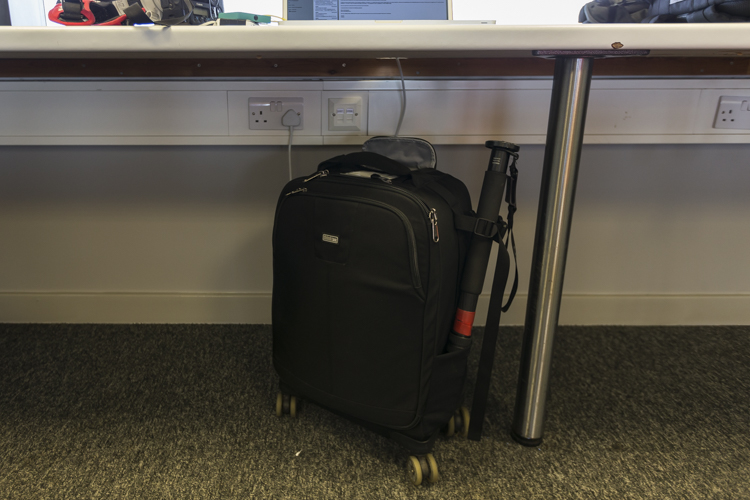
This has now become my go-to bag for day-to-day use. It’s smaller than my other roller bag, which makes it easier for fitting in to cars, on trains, etc., and is also easier to fit under a table in a media room. The four castor design makes it easier to put the bag under a table, and take it out again; without having to move myself about to maneuverer it. I can just simply push it under, or grab it out.
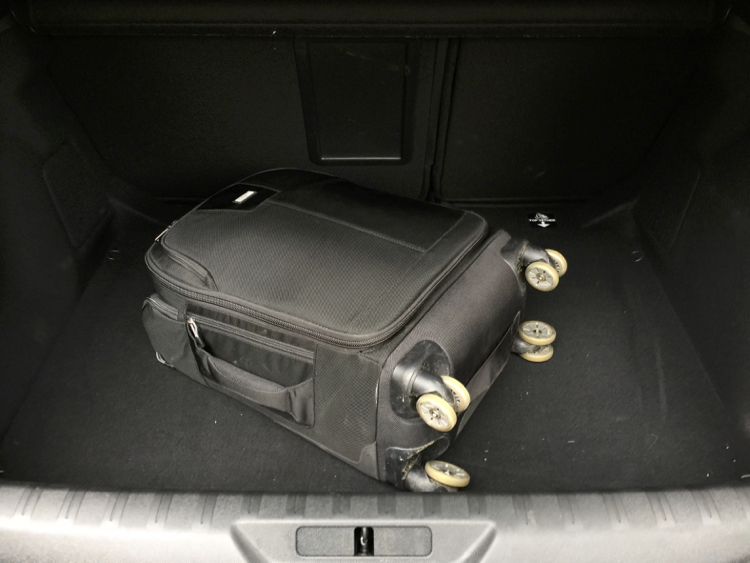
Here it is in the trunk (boot) of my car.
I’ve found the compact design of the bag to be very helpful when working in tighter spaces (some of the media rooms here in the UK are very ah….cozy!) as it doesn’t get in the way when I am unpacking my kit from it. Yet, despite its compact nature I can still fit my everyday required kit.
In this bag I can fit:
|
|
CONCLUSION
I love roller bags, they work perfectly for my requirements. For me, this bag is a winner. It’s compact design, yet high carrying capacity, make this bag ideal for people who want to carry larger amounts of equipment easily. Here are my thoughts:
Who is this bag for:
This bag is ideal for people who want a bag that they don’t have to carry around. The wheels make transporting equipment so much easier. It’s particularly ideal for travel on public transport, as its compact design will easily fit in the luggage area of many trains, or next to you on the seat.
Who is this bag NOT for:
If you’re someone who needs to travel with a bag with them all the times, you may want to look outside roller bags. If you want to carry more equipment, this particular model may be a little too small as well.
Pros:
Empty, the bag is quite light for a roller bag, weighing in at 5kg (11 pounds). Its compact design makes it easier to store when you’re in transit and at home, and the wheels make it a lot easier to move around. A well thought out design makes the most of its compact size to fit a generous amount of kit inside.
Cons:
I wouldn’t say this is necessarily a con; rather just something to be aware of, but the 4-wheel design can mean the bag can tend to roll away if it’s left on a slope, so be careful of this! When using a large lens (such as a 400mm f/2.8 or 600mm f/4, etc.) with the hood on, you are no longer able to put a laptop in the laptop compartment in the front of the bag. The price may be a con for some if you’re not in the market for a bag that’s almost $ 400.
If you’re on the market for a good quality, durable, and ergonomic roller bag, I would strongly suggest you take a look at the ThinkTank Photo Airport Roller Derby!
googletag.cmd.push(function() {
tablet_slots.push( googletag.defineSlot( “/1005424/_dPSv4_tab-all-article-bottom_(300×250)”, [300, 250], “pb-ad-78623” ).addService( googletag.pubads() ) ); } );
googletag.cmd.push(function() {
mobile_slots.push( googletag.defineSlot( “/1005424/_dPSv4_mob-all-article-bottom_(300×250)”, [300, 250], “pb-ad-78158” ).addService( googletag.pubads() ) ); } );
The post Review – The ThinkTank Photo Airport Roller Derby Bag by Daniel Smith appeared first on Digital Photography School.


 I remember seeing a poster on the wall of my fourth grade elementary school class that said, “What’s right isn’t always popular, and what’s popular isn’t always right.” The quote is attributed to Albert Einstein, and while he was most likely speaking with regard to issues of ethics, justice, and social equality, he might as well have been referencing the current state of image editing software.


You must be logged in to post a comment.