RSS
 

Posts Tagged ‘REVIEW’

Quick review: Apexel 8mm fisheye lens for smartphones

02 Sep

Fixed focal length lenses are one of the key limitations of smartphone cameras. So it’s no surprise that add-on lenses, which allow you to vary the focal length, are among the most popular smartphone accessories.

We have had the chance to test one of the more extreme variants, the Apexel 8mm fisheye lens, which provides a whopping 238-degree field-of-view. The lens comes with a clip that makes it very easy and quick to attach to most mobile devices – Apexel claims it is compatible with 98% of all smartphones – but we’ve found it to work best with the latest generation Apple iPhones, as the back of the lens slots onto the iPhone’s lens protrusion, where it is firmly held in place. On other devices, without a protruding camera-module, things can get a little more difficult and you might have to optimize the position of the lens by moving it around very slightly until you find a position that gives the best image quality. 

The provided clip makes lens attachment very easy and quick. Lens construction features six elements in five groups.

The lens construction features six elements in five groups and a multi-layer coating. The glass is housed in an aluminum body and the clip is made from very robust ABS plastic. Apart from the lens and clip you’ll find a lens cap, storage case and lanyard in the box.

In use

Image quality does of course vary depending on the smartphone camera you are using, and can be a little hit and miss. We tested the lens on the iPhone 6s Plus and the Lenovo Moto Z Force. On the iPhone, the lens clips neatly onto the protrusion of the phone camera but still, many images are very soft across the frame. During our testing the iPhone’s AF system clearly found it more difficult than usual to find a lock and, so it seems, sometimes simply did not focus correctly before the shutter was triggered. Other images are relatively sharp at the center of the frame and only show softness around the edges.

$ (document).ready(function() { SampleGalleryV2({“containerId”:”embeddedSampleGallery_1546006066″,”galleryId”:”1546006066″,”isEmbeddedWidget”:true,”standalone”:false,”selectedImageIndex”:0,”startInCommentsView”:false,”isMobile”:false}) });

In general, sharpness was better on the Moto Z Force but you’ll have to make sure the lens lines up perfectly with the smartphone camera. That said, even in a best case scenario vignetting is much more pronounced than on the iPhone – in sunny conditions lens flare is visible and again the AF occasionally takes much longer to lock than without the clip-on lens. With the Apexel’s extreme angle of view it can also be difficult to keep fingers and other body parts out of the frame, so check the preview image carefully before pulling the trigger.

Of course, the lens also works in video mode. The sample below was recorded in the Lenovo Moto Z Force’s 1080p video mode. It shows most of the same imperfections as the still images but thanks to the lower video resolution they are not quite as intrusive. 

Conclusion

The Apexel 8mm fisheye lens for smartphones is a nicely made accessory lens that is very easy to clip onto most phones (as long as you don’t use a case). The fisheye effect is extreme and can be an interesting additional weapon in your creative mobile imaging arsenal. However, image quality purists won’t be happy with the strong softness, vignetting and some lens flare we’ve seen in our sample pictures. Not that we were expecting Zeiss quality from a smartphone accessory lens, but the Apexel is generally quite a bit softer than we’d like.

That said, the lens can be fun to use and capture image results that are different from your usual smartphone pictures. The Apexel 8mm Fisheye is currently available for approximately $ 44 on Amazon.com*.

Pros:

  • Extremely wide angle-of-view
  • Nice fisheye effect
  • Solid build quality
  • Easy and quick attachment
  • Compatible with most smartphones (although works best with iPhone 6/6s generations)

Cons:

  • Strong image softness
  • Varying degrees of vignetting (depending on smartphone camera)
  • Some lens flare in sunny conditions
  • Slows down camera AF
  • Exposed front element prone to scratching and fingerprints
  • Clip not compatible with many phone cases
 
 
* dpreview.com is a wholly-owned subsidiary of Amazon but is editorially independent of our parent company.

Articles: Digital Photography Review (dpreview.com)

 
Comments Off on Quick review: Apexel 8mm fisheye lens for smartphones

Posted in Uncategorized


Canon EOS 5D Mark IV First Impressions Review

26 Aug

The Canon EOS 5D series is arguably one of the most recognizable camera lines of the digital age and the Mark IV is designed to appeal to the same wide range of enthusiasts and professionals. Nearly identical-looking to its predecessor, it receives substantial upgrades under the hood, including: a higher-resolution sensor with Dual Pixel autofocus, 4K video capture, an upgraded AF system, a touchscreen, improved weather-sealing, built-in Wi-Fi/NFC and GPS. All this adds up to a camera that fits into Canon’s product line nicely as the all-around full-frame option.

It is built around a new 30.4MP CMOS sensor and uses the Digic 6+ processor. The AF system is from the flagship 1D X Mark II and contains 61 AF points (41 of which are cross-type) with up to 24% expanded vertical coverage compared with the system in the Mark III. The center point is sensitive to -3EV in One Shot (AF-S) mode (in Live View the sensor is sensitive to -4EV with a fast lens).

4K video capture is a welcome addition to this camera and users can record in either 24 or 30p, albeit with a 1.64x crop. All footage is captured as Motion JPEG. Additionally, the camera allows for 4K Frame Grabs, effectively giving users 30 fps stills shooting with (Dual Pixel) AF. The usefulness of this may depend on how well-controlled the camera’s rolling shutter is, and how acceptable 8.8MP, ~17:9 JPEGs are to you, but we’ve been impressed by how effective 4K/60p video capture on the 1D X II has been for capturing the decisive moment still.

While developing the IV, Canon says it sought feedback from 5D-series users and found that dynamic range, resolution, AF precision and AF speed were the four most important areas improvements were requested. On paper, the Mark IV seems to address these aspects nicely:

Canon 5D Mark IV Key Specifications

  • New 30.4MP CMOS full-frame sensor with Dual Pixel AF
  • DCI 4K 30/24p video using Motion JPEG + 4K Frame Grab
  • 61-point AF system with 41 cross-type sensors (center point sensitive to -3 EV)
  • Dual Pixel AF (sensitive to -4EV) for continuous Servo AF in stills (first for a full-frame Canon camera) and video
  • ISO 100-32000 (expandable to 102400)
  • 7 fps continuous shooting
  • Dual Pixel Raw (image microadjustment, bokeh shift, ghosting reduction)
  • 150,000-pixel RGB+IR metering sensor
  • 1.62M-dot 3.2″ full-time touchscreen
  • Wi-Fi w/ NFC + GPS
  • Built-in bulb timer interval timers
  • Improved weather-sealing

The 30.4MP chip offers a decent jump in resolution over the 22.3MP chip in 5D III. And judging from the improved dynamic range in Canon’s other recent DSLRs (the 80D and 1D X II), we expect Raw dynamic range in the IV to be much improved over its predecessor, which had some of the worst shadow noise and banding we’d seen in a modern full-frame digital camera. The improvement is thanks to the recent move to a design that uses on-chip analog to-digital-conversion, resulting in lower downstream read noise and therefore less shadow noise and better overall dynamic range at lower ISOs.

In terms of AF, the increased coverage area is definitely a big deal: after all, it’s the exact same AF system found in the company’s flagship sports camera. The 150,000-pixel RGB-IR metering sensor, which feeds scene information to the AF system, is borrowed from the original 1D X, bringing enhanced subject identification (including faces) and tracking (‘iTR’), as well as improved metering and flicker detection. Unfortunately, we’ve found iTR to be too situation dependent to be generally relied upon, and our initial impressions from our brief time with the Mark IV leave us similarly unimpressed at the camera’s ability to automatically shift AF points to stick to your specified subject.

Our impressions of Dual Pixel AF in live view are exactly the opposite though, with the Mark IV being incredibly good at sticking to the original subject (or face) you initiated focus on. What’s more, it’s incredibly easy to specify your subject: just tap on it on the touchscreen in ‘Face Detect+Tracking’ mode, and the camera will stick to it like glue, no matter where it moves to in the frame. The 5D Mark IV is Canon’s first full-framer that can continuously focus in Live View during stills capture, and because of the way Dual Pixel AF works, focus is incredibly accurate, even with fast lenses.

The 5D Mark IV also has some new tricks up its sleeve including Dual Pixel Raw, a nifty option that can prove useful in specific shooting scenarios. It works by recording two 30MP images, one from each of the ‘left-looking’ and ‘right-looking’ photodiodes at each pixel. Previous Canons have combined these two signals at each pixel, but Dual Pixel Raw gives you the option of keeping them separate. This results in a file that’s twice as large, but one that allows for ‘image micro-adjustment,’ ‘bokeh shift’ and ghosting reduction (more on this on our Features page) in Canon’s supplied Digital Photo Professional software.

Compared to its peers

Canon now offers a range of full-frame models. On the high end you have the Canon’s sports and action-oriented 1D X Mark II, with its 20.2MP sensor and 14 fps continuous shooting (with AF). The 5DS (and ‘R’ variant), with their 50.6MP sensors, are the company’s high resolution options. The 5D Mark IV splits the difference in terms of resolution and is positioned as Canon’s all-rounder. For those on a budget, the compact EOS 6D soldiers on, four years after its introduction.

So how does the 5D Mark IV stack up against its closest sibling and predecessor? Take a look for yourself:

  Canon EOS 5D IV
Canon EOS 5D III
Canon EOS 5DS
MSRP $ 3499 $ 3499 $ 3699
Sensor 30.4MP 22.3MP 50.6MP
ISO range
(expanded)
100 – 32000
(expandable 50-102400)
100 – 25600
(expandable 50-102400)
100 – 6400
(expandable 50-12800)
AF points 61 (41 cross-type)
over expanded region
61 (41 cross-type) 61 (41 cross-type)

Live view/video AF ‘Dual Pixel’ phase detection Contrast detection Contrast detection
RGB metering sensor resolution 150k pixels 63-zone dual-layer 150k pixels
LCD 3.2″ 1.62M-dot touchscreen 3.2″ 1.04M-dot 3.2″ 1.04M-dot
Burst rate 7 fps 6 fps 5 fps

Video DCI 4K/30/24p 1080/30p 1080/30p
Headphone socket Yes Yes No
Card format 1x Compact Flash
1x SD

1x Compact Flash
1x SD

1x Compact Flash
1x SD
Built-in Wi-Fi/NFC Yes No No
 GPS Yes No No

Obviously if you need the resolution, the Canon EOS 5DS is the more sensible choice. But in just about every other regard, the Canon EOS 5D Mark IV is the far more versatile camera and a worthy upgrade from the 5D Mark III.

Pricing and availability

The Canon EOS 5D Mark IV ships this September and will cost $ 3499 body only, $ 4399 with the 24-70mm F4L IS USM lens and $ 4599 with the 24-105mm F4L IS II USM lens.

Articles: Digital Photography Review (dpreview.com)

 
Comments Off on Canon EOS 5D Mark IV First Impressions Review

Posted in Uncategorized


Review: Simple Booth Event Edition photo booth app

20 Aug

Simple Booth Event Edition iOS App
$ 60/£45 | www.simplebooth.com 

Photo booths are a pretty popular item to have at your event these days. Weddings, parties, fundraisers – you’ll find a photo booth at many of them. From a simple camera on a tripod with a remote to fancier automated systems that take multiple images and print instantly, people seem to love being able to control their own image making. Could it be the result of selfie-obsession on steroids? Or is it nostalgia for the chemical-photography based photo booths of our past? Either way, people are fascinated by them. Because of this, having the ability to set up your own booth could make you the star of your office holiday party, PTA fundraiser, or child’s birthday.

Into that popularity steps Simple Booth. Simple Booth is an iOS app designed to place all of the software you need to take, layout, share and print photo booth images into the hardware of your iOS device. There are four versions of the app with varying capabilities (one for the iPhone and three for the iPad): iPhone, Event Edition, Pro Edition 2, and Enterprise. Simple Booth Event Edition is the version I focus on in this article. It is the best choice for a photo enthusiast who wants to set up a photo booth. The iPhone version is pretty limited and while the Pro and Enterprise versions offer a number of additional options, they are probably overkill for anyone who isn’t running a photo booth business.

What does Simple Booth do?

When you start the Simple Booth app, you are presented with a setup screen with a number of options for how the app will work and your images to be laid out. You can choose 2/3/4 image photostrips for the classic booth style. For a more modern look, there are also a number of other multi image options in square or rectangular layouts. You have are options for setting background color, auto cropping, custom logos, and even Instagram-style film effects. You can also give your users the ability to crop, change the layout, and apply effects once the photos are taken. Though, to be honest, this doesn’t lend itself to the quick in-and-out pace of photo booths and I would suggest leaving that option off. I tend to feel the same way about the “retake” option, it encourages picky people to monopolize the booth trying to get the perfect photos.

For output, you can set up a printer (more on that option below), send to various social media services, email, or sync to dropbox. You can also tell the app to save each individual image taken to the camera roll as well as saving the photostrips. Honestly, the print option is the winner here. The social media options require people to mess around logging into their accounts, thus taking up time in the booth when others are waiting, and the email has to use the iOS mail app. Now, if you have an extra iPad handy, you can use Simple Booth’s free companion app Live Booth Lite to create an “out of the booth” interface for people to use for emailing, sharing, and even printing. In order to connect with any of the social or output options, you will need to have access to an active wifi network. One odd thing for a photo app in this day and age is that there is no Instagram sharing option. The Simple Booth crew explains that this is because Instagram doesn’t offer an API that would enable uploading. You can choose to use either the front or rear camera on the iPad but there is no option to use an external camera. In all honesty, the front-facing camera is the one you are going to want to use. Using the rear camera has advantages as far as resolution and image quality, but it means that someone has to stand there operating the booth because users will not be able to touch the screen to do so themselves. And if you are having someone standing there, you might as well have them take the photos with a real camera. Part of the allure of a photo booth is that it can operate unattended. 

Once you have decided on your initial settings, you put the app into booth mode, and it’s ready to go. Users cannot get back to the settings page and muck things up. Okay, well that isn’t completely true, if they think to double tap the home button and shut down the app, then restart it, they could get to the settings. But that is why you will probably want to use Guided Access to limit the iPad to just running Simple Booth.

From the user POV, the app is really quite simple. Clear “tap to start booth” and “look here” messages instruct them on what to do. A visible countdown timer and beeps mark the pace between the images being taken. Once complete, the photostrip appears on screen with the various edit/print/sharing options. If anything can be described as foolproof in the digital age, at least as user interface for the end user, Simple Booth is pretty darn foolproof.

What equipment will you need? 

At the very least, you will need an iPad. The newer iPads with improved cameras will have better resolution and low light performance. But just about any recent vintage iPad will work. A tripod and mount capable of holding your iPad will make interacting with the app much easier for your subjects and safer for your iPad. You’ll need a neutral backdrop of some sort, though a plain wall could be used as well. And you will probably want some lights. Unless you are outdoors in open shade on a bright day, you will likely find ambient light to be too dim for the iPad’s camera. This is one area where having the ability to use a DSLR would be an improvement, both for the improved low light performance and ability to connect to strobes. But as is, you can solve the problem with something as simple as a couple clip on fluorescent work lights.

Using a printer…

While the social media sharing features are handy in this day and age, having a printer on site is really the way to go with a photo booth. You increase the smile and fun quotient 1000% when someone is able to walk away from the booth with an image in their hand. While an inkjet printer will work, as any event photographer can tell you, a dye-sublimation printer is the way to go in this situation. The speed and toughness that dye-sub prints can offer over inkjets is significant in an event environment. 

When looking at dye-sublimation printers, you have options on either end of the market, and not much in between. Both offer excellent prints, but at vastly different prices. At the one end is the Canon Selphy series of printers. At around $ 100, the compact Selphy 1200 won’t break the bank. With wifi connectivity and AirPrint, connecting to iOS devices is easy. Print speed is a somewhat slow 47 seconds and it can only hold 18 sheets at a time. Finally, print prices are a fairly inexpensive $ 0.28 cents per 4×6.

At the other end of the market is the $ 1000 DNP DS620A. Designed for the high volume, high speed needs of event photography printing, the DS620A prints a 4×6 in as little as 8.3 seconds and can print up to 400 images without needing the paper roll replaced. The dye transfer is all done internally and the image only pops out once it is completely done. This makes it perfect for an unmanned both, you can set the DS620A up and leave it running all night. Print prices for a 4×6 work out to $ 0.14 a piece.

Inkjet or dye-sublimation connecting Simple Booth to a printer needs to be done in one of two ways. If you have an AirPrint compatible printer, like the Canon Selphy 1200, the app can connect directly to the printer as long as both are on the same Wi-Fi network. If you have a printer that isn’t AirPrint compatible, such as the DNP DS620A, you’ll need to connect it to a computer and run an app to make it available via AirPrint. I used Printopia, a dead simple $ 20 utility app that works perfectly for sharing a printer with your iOS devices. 

How does it work in the real world?

While I was working on this review, my son received an invitation to a classmate’s birthday party. So, I offered to bring along a Simple Booth setup and printer (in this case, a DS620A) for the kids to play with. Partially, I was just helping a dad-buddy put on a party. But I also wanted a chance to see how Simple Booth worked in real life with people who had never played with it before. Would 6-8 year olds be interested in something as retro as a photo booth? Would they have trouble operating it? Would the printer jam or run out of paper? 

Since this was a sunny summertime party, I had been planning to just set up a backdrop and tripod in some open shade and let the kids have at it. But my friend is a carpenter and decided at the last minute that he wanted to knock together a real “booth”. A few trips to the hardware store later and we had a low rent copy of an old school photo booth. It was nothing fancy, but the ipad was mounted and the printer delivered the print through a slot into the grubby over-sugared hands of the party goers. 

Did it work? It couldn’t have worked better. Being an old-man tech-nerd, I insisted on showing the first group how to do it. But with much eye-rolling, they made it clear that I might as well have been teaching them to drink a glass of water. They had no problem understanding how to make it work. The DNP DS620A printer was outstanding for this sort of use. Having a print in their hands in less than 10 seconds was pretty exciting for the kids and knowing that I could go hundreds of prints without having to reload the printer was pretty relaxing for me. The kids piled in and out of the printer in group after group. They giggled, laughed and loved it completely and all went home with handfuls of photo strips.

What’s the bottom line?

Simple Booth is a pretty amazingly full featured solution to creating a photo booth out of gear that many photographers already own. It is simple enough for children or technophobes to use, but offers enough options to allow customization of layout and operation.

At $ 59.99, it is likely more expensive than most any other iOS app that you own. That said, when you consider what you are getting and what it would cost you to figure out a way to do it without Simple Booth, it starts to look like a bargain. Perhaps more importantly, the proof is in the pudding. Even our hastily knocked together photo booth was a huge hit with the kids at the party – plenty of smiles and laughs and threats of tantrums if I didn’t print out duplicates for the kids in the group shots.

Tired of bringing meatloaf to your local block party every year? Bring Simple Booth and a printer instead and watch yourself turn into the neighborhood hero. 

What we liked:

  • Easy to set up
  • Customizable layouts
  • Pretty fool-proof in operation
  • Saves individual images as well as the “photo booth strips”
  • Print, email, social media integration

What we didn’t like:

  • iPad rear camera offers limited resolution and quality, using higher resolution front camera eliminates the viewing screen
  • No options for flash lighting, must use constant lights
  • While inexpensive for a photo booth, somewhat expensive for an app

Rating

Articles: Digital Photography Review (dpreview.com)

 
Comments Off on Review: Simple Booth Event Edition photo booth app

Posted in Uncategorized


Rebel in your pocket: Canon EOS M3 Review

17 Aug

Unbeknownst to many, Canon has been selling mirrorless cameras since 2012, in addition to SLRs and point-and-shoots. Marketing for the EOS M system is starting to pick up – at least in the U.S. – with two models to choose from: the entry-level EOS M10 and step-up EOS M3, which we’ll be covering here.

The EOS M3 (left) with its cheaper sibling, the EOS M10.

The EOS M3 is very much like a Rebel T6s stuffed into a compact body that resembles the company’s PowerShot models. It uses the same Hybrid CMOS AF III 24.2MP CMOS sensor as the T6s as well as a Digic 6 processor, touchscreen LCD and Wi-Fi with NFC. Unlike the Rebel and EOS DSLRs in general, EOS M bodies use the EF-M lens mount, though EF lenses can be used via an optional adapter.

Trying to figure out where the EOS M3 fits into the mirrorless landscape is tough. Its closest peers, based on price and features, are the Fujifilm X-A2, Olympus E-M10 II and Sony a6000 (we’re leaving Nikon 1 cameras out of the list, as we believe the series is no longer being developed.) Like the EOS M3, the Fujifilm lacks a built-in EVF and has an LCD that flips upward 180°. The Olympus E-M10 II and Sony a6000 offer EVFs but don’t have the ‘selfie’ LCD.

Compared to EOS M10 and Fujifilm X-A2

Below is a spec comparison pitting the EOS M3 against its cheaper sibling, the EOS M10, as well as the Fujifilm X-A2, which is one of its closest competitors.

  Canon EOS M3 Canon EOS M10 Fujifilm X-A2
Sensor 24MP APS-C CMOS 18MP APS-C CMOS 16MP APS-C CMOS
Lens mount Canon EF-M Canon EF-M Fujifilm X
Crop factor 1.6x 1.6x 1.5x
Hybrid AF Yes Yes No
LCD type Tilting
(180° up/45° down)
Tilting
(180° up)
Tilting
(175° up)
LCD resolution 1.04M-dot 1.04M-dot 920k-dot
Touchscreen Yes Yes No
Electronic VF Optional No No
Control dials 2 1 2
Burst rate 4.2 fps 4.6 fps 5.6 fps
Video 1080/30p/24p 1080/30p/24p 1080/30p
Mic input Yes No No
Hot shoe Yes No Yes
In-camera Raw conversion No No Yes
Battery life 250 shots 255 shots 410 shots
Dimensions 111 x 68 x 44mm 108 x 67 x 35mm 117 x 67 x 40mm
Weight 366 g 301 g 350 g

The features that differentiate the M3 vs the M10 are pretty obvious – the M3 offers one more control dial and another for exposure compensation plus a hot shoe (to which you mount the optional EVF), an LCD that can angle downward and superior build quality. All of which suggest Canon has a more committed photography audience in mind. Comparing the M3 versus the X-A2 is a bit more complex, as there are clear tradeoffs for both cameras. One thing is for certain, though: Canon needs to work on battery life – badly.

The EOS-M system

The six currently available EF-M lenses from Canon

Despite being around for over four years, there are just six EF-M lenses available from Canon. They include four zooms (11-22 F4-5.6, 15-45 F3.5-6.3, 18-55 F3.5-5.6, 55-200 F4.5-6.3) and two primes (22mm F2 and 28mm F3.5 macro). There are lenses from third party manufacturers such as Tamron and Samyang/Rokinon (which are manual focus).

The EF to EF-M adapter lets you use giant lenses like this 70-200 F2.8L II.

To get access to the full collection of Canon EF and EF-S lenses, you can use an optional adapter, which sells for about $ 80. As it turns out, there are adapters for nearly every lens mount you can think of, from Micro Four Thirds to Olympus OM.

Articles: Digital Photography Review (dpreview.com)

 
Comments Off on Rebel in your pocket: Canon EOS M3 Review

Posted in Uncategorized


Review of the Tamron 85mm F1.8 Di VC USD Lens

15 Aug

There has been, and likely always will be, a lingering debate among professional photographers and amateur photo enthusiasts, about whether or not a third party lens can be every bit as good as the native glass produced by your camera’s manufacturer.

There is often a margin of compromise between cost and quality. Over the last five years or so, that margin has become increasingly slim. It’s become so small in fact, that we find ourselves living in an incredible time when these third party lenses are equalling the performance of high end lenses, in terms of optical performance and build quality.

Lens 7

To date, very few lenses I have evaluated have exemplified this coming of age of lens manufacturing, more so than the Tamron 85mm F1.8 Di VC USD. It is intended to be used with full-frame dSLR’s, as well as APS-C bodies (it becomes 136mm equivalent). This lens embodies what could be called a levelling of the playing field, in terms of cost versus performance. Recently, Tamron announced their intentions to re-energize, and improve their lens offerings with increased image quality, and more reliable build. During this review I was amazed at just how much punch Tamron has been able to deliver with their 85mm f/1.8.

First Impressions

After breaking open the box I found the lens, along with hood, to be very well cradled in its packaging.

Lens 1

Lens 3

Lens 5

At first feel, the Tamron 85mm f/1.8 seemed hefty, with a solid weight. Not overly heavy at 24.7 ounces (700 g), but certainly not light either. You will definitely know this lens is on your camera. The look of the lens is clean and classic.

The lens body itself is nicely finished in matte black, while Tamron has added some silver-toned accents; most notably of which is the new metallic ring at the base of the body around the mount. The focus ring is pleasantly rubberized, and feels very comfortable to the touch. There is also a voucher for a free download of SilkyPix, Tamron’s post processing software, included with the lens purchase.

Build Quality

As I said, the most noticeable physical aspect of this lens is its weight. Which isn’t a bad thing, and it strikes a balance when compared to other similar lenses: the Canon EF 85mm f/1.8 and the Canon EF 85mm f/1.2 L which come in weighing 14.99 oz (425 g) and 36.16 oz (1.025 kg) respectively. Keep in mind that neither of those two lenses sports image stabilization(more on this feature later). Overall, the Tamron just feels serviceably solid. The focus ring is firm and extremely smooth when turning. All the markings and accents are very well executed and the focus indicator window is nicely done.

Lens 2

Lens 4

Here are the Tamron 85mm F1.8 mounted to a Canon 7D Mk1 alongside another excellent prime, the Canon EF 50mm F1.4 (below) for a size comparison.

85 and 50

The VR( image stabilization) and AF/MF switches are well placed for easy operation, and they switch on/off firmly. The included barrel-type lens hood looks great without screaming “Hey! Look at me!” and locks on securely with ease.

Here’s the official specification sheet from Tamron

Spec Sheet

One thing which I’ve always found so pleasing about Tamron, albeit a small detail, is their attention to their lens cap ergonomics. I know, I know – it’s just a lens cap. But it’s a very important element of any lens that is intended to be used extensively. I mention it due to the fact that Tamron lens caps have a very deeply recessed front pinch.

Cap

Very much of my work centers around adventure and outdoor photography, where the elements aren’t always cooperative. Being able to take the lens cap on and off without fear of dropping (even with gloved hands) is a huge advantage in those kinds of situations. Small detail? Yes. An important detail? Very much so. It’s a feature that my fellow landscapers and outdoor photographers will greatly appreciate.

Now, back to your regularly scheduled review.

If you look closely at the lens you might notice a small black rubber gasket at the area of the lens mount.

Seal 1

Seal 2

This is part of the advanced steps Tamron has made to improve the resistance of their lenses to the elements. Though not as readily visible as the seal on the lens mount, the entire lens design has incorporated increased weather sealing on the areas between the focus ring and lens barrel. This means better long term service and protection from the grit and grime, often found when making photographs in the outdoors, where dust and moisture make themselves an unwelcome nuisance.

Image Quality

The 85mm F1.8 is intended to be a medium telephoto lens, that offers decent compression for portrait work, as well as true to life color rendition. In all these things, Tamron has excelled. I was excited to see that the lens performed very well, and was very sharp through the complete f/1.8 to f/16 aperture range. The corners were a little soft at f/1.8 but became crisp at f/4 and beyond. Overall sharpness was best observed from f/4 to f.8, with f/5.6 seeming to be the sweet spot of this review model.

Admittedly, I was very impressed with the sharpness, but the color performance is a point where this lens truly shines. Colors come through well saturated, with only moderate chromatic aberrations at wide apertures (past f/2.2 becomes very good) and contrast is wonderfully bold.

This is a series of uncropped images, showing the performance across common apertures from f1.8 through f/16.

F1 8

F2 8

F4

F5 6

F8

F11

F16

Now, have a look at that same set after being cropped to approximately 1:1.

F1 8 Zoom

F2 8 Zoom

F4 Zoom

F5 6 Zoom

F8 Zoom

F11 Zoom

F16 Zoom

The nine curved aperture blades produce a creamy bokeh, which portrait shooters will love. I especially loved the bokeh produced at the largest aperture of f/1.8. In some situations it even hinted at a faint swirling effect, reminiscent of the selectively loved/hated Helios 44-2.

In any case, you will no doubt be pleased with the background blur of your images. Taken alongside the great color and contrast, the 85mm f/1.8 will consistently produce quality images with good sharpness, in a wide range of situations.

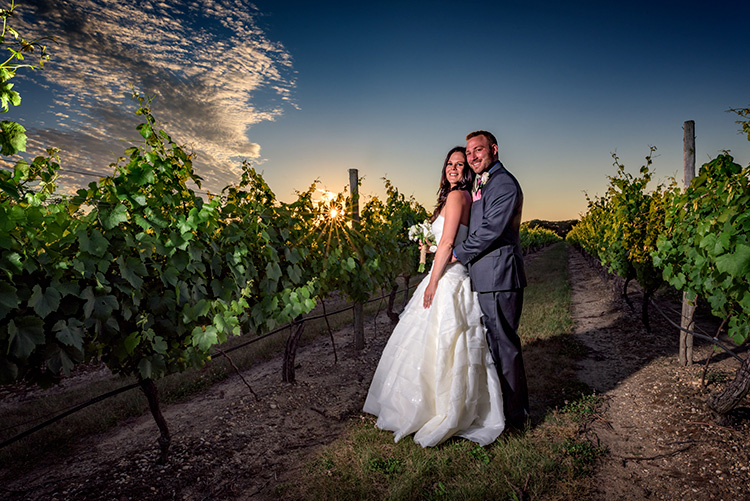
Here are some additional sample images made with the Tamron 85mm F1.8.

Hand

Leaf

Coffee

Clouds

Lime

Swing

Autofocus and Image Stabilization Performance

This is the part of the review that I could not wait to write about in regard to the 85mm F1.8. The autofocus of this lens is fast, accurate, and quiet. The ultrasonic motor drive produced very little vibration during autofocusing, which was great. I’m a big time fan of having the final say with my focusing. Tamron has included a full-time manual override capability, which definitely allows greater control for pinpoint adjustments when needed, without having to switch the AF/MF switch to manual.

The autofocus tracked very accurately when shooting moving subjects as well. Overall, the AF performance of the lens is top notch.

The image stabilizer on this lens is an absolute marvel. In most cases, vibration reduction technology is useful, but for me, it’s never been a make or break selling point when I shop for lenses. With the 85mm – I must say that I am thoroughly impressed. The image stabilization performance of the lens is one of, if not the best, I have ever encountered. Tamron states that the 85mm F1.8 was the first 85mm fast-prime to include the technology (as of January 2016). The VR (vibration reduction) makes shooting at what might be considered impractically slow shutter speeds in sub-optimal light, very possible. This is great for street photographers, and really anyone who finds themselves needing to keep their ISO in check, who also frequently encounters low light conditions.

VR Off

This is an image shot handheld at 1/10 second with VR turned off.

VR On

Here we see the almost magical impact of the image stabilizer once the VR is switched on.

Generally, I base the majority of my exposures around the Reciprocal Rule (1/focal length) so at 85mm I wouldn’t normally go slower than 1/80th of a second, or 1/60th on a good day. The fact that I was able to pull off this measure of sharpness at 1/10th of second, means that the image could have been made with an even slower shutter speed, while still maintaining acceptable clarity. This means a lower ISO can be used in situations when it would previously not have been possible. Tamron has hit the VR out of the park with the 85mm F1.8.

Final Verdict

What you’ll like:

  • Outstanding sharpness through entire aperture range.
  • Great color and contrast performance.
  • Build quality is great.
  • Improved weather sealing helps control moisture and dirt problems< ./li>
  • The VR performance is outstanding. Image stabilization level: Jedi.

What you might not like:

Well, it’s difficult to list anything here. An extremely scrutinous shooter might mention the weight and moderate chromatic aberrations at f/1.8 as drawbacks, but both fall very safely in the range of what would be considered acceptable for most uses.

Closing Thoughts

It’s difficult for a lens to leave a reviewer without having any real negatives. Still, the Tamron 85mm F1.8 appears to have done just that. There were no issues encountered that would warrant inclusion. The fact is that the optically quality is superb, and the build is very solid.

Taking into consideration the fast autofocus, and the incredible image stabilization, it truly is a tough lens to beat at this price (around $ 749 USD). Add in the beefed up weather protection, and you are left with a beast of a mid-range telephoto lens, which will excel at portraiture and street photography, while holding its own during adverse shooting conditions in the outdoors.

4.5 out of 5 Stars

googletag.cmd.push(function() {
tablet_slots.push( googletag.defineSlot( “/1005424/_dPSv4_tab-all-article-bottom_(300×250)”, [300, 250], “pb-ad-78623” ).addService( googletag.pubads() ) ); } );

googletag.cmd.push(function() {
mobile_slots.push( googletag.defineSlot( “/1005424/_dPSv4_mob-all-article-bottom_(300×250)”, [300, 250], “pb-ad-78158” ).addService( googletag.pubads() ) ); } );

The post Review of the Tamron 85mm F1.8 Di VC USD Lens by Adam Welch appeared first on Digital Photography School.


Digital Photography School

 
Comments Off on Review of the Tamron 85mm F1.8 Di VC USD Lens

Posted in Photography


Still solid: Fujifilm X-E2S Review

10 Aug

Introduction

Key Features

  • 16MP APS-C X-Trans sensor
  • 77-point autofocus system
  • 1080/60p video capture
  • Fixed 3″ 1.04M-dot LCD
  • 2.36M-dot electronic viewfinder
  • ISO 200-6400, expandable to 51200
  • 7 fps burst shooting
  • Wi-Fi

The Fujifilm X-E2S is a rangefinder-styled mirrorless interchangeable lens camera featuring a 16MP X-Trans sensor, abundant external controls, a high-resolution electronic viewfinder and a hybrid autofocus system. Feature- and performance-wise, it is all but identical to Fujifilm’s existing X-E2 with the newest firmware installed, but the X-E2S launches at a $ 300 discount compared to its predecessor.

At an MSRP of $ 699 (or $ 999 with an 18-55mm F2.8-4 kit lens), Fujifilm has effectively taken an enthusiast-level camera with enthusiast-level controls and placed it alongside more traditionally entry-level models across the marketplace. If you’re a photographer with some experience but a tight budget, that’s great news. And if you’re a beginner looking to get in to photography, the X-E2S might pique your interest.

Straight-out-of-camera JPEG with Velvia film simulation. Fujifilm XF 23mm F1.4. ISO 200, 1/450 sec, F1.4, 35mm equiv. 

Photo by Carey Rose

So, the X-E2S is a re-released X-E2 with updated software, but there are still a few tweaks unique to the newer model.

What’s new on the X-E2S

  • An ‘Auto’ button on the rear, which puts the camera into a point-and-shoot ‘Scene Recognition’ mode similar to the auto lever on the top of the Fujifilm X-T10 (this button is also reassignable)
  • When shooting in Auto ISO, the X-E2S will attempt to detect motion in the scene and raise the minimum shutter speed automatically, if needed
  • Maximum ‘boosted’ ISO comes in at 51200 (JPEG only)
  • Tweaked grip, top plate loses the ‘Fujinon Lens System’ engraving
  • Rear four-way controller now defaults to AF point selection, but all buttons remain customizable

As you can see, there’s really not much in it between the two cameras — the changes are almost ‘nitpicky.’ More importantly, everything that we loved about the X-E2 is still here in the X-E2S: attractive retro design, plentiful and customizable controls, and most importantly, solid image quality. 

In some ways, though, the X-E2 models are starting to show their age. There are cameras out there that offer better autofocus performance, better video capture and higher resolution. But they aren’t all likely to offer the level of direct control, quality of this user experience, or as thorough a useful lens lineup as the X-E2/X-E2S.

And speaking of lenses, you’ll pay more for the Fuji kit lens than you might on another entry-level camera, but this XF 18-55mm F2.8-4 lens is better built, sharper and has a wider aperture than any competitors’ F3.5-5.6 bundled zooms. It will be more than enough to satisfy users that aren’t looking to build up a lens portfolio or swap lenses very often.

Dials on dials – in typical Fujifilm fashion, the X-E2S puts crucial controls at your fingertips. They’re perfect for those with some photographic background, but could be intimidating for people just getting started. Photo by Samuel Spencer

In short, if you are a beginner who is serious about getting into photography, the Fujifilm X-E2S is likely to give you much more in terms of an engaging shooting experience than many other options out there. Likewise, if you’re an established photographer looking to either try out the Fujifilm system or add another camera to your arsenal, the X-E2S is hard to ignore – let’s investigate why.

Regular readers will know by now that we have kind of a thing for Fujifilm’s out-of-camera JPEG rendering, and files from the X-E2S are no exception. Straight-out-of-camera JPEG with the Provia film emulation. Fujifilm XF 23mm F1.4. ISO 200, 1/120 sec, F1.4, 35mm equiv.

Photo by Carey Rose

Articles: Digital Photography Review (dpreview.com)

 
Comments Off on Still solid: Fujifilm X-E2S Review

Posted in Uncategorized


Lens Review: Sigma 20mm F1.4 DG HSM Art Lens

10 Aug

In my opinion, one of the best developments to happen in photography recently is the stepped-up offerings of third party lens manufacturers. Early in my photography career, third party lenses were decent alternatives for a lower cost option, but my own experience was that the cost savings also came at a cost in performance. Those lenses weren’t as sharp, focused slower, and weren’t built to the same quality of similar lenses by Nikon and Canon (and other camera brands).

Sample image from Sigma 20mm f/1.4 DG HSM Art

The Sigma 20mm lens allows for capturing expansive views when photographing landscapes.

Enter Sigma’s Art lineup of lenses. When the Sigma 35mm f/1.4 Art lens was introduced in 2012, it ushered in a new era of third party lenses, giving users lower cost options while maintaining high image quality and performance. As Sigma has continued to build out their Art lineup, adding a 50mm f/1.4, a mind-boggling 50-100mm f/1.8 zoom for APS-C cameras, and others – photographers are gaining new respect for Sigma as a lens maker. Recently, Sigma announced a new entry, the 20mm f/1.4 DG HSM Art lens, and I was thrilled to have an opportunity to try it out.

First Impressions: Sigma 20mm f/1.4 Art Lens

Sigma 20mm f/1.4 DG HSM Art

Image courtesy of Sigma

When the lens first showed up on my doorstep, I immediately unpacked it to see what Sigma has done.  It is impressive. An ultra-wide angle lens with an ultra-fast maximum aperture, the 20mm f/1.4 Art lens is one with quite a few applications including; photojournalism, wedding photography, street photography, and landscapes, to name a few. If the image quality for this lens lives up to the reputation of previous Art lenses, it’s going to be an incredible lens to work with.

A quick glance at the major manufacturers’ websites reveals that no other lens maker builds a 20mm lens with a maximum aperture as large as the Sigma 20mm f/1.4 Art lens. That fast aperture allows a lot of room for use of shallow depth of field, or for working in low light conditions. It also makes applications such as astrophotography a bit easier as well. The minimum aperture is only f/16, as opposed to f/22 on lenses such as the Canon Ef 24mm f/1.4. While that is not a huge issue, it does mean that when you’re trying to use slow shutter speeds on sunny days, a filter may be necessary.

Detail image of Sigma 20mm f/1.4 DG HSm Art

The bulbous front element of the Sigma 20mm f/1.4 DG HSM Art lens. Photo courtesy of Sigma.

Out of the box, the lens is fairly sizable (90.7mm x 129.8mm / 3.6  x 5.1 inches) and is a bit heavy (950 g / 33.5 oz.). It is considerably larger than my Nikon 24mm f/1.4 G or the Canon EF 24mm f/1.4L II. The outer barrel does have a bit of plastic feel to it, but the brass mount and considerable heft, assuage any fears of cheap build quality. Constructed of 15 elements in 11 groups, including F Low Dispersion, Special Low Dispersion, and aspherical elements, Sigma claimed class-leading image quality. I found minimal distortion and chromatic aberration in images I shot with this lens, and what I did find was easily corrected in Lightroom or Photoshop. The lens features a 9-blade rounded diaphragm aperture, excellent for soft rounded bokeh in out of focus areas of the image. Minimum focusing distance is 27.6 cm or 10.9 in.

My one disappointment with the lens is the bulbous front element, which eliminates the ability to use either screw-in filters such as polarizers, or the smaller 100mm drop-in filters. While I have a set of 150mm filters, my adapter would not fit the lens, and other manufacturers had yet to build an adapter that works. I am told by several filter manufacturers that they are working on a suitable adapter for the 150mm filter kits on the market.

The Sigma 20mm in the field

Sample image from Sigma 20mm f/1.4 DG HSm Art

Being a landscape photographer, the first thing I wanted to do was take this lens for a spin at one or two of my favorite local spots. While the lack of filters meant I had some difficult choices to make when photographing the sunset, I was anxious to use the wide angle lens to accentuate the foreground and the sky.

The Sigma 20mm f/1.4 Art gave me no issues and focused smoothly on my subject. The 94.5° field of view on a full frame sensor provides a nice panoramic image, allowing you to emphasize the immediate foreground while creating context in showing the background. The necessity of filters will be more dictated by your camera sensor’s dynamic range, but I found on my Nikon D810, I was able to expose for the highlights and recover the shadows in post-production. Sharpness throughout the scene was excellent, with minimal distortion and loss of resolution at the corners. Color and contrast are excellent as well.

20160624_Maureen-Chuck_0611b

My next test was to try the lens at a wedding. I will often employ a wide angle lens for capturing action on the dance floor, and occasionally for environmental portraits of the bride and groom like the image above. I found the Sigma 20mm f/1.4 Art lens excelled in both instances.

On the dance floor, even in low light, I found the lens to focus quickly and accurately. The fast aperture allowed me to minimize my use of flash in the reception hall (below), and use the ambient lighting for a more natural, festive look. In addition, for the formal portraits I used the lens outdoors at sunset for some bridal portraits, and was impressed with the image quality in a high contrast situation. I used an external strobe to light the bride and groom (image above), with the sunset in the background, and stopped all the way down to f/16 for a starburst effect on the sun.

Sample wedding image from Sigma 20mm f/1.4 DG HSM Art lens

My final test was to do some astrophotography with the lens. In the past, I’ve used both the Nikon 24mm f/1.4 and the Canon EF 24mm f/1.4L II lenses, and while both were satisfactory, each has a tendency to produce some comatic aberration, especially in the corners.

While I did find some coma using the Sigma 20mm f/1.4 Art, I found it to be less noticeable than either the Nikon or the Canon. The fast f/1.4 aperture allowed me to capture the stars, while using an ISO of 800 and a 15 second exposure time. If nothing else, this lens is an astrophotographer’s dream, being wider than any other f/1.4 lens currently on the market, which allows for capturing expansive sections of the night sky.

Sample images from Sigma 20mm f/1.4 Dg HSM Art lens.

Summary

In the 20mm f/1.4 Art lens, Sigma has managed to build an exceptional, wide aperture, wide angle lens that will suit a variety of photographers, from photojournalists, to landscape artists, street photographers and wedding photographers. Priced at $ 899, it’s less than half the price of the equivalent Nikon or Canon 24mm lenses, and provides a wider angle. Nikon’s 20mm f/1.8G is as close as the major manufacturers get to this lens, at a cost of $ 100 less than the Sigma. The Sigma 20mm f/1.4 DG HSM Art is available in Canon, Nikon, and Sigma mounts.

I highly recommend this lens to anyone in the market for an ultra-wide, ultra-fast lens. My one caveat is that if you’re not already invested in a 150mm filter system, you will need to do so if you want to use filters with this beast.

googletag.cmd.push(function() {
tablet_slots.push( googletag.defineSlot( “/1005424/_dPSv4_tab-all-article-bottom_(300×250)”, [300, 250], “pb-ad-78623” ).addService( googletag.pubads() ) ); } );

googletag.cmd.push(function() {
mobile_slots.push( googletag.defineSlot( “/1005424/_dPSv4_mob-all-article-bottom_(300×250)”, [300, 250], “pb-ad-78158” ).addService( googletag.pubads() ) ); } );

The post Lens Review: Sigma 20mm F1.4 DG HSM Art Lens by Rick Berk appeared first on Digital Photography School.


Digital Photography School

 
Comments Off on Lens Review: Sigma 20mm F1.4 DG HSM Art Lens

Posted in Photography


Rock Solid: Canon 1D X Mark II Review

28 Jul

The EOS-1D X Mark II is Canon’s newest flagship DSLR aimed at pro-level photographers. A quick glance reveals the camera’s 1D-series heritage, but under the hood there are some exciting upgrades going on. The 1D X II is built around a new 20.2MP full-frame CMOS sensor, now with Canon’s Dual Pixel autofocus system, includes an expanded 61-point autofocus system with 24% more coverage and a 360,000-pixel RGB+IR metering sensor, and is one of the first Canon DSLRs (other than the somewhat niche 1D C) that captures 4K video. Predictably, it’s also built like a brick and performs like a Formula 1 race car.

Canon 1D X Mark II Key Specifications

  • New 20.2MP CMOS full-frame sensor with Dual Pixel autofocus
  • 14 fps continuous shooting (16 fps in live view)
  • 200+ shot buffer with Raw+JPEG (CFast 2.0)
  • 61-point AF system with 41 cross-type sensors and 24% more coverage
  • 360,000-pixel RGB+IR metering sensor
  • Native ISO from 100-51,200 (expandable to 50-409,600)
  • 4K/60p video in DCI format (4096 x 2160 pixels) using Motion JPEG
  • 1.62 million dot LCD touch screen
  • Flicker detection
  • CFast 2.0 card support
  • USB 3.0

The 1D X Mark II is a camera that anyone with previous 1D series experience can probably pick up, dial in their favorite settings, and start shooting right away — though as we’ll see on the following pages, in doing so one might overlook advancements that Canon has made in this newest edition. There are a few minor tweaks to the body – all for the better in our opinion – and it takes very little effort to adapt. This conservative approach to design is a testament to the fact that the basic form factor works well. It’s no surprise that the designs of both the Canon 1D and Nixon Dx series are quite similar and haven’t seen many changes to the basic design over the years.

Conservative changes to the body notwithstanding, the 1D X II is full of new and updated technology designed to make the camera one of the top performing models in the world. The new AF system, although still utilizing 61 AF points, now covers 24% more of the frame and is, predictably, extremely fast. There’s also a new 360,000-pixel RGB+IR sensor for face recognition and subject tracking, which Canon refers to as iTR (Intelligent Tracking and Recognition).

The jump to 20MP (vs. the 1D X’s 18MP) isn’t exactly Earth shattering, but this is a completely different sensor than any found in Canon’s previous flagship models. The 1D X II is the first full frame EOS DSLR to include Canon’s Dual Pixel autofocus system, a feature we’ve praised on other cameras. Additionally, Canon has moved to a design that uses on-chip analog to-digital-conversion, which should result in improved dynamic range of the sensor.

Compared to the Nikon D5

The obvious point of comparison to the 1D X II is the Nikon D5. A quick comparison reveals a lot of similarities and a few differences. On the surface it appears that Nikon takes the prize for high ISO and AF specs, while the 1D X II wins on continuous shooting speed and video. On the following pages we’ll try to give you a sense of how they stack up in the real world.

  Canon EOS-1D X II Canon EOS-1D X Nikon D5
MSRP $ 5999 $ 6800 $ 6499
Sensor 20.2MP 18.1 MP 20.8MP
ISO range
(expanded)
100 – 51,200
(50 – 409,600)
100 – 51,200
(50 – 204,800)
100 – 102,400
(50 – 3,280,000)
Viewfinder spec 0.76x mag
100% coverage
20mm eyepoint
0.76x mag
100% coverage
20mm eyepoint
0.72x mag
100% coverage
17mm eyepoint
AF points 61 (41 cross-type) 61 (41 cross-type) 153 (99 cross-type)
Live view/video AF ‘Dual Pixel’
phase detection
Contrast detection Contrast detection
AF working range -3 – 18 EV -2 – 18 EV -4 – 20 EV
RGB metering sensor resolution 360k pixels 100k pixels 180k pixels
LCD 3.2″ 1.62M-dot touch-enabled 3.0″ 1.04m dot 3.2″ 2.36M-dot touch-enabled
Burst rate 14 fps
(16 with mirror up)
12 fps 12 fps
(14 with mirror up)
Buffer
JPEG / Raw / Raw+JPEG
  • Unlimited
  • 170
  • 81
  • 180
  • 38
  • 17
  • Unlimited
  • 200
  • 200
Video DCI 4K/60p 1080/60p UHD 4K/30p
HDMI Out 1080 8-bit 4:2:2 1080 8-bit 4:2:2 4K/30 8-bit 4:2:2
Headphone socket? Yes No Yes
Card format 1x Compact Flash
1x CFast
2x Compact Flash 2x Compact Flash or 2x XQD variants
Battery life (CIPA) 1210 shots 1120 shots 3780 shots
Dimensions 158 x 168 x 83mm 158 x 164 x 83mm 160 x 159 x 92mm
Weight 1530 g 1530 g 1405 g (XQD)

We doubt that many people are going to seriously contemplate a switch between Canon and Nikon over a few specs on one model or the other unless it’s something absolutely mission critical. Most shooters utilizing this type of camera are likely heavily invested into a system, including lenses, strobes, and even institutional support. At the same time, it’s instructive to see just how advanced both flagship models are getting. We expect that most pros or advanced amateurs could produce great results with either one.

Articles: Digital Photography Review (dpreview.com)

 
Comments Off on Rock Solid: Canon 1D X Mark II Review

Posted in Uncategorized


First impressions review: Lenovo Moto Z Force shows promise

26 Jul

The Moto Z Force is Lenovo’s brand new, top-of-the-line smartphone. Currently exclusive to the Verizon network in the US as the Moto Z Force Droid Edition, we expect an international launch of the device in the near future. 

The device packs a 21MP image sensor with a 1.12 µm pixel size, an F1.8 aperture, on-sensor phase detection, laser-assisted AF and an optical image stabilization system into its camera module. The camera app offers full manual control and the Moto Z Force can save DNG Raw files with third party apps, such as Manual Camera.

The metal and glass body is just under 7mm thin and comes with a shatterproof 5.5″ Quad-HD AMOLED display and a beefy 3,500 mAh battery. The Android 6.0.1 Marshmallow OS is powered by a Qualcomm Snapdragon 820 chipset and 4GB of RAM. Mobile photographers will also appreciate the microSD-slot for easy storage expansion. 

In addition, Moto Z Force users can select from several Moto Mods accessory modules which connect to the back of the device magnetically and via 16 connection points. So far there are the InstaShare projector, a JBL Soundboost 6 Watt speaker and a 2220 mAh battery pack. The Moto team has promised more Moto Mods for the future and according to rumors, one of them could be a camera grip. For now we’ll have to make do without the latter, but that hasn’t stopped us from shooting with the brand new Moto device. Read on for our first impressions. 


Image Quality

In bright light conditions the Moto’s 21MP sensor resolves a good deal of detail. Under close inspection some smearing of fine detail and textures is noticeable, but on the other hand luminance noise is very well controlled. During our brief testing, exposure was reliable but in very bright scenes, such as the one below, the image processing’s strong contrast can results in some clipped highlights. That said, overall the Moto Z Force does well in these conditions.

 ISO 50, 1/760 sec

Color tends to be quite saturated, but neutral and without any notable casts. This includes bright red tones which many smartphone cameras struggle with, especially under strong illumination.

 ISO 50, 1/452 sec

At higher ISOs the camera finds a good compromise between noise reduction and detail retention. The ISO 320 shot below was captured in a fairly well-lit interior space and shows very good edge detail. 

 ISO 320, 1/33 sec

The ISO 500 shot below shows some more luminance noise in the mid-tone areas of the frame but the noise pattern has a fairly fine grain and is not too intrusive. Chroma noise is well under control and the image still shows a very good amount of fine textures and detail.

 ISO 500, 1/25 sec

The Moto Z Force maintains good exposure and color down to very low light levels. The challenging lighting conditions in the shot below lead to some channel clipping in the illuminated stage area, but overall the scene is captured very nicely. The slow shutter speed of 1/10sec results in some blur on moving subjects but the optical image stabilization does a very good job at counteracting camera shake. 

 ISO 1250, 1/10 sec

Special modes

The Moto Z Force comes with Motorola’s usual HDR mode which does an efficient job of protecting the highlights in high-contrast scenes, such as the one below. Using the standard auto exposure mode, some clipping occurs on the light colored elements in the frame. Using HDR mode, image clipping is noticeably reduced. Shadows are lifted very slightly but overall the image still looks pleasantly natural.

 ISO 50, 1/1468 sec, standard exposure
 HDR exposure

Night mode is not a new feature for Moto devices but the latest incarnation works in a slightly different way than before. In low light scenes the camera automatically triggers multi-frame capture which produces clean images but struggles with moving subjects, which often show pronounced motion blur. On the new device, night mode now saves a standard exposure in addition to the night mode image, allowing the user to pick the version which best suits their purposes.

The sample images below both report ISO 1000 and a shutter speed of 1/10sec in the EXIF data. However, as you can see at close-up view they look very different. The multi-frame night mode image on the left is cleaner but shows motion blur, even on slow-moving subjects. The accompanying standard exposure shows better edge definition on moving subjects but noticeably higher levels of luminance noise. 

Night mode Standard exposure
100% crop 100% crop

In video mode the Moto Z Force is capable of recording both 1080p Full HD and 4K footage. The combination of digital and optical stabilization keeps things steady and allows for smooth panning. The 1080p video below shows similar tonal characteristics to the still images and decent detail but very occasionally we found the lens refocusing for no obvious reason.

The 4K video mode offers noticeably better detail for those who need it. It also allows users to grab 8MP video stills for those occasions when the full 21MP still resolution is not needed.

First impressions 

With its solid build, large high-resolution screen and metal frame the Moto Z Force looks and feels like a premium device. The Snapdragon 820 chipset under the hood ensures the performance of the Android operating system matches the device’s high-end exterior and the 3,500 mAh battery lets you shoot, edit and share images for a long time away from a power outlet.

The camera module’s 21MP captures a good level of detail and offers plenty of scope for cropping. There are the usual signs of smearing of fine textures at base ISO, but in low light the camera finds a good balance between noise reduction and detail retention. In addition, night mode lets you pick between a clean multi-frame image that works best for static scenes, and a standard exposure that shows more noise but is capable of freezing at least some motion. 

Colors are mostly quite saturated and contrast is strong which can lead to some highlight-clipping in high-contrast scenes. However, HDR mode does a very efficient job of protecting highlight detail, and in addition the Moto Z Force allows for the capture of DNG Raw files with third party camera apps, such as Manual Camera. This allows you to apply your very own mix of contrast, saturation, noise reduction and other image parameters in post processing. Add the camera app’s full manual control into the mix, plus the potential of a camera-grip add-on module in the nearer future, and the Moto Z Force is one of the year’s most interesting mobile photography products thus far.

Articles: Digital Photography Review (dpreview.com)

 
Comments Off on First impressions review: Lenovo Moto Z Force shows promise

Posted in Uncategorized


Fujifilm X70 User Review: Sweet for Street

25 Jul

Fujifilm x70 is the newest little beast in Fujifilm lineup of premium compact cameras. This camera is targeted towards enthusiast and professional photographers (thanks to retro styling and large APS-C sensor) who want to travel light and want image quality at the same time. Fuji x70 is a trade-off between the legendary Fujifilm x100T and more travel oriented point and Continue Reading

The post Fujifilm X70 User Review: Sweet for Street appeared first on Photodoto.


Photodoto

 
Comments Off on Fujifilm X70 User Review: Sweet for Street

Posted in Photography