RSS
 

Posts Tagged ‘REVIEW’

Updating a classic: Canon 16-35mm F2.8 III lens review

20 Dec

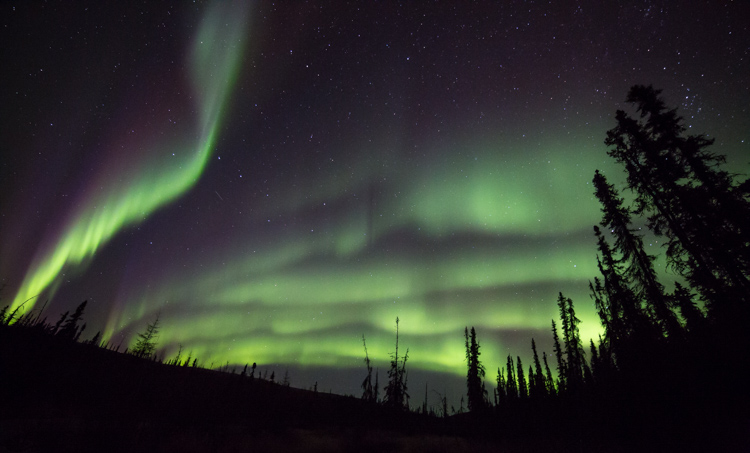
The Canon 16-35mm F2.8L II has been one of the most coveted lenses amongst landscape photographers for a fairly long time. The infamous sunstar was one of the major selling points of the lens and it was one of the major characteristics that really separated the Canon lens from the rest of the field.

When we first heard that Canon was going to release an updated version of the lens we were pretty darn excited. The Mark II was a fantastic piece of glass, but struggled in terms of corner sharpness and control of chromatic aberration along the edges and in the corners of the frame. The upgraded version of the Canon lens promised to correct a number of those issues while still holding onto some of the characteristics of the previous version that made it so appealing to landscape shooters around the world.

With that said, the real question is; how does the updated Canon lens compare to its predecessor? The previous iteration of this lens had a number of issues that we will discuss in this review while we compare and contrast the two versions. The fundamental questions that we will be addressing in this review is; if the upgrade warrants the price increase and if the performance from the new design is convincing enough to justify the upgrade.

APS-C

With an equivalent focal length of 25.6-56mm and an equivalent aperture of F4.5 there are better wide-angle APS-C options on the market such as the Tokina 11-16mm F2.8 AT-X116 Pro DX II Lens or the Sigma 18-35mm F1.8 Art DC HSM that can really take advantage of a fast aperture for a fraction of the price. For this reason we’re not going to consider this lens for use on the APS-C platform in this review.

Canon 16-35mm F2.8L III USM Headline Features

  • Fully weather-sealed construction
  • F2.8 maximum aperture
  • 16-35mm focal range
  • Sub-wavelength Coatings (SWC) and Air Sphere Coatings (ASC) to eliminate lens flare and ghosting
  • Two large-diameter double-surface GMo lenses plus a ground aspherical lens to help decrease distortion, curvature of field and astigmatism
  • Two UD lenses help to reduce chromatic aberration

Specifications Compared

  Canon 16-35mm F2.8L II USM Canon 16-35mm F.28L III USM
MSRP $ 1599.00 $ 2199.00
Lens Type Wide-Angle Zoom Wide-Angle Zoom
Focal Length  16-35mm 16-35mm

Filter Thread 

82.0mm 82.0mm
Image Stabilization  No No
Lens Mount Canon EF Canon EF
Aperture Ring No No
Maximum Aperture  F2.8 F2.8
Minimum Aperture F22 F22
Minimum Focus  0.28m (11.02″) 0.28m (11.02?)
Diaphragm Blades 7 (rounded)  9 (rounded)
Elements  16 16
Groups  12 11
Special Elements/Coatings 2-Ultra-low dispersion glass lenses, 3 high-precision aspherical lens elements; ground, replica and GMo, Super Spectra lens coatings 2 large-diameter double-surface GMo lenses and a ground aspherical lens, Sub-wavelength Coatings (SWC) and Air Sphere Coatings (ASC)
Autofocus  Yes Yes
Motor Type Ring-type Ultrasonic Ring-type Ultrasonic
Full Time Manual  Yes Yes
Focus Method Internal Internal
Distance Scale  Yes Yes 
DoF Scale No No
Full Weather Sealing Yes Yes
Zoom method  Rotary (internal) Rotary (internal)
Weight  635 g (1.4 lb) 790 g (1.74 lb)
Dimensions

111.6mm (4.39″) x 88.5mm (3.48″)

128 mm (5.02?) x 89 mm (3.48?)
Hood Included (EW-88D) Included (EW-88D)

Articles: Digital Photography Review (dpreview.com)

 
Comments Off on Updating a classic: Canon 16-35mm F2.8 III lens review

Posted in Uncategorized


Action-packed: Sony a6500 review

15 Dec

The Sony a6500 is the company’s top-tier APS-C mirrorless model, a 24MP stills and video camera with image stabilization. It sits above the similar-looking a6300 in Sony’s lineup, adding touchscreen capability and stabilization for enthusiasts willing to dig a little deeper into their pockets.

Key Features:

  • 24MP APS-C CMOS sensor with 425 phase detection points
  • 2.36m dot OLED EVF
  • Tilting rear touchscreen
  • 5-axis in-body image stabilization
  • 11 fps continuous shooting for up to 300 JPEGs / 100 Raws
  • 1/4000th sec maximum shutter speed

As should be apparent, many of its core specifications are shared with the a6300 – itself a DPReview Gold winning camera. The biggest differences are the touchscreen, the image stabilization and a ‘Front End LSI’ (processing chip) to allow faster and more complex processing. There are also a few small tweaks, such as the addition of a highlight spot metering mode.

The touch sensitivity of the rear screen can be used for your choice of two things: as an touchscreen for positioning the focus point or triggering focus and shutter, or as a touchpad, when the camera is held to your eye.

The added processing oomph promises a more responsive camera: one that allows immediate image review even when shooting bursts of images. The a6500 also gains a much-needed update to Sony’s menu system, adding color-coding to make it easier to recognize and remember different parts of the menu.

This change to the menu, and the addition of a quick way of setting AF point immediately address two of our biggest frustrations with the a6300. However, Sony is making no claims about improvements in terms either of rolling shutter or of recording longevity. With the most recent firmware, the a6300 can often record 4K video for the full 29:59 duration that the camera allows but this is not always possible in warm conditions or if you’ve just shot a long clip. Sony only claims ‘about 20 minutes’ of 4K recording for both cameras.

The a6500 uses the same form factor as both the mid-range a6300 and the entry-level a6000

Despite being positioned significantly further up the market, the a6500 uses the same form factor (and dial arrangement) as both the mid-range a6300 and the entry-level a6000. Although all three cameras have two control dials, they are arranged so that both must be controlled using the thumb and, for many people, requiring the hand to be repositioned when switching from one to the other. Such a limitation is reasonable at the a6000 end of the market but seems an odd fit for a $ 1400 camera.

The other similarity with the 6300 that seems even more odd at this level is Sony’s decision to only offer lossy compressed Raw, limiting their processing latitude.

This table compares how the a6500 compares with Fujifilm’s fairly similarly-priced X-T2 (probably the most capable rival in terms of stills and video shooting).

   Sony a6500 Fujifilm X-T2 Sony a6300
MSRP (Body only) $ 1400 $ 1600 $ 1000
Pixel Count 24MP 24MP 24MP
ISO Range 100-25600 (51200 with multi-shot NR) 200-51200 100-25600 (51200 with multi-shot NR)
AF Point control Touchscreen/touchpad Joystick 4-way controller
Card slots 1 x UHS I 2 x UHS II 1 x UHS I
USB USB 2.0 USB 3.0 USB 2.0
Continuous Shooting rate 11fps 14fps (e-shutter)
8fps (mechanical)
11fps
Rear screen Tilting up/down touchscreen Dual tilt: Up/down/right Tilting up/down
Flash Built-in Clip-on (supplied) Built-in
Image stabilization In-body (+In-lens where available) In-lens In-lens
4K video capability UHD 4K at 24/25/30p UHD 4K at 24/25/30p UHD 4K at 24/25/30p
4K video crop

24/25p Full Width
30p 1.23x crop

1.17x crop 24/25p Full Width
30p 1.23x crop
4K video duration Up to 20 minutes (temperature dependent) ~10 minutes
(Up to 29:59 with optional grip)
Up to 29:59 (temperature dependent)
Video log profile S-Log2 & S-Log3 with extensive video-focused Picture Profile settings F-Log (over HDMI only)  S-Log2 & S-Log3 with extensive video-focused Picture Profile settings
USB Charging (USB Power?) Yes/Yes Yes/No Yes/Yes
Battery life – CIPA (Rear screen/EVF) 350/310 340 400/350

Articles: Digital Photography Review (dpreview.com)

 
Comments Off on Action-packed: Sony a6500 review

Posted in Uncategorized


Product Review: Polaroid Carbon-Fiber Travel Tripod and Varipod

02 Dec

First a little background: I’m a wilderness photographer. I spend time, a lot of time, every year on multi-day river, backpacking, and winter trips in Alaska. This past summer, between June and mid-September, I spent more than 60 days in the backcountry. On every one of these trips, to one degree or another, weight was an issue, and I’m always on the lookout for good, light equipment that might suit my travels. With that in mind, on to the review of two new support products from Polaroid, the Polaroid Pro Series Carbon Fiber Travel Tripod, and the Varipod.

ak-homer-109256-sunset-48

Image made using the Polaroid Pro Series Carbon Fiber Travel Tripod (ISO100, 1/5th sec @ f22)

Polaroid Pro Series 55″ Carbon Fiber Travel Tripod With Removable Ball head

polaroid-tripod-review

I was excited to open up the box containing Polaroid’s new carbon travel tripod. Upon first inspection, I was impressed. There are five leg segments, each about eight inches in length making the tripod very compact. Additionally, it is designed so the legs fold back over the center post and included ball head, making the fully collapsed tripod very small indeed.

Build

The leg segments are of the twist-lock variety, ergonomic, and very effectively hold the sections in or out with a simple, quick twist. The numerous legs section means that the lowest sections are thin, giving the impression of flimsiness. However, after several days of use, they did not strike me as fragile.

img_3264

The legs of the tripod, even when fully extended are not very long. Polaroid has made up for this shortcoming by having a fixed center post that extends up another foot or so from the top of the tripod, adding substantially to the height. The post itself is expandable, allowing the very compact tripod to stretch almost to my eye level (I’m six foot). Though using this extendable system reduces stability.

polaroid-tripod-review-01

The included ball head is the highlight of this tripod. Made of machined aluminum, it’s designed much like the large Kirk Industries head on my full-size tripod. Polaroid’s version uses three knobs, one to lock the quick release (similar to Arca-style plates), one to control the rotation, and one to lock and unlock the ball itself. One side cut allows for vertical compositions. Simply, it’s a great little ball head that held my big Canon SLR easily. In fact, it was so good, I wish I could purchase it separately to replace the flimsy head atop my current compact tripod. As the head is the point where many light and entry-level tripods fall short, I was impressed and surprised by this one.
img_3248

Usability of the tripod

I put this tripod to use a number of times over a couple of weeks, including a couple of sunset photo shoots on a beach, and two evenings photographing the aurora borealis. In bright conditions and relatively fast shutter speeds, the tripod worked well. The height adjusts easily and quickly, though the center post system does limit how low the camera can go. (At its lowest, the camera is still 12-15 inches off the ground, see photo below.)

img_3255

During my sunset photo shoots, the system worked fine at a variety of heights, and I was able to use shutter speeds down to about 1/5th of a second, and still maintain sharp images (see top image in this article).

pltric-90-final

Image showing the design of the non-retractable center post on the Polaroid Carbon Travel Tripod.

It was when I tried to shoot the northern lights that the tripod showed its one flaw – instability with a heavy camera. The non-retractable, non-removable center post, make the tripod a bit jiggly when used with a full-size DSLR. A point and shoot, or mirrorless system would not likely have the same trouble. However, even with the heavy camera, I was able to attain sharp images when I used a remote shutter release and the mirror lock-up function of the camera.

To maintain sharpness, I was forced to use the camera's timer and mirror lock-up functions.

To maintain sharpness at extended shutter speeds, I used the camera’s timer and mirror lock-up functions.

Conclusion

If it weren’t for that wobbly center post, I would give this small, light tripod, with an awesome ball-head, a glowing review. I’d like to see Polaroid include a system to retract the center post to add stability when I drag the shutter. If the next version of this tripod includes such a feature, I’ll strongly consider adding it to my quiver. In the mean time, I can easily recommend this tripod to anyone shooting with a light-weight camera system. If you are working with a point and shoot, or mirrorless, the simplicity, flexibility, and the particularly impressive ball head make the Polaroid Pro Series Carbon Fiber Travel Tripod a contender.

Rating 3.5 out of 5 stars.

Polaroid 65″ VariPod

2-in-1 Telescoping Camera Monopod with Removable Tripod Balance Stand Base

varipod-polaroid

Out of the box, Polaroid’s rendition of this classic long-lens tool, the monopod, looked more or less like a standard version of the product, with one exception. The foot of the monopod incorporates a removable, articulated, three-legged base. At first, I didn’t understand the purpose of this feature, but later, as I used the Varipod outdoors, I figured it out (more on that in a moment). The expandable leg, like the tripod reviewed above, uses a twist-lock system that holds the aluminum tubes firmly extended. I had no issues with segments collapsing, even with a heavy lens and SLR.

In the field, the monopod worked well. The removable foot is articulated so it doesn’t interfere when you tip the monopod forward or back. Though at first confused by this seemingly unnecessary add-on, as I shot with a 500mm f/4 on a sandy beach, the usefulness of the stand was obvious; the monopod foot didn’t sink into the muck. This could be useful to anyone shooting in soft terrain, whether the sidelines of a sports field or a muddy wetland.plmonstand-66-final

The foot system did seem overly complex. It is made of aluminum with various hinges and springs. Though effective at providing support in soft terrain, it also got dirty and was very difficult to clean. The foot had to be blown out, rinsed, and shaken before I eventually managed to remove all the grains of sand.

The support provided by the monopod allowed me to achieve sharp images with my 500mm f/4 at shutter speeds as low as 1/30th, opening up creative composition possibilities with moving subjects. The monopod is also far lighter and maneuverable, though of course less stable, than a full-size tripod.

Conclusion

The Polaroid Varipod works. The articulated foot provides support in soft terrain, and the legs are sturdy and easy to adjust. My main complaint is the complexity of the foot and difficulty in cleaning. I’d like to see this made simpler, with fewer parts that can jam with sand and dirt. Otherwise, it’s a solid contribution to the market.

Rating 4.5 out of 5 stars.

googletag.cmd.push(function() {
tablet_slots.push( googletag.defineSlot( “/1005424/_dPSv4_tab-all-article-bottom_(300×250)”, [300, 250], “pb-ad-78623” ).addService( googletag.pubads() ) ); } );

googletag.cmd.push(function() {
mobile_slots.push( googletag.defineSlot( “/1005424/_dPSv4_mob-all-article-bottom_(300×250)”, [300, 250], “pb-ad-78158” ).addService( googletag.pubads() ) ); } );

The post Product Review: Polaroid Carbon-Fiber Travel Tripod and Varipod by David Shaw appeared first on Digital Photography School.


Digital Photography School

 
Comments Off on Product Review: Polaroid Carbon-Fiber Travel Tripod and Varipod

Posted in Photography


The whole nine yards: Canon 35mm F1.4L II USM review

01 Dec

Canon is on a roll with its updated Mark II lenses and scoring bullseyes with pretty much every shot. New versions of key focal lengths are being rolled out across the range, with fully revised optics and mechanical construction. Most are class leading, often setting new standards in one area or another, and the Canon EF 35mm F1.4L USM MkII is no exception – it is sharp, very, very sharp!

The MkII model launched last year replaces the elderly MkI of 1998. That lens was originally designed for film SLRs, but it won many digital hearts, including some on the DPReview team and several articles have already been published, looking back at the old lens and forward to the MkII with sample galleries, user reports and comparisons.

One thing missing from those articles though, is the close scrutiny of DxO Mark’s lab tests, with full analysis of MTF (Modulation Transfer Function) sharpness performance, and other important aspects of image quality that can only be properly assessed under controlled conditions. So now we’re putting that right, and the resolution of this lens on a 51 megapixel Canon 5DS R is something to behold. The new Canon 35mm F1.4 MkII shares headline specifications with the MkI, and most key features are the same or similar. It’s all-change under the skin though, with more of everything in the quest for quality, including a significant increase in size, weight and cost.

Key specifications

  • New optical design with 14 elements in 11 groups (MkI version has 11 in 9)
  • One UD glass element added, and two aspherical surfaces (MkI has one aspherical)
  • New BR Optics layer reduces CA
  • Nine rounded aperture blades (MkI has eight)
  • Weight goes up 31% and length 23% (compared to MkI)
  • Military-grade weather resistant build (MkI is not weather resistant)
  • Manufacturer’s Suggested Retail Price $ 1799USD (MkI $ 1479)

Canon has paid close attention to the optical redesign and the mechanical construction, and both raise the bar. No stone has been left unturned, and just about the only thing that stays the same as the MkI is the 72mm filter size, and the minimum focusing distance is also very similar at 28cm (11in).

There is no image stabilization, with that option already very effectively covered by the Canon 35mm F2 IS USM. Purists will welcome the decision to concentrate on sheer optical quality, and it helps to keep complexity and the burgeoning weight in check.

Angle of view

35mm focal length delivers a 63° field of view on full frame cameras, measured conventionally across the diagonal, from corner to corner. Image corrected for lateral CA, distortion and vignetting in Lightroom, at default sharpening. Canon 5DS R (51mp), 1/2500 sec, F4, ISO 100, mirror lock-up.
On APS-C format, the 35mm focal length’s field of view is narrowed to 42° (56mm equivalent). This is a digital simulation, cropped 1.6x (20mp) from the full frame image above. Shire Hall, Cambridge, UK.

Articles: Digital Photography Review (dpreview.com)

 
Comments Off on The whole nine yards: Canon 35mm F1.4L II USM review

Posted in Uncategorized


Review and Field Tests of the new Canon 5D Mark IV – Is it Worth Upgrading?

28 Nov

Canon recently announced the new incarnation of its 5D lineup, the Canon 5D Mark IV. I myself have owned the 5D Classic (Mark I), and I currently own the Mark III. Personally, I don’t have any plans to upgrade as I went another way instead, choosing to shift to the Fuji X-series as they are smaller and lighter for traveling. However, I am eyeing the new X-T2!

For those of you considering an upgrade on your Canon camera body, here are some reviews and field tests I found for the 5D Mark IV. Whether you’re going from an APS-C camera up to full frame, or just looking to upgrade from an older 5D model, do your own testing and decide if it’s the right move for you.

The Camera Store Guys

This store is in Calgary, AB, Canada – a mere four hours drive from my city. Not the place you’d expect world class camera reviews to come from – but these guys really do some great tests, in real-world situations and they produce some great videos that are totally impartial. If they find a flaw or sticky bit, they will tell you about it. I like that.

Let’s see what they had to say about the Canon 5D Mark IV:

Hmmm, interesting! Watch to the end where Chris sums up his thoughts on the 5D Mark IV they may surprise you. He’s very honest about it.

PhotoRec TV – Comparison of three cameras

The Canon 5D Mark IV, 5D Mark III and the Sony A7RII

Toby from PhotoRec TV has some notes for you comparing three different cameras including the 5D Mark IV’s predecessor, and the Sony A7RII full frame camera. He talks about what’s new and improved from the Mark III and how it compares to the Sony.

Dphog discusses the new dual-pixel RAW capability

This is a new introduction by Canon, dual-pixel RAW format. What does that mean? Quoted from Canon’s UK site:

Using the Dual Pixel RAW Optimizer in Digital Photo Professional software, users can make use of the Dual Pixel data recorded with the Dual Pixel RAW image for micro-adjustments of the position of maximum sharpness using the depth information contained within the file.

Is it worth it? Would you use this feature?

Pye from SLR Lounge shot a wedding with the Mark IV

Pye has done quite a few articles for us here on dPS, so you may be familiar with him. He took this camera to a wedding shoot and put it to work. He pushed the limits on it in many areas and tested ISO, dynamic range, the new dual-pixel RAW and some of the great new focus features.

Conclusion

So are you considering buying the Canon 5D Mark IV? If so you can price them out here:

  • On Amazon.com
  • On B&H Photo’s site

I would be remiss if I didn’t mention there have been some reported issues with the 5D Mark IV. So do some research and due diligence if you are thinking about buying this camera.

Have you tried one of these cameras out yet? Give us your thoughts in the comments below.

googletag.cmd.push(function() {
tablet_slots.push( googletag.defineSlot( “/1005424/_dPSv4_tab-all-article-bottom_(300×250)”, [300, 250], “pb-ad-78623” ).addService( googletag.pubads() ) ); } );

googletag.cmd.push(function() {
mobile_slots.push( googletag.defineSlot( “/1005424/_dPSv4_mob-all-article-bottom_(300×250)”, [300, 250], “pb-ad-78158” ).addService( googletag.pubads() ) ); } );

The post Review and Field Tests of the new Canon 5D Mark IV – Is it Worth Upgrading? by Darlene Hildebrandt appeared first on Digital Photography School.


Digital Photography School

 
Comments Off on Review and Field Tests of the new Canon 5D Mark IV – Is it Worth Upgrading?

Posted in Photography


Sony Xperia XZ camera review

25 Nov

$ (document).ready(function() { SampleGalleryV2({“containerId”:”embeddedSampleGallery_3336540306″,”galleryId”:”3336540306″,”isEmbeddedWidget”:true,”standalone”:false,”selectedImageIndex”:0,”startInCommentsView”:false,”isMobile”:false}) });

The Xperia XZ is the top-of-the-line model in Sony’s Xperia X series and comes with some of the latest technologies implemented in its camera module. A Sony IMX300 1/2.3” 23MP image sensor with on-sensor phase detection is accompanied by a laser that measures distance to its subject to improve AF speed and accuracy in low light. Also on board is an RGBC-IR sensor that measures the color values of a scene in order to fine-tune the white balance system. The hybrid AF-system is also predictive and can track subjects in motion.

The Sony G lens comes with a 24mm equivalent focal length and an F2.0 aperture. In video mode, the camera can record footage in 4K resolution and the Xperia XZ is also the first device on which Sony has implemented 5-axis electronic video stabilization. At the front there is a 13MP 1/3″ sensor with F2.0 aperture and 1080p video – specifications that would have been worthy of a main camera not too long ago.

Processor and other components match the high-end characteristics of the camera and all the technology is wrapped up in an 8.1mm thin metal body that is water and dust tight (IP65/68). The Sony is also one of only a few smartphones to come with a dedicated camera button, making it an interesting option for any photography-oriented user.

Key Photographic / Video Specifications

  • Sony IMX300 1/2.3” 23MP BSI CMOS sensor
  • 24mm equivalent focal length
  • F2.0 aperture
  • AF with on-sensor phase detection and laser-assistance
  • Subject tracking
  • RGBC-IR sensor
  • Manual control over shooting parameters
  • 4K video at 30 fps
  • 5-axis electronic video stabilization
  • 13MP front camera, F2.0, 22mm equivalent focal length

Other Specifications

  • 5.2-inch 1080p IPS screen 
  • Qualcomm Snapdragon 820 chipset
  • 3GB RAM
  • 32/64GB storage
  • MicroSD support
  • 2,900mAh battery
  • Environmental protection  (IP65/68)
  • Fingerprint reader

DPReview smartphone reviews are written with the needs of photographers in mind. We focus on camera features, performance, and image quality.

Articles: Digital Photography Review (dpreview.com)

 
Comments Off on Sony Xperia XZ camera review

Posted in Uncategorized


Ultimate OM-D: Olympus E-M1 Mark II Review

23 Nov

Olympus’ OM-D EM-1 has been one of our favorite mirrorless cameras since its introduction in 2013. It impressed us with its build quality, image quality, ridiculous amount of manual control (that’s a compliment) and boatload of features. Three years later, it’s still very competitive.

To say that Olympus has topped itself with the E-M1 Mark II is an understatement. The company told us that this camera was overdeveloped, and it shows. Its blazing dual quad-core processors allow for 60 fps burst shooting (18 fps w/continuous autofocus) and ridiculously fast image playback. Combine that with one of the most advanced autofocus systems we’ve seen and 5-axis in-body image stabilization – along with what made the original so impressive – and the Mark II is a force to be reckoned with.

One thing about the Mark II that makes us pause is its price. Its MSRP of $ 2000 is higher than that of Nikon’s D500 and full-frame D750 (both are $ 1800), and the Mark II’s Four Thirds is small in comparison to the D500 and other APS-C cameras and tiny versus full-framers. 

Key Specifications

  • 20MP Live MOS sensor
  • 5-axis in-body image stabilization system
  • 121-pt hybrid AF system
  • 60 fps burst shooting (18 fps with continuous AF)
  • Fully articulating 3″ LCD display
  • High-res electronic viewfinder
  • Cinema (DCI) and UHD 4K video
  • 50MP High-Res Shot mode
  • Weather-sealed body
  • USB 3 (Type-C)

Compared to Olympus E-M1 and Nikon D500

We are including the D500 here since it’s target audience is in the same vein: those who want high-speed shooting and an advanced AF system. As mentioned above, they both have a similar MSRP.

  Olympus E-M1 II Olympus E-M1 Nikon D500
Sensor 20MP Four Thirds 16MP Four Thirds 21MP APS-C
ISO range (expanded) 64-25,600 100-25,600 50-1,640,000
Image stabilization In-body (up to 5.5 stops*) In-body (up to 4 stops) Lens only
Autofocus system 121-point hybrid 81-point hybrid 153-pt phase-detect
Burst mode (electronic) 60 fps (AF-S)
18 fps (AF-C)
11 fps (AF-S) N/A
Burst mode (mechanical) 15 fps (AF-S)
10 fps (AF-C)
10 fps (AF-S, no IS)
6.5 fps (AF-C, no IS)
10 fps
LCD 3″ fully articulating touchscreen 3″ tilting touchscreen 3.2″ tilting touchscreen
Viewfinder 2.36M-dot EVF (0.74x equiv. mag) Optical
(0.67x equiv. mag)
Flash GN 9.1 external GN 7 external None
Video capture DCI/UHD 4K (237Mbps) 1080/30p (24Mbps) UHD 4K (144Mbps)
Video output 4:2:2 over HDMI N/A 4:2:2 over HDMI
I/O ports Headphone, mic, remote, flash sync, USB 3, HDMI Mic, remote, USB, HDMI Headphone, mic, remote, flash sync, USB 3, HDMI
Storage Dual SD (UHS-II/UHS-I) SD (UHS-I) SD + XQD
Wireless Yes Yes Yes, with Bluetooth and NFC
Weather-sealed Yes Yes Yes
Battery life (CIPA) 440 shots 350 shots 1,240 shots
Dimensions 134 x 91 x 69mm 130 x 94 x 63mm 147 x 115 x 81mm
Weight (CIPA) 574g 497g 760g

* 6.5 stops with Olympus 12-100mm lens

Accessories

$ (document).ready(function() { SampleGalleryV2({“containerId”:”embeddedSampleGallery_5394800926″,”galleryId”:”5394800926″,”isEmbeddedWidget”:true,”standalone”:false,”selectedImageIndex”:0,”startInCommentsView”:false,”isMobile”:false}) });

At the time of its launch Olympus also debuted a number of accessories to go along with the E-M1 Mark II. The one most people will likely purchase is the HLD-9 battery grip ($ 249), which doubles battery life and offers two control dials and two custom buttons. It also features a DC-in jack, so the battery can be charged right inside the grip via an outrageously priced AC adapter.

Also available is the powerful FL-900R external flash ($ 299), which has a guide number of 58m, built-in video lamp, wireless control and the ability to fire at 10 fps. The STF-8 Macro Flash Set ($ 479) has fully adjustable (and removable) left and right flashes, manual control down to 1/128 power and support for focus stacking. Both of these flashes are weather-sealed.

For those who want to take the camera underwater there’s the PT-EP14 housing ($ 1299). It works down to 65m/196ft and numerous brackets, weights and arms are available. Naturally, you’ll need a housing for whatever lens you attach.

Articles: Digital Photography Review (dpreview.com)

 
Comments Off on Ultimate OM-D: Olympus E-M1 Mark II Review

Posted in Uncategorized


Review and Field Test of the New SpiderLight Holster

23 Nov

Since 2010, Spider Holster has produce camera carrying systems which are intended to create a more innovative method for carrying your camera with you while working. Their carry systems are designed to offer a convenient and comfortable way to access your camera quickly while still managing to store it securely within easy reach when not in use.

SpiderLight Holster Close Up

Recently, Spider Holsters has launched a brand new Kickstarter campaign for the latest addition to their line of quick-draw type camera carry systems; the SpiderLight Holster. The SpiderLight is intended specifically for those shooters who carry a mirrorless or smaller SLR camera setup. Being a recent convert to a mirrorless camera system myself, I was excited to try out this newest offering from Spider and see if I would truly “Ditch the strap” in favor of this inventive way of carrying my camera while in the field.

First Impressions of the SpiderLight Holster

My cameras are more like extensions of myself than just pieces of metal and plastic. I love my cameras. So naturally I was, shall we say, somewhat hesitant to place their welfare in the hands of a new type of carry system instead of my heavy-duty leather camera strap. All those fears were genuinely soothed as soon as I handled the SpiderLight Holster for the first time. The product is solid, beefy, and extremely substantial. More so than I expected it to be based on the product photos from Spider Holster’s website.

SpiderLight Holster_Plate_2.jpg


The construction of the SpiderLight is all stainless steel and aluminum, subdued in a professional-looking matte finish. The holster itself is constructed of aluminum with a stainless steel insert to prevent wear with the belt clip on the back, being made from spring steel. The camera plate is crafted from heavy aluminum as well, while the Spider pin (the part that slides into the holster) is CNC machined stainless steel.

SpiderLight Holster Plate

SpiderLight Holster Release

All the screws were tight and the entire mechanism moved smoothly with no burrs or imperfections appearing to be found. Even the markings on the product are etched into the metal instead of being painted onto the surface. The belt clip itself is substantial and provides a heartily robust grip to a wide range of belt widths.

Real World Use

The majority of my work focuses on wilderness and adventure photography with a little bit of everything else thrown into the mix. I spend lots of time in the outdoors chasing light so I was extremely curious to see how well the SpiderLight would perform during hiking and fast movements. I tested the mechanism using my main camera body, the Sony A7r Mk1 fitted with Zeiss Vario-Tessar 24-70mm F4.

SpiderLight Holster 3

Functionally, the SpiderLight is deceptively simple. There is a steel peg that slides into a groove on the holster in such a way that the camera hangs inverted from the holster. However, looking more closely reveals evidence of some fairly impressive engineering at work.

A well placed two-stage locking switch secures the camera in one of two ways depending on your needs. This switch is invaluable. It locks the camera in place until the user disengages it with a subtle flick. More importantly, it can be completely disengaged to facilitate quick retrieval of your camera.

SpiderLight Holster 4

SpiderLight Holster 5

I was extremely surprised at just how versatile the SpiderLight could be in practice. I walked, jogged, bent down, and did all the epic things photographers do without any real encumbrance caused by the device. The only adversity I encountered was to remember the camera was by my hip when passing through doorways. After a little practice, I completely forgot that I carried the camera at my side. It worked, for lack of a better word, beautifully.

SpiderLight Holster 2

SpiderLight Holster 1

Using a tripod with the SpiderLight Holster

The SpiderLight still allows for the attachment of your own tripod’s quick-release plate, so it does not interfere with your normal workflow if you find yourself shooting with a tripod. It’s not guaranteed that the holster will work with your specific tripod, though. Notice I have to mount mine backward. Still, the function was not hindered in any way by the Spider.

SpiderLight Holster Tripod 1

SpiderLight Holster Tripod 2

One caveat

The only possible reservation I have with the SpiderLight is that even with a lightweight camera kit (Sony A7r and 24-70mm Zeiss) the one-sided weight distribution sometimes sags the pants. I wouldn’t consider wearing the system without a sturdy belt. This wasn’t something that deterred me from using the holster but it is definitely a point of consideration. If you carry a heavier camera I would highly recommend the Spider Holster Pro.

Final Thoughts

The SpiderLight Holster works great for use with a lightweight kit such as mirrorless cameras and smaller DSLRs. From the perspective of a first time user, the SpiderLight performed admirably, in spite of my reservations. The overall build is sturdy enough for heavy-duty use and the complete concept works well. If you are considering the idea of trying the SpiderLight or any other of the products in Spider Holster line you won’t be disappointed.

That being said, give yourself enough time to get to know the holster. Some will love it, some not so much. One of the biggest obstacles I faced was learning to actually trust the holster to securely carry my camera. In my case, breaking 10 years of absolute camera strap reliance takes some time. Still, you never know until you try it and it very well could become your favorite method of carrying your camera.

googletag.cmd.push(function() {
tablet_slots.push( googletag.defineSlot( “/1005424/_dPSv4_tab-all-article-bottom_(300×250)”, [300, 250], “pb-ad-78623” ).addService( googletag.pubads() ) ); } );

googletag.cmd.push(function() {
mobile_slots.push( googletag.defineSlot( “/1005424/_dPSv4_mob-all-article-bottom_(300×250)”, [300, 250], “pb-ad-78158” ).addService( googletag.pubads() ) ); } );

The post Review and Field Test of the New SpiderLight Holster by Adam Welch appeared first on Digital Photography School.


Digital Photography School

 
Comments Off on Review and Field Test of the New SpiderLight Holster

Posted in Photography


Sigma 12-24mm F4 DG HSM Art Lens Review

23 Nov

The Sigma 12-24mm F4 DG HSM Art was first announced September 16th, 2016. This is Sigma’s widest zoom lens offering to date and joins Sigma’s growing list of Art lenses. The lens is priced at just under $ 1600, which makes it a fierce competitor to Canon’s EF 11-24mm F4L USM lens which is priced at just under $ 3,000.

The Sigma is available in Canon, Nikon F (FX) and Sigma SA Bayonet mounts and will most likely appeal to landscape and architecture photographers that are looking for an extremely wide field-of-view (12mm gives around a 122° diagonal field of view).

The looming question is: does the extreme difference in price effect the build quality and performance of the Sigma? In this review we will be looking at the Sigma’s performance and just how it stacks up against the Canon 11-24mm F4L.

APS-C

If you’re an APS-C shooter, the Sigma can be utilized on that platform with an equivalent focal length of 19-38mm and an equivalent aperture of F6.4. It’s worth noting however that Sigma already offers a considerably less expensive 10-20mm F3.5 which would be a 16-32mm F5.6 equivalent, which would be a much better wide-angle option. For this reason we’re not going to consider this lens for use on APS-C in this review.

Sigma 12-24mm F4 DG HSM Art Headline Features

  • 12-24mm focal length
  • F4 maximum aperture
  • Ring-type Ultrasonic Focusing
  • Available in Canon EF, Nikon F (FX) and Sigma mounts

Specifications Compared

  Sigma 12-24mm F4 DG HSM Art Canon EF 11-24mm F4L USM
Price (MSRP) $ 1,599.00 $ 2,999.00
Lens Type Wide-Angle Zoom Wide-Angle Zoom 
Focal Length 12-24mm 11-24mm
Filter Thread  None None (rear insert-type)
Image Stabilization No No
Lens Mount Canon, Nikon F (FX), Sigma SA Bayonet Canon EF
Aperture Ring No No
Maximum Aperture F4  F4 
Minimum Aperture F22 F22
Minimum Focus 0.24 m (9.45?) 0.28m (11″)
Diaphragm Blades   9 (rounded) 9 (rounded)
Elements   16 16
Groups   11 11
Special Elements/Coatings Super Multi-Layer Coating, F-Low Dispersion and aspherical elements, including an 80mm large-diameter molded glass aspherical element

Super UD, UD, and 4 Aspherical Elements, SWC, Air Sphere, and Fluorine Coatings, Rear element fluorine coatings

Autofocus Yes Yes
Motor Type Ring-type Hypersonic Ultrasonic
Full Time Manual Yes Yes
Focus Method Internal Internal
Distance Scale  Yes Yes
DoF Scale No No
Weather Sealing  Dust and Splash Proof Construction with rear rubber gasket Full Weather Sealing
Zoom Method  Rotary (extending) Rotary (internal)
Weight 1151g (2.54 lb) 1180g (2.60 lb)
Dimensions 132mm (5.2″) x 102mm (4.0″) 132 mm (5.2?) x 108 mm (4.25?)
Hood Included Yes (built in) Yes (built in)

The Sigma and the Canon share a rather large number of the same features with respect to lens design. The main differences between the two lenses are highlighted in green. The Canon has a slight edge over the Sigma in terms of build quality with full weather sealing, where the Sigma offers a ‘moisture resistant’ rubber gasket on the lens mount and water-repellent coatings on the front and rear lens elements.

Both lenses are very heavy and are nearly identical in size and shape, and both feature built-in lens hoods. Neither lens accepts standard screw type filters, but the Canon has a slot to accept rear gel filters. The Sigma has that familiar Art build that feels very robust in hand but lacks the same ‘sealed’ feeling that the Canon lens provides due to its water resistant external construction.

The Canon has a slight advantage over the Sigma in terms of the zoom method as the Sigma has an external extending zoom whereas the Canon’s is internal. Being that the Sigma isn’t fully weather sealed this could be a weak point in the design in terms of moisture penetrating the lens during adverse or wet weather conditions. 

With these specifications in mind, we will now be looking at how well the Sigma performs to determine how it fairs in our head-to-head comparison with the Canon 11-24mm F4L. 

Articles: Digital Photography Review (dpreview.com)

 
Comments Off on Sigma 12-24mm F4 DG HSM Art Lens Review

Posted in Uncategorized


Panasonic Lumix DMC-LX10/LX15 Review

22 Nov

The Panasonic Lumix DMC-LX10 (LX15 in some markets) is a 20MP large-sensor compact with a bright (F1.4-2.8), 24-72mm equivalent zoom lens. Which is to say, it’s a very capable pocket camera. And, being a Panasonic, it has video specs and clever video-based features to back up its stills capabilities.

Panasonic’s LX cameras have always had the enthusiast in mind, built around larger-than-average sensors with short but bright lenses and as many direct controls as can sensibly be fitted onto a pocketable camera body. They helped reinvigorate the enthusiast compact sector and prompted a series of imitators before the much larger sensor of Sony’s RX100 rendered them irrelevant.

Key specifications

  • 20MP 1″-type CMOS sensor
  • 24-72mm equivalent F1.4-2.8 zoom
  • 7 fps continuous shooting with autofocus
  • 4K video at up to 30p
  • 5-axis, digital and optical stabilization in 1080 video
  • 4K Photo mode
  • Post Focus and Focus Stacking modes

The LX10 is Panasonic’s first direct response to the big-sensored Sonys. The company has already built an excellent series of compacts that address every other niche you can think of: the long zoom stills/video FZ1000 and FZ2500, a large sensor ZS100 version of their well respected travel zoom series, and a larger sensor photographer’s camera, the LX100. But the LX10 is a head-to-head competitor for Sony’s pocket wonders.

The approach is a little different: unlike the RX100 III and IV, the LX10 doesn’t have a viewfinder. Instead, it offers a touchscreen interface and a screen that can be tilted upwards. In many respects, the LX10 is a logical post-1″ successor to the last of the smaller sensor models: the LX7.

The camera also offers Panasonic’s 4K Photo mode, which offers a series of ways of specifying when the camera should capture a video clip from which stills can then be extracted. It also has Panasonic’s Post Focus mode that captures a video clip of the camera racking focus, so you can choose to grab the frame with optimal focus, after the fact.

Compared with its peers

The LX10 means there are now three brands building small cameras with 1″-type sensors and short, bright zooms (and Nikon promising a comparable ‘DL’ model at some point). We’ve also included the LX10’s big brother, the LX100 in this comparison, just to show what you get if you have room to carry its additional size.

  Panasonic
LX10
Sony
DSC-RX100 IV
Canon G7X
Mark II
Panasonic
LX100
MSRP $ 699 $ 999 $ 699 $ 899
Sensor area 116 mm2 116 mm2 116 mm2 180 mm2
Lens range (equiv) 24-72mm 24-70mm 24-100mm 24-75mm
Aperture range F1.4-2.8 F1.8-2.8 F1.8-2.8 F1.7-2.8
Control dials Aperture ring
Command dial
Lens ring (stepless)
Four-way/dial

Lens ring
(stepped/
stepless)
Exposure Comp
Four-way/dial

Aperture ring
Shutter dial
Exposure Comp
Lens ring (stepless)
Four-way/dial
Viewfinder No  2.36M-dot No 2.76M-dot
equiv.*
Rear screen Tilt up
Touchscreen
Tilt up/down Tilt up/down
Touchscreen
Fixed
Video capability 4K/30p
1080/120p**
4K/30p
1080/120p
1080/60p 4K/30p
1080/60p
Built-in ND Filter No Yes
(Auto for stills)
Yes
(Auto for stills)
No
Flash Built-in pop-up (bounceable) Built-in pop-up
(bounceable)
Built-in pop-up
(bounceable)
Clip-on hotshoe flash
Battery life (CIPA) 260 280
(230 with EVF)
265 300
(270 with EVF)
Dimensions
mm (in)
105 x 61 x 42
(4.1 x 2.4 x 1.7)
102 x 58 x 41
(4.0 x 2.3 x 1.6)
106 x 61 x 42
(4.2 x 2.4 x 1.7)
115 x 66 x 55
(4.5 x 2.6 x 2.2)

*The LX100 uses a field-sequential display that updates red, green and blue information in sequence and, as such, does not require three dots to make up each three-color ‘pixel.’
**1080/120p is a dedicated high speed video mode, with limited control.

Equivalent apertures

The chart below breaks down the equivalent aperture for each camera, as you work your way through the zoom range. Our article here explains the concept of equivalence, but at a high level all you need to know is that the lower the line is on the graph below, the blurrier the backgrounds you’ll be able to get and, typically, the better the overall low-light performance.

LensEquivalentApertures([“Equivalent focal length (mm)”,”Panasonic LX100″,”Sony RX100 IV”,”Canon G7 X II”,”Panasonic LX10″], [[24,3.7434,”Panasonic LX100 at 24mm: F3.7″,4.90909090909091,”Sony RX100 IV at 24mm: F4.9″,4.90909090909091,”Canon G7 X II at 24mm: F4.9″,3.8181818181818183,”Panasonic LX10 at 24mm: F3.8″],[25,3.9636,”Panasonic LX100 at 25mm: F4.0″,5.454545454545455,”Sony RX100 IV at 25mm: F5.5″,null,””,4.0909090909090917,”Panasonic LX10 at 25mm: F4.1″],[26,4.1838,”Panasonic LX100 at 26mm: F4.2″,6.0000000000000009,”Sony RX100 IV at 26mm: F6.0″,null,””,4.90909090909091,”Panasonic LX10 at 26mm: F4.9″],[27,4.404,”Panasonic LX100 at 27mm: F4.4″,null,””,null,””,5.454545454545455,”Panasonic LX10 at 27mm: F5.5″],[28,4.6242,”Panasonic LX100 at 28mm: F4.6″,6.8181818181818183,”Sony RX100 IV at 28mm: F6.8″,null,””,6.0000000000000009,”Panasonic LX10 at 28mm: F6.0″],[29,null,””,null,””,null,””,6.8181818181818183,”Panasonic LX10 at 29mm: F6.8″],[30,4.8444,”Panasonic LX100 at 30mm: F4.8″,null,””,null,””,null,””],[31,null,””,null,””,null,””,7.6363636363636367,”Panasonic LX10 at 31mm: F7.6″],[32,null,””,7.6363636363636367,”Sony RX100 IV at 32mm: F7.6″,6.0000000000000009,”Canon G7 X II at 32mm: F6.0″,null,””],[34,5.0645999999999995,”Panasonic LX100 at 34mm: F5.1″,null,””,null,””,null,””],[37,5.2848,”Panasonic LX100 at 37mm: F5.3″,null,””,null,””,null,””],[39,null,””,null,””,6.8181818181818183,”Canon G7 X II at 39mm: F6.8″,null,””],[41,5.505,”Panasonic LX100 at 41mm: F5.5″,null,””,null,””,null,””],[44,5.7252,”Panasonic LX100 at 44mm: F5.7″,null,””,null,””,null,””],[52,6.1655999999999995,”Panasonic LX100 at 52mm: F6.2″,null,””,null,””,null,””],[54,null,””,null,””,7.6363636363636367,”Canon G7 X II at 54mm: F7.6″,null,””],[70,null,””,7.6363636363636367,”Sony RX100 IV at 70mm: F7.6″,null,””,null,””],[72,null,””,null,””,null,””,7.6363636363636367,”Panasonic LX10 at 72mm: F7.6″],[75,6.1655999999999995,”Panasonic LX100 at 75mm: F6.2″,null,””,null,””,null,””],[100,null,””,null,””,7.6363636363636367,”Canon G7 X II at 100mm: F7.6″,null,””]])

Just as the specs suggest, the LX10’s lens is broadly similar to that of the Sony RX100 III and IV. It’s 2/3EV brighter at first but by 30mm equivalent they’re both already down to F2.8 (F7.6 equiv). So although it should offer a similar performance to its big brother, the LX100, at wide angle, the bigger camera maintains an advantage across the rest of its zoom range.

Articles: Digital Photography Review (dpreview.com)

 
Comments Off on Panasonic Lumix DMC-LX10/LX15 Review

Posted in Uncategorized