RSS
 

Posts Tagged ‘Reasons’

3 Reasons to Disable Your Camera’s Auto-Review Function

19 Apr

Whether you have an iPhone, a pocket camera, or a DSLR it’s likely that the first thing you do after taking a picture is peek at the back LCD screen to see how it turned out. Did you capture that flawless sunset glow? Is that flower petal perfectly in focus? Was everyone in the group photo smiling?

The simple act of looking at the LCD screen seems so natural that we often don’t give it a second thought, and nearly every camera has this auto-review function turned on by default. Ironically, turning this off can have a can have a profound impact on your photography, and I’d like to share three reasons below you might want to disable it.

kids-walking

1. It makes you more confident

I have been shooting without the auto-preview on my camera for a long time, but when I first made the decision to disable it I was kind of a nervous wreck.

  • How will I know if my shot turned out?
  • What if I didn’t get the exposure right?
  • Don’t people expect me to check to see if I got the photo?

I asked myself all sorts of questions like that, while remaining determined to leave the auto-preview feature off, and much to my surprise these thoughts quickly faded. It’s a weird feeling to take a picture and not have it instantly show up on the back screen of your camera, and at first I found myself constantly clicking the Review button to check my photos anyway.

duck

Rather than checking my camera after each shot, I trusted my instincts and experience to get the photo right. This also made it possible for me to simply pay more attention to the duck and my surroundings.

I soon found myself looking at my shots less and less, and instead relying on my knowledge of composition, framing, and a proper reading of my camera’s light meter to get the picture right from the beginning. I learned to pay more attention to my exposure settings like aperture, shutter speed, and ISO and started to trust my instincts as a photographer instead of snapping a few pics, checking the back screen, snapping a few more, checking again, and…well, you know the pattern. If you have seen the first Star Wars movie you might remember the end when Luke Skywalker switches off his targeting computer and decides to trust his instincts (or The Force) instead of relying on technological gimmicks, which is a bit like disabling the auto-review feature on your camera.

Not having your pictures automatically appear after every shot might seem scary at first, but the less you rely on constantly checking to ensure you got things right, the more you will find yourself growing confident in your ability as a photographer. It’s similar to learning to ride a bike without training wheels, and the extra step of actually pressing the Review button requires just enough effort that you will probably stop doing that most of the time too. Fortunately if you do decide that you want to check your shots, they’re all just a button press away.

I knew I would not be back at this location for at least a year, but I shot this using f/8 and a low ISO and never looked at the photo until I got home 400 miles later. The photo turned out precisely how I wanted.

I knew I would not be back at this location for at least a year, but I shot this using f/8, 1/1500 second, ISO 280 and never looked at the photo until I got home 400 miles later. The picture turned out precisely how I wanted.

2. It helps you be more present in the moment

Have you ever had dinner with someone who was constantly checking his phone? Or been at a meeting where one person is clearly focused on texting her friend rather than talking to her coworkers? It’s obvious that these people were not engaged with what was going on around them, and their behaviour probably made you more than a little annoyed. Likewise, having the auto-preview enabled on your camera can turn you into the photographic equivalent of the chronic phone-checker; someone who is more interested in looking at his or her electronic gadget,s rather than being a part of the events around you.

girl-smiling

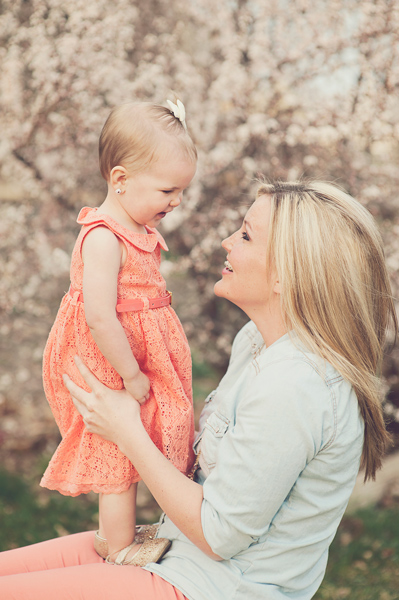
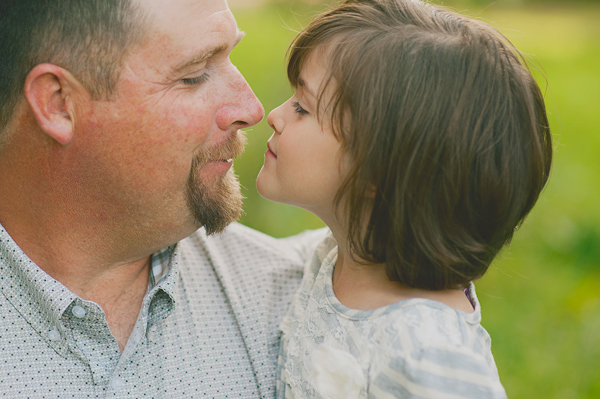
Because I was giving this girl my undivided attention instead of looking at the back of my camera, the two of us were able to just goof around and have fun, while also getting some good portraits.

Consider this scenario: Your kids are playing with their cousins at the park, and you’ve brought your trusty DSLR along to document the afternoon. But you’ve got the auto-preview turned on, so after every shot you find yourself looking down at the LCD screen on your camera instead of watching the kids play and have fun together. It might not seem like a big deal, but to the little ones around you this constant shoot-check-shoot-check routine sends the message that your camera is more important than their swinging, sliding, or slipping around on the sand.

Or maybe you’re out with your camera and tripod for an evening of landscape photography, but after each one you meticulously examine the rear LCD screen to see if you got it just right. Every second you spend poring over your pictures is a second you are not enjoying the sights and sounds of the scenery around you, and that time adds up.

kids-horses

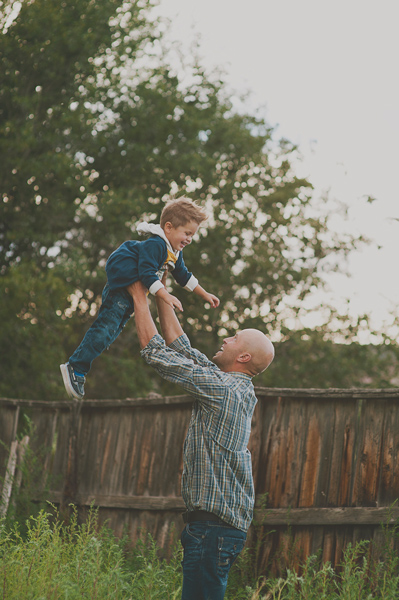
Watching these kids at a horse show was so much fun I did not want to spoil it by looking at my camera after every shot.

By disabling the auto-preview you will learn to not only trust your instincts and build confidence in your abilities, but simply be more present in the world around you. You will find yourself worrying less about whether you got the perfect photo of your kids playing or snapped the ideal landscape, and instead start enjoying the squeals and screams of the children or feeling like a part of nature rather than an observer of it. Remember, you can still use the review button to check your shots! You will just learn to use it more intentionally rather than as the default.

Surprisingly, a recent study suggests that people who are busy snapping pictures of a given event are less likely to remember details of the event than those who took no pictures at all. Although the researchers did not specifically investigate whether the effects of constantly peeking at the screen to look at photos had any affect on the outcome, I think it would be safe to conclude that doing so would serve to take you out of the moment even more than if you were just taking photos and not looking at the screen. Suffice to say, the seemingly harmless act of checking the rear LCD screen on your camera can have a greater impact than it might appear, and disabling the auto-preview is a good first step in helping you experience moments instead of just capturing photos of them.

baby-flying

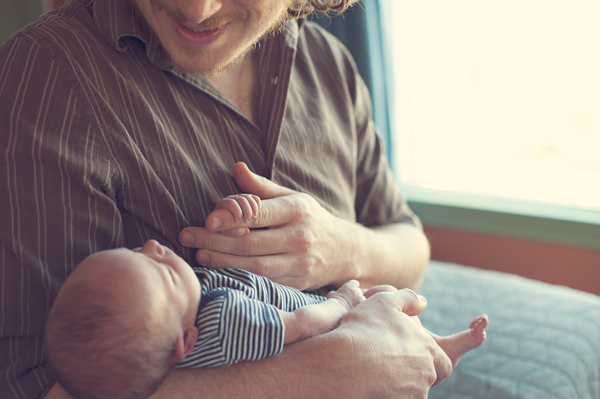
By just having fun and not concentrating on whether I nailed the perfect shot, my brother and I were able to just have fun and enjoy the afternoon while we played with his son.

3. It brings back the magic of shooting with film

Do you remember the days of shooting film when you had to wait days, or even weeks, to see if your pictures turned out? The excitement of dropping off your rolls of film, the anticipation of getting them back, and the nervous elation as you saw your images come to life in your hands is something that has been all but lost in the modern era of instantaneous photography. Even though I can check the back of my camera as much as I want, I have found myself not reviewing my pictures at all until I pop my memory card into my computer many hours or even days after I’m done shooting. More than bringing back a bit of nostalgia, this process has made me a much more intentional shooter. I think carefully about the photographs I want and how to capture them, I spend time being present in the moment, and most of all I don’t worry so much about my photos. I get the shots I get, and if I find out a few days later that I did not nail a photo how I wanted to, I use it as inspiration and a learning opportunity.

fence

This was one of those times when I did have to review every shot because my depth of field was so shallow that I had to be sure I was getting the right part of the fence in focus.

I want to make clear that I don’t think you should stop using the LCD screen to review your shots altogether, especially if you are a professional, or semi-professional, who takes on photo jobs for money. It’s important to know when to review and when not to. If I’m doing a portrait session there are many times when I stop to check and look to see if I nailed the focus or the lighting worked out how I wanted it to. I’m not saying you should never look at the back of your camera to check your photos, but that you might want to reconsider whether you have the camera automatically show them each time you click the shutter.

Of course, if you shoot mirrorless, or with any other camera that has an electronic viewfinder, much of this article is kind of a moot point. But, the overall lesson remains intact; don’t look at your photos so much when you’re taking them.

What about your experience? Do you use the auto-preview, or have you disabled it? Leave your thoughts in the comment section below!

googletag.cmd.push(function() {
tablet_slots.push( googletag.defineSlot( “/1005424/_dPSv4_tab-all-article-bottom_(300×250)”, [300, 250], “pb-ad-78623” ).addService( googletag.pubads() ) ); } );

googletag.cmd.push(function() {
mobile_slots.push( googletag.defineSlot( “/1005424/_dPSv4_mob-all-article-bottom_(300×250)”, [300, 250], “pb-ad-78158” ).addService( googletag.pubads() ) ); } );

The post 3 Reasons to Disable Your Camera’s Auto-Review Function by Simon Ringsmuth appeared first on Digital Photography School.


Digital Photography School

 
Comments Off on 3 Reasons to Disable Your Camera’s Auto-Review Function

Posted in Photography


3 Valid Reasons it Might be Time to Upgrade Your Camera Equipment

11 Apr
Ludovic Hirlimann

By Ludovic Hirlimann

For all of you camera enthusiasts, lens aficionados and gear fetishists, hearts race and palms sweat when broaching the subject of camera equipment upgrades. Camera companies keep a constant flow of equipment releases coming to quench the insatiable appetite of those who are convinced they need the latest and greatest.

It’s important to keep in mind that just because the new iteration of your camera body or a new lens with an even longer list of acronyms outlining its features is released, it doesn’t instantly make your equipment obsolete.

All you savvy consumers should strive to be honest with yourselves and carefully consider the tangible benefits that you will enjoy from that upgrade. Certainly most of you will legitimately grow out of that point-and-shoot or entry-level DSLR, however, many make the jump too soon before you’re able to fully exploit the capabilities of your equipment.

Some good reasons to to upgrade:

If you are reading this, you have likely purchased a camera (and possibly additional lenses and other accessories), in which case you are familiar with what could be called the Christmas morning feeling.

#1 Renew your enthusiasm or spark creativity

For photographers, an upgraded body or a new lens can be an important catalyst to revive waning enthusiasm. Many certainly see this as a thinly veiled excuse for coughing up the cash for some new equipment, but it can provide a needed boost to drag you out of the dreaded photographers-block.

For example, adding a large aperture lens – with an f-stop of f/2.8 or greater – to your stable reveals a whole new perspective, enabling you to further blur out backgrounds and isolate your subject.

Depth of field 1

Depth of field 2

Similarly, a telephoto lens will enable you to compose tighter shots from farther away, or experiment with closely cropped shots from a short distance. As focal length increases (and with it the distance to the subject), depth of field decreases and background objects appear closer to the subject opening up new compositional opportunities.

Telephoto by Jeremie Schatz 1

If you are already shooting with a DSLR, depending on the lenses you are using, adding a teleconverter to your bag can be a less expensive option for increasing lens focal length. Teleconverters fit between the lens and camera, and add a certain level of magnification such as 1.5x or 2x. Many lenses are compatible with teleconverters, but not all, so be sure to check with the manufacturer before buying one.

Teleconverter by Jeremie Schatz 1

While some photographers can continue to produce compelling images with a basic body and a 50mm lens, many will discover a new realm of possibilities which unfold with the addition of new equipment.

#2 Your gear is limiting your progress as a photographer

Another way to legitimize an upgrade is if you recognize that your evolution as a photographer is being hindered by your equipment’s limitations.

One advancement which can be gained with a camera or lens upgrade is improved low-light performance. If you find yourself shooting fast-moving kids in your dimly lit house or indoor sporting events, you will quickly discover that shooting at high ISO settings at maximum aperture results in less sharp images riddled with color noise. Color rendition and saturation levels can also suffer greatly in these situations, especially in shadowed areas and with skin tones.

Unfortunately, other than the limited corrections you can make with editing software, an equipment upgrade may be a necessity if you want to get great looking photos in low-light conditions. Point-and-shoot and entry-level DSLR cameras sport better high-ISO performance than just a few years ago, but more advanced models show a drastic improvement in this regard and large aperture lenses can enable you to shoot at lower ISO settings.

In addition to better low-light performance, upgrading your camera body can put a bunch of useful features in your hands such as: a self-cleaning sensor, wireless uploading, increased pixel count, more accurate auto-focusing, faster shooting rates, dual memory-card slots, and more. Be sure to compare your current camera’s specifications with that of a potential upgrade and ask yourself if the added features will have a significant impact on your photography.

Memory card slots

Although it doesn’t go in your camera bag, upgrading your editing software can be a game changer for your photographic pursuits. Making the leap from using free editing software, to purchasing and learning Lightroom or Photoshop, can make drastic changes to your final images. These programs open up new avenues for stylizing your images, and countless plugins are available which can enable you to have even more control over the look and feel of your work.

Even if you have the software already, an upgrade in your understanding and ability to use it, can go a long way. Investing time in knowing how to use the software properly, may help boost the quality of your images.

Lightroom by Jeremie Schatz 1

#3 The equipment is no longer usable

A more utilitarian reason to upgrade equipment is that it is simply reaching the end of its usable life. Camera shutters are rated for a certain number of actuations, at which point the risk of failure and inaccurate shutter speeds increase.

Even the best lenses have many plastic parts, and most modern ones have internal motors with a finite life span. Stiff or stuttering zoom and focus rings, loud or slow focusing and loose lens mounts are a few indications that a repair or replacement is imminent.

This may be a non-issue for many who live by the “if it’s not broken, don’t fix it” philosophy, however, if you use your equipment for paying gigs or to document important events, you may end up regretting a potentially preventable equipment failure.

There are many reasons to make equipment upgrades and most of you will make that leap at some point, but it is important not to set your expectations too high as to what new gear will do for your photographs. Think about your goals and consider which is the most accessible path to take in order to reach them.

Sergio

By Sergio

I’ll leave you to think about this quote:

“A lot of photographers think that if they buy a better camera they’ll be able to take better photographs. A better camera won’t do a thing for you if you don’t have anything in your head or in your heart.” – Arnold Newman

googletag.cmd.push(function() {
tablet_slots.push( googletag.defineSlot( “/1005424/_dPSv4_tab-all-article-bottom_(300×250)”, [300, 250], “pb-ad-78623” ).addService( googletag.pubads() ) ); } );

googletag.cmd.push(function() {
mobile_slots.push( googletag.defineSlot( “/1005424/_dPSv4_mob-all-article-bottom_(300×250)”, [300, 250], “pb-ad-78158” ).addService( googletag.pubads() ) ); } );

The post 3 Valid Reasons it Might be Time to Upgrade Your Camera Equipment by Jeremie Schatz appeared first on Digital Photography School.


Digital Photography School

 
Comments Off on 3 Valid Reasons it Might be Time to Upgrade Your Camera Equipment

Posted in Photography


5 Reasons to Use Flash to Improve Your Travel Photography

19 Mar

When it comes to travel photography, I am all in for carrying less. However, a good flash is always within reach in my everyday camera bag. I strongly believe that a flash helps to achieve much better results in a number of situations, and here are five reasons and examples:

1) Fill the shadows

Fishing on the Cau River

The alleyway that protects these fishing villagers from the heat in Vietnam makes it almost impossible to have a good balance between the bright sunlight on the river, and the walls of the alley. The use of flash, in a controlled way, over the foreground helps to open up the shadows and show some detail on the otherwise totally dark foreground.

2) Under-expose your background

Farmer in Van Ha

When making portraits, it is always good to have decent separation between your main subject and the background. Granted, one of the most popular ways is to use a shallow depth of field and blur the background while keeping the principal element of your photo sharp. Another way is to intentionally under-expose your photo one or two stops, and light your subject with flash to compensate.

3) Freeze motion

For the love of the kids

If you are working with moving subjects, the use of flash will help to freeze some of the motion if you intend to do so. This depends on a number of factors, including what shutter speed you are shooting at and the length of the flash duration. But, if you notice in the example above, the flash is only being used to achieve points one and two of this article, meaning I am also underexposing the image a tad, and opening up the shadows in the main subject to bring more attention to them.

4) Dark interiors

Old Black Hmong man

This artisan from the Hmong minorities in North Vietnam was working his craft inside his house where no lights are available. Despite being close to a window, it was way too dark to photograph, even at high ISO. If you encounter a similar condition, the use of flash will not only make a big difference, but could also be the reason you get the shot at all.

5) Keep shooting at night

Street performer at night in New Orleans

Some places are meant to be enjoyed at night. All kind of photos are possible during this time. Cityscapes and lights trails are certainly compelling propositions, but when it comes to capturing street life there is no better way than with the aid of flash. That extra pop of light will make your subjects come alive and stand out.

The key to doing this is to practice and learn how to manage and balance ratios. Every moment is different and sometimes your key light will be your flash, and other times you’ll be using it just to fill. My personal preference is to do it manually. I think you have much better control by dialling in the power of your speedlights manually, rather than letting the camera figure it out. It takes practice, but it is not difficult to master.

In terms of equipment, I really like the Yongnuo YN 560-III, the main reason is the integrated radio trigger. The units are inexpensive, but well made, which doesn’t hurt either. But as I always use it off-camera, the fact that I don’t need to attach cables or be worried about optical slaves is something that I appreciate. That radio signal goes everywhere, even behind walls, making it very easy to trigger.

What about you? Do you use any flash in your travel photos or in situations like these? Share your images and comments below.

googletag.cmd.push(function() {
tablet_slots.push( googletag.defineSlot( “/1005424/_dPSv4_tab-all-article-bottom_(300×250)”, [300, 250], “pb-ad-78623” ).addService( googletag.pubads() ) ); googletag.pubads().enableSingleRequest();
googletag.pubads().disableInitialLoad();
googletag.pubads().collapseEmptyDivs( true );
googletag.enableServices();
} );

googletag.cmd.push( function() { googletag.display( ‘pb-ad-78623’ ); } );

googletag.cmd.push(function() {
mobile_slots.push( googletag.defineSlot( “/1005424/_dPSv4_mob-all-article-bottom_(300×250)”, [300, 250], “pb-ad-78158” ).addService( googletag.pubads() ) ); googletag.pubads().enableSingleRequest();
googletag.pubads().disableInitialLoad();
googletag.pubads().collapseEmptyDivs( true );
googletag.enableServices();
} );

googletag.cmd.push( function() { googletag.display( ‘pb-ad-78158’ ); } );

The post 5 Reasons to Use Flash to Improve Your Travel Photography by Daniel Korzeniewski appeared first on Digital Photography School.


Digital Photography School

 
Comments Off on 5 Reasons to Use Flash to Improve Your Travel Photography

Posted in Photography


10 Reasons to Ditch Your Softbox for a Light Panel

11 Mar

So you want to create soft, beautiful light? One of the first light modifiers that comes to your mind is probably the tried and tested softbox. But, when it comes to versatility, are softboxes really worth the money? In this article, we are going to look at a viable contender to the age-old softbox – the light panel.

Now, the goal of this article is not to bash softboxes, I personally have nothing against them. I own several and use them whenever I feel that they are the right tool for the job. However, my go-to light modifier for the majority of my photography is the light panel. Why? I am glad you asked. Here are 10 reasons why you should consider using a light panel instead of a softbox for your next shoot.

Wide shot of two light panels

Wide shot of two self-standing PVC light panels fitted with diffusion and black fabric. The diffusion fabric is used like a large softbox, while the black fabric is used to flag or block light.

#1. They are inexpensive

For under $ 50 you can create a self-standing light panel that is larger than softboxes costing more than $ 300!

#2. They are easy to make

You can make a basic panel frame and legs with nothing more than a hacksaw. However, a pair of PVC shears is a great investment and will make your job a lot easier.

#3. Quickly change the size/quality of the light

Moving the light closer or further from a panel fitted with diffusion fabric can quickly create a different size softbox effect (closer to the panel = smaller light/harder quality versus further from the panel = larger light/softer quality). Since the panel and light are separated, the panel becomes the source of illumination and can remain in the same stationary position, in relation to the subject, throughout the entirety of the shoot.

#4. Easily change the shape of the light

By clamping pieces of black fabric over a panel fitted with diffusion material, you can create light sources of different shapes. This is a great technique if you want to create a tall, thin stripbox effect, or if you only need to use a portion of the panel.

#5. Different fabrics = different light modifiers

While softboxes can be sort of a one-trick pony, light panels can easily be turned into flags (to block light) or reflectors, just by changing out the fabric. I love to add black material to my panels and use them as flags to shape the light. I also like to use opaque white fabric to reflect and bounce light. It makes a beautiful fill for both indoors and out.

One of the coolest things you can do with light panels is harness the stray light from your strobe, to create multiple sources from one light. I oftentimes shoot through a diffused panel, then reflect some of the stray light back into the shadow side of the subject, using a second panel fitted with a white reflective material (as seen in the figures below).

portrait of bride lit with light panels

A bridal portrait primarily lit using two light panels

diagram showing how to bounce stray light with light panels

Using two panels to create a large soft key and fill from one light source. The white reflective panel was placed where stray, un-filtered, light was able to strike the front edge, which opened up the shadows more than if it were only allowed to bounce the light coming from the diffusion panel. A black panel was added to keep the light from spilling onto the background. It could have been removed, lighting the background and essentially filling the job of three lights (background, key and fill lights).

#6. No speed rings required

Speed rings can be such a hassle. After shelling out serious cash for a new softbox, the last thing you want to do is buy an adapter so you can actually use it. It can be a one-time cost, but if you ever change brands of lights you are most likely going to need a whole new set. Want to add a softbox to your speedlights? Well, you are going to need another type of speed ring adapter for that, too. With light panels, no matter the type of light source, all you have to do is place your light behind the panel and start shooting. Which brings me to #7 on our list.

#7. Home Depot light friendly

If you are just starting out and you want to try your hand at lighting with inexpensive Home Depot shop lights, then light panels are the best way to soften them. Stick multiple lights behind a panel fitted with diffusion fabric, or bounce them off a piece of white fabric to create a soft, bright, single source that can be used for photography or video. Now, all you will need is a good air conditioner to manage the heat!

#8. Gelling made easy

Have you ever tried to gel a softbox? It can be a tremendous waste of gel. Especially if your softbox is large. By shooting through a diffusion panel, you are able to attach a small square of gel to your strobes reflector, allowing you to purchase your gel in small sheets instead of giant rolls. For instance, at the time of this writing a 20×24” sheet of Rosco CTO gel cost roughly $ 7.50, as opposed to a 20”x25’ roll, which cost around $ 94.

#9. Better reflections for your product photography

Softboxes are made to distribute the light evenly over the face of the outer diffusion panel. Even with the inner baffle removed, the reflective interior creates a fairly even spread of light. When lighting reflective objects, this evenness can sometimes be a bad thing. Notice the gradated reflections in the two images below. This is the kind of reflection you will typically get when placing a light behind a light panel. Take note on how it adds contrast, depth and interest to the scene.  If these same images were lit using a softbox, the reflection would be an even tone, with no gradation or falloff.

jewelry product shot using overhead light panel

Light placed behind light panel creates gradated reflection in black reflective paper.

jewelry product shot using a gelled strobe and light panel

Another example of the pleasing gradation light panels reveal in reflective surfaces. The same reflective black paper from the first example is used, but the light has been gelled blue.

#10. Portable walls

Have you ever been out on a remote location where you have needed a changing area for your model? You can easily create a makeshift changing room by attaching three or four panels together using connector clips, then covering them with black fabric. If it is windy, throw some sandbags on the bottom of each panel to weigh them down, for good measure.

I hope this article has given you a little more insight on how versatile and economic light panels can be.

Many companies make and sell light panels. They are usually made from light-weight aluminum and are relatively inexpensive, compared to softboxes. However, you can save a lot of money by making your own frames out of PVC.

In a future article I will:

  1. Show you how to create your own self-standing PVC light panel frames and accessories
  2. Offer helpful tips on making them stronger and easier to assemble
  3. Share some cheap fabric alternatives to use with your new frames

Until then, go out, have fun, experiment and create something awesome!

googletag.cmd.push(function() {
tablet_slots.push( googletag.defineSlot( “/1005424/_dPSv4_tab-all-article-bottom_(300×250)”, [300, 250], “pb-ad-78623” ).addService( googletag.pubads() ) ); } );

googletag.cmd.push(function() {
mobile_slots.push( googletag.defineSlot( “/1005424/_dPSv4_mob-all-article-bottom_(300×250)”, [300, 250], “pb-ad-78158” ).addService( googletag.pubads() ) ); } );

The post 10 Reasons to Ditch Your Softbox for a Light Panel by Joel Dryer appeared first on Digital Photography School.


Digital Photography School

 
Comments Off on 10 Reasons to Ditch Your Softbox for a Light Panel

Posted in Photography


4 Reasons Shooting at Sunrise and Sunset Will Help You Take Better Photos

10 Mar


Tree-2

Perhaps the most important change you can make to improve your photography is to change the time of day you are shooting. It is as simple as that. Photos taken in the middle of the day all have problems that can be avoided if you photograph near sunrise or sunset. Photographers agree on very little, but they all seem to agree that the times around sunrise and sunset are the best for photography. In fact, many photographers go so far as to put their cameras away during the hours between 9 a.m. and 5 p.m.

Getting up at dawn, or hanging around after sunset, is generally not convenient. It is no fun to get up well before sunrise, especially in the summer when sunrise comes early. But if you want to elevate your photography, that is how to do it.

You may have heard all this before, but in this article I will explain why, and show you some of the reasons why sunrise and sunset can help you take better photos.

Schoodic

Reason #1: Avoid harsh contrast

The bright light of the midday sun creates harsh shadows in your photography. Nearly every object within your view will create harsh shadows. Obviously large objects like trees and buildings create such shadows, but it goes at lot further. When photographing a person, for example, you will likely encounter harsh shadows on their faces. Even something as small as grass or leaves will leave unsightly black shadows in your pictures.

Photographing near sunrise or sunset fixes this problem. At those times, the sun’s rays are coming from a more horizontal angle, which means that the rays have to pass through a lot more of the earth’s atmosphere before reaching you.  That makes the light more diffused.

In addition, the times just before sunrise and after sunset don’t involve any direct rays at all. At those times you are dealing only with indirect rays of the sun. You will not have a problem with harsh shadows.


Telluride-2

Reason #2: Maintain tones within your camera’s dynamic range

In all outdoor photography you have to cope with the problem that the sky is invariably brighter than the foreground. Sometimes it is much, much, brighter. If you meter light based on the brightest part of your camera’s view, which is inevitably the sky, the shadows in your picture will end up as pure black. Conversely, if you meter light based on the foreground or shadows in your camera’s view, the brighter portions of your picture will be overexposed or even blown out (pure white).

For pictures taken during the middle of the day, this problem can be exacerbated. That is when the sky is at its brightest. If your foreground is not as bright, you are will have a problem where the scene is beyond the dynamic range of your camera.

When photographing around sunrise or sunset the sky is not quite as bright as it is when the sun is high in the sky. This cuts down the dynamic range your camera has to capture, so it is possible to capture the entire scene in full detail.


WesternLake-2

Reason #3: Avoid the commonplace

You simply cannot take a unique picture by photographing the same places, at the same time, from the same angles as everyone else. If you want your pictures to stand out from the crowd, you need to do something different. Photographing at sunrise and sunset goes part of the way in giving you that something different.

Most people are used to seeing the world as it exists in the middle of the day, they are not used to seeing it at sunrise and sunset. A typical day will have 10 hours of midday lighting, but the sunrise and sunset last only a little while. Further, people often miss them entirely. People are usually sleeping at dawn, or if not, are getting ready for work and not focused on the sky.

By photographing at sunrise and sunset, you are showing your viewers something they don’t see all the time. It avoids the commonplace. It will make your pictures more interesting to your viewers.

Achill

Reason #4: Capture the sky at its most vibrant

People often go to scenic locations to watch the sunrise or the sunset. There is a reason for that: because those are the times when the sky is at its most dramatic. As a photographer, that is the sky that you want to capture.

Skies at sunrise and sunset are full of color. The orange of the sun combines with the blue of the sky and creates interesting colors. When there are clouds in the picture as well, there can be a variety of different colors. Conversely, in the middle of the day, the sky is blue (if you are lucky, otherwise it is grey). By photographing at sunrise and sunset, you can capture those colors in your pictures. To make sure you are capturing the colors at their most vibrant, set your camera to meter off the sky and then underexpose a little bit.

Marina-2


Conclusion

I hope this article explains the advantages of photographing around sunrise and sunset. It is one thing – and perhaps the only thing – that I can guarantee will improve your photography. But one final note to help you maximize the benefit, is that you should not arrive at your location at sunrise and/or leave at sunset. Rather, arrive about 45 minutes before sunrise and hang around at least that long after sunset. These periods when the sky is bright, but the sun is beyond the horizon, sometimes result in more dramatic images than the sunrise/sunset itself. I have often seen people pack up when the sun dips over the horizon, only to miss the most dramatic colors of the day.

I would also encourage you to check out the importance of photographing at these times for yourself. The next time you are on your favorite photo sharing website, look at your most-liked photos. Make a quick note of how many of them were taken at sunrise or sunset. My bet is that it will be a lot of them.

So if you want to take more dramatic and interesting photos, take them at sunrise or sunset. The good news is that it doesn’t cost you anything. You don’t have to buy any special gear. Yet this one change will make more difference than any new camera or lens.

googletag.cmd.push(function() {
tablet_slots.push( googletag.defineSlot( “/1005424/_dPSv4_tab-all-article-bottom_(300×250)”, [300, 250], “pb-ad-78623” ).addService( googletag.pubads() ) ); } );

googletag.cmd.push(function() {
mobile_slots.push( googletag.defineSlot( “/1005424/_dPSv4_mob-all-article-bottom_(300×250)”, [300, 250], “pb-ad-78158” ).addService( googletag.pubads() ) ); } );

The post 4 Reasons Shooting at Sunrise and Sunset Will Help You Take Better Photos by Jim Hamel appeared first on Digital Photography School.


Digital Photography School

 
Comments Off on 4 Reasons Shooting at Sunrise and Sunset Will Help You Take Better Photos

Posted in Photography


5 Quick Reasons to Use the Nifty Fifty for Landscape Photography

17 Jan

The 50mm prime lens, or as it’s more commonly known, the Nifty Fifty; we all know the name, even inexperienced photographers have likely heard of it. Most of us know it for its outstanding qualities; an inexpensive, quality, prime lens that is in plenty of photographers’ bags around the world, and one of the most popular lenses of all time.

What we might NOT think of it as, however, is a lens normally used for landscape photography. The zoom is tight, and doesn’t possess a field of view wide enough to usually be considered proper for this sort of work.

But I have. For four years, the 50mm f/1.8 has been my workhorse for portfolio building (which is primarily nature and landscape), and even though I’m branching off with other lenses, I can’t stress the usefulness of the Nifty Fifty. And I’m not alone.

50mmLens

My primary reasoning for using the 50mm instead of going out and buying a proper wide angle lens such as a 35mm or even wider? Cost. I was delving back into photography, and was on an extremely tight budget. After buying my camera, spending $ 500 on a lens simply wasn’t an option. It didn’t take long for me to hear my fellow photographers sing the praises of this wonderful lens; cheap, fast, and sharp. Right up my alley.

There are no tricks or immaculate revelations here, and you won’t likely become famous for taking only landscape shots with 50mm lenses – but there are a few reasons why shooting landscapes with a 50mm lens can produce great results. Giving it a try can only improve your photography and make you a better observer of the world around you.

Focus on What’s Important

We think of landscapes as sprawling, wide shots, that include many elements in one frame, but does it have to be that way? Can we not capture the beauty of the area around us, in a tighter package? The rolling hills and an interesting tree in an outdoor scene are more than enough to create a photo that provokes thought.

The Nifty Fifty makes it easier to focus on whatever is most important in your photo, while still capturing enough around the subject to lend it scope.

The Nifty Fifty makes it easier to focus on whatever is most important in your photo, while still capturing enough around the subject to lend it scope.

Shooting at this focal length forces us to focus on the most important parts of what we’re seeing around us. Trimming the fat, as they would say. In doing this, we’re also training ourselves psychologically to do the same in all of our shots.

Quality

Landscapes usually require very good sharpness, and the 50mm prime lenses excel at that. No extra moving parts normally required for varied focal lengths (zooms) mean a crisper, sharper result. As with most lenses, its sweet spot isn’t wide open, but more in the f/4 to f/5.6 range. Even narrower apertures will still yield excellent results.

The 50mm prime allows you to capture very sharp images

The 50mm prime allows you to capture very sharp images.

Take Your Time

Since the 50mm is a prime lens, you’ll get an added benefit (or detriment, depending on how much you care for walking); the single focal length means you can’t just shoot from anywhere, you’ll need to move around to find the best angle and distance. This automatically forces you to think about your shot a bit more, which is always a good thing.

The 50mm allows you to think differently about the landscape or subject you're framing, and to make more creative choices.

The 50mm allows you to think differently about the landscape or subject you’re framing, and to make more creative choices.

With a zoom, you’d adjust focal length without even thinking, until the scene is framed in a way that looks good. But what if that isn’t the best angle or distance? The Nifty Fifty will give you incentive to take a chance and try something different, whether it be an angle, a distance, or even perspective.

No Wide Angle…or Can There Be?

Of course there can! The 50mm gives you a gentle push into playing around with some panoramic shots. Three, four, five, or more shots can be stitched into a flattering wide angle composite, sometimes with even more dramatic results than a single wide angle shot.

By stitching together shots, we can create a panorama that gives us the wide field of view we're looking for

By stitching together shots, we can create a panorama that gives us the wide field of view we’re looking for.

Lightweight is King

If you’re serious about landscape photography, you’re probably already lugging around a considerable amount of gear; camera bodies, other lenses (you don’t go out with just one lens, do you?), tripods – the list goes on. The last thing you need are more heavy lenses when you’re out and about, right? Do you know what the Canon 50mm f/1.8 weighs? 4.6 ounces (130 g). It’s short, sweet, and light to boot.

At the end of the day, all lenses and focal lengths have advantages and disadvantages, and the case can certainly be made for using glass with wider angles. But as a teaching tool, the 50mm prime lens is a great option for your landscape photography; it will make you think a bit differently about those types of shots and easily provide you with clear, sharp images.

What are your experiences with this lens? What images have you captured? Tell us your opinion below, and show us those Nifty Fifty shots!

googletag.cmd.push(function() {
tablet_slots.push( googletag.defineSlot( “/1005424/_dPSv4_tab-all-article-bottom_(300×250)”, [300, 250], “pb-ad-78623” ).addService( googletag.pubads() ) ); } );

googletag.cmd.push(function() {
mobile_slots.push( googletag.defineSlot( “/1005424/_dPSv4_mob-all-article-bottom_(300×250)”, [300, 250], “pb-ad-78158” ).addService( googletag.pubads() ) ); } );

The post 5 Quick Reasons to Use the Nifty Fifty for Landscape Photography by Tim Gilbreath appeared first on Digital Photography School.


Digital Photography School

 
Comments Off on 5 Quick Reasons to Use the Nifty Fifty for Landscape Photography

Posted in Photography


4 Reasons to Capture Images of You and Your Child Together Right Now

30 Oct

102

1. You Need to Document That You Were There

I get it, I do. You’re the one behind the camera. You’re the one taking the photo of that adorable little smile. You’re the one documenting that you spent a day at the park together. Someone’s got to do it, right?

Sometimes you have to get on the other side of the camera, and let someone else be the photographer for a minute. Even if you weren’t planning on being in photos that day, just do it. It doesn’t matter if your hair is perfect. It doesn’t matter if you wore the most flattering outfit. It doesn’t matter if you meant to lose five pounds first. Just get in there.

164

When your kids look back at photos years later, don’t you want them to remember the fun times you had together, instead of wonder if you were even there, since you don’t appear in ANY photos? Don’t you want to remember yourself as a young mother with a brand new baby, or a father that loved to play football with your kids? You may think that you’ll remember how things were, but the fact is, you won’t remember everything. These photos showing that you were THERE will mean everything to you and your kids later.

191

2. Once Upon a Time Your Kids Were Small

One day that baby boy you’re holding in your arms is going to tower over you. He’ll have big man hands, and his voice will be deep and strong. You’ll have a hard time believing that there was a time when his teeny fingers couldn’t even wrap all the way around your fingers. Make sure to capture the little details. Those little faces, hands, and feet are so adorable when contrasted with a parent’s hands.

194

You might have days where you wonder if this kid ever even thought you were cool, or wanted to be around you, and honestly, you’ll probably have days where you wonder if you want to be around them. These photos that prove that your kid once thought that you hung the moon will then become even more meaningful. Nostalgia is a wonderful thing to warm your heart and strengthen your bonds.

175

3. You Have Fun Together

You know those things that you do together that are just between the two of you? Maybe it’s eskimo kisses, tossing your child in the air so they can feel that sensation of flying for just a moment, or exploring new things together. Those special things you do together will change through the years. How much fun would it be to have all of those bonding memories captured to look back on, and remember how your child grew and changed as the years flew by?

168

Capturing your fun times together can be as big as taking photos of the two of you together on a ferris wheel, or with the classic car you restored together; or they can be as small as a special high five you always give each other. When you document these things with your kids, it shows them that they are a big part of your life, and the things you do together are as important to you as they are to them.

169

4. You Love Each Other

Yes, this is perhaps the most important reason to get photos with you and your child together. You love each other. Your relationship is one of the most important relationships either of you will ever have in your life. A picture is worth a thousand words. Imagine how much a photo of you looking at your infant child with complete fascination and adoration will mean to that child when she is grown. Imagine how much you will treasure a photo of your child gazing up into your eyes with absolute trust. Saying “I love you” means so much, but a photo is a lasting reminder of that love.

190

I hope these four reasons will encourage you to be in more photos with your children. You will never ever regret these precious moments captured forever.

The post 4 Reasons to Capture Images of You and Your Child Together Right Now by Melinda Smith appeared first on Digital Photography School.


Digital Photography School

 
Comments Off on 4 Reasons to Capture Images of You and Your Child Together Right Now

Posted in Photography


How to Add Blur to Your Images for the Right Reasons

16 Oct

Bycicle Blur

Blurring is a Tool, Not a Gimmick

Adding blur or movement to a photo just for the sake of it is the same as a magic trick; razzle-dazzle but without purpose. Using a blur effect makes sense when you actually wants to say something specific with the photo. Sometimes it’s to create a sense of speed, and sometimes it’s to add an ethereal, soft kind of ambiance to the shot, but it’s not something to use just because.

Monks  before lunch

Know What You Want to Convey

Although it’s true that sometimes a random or accidental shot yields good fruit, more often than not, there is a better chance of taking a great photo if you think about the setup beforehand. Adding blur is a great option but should be used sparingly and always planned for. Take a look at your scenario and think about what you want from it; motion, speed, a little ethereal mystery? Achieving each of these in a photo takes a different attack, so plan ahead before taking the shot.

Hard versus Soft, Blurry versus Sharp

Taking good photographs means understanding contrast; light versus dark, soft versus sharp edge, focusing on the foreground or the background, etc. As for blurring, it always comes out best if the blur tool is only used on part of the photo. That way, the clearer, sharper part of the image is in contrast to the blur, and it’s this contrast that conveys the sense of speed.

Bycicle Blur 2

It’s All Right to Make Mistakes!

Iteration is fine. Much like athletes and sketch artists need to warm up, taking several test shots, playing around with speed and f-stops is a great way to prepare for your final photo. Use these shots to find your direction, see what each exposure brings. As stated before, a good blurry picture requires some planning – so take the time to plan. The digital age of photography and instant viewing has given us a great boon in terms of being able to experiment in a trial-and-error sort of way, so you can calmly view and sort out what exactly you intend to do.

Floating Monk

Choose the Best Speed

The main photographic technique for blurring is to use a slow shutter speed. Depending on the speed of the object or subject, as well as its relative direction or angle to you and your camera, you will need to play with your shutter speed. If someone is walking in a straight line, facing you, the speed needed in order to create the idea movement will be slower, perhaps 1/8 of a second. If the same person is walking form left to right perpendicular to you, you will need a faster speed, perhaps a 1/20th.

Taking still shots of subjects that are sitting, standing, etc, your speed can be as low as ¼ of a second.

Even if you are shooting at this speed, a still shot might not show the motion at all, if the subject doesn’t move. Usually for standard walking shots on the street the speed will be between 1/8 and 1/15.

Again, the mantra to remember is that different scenarios call for different things. Devotees bathing at Varanasi, someone taking their time walking through a gallery, or a cyclist in mid-race will all need vastly different shutter speeds. As well, you have to determine the degree of movement you want to portray.

In the case of the devotees in Varanasi, I did not want to reflect speed, so much as mystery, a very slight sense of motion, as if it were a dream.

Early Morning Bath

For producing a sense of mass motion, and by this I mean, small crowds strolling around galleries for example, you will sometimes need to use open exposure. This means letting people blur the image by moving, because it will create a contrast with anything that remains still.

Take Care With F-Stops and ISO

Remember that speed is only one of the three factors involved in correct exposure. The other two factors are aperture (f-stops) and ISO. My advice is to set the camera on shutter priority, (possibly “S” for your camera) and let it adjust the f-stop. See if the latter suits you, and adjust the ISO accordingly.

Monks before lunch 2

Don’t Leave Everything to Luck

Certainly, if there’s one time when you need a little bit of luck, it’s when capturing something in motion.

You should always plan and set yourself up if you want the best chance to get a lucky shot, especially when you want to work with something so unpredictable as motion-based shots. Normally, I get myself situated in my chosen venue and take picture after picture at all different speeds. It’s not unusual for me to glance at my watch and realize I’ve been in the same spot for over half an hour. But with one eye on the camera and the other on the scene in front of me, I’ve got a good view for when luck happens my way, as long as I have the patience and dedication to wait for it.

Tuc Tuc Blur

The post How to Add Blur to Your Images for the Right Reasons by Harry Fisch appeared first on Digital Photography School.


Digital Photography School

 
Comments Off on How to Add Blur to Your Images for the Right Reasons

Posted in Photography


6 Great Reasons to Get over Post-Processing Anxiety

24 Sep

I’m baffled when my workshop students tell me that they find image post-processing to be a chore, a dreaded task that prevents them from even looking at their beautiful photographs more than once. If you’re one of those types, I’m here to tell you that you’re missing out on a delicious second hit of creative joy.

1 – Don’t Miss Out – Post-Processing is Half the Fun

Night Photography with high ISO - Gavin Hardcastle

Unprocessed version below. Total processing time = five minutes. Steps taken:

  1. Boosted blacks and shadows
  2. Reduced whites
  3. Increased exposure by +1
  4. Increased clarity
  5. Increase contrast
  6. Subtle noise reduction
  7. Subtle sharpening

Victoria Night Photography - Gavin Hardcastle

I think one of the reasons that I love photography so much is that I get that double whammy of artistic creativity. The first is when I’m out taking the shot, often standing in awe at the scenery unfolding before me. The second hit is when I get back home and start processing my images.

When I’ve shot an image that I know is really strong, I can’t wait to get that RAW file opened up so that I can relive the moment and get creative with my processing to realize the visual feast that I witnessed when I was on location.

2 – RAW Files are Your Best Teacher

RAW file processing of Landslide Lake - Gavin Hardcastle

Unprocessed version below. Total processing time = three minutes. Steps taken:

  1. Boosted blacks and shadows
  2. Reduced whites
  3. Added high contrast grad filter just above water level to emphasize mountain structure
  4. Increased clarity
  5. Increased contrast
  6. Subtle sharpening added
  7. Increased vibrance
  8. Increased red highlights in the foreground

Unprocessed RAW image of Landslide Lake - Gavin Hardcastle

The first thing that you’ll learn when processing your images is what you did wrong. Maybe you selected the wrong aperture, perhaps your ISO was too high and your image is full of noise, or maybe you just focused in the wrong spot.

By processing and essentially studying your own photographs, you’ll quickly learn which techniques you need to improve and what you could have done to make your images better. If you got everything right when taking the shot, you’ll have loads of fun tweaking the most quality out of your RAW file, and producing an image that you’re proud to share with the world.

If you simply don’t care about sharing your images that’s fine, but if you’ve captured a beautiful moment in time, chances are that most people will gain pleasure from seeing your work. Don’t be so shy, process that image and show the world what you made.

3 – Didn’t Get it Right in Camera? No Problem

It’s totally possible to capture a truly beautiful image in camera, that requires minimal or zero processing, and that’s something you should strive for. However, most of the time there are technical challenges that our cameras simply can’t handle. That’s where image processing comes to the rescue. This could be as simple as red-eye reduction, right through to noise reduction and fixing blown out highlights.

When you’ve become adept at image processing, you’ll be far more daring in your photography by taking photos that you otherwise thought might have been too noisy, too blown out, or unusable for whatever reason. Having even a basic understanding of image processing will open your creative horizons and give you more confidence.

4 – The Camera Sees What You Did Not

aroura-borealis-photography-gavin-hardcastle

Unprocessed version below. Total processing time = five minutes. Steps taken:

  1. Changed the white balance
  2. Reduced whites
  3. Reduced red highlights in the foreground
  4. Increased clarity
  5. Increased contrast
  6. Applied heavy noise reduction
  7. Added subtle sharpening
  8. Increased vibrance

aroura-borealis-unprocessed-photography-gavin-hardcastle

There are times when your camera can see things that you might have missed or were not capable of seeing. When shooting aurora like the image above, most cameras are able to record colours that are barely visible to the naked eye. Some of this processing happens in the camera, but until you look at the RAW file and see what can be done to clean up your image, you won’t realize the full potential of the moment that you captured.

In the image above, I chose the wrong white balance while shooting, and wasn’t really happy with the colours until I switched the white balance to Tungsten in Adobe Camera Raw. I could have done this in camera, while shooting, but everything looks awesome on the little LCD screen on the back of the camera so I thought it was fine until I got back home.

High ISO images of the Milky Way or an aurora might be totally unusable until we’ve cleaned up the noise, fixed any white balance issues and corrected the contrast – among other things.

5 – It’s Easier Than You Think

Sve Your Adobe Camera RAW Defaults

This is how I do it in Adobe Camera RAW. Once you’ve tweaked your most commonly used settings such as lens profiles, chromatic aberration, shadows, highlights, etc., click on the top right tab and then choose ‘Save New Camera RAW defaults’. This well be called up automatically when you next open a RAW file.

A lot of the grunt work can be taken out of editing your images by the simple act of saving your default processing settings to match your camera and lens. Whether you process your images in Adobe Camera RAW or in Lightroom’s Develop Module (which is almost the same thing), you can save your most commonly used processing settings as a default file that will automatically be applied to any RAW file that you open.

This is a real time saver and can be used as a great starting point. There’s no one setting to suite all images, but if you often shoot the same types of images, it’s good to have a default setting that is already pre-configured for your equipment and processing style.

You can even save multiple presets so that if you change your shooting style for different projects, you’ve already got your previous go-to processing settings to get you off to a quick start. From that point, simply tweak your settings until you’re happy.

6 – Black and White Saves the Day

buttle-lake-the-hand-monochrome-conversion

Unprocessed version below. Total processing time = five minutes. Steps taken:

  1. Boosted blacks and shadows
  2. Reduced whites
  3. Converted to black and white
  4. Increased clarity
  5. Increased contrast
  6. Added a vignette
  7. Used the dodge brush to accentuate tree root highlights

buttle-lake-the-hand-unprocessed

I often shoot images that I know will work in black and white much more effectively.

Let’s say I really like the composition that I’ve got and the weather conditions are just perfect, except for the fact that there isn’t much colour in my scene. In those situations I’m already looking forward to converting my image to black and white which can sometimes result in a much more punchy, and dramatic image than the original colour version.

You can easily do the conversion in either Photoshop or Lightroom. Then have fun playing with contrast, shadows and highlights and maybe even a little dodge and burn to accentuate key areas.

Start Processing Your Images Right Now

I hope these six reasons have convinced you that it’s worth setting aside just a little bit of time to process your images. You might discover that you’re a much better photographer than you realized. At the very least, you’ll be able to figure out where you went wrong, and what you need to do to improve your photography.

Maybe you’ll even learn to love image processing as much as you loved taking the shot.

The post 6 Great Reasons to Get over Post-Processing Anxiety by Gavin Hardcastle appeared first on Digital Photography School.


Digital Photography School

 
Comments Off on 6 Great Reasons to Get over Post-Processing Anxiety

Posted in Photography


20 Reasons Why I Won’t Cover Fashion Week for Free (But I Would for Expenses)

17 Sep

London Fashion Week just wrapped up, and a lot of the people I follow on social media were there, taking over brands’ social media accounts, taking pictures, looking good. I spent most of the past four days sitting around at home with absolutely no plans to go anywhere, and I think if you’d touched me, my relief would have actually Continue Reading

The post 20 Reasons Why I Won’t Cover Fashion Week for Free (But I Would for Expenses) appeared first on Photodoto.


Photodoto

 
Comments Off on 20 Reasons Why I Won’t Cover Fashion Week for Free (But I Would for Expenses)

Posted in Photography