RSS
 

Posts Tagged ‘Reasons’

20 Reasons Why I Won’t Cover Fashion Week For Free (But I Would For Expenses)

14 Sep

London Fashion Week is underway, and a lot of the people I follow on social media are there, taking over brands’ social media accounts, taking pictures, looking good. I’m currently sitting on a comfy chair in my bedroom with absolutely no plans to go anywhere this weekend, and I think if you touched me my relief would actually rub off Continue Reading

The post 20 Reasons Why I Won’t Cover Fashion Week For Free (But I Would For Expenses) appeared first on Photodoto.


Photodoto

 
Comments Off on 20 Reasons Why I Won’t Cover Fashion Week For Free (But I Would For Expenses)

Posted in Photography


Four Reasons to Display Photos of Your Children

14 Jul

As parents and photographers, we take thousands and thousands of photos of our children every year. Looking at my Lightroom catalogue from last year, I have over 3000 photos of the kids, and that doesn’t include all the pictures I took with my phone camera!

Amy lee 3

In our house, the camera is always out. I take pictures of them throughout the day, no matter what they’re doing. The kids know the camera is a part of our lives, and they don’t act differently when they see me taking pictures of them, as some adults would.

I’m a big believer that photos are too precious to live on computers. Hard drives fail and images can get lost so your best insurance is having the tangible photo right in front of you. Twice a year I go through thousands of our photos to print a few for display, I recommend you do this also.

Amy lee 2

In our house, we use photos as home decor. We have a couple large collections of photos throughout the house, smaller prints displayed everywhere, as well as photobooks alongside the framed photos.

These photos really are a gift because it helps us remember how much we are loved, and it reminds us how blessed we are to have each other. There are times when I have had a bad day and seeing a photo of us laughing and hugging each other reset my mind and helped me remember what is most important.

Aside from these reasons, here are four other reasons why you as parents (or grandparents) should display photos of your kids.

Self-Esteem

It is amazing to see what a boost of confidence and self-esteem comes to the child whose parents display a lot of photographs of them around the home. Your children understand that you have taken the time to hang, frame, and display their photos, and it makes them understand that you value them, find them to be beautiful, and want to see them each day.

Amy lee 1

Memories

In the hectic pace of modern family life we can forget what kids looked like only a year earlier. Images not only give us a glimpse into the past, but they can also bring us back to the moment in an instant. Remember how proud you felt when your child was a newborn and how perfectly they fit in your arms? Photos bring you back to those feelings when the photos were made.

Forgotten

How often do you scroll through your phone’s photo roll or look at the folders full of images on your hard drive? Hard drives could fail and images could be forever lost. Why lose out on the opportunity to put all of those smiling faces on your walls? You have a museum full of gorgeous artwork just waiting to be printed.

Sharing

When you print out and display these images in your home it opens a dialogue and creates a habit of sharing memories. Kids may not look at certain photos for a long time, and then suddenly lean in and remember something important. When some of these photos were taken during the best moments of your lives, it is worth reliving and remembering.

I could go on with the list, but these are the reasons I continually hang new photos on the walls and update my displays. Do you have others? Do you display your photos in your home?

Other related articles:

  • How to Create a Family Photo Essay
  • Click! How to take gorgeous photos of your kids – a dPS ebook
  • How to photograph children {and other stuff} indoors


Editor’s challenge: this is something I feel strongly about as well, so I challenge you. If you have not got any printed photos of your own family around your house – do it now. Go select a few, order the prints, and get them framed. Or make a photo book. Or both! Involve your kids in helping select the images, make it a family project. Then take a photo of your newly hanging family artwork and share it with us here in the comments.

The post Four Reasons to Display Photos of Your Children by Amy Lee appeared first on Digital Photography School.


Digital Photography School

 
Comments Off on Four Reasons to Display Photos of Your Children

Posted in Photography


10 Reasons Why a Pro is Using a Mirrorless Camera for Personal and Paid Jobs

19 Jun

Image01

Everyone can take a picture, but as photographers (professional or aspiring), we have the skill set and the tools to create great images in any situation. We have the ability to turn the ordinary into extraordinary through photography. As the saying goes, the shoemaker’s kids have no shoes, and similarly, we often don’t put the same emphasis on images for ourselves and our family as we do for others and their families.

Personally I’ve always struggled with feeling like the “photographer” during personal affairs; I don’t feel right bringing a big DSLR, lens and flash to a family function, vacation or personal outing. Often this means that I either trust others to take pictures, or I take my own quick snaps with a point-and-shoot or with my iPhone.

My wife and I welcomed our first daughter Ava last March, and as a photographer, I know the importance of documenting those young, tender moments, and how impactful it can be to tell the story of childhood through photography. At the same time, I didn’t want to be “that Dad” who is always lugging around a camera bag. Quick aside: if that’s you, that’s perfectly fine, it just doesn’t work for me personally. I wanted to get great pictures of Ava on vacation, I wanted to be in the pictures myself, I wanted to capture happy moments around the house and I wanted to document her first Christmas. All the while, I wanted to leave the “big guns” in the studio.

Image02

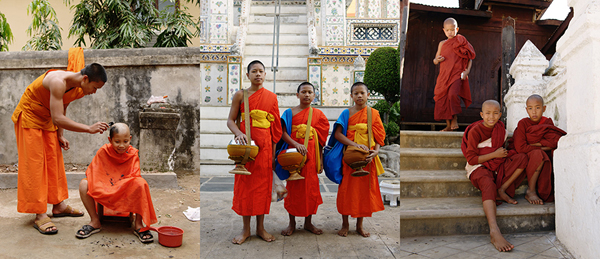
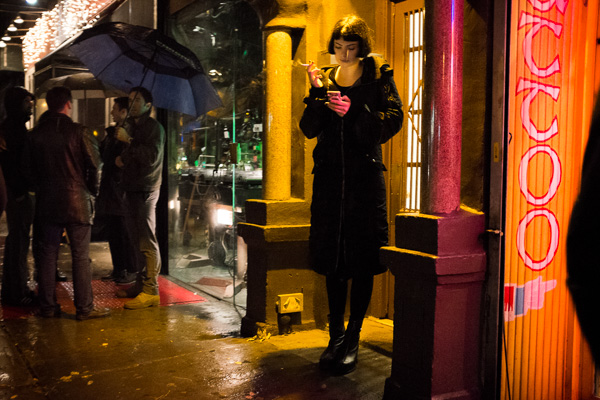
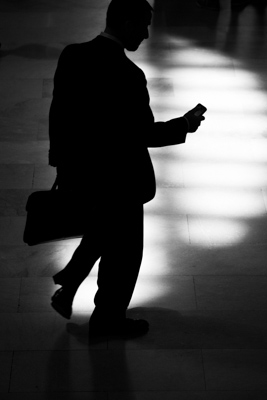
With my mirrorless camera (I use the Fuji X-T1, X-E2 and the X100S), I can still take those great images while not standing out as a photographer. In fact, all of the images in this blog post are taken with my Fuji mirrorless cameras, and you probably didn’t know the difference

Creative Loop Versus Business Loop

Let’s back-up to 9 years ago. My story of discovering photography is not all that different from most photographers. I got into it because I loved the creative side of photography: the art, the composition, the lighting and the medium’s storytelling ability. We all start out in a “Creative Loop” that is a cycle of being creatively inspired, practicing, educating ourselves, learning and then gathering feedback.

Once you start out in business as a photographer, though, priorities often shift. As an entrepreneur, we have so many other aspects to think about outside of the creative process, such as marketing, pricing, branding, clients, workflow, customer service, and so on. We enter into the “Business Loop” that pulls our energy and attention away from the creative side.

For me, after a few years of being a professional photographer, I was becoming recognized, awarded, and known for my skills as a photographer. I became comfortable with my creative abilities and therefore much of my focus shifted to the business side of being a photographer.

Mirrorless Love

In October 2013, I attended a workshop with world-renowned photographer David Beckstead where he taught his approach to light, shadows and composition. What inspired me the most though was David’s shooting style with his Fuji X-E1, and how it forced him to be purposeful, be intentional and slow down. From the moment I looked through the electronic viewfinder (EVF) and saw the ability to shoot in Black and White and see in terms of tone and mood. I was hooked.

Fast forward to today and I am now shooting 60% of my professional work with my Fuji mirrorless camera, and 100% of my personal work with it. Here are the 10 reasons that I love shooting with a mirrorless camera.

Mirrorless Photography Love #1: Intentional and purposeful photography

I photograph mostly with my Fuji camera set to B&W mode and my Nikon full-frame camera set to colour, so when I am photographing, I am intentionally choosing to create an image in colour or B&W as I shoot. It is almost as if I am post-processing my images as I shoot. What I love most about this process is that it makes me think about these things before I press the button and it makes me photograph with greater purpose.

Image03

Mirrorless Photography Love #2: More thoughtful photography

Admittedly, the processing and usage of most mirrorless cameras aren’t as “snappy” and quick as the high-end DSLRs, but I actually like that. My Fuji mirrorless cameras makes me more thoughtful and forces me to slow down and be more methodical about my compositions and timing. This has made me a better photographer with more intentional images and less “spray and pray” sequences.

Mirrorless Photography Love #3: Seeing light, tone and mood

The electronic viewfinder (EVF) in my mirrorless cameras opens up a whole new world of possibilities. You’re looking at a processed image as it’s happening, it’s “what-you-see-is-what-you-get”. This has several benefits:

  • You can see the image as you are capturing it, which means you don’t have to review and look at the screen (chimp) afterwards.
  • You can see the exposure as you’re creating it, so you can more accurately fine-tune your exposure and get it right in the camera with more accuracy.
  • In my case, where I shoot in B&W mode, it allows me to see that monochrome image as I’m making it so I am free from distraction of colour. It allows me to focus more on the light, tone and mood.
  • When I’m shooting in colour mode, I can see the image in its “enhanced” state – with saturation, contrast, tone and sharpening adjustments applied. Sometimes I’m seeing an image better than what it looks like in real life!

Mirrorless Photography Love #4: Saves time

It’s obvious to see how shooting with a mirrorless camera, and an EVF specifically, will save you a ton of time on the back-end of your workflow. Shooting with greater purpose, while seeing mood and light more effectively and making exposure adjustments as you shoot, will result in more refined images right out of the camera, which eliminates a lot of post-processing work.

Mirrorless Photography Love #5: Low-profile presence

The physical appearance of a mirrorless camera is closer to that of a point-and-shoot instead of a DSLR. This is a good thing if you’re a photographer, like me, who wants to “blend in” with a crowd and not stand out.

Image04

Mirrorless Photography Love #6: Lighter and smaller

The smaller physical size also takes significant weight off of my shoulders and back, which I appreciate during a 12-hour wedding day. It also means that I can have a smaller camera bag. For the travelling photographer, you’ll appreciate the compactness as well.

Mirrorless Photography Love #7: Being a part of the picture-making process

This is highly subjective, but for me, the physical form factor of my mirrorless camera has a certain “feel” to it that makes me feel as though I am a part of the picture-making process. The raw, hard, mechanical and manual feel to my Fuji camera is so much more inviting and intimate. This inspires me to shoot differently and puts me in a different place creatively.

Image05

Mirrorless Photography Love #8: Improved autofocus

The benefit of not having a mirror involved in the picture-making process means that there is less to go wrong in terms of autofocus. The accuracy of autofocus in mirrorless cameras is significantly better than DSLRs because of this. Secondly, because the mirrorless camera doesn’t have to rely on a separate phase-detection AF chip to focus, the focus points aren’t limited to the center of the frame. This means that your autofocus points have great coverage and more flexibility.

Mirrorless Photography Love #9: Easier AF refinement

The EVF in mirrorless cameras means a whole new world of possibilities with regards to manual-focus. Specifically, split-image and focus-peaking are huge benefits that make manual focus and AF focus refinement much easier with a mirrorless camera.

Mirrorless Photography Love #10: More intimate subject engagement

The LCD screen on a mirrorless camera is the same as the EVF, and therefore you can use them both interchangeably without limitation. Being able to use the LCD screen has a huge benefit in that it allows me to engage and have eye-contact with my subject when it’s needed.

Image06

The Future of Photography

What does the future of photography look like? Is mirrorless a part of it? I believe so. There are three main reasons why I feel that mirrorless cameras and the mirrorless market will shape the future of photography:

Technology

The technological gap between the mirrorless line-up and the DSLR line-up is narrowing. Already there are so many reasons that mirrorless cameras are better for many photographers, as I’ve outlined above. The remaining areas where DSLRs have the leg-up on the competition are diminishing. My estimate is that within the next two to three years, the mirrorless technology will have caught up, and in six to eight years, the only real option on the market will be mirrorless cameras.

Innovation

The attention that mirrorless cameras have been getting has done wonders for the photography industry. What I love most about it is that it’s no longer a monopoly, and competition ultimately fuels innovation. Every camera manufacturer needs to be thinking forward, and this will push the industry and the technology in a positive direction.

Why Not?

Lastly I ask – why not? Why shouldn’t mirrorless technology be a part of the future? Maybe I should ask this a different way – why do we need the mirror in cameras today? It’s an old technology that is clunky, outdated and unnecessary. If we can use the same sensors, have the same kind of processing power, have the same autofocus, and ultimately achieve the same kinds of images without the mirror, wouldn’t you just say that it’s one more thing to break or to worry about?

Image07

Further Discussion

If the topic of mirrorless photography intrigues you and you’d like to further the discussion, I would love to talk! Please post your comment in the section below.

The post 10 Reasons Why a Pro is Using a Mirrorless Camera for Personal and Paid Jobs by Bryan Caporicci appeared first on Digital Photography School.


Digital Photography School

 
Comments Off on 10 Reasons Why a Pro is Using a Mirrorless Camera for Personal and Paid Jobs

Posted in Photography


Creative Reasons to use Intentional Camera Movement

14 Jun

One of the earliest lessons you likely learned as a photographer was the importance of keeping your camera steady and stable. You wanted tack-sharp focus, so you learned to tuck in your elbows and support your camera properly. But why limit yourself when there are so many creative reasons to move your camera?

intentional camera movement, ICM, blur, motion blur, how to, sunrise

Try Intentional Camera Movement or ICM

ICM is the abbreviation for Intentional Camera Movement, a term that covers a wide range of photography situations. What brings these different situations together is the fact that rather than remaining still, the camera itself is moving while the photograph is being taken. This creates a wide-range of creative effects and abstract images, like the sunrise image above.

In order to capture recognizable blur, you need to shoot at a slow enough shutter speed to capture significant motion. A quarter to a half-second or longer is a good place to start. Shooting in Shutter Priority mode allows you to set a longer shutter speed, and your camera will choose an appropriate aperture. If the picture is too light or too dark, you may want to consider dialing in all of the settings in Manual mode. You can also achieve ICM style shots with a point-and-shoot camera in darker situations, where your camera will select for a longer shutter speed. (Both of the panning shots, below, were taken with a point-and-shoot camera in Program mode.)

Try Panning

Panning is one specific type of intentional camera movement. Rather than being random movement when panning, the movement of the camera mimics the relative movement of the subject. This results in an unusual composition where a moving subject appears frozen and the background of the image becomes blurred and conveys the sense of motion.

intentional camera movement, ICM, panning, people, motion, blur, blackandwhite

Panned at 1/4 of a second – if you want less blur use a slightly faster shutter speed like 1/30th

The tricks behind panning are in the focus and the follow-through. A moving subject and a moving camera can confuse your camera’s autofocus, so you will get better results if you use back-button focus or pre-focus the camera to the right distance and then switch it into manual focus mode. Either technique will keep the camera focused at the right distance, and you will not waste time waiting for your autofocus to lock on to your subject.

The second trick for panning is in the follow-through: both before and after you take the shot. Just like in golf or baseball, the smoothness of the swing comes from continuing the motion before and after the point of contact (hitting the ball or hitting the shutter). If you want smooth motion blur in your panning image, you need to be moving and following your subject both before and after hitting the shutter.

intentional camera movement, ICM, panning, motion, blur, car, vehicle

Panned at 1/8th of a second

The best way to get a feel for the mechanics of panning is to practice the movement without actually hitting the shutter and taking a photograph. Practice keeping your subject in approximately the same place within your viewfinder as it moves past you. For example, if you are trying to capture a panning shot of a car, begin by locating the car in your viewfinder when it is a short distance away from you. Swing the camera to follow the motion of the car as it approaches, passes, and zooms away from you. Once you have been able to successfully track a few cars and keep them in the frame, try repeating the same process but press the shutter button midway through the motion. Continue to follow the car with the camera as the shutter closes, and you will find you have a much smoother feel and flow to the final image.

Shooting a few successive frames using High Speed or Burst mode can help get a successful panning image also.

Try a Zoom Burst

A zoom burst is another specific type of intentional camera movement. Rather than moving the entire camera, during a zoom burst shot you move the lens and zoom it in or out while the photograph is being taken. The more focal lengths covered by your camera lens, the greater the zoom effect will appear to be.

intentional camera movement, ICM, zoomburst, zoom, motion, blur, christmas lights, abstract

18-270mm lens, 4 seconds at f/13, ISO 100 on a tripod

The bright points of light on a Christmas tree provide an excellent subject for a zoom burst shot, as each individual light renders as a bright streak across the image, making for a feeling of achieving warp speed and rocketing forward into the photograph. This shot had a shutter speed of four seconds and was taken hand-held, with one hand holding the camera and the other rotating the zoom lens during the shot. The slight bumps and jumps in the lights are a result of the movement of the camera body due to camera shake and the added motion from zooming the lens.

intentional camera movement, ICM, zoomburst, zoom, autumn, leaves, abstract, motion, blur

10-24mm zoom lens, ISO 100, 1/25th at f/22

Zoom burst shots can be of any subject, not just bright points of light. Here, the variations in color of the fallen leaves provide a colorful backdrop for the motion and lines of the zoom burst effect. This shot also demonstrates that you can achieve a zoom burst effect with a smaller range, as this image was shot hand-held using a 10-24mm lens.

Conclusion: try Intentional Camera Movement

There are many, many ways to use Intentional Camera Movement to capture creative and unusual shots, and these different techniques are just the tip of the iceberg. Don’t let yourself be locked in to only stable, tack-sharp photographs.

intentional camera movement, ICM, blur, motion, abstract, sunrise

ISO 100, 0.6 seconds at f/11 done hand-held by rotating the whole camera when shooting (took several tries to get that smooth)

Experiment with intentional camera movement, and you might surprise yourself! Share your results in the comments below.

The post Creative Reasons to use Intentional Camera Movement by Katie McEnaney appeared first on Digital Photography School.


Digital Photography School

 
Comments Off on Creative Reasons to use Intentional Camera Movement

Posted in Photography


8 Reasons to Use Silver Efex Pro 2 for Your Black and White Conversions

13 Jun

Silver Efex Pro 2 review

You can convert colour photos to black and white in Photoshop and Lightroom (or your Raw conversion software of choice). But the last few years have also seen an increase in the number of plug-ins built to do nothing else, other than convert photos to monochrome.

Today I’m going to look at what many people consider to be the best black and white plug-in around – Nik Software’s Silver Efex Pro 2. Rather than provide a comprehensive review of the software, I’m going to look at some of the things you can do with it that you can’t (or would be much more difficult) in Photoshop or Lightroom.

1. Presets

Silver Efex Pro 2 has 38 presets that you can use as starting points for your processing work, including vintage looks as well as modern ones. This places the plug-in ahead of Photoshop, and probably ahead of Lightroom too. You can buy Develop Presets for Lightroom, but it will be difficult to find some that give you as many options as those in Silver Efex Pro 2.

Here’s a sample of some of the presets. The original colour photo is shown top left.

Silver Efex Pro 2 review

2. There are more tools for enhancing texture

Silver Efex Pro 2 review

The full set of Contrast and Structure sliders in Silver Efex Pro 2.

One of the elements that makes black and white photos so effective is texture. You can enhance texture in both Photoshop and Lightroom (the Contrast and Clarity sliders are my favourite tools for this) but Silver Efex Pro 2 takes it several steps further.

The Contrast sliders

Silver Efex Pro 2 has four sliders for adjusting contrast. The Contrast slider is the same as the one in Lightroom or Adobe Camera Raw. The Amplify Whites and Amplify Blacks sliders let you increase Contrast in the highlights and shadows respectively. There’s also a Soft Contrast slider that increases contrast but in a less aggressive way, almost as if there is an overlay of gaussian blur. This slider is very useful for portraits.

If you get carried away with the Contrast sliders you can lose detail in the highlights and shadows. So, in addition to the four sliders already mentioned, there are two Tonality Protection sliders used to bring back detail in clipped areas.

Silver Efex Pro 2 review

These portraits show the difference between Contrast and Soft Contrast. Soft Contrast is ideal for portraits, while Contrast is better for subjects like architecture and the landscape.

The Structure sliders

Structure slider is similar to Clarity in Lightroom and Adobe Camera Raw. But while in those programs the Clarity slider affects all the tones in the selected area, in Silver Efex Pro 2 you can choose to adjust Structure independently in the shadows, midtones and highlights. There is also a Fine Structure slider for increasing mid-tone contrast in areas of fine detail.

Silver Efex Pro 2 review

The above photo shows three close-ups of the same portrait used earlier.

Top: A neutral black and white conversion, with no increase in Clarity.

Middle: This is what happens when you increase Clarity to 100% in Lightroom (note that you wouldn’t normally push it that far for a portrait, I did it here to show you the effect). Clarity is increased uniformly across the frame, affecting the skin tones as well as the hair.

Bottom: Shadows Structure set to 100% in Silver Efex Pro 2. Only the shadows are affected, leaving the midtones and highlights alone. This brought out the detail in the model’s hair and eyes, but left her skin untouched. You would have to use a selection or a mask in Photoshop or the Adjustment Brush in Lightroom to achieve the same effect.

3. Control Points make local adjustments easy

Just like in Photoshop and Lightroom you can apply adjustments locally as well as globally, using a system called Control Points.

A Control Point is the centre of a circle within which you can make tonal adjustments. The adjustment is applied to tones similar in brightness and colour to the pixels underneath the Control Point itself. For example, if you place a Control Point over a dark tone, then increase the brightness, only the dark tones within the circle are adjusted. Light tones remain untouched.

Silver Efex Pro 2 review

The yellow and black dot marks the Control Point. Adjustments are made to pixels matching the colour and brightness of the pixels underneath it. There are seven sliders you can adjust: Brightness (Br), Contrast (Co), Structure (St), Amplify Whites (AW), Amplify Blacks (AB), Fine Structure (FS) and Selective Colorization (SC).

It may sound complicated but it only takes a little practice to understand how it works. You can use as many Control Points as you want in an image, and group them together to cover areas that don’t conform easily to a circular shape.

4. Selective colouring is easy

Selective colouring is the technique of converting an image to black and white while leaving part of it in colour. This is easy with Silver Efex Pro 2 as all you have to do is place a Control Point over the area where you want to retain colour.

I used two Control Points in the following example, one on each coloured shutter:

Silver Efex Pro 2 review

5. The History panel is excellent

Silver Efex Pro 2 has the best History panel I’ve seen in any software. Every adjustment you make to your photo is listed.

Silver Efex Pro 2 review

The History panel works together with the Compare view. The yellow tab on the left indicates the photo used for the Before view, and the entry used for the After view is displayed in yellow text. This simple method lets you compare any two entries in the History panel.

6. The Zone System

Silver Efex Pro 2 can show you where the tones in your photo fall within the eleven zones of the Zone System. One useful application of this is that you can use it to see which areas of your photo may block up in print because they are too dark or too light.

This screenshot shows the tones which fall into zone 3. They are indicated by the brown diagonal lines.

Silver Efex Pro 2 review

7. Black and White film emulation

The Film Types panel gives you a choice of 18 different black and white films. When you choose one the plug-in emulates the tonality and grain structure of the selected film. It’s an easy way to get the film look without having to shoot, develop, and scan black and white film.

8. Silver Efex Pro 2 comes bundled with other software

Silver Efex Pro 2 is part of the Nik Collection, which includes seven applications and costs $ 149. That works out to less than $ 25 a plug-in.

Note: If you’re on a tight budget, the standalone version of OnOne Software’s Perfect Photo Suite 8 represents even better value at $ 79. Click the link to learn more.

Further resources

You can learn more about Silver Efex Pro 2 at these links:

  • Silver Efex Pro 2 official page
  • Silver Efex Pro 2 tutorials
  • Silver Efex Pro 2 videos on YouTube

Your turn

What software do you use for black and white conversions? Do you prefer Photoshop, Lightroom, another Raw conversion program or a plug-in? Let us know in the comments – what would you recommend to other readers?

The post 8 Reasons to Use Silver Efex Pro 2 for Your Black and White Conversions by Andrew S. Gibson appeared first on Digital Photography School.


Digital Photography School

 
Comments Off on 8 Reasons to Use Silver Efex Pro 2 for Your Black and White Conversions

Posted in Photography


5 Reasons Why Bad Weather Days are the Best Times for Photography

15 May

Bad Weather Photography Equals High Impact  Photos

Remember those days when you looked out your window and wished that the weather was better so you could get out and take some fantastic photographs? Do rainy, windy, stormy days stifle your photographic ambitions? I’ll give you five reasons why bad weather is not all doom and gloom for photographers.

bad weather photography with dark clouds

The things that keep most people indoors on bad weather days are the very things that have creative photographers heading for the great outdoors. Grab a rain jacket, brave the elements AND take your camera – these can be the best times for photography to capture something memorable.

Let’s look these five reasons to appreciate bad weather, and what they can offer you for photographs that get that second look.

  • Dark and unpredictable clouds
  • Powerful winds
  • Rain and drizzle
  • Snow
  • Fog

#1 CLOUD PHOTOGRAPHY FOR DRAMATIC IMAGES

Clouds can be brooding, moody and sinister – a great backdrop for photographing old buildings, new skyscrapers, and trees. While you’re out in the storm, also think about shooting just the clouds by themselves, to create a “cloud bank” of images to use as drop-ins for compositing with other images. Clear blue skies are pretty boring in most photos. With your catalog of cloud shots you’ll never have a bland sky photo again.

Low hanging clouds can add a really mysterious quality to your images. Think black and white photography when considering ways to take advantage of clouds. You can use post-processing techniques to accentuate the various layers of the cloud formations to add even more drama to your images.

In this shot of a storm moving in over the Bugaboo mountain range, I used Google Nik Silver Efex Pro and the Structure setting to add tonal definition to the clouds to create atmosphere.

bad weather photography stromy clouds

#2 WIND PHOTOGRAPHY FOR ARTISTIC EXPOSURES

bad weather photography- windy days
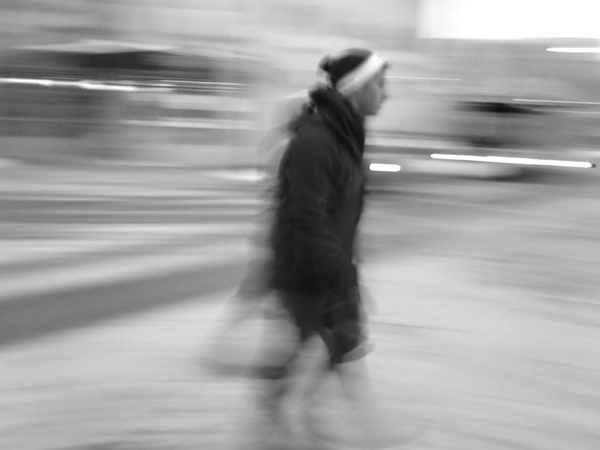
Windy days provide you with all you need to make excellent motion studies for long exposures – tall grasses flowing like waves, tress swaying wildly, leaves trembling and dancing full of motion. Waves on lakes become whitecaps, perfect for those milky long exposure waterscapes.

Even though still photographs capture a single moment, you can achieve great impact when you capture the residue of motion in a single frame. High impact daytime long exposure photographs need movement to be successful, and when the wind is blowing, things are moving. Capture this in a single frame and you have an instant “wow” shot.

Use a neutral density filter to slow your shutter so that it captures the motion created by the breeze. Use a tripod for your wind shots to make sure that whatever is not moving in your image stays nice and sharp. The contrast of solid and fluid is a powerful creative technique.

#3 RAINY DAY PHOTOGRAPHY FOR COLOR AND SPECIAL EFFECTS

badweatherphotography-rainstreaks

Rain is awesome for artistic and creative photos.

When it’s wet outside, colors become deeper, richer and more saturated. This provides you with a way to look at the great outdoors in a “different light.”  Observe how flat and lifeless colors appear on an overcast day. But add some rain and the colors really pop!

Rain photography gives you hundreds of subjects for creative artistic photos using reflections and ripples in puddles, lakes and other water bodies. A wet rainy day gives you macro photography opportunities, by providing you with drops, ripples, and rivulets, perfect in the flat, even light of a rainy day. Use rain streaks on windows as art effects to make high impact abstract images.

badweatherphotography-raindrops

badweatherphotography-rainclouds

#4 SNOW PHOTOGRAPHY

Gently falling snowflakes in photography can add an additional element of emotion to add more impact to your images – who hasn’t felt a little shudder in the blustery cold? It can be used to create a sense of realism in a photo, especially in street photography.

Heavy falling snow adds an instant texture to your images. Colors appear softer, and less vibrant as they compete with the white of the flakes. I find it adds an instant painterly effect to most images – especially those with lots of natural colors.

badweatherphotography-snow

#5 FOG PHOTOGRAPHY

Fog – moody and high impact scenic shots, great for storytelling, and it can be used as a “backdrop” to hide distracting backgrounds to isolate your subject.  I especially like fog photography because it adds an instant pastel effect to your images, which can make for stunning fine art photography.

badweatherphotography-fog

SURPRISE BENEFITS OF BAD WEATHER PHOTOGRAPHY

If you’ve endured the rain and the wet, chances are you’ll be rewarded handsomely for your efforts and patience.  You’ll have captured some rare and uncommon moments that most people never attempt. Because luck favors the prepared mind, you may also get really lucky. You’re outdoors, you have all your gear, and you are shooting. In amongst all those dramatic bad weather photographs you capture, you may find something truly wondrous in the very next frame.

badweatherphotography-opportunity

If you have any questions or comments please leave them below, and do share your bad weather stories and images as well.

The post 5 Reasons Why Bad Weather Days are the Best Times for Photography by Alex Morrison appeared first on Digital Photography School.


Digital Photography School

 
Comments Off on 5 Reasons Why Bad Weather Days are the Best Times for Photography

Posted in Photography


5 Reasons for Doing Natural Light Portraits

15 Apr

Natural light portrait

With all the attention given to the art and craft of shooting portraits using flash, you could be forgiven for thinking that this is the only way to take a portrait. The truth is that while fashionable Speedlites get all the attention, there are photographers working almost entirely in natural light and creating beautiful portraits without a softbox or light stand in sight.

One of the most prolific is Eduardo Izq, a photographer based in the United States who has built an impressive portfolio of natural light portraits taken using local models and dancers. Eduardo takes natural light portraiture to an extreme, often photographing his models without make-up. He may not be creating beauty portraits in the conventional sense, but by concentrating on character he is capturing portraits that are beautiful in a deeper, more fundamental way.

Please take some time to look at Eduardo’s website, you will learn a lot from it. For another insight into his work you can also read my interview with Eduardo about his ballerina portraits.

Intrigued? Here are five more reasons why you should take some natural light portraits:

1. It teaches you about light

To get the best out of natural light you need to become an observer of light. How does the quality, and quantity, of light change where you live from hour to hour, and season to season? How is the light affected by weather and the location? To take good natural light portraits you need to work in the most flattering light, and that usually means finding the shade or going out and taking portraits at the end of the day during the golden hour and twilight (my article The Magic of Natural Light: Twilight will help). Doing so will help you appreciate the quality of light in your area. This knowledge will also help you in other areas of photography.

2. Light is linked to location

As you become more aware of light you will come to see that the quality of light is linked to location and season. When you take a portrait of somebody outside, the light provides a link between the subject and the place they are in, tying the two together. Light, location and subject are entwined: it was only possible to take a photo of that person in that place with that type of light at one particular time. It’s almost impossible to reproduce the effect afterwards – the uniqueness of the light becomes part of the image. That is something different (not necessarily better, just different) from the effect of using flash, which is easily reproduced.

Natural light portrait

The soft light of the setting sun links the portrait of the woman with her horse to the location. Both are lit by the same light, a type of light that occurs naturally in this location in certain conditions at the right time of year.

3. Natural light is simple

Natural light portrait

Natural light is also ideal for black and white portraits. Here the light is shaped by the archways on the right.

Flash is not complicated for everybody, but it takes time to master and that can get in the way when you are starting out. One of my friends told me a story about a portrait shoot that went wrong. She modelled for a photographer who was working outdoors, and he spent so long setting his lights up and measuring the light that the shoot never really got going. She wasn’t happy with the results and I guess neither was the photographer.

Natural light is different because it is simple. In fact, I often go on a portrait shoot with just one camera and a single lens. This simple approach to equipment lets you concentrate on composition, lighting, and building rapport with your subject. Another benefit is that it is quick and easy to move from one place to another if you don’t have much gear. It is much more difficult if you have flash because you also need to move the extra equipment.

4. Your relationship with the model is critical

The number one thing that determines the success of your portraits is your relation with your subjects. Building rapport is essential, especially if you’ve never worked with your model before. Simplifying your approach means that you have more time to concentrate on building the relationship. This is essential. Your model’s pose and expression are the prime factors that determine the success of the portrait.

A portrait shoot is a collaboration, two people working together to create a beautiful image. If you ignore your model at the expense of setting up lights, the results will suffer. It takes real skill to be able to set up your lights quickly and effectively, while building a relationship with your subject. That can come later. If you start off with natural light, it gives you time to learn how to build rapport, and you can introduce flash at a later stage. Master one skill at a time.

5. Natural light is beautiful

Natural light portrait

The subject of this portrait is lit by the extremely soft red light that appears briefly after the sun has set.

It’s hard to beat the beauty of natural light at its best. The photo to the right is a good example. We were taking portraits at the beach at the end of the day and the light became more and more magical as the sun disappeared over the horizon. For a few short minutes we experienced the beautiful red afterglow of the sunset, and I used it to take the last few portraits of the session. Moments like this don’t come often, but the results are worth it. Shooting in light that is beautiful, yet fleeting and difficult to find, elevates your portraits to another level.

Your turn

What is your experience of shooting portraits in natural light? Do you prefer to take the simple approach to equipment and lighting? Can you recommend any portrait photographers who work in natural light? Let us know in the comments.


The Natural Portrait ebookThe Natural Portrait

My ebook The Natural Portrait teaches you how to take beautiful portraits in natural light. This 240 page ebook, published by Craft & Vision, takes you through the entire process of natural light portrait photography through from finding a model, deciding where to shoot, working with natural light and post-processing your images. Click the link to learn more or buy.

The post 5 Reasons for Doing Natural Light Portraits by Andrew S. Gibson appeared first on Digital Photography School.


Digital Photography School

 
Comments Off on 5 Reasons for Doing Natural Light Portraits

Posted in Photography


8 Reasons You Should Organize Your Photo Collection

18 Mar

Editing and organizing our websites, print portfolios, business collateral and promotional material is something every professional photographer does at least once if not several times a year. It allows us to present the best possible vision of our work to our clients.

After a build-up of new work it was time for me to edit my portfolio as well. I’ve spent the last several weeks working on a vigorous edit in preparation for a large annual marketing and meeting push – and it occurred to me this would make a good post for dPS. While the purpose of my organizational edit is for business reasons, you don’t need to be a professional photographer to benefit from a good organization of your images. Every level of photographer will find something valuable in it.

Here are eight reasons why you should consider spending a bit of screen time and organize your photo collection.

Website Thumbnail Edit

1. Everything is easier to find

If you don’t have a good organizational system in place, there’s little that’s quite as droll as sifting through your images and key wording, tagging, starring, folder sorting, and/or color coding them. However you want to distinguish your files, it helps to find them in a pinch.

Without a good system how will you ever locate those photos of the Johnson family if they decide they actually want to buy some from you down the line? Or what about that shot you entered a year ago on a National Geographic forum… and now they want to publish it!

No matter what your system is, it’s important to develop one. Just know yours in and out, in case a cool or monetary opportunity arises in the future.

How could you find a file in this mess?

How could you find a file in this mess?

2. See how you’ve progressed

Sitting down and organizing your images from beginning to the present gives you a great overview of how you’ve progressed since first picking up a camera. You’ll notice not only the difference in content of what you’re photographing, but the quality of it as well. There’s nothing as bemusingly head-shake inducing as looking at some of the first images that came out of your camera. How could you possibly ever have been that bad?! Look back and see how far you’ve come and celebrate!

3. You’re forced to review the good with the bad

There are some valuable lessons to be learned in organizing your images, especially in recent ones. You’ll get a play-by-play look at the good images, along with the bad ones.

Sit down and really take some time to think about what it is that makes you admire certain images, but dislike others. What did you do right in those great ones? What did you do wrong in the poor ones? This critical review will help you develop your eye and create better images in the future.

4. It will teach you to avoid recurring mistakes

During any good review you’ll probably realize there are one, two or more mistakes you’re consistently making. You’ll find new ones every time you do this, and you’ll know what to avoid in the future.

During past reviews I found I used to slightly overexpose my images, or that I was lacking in night images with my travel shots. Taking the time to review allowed me to correct those mistakes and bolster the holes in my portfolio. I’m always finding something new to work on, and so will you. Learning from your mistakes is what makes you better.

5. Discover ideas you want to revisit

Perhaps a year or two or more ago you took a trip to the Grand Canyon or photographed a really fun concept, but realize now all the little things you missed or messed up on. Now that you’ve sat down to organize you remember that great idea you had – and with your new-found knowledge, it could be a great time to revisit the shoot and improve upon it.

There’s nothing wrong with revisiting a concept you’ve photographed before and working to improve it. Many professionals work on a project or series for years before they think it’s complete. Some scrub everything they’ve shot and re-start again on a concept they love, but want to tackle with a new execution. Consider it a challenge to re-invent something you’ve already done.

Color-Theme-MattDutile

6. Find themes and begin developing a vision

If you had your own website, or already do have one, how would you organize it? Would there be a portrait section? Or weddings and babies? Perhaps landscapes and still life? Or travel and lifestyle? Most professionals organize their images by subject, project or theme. Doing so in your own work can tell you a lot about what kind of photographer you think you are or want to become. What do you value and enjoy shooting?

Look for themes across your work other than simply subject. What you may notice appearing is your specific style or vision. After a great period of time every photographer begins developing a sense of style, but you may be able to notice the threads of it early. It’s a clue to what you value in your images and your unique perspective.

Monk-Theme-MattDutile

7. It’s easier for potential clients

If you have the desire to take your hobby professionally one day, organizing now and understanding how you would define your photography will make it easier for potential clients to identify what they like about your work ,or why they should hire you. The business of photography is defining what you bring to the market that’s different, and at what value. It’s answering the question, “Why should I work with you?”.

8. It just looks nice

The last reason is one of simple vanity. Organization, if done right, just looks pretty. I often enjoy in my spare time putting together different color arrangements, collages and themes. Some of them make their way into my marketing material if the idea turns out particularly good, others may entirely change the way I categorize my business, and still others go in the trash as a fun but failed experiment. Organization doesn’t just have to be a boring task though, it can fuel creative insight and help you develop your images.

The post 8 Reasons You Should Organize Your Photo Collection by Matt Dutile appeared first on Digital Photography School.


Digital Photography School

 
Comments Off on 8 Reasons You Should Organize Your Photo Collection

Posted in Photography


8 Reasons We’re Looking Forward to Springtime Photography

26 Feb

Ah, the changing of the seasons. For us photographers, most seasonal changes bring about opportunities to take great photos under differing conditions, and usually no change is more dramatic than the transition from winter to spring.  The world thaws into a new and color-dripped landscape, ripe for capturing its natural beauty through springtime photography. There is always an influx of Continue Reading

The post 8 Reasons We’re Looking Forward to Springtime Photography appeared first on Photodoto.


Photodoto

 
Comments Off on 8 Reasons We’re Looking Forward to Springtime Photography

Posted in Photography


Some Reasons Why to Shoot High ISO

08 Jan
1/125th at F2, ISO 6400 (Fuji X100s)

Fuji X100s: 1/125th at F2, ISO 6400.

The most common photographic fear that I come across these days is when people are afraid to raise the ISO setting on their cameras.

Just a handful of years ago, these fears were justified.  Raising your ISO to 1600 or 3200 was a no-go for a majority of cameras.

But no longer. Things are changing.

Some Reasons Why to Shoot High ISO  

The improvements in camera technology have been such that you can now photograph at ISO 1600, 3200, and even 6400 with many of the newer SLRs, micro four-thirds, and mirrorless cameras.

Before you move on, if you are unclear about what ISO is, read more on the subject here:

  • Introduction to ISO
  • Photography 101.7 – ISO
  • Moving Toward Manual Settings: Understanding ISO (a beginner’s guide)

But doesn’t a lower ISO mean better image quality?

Canon 5D Mark II: 1/320th at F6.3, ISO 1600 (135mm). The high ISO allowed for a 1/320th shutter speed to account for both the motion in the scene and for the long focal length used.

Canon 5D Mark II: 1/320th at F6.3, ISO 1600 (135mm). The high ISO allowed for a 1/320th shutter speed to account for both the motion in the scene and for the long focal length used.

Well yes – and no.

Yes, if you are setting up a studio shot and controlling the lighting.  Yes, if you are using a tripod, if you are a landscape photographer, or if there is very strong natural light.  Yes, if you don’t have to compromise your shutter or aperture settings to expose the shot correctly.  ISO 200 will always create a significantly sharper and cleaner image than a shot at ISO 1600 when the aperture and shutter settings are the same.

In every other case the answer is no.

Raising your ISO will give you the ability to capture a higher quality photograph in many situations because it gives you the ability to use a faster shutter speed and smaller aperture (a larger aperture number) to get a sharper scene.  Getting the aperture and shutter settings correct are much more important than using a low ISO in creating a technically great photograph.

If you want to know how great event photographers consistently create such bright and beautiful images, it’s not only because they use fast lenses and flashes.  It’s because they are not afraid to raise the ISO to very high levels to capture the natural light in a scene.

In addition, the look of grain at high ISOs in digital cameras has become more pleasing.  The newer camera models have not only reduced the strength of grain (noise) at high ISOs, but they have given that grain a more pleasing look.

ISO has now become a luxury instead of an obstacle.  We can photograph in dark areas while handholding the camera when we need to.

Detail Shot of the 5D Mark II at ISO 1600. Minimal, pleasing grain.

Detail Shot of the 5D Mark II (released in 2008) at ISO 1600. Minimal, pleasing grain.

When shooting at a high ISO, get the exposure right

The major problem with photographing at a high ISO is that raising the exposure in post production significantly will ruin the look of the grain.  Raising the exposure a small amount is usually okay, but if you are photographing with a high ISO, you need to be even more diligent than usual about exposing your images correctly in the camera.

Pay attention to colour noise versus black and white noise

You also want to pay attention to how your camera handles the look of noise in your colour images.  The Fuji X100S, for instance, handles colour noise exceptionally well, where as other cameras do not do so well with colour noise at very high ISO levels.  However, in many cases, the problem can often be solved by simply turning the photo into black and white.

Fuji X100S, tiny detail at 6400.  Excellent color noise.

Fuji X100S, detail shot at ISO 6400. Very significant grain but excellent colour noise.

Take a look at the image detail above.  This was taken with a compact mirrorless camera at the very extreme end of its ISO range, 6400.  Yes, there is a lot of grain but it still looks good.   I prefer not to go over 3200 with this camera when I can avoid it, but without using ISO 6400 here I probably would not have been able to capture this image.

How do I test my camera’s ISO?

I wish I could talk about specific cameras here, but the list is too long.  I use the Canon 5D Mark II (released in 2008) and Fuji X100S and regularly shoot at ISO 1600, 3200, and even 6400 when capturing the city streets at night.  The Canon 5D Mark III does an even better job with noise at high ISO.

Each camera has different noise (grain) levels, so the first step is to research reviews on the noise levels of your camera or potential purchase.

If you own the camera already, the next step is to test it out yourself.  Make sure you are using a fast shutter speed and an aperture of somewhere between F8 and F16, so that each image you take is guaranteed to be sharp.  Then take the same shot at ISO 200 all the way through 6400.  Look at the images zoomed in to 100% (1:1 in Lightroom) on your monitor in both black and white and colour.

If you have a photo printer, I highly suggest printing out those images to see how the grain looks in real life and to see the differences between each image.

It is also important to remember, if you are regularly printing at smaller sizes, such as 5×7 or 8×10, then you will likely not notice a significant difference between ISO 200 and 1600.  If you prefer to print at larger sizes, such as 13×19 or 20×30, then there will be a noticeable difference.  So test it out.

Canon 5D Mark II: 1/500th at F9, ISO 800 (28mm).

Canon 5D Mark II: 1/500th at F9, ISO 800 (28mm).

Zoomed in - insignificant grain at ISO 800.

Zoomed in – insignificant grain at ISO 800

Fuji X100S: 1/250th at F9, ISO 1600.

Fuji X100S: 1/250th at F9, ISO 1600.

Insignificant and pleasing grain.

Zoomed in – insignificant and pleasing grain

Grain is beautiful!

Do you remember the last old, grainy photograph that you saw in person?  It was gorgeous, right?  Digital technology is getting there.  Now is the time to get over your fear and try out shooting at higher ISO!

The post Some Reasons Why to Shoot High ISO by James Maher appeared first on Digital Photography School.


Digital Photography School

 
Comments Off on Some Reasons Why to Shoot High ISO

Posted in Photography