RSS
 

Posts Tagged ‘Reasons’

5 Good Reasons to Take Your Dog on Photography Walks

27 Sep

When I travel into the city (San Francisco) I take along my furry assistant and mini model, Mila, for the trip. She’s been working with me for awhile now. She trades in Pup-Peroni and DentaStix, and her daily rate is affordable, but I think she’d work for free too without complaint. I’d always rather bring my pup along on photography walks than go solo.

Take Your Dog on Photography Walks Header

There are a lot of great reasons to practice photography with your dog! I can already think of five good reasons to take your dog on photography walks.

1. Dogs pose for you

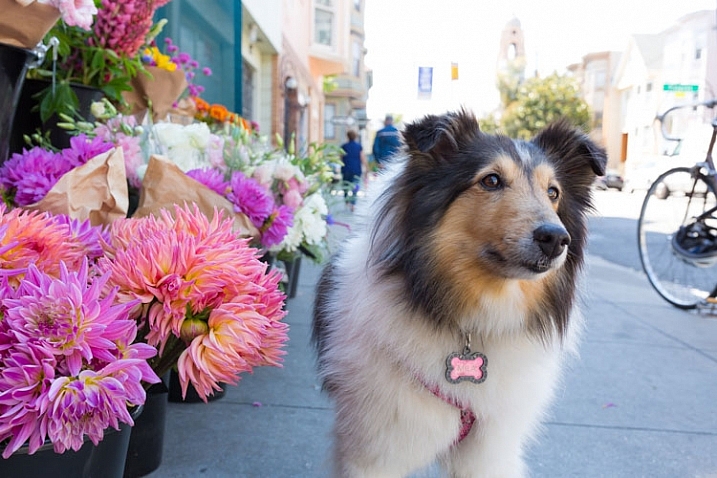
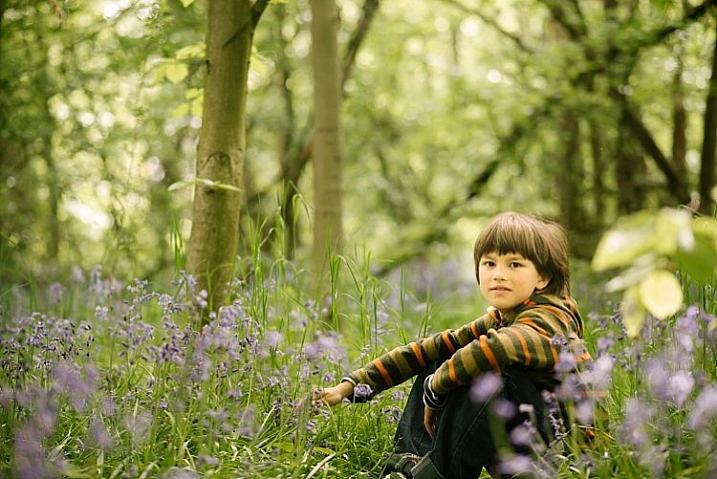
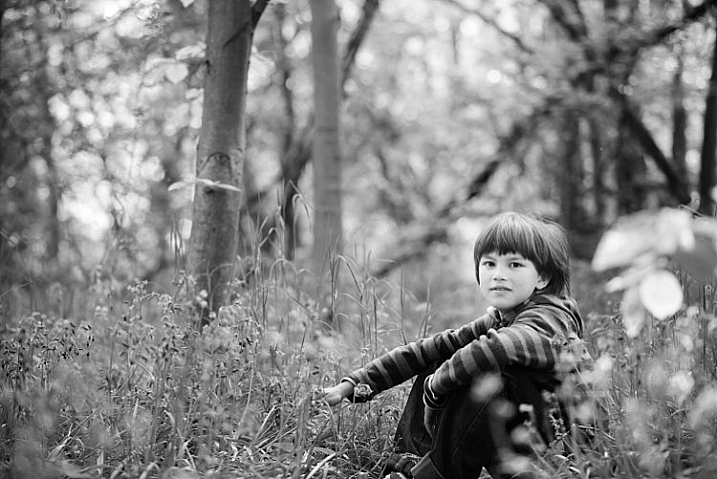
What better way to get test shots of a location than to photograph an assistant? But assistants cost money or at least a glass of wine, so if you’re running a tight ship your dog is a great option. My girl Mila has stood in for me on many location scouting trips. The best part about it is that I now have gazillions of photos of her from all of our adventures.

Take Your Dog on Photography Walks - dogs pose

Would this image have been as interesting without Mila posed in the middle?

2. Dogs break the ice

I find this especially useful for street and travel photography. People are less leery of me walking around taking pictures of their homes, businesses, etc., when I have Mila with me. In fact, they often stop to take pictures of her. Her presence encourages positive interaction and engagement, which is very helpful for me when I am trying to get the pulse of a place. Plus, it relaxes people, which makes for all-around better photography in my book.

Take Your Dog on Photography Walks - dogs break the ice

Mila always turns heads on the street. Who doesn’t love a dog that knows how to work the camera?

3. Dogs are like kids, they teach you patience

They need to be fed when they’re hungry. They need to drink when they’re hot. They fidget and don’t give you much time to get that winning shot. Oh, and they get tired and need to take naps in the middle of the street. If you thought child photography was difficult, try pet photography.

Mila is an exceptionally well-trained and mature dog, but she still reacts to her basic needs much as a toddler would. Practicing photography with her makes me very aware of my timing and helps me develop my patience, speed, accuracy, and client empathy. Dogs are great “personal trainers” for working with younger or more demanding subjects.

dogs are like kids they teach you patience

The hunched shoulders tell me all I need to know: it’s time to take a break. Even so, Mila was patient enough to let me snap this shot of her in front of the famous murals at the Mission District Women’s Center.

4. Dogs protect you

I will not lie, the thought of walking solo through San Francisco with the street value equivalent of a small sedan around my neck is somewhat unnerving. Couple that with a lack of situational awareness when I am focused on taking a shot, and I’ve got all the makings for a pretty nice mugging. I always feel better when Mila is with me because (a) thieves don’t like messing with chicks with dogs, and (b) she’s got really sharp teeth. (I learned the hard way not to hand-feed her bacon.) If you can’t take a human friend on your next photography walk, why not take man’s best friend?

Take Your Dog on Photography Walks - dogs protect you

Check out that sassy tongue! I challenge anyone to mess with me while my furry bodyguard is on the job.

5. Dogs encourage new perspectives

It’s true that all photographers get into ruts. We get used to taking certain kinds of photos because we’ve had past success with them and therefore know they will be well-received. We have to continually challenge ourselves to seek out new perspectives, and a great way to do this is to imagine seeing the world through someone else’s eyes.

Why not a dog’s? When I work with Mila, I always get inspired to look at things differently because I have to get down on her level or compose shots to complement her smaller size. Just be prepared for lots of dirty knees, soiled shirts, and the occasional funny look as you combat crawl through grass and gutters towards your furry subject.

Get low. Amazing how the scenery changes when you're 18 inches off the ground.

Get low. Amazing how the scenery changes when you’re 18 inches off the ground.

Conclusion

I love taking my dog with me on photography walks. Does it add some extra complexity? Absolutely. (I realized a little too late that I shouldn’t drink two glasses of water on the way to the city, it’s not easy to find dog-friendly bathrooms!) But I think about the rewards of having a pet companion with you on a photography walk, one that encourages you to interact with your environment and seek out new perspectives. It is well worth the extra effort.

If you don’t have a dog of your own to accompany you, perhaps you can borrow a friend’s.

Scroll below for more images from our San Francisco photography walk. Do you take your dogs on photo walks with you? Please share your photos and thoughts in the comments below:

Take Your Dog on Photography Walks 8

Black Magic Woman. I never knew Mila was a Santana fan. The things you learn about your dog on a photography walk.

Take Your Dog on Photography Walks 9

Funky fun style is a must in the Mission! Wear something colorful and bohemian and you are bound to blend in. Mila’s fashion sense led the way to this rack of hot threads.

Take Your Dog on Photography Walks 10

Dog Friendly. There are lots of lovely outdoor seating options at cafes, making them great places to grab a bite with your furry friend.

Take Your Dog on Photography Walks 11

I imagine this is what Mila sees when she looks up. The Mission District is renowned for its vibrant murals that celebrate the heritage and culture of the local Mexican community.>

Take Your Dog on Photography Walks 12

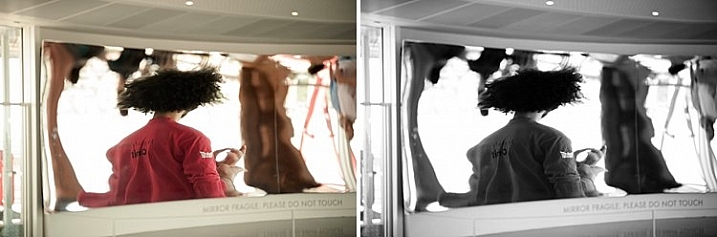
Driveways in San Francisco are often small and on an incline, making backup mirrors like this an important garage accessory. They’re also convenient when you want to take a grungey selfie with your Sheltie.


googletag.cmd.push(function() {
tablet_slots.push( googletag.defineSlot( “/1005424/_dPSv4_tab-all-article-bottom_(300×250)”, [300, 250], “pb-ad-78623” ).addService( googletag.pubads() ) ); } );

googletag.cmd.push(function() {
mobile_slots.push( googletag.defineSlot( “/1005424/_dPSv4_mob-all-article-bottom_(300×250)”, [300, 250], “pb-ad-78158” ).addService( googletag.pubads() ) ); } );

The post 5 Good Reasons to Take Your Dog on Photography Walks by Jessica Tallman appeared first on Digital Photography School.


Digital Photography School

 
Comments Off on 5 Good Reasons to Take Your Dog on Photography Walks

Posted in Photography


So, you don’t care about the iPhone 7? Here’s 10 reasons why you should

10 Sep
The iPhone 7 has a newly designed 12MP camera with a six-element, optically stabilized lens. As well as stills it can shoot 4K video at up to 30p, and the iPhone 7 Plus offers a twin-lens camera providing 28mm and 56mm focal lengths. 

Another year, another iPhone, the usual chorus of Internet commenters going to great lengths to tell the world how little they care. But we’d be foolish to ignore the world’s most popular camera – and so would you.

Here’s why.

$ (document).ready(function() { SampleGalleryV2({“containerId”:”embeddedSampleGallery_5515118563″,”galleryId”:”5515118563″,”isEmbeddedWidget”:true,”standalone”:false,”selectedImageIndex”:0,”startInCommentsView”:false,”isMobile”:false}) });

Official iPhone 7 sample photos, courtesy Apple

1: 12MP is good enough

Ok, most DSLRs and high-end compacts offer 20MP+ but if we’re being honest, 2MP is good enough for Facebook, 3MP is good enough for a magazine cover, 6-8MP is good enough for a large-ish wall print and anything more than that is a bonus, most of the time. In short, the chances are that 12MP is good enough for you. 

2: It shoots Raw

It was only a matter of time before Apple added a Raw capture option to its iPhone series, and the day has come. As such, the iPhone 7 and 7S are arguably more enthusiast-friendly than the majority of low-end zoom compact cameras, and almost all tough cameras.

Adding Raw capture to the iPhone gives photographers a lot more creative freedom, and should allow them to mitigate – if not entirely overcome – some of the limitations of shooting with a control-limited device and a small sensor format. Raw shooting is coming to older iPhones soon too, with the upcoming release of iOS 10.

3: The iPhone 7 Plus has a proper zoom. Kind of.

The iPhone 7 and 7 Plus feature 12MP imaging sensors – most likely a 4.9 x 3.7mm BSI-CMOS which gives an equivalent crop factor of around 7X. The 7 Plus has two of them, which form twin cameras shooting at 28mm and 56mm equivalent. Their F1.8 and F2.8 apertures are equivalent in depth of field terms to ~F12 and ~F22 respectively.

The iPhone 7 Plus features a twin-camera design, which comprises 28mm F1.8 and 56mm F2.8 equivalent prime lenses. A forthcoming update will enable a computationally-derived bokeh simulation effect.

A 28-56mm two-step zoom might not set your heart ‘a flutter, but for the average beginner, or keen smartphone photographer, the added versatility of a proper choice of optical focal lengths is a serious selling point of the iPhone 7 Plus over every other phone on the market. A true optical zoom would be hugely complicated, but Apple’s approach makes sense. One lens for landscapes, one for portraits.

5: The iPhone 7 Plus can do bokeh. Kind of. 

We’ve seen attempts to blur out backgrounds using software before, but they don’t tend to end well. Typically, in the devices which offer some kind of algorithmic background blur feature, the effect is inconsistent. Even when it works, it doesn’t hold up well to critical examination.

We won’t be able to properly test the iPhone 7 Plus’s bokeh simulation effect for a while, but early samples look very encouraging indeed. 

Apple seems to be doing two things a little differently. The first is that the feature only works in ‘Portrait’ mode (when the iPhone 7 Plus’s 56mm equivalent lens is employed), and the longer focal length probably gives it a bit of a head-start in terms of baseline background blur for portraits compared to a bog-standard wideangle cellphone lens.

The second is that rather than just identifying your subject, making a mask, then blurring everything which looks like it probably isn’t your subject, the iPhone 7 Plus’s software makes a very complex depth map of the scene, and selectively applies blur based on the calculated distance of the background from your intended subject. For now, we only have Apple’s sample images to go by, but it seems to work impressively well.

6: It’s optically stabilized

Here’s an exploded view of the iPhone 7’s camera, showing its six-element construction.

This is old news in the mainstream camera market, but optical stabilization still isn’t included in some fixed-lens cameras. Optical I.S. will make the iPhone 7 and 7 Plus cameras more useful in poor light, extending the potential of the products for social and environmental photography.

7: It’s quick, and powerful

Modern smartphones incorporate an incredible amount of processing power, and compared to most cameras they’re capable of churning through much more data. With the cameras activated, the iPhone 7 and 7 Plus are constantly sampling a scene in preparation for exposure. So effectively, when you tap the shutter button, they’ve already taken the picture. On-sensor phase-detection autofocus using dedicated pixels means there’s virtually no hunting for focus, either.

Apple claims that the iPhone 7/Plus’s imaging processor manages more than 100 billion operations every time a picture is taken. Think about that the next time you take a photo of your cat.

8: It shoots 4K

Maybe you think you don’t care, but trust us – even if you’re not a filmmaker, the ability to capture 8MP frames at up to 30fps can be pretty handy.

9: It’s water-resistant

You can take the iPhone 7 and 7 Plus out in the rain, or drop them in the bath without worrying. How many photographers can say the same thing about their ‘proper’ cameras?

Supposedly, the iPhone 6S was almost water-sealed, but not quite. With the removal of the headphone jack, the iPhone 7 and 7 Plus have been made fully water resistant, and are both capable – apparently – of being submersed for up to 30 minutes without damage. 

10: Good iPhone cameras lead to better ‘proper’ cameras.

Even if you’re one of those people who has an almost religiously-held indifference to cellphones (and I know you exist because I get emails from you), consider this:

The greater the public’s expectations of the cameras in their cellphones, the more they expect of ‘proper’ cameras, if and when they buy one. There is certainly an argument to be made that the only reason we have things like beautiful high-resolution touch-screens, wireless connectivity, GPS and 4K video in cameras now is the iPhone. That ten years ago, Apple kicked off a smartphone revolution with the original iPhone which lead to the inclusion of these features in cameras becoming an expectation on the part of smartphone upgraders.

Habitual iPhone photographers won’t put up with laggy low-resolution touch-screens on DSLRs, or the omission of features like 4K video and wireless connectivity that they’re used to from their phones. This drives camera manufacturers to add more features to their products, and we all benefit. Right?

10.5: It’s an iPhone camera.

This is an obvious point, but bear with me. Remember what I just wrote about this being the ‘world’s most popular camera?’ Apple has been phenomenally successful when it comes to putting its devices in people’s pockets. More people are taking photographs now than ever before, and the iPhone, in its various versions, is the most popular picture taking device (or strictly speaking, series of devices) in the world.

What that means is that like it or not, when Apple does something, even if it didn’t do it first, it tends to have a certain significance. It’s safe to assume that there are a lot of people talking about the words ‘Bokeh’ and ‘Raw’ today who had never heard the terms before Apple’s launch event this week. Maybe I’m just a misty-eyed optimist, but I think that’s kind of cool. 

Articles: Digital Photography Review (dpreview.com)

 
Comments Off on So, you don’t care about the iPhone 7? Here’s 10 reasons why you should

Posted in Uncategorized


6 Reasons Why an iPad Makes a Good Photography Companion

08 Sep

I have an iPad Air 2 and I simply love it. It’s my portable digital workhouse. I can pop into most cafés where free wi-fi is the norm. I can enjoy a delicious cup of java, while checking my inbox, or pen a draft for my next article for dPS.

iPad Air 2

iPad Air 2

My main reason for purchasing the iPad was that I went back to college recently. I thought about buying a laptop. After a bit of research, I decided an iPad, paired with a keyboard case, essentially turned it into a mini laptop of sorts. Plus it was less expensive and more portable. I’ve completed the course, but the iPad has now become a great companion for my photography.

I was recently in a cafe waiting to meet a client, when an idea started to take shape about the advantages of having an iPad as a photographer. Following on from a previous article I wrote on “Can an iPad be used as a softbox or custom background?“, I realized that I am using my iPad more and more in my photography work than ever before.

ipad-paired-with-keyboard-open

iPad Air 2 paired with a Logitech keyboard

I could go on at length, extolling the many virtues of having an iPad/tablet as a photographer. Instead, I’ll limit my list for now to just six.

Here are my top six reasons an iPad makes a good photography companion

  1. Portability makes it handy to take anywhere
  2. Displaying your work or portfolio makes you look good
  3. Editing and sharing images is easy
  4. Reading and learning
  5. Spoiled for choice with so many Apps
  6. Google Drive

1. Portability of the iPad

The iPad Air 2 and other tablets are just so light, and even more portable than most laptops. The iPad Air for me is the ultimate Digital Briefcase! The dimensions are 9.4 x 6.6 x 0.24 inches (240 x 169.5 x 6.1 mm). It weighs just 0.96 pounds (436 grams). I feel like James Bond! (sorry Jane Bond)

portability

The iPad fits snugly into my camera bag.

2. To display your work

As a photographer, your work should speak for itself. As a commercial photographer, it’s what gets you your next gig. Now more than ever, there are so many ways to get your work online.

The first option is to have a personal website. But this does mean paying for a domain name and hosting. So what if you don’t want to invest in a website? If you are just starting out in your photography career or you’re a keen hobbyist? Again there are many ways to showcase your portfolio online and in most cases for free. For example there is Behance Display, Flickr, 500px and Morpholio to name just a few.

The retina display on the iPad allows maximum clarity of your photos, and makes it very easy for the viewer to look at the details by easily “zooming in” by pinching the screen. Also, flicking through your images or albums with a swipe of a finger, makes the experience much more tactile and hands-on. Similar to flipping pages of a book.

Recently, I met with a client and I needed to bring a digital portfolio with me. I don’t have my full range of work online. I also couldn’t rely on a solid wifi connection. So I put together a portfolio, saved it out as a PDF, and synced it to iBooks on the iPad. A typical page layout program, such as InDesign would be used to put a portfolio together. However, if you just have Photoshop, then here is a great way to create your own portfolio PDF for your iPad from multiple pages.

Creating a PDF portfolio from multiple pages in Photoshop

Open Photoshop and create all your pages the same size, 2048 X 1536 pixels. Place each image and text on a separate page. You can determine how many pages that you want in your portfolio. A general guide is 15-20 pages.

Go up to File>Automate>PDF Presentation. Check this box, “Add Open Files”, and click Save. Name your file and Save it to a location on your computer.

File-Automate-PDF-Presentation

This is handy tip in creating a pdf file from multiple pages or images in Adobe Photoshop.

Make sure to check the Add Open Files box.

When another dialog box appears, make sure Optimize for Fast Web Preview is checked.

Optimize-for-fast-webpreview

Make sure that the Optimize for Fast Web preview box is ticked.

Click on Compression under General (on the left side, see below screenshot). At the top, change the Adobe PDF Preset to High Quality Print, and next to Image Quality, change the setting from Maximum to Medium. Then click on the Save PDF button.

Compression-image-quality-medium

Choose the High Quality Print from the Adobe PDF Preset at the top. Then change Maximum beside Compression to Medium.

Tip: Try and keep the file size below 5mb so as you can email it to potential employers or clients. If you can’t optimize the file size to less than 5mb, then create another portfolio with less pages. PDF files can be viewed on a Mac or PC.

If you don’t have Photoshop, then read on to number six below, and I’ll show you how to create a PDF portfolio using Google Slides.

3. Editing and sharing images is easy

I haven’t done a lot of editing on the iPad. I prefer to do my post-processing at my desktop, where I have the big monitor and stylus. However, I think the iPad Pro could possibly change my mind.

I did try Snapseed. It’s impressive, so intuitive, and free. Other free editing apps are VSCO, Adobe Photoshop Express, and Instagram. What also makes these apps powerful is the ease with which you can share your images online to your social media accounts, or upload them to the cloud.

4. Reading and learning

I’m coming around to reading ebooks and PDFs on my iPad rather than a book. Although, you can’t beat a physical book in your hand. That said, from a practical point of view when travelling, carrying just one book takes up so much room!

I now have my Nikon D750 user manual downloaded on the iPad. This manual alone, although relatively compact in size, still has 507 pages and weighs 310g (11oz).

Tip: If you are using the Safari browser and open a PDF file, you can save it straight to iBooks.

5. Choice of Apps for the iPad

Given the array of apps already in the app store, it’s just not possible to run the gauntlet on them all. Here are a few that popped up on my radar.

  • LightTrac ($ 8.99): LightTrac calculates and plots the angle of Sun and Moon on top of a map, for any location.
  • The Photographer’s Ephemeris ($ 8.99):  TPE  shows you which direction the sun is shining at any given time during the day, no matter what location you choose.
  • Pocket Light Meter (FREE): A light meter that is always in your pocket. It is indispensable for film photography with a manual camera. Measures reflected light, and allows reciprocity calculations.
  • Simple DoF Calculator ($ 1.99): Simple DoF Calculator allows you to calculate the depth of field and hyperfocal distance for any given settings.
  • Take notes to a new level with Evernote (FREE), the productivity app that keeps your projects, ideas, and inspiration handy across all your digital devices.
  • Photography Releases – 500px has a free one. If you shoot Stock photography, a model/property release is a must have.
  • Snapwire also has a free model/property release. I downloaded this app and found it really useful, especially as it stores the photographer’s information. No need to keep filling in this info for every release. Plus it has the templates for all of the major stock sites.

6. Google Drive

What’s not to like about Google Drive? Google Drive is a complete office suite with Google Docs, Sheets, and Slides. Plus you get 15 GB free storage online. In Google Photos, images not exceeding 2048 x 2048 pixels, and videos shorter than 15 minutes ,also do not count towards this limit. It is hard to find fault with this setup when it’s all free!

It is really a Digital Photo Assistant. You can access email, write and publish blog posts, keep track of your schedule and contacts. Share out documents and collaborate with clients online. I also love that you can work with Google docs offline. This has proven as a great time saver if your internet connection is poor, or you simply don’t have access to an internet connection when you need it.

Google Slides is Microsoft’s version of Powerpoint. Here’s an animated gif to illustrate how easy it is to create your PDF portfolio. It’s well worth giving it a go.

animated-gif-slides-portfolio

An animated gif illustrating how easy it is to use Google Slides to create a PDF portfolio for the iPad.

To sum it all up

It was a challenge to keep this list to just six things. I know this could change over the next few months as I continue to use the iPad.

I didn’t mention uploading your photos from your camera directly onto the iPad. You can, but you need the Lightning to SD Card Camera Reader – $ 29.00 or the Lightning to USB Camera Adaptor – $ 29.00.
I only mentioned a mere smidgen of available apps, and most of those were free. This is only a tip of the app-iceberg-store. Some of the paid apps look interesting too.

It’s mind boggling just keeping up with trends. With the recent launch of the iPad Pro. It won’t be long before the iPad has morphed into a real contender, in place of a laptop, for the photographer out in the field.

Do you have an iPad or tablet? What apps do you use? Please share in the comments below.

googletag.cmd.push(function() {
tablet_slots.push( googletag.defineSlot( “/1005424/_dPSv4_tab-all-article-bottom_(300×250)”, [300, 250], “pb-ad-78623” ).addService( googletag.pubads() ) ); } );

googletag.cmd.push(function() {
mobile_slots.push( googletag.defineSlot( “/1005424/_dPSv4_mob-all-article-bottom_(300×250)”, [300, 250], “pb-ad-78158” ).addService( googletag.pubads() ) ); } );

The post 6 Reasons Why an iPad Makes a Good Photography Companion by Sarah Hipwell appeared first on Digital Photography School.


Digital Photography School

 
Comments Off on 6 Reasons Why an iPad Makes a Good Photography Companion

Posted in Photography


6 Reasons to Love Ultra-Wide Lenses

12 Jul

Get 50% off Tom’s ebook Ang’s World – A Life in Photography eBook, now only until July 26 at Snapndeals.

Right now is the best time in the history of photography to get into ultra wide-angle lenses. In the last few years, lens designers have given us quality that is far better than ever – in fact, far better than we ever thought possible. Yet you may have been warned against using ultra wide-angles. Tutors tell you they’re really tricky to use, that you’ll produce ugly effects. Even that these lenses teach you bad habits.

Well, I’ve used ultra-wides for well over 30 years and they haven’t harmed my career. In fact, my last two exhibitions were shot entirely with them.

01 DSC0565

When you need to get everything into a single image – as in this hotel in Manila, Philippines – and you have no room to manoeuvre, an ultra wide-angle focal length of 11mm is your best friend.

If wide-angle lenses take in more of the view than normal, ultra wide-angles take in a huge amount more. The field of view of these lenses is enormous. Compared to around 47º of normal lenses, they can be nearly two-and-a-half times wider, about 130º. There’s one proviso: straight lines in the view remain fairly straight. This contrasts with fish-eye lenses that freely bend straight lines.

Going by 35mm equivalent focal length (comparing focal length to a standard 35mm film or full frame format), focal lengths shorter than the normal 50mm are called wide-angle. The range from 24-35mm can be said to be wide-angle. Shorter than that, to around 18mm is very wide. Any focal length shorter than 18mm we call ultra or extreme wide-angle. Best-known of these lenses is the Sigma 12mm-24mm zoom, challenged by the mighty, and costly, Canon 11mm-24mm f/4. This dwarfs the neat, new Voigtländer 10mm.

02 DSC1518 28mm

This image covers about 28mm – the widest angle that you’ll commonly see because it’s the widest often found in zoom lenses on compact cameras.

03 DSC1518 11mm

Compare the same view shot at 11mm: almost the widest straight-line shot you can obtain on any format. When you get used to ultra wide-angles, normal focal lengths look telephoto.

Let me share the reasons why I love using ultra wide-angle lenses.

#1 – THEY IMMERSE YOU

The first one, above all, is that they immerse you in the scene. They take you into the situation. They draw you in. The reason is simple; you, as the photographer, must get close to your subject to capture it effectively. The lens draws you into the action, often well into personal space, and it draws you into the undergrowth.

04 asleep at prayers

With my wide-angle zoom set to 16mm I had to get within touching distance of this mother and her sleeping child. Watching from the outer perimeter just wasn’t an option.

05 DSC2794

You can reach close into nature, the nearest leaves almost touching the lens, yet still capture the wider vista of the trees beyond as well as their reflections in the lake.

#2 – THEY HELP YOU SEE STRAIGHT

You know what it’s like; you’re close to some elegant building like a cathedral and you want to get it all into the shot. But when you point the camera up, the building leans backwards in a thoroughly inelegant way. If you use an ultra wide-angle lens, there’s a good chance you can get the whole building into shot without having to point upwards. Keep the camera pointed at the horizon, and all the verticals stay vertical, so the cathedral won’t look like it’s leaning back.
You’ll get lots of foreground, but that’s easily cropped off.

Here’s a bonus benefit: with ultra wides, you usually don’t have to back that far away from the building to get it all in.

06 DSC0587A

The soaring steeple of this church in New Zealand is not improved by being exaggerated – which would have happened if the camera had been pointing upwards more.

6A DSC0587A crop

The ultra wide-angle view of 12mm took in too much of the foreground fence, so cropping it off benefits the whole image.

#3 – THEY REVERSE SCALE

This effect is perhaps the best-known of ultra-wide lenses: they make things close to the lens look enormous, while objects further away look tiny. You may see this called perspective distortion or extreme perspective. In practical terms, what you can exploit is that small things can be made to look huge, and big things made to look very small. The wider the lens, the greater the effect.

07 MG 8638A

With the poppy nearly touching my ultra wide-angle zoom lens set to 12mm, the chateau becomes a tiny, model-like building.

07B DSC8791 1 A

It follows from their strong effect on foreground-background difference that converging lines are very strongly rendered, making for dramatic receding effects as in this wooden walkway in Singapore.

#4 – THEY HAVE BUILT-IN PANORAMA FUNCTIONALITY

Thanks to their ability to capture a huge amount of scenic real estate, ultra-wides are perfect for creating pseudo-panoramas. You simply slice chunks from the top and bottom, and you can create an image that would otherwise need the stitching together of two or more shots. To make the most of this, it helps to ensure the camera is aimed horizontally, as a crop tends to emphasize any leaning of objects.

08 valley of gods ANG2981A

A view of the Valley of the Gods in USA at 12mm can lose the sky and the foreground, so taking your attention to the relation between the flowers in the foreground and the distant landmarks.

09 DSC0940A

A 12mm focal length shot of sailing in Auckland, New Zealand, was attractive with the sky and sand in view.

09B DSC0940A cropped

But it’s much stronger cropped to panorama, as the emphasis is clearly on the repeated triangles of the sails and busy activity.

#5 – THEY GIVE GLORIOUS REFLECTIONS

If you love working with reflections (who doesn’t?) the wider your field of view, the more reflection you can dig out, and you can’t have too much of that magic. The secret to making the most of reflections is to get as close to the reflecting surface as possible. I’ve been known to dip the camera nearly in the water in my attempt to get to the mirror surface.

10 Travel 154A
This image, at 12mm setting, was the easiest possible capture, if not best for looking after equipment. After a heavy downpour in Venice, I placed the camera on the ground and pressed the shutter button. The camera got wet, but the ground steadied it for the long exposure needed.

#6 – THEY ARE SIMPLY MAGIC!

To be sure, many views such as landscape vistas may look like you should capture as much as possible, when selective views often work more effectively. But here’s the thing – where you absolutely need the widest view, an ultra wide-angle can’t be beaten. Where views and treatments simply call for the widest possible view, then the wider you can get it, the better. This is particularly true of ceilings, (e.g., painted ceilings of great houses), and also natural ceilings such as a leafy canopy.

11 DSC2282
If this view were shot at 16mm or 18mm it might look pretty similar. But a wide-angle freak wants more! Made at 11mm focal length, the extra field coverage draws in nearby detail such as criss-crossing branches and sun-lit leaves that smaller views miss out.

In the end, the best reason for using any lens is that it makes magic. Ultra wide-angles do that for me, which is why it’s my most used lens. Do you have any wide-angle images or thoughts you’d like to share? Please do so in the comments below.


Get 50% off Tom’s ebook Ang’s World – A Life in Photography eBook, now only until July 26 at Snapndeals.

googletag.cmd.push(function() {
tablet_slots.push( googletag.defineSlot( “/1005424/_dPSv4_tab-all-article-bottom_(300×250)”, [300, 250], “pb-ad-78623” ).addService( googletag.pubads() ) ); } );

googletag.cmd.push(function() {
mobile_slots.push( googletag.defineSlot( “/1005424/_dPSv4_mob-all-article-bottom_(300×250)”, [300, 250], “pb-ad-78158” ).addService( googletag.pubads() ) ); } );

The post 6 Reasons to Love Ultra-Wide Lenses by Tom Ang appeared first on Digital Photography School.


Digital Photography School

 
Comments Off on 6 Reasons to Love Ultra-Wide Lenses

Posted in Photography


5 Reasons Why Converting to Black and White May Improve Your Image

09 May

Photography styles are always down to personal taste, in my opinion. I respect that; people have different preferences, and in the same vein photographers can’t please everybody. This also applies to black and white photos, which will be the focus of this article. I have clients who absolutely do not like black and white images, and clients who want a full set of black and white conversions. Personally I give my clients at least 95% color photos and the rest are in black and white.

reasons-to-convert-to-black-white-tips-photography

But why convert to black and white? Is it ever necessary? When do I convert color images to black and white? Here are five reasons why I do black and white conversions on selected photos.

#1 When the background is colorful and distracting

When there are too many colorful things cluttering in the background and taking the focus away from the subject, if they are not intended to be there, they are more likely to be a distraction rather than an enhancement to the image. It may also be that you have no control over the location and cannot move things away to de-clutter. In the photo below, my intention was to shoot backlit, and this was the only possible spot in a small patio. Light was my priority, and I had no control over the neighbor’s garden. This was a personal snap of my kids and I was not going to spend ages photoshopping the clutter away. Black and white was the way to go.

reasons-to-convert-to-black-white-tips-photography

reasons-to-convert-to-black-white-tips-photography

#2 When colors in the photo or the subject’s clothing do not enhance the image

Sometimes you just have to go with the flow. When you have children, you choose your battles. This photo was taken during a family walk looking at the bluebells. It was hard enough getting the kids out of the house in good time, let alone fighting over which outfits they want to wear. Clearly my son’s outfit does not remotely fit in with the tone of this image. Another hooray for black and white.

If clients turn up during a photoshoot with outfits that are too bold or distracting, then you have the option of offering them a choice of color or black and white. Explain your reasons why you felt it was necessary to convert it, and show them the difference it makes on the impact of the image.

reasons-to-convert-to-black-white-tips-photography

reasons-to-convert-to-black-white-tips-photography

#3 For artistic purposes like exaggerating contrasts and silhouettes

There are no rules in photography when it comes to creative style. It’s all down to your personal taste and vision. Artistic license is a great thing. You can photograph with motion blur and activity blur in mind, or add grain for more creative effect or a film look. Converting to black and white is just one more creative tool at your disposal.

reasons-to-convert-to-black-white-tips-photography

reasons-to-convert-to-black-white-tips-photography

#4 When black and white has more impact than color

Sometimes a scene just looks blah. It’s muddy and the colors seems non-committal; they are neither here nor there, not standing out, nor serving a purpose. Trust your gut. When I see “muddy” I run to black and white. An example would be a photoshoot in a living room with cream walls, a cream settee, and the subjects are also wearing cream. You can bring out more contrast in a black and white image.

At the other end of the spectrum, if the subject are wearing clashing colors that are too much, then converting to black and white turns the colors into varying values of gray, thus giving more cohesion to the overall look of the image.

In this snapshot of my kids below, I blew out the sky and wanted to bring some of the faint clouds back in. Apart from the muddy colors, it was easier to recover the blown out sky which would have looked very gray in a color image anyway.

reasons-to-convert-to-black-white-tips-photography

reasons-to-convert-to-black-white-tips-photography

#5 When the image is too noisy in color

Sometimes there are moments when your camera is not set correctly, and yet you see something you just have to capture in a split second, without having the chance to change your settings. The result would predictably be an underexposed image with unacceptable noise levels, or an overexposed image with plenty of highlights clipped. But the moment was priceless nonetheless. Black and white lessens the impact of the imperfection and makes the photo acceptable.

Perhaps this is because we are used to seeing grain in old black and white photos, and accepting the nostalgia associated with such a photo could forgive such an error in today’s digital image. However, beware of making this as an excuse. It should be a last resort to save a photo that is priceless, but never as part of your normal workflow.

reasons-to-convert-to-black-white-tips-photography

The kids in the photo above were never still, always running in different directions. I looked back and suddenly saw them walking in a row down a shaded path. I took a few successive shots knowing full well it would be underexposed based on the settings of my previous shots. I anticipated they would suddenly disperse, which they did in a few seconds, so I fired away. From the shots I took within seconds of this happening, I chose the one where they had just walked through a sunlit part of the path. There was still visible noise even after editing, but it becomes a non-issue in black and white.

How about you? Do you like black and white images? What reasons do you convert to black and white? Please share your thoughts in the comments below.

googletag.cmd.push(function() {
tablet_slots.push( googletag.defineSlot( “/1005424/_dPSv4_tab-all-article-bottom_(300×250)”, [300, 250], “pb-ad-78623” ).addService( googletag.pubads() ) ); } );

googletag.cmd.push(function() {
mobile_slots.push( googletag.defineSlot( “/1005424/_dPSv4_mob-all-article-bottom_(300×250)”, [300, 250], “pb-ad-78158” ).addService( googletag.pubads() ) ); } );

The post 5 Reasons Why Converting to Black and White May Improve Your Image by Lily Sawyer appeared first on Digital Photography School.


Digital Photography School

 
Comments Off on 5 Reasons Why Converting to Black and White May Improve Your Image

Posted in Photography


8 Reasons to Love Long Exposure Photography

06 May

Long exposure photography is not a new type of photography, but it is one that is gaining in popularity. Many photographers are buying Neutral Density filters (ND Filters – more on them below) to capture their own long exposures. It is quite an addictive form of photography. Over the last couple of years I have added many different ND filters to my kit. I use Formatt Hitech filters, though there are other brands that have them as well. Here are some reasons why I love this type of photography.

Drop-in and screw-in filters

Note: Neutral Density filters or ND Filters are designed to restrict the amount of light that enters the lens and camera. They can either screw onto the end of the lens or you can buy brackets that will fit square ones. They came in different densities, and how dark they are is referred to by how many stops of light they block. The most common ND filter is the 10 stop which many brands make. The neutral refers to them having no colour, supposedly. They are meant to have no colour and cause no colour cast in your images, though the more stops the filter has, often the more likely you are to get some colour cast. Cheap ND filters always have a colour cast, usually magenta. If you want to get serious about doing long exposure photography, then purchasing good quality filters from the start is something you will never regret.

1 – Get a smooth look to water, or show how the water moves

One of the more popular ways of using long exposures is to smooth out water to make it look still or frozen. This can be done with the ocean, rivers, and lakes. It can make the water in a scene less distracting because the water doesn’t have any movement in it. The image is then more about the sky, the rocks or whatever else is there.

LeanneCole-7reasons2lovelongexposures-daveysbag

A pier at Davey’s Bay, the long exposure has blurred the clouds and smoothed the water – 5 minute exposure.

Another alternative is to do long exposures of around a second, so you can see the movement of the water. As the tides come in and out on the beach, you can see where it has been, it almost looks like a slow motion capture. It’s a wonderful effect and we are seeing it a lot more. Though water moving on the beach isn’t the only way to use it, water falling over rocks can be just as engaging.

Waterfalls are another type of long exposure that people love. Though many waterfalls are down in canyons, you still need a ND filter to get that smooth marshmallow effect with the water as it flows down. Though, you don’t often need a multi-stop one like you would for the previous water examples.

LeanneCole-7reasons2lovelongexposures-taggertycascades

Adding a few seconds (1.33 seconds) to an image of a waterfall gives it a lovely marshmallow effect. You can also see the movement of the water.

2 – Get blurred clouds

Architecture is a very popular subject for long exposures because you can blur the clouds. It gives the image a different look, and it almost seems like your subject is lost in time. With blurring the clouds, it also makes the building(s) you are photographing your main focus point, and gets rid of any distractions.

LeanneCole-7reasons2lovelongexposures-melbourne

Melbourne from across the river. The long exposure (4 minutes for this shot) gives the view a different feel to what we normally get.

3 – You can clear spaces of people and traffic

If you love photographing areas in towns and cities, but one of the challenges of that type of photography is that people are always around, long exposures using filters will help you clear those distractions. Exposures of several minutes can almost clear a scene of people, though it depends on the density of them. A scene where there are only a few people walking around can come out with the appearance of being empty with a long exposure. However, where there are many people you will find that they just blur, though this can be a great effect as well.

LeanneCole-7reasons2lovelongexposures-youngandjacksonscorner

Photographing a busy intersection with a ND filter makes people look like ghosts – 30 second exposure.

4 – There is a quietness about the work

Once people are introduced into a scene that you are photographing, it brings with it noise, as in how people see the images. They can be noisy, and whether people looking at the images realize it or not, they hear what they would hear if they were actually there. Vehicles can have a similar effect.

LeanneCole-7reasons2lovelongexposures-bourkestmall

Bourke Street Mall at peak hour, a 10 minute exposure has removed the people and given it an empty feeling.

If you do a long exposure of the same thing, that noise is gone. Often when you see a long exposure image it has a quietness to it. Fill a room with images done this way and put people in it, they will feel as though they have to be quiet.

5 – Take photos of a common subject and give it a completely different feel

In every city around the world there are iconic places and scenes that everyone is trying to photograph differently than others. If you have some ND filters and your tripod, you can create an image that not many others get. Especially when travelling, not many people have filters with them. You would have an opportunity to get something quite different to the thousands of other photos that are taken in those places. Of course it is a given that they are places where you can set up a tripod.

LeanneCole-7reasons2lovelongexposures-eurekatower

Eureka Tower is a very photographed building in Melbourne, the image on the right is similar to what most people get, but by adding a ND filter you give a well photographed building a different look. Left image: 1/200th – Right image: 6 minutes.

6 – Give a landscape a sense of time, or time passing

When you have images of clouds being blurred as they go over the top of a building or a landscape, it seems like you have captured time. Many people feel like they are looking at time passing. The long exposure is taken over a period of time, so it makes sense that you would get that feeling when you look at those images.

LeanneCole-7reasons2lovelongexposures-banyuleflats

Dead trees in a dried out swamp, and the moving clouds give the impression they have been there for an eternity – 3 minute exposure.

7 – Images have a surreal look and give you a different perspective

One of the great aspects of long exposure photography is that you can set up your camera, your tripod, and slot in your neutral density filter, but you won’t know what you will get until the image is taken. It will give you an image that is nothing like what you can see with your eyes. When you get the images onto your computer it is always a surprise to see exactly what you have captured.

LeanneCole-7reasons2lovelongexposures-dragonshead

The same image, one take without the ND Filter and the second one with it. It gives the scene a completely different feel. Top image: 1/50th – Bottom image: 13 seconds.

8 – Night Photography is great for the same reasons

Night photography gives you an opportunity to take photos and not have to worry about filters. You can expose for however long you need. If it;s a windy evening and there are clouds in the sky, you will get movement in your images. If you are taking photos across a water way, then the water will be smooth, and you will get reflections of the lights if there are some on the other side. For all the reasons stated for long exposures, night photos have the same effect.

LeanneCole-7reasons2lovelongexposures-melbournestar

A night long exposure makes the Melbourne Star blurred and you can see how it moves – 2 minute exposure.

These are the reasons why I think long exposure photography is wonderful. If you are curious and want to try doing these then I am sure you will become addicted like many others. If you already do them, you might have your own reasons and perhaps you would like to share with us what they are in the comments below as well as your long exposure images.

googletag.cmd.push(function() {
tablet_slots.push( googletag.defineSlot( “/1005424/_dPSv4_tab-all-article-bottom_(300×250)”, [300, 250], “pb-ad-78623” ).addService( googletag.pubads() ) ); } );

googletag.cmd.push(function() {
mobile_slots.push( googletag.defineSlot( “/1005424/_dPSv4_mob-all-article-bottom_(300×250)”, [300, 250], “pb-ad-78158” ).addService( googletag.pubads() ) ); } );

The post 8 Reasons to Love Long Exposure Photography by Leanne Cole appeared first on Digital Photography School.


Digital Photography School

 
Comments Off on 8 Reasons to Love Long Exposure Photography

Posted in Photography


5 Good Reasons to Add People into Your Landscape Photography

25 Apr

Are you looking for a way to spice up your landscape photography? Many times when we think of making great landscapes image,s we try not to include people. Sometimes we even wait for long periods of time for other sightseers (or other photographers) to exit our view. There are many times this is the best technique for shooting a landscape photo, but adding the human element to a scene can be just the extra touch needed to create a great image. Let’s take a look at 5 reasons to add people to your landscape images.

Sometimes breaking the rules can work. Here the man walking out of the image seems to work with the image of the end of the day on the beach.

This surfer is done for the day. Normally it is preferable that a person faces into the photo, but exceptions may work too.

#1 Tell a Story

Adding a person to your landscape can help your image tell a story. People, or even a single individual, may add mystery and adventure to your landscape, causing your viewers to wonder who, what, and why about the person in your image. When your viewers ask these questions, their eyes will stay engaged with your image, adding entertainment value to the photo. An image of a person standing in front of a grand mountain range may cause the viewer to wonder what that individual is doing there. If the person has a backpack and a walking stick, the viewer may imagine a hike in the mountains is about to commence. Or maybe the person in your shot is carrying a rifle and wearing camouflage, leading the viewer to imagine a hunter heading into the woods in search of adventure. A person can be the subject of the image or interact with the landscape of the image; but either way, if the person fits into the image’s story, your landscape will draw the viewer in and the photo will tell a successful tale.

This image seems to tell the story of a man thinking about the yester-years working on a river boat.

This image tells the story of a man thinking about his former career working on a river boat.

#2 Composition

Placing a person or persons in an image in negative space can add balance to your landscape. A person in the foreground, or mid-way into your scene, will help create a sense of depth in the image. When you have the opportunity to position the person, take care to place them in the image in a way that draws the viewer into the image. Place your subject off to the side, preferably on a rule of thirds point, with them facing into the open space. It is almost never a good idea to have a person looking or facing out of your image, as this will cause a viewer’s eye to leave the image rather than explore the image fully. Nevertheless, with every rule of composition there are exceptions that will work. Knowing the rules of composition, when to use them, and when to break them, will help you when adding a person to your image.

The couple taking a selfie is placed in a rule of thirds position and fills a negative space on the beach.

This couple taking a selfie is placed in a rule of thirds position, and fills a negative space on the beach.

#3 Scale of Size

Adding a human to an image is a great way to reveal the size and scale of objects in your image. Without the person in many images, objects like trees and rocks may lack a scene of scale. The addition of a person immediately gives your viewer a point of reference and scale to the landscape.

In this image of Rock House in Hocking Hills State Park in Logan Ohio adding the Silhouetted figure at the end of the cave adds a sense of scale and also adds a focal point to the image.

Adding the silhouetted figure at the end of the cave gives a sense of scale and also adds a focal point to the image.

#4 Drama and Excitement

Silhouetting someone against a sunset or other backlit view, is a perfect example of how a person can help create a more dramatic image. Even the simplest of landscapes can become more interesting and exciting by adding people within the image. Photographing a couple holding hands as they interact with the landscape can add the drama of romance to your image.

This image tells a story of a Father and son playing in the surf at sunset. The sillouhetted figures add drama to an image that could just be another sunset at the beach.

A silhouetted father and son playing in the surf at sunset add drama to an image that would otherwise be just another sunset along the shore.

#5 Focal Point

A successful photo needs a focal point that gives the viewer’s eye a place to land to hold their attention, and adding people can achieve that. It is important to add a point of interest that will change a boring landscape into a striking one. Most landscapes have natural features or buildings as a point of focus, but adding a person can sometimes make for a much more interesting image. As mentioned earlier, at times you may have negative space in the foreground of your landscape, and by adding a person into your scene that negative space is filled, and your image will benefit from the balance. As a focal point, the person in your image can be the subject of the scene, or a complement to your landscape.

A couple sitting on a rock enjoying the Autumn view adds a romantic drama to the fall colors of the West Virginia Mountains

This couple sitting on a rock enjoying the fall color,s placed on the rule of thirds, creates romantic drama.

Tip: When adding a person or persons to your landscape, try to keep their face (s) obscure. This will allow the viewer to imagine themselves as the participant in the image.

Conclusion

Many times adding a person to your landscape image can be as serendipitous as people just wandering into your viewfinder, especially if you are visiting a park or popular scenic area. But if you are out alone in an interesting area, use yourself as the person in the scene. Place your camera on a tripod, set the timer, then add yourself into the image. Next time you are engaged in a landscape photo shoot, look for opportunities to add one or more persons to one of your images, and see if you like the results. You may be surprised at the difference you see.

Many landscape locations are powerful enough to stand on their own, but if your image needs a little spice, try adding a human. What other kinds of landscape scenarios do you think could benefit from adding a person to create a more interesting image? Leave your ideas in the comments below.

People photography week

This week on dPS we’re featuring articles all about different kinds of people photography including portrait, event and travel photography. See all the previous ones below, and watch for more people photography articles over the next few days.

  • How to Take Low Key Head-shots
  • How to Do a One Light Portrait Setup and Use it as Your Back-up Plan
  • Travel People Photography – Tips and Pitfalls
  • 8 Tips for Photographing Men
  • 24 Diverse Images That Showcase People Photography
  • Weekly Photography Challenge – People Photography
  • Tips for Getting Yourself to Relax as a Photographer and Have More Successful Portrait Sessions

googletag.cmd.push(function() {
tablet_slots.push( googletag.defineSlot( “/1005424/_dPSv4_tab-all-article-bottom_(300×250)”, [300, 250], “pb-ad-78623” ).addService( googletag.pubads() ) ); } );

googletag.cmd.push(function() {
mobile_slots.push( googletag.defineSlot( “/1005424/_dPSv4_mob-all-article-bottom_(300×250)”, [300, 250], “pb-ad-78158” ).addService( googletag.pubads() ) ); } );

The post 5 Good Reasons to Add People into Your Landscape Photography by Bruce Wunderlich appeared first on Digital Photography School.


Digital Photography School

 
Comments Off on 5 Good Reasons to Add People into Your Landscape Photography

Posted in Photography


3 Reasons Why Mirrorless Cameras are Better than Digital SLRs for Focusing

30 Mar

Mirrorless cameras and focusing

A lot has been written about the drawbacks of autofocus performance from mirrorless cameras. Most of this focuses on the tracking of moving subjects – an area where the phase detection autofocus found in digital SLRs is still superior (although the gap is closing).

But when it comes to focusing on still subjects, the mirrorless camera is a better tool. Surprised? If you’ve never used a mirrorless camera, you may be. Let’s take a look at the reasons why.

1. Phase detection versus contrast detect autofocus

Mirrorless cameras have a different autofocus system than digital SLRs.

In a digital SLR most of the light coming through the lens is reflected up by the mirror, into the pentaprism and through the viewfinder. A small part is deflected downwards to a dedicated autofocus sensor. It uses a system called phase detection autofocus to calculate the camera to subject distance, and tell the lens where to focus.

Mirrorless cameras and focusing

The red lines in this diagram show the path that light takes through an SLR camera with the mirror in the down position. Most of the light is reflected into the pentaprism and the viewfinder. Part of it is reflected downwards towards the autofocus sensor.

The advantage of phase detection autofocus is that it’s fast (generally speaking – but it also depends on which camera you have) and very good at tracking moving subjects. It’s the best system anyone has managed to come up with for an SLR camera.

However, phase detection autofocus has a significant weakness – lack of accuracy.

There are two main reasons for this. The first is that most digital SLRs have a combination of cross-type and single line autofocus points. Cross-type autofocus points are the most accurate, and should always be used when focus is critical (for example, when using a prime lens at its widest aperture), otherwise the camera may not focus where it is supposed to. Your camera’s manual will tell you which of its AF points are cross-type.

Whenever you use a non cross-type autofocus point, you cannot rely on the camera to focus accurately. This is fine when using small apertures, which give you plenty of margin for error, but not when focus and accuracy is critical.

The second reason is to do with camera and lens calibration. Even when you use a cross-type autofocus point your camera may not focus exactly where it is supposed to. For accurate focus, every part of your camera setup – from the autofocus sensor, to lens and autofocus motors that tell the lens where to focus – must be working in perfect harmony. It only takes a small degree of misalignment to throw the accuracy of the system out.

Most of the time you won’t notice, because there is sufficient depth-of-field to make the focusing inaccuracies irrelevant. But if you use a wide aperture, especially with a telephoto lens, then depth-of-field is measured in millimetres, and accurate focus is essential.

For example, if you are taking a portrait then it is conventional to focus on the model’s eyes. If you miss focus, and her eyes are soft, then people will notice and the portrait will lose its impact.

Mirrorless cameras and focusing

I made this portrait with an EOS 5D Mark II and 85mm lens set to f1.8. With this camera it is necessary to measure and calibrate the autofocus system to ensure accurate focus at wide apertures.

Most mid-range and high-end digital SLRs have a feature that allows you to measure and compensate for inaccurate focusing. Manufacturers have different names for this – Canon and Sony use the term Autofocus micro-adjustment, Nikon calls it Autofocus fine tune, Pentax uses the term Autofocus adjustment and Olympus Autofocus focus adjust. It’s bit of a long winded process – you have to test your lenses by focusing on a ruler, or a purpose made scale, to see if the focus is accurate, and make adjustments if it isn’t.

You can also get your camera and lenses calibrated at a service centre. This is the only way to calibrate an SLR camera that doesn’t have the above feature built-in.

That was bit of a long explanation, but crucial if you are to understand why phase detection autofocus is not as accurate as it should be.

How are mirrorless cameras different?

So, how do mirrorless cameras differ? As they don’t have a mirror, there is no way of deflecting light to a dedicated autofocus sensor. The solution is to take a reading from the sensor. The camera looks at the point on the sensor which is meant to be in focus, and adjusts the lens until maximum contrast is achieved. This is called contrast detect autofocus.

This system is slower, because the camera has to move the lens first one way, then the other, to find the sharpest point. But, it is much more accurate (for still subjects).

With a mirrorless camera autofocus micro-adjustment is redundant. You don’t need it, and you will never have to measure or calibrate the camera’s autofocus system. It also doesn’t matter which autofocus point you use, as they all work equally well. That is why, for still subjects, autofocus in mirrorless cameras is superior to that of digital SLRs.

Mirrorless cameras and focusing

I made this portrait with a 56mm lens at f/1.2 with my Fujifilm X-T1 mirrorless camera. With this camera it is easy to focus on the model’s eye. There is no need to calibrate the camera’s autofocus system.

2. Manual focusing

Mirrorless cameras are also a better tool for utilizing manual focus lenses.

Modern digital SLRs are not designed to be helpful with manual focus lenses. The split prism focusing screens of the past are gone, and assistance is limited to a light that comes in the viewfinder when the subject underneath the selected AF point comes into focus.

Mirrorless cameras are different. They have a tool called focus peaking, which is specifically designed to help you manually focus a lens. The camera highlights the parts of the scene that are in focus, so that you can see which areas are sharp. You can also magnify the image at the touch of the button, making it even easier to see whether the subject is sharply focused.

This feature works best when using lenses at wide apertures. Both tools take advantage of the camera’s electronic viewfinder, a feature that most digital SLRs don’t have.

Mirrorless cameras and focusing

This mock up shows how focus peaking works. I made the portrait with a Helios 58mm manual focus lens at its widest aperture setting of f/2. The red lines indicate how focus peaking shows you what is in focus.

3. Hyperfocal distance

Fujifilm cameras have another tool that will be of interest to landscape photographers as it helps you instantly find the hyperfocal distance without referring to tables or smartphone apps.

The viewfinder has a depth-of-field scale that shows you the point you are focused on and the area in focus on either side, according to the selected aperture. If you move the focusing ring until the depth-of-field scale touches the infinity mark at one end, you have found the hyperfocal distance point. It’s quick and easy.

To be honest, I don’t know if this feature is available in any brand of mirrorless camera other than Fujifilm. I’d be grateful if Sony/Olympus/Panasonic, etc., owners would let us know.

Mirrorless cameras and focusing

This diagram shows how the depth-of-field scale works. The bar shows the point the lens is focused on (white), and how much of the scene is in focus (blue). The lens is focused on the hyperfocal point in this made-up example.

Since buying my first Fujifilm camera a little over 18 months ago, I’ve been pleasantly surprised by what a great tool mirrorless cameras are for photography. They are much better than my old digital SLR for focusing on still subjects, or for using manual focus lenses.

The difference is so great that I predict that one day most photographers will use mirrorless cameras, and digital SLRs will be a niche item built for photographing sports and wildlife.

But what do you think? Please share your thoughts, or ask any questions about focusing, in the comments below.


Mastering Lenses

If you want to know more about lenses and autofocus check out my ebook Mastering Lenses: A Photographer’s Guide to Creating Beautiful Photos With Any Lens.

googletag.cmd.push(function() {
tablet_slots.push( googletag.defineSlot( “/1005424/_dPSv4_tab-all-article-bottom_(300×250)”, [300, 250], “pb-ad-78623” ).addService( googletag.pubads() ) ); } );

googletag.cmd.push(function() {
mobile_slots.push( googletag.defineSlot( “/1005424/_dPSv4_mob-all-article-bottom_(300×250)”, [300, 250], “pb-ad-78158” ).addService( googletag.pubads() ) ); } );

The post 3 Reasons Why Mirrorless Cameras are Better than Digital SLRs for Focusing by Andrew S. Gibson appeared first on Digital Photography School.


Digital Photography School

 
Comments Off on 3 Reasons Why Mirrorless Cameras are Better than Digital SLRs for Focusing

Posted in Photography


6 Powerful Reasons Why All Photographers Need Facebook Pages

04 Mar

Why Photographers Need A Facebook PageHi there everyone,


It’s Ed a.k.a Edrenalin here, editor of FashionPhotographyBlog.com, bringing you insights from the inside.


I’m constantly intrigued when I discover that out of the numerous photography businesses I’ve helped, the majority of them do not have a Facebook page for their business. Sure, these photographers had a personal Facebook profile, however, when it came to having a dedicated page for their photography, this was non-existent. I see this over and over again, and I can tell you that they are missing out on a great marketing tool in their business tool belts.


However, I have to insert a disclaimer here, in that not every business will benefit from having a Facebook page for their business. It really depends on what kind of clients you are after for your business. For those of you who are looking for clients to make contact with you to book you then a Facebook page would be an ideal platform for you. If not, you can still create a Facebook page but there may be other social media platforms that may be more relevant to your market.


Top 6 reasons why you need a Facebook Page for your business (even if you don’t have a photography business yet).


1. It’s free as long as you are connected on Facebook with a personal account. It won’t cost you anything to create a Facebook business page and it’s pretty quick and easy to set up so give it a go, you have nothing to lose.


2. Having a recognisable authority website such a Facebook, talking about your website provides bonus points for SEO. Not all social media accounts pass on “SEO link juice” these days (the reason for this is to prevent online scammers from abusing these social media platforms) however having a Facebook page is a great way to increase the visibility of your photography business, on Facebook and Google searches.


3. Not only can people see friends that they know like and interact with your page, they can read the reviews and the feedback that people leave in the comments, to work out if you are a reputable photography business or not. People trust what their friends say more than what what you say. It’s one thing for you to talk about how great you are with your photography business, but it’s another when they hear it (or read it) from people they know, trust or relate to.  


4. Potential clients who want to send a message to you on your website for an enquiry or booking might want to first know how quickly will you reply back to them (and whether you are still in business or on holiday). They may check out your Facebook page, since Facebook is one of the largest social media platforms in the world, and see what you are currently up to, and check up on your most recent posts.


5. It allows your target audience to discover your photography business outside your website. By having a Facebook page you have another web property with a sizeable audience that potential clients can find out about you and your photography, even if they don’t know what the web address of your photography website is (or even if you don’t have one yet).


6. And here is one of the most important reasons – If you don’t have a Facebook page yet, you can guarantee that your competitors already do and they are communicating with your potential clients before you get the chance to. This is the reality in today’s competitive marketplace and a lot of photographers are losing potential business because they haven’t jumped on board Facebook yet and join the conversation.


So if you are hesitating or been thinking about starting a Facebook page for a long time but haven’t done so yet, I recommend that you do so right away for the reasons stated in this article. Do not worry if it doesn’t look perfect the first time. Remember that progress is better than perfection, and you can always close the page down or make edits to it later if it’s not to your satisfaction.


Do you like this article? Want to read more articles like this? Then please SHARE this article on social media. If you have any comments or questions please feel free to put them in the comment section below. 


Fashion Photography Blog

 
Comments Off on 6 Powerful Reasons Why All Photographers Need Facebook Pages

Posted in Uncategorized


5 Killer Reasons Why Photographers Need Social Media

01 Mar

fashion-photography-blog-social-media-for-photographers

Hey there everyone,


This is Ed a.k.a Edrenalin, the editor of FashionPhotographyBlog.com, here to bring you insights from the inside.


After all of my client’s photography businesses I’ve helped improve, one thing is common across each and everyone one of them, they wanted to have a presence online and they wanted to be on social media. That’s understandable since that’s where all the major businesses across every industry is moving towards. However, when I asked them why they wanted to be on social media and what they wanted social media to do for them, they couldn’t answer the question. At the end of the day, they felt that they needed to be on social media because everyone else told them they had to.


So how can you work towards your social media objectives if you don’t know what they are in the first place? Don’t despair though, because if you are thinking similarly in this way, then you are not alone. It is a common misconception amongst photographers and creatives based on the encounters that I’ve come across. I’m going to share with you what I share with them to help clear up the reasons why you should consider incorporating social media in your own marketing strategies for your photography business.


Top 5 reasons why photographers need social media today


1. Social media accounts proves that there is a real person behind the photography business and that you didn’t just “open shop” yesterday. The accounts establish that the business has history and participates in dialogue and that you are active online.


2. Google now is starting to incorporate social signals from your social media accounts as a factor in their SEO algorithms to determine the relevancy and engagement of your website when deciding to show your website on the search results pages. The weight social signals has in this algorithm is unknown and is locked away in the unbreakable vaults of Google however, I can confirm that it is now a factor.


3. Your target audience can see social proof based on what others are saying about your photography business in your social media accounts such as in your comments and reviews section.


4. Potential business partners and magazine editors, might want to see how engaged are your followers. If they do business with you or publish your work, then you publish the news on your social media accounts, they might want to know how many people following you would actually know about it and get eyeballs to their brand.


5. Not everyone will know your website address, before they know about your business. With social media you are able to engage with your target audience in other social networks and hang out where they hang out. Here’s a question, how many people visit your website every day? and now how many people visit Facebook every day? which is the greater number?


The concept behind social media marketing is that you are participating in discussions with communities of these larger social networks, “borrow” them from these established networks and introduce them to your photography business.  


If there is one thing that you can do to improve your business this year, is to get onto social media for your business to increase the online presence for you.


Do you like this article? Want to read more articles like this? Then please SHARE this article on social media. If you have any comments or questions please feel free to put them in the comment section below. 


Fashion Photography Blog

 
Comments Off on 5 Killer Reasons Why Photographers Need Social Media

Posted in Uncategorized