Facial expressions, skin and hair, and sad or sparkly faces have attracted the artist’s eye since the first caveman recorded his first story on rock. Facial features have the power to convey stories. A single image says more than a thousand words. If you are a photographer who shares this joy in the human form, you would recognize that each person is unique and beautiful in his or her own way. If you are a portrait photographer, you know how humbling it is when you are given the privilege of taking a photo.
Storytelling through portraits requires a code of conduct that should be observed. Through my experience, I have developed some rules that I follow, and I would like to share some tips and etiquette of taking portraits in public with you.

You can not only admire the beauty of the person, but also his work and workplace.
#1 – Show Your Presence
Smartphone holders, tourists, and casual snappers with DSLRs have made the jobs of serious portrait photographers a bit difficult. Photography overload has contributed toward a sort of over saturation in the population – perhaps the subjects have become weary. You are never sure of the reaction when you point your camera toward a person. If you see someone you would like to take a photo of, try to stand around for a while and become part of the scene. Observe the movements and dynamics, even try to catch their eye, but do not make the person feel uncomfortable.
#2 – Engage
If you don’t know the language, at least learn the local words to greet people. Remember, every culture has its signs of respect and ways to start a conversation, so keep those in mind. Show interest in whatever he or she is busy doing, selling, or offering. Engaging in such a manner normally makes people comfortable, and often less skeptical, of to your forbidding-looking, long lens. You come across first as an individual with a personality. Try to engage with something that you believe will be appreciated, be it about their children or their surroundings – sound them out, gauge a response. Of course, lack of response is answer enough that you do not proceed to take their picture.
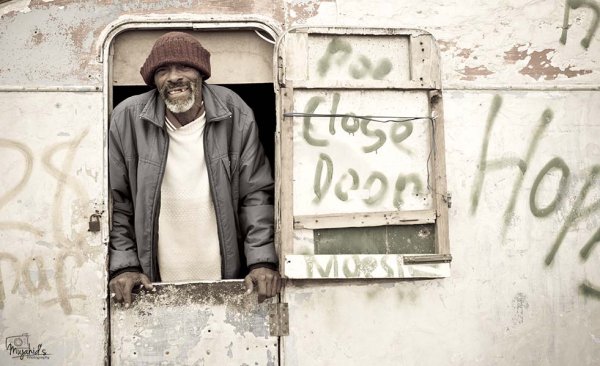
Freek, the fisherman. I said hello to him as I passed by his caravan. We chatted for a while before I opened my camera bag and requested a photo.
#3 – Ask Permission
You are allowed to take photos in public spots, even without permission. Portraits need all of what we have discussed so far. However, this is not an hour long process; you need to get to the bottom line soon. Ask permission. If it is given, help the person posing as per your preference. Do not feel bad if they refuse, accept it politely and pleasantly, and remember especially then, to be respectful. A few things I learned along the way:
- A guard asked me to gain permission from the shop owner first (cool guard!).
- I was once told by a religious person that his faith doesn’t allow taking photos.
- A tribesman allowed me to take photos of men and children only, and not of the women.
- A young girl allowed me to take her photo on condition that I would never upload it; it was for my eyes only as she was comfortable with me but not the general public.
#4 Remember People
You cannot do justice to a portrait if you do not include at the very least the name and background of the person, and preferably also age. You need to know who they were, and what their life was like. It is first and foremost a sign of respect to the person whose image you have used for your own purpose, but secondly you will realize how powerful your portraits become when contextualized. I currently use my smartphone to note down these details, but am considering carrying a dictaphone. A simple notebook will do.

Capture their names, ages and origin.
#5 Show the results and make people feel good about themselves
If your camera allows previews, show it immediately, and get feedback. Sometime the best ideas come from the person in front of the lens. Make your new friend smile and even chat while you are taking photos. I often ask questions while I am busy taking photos. I believe it is a great technique which helps people calm down. When they are animated about something important to them, it reflects in the photo. If you have a companion with you, sometimes having them strike a conversation allows for the opportunity of candid shots of your subject with spontaneous expressions.
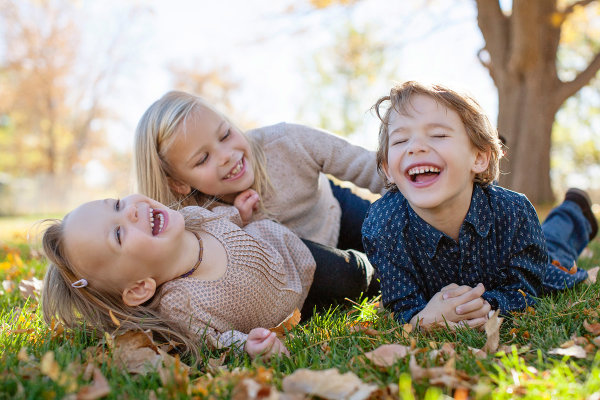
“Wow, you are in grade 2. This is so cool buddy, I wish I was in grade 2 again”.
“Were you a solider before Mr. Sadeeq? I feel that strength in your eyes”.
“Enrique, you remind me of my cousin… he has a beautiful mustache like you”.

After I showed the first shot to this umbrella-making lady, and told her she looked beautiful, she felt shy and even gave me a big smile.
#6 Respect their possessions
I have not followed this rule strictly, and I have regretted it several times in retrospect, after the moment passed. Once, after taking photo of a guard, I proudly showed it to him, and he asked, “Where is my gun? It is not in the photo”. His voice echoed in my mind for many days, I had missed an important aspect of what made him a guard! Not only was it integral to his identity, but what an important prop I had omitted in error. Take two.
Take a photo of the people with their surroundings to remember what they were doing. It will help you in your story telling one day!

Take #1 – first photo. |

Take #2 – photo with guard’s belongings, i.e. his gun. |
#7 Say Goodbye and inform them of the use of their photo (legal)
Greet properly. Ask if they would mind if it was published or uploaded. Some photographers even carry model releases on their person, for use as required. If this is not feasible, as far as language allows, at the least make your subject aware that you may use the images. Later, if you were to personally or commercially use the images, depending on the laws of your country which are variously lax and stringent, you may either need to submit a model release and/or affidavit along with the photo to make its use legal.
Remember to be informed and aware of not only the etiquette of taking portraits, but also of the legal requirements which will vary from country to country, and are a topic of their own. Be particularly cautious when photographing the faces of minors without formal consent of their parents. I still have inadequate knowledge in this area myself.
I hope these tips would help you in your portrait photography. I look forward to seeing your feedback and learning from you all.
googletag.cmd.push(function() {
tablet_slots.push( googletag.defineSlot( “/1005424/_dPSv4_tab-all-article-bottom_(300×250)”, [300, 250], “pb-ad-78623” ).addService( googletag.pubads() ) );
} );
googletag.cmd.push(function() {
mobile_slots.push( googletag.defineSlot( “/1005424/_dPSv4_mob-all-article-bottom_(300×250)”, [300, 250], “pb-ad-78158” ).addService( googletag.pubads() ) );
} );
The post 7 Tips and Etiquette for Taking Portraits in Public by Mujahid Urrehman appeared first on Digital Photography School.


 The Natural Portrait


You must be logged in to post a comment.