RSS
 

Posts Tagged ‘portraits’

24 Photos of Perfectly Posed Portraits

12 Jun

Editor’s note: this week we will be featuring a series of articles on posing for portraits. Look for a new one each day. If you miss any make sure you subscribe to our newsletter and you’ll get a reminder of all our articles once a week.

When doing a portrait there is a lot to think about. You have to find a good location and background. The right lens needs to be selected. Camera settings are a consideration. The light needs to be just right.

But if that’s all you focus on you’re forgetting something rather important. The person in front of your camera. They need direction and reassurance on how to position their body to look their best. As the photographer it is your job to help them, and it is our job to help you. So here are some ideas to get started posing people in your portraits. You can also check out the dPS ebook Portraits: Striking the Pose or our set of posing guides 67 Portrait Poses (printable).

Photograph * * * by Sergey Lukankin on 500px

* * * by Sergey Lukankin on 500px

Photograph Stairway to heaven by Seemanta Dutta on 500px

Stairway to heaven by Seemanta Dutta on 500px

Photograph *** by Irina Dzhul on 500px

*** by Irina Dzhul on 500px

Photograph transylvanian hunger by  Moga on 500px

transylvanian hunger by Moga on 500px

Photograph **** by Brian Ingram on 500px

**** by Brian Ingram on 500px

Photograph Mehmet Haci by Ahmed  Mustafa on 500px

Mehmet Haci by Ahmed Mustafa on 500px

Photograph Marta by Noi korukay Marquez on 500px

Marta by Noi korukay Marquez on 500px

Photograph N by Nikolay Tikhomirov on 500px

N by Nikolay Tikhomirov on 500px

Photograph falling leaves by annabella photography on 500px

falling leaves by annabella photography on 500px

Photograph Country Family by Lisa Holloway on 500px

Country Family by Lisa Holloway on 500px

Photograph Family Portrait by Jimmy Rodriguez on 500px

Family Portrait by Jimmy Rodriguez on 500px

Photograph Brothers by Sarah johnson on 500px

Brothers by Sarah johnson on 500px

Photograph Magic Lavender by Sergey Bondarev on 500px

Magic Lavender by Sergey Bondarev on 500px

Photograph Family by Karin Sanders on 500px

Family by Karin Sanders on 500px

Photograph I see you... by Ett Venter on 500px

I see you… by Ett Venter on 500px

Photograph Doux by August Malinin on 500px

Doux by August Malinin on 500px

Photograph Afternoon by TJ Drysdale on 500px

Afternoon by TJ Drysdale on 500px

Photograph Portrait: "Lovers" by Mike Champagne by Mike Champagne on 500px

Portrait: "Lovers" by Mike Champagne by Mike Champagne on 500px

Photograph A Mother's Love by Jake Olson Studios on 500px

A Mother's Love by Jake Olson Studios on 500px

Photograph Mother and Daughter by Edi V on 500px

Mother and Daughter by Edi V on 500px

Photograph Contrast by Jake Olson Studios on 500px

Contrast by Jake Olson Studios on 500px

Photograph Daydremers by Katie Andelman Garner on 500px

Daydremers by Katie Andelman Garner on 500px

Photograph Kiss by Holly Spring on 500px

Kiss by Holly Spring on 500px

Photograph Old Men I by Alexander Rink on 500px

Old Men I by Alexander Rink on 500px

googletag.cmd.push(function() {
tablet_slots.push( googletag.defineSlot( “/1005424/_dPSv4_tab-all-article-bottom_(300×250)”, [300, 250], “pb-ad-78623” ).addService( googletag.pubads() ) ); } );

googletag.cmd.push(function() {
mobile_slots.push( googletag.defineSlot( “/1005424/_dPSv4_mob-all-article-bottom_(300×250)”, [300, 250], “pb-ad-78158” ).addService( googletag.pubads() ) ); } );

The post 24 Photos of Perfectly Posed Portraits by Darlene Hildebrandt appeared first on Digital Photography School.


Digital Photography School

 
Comments Off on 24 Photos of Perfectly Posed Portraits

Posted in Photography


Nikon to offer free newlywed portraits at New York’s City Hall next week

28 May

Nikon will be offering newlywed portraits for free to couples who marry at the New York City Hall on June 4th and June 5th. Couples married at City Hall will be treated to a free portrait session with pro photographer and Nikon Ambassador Joe McNally, working out of a 20-foot ‘Wedding Truck’ studio. Read more

Articles: Digital Photography Review (dpreview.com)

 
Comments Off on Nikon to offer free newlywed portraits at New York’s City Hall next week

Posted in Uncategorized


How to See the Light for Portraits: A Quick Tip for Beginners

05 May

Light1_2

As a beginning photographer, one of the easiest ways to move from taking average snapshots to more professional looking portraits is to develop a good understanding of light. Harsh and uneven lighting can often be distracting and make the photograph look amateur, whereas even lighting allows the viewer to focus solely on the subject and is more visually appealing.

Spending some time learning about the exposure triangle, the quality and direction of light is a great first step, something that I highly recommend to everyone. That said, even if you understand the theoretical aspects of light, it can still be difficult to walk into a park with your children, or clients, and know intuitively where to situate your subject for the best possible portrait lighting. So, I’d like to share one quick and easy trick that you can use to help you “see” the best light if you’re unsure of where to begin:

The Circle Trick

Step One:

Have your subject stand facing you, at the appropriate distance for whatever focal length you’re using. Think of the two of you being like a clock, with you in the center tether position and your subject as the clock’s hour arm in the 12 o’clock position. Take a photo.

In this instance, I was photographing my daughter in our backyard at about 6:30pm. My starting (12 o’clock) position was with the sun behind her.

Step Two:

Have your subject move to the three o’clock position. Pivot with them so that you continue to face each other. Take another photo.

Now, I’ve moved her into the 3 o’clock position. You can see that if you’re looking at her, the sun is predominantly on the left side of the image.

Step Three:

Have your subject move to the 6 o’clock position. Again, pivot with them. Take another photo.

Now, she’s moved into the six o’clock position, and is looking into the sun. You can see that’s going super well.

Step Four:

Have your subject move to the nine o’clock position. Continue to pivot with them, and take another photo.

Finally we’ve moved into the nine o’clock position. As you’re looking at her, the light is primarily on the right side of her face.

Step Five:

Review the four photos that you’ve just taken, and decide which one offers the most appropriate lighting for the look you’re trying to achieve.

Unless you’re shooting at high noon with the sun directly above you, you’ll probably notice that the lighting will vary dramatically between each of the four photos, with some being much more visually appealing than others. This gives you a great starting point to be able to visually “see” the light and quickly determine which direction you’d like your subject to be facing for your portraits (or in a large park, which general direction you may want to head for your session).

Bonus Tip:

If you notice pretty severe backlighting as in the photo for the 12 o’clock position above, and that is not the look you’re trying to achieve, try having your subject sit down!

This image was taken in the exact same location as the “12 o’clock” image above, only with my daughter sitting on the ground instead of standing.

Keep in mind that the circle trick works in the reverse as well, with your subject standing in the same location and you walking around them as the positions of the clock. Sometimes it’s easier for the photographer to do the bulk of the moving around rather than the subject. On the other hand, I spend a lot of time photographing elementary age children, and find that they really enjoy getting to be a special helper at the beginning of a photo shoot. Getting them engaged early on is a good way to help them to feel comfortable with me. In fact, even though I don’t actually need to use the circle trick anymore to be able to see the light, sometimes I still use it as a quick ice breaker at the beginning of sessions with younger children, showing them the four different photos at the end.

For many people, understanding the quality and direction of light is something that’s learned practically – the more you practice, the more you’ll eventually begin to be able to “see” the light intuitively. This is one really simple (and quick!) way to begin to train your eye to begin to see light – so if lighting for portraits is something that you tend to struggle with, grab a friend and give it a try!

googletag.cmd.push(function() {
tablet_slots.push( googletag.defineSlot( “/1005424/_dPSv4_tab-all-article-bottom_(300×250)”, [300, 250], “pb-ad-78623” ).addService( googletag.pubads() ) ); } );

googletag.cmd.push(function() {
mobile_slots.push( googletag.defineSlot( “/1005424/_dPSv4_mob-all-article-bottom_(300×250)”, [300, 250], “pb-ad-78158” ).addService( googletag.pubads() ) ); } );

The post How to See the Light for Portraits: A Quick Tip for Beginners by Meredith Clark appeared first on Digital Photography School.


Digital Photography School

 
Comments Off on How to See the Light for Portraits: A Quick Tip for Beginners

Posted in Photography


7 Essential Tips for Shooting Portraits on Location

22 Apr

I have so many friends who have the good fortune to travel the world, but they always come home frustrated because they either try to take portraits in obvious places, standing on top of the landmark with thousands of people all around, or they don’t show the things that they found interesting or personal about where they were. So let’s Continue Reading

The post 7 Essential Tips for Shooting Portraits on Location appeared first on Photodoto.


Photodoto

 
Comments Off on 7 Essential Tips for Shooting Portraits on Location

Posted in Photography


5 Ways to Use a Beauty Dish Light for Portraits

12 Apr

The beauty dish. It’s one of my favorite light modifiers, which is why I’m so excited to share some techniques you can try with your beauty dish. Don’t have one? Not to worry. There are plenty of DIY beauty dish project plans online. I’ve actually made them out of aluminum turkey pans. When you decide to step up to a more professional beauty dish, however, they are usually not as expensive as most light modifiers and you can get them for speedlights or studio strobes.

Beautydish 2

Beauty dishes are a niche modifier usually reserved for beauty shots. These tend to be head and shoulder portraits that highlight makeup and hair, and are commonly used in the fashion industry. So why should you try it? Well, it’s fun to see if you can make images like you see in the fashion magazines, it’s also very creative. You really have to plan and construct the entire image. This may include everything from your choice of background, lighting setup, and hair and makeup.

The quality of light produced by a beauty dish is not as soft as a softbox, but it is softer than an umbrella, and not as hard as just using a 7 inch reflector. The light falloff is quite rapid, which helps to sculpt the subject’s face and to show texture in their skin. Beauty dishes often produce nice catch lights in the eyes and shadows under the jaw line. They are versatile modifiers because you can change the quality of light by choosing a dish with a silver, or white, inner surface. The white surface will produce slightly less specular highlights on the subject’s face. You can also control the spill of light by using a grid and even further soften the light by adding a sock over the front.

Beautydish 3

When you plan a shoot using a beauty dish, only use it on clients or models with very good skin because the light pattern it produces can show off imperfections like wrinkles and blemishes. It’s also helpful to find a good makeup and hair artist because you will be showing off the subject’s face in detail. If you’re not ready to pay a makeup artist for this service, you can offer them a trade for images so they can expand their portfolios; or, if you’re really lucky sometimes you can find a model that is skilled at doing her own makeup.

When setting up your camera, I recommend a lens in the 85-200mm range. I use studio strobes and an aperture around f/8 or f/11. I would also recommend using a boom arm because it will help you put the beauty dish in just the right spot, without getting in the way of your shot. The beauty dish will give you very nice light on the subject’s face. Keep in mind you often need to spice up the image with a rim (or accent) light, hair light or a background light.

Beautydish 3 2

Let’s get started with five ways to use your beauty dish:

1. One light with a reflector: Clam shell lighting)

This is the typical way you will see a beauty shot set up. The dish is positioned right above the subject’s face, pointed down slightly, so the center of the dish is aimed at the subject’s forehead, right between the eyes. The dish should be close to your subject to produce soft light, usually within two to four feet. When you set this up, make sure you can see catchlights in the top of subject’s eyes. Then add a reflector under the beauty dish to bounce light back up on to their face. This will help minimize the shadows under chin, and add a catch light at the bottom of the eyes. You will have to put your camera between the beauty dish and the reflector. Some photographers also like to add black cards on either side of the subject to help create shadows on the sides of the face.

Beautydish 1 2 Beautydish 2 2

2. Two light setup: Clam shell lighting

This is basically the same as number one above, except you use a strobe in place of the reflector. This allows you control of the power output of the fill light. I prefer to use a strip box for this purpose, set one or two stops darker (lower) than the main light.

Beautydish 7b Beautydish 8

3. Add a sock over the beauty dish

The sock is a piece of diffusion material, that looks like a shower cap, which you put over the beauty dish. This softens the light on the subject’s face, and if you are getting shiny spots it will reduce the specularity of the light. Using a sock will produce a creamy look, with less skin texture.

Beautydish 9

4. Add a grid to the beauty dish

The grid will focus the light into more of a spotlight type pattern, which can be used to create some interesting effects. Just make sure the grid is pointed directly at the subject or the light pattern will not strike the face correctly. The easiest way to check this is to make sure the subject can see directly through the grid to the light source.

Beautydish 4

5. Take it outdoors

The beauty dish is a great light modifier for outdoors because it’s more compact than a softbox, but can be used like one. The light quality will be softer than an umbrella, and won’t catch the wind as much as an umbrella or a softbox. It can be used as the main light source or as a fill light. If you use it as a main or fill light you can set it up at a 45 degree angle like you might use a softbox. When the light conditions are warm in tone such as sunrise or sunset, you may want to add a color temperature orange gel over the beauty dish to help blend the strobe’s light with the sunlight.

Beautydish 6

The beauty dish is a bit of a specialist tool that can produce wonderful lighting patterns when used correctly. However, it can also be used in many creative ways to produce interesting shots. I hope you have fun giving the beauty dish a try.

Beautydish 5

googletag.cmd.push(function() {
tablet_slots.push( googletag.defineSlot( “/1005424/_dPSv4_tab-all-article-bottom_(300×250)”, [300, 250], “pb-ad-78623” ).addService( googletag.pubads() ) ); } );

googletag.cmd.push(function() {
mobile_slots.push( googletag.defineSlot( “/1005424/_dPSv4_mob-all-article-bottom_(300×250)”, [300, 250], “pb-ad-78158” ).addService( googletag.pubads() ) ); } );

The post 5 Ways to Use a Beauty Dish Light for Portraits by Gary Detonnancourt appeared first on Digital Photography School.


Digital Photography School

 
Comments Off on 5 Ways to Use a Beauty Dish Light for Portraits

Posted in Photography


3 Tips for Capturing Connections in Family Portraits

08 Apr

Capturing Conenctions in Family Portraits Article for DPS by Memorable Jaunts 01


We’ve all heard the dreaded words, “Okay everyone, look at the camera and at the count of three say Cheese!”. I have been guilty of using this technique too in my early days of as a family portrait photographer. I remember coming home from client photo shoots and kicking myself for not being original, botching up my client’s experience, and getting really mediocre images that lacked any emotion or connection.

Over the course of time, my style of photography evolved and I started investing more time and effort in making my clients feel comfortable before, during, and after their photoshoot. The results were images that were fun, fresh and full of emotions. Exactly the kind of images that I want in my portfolio. My clients love the experience and I often hear words like, “Oh that was so much fun!” or ‘Thank you for making it so easy”, and “I loved how you made us feel at ease”. I realized that if, as a photographer, I was having a good time interacting with and photographing my clients, they were having a great time too.

Capturing Conenctions in Family Portraits Article for DPS by Memorable Jaunts 02


At the end of the day, my job as a photographer is not only to take great, meaningful and beautiful pictures for my clients but also to make sure they have a great time and it is a pleasant experience. To that end, there are some things to keep in mind to capture connections among your clients

#1 – Family dynamics

It is very important to understand family dynamics prior to the photoshoot. This goes beyond the typical questions about the names and ages of the kids. Try and understand likes and dislikes of the people involved. If there are young children involved, take the time to understand personalities of the kids as individuals, and with their siblings. Is the family casual and easy going, or do they like formal, traditional posed pictures? Just because they like a particular style of imagery does not mean you have to stick to that. But certainly incorporate what they want first, then feel free to experiment.

Capturing Conenctions in Family Portraits Article for DPS by Memorable Jaunts 03

This family made it very clear that their new puppy was their second baby! – Rather than excluding the dog, I made sure to include him in almost all their images.

Capturing Conenctions in Family Portraits Article for DPS by Memorable Jaunts 04

Large family groups don’t have to be intimidating. Just engage with them and give them something to do.


#2 – Structure the shoot

Trust me, this is key and will ensure you maintain your sanity during the photoshoot. Have a plan of action. I make it a point to spend the first five minutes of every session educating my clients on what they can expect. The first few minutes is warmup time – testing the light, figuring out the right lens, etc. I let my clients know exactly what’s happening, and many times, I get a lot of beautiful images during this time. Clients are much more relaxed if they think these first few minutes don’t really count.

Then we incorporate an activity like walking along a path, climbing a tree, playing in the park, and I photograph around that activity. Finally we just sit down to enjoy each other’s company. This not only let’s the clients know exactly how we are going to spend our time but also helps keep me in check. Because let’s face it, for most of us, once we start clicking that shutter, it is so easy to loose track of time!

Capturing Conenctions in Family Portraits Article for DPS by Memorable Jaunts 05

A simple conversation that was set up resulted in some magical daddy-daughter moments.

Capturing Conenctions in Family Portraits Article for DPS by Memorable Jaunts 06

Sometimes just use hands to communicate connection among family members.


#3 – Make it fun

This is a critical part of capturing connections among family members during the photoshoot. For family portraits with little kids, try techniques like tickle-fest, blowing bubbles, rocking out those dance moves and other such methods to get the kids in the spirit of having fun. If kids are a little older, try cracking jokes. Bring some basic props if required and let the kids play. Photograph around the activity and capture candid moments of family interactions. If all else fails, it is okay to setup the shot and work the family into the pose. Make sure to keep clicking so that you can get some candids through out the whole process.

Capturing Conenctions in Family Portraits Article for DPS by Memorable Jaunts 07

Capturing Conenctions in Family Portraits Article for DPS by Memorable Jaunts 08

Bride + Bridesmaids + a catwalk pose = really fun images!


Remember that families that play together, stay together. Your job as a photographer is to capture these family dynamics in a fun and pleasing way. If your clients have a great time during the shoot, it is more than likely that they will love your images because they will remember the experience in a positive light.

googletag.cmd.push(function() {
tablet_slots.push( googletag.defineSlot( “/1005424/_dPSv4_tab-all-article-bottom_(300×250)”, [300, 250], “pb-ad-78623” ).addService( googletag.pubads() ) ); } );

googletag.cmd.push(function() {
mobile_slots.push( googletag.defineSlot( “/1005424/_dPSv4_mob-all-article-bottom_(300×250)”, [300, 250], “pb-ad-78158” ).addService( googletag.pubads() ) ); } );

The post 3 Tips for Capturing Connections in Family Portraits by Karthika Gupta appeared first on Digital Photography School.


Digital Photography School

 
Comments Off on 3 Tips for Capturing Connections in Family Portraits

Posted in Photography


Fun Poses for Portraits of Your Pals

03 Apr

Is your Instagram full of photos of your very best pals?

Ours too! We’ve found patient pals make the best models. But what if you wanna get rid of the “stand stick-straight with an adorable (but played out) grin” stance?

Answer: check out our list of poses for pals and try one or all of them! Your photos of friends will go from “meh” to “marvelous!” in just a few simple motions.

Poses for Your BFFs’ Portraits 

(…)
Read the rest of Fun Poses for
Portraits of Your Pals (643 words)


© Taylor for Photojojo, 2015. |
Permalink |
No comment |
Add to
Portraits of Your Pals”>del.icio.us

Post tags:


Photojojo

 
Comments Off on Fun Poses for Portraits of Your Pals

Posted in Equipment


Yale acquires Meserve-Kunhardt Collection with iconic Abraham Lincoln portraits

31 Mar

Yale has announced the acquisition of the Meserve-Kunhardt Collection, which is comprised of more than 73,000 items including portraits of Abraham Lincoln. The collection was assembled by Frederick Hill Meserve and his daughter Dorothy Meserve, and serves to document American history spanning from the Civil War up to the 19th century. Read more

Articles: Digital Photography Review (dpreview.com)

 
Comments Off on Yale acquires Meserve-Kunhardt Collection with iconic Abraham Lincoln portraits

Posted in Uncategorized


How to Mix Ambient Light and Fill-Flash for Outdoor Portraits

31 Mar

If you have ever wondered how to improve your outdoor portraits. Turn off your Smartphone, shuffle your schedule, and make sure you read every single word on this page. Because outdoor portrait lighting secrets will finally be revealed.

Below is an example of one of my typical on-location lighting setups. It consists of a studio strobe with a battery pack and a Westcott 35″ Deep Parabolic Zeppelin modifier.

Mod1

I am guessing you have most likely stumbled upon this article because you are searching for a way to improve your outdoor portraits. If you would like to capture perfectly exposed images in ambient light, the real secret is to use fill-flash and a light modifier. Sure, if you have a reflector and an assistant you may be able to achieve similar results using only natural light. But in this article, I am going to assume you shoot outdoor portraits by yourself and you are looking for the easiest way to control, and modify the light in your images.

Below is an example of an image taken with the above lighting set up, where I lowered the background exposure with a three stop neutral density filter.

Lia1

Before we go any further, I just want to caution you, you may find some aspects of this article confusing the first time you read them. So I have included a video tutorial for you to further illustrate the lighting concepts discussed here.

Let’s break it down step by step:

Step #1 – meter the background

Step one is to meter the background area behind your subject, using either a light meter or your in-camera meter. For example, let’s say you metered the background at f/5.6 and you took a test exposure with your camera.

Step #2 – check highlights on the test shot

The second step is to examine your test shot and to make sure there are no blown out highlights in the brightest part of your image. Some DSLR models have a highlight warning indicator that you can enable and you can also view the Histogram to help you decide if your exposure falls within an acceptable range. The reason you are checking for blown out areas, is that once you loose detail in the highlights, the information from that part of the image is lost forever. So adjust your exposure if necessary to ensure you have an accurately exposed image with highlight detail intact.

Malia1

Step #3 – check highlights on the test shot

Once you are pleased with the background exposure you may find that your subject appears too dark in relation to the background. Your next step is to match the foreground exposure with fill-flash. To do that, you can use either a speedlight or a studio strobe with the light modifier of your choice.

Let’s go into a little more detail. For example, if your background is exposed at f/5.6 then you have to match the same exposure on your subject’s face. Sounds simple right? Here is where you can run into some problems. If you meter the background at f/16 on a sunny day, but the speedlight you are using only meters f/11 at full power – then what do you do? Your subject will appear darker than the background. What are your choices?

In most cases your first impulse would be to raise the shutter speed, but when you’re using strobe lights you are capped at a shutter speed between 1/160 and 1/200th of a second. In some cases you may be able to use high-speed sync, but for the purpose of this article let’s say your maximum shutter speed is 1/200 (your camera’s native flash sync speed). If that is the case, you will have to use a two or three stop neutral density filter to lower the background exposure, so you can match the foreground exposure to the background.

Have I lost you yet? In case you find this concept difficult to grasp, I have included another video tutorial below on outdoor portraits using fill-flash, where I use a three stop neutral density filter to bring down the ambient exposure. In this example that allows me to use a wide open aperture, in combination with fill-flash to create a blurry background effect.

If you are like most people, it will probably take you a little practice until you feel comfortable balancing ambient light and fill-flash. Take your time and have fun with it. Read the article a few times and watch the video tutorials again. Once you have a pretty good grasp of the concepts discussed, head out and practice balancing your exposure. Some people prefer a background exposure that is one to two stops darker than their subject. Experiment with different ratios until you find a look that suits your style.

Sheena1

Please post any questions you have in the comments below.

googletag.cmd.push(function() {
tablet_slots.push( googletag.defineSlot( “/1005424/_dPSv4_tab-all-article-bottom_(300×250)”, [300, 250], “pb-ad-78623” ).addService( googletag.pubads() ) ); } );

googletag.cmd.push(function() {
mobile_slots.push( googletag.defineSlot( “/1005424/_dPSv4_mob-all-article-bottom_(300×250)”, [300, 250], “pb-ad-78158” ).addService( googletag.pubads() ) ); } );

The post How to Mix Ambient Light and Fill-Flash for Outdoor Portraits by Craig Beckta appeared first on Digital Photography School.


Digital Photography School

 
Comments Off on How to Mix Ambient Light and Fill-Flash for Outdoor Portraits

Posted in Photography


4 Tips for Creating Portraits with Impact

25 Mar

Faceplant

Since the birth of the camera, an overwhelming number of photographers have concentrated on portraiture. Capturing the personality, mood, or expression of a fellow human is sublimely beautiful. Because of this, many of us have thousands of portraits saved on hard drives, and eagerly await the next portrait contest. Honestly, how many of these portraits actually have visual impact? How many of our portraits are powerful enough to hold a viewer’s attention longer than a couple of seconds?

We can continue to produce countless portraits that are stale and void of visual power, or we can step back, evaluate our work, and begin to strategically create portraits that do have impact. Whether you are shooting on location or in a studio, begin adding some punch to your portraiture to captivate your audience. Here are a few ways to start creating portraits with impact immediately.

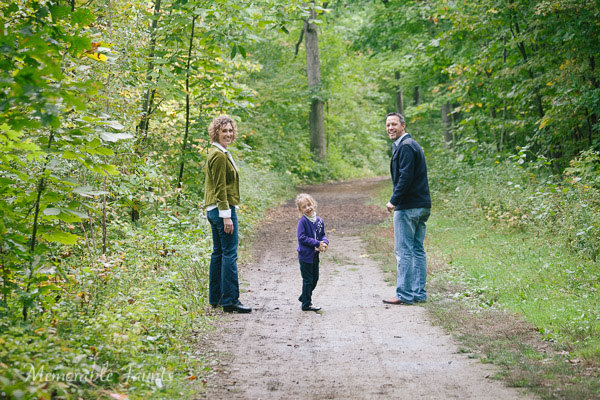
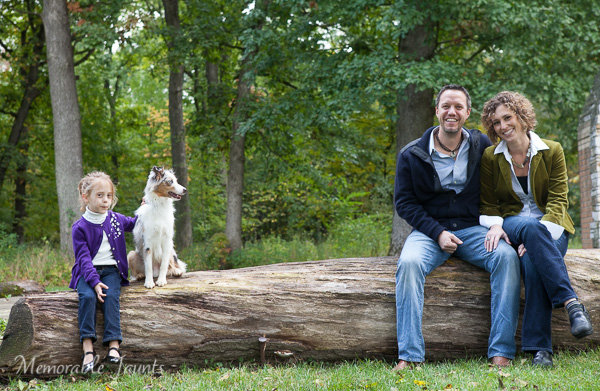
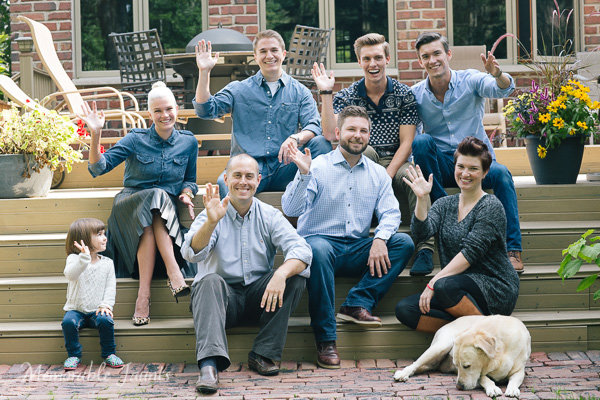
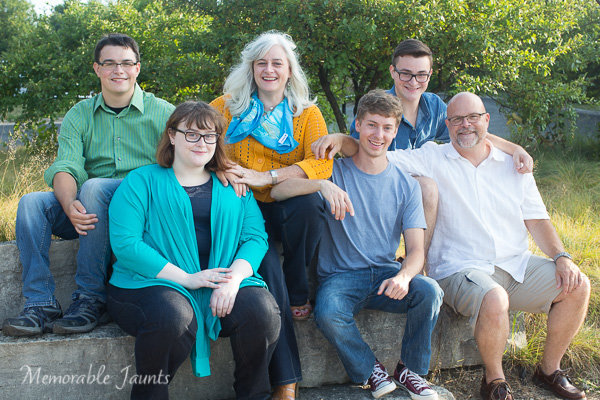
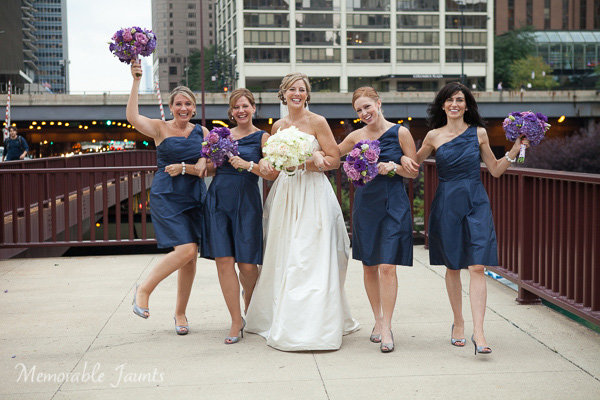
#1 INCLUDE ENVIRONMENT

When we pick up our cameras to snap a portrait, we almost instinctively move close to our subject. Yet, constantly shooting tight portraits can put us in a close-up rut. Simply moving your camera body closer to someone’s face, or using the telephoto aspect of your lens, doesn’t always lend itself to powerful photographs (the selfie is a perfect example of how easy it is to botch a close-up portrait).

Jun Temple

By physically taking several steps back, or by retracting your zoom, you allow context to enter the frame. Suddenly, what was just a photograph of a person’s face, can become an image rich with balance and environmental information. Additionally, a portrait with contextual information can easily appeal to a much wider audience by relating a story.

Steve wide

Shooting tip: When shooting wide portraits, make smart lens choices. Many wide-angle lenses (such as Canon’s 17-40mm L-Series) come with a great deal of distortion and will exaggerate a subject’s features. So that your subjects are not distorted, use a standard portrait lens (i.e. 85mm) and move your body in relation to your subject.

#2 USE NEGATIVE SPACE

Negative Monks

Stepping back and including environmental information can add impact to many portraits. However, the surrounding environment can also distract from your intended subject. At times, photographs are more powerful if the environment is minimal or void.

To draw the viewer’s eye directly to your subject, strategically add abundant negative space (area around or between a subject) in your frame. The use of negative space can be a key element in artistic composition in that it emphasizes and defines the main subject of a photograph (positive space) and adds impact.
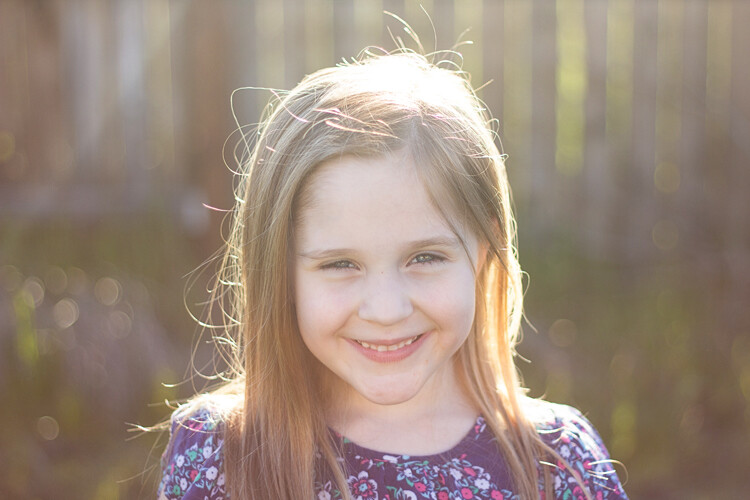
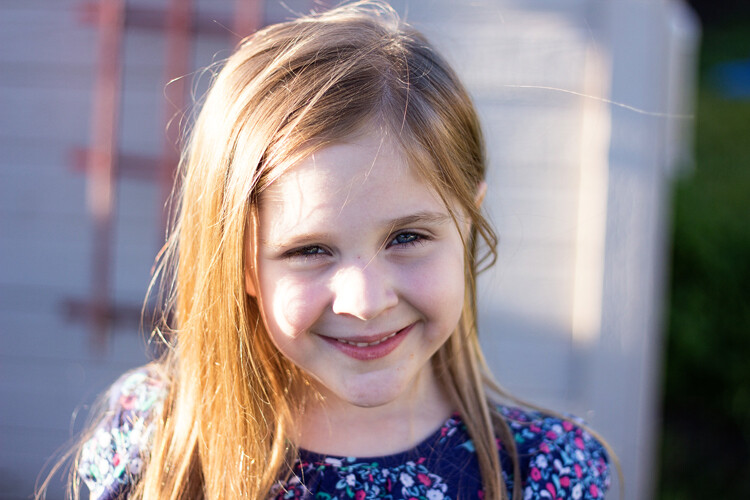
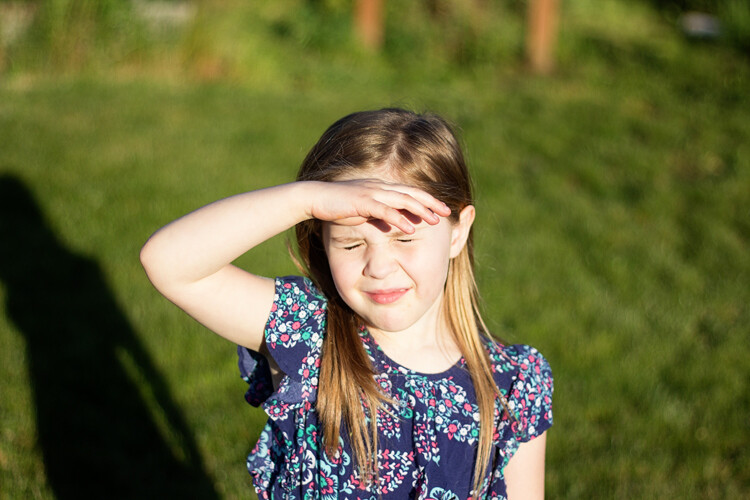
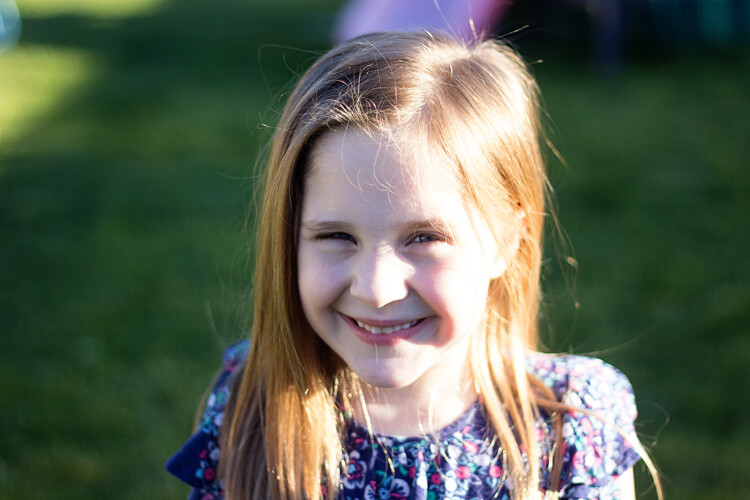
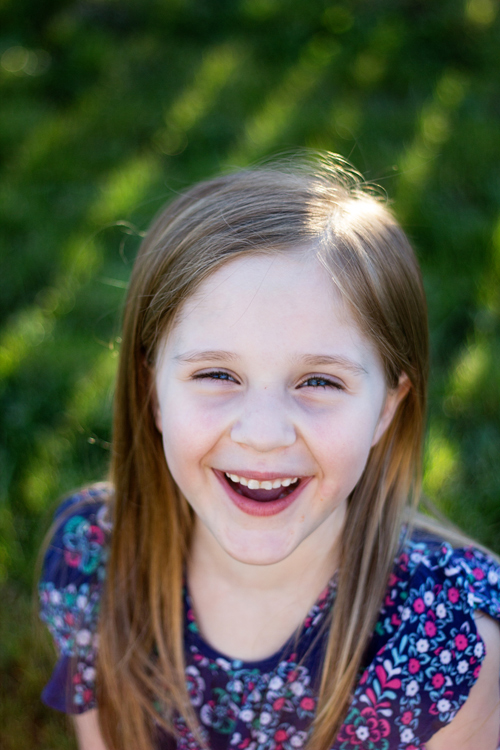
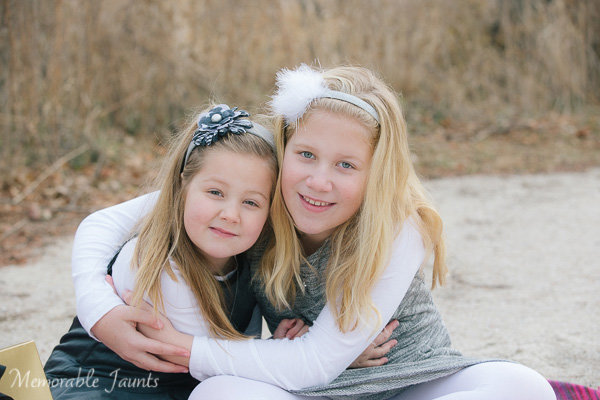
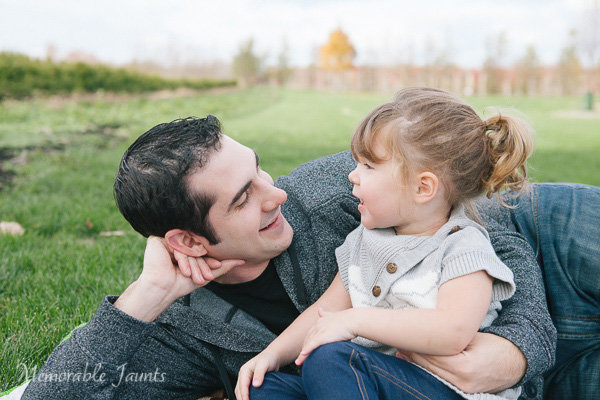
#3 FORGET THE FACE

When we think of portraits, the first thing that usually comes to mind is a frame filled with a face. We can agree that there are many positives to this approach to portraiture. In a headshot we can see facial features, skin tones (unless we wipe them away in Photoshop or Elements) and the catchlights that draw us into the windows of the soul.

Alessa s Leg Grandmother s Hands

Luckily though, all of our photographs do not have to follow a headshot-only, antiquated view of portraiture. It is important to remind ourselves that a portrait is simply a representation of a person. Photographers are given the artistic license to determine how their subjects are portrayed. Instead of snapping a run-of-the-mill headshot, try shooting hands, feet, necks or even the cast shadow of a person. At times, moving away from a person’s face can lead to a frame that carries a tremendous amount of visual impact.

#4 CROP YOUR FRAMES

IMG 5902

Another way to add impact to your portraits is to experiment with cropping. This is one of the simplest ways to add impact to a portrait and to showcase your aesthetic as a photographer. If you are finding it difficult to see fresh or unique frames while you are actually shooting, experiment with the crop tools in post-production.

Focusing on smaller portions of your subject can have much more impact than if you neglect to adjust the original frame. Moreover, a cropped picture can completely alter the photograph’s intention or interpretation. The more you experiment with cropping, the more apt you will be in spotting unique and powerful frames in the field.

Singh

Shooting tip: If you are photographing with particular frame in mind, it is better to take photographs that are a bit wider than your intended crop. You can always crop tighter, but you cannot widen the original frame.

Whether you are an amateur or a seasoned professional, rethinking the way you shoot portraits will inevitable invigorate your craft. The next time your camera is pointed toward another human, try something new. Experiment with a variety of strategies that will add impact to your portraits.

googletag.cmd.push(function() {
tablet_slots.push( googletag.defineSlot( “/1005424/_dPSv4_tab-all-article-bottom_(300×250)”, [300, 250], “pb-ad-78623” ).addService( googletag.pubads() ) ); } );

googletag.cmd.push(function() {
mobile_slots.push( googletag.defineSlot( “/1005424/_dPSv4_mob-all-article-bottom_(300×250)”, [300, 250], “pb-ad-78158” ).addService( googletag.pubads() ) ); } );

The post 4 Tips for Creating Portraits with Impact by Andrew Faulk appeared first on Digital Photography School.


Digital Photography School

 
Comments Off on 4 Tips for Creating Portraits with Impact

Posted in Photography