By Oded Wagenstein
Have you ever met a person, while travelling abroad or at home, who has such an interesting face that you would really like to photograph? But, just before you press the shutter, you suddenly think, “How am I going to shoot this”?
Because there are so many questions to answer: How do I approach a strange person? Should I photograph from a distance, with a Tele-photo lens, or should I get closer? What if the person will get offended or angry?
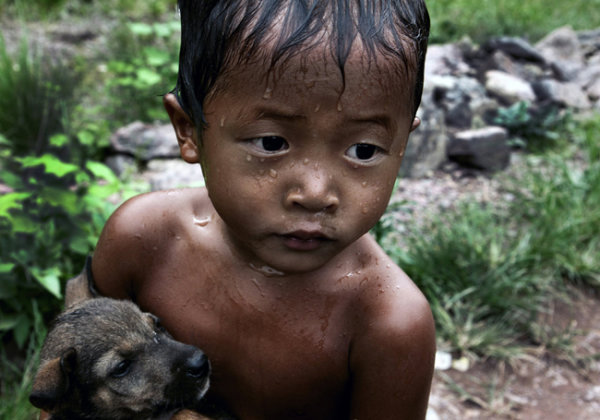
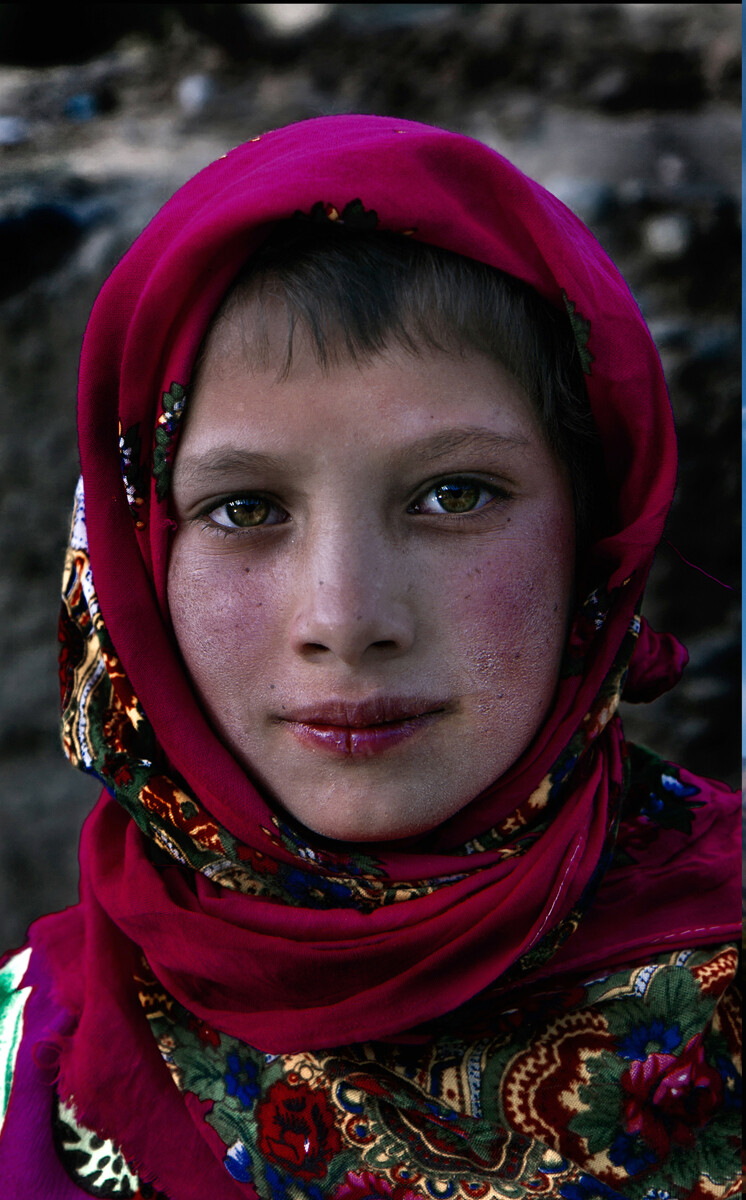
It depends on the situation but, in 99% of my portraits, I use what I like to call the “being involved” technique. This technique requires the photographer to get closer to the subject, by using a wide focal length lens and there is no doubt, that the subject will be aware of the photographer and the camera.
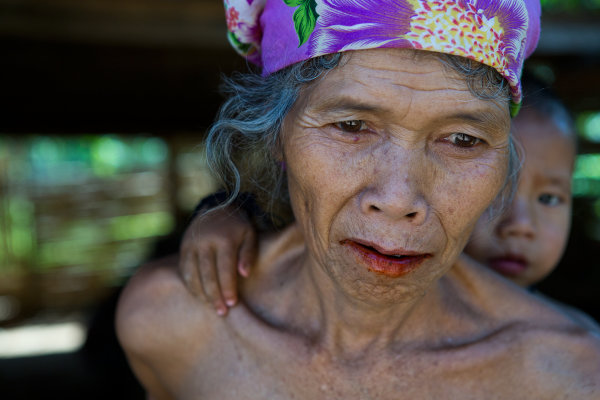
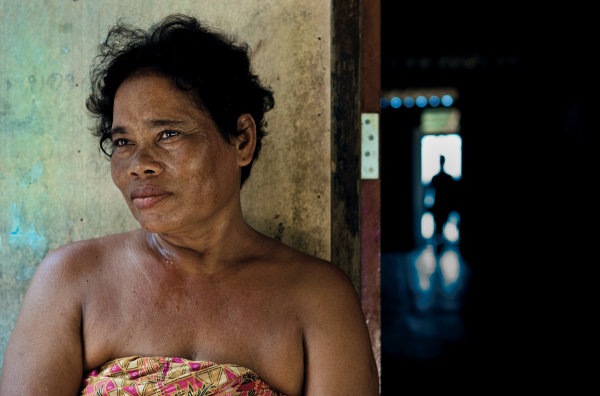
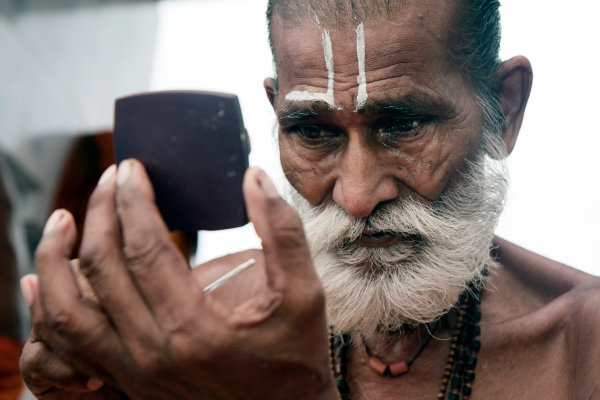
Fstop of 4.5, shutter speed@10 and ISO 320
There are so many advantages to using this method, for instance the ability to control the composition, the angle, the background, not to mention asking your subject for “one more take” and of course, the possibility of making a new friend. Creating a close-up portrait, with the technique of “being involved” creates intimacy and gives warmness to the image that you wouldn’t get with a Tele-photo lens in most cases. But, with this method as my students are well aware, there is one big disadvantage, when a person becomes aware of the camera, his behavior and the authenticity and spontaneity of the moment disappears.
Once, on a very cold night, while shooting in Japan, I asked my good friend and great photographer Dave Doisneau – “What kind of super power he would like to have?” (Cold nights in Japan will make you ask stupid and philosophical questions) Dave answered “I would like to be invisible. To be able to photograph a person, inches away from their face without them being aware that I was even there”. This for me sums up my whole philosophy on portrait photography. Losing the spontaneity, or the fear of losing authenticity, are just weak excuses. As a photographer, your job is to bring all these qualities back to your image. How can you do that? (Here’s a little hint for you) Photoshop or expensive equipment won’t help you.

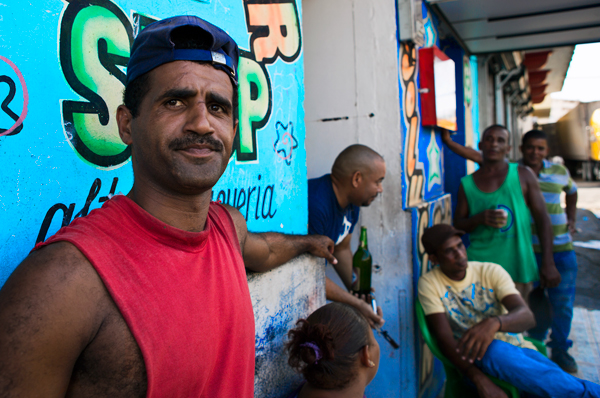
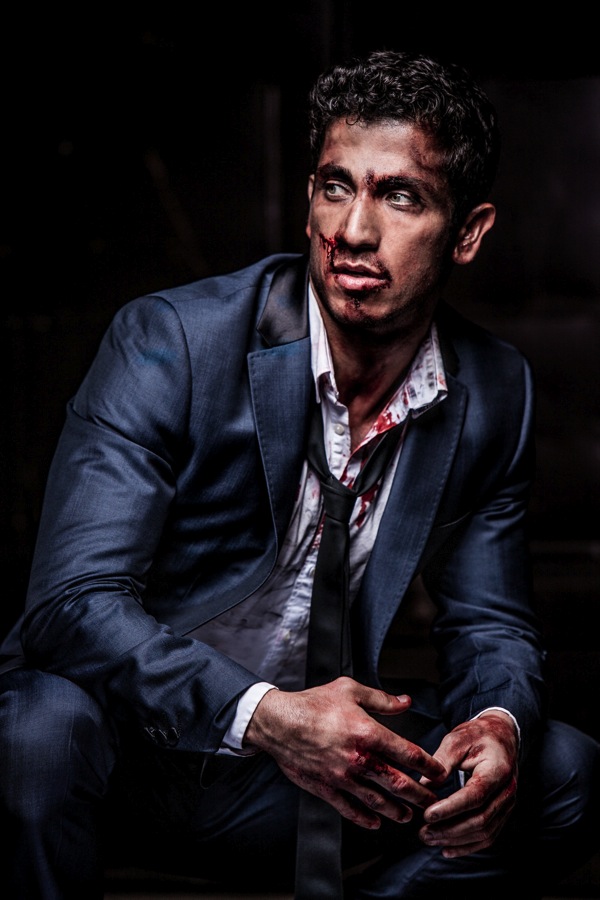
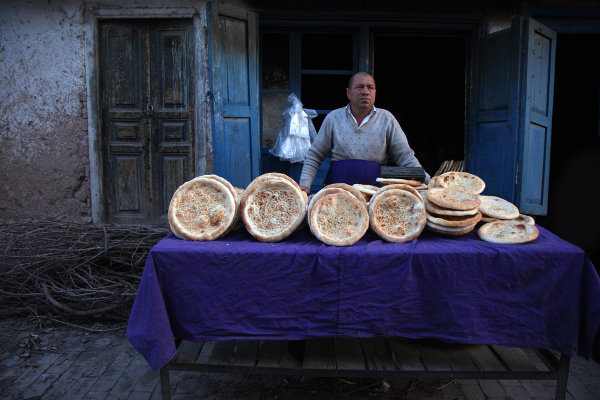
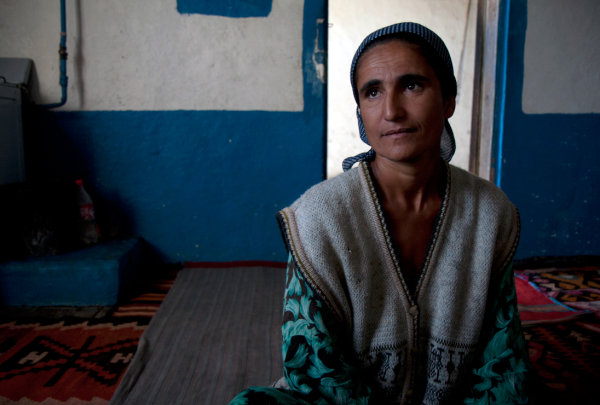
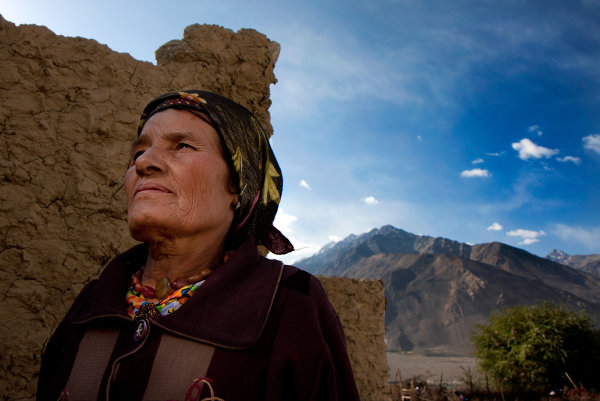
Fstop of 2.8, shutter speed@10 and ISO 100
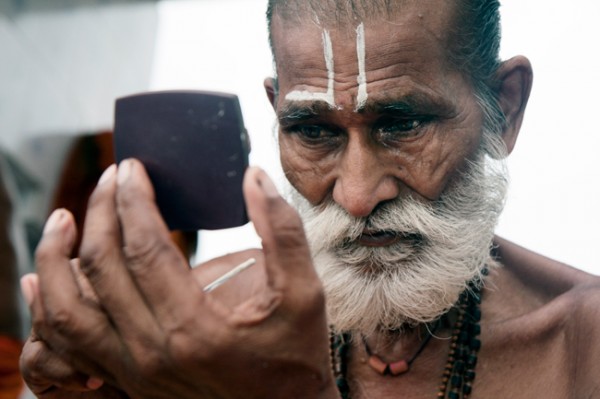
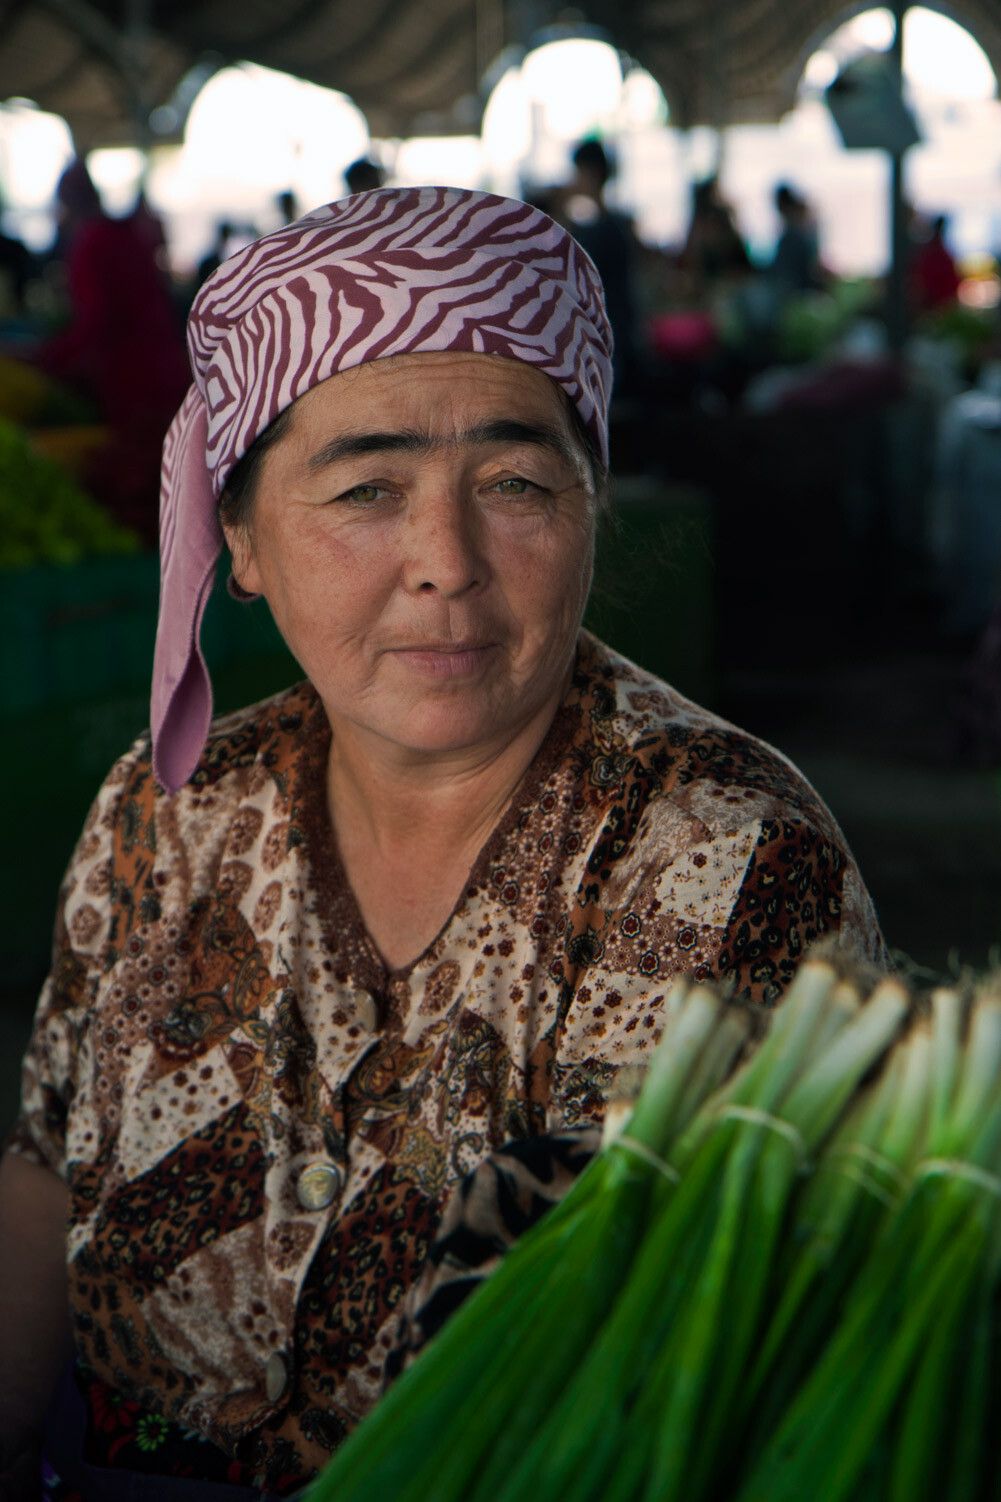
As one of the great photographers, Ansel Adams once said: “You don’t take a photograph, you make it”. The difference between an amateur and a professional is in the preparation.Knowledge is power and the more you know about a person and their culture, the easier it will be for you to become invisible. While I was in the Wakhan valley, between the Afghan and Tajikistan border, I learned, in advance that the people who live there have many cultural dos and don’ts. From the way they greet a stranger (Right hand on the chest and a slight bow) to the proper way to react when invited to a local house (just say yes and prepare yourself for tea, and lots of it!).
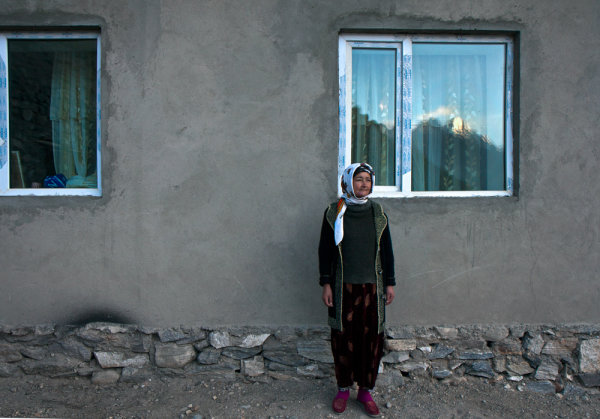
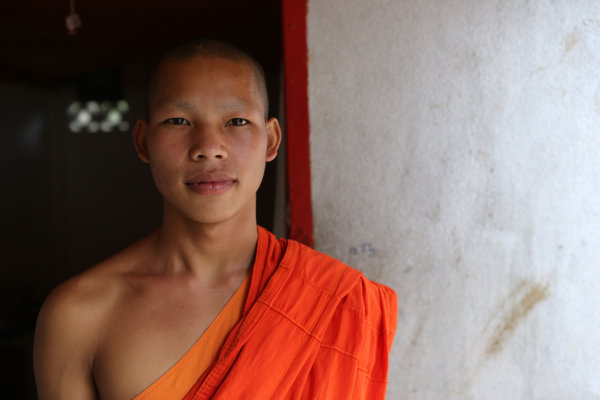
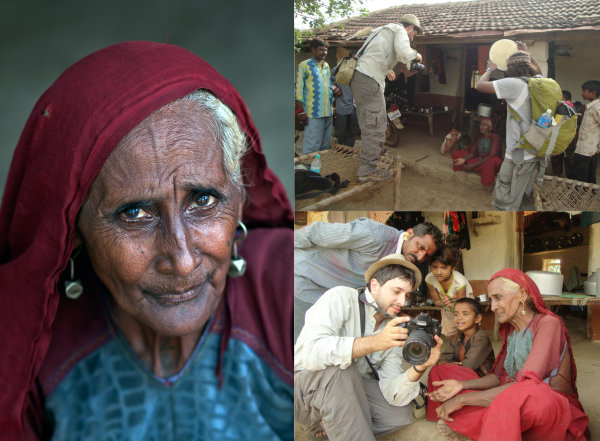
Fstop of 4.5, shutter speed@1 and ISO 125
So before I travel anywhere, I familiarize myself, in advance, with any photography related taboos. From how will people respond to the camera, to things that you should not shoot. For example, did you know that the people of the Akha tribe in south East Asia, believe that photographing one of their tribe member will actually steal his soul?
You can learn all these things and more by consulting with a photographer who has already visited the place. The internet is a great place to find him or her. You can consult travel forums, books, or even call the embassy of the country of your destination.
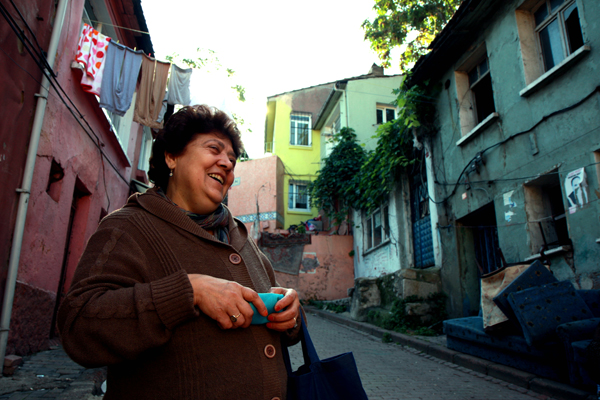
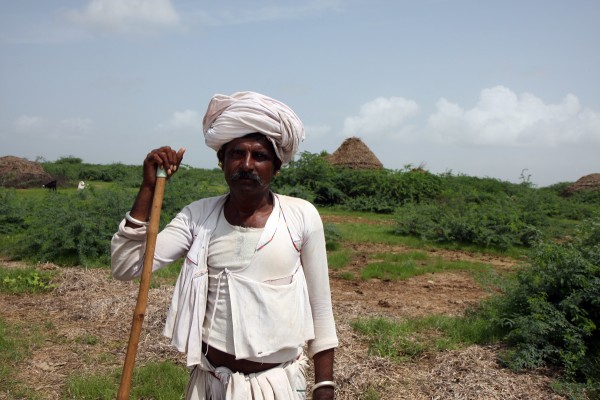
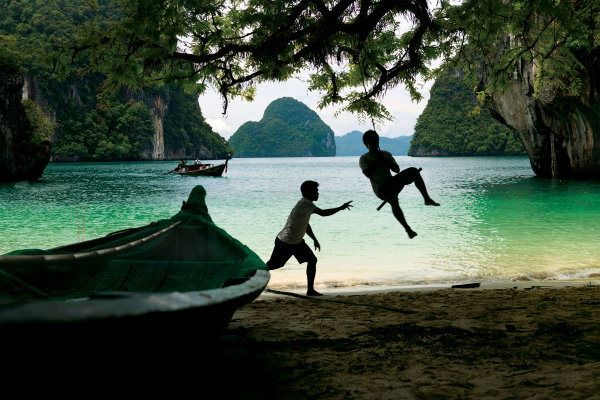
Fstop of 4.5, shutter speed@10 and ISO 200
Many photographers will advise you to take your camera with you all the times. For me, the camera is just a tool, and as a tool it must not interfere. Have you ever felt uncomfortable because someone is aiming a camera at you? Have you ever thought how YOU look when you stand behind the camera? (A bit like holding a weapon right?).
Nobody likes it when you aim something at them without any explanation or permission. That’s why, when I encounter a new and interesting person, I would like to photograph, I first introduce myself as Oded the person before as Oded the photographer. by the time I take out my camera, the person has lost interest in me, and gone back on his work, I then become invisible and Voilà I can take my shot and I’ve make a new friend into the bargain.
In the past year, I have photographed hostile tribes in South East Asia, gypsy communities in Central Asia and even in the former Soviet Union. If there is one thing that I’ve learned from visiting those places, is that most people would actually like their picture taken, if we do it right. So please give yourself a confidence boast and try it. Anywhere you are on the globe, if you act with respect, be polite, and even have a little bit of sense of humor, most of the time people will act the same way towards you.
Yes, we’ve all got a horror story, of the one person who shouted at us while we took his photo. Think about it for a second; did it happen when you tried to shoot the person without his permission? If you approach a person with dignity, make a connection, and then you take out the camera, what the worst thing that can happen? They will say no, but at least you would have tried right?
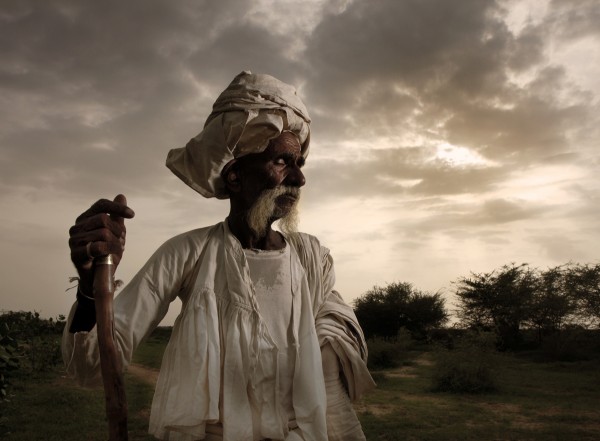
Fstop of 5.6, shutter speed@15 and ISO 100
When you found a person with a unique face, invest the time to break the ice with them, then when you finally have his approval for the shoot, if he’s very polite, you will probably have around 30 seconds to take the shoot before they moves on, that’s some pressure.
This may be the most important section of this article, that many photographers forget, just relax. Being stressed never helps especially when dealing with people or while creating art. It’s true you may not have much time to decide on the focal length, the background, the shooting angle, the shutter or the aperture.
Also, try not to let your technical level stand in your way. How? Before starting to shoot people, try your craft on still life. Flowers would be perfect to start with. Also it would be really wise to invest in some photography course (much more important than buying new equipment). Last but by no means least, don’t forget to RTFM- read the camera’s fu*** manual!
That’s right, creating interesting and strong portraits is not easy. Take your time to work on your craft. Shoot flowers, then your friends and family members. Learn, learn and learn everything you can about your camera and about your subject. Come with respect and most important – relax.
Fstop of 3.2, shutter speed@10 and ISO 200
Oded Wagenstein is a Travel photographer and writer. He is a regular contributor to the National Geographic Traveler magazine (Israeli Edition) and he is known for his intimate portraits from around the world. You can join his Portrait & Travel Photography Facebook page and continue to discuss on travel and people photography and get more amazing tips!
Post originally from: Digital Photography Tips.
Check out our more Photography Tips at Photography Tips for Beginners, Portrait Photography Tips and Wedding Photography Tips.
How to Photograph a Portrait of a Stranger with the WOW Factor


 Today I’m excited to announce the launch of a new dPS eBook – Portraits Lighting the Shot – by Gina Milicia.


You must be logged in to post a comment.