RSS
 

Posts Tagged ‘Portrait’

Portrait Tutorial Feast – Best of dPS 2013

29 Dec

Just a reminder that this week we are looking back at some of the best articles on dPS in 2013. So far we’ve looked at:

  • Top 12 landscape articles
  • All about gear top 14

best_wedding_photos_09.jpg

Now it’s time to move to portraits. Hopefully you’ll have some time with family and friends this holiday season, and had a feast or two. Well here’s another one for you, I present the Portrait Tutorial Feast! In no particular order:

The top 17 most popular portrait tutorials of 2013

  1. 10 Ways to take stunning portraits
  2. 6 Portrait lighting patterns every photographer should know
  3. 13 tips for improving outdoor portraits
  4. Family portrait dos and don’ts
  5. 10 techniques for amazing portraits
  6. How to take portraits – 19 portrait photography tutorials
  7. More Portrait Tips
  8. 8 Posing Guides to Inspire Your Portraiture
  9. Clothing for Portraits – How to Tell your Subjects What to Wear
  10. 5 Fail Proof Portrait Poses
  11. 10 Tips for Creating Great Family Portraits
  12. 10 Ways to Direct a Portrait Shoot like a Pro
  13. One Light Portraits: Simple Elegance
  14. How to Achieve Blurred Backgrounds in Portraits
  15. 5 Classic Lighting Positions for Portrait Photography
  16. Stunning Portraits: Manipulating White Balance
  17. Discover the Secrets of Beautiful Portrait Lighting – a dPS ebook


The post Portrait Tutorial Feast – Best of dPS 2013 by Darlene Hildebrandt appeared first on Digital Photography School.


Digital Photography School

 
Comments Off on Portrait Tutorial Feast – Best of dPS 2013

Posted in Photography


How to Make a Portrait of a Stranger in 8 Easy Steps

10 Dec

While you may be at ease shooting candid street photography, you may not feel quite as comfortable doing street portraits… Making a portrait of a stranger, is a very different approach which requires an interaction with your subject.

If you are a very social person who talks to strangers anywhere you go, like I do, taking the next step should not be too much of an issue. If, on the other hand, the thought of approaching a stranger terrifies you, keep reading.

Meet Steve ~ While waiting for the light to cross the street, I made a comment on his cool hat. We talked for 10 minutes! ©Valérie Jardin

Meet Steve ~ While waiting for the light to cross the street, I made a comment on his cool hat. We talked for 10 minutes! ©Valérie Jardin

Step 1 – practice without a camera

Make it a goal to talk with strangers everyday for a few days. They can be waiting in line at the coffee shop with you or on the subway. Make small talk about the weather, comment on the new coffee flavor, just about anything that comes to mind as long as it’s not weird. You may find it terrifying at first but I can assure you that it will become easier everyday and you will soon look forward to your next encounter.  Granted, there is a big leap between approaching a stranger to comment on their cool hat ,or funky sun glasses, and asking them to make a portrait.

Yet, if you are shy, the first step will help you get to the second.

Once there is eye contact, just tell your subject why you want to take a picture. Here I saw a timeless black and white image and I had to ask! ©Valérie Jardin

Once there is eye contact, just tell your subject why you want to take a picture. Here I saw a timeless black and white image and I had to ask! ©Valérie Jardin

Step 2 – photograph a street performer

Another way to ease into it is by photographing street performers. They are there to be seen and they are easy subjects. Purists will tell you that they don’t count because they are too easy. As far as I know there is no authority or rules for street portraiture or street photography in general, so go ahead! Photograph a street performer and remember to leave a tip.

Step 3 – go with a friend

Having another person at your side will embolden you, and you will find it easier to approach a stranger if you’re not alone. The friend doesn’t even have to be a photographer.

Step 4 – don’t hide behind a long lens

Just like with candid street photography, the closer the better! Also, a smaller camera will be less intimidating for your subject.

Step 5 – be confident

Introduce yourself and tell them why you want to make a portrait of them. You’re not doing anything wrong, so don’t take the shot and run! If they ask you why you want to take their picture, simply explain that you are photographing strangers for a personal project and you found them quite interesting. Most people will be flattered.

Most people are flattered that you want to make a portrait of them. ©Valérie Jardin

Most people are flattered that you want to make a portrait of them. ©Valérie Jardin

Step 6 – take your time

You asked for their permission to take the picture, so now it’s your responsibility to do a good job. The background may be distracting, or they may be squinting from the sun in their eyes. Ask them to move or even cross the street if the light is better. Take two or three shots until you are satisfied with the result. Make sure you thank them for their time before you part ways.

Once you have the permission to do a portrait, it's okay to ask your subject to move to a more pleasing background. This young woman was part of my ongoing 'Beautiful Smiles' blog series. ©Valérie Jardin

Once you have the permission to do a portrait, it’s okay to ask your subject to move to a more pleasing background. This young woman was part of my ongoing ‘Beautiful Smiles’ blog series. ©Valérie Jardin

Step 7 – enjoy the experience

Ask for their name, maybe you’ll even engage them in a conversation and find out some interesting things about their lives. Show them the picture on the back of the camera. Share email addresses and send them the best picture if they ask.

Step 8 – share your work

Those portraits are useless if they stay on your hard drive. Share them on a blog or social media network. The more you share, the better you will feel about your project and the more you’ll want to go out and shoot.

If you’ve never done this, why not make it a photographic goal for 2014? Good luck!

Next step . . .

Please share your experience with the dPS community. How did you start interacting with strangers to photograph them? Do you find it as addictive as candid street photography?

There are smiles that are irresistible! ©Valérie Jardin

There are smiles that are irresistible! ©Valérie Jardin

Post originally from: Digital Photography Tips.

Check out our more Photography Tips at Photography Tips for Beginners, Portrait Photography Tips and Wedding Photography Tips.

How to Make a Portrait of a Stranger in 8 Easy Steps

The post How to Make a Portrait of a Stranger in 8 Easy Steps by Valerie Jardin appeared first on Digital Photography School.


Digital Photography School

 
Comments Off on How to Make a Portrait of a Stranger in 8 Easy Steps

Posted in Photography


Portrait Gear Essentials – by dPS eBook author Gina Milicia

21 Nov

portrait-gear-essentials-02

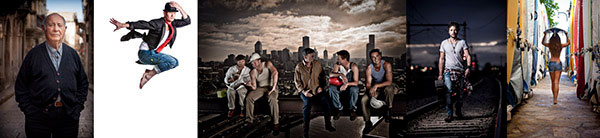
My Portrait Gear Essentials – Images by Gina Milicia

What’s the best equipment for taking amazing portraits?

portrait-gear-essentials-12

I’m often asked what the best equipment is for taking great portraits. Many people assume that a great camera will take great portraits. That is simply not true. A quick scan through Flickr, Instagram or any photo sharing site will reveal thousands of beautiful portraits, some taken on mobile phone cameras, and yet others using very basic entry level equipment.

A great photographer can take great photos using any kind of camera. A great camera in unskilled hands will still deliver mediocre photos. Before you invest the big bucks in high end gear take the time to learn the craft first.

I started out my professional career with a borrowed camera and very cheap lens. I worked this way for a few years and then invested in a high end second hand camera and lens. If I were starting out again now I would do exactly the same thing. My advice on buying a camera is always buy within your means and upgrade as your skills start to improve.

Most girls love buying shoes and handbags. I admit I’m a self-confessed gear-a-holic!

It’s taken me 25 years to accumulate this gear. My gear is subjected to punishing workouts, with my average shoot being approximately 2000-3000 images. I need gear that is built to last and won’t curl up and cry for its mama when I push it too far.

My portrait gear essentials – what’s in my bag

Cameras

  • Canon 1Ds Mark III – this is a pro-level camera, so it’s more expensive and a lot heavier but it’s designed to survive heavy usage. I would say I use this camera for 80% of my shooting.
  • Canon 5D Mark II – I’ll favour this camera body if I know I have to shoot with a high ISO (in very low light or on a night shoot). At 400-1600 ISO this camera is amazing.

Lenses

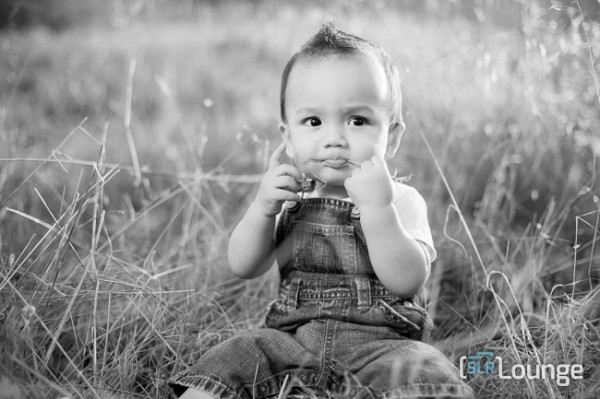
I like to work with a focal length between 70mm and 200mm. With a long lens, facial features are slightly compressed, which is really flattering for portraits.

The workhorse

Canon EF 70-200mm f/2.8L IS lens – this lens is my workhorse and I use it for 70% of my shoots. It’s fast, sharp and consistently gives amazing results.

I like working with zoom lenses because they give me the luxury of zooming in to get tight head shots and mid-shots, or zooming out to get full length shots. All without moving my camera. As a result, I can stay out of my model’s personal space, which can be intimidating or confronting, and keep the momentum of the shoot flowing.

The traveller

Canon EF 24-105mm f/4L IS lens – this is the lens I use for events, lifestyle and travel shoots. It’s light, compact and my go to lens when travelling.

Makes my heart skip a beat

Canon EF 85mm f/1.2L lens – it’s expensive, heavy, and slow to focus but I quickly forget all of this when I see the gorgeous results. I love using this lens for head shots, beauty, portraits, and events.

This lens will give amazing results in very low light conditions and the shallow depth of field will eliminate any background clutter giving me the luxury to use it lens in any location.

Tripods

portrait-gear-essentials-11

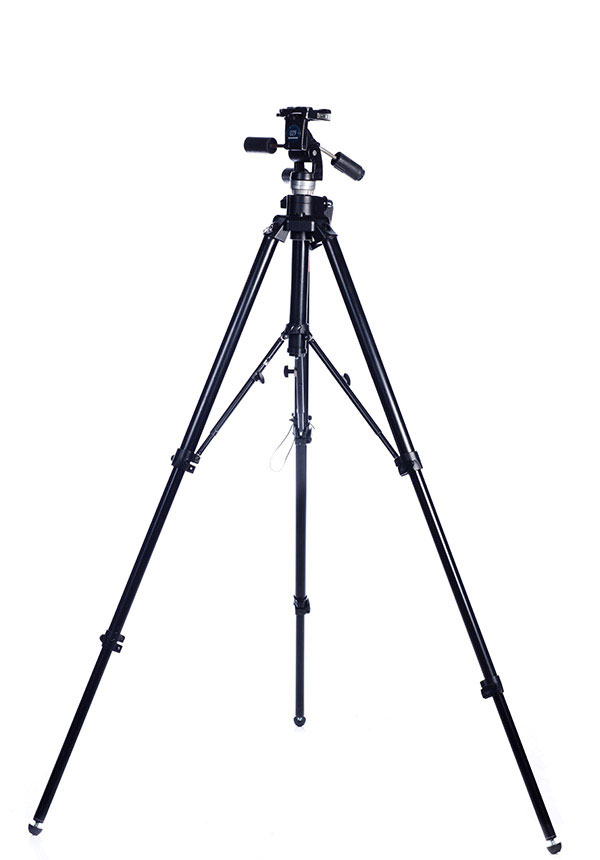
Most of my portraits are shot using tripods. I like to set up my shot, position my model and then focus on their expression. Keeping my camera fixed in one position allows me to do this and really suits my shooting style.

Having my camera on a tripod also allows me to focus 100% of my attention on my model and frees me up to gesture with my hands, or step away from the camera without breaking the shot.

I have four tripods:

  • Manfrotto 190XPROB – small, light-weight tripod that I use when I travel
  • Manfrotto 475B Pro – great sturdy tripod for location shoots
  • Manfrotto 058B – heavy duty tripod for studio use
  • Manfrotto 679B Monopod – for film, TV stills, and theatre

portrait-gear-essentials-07

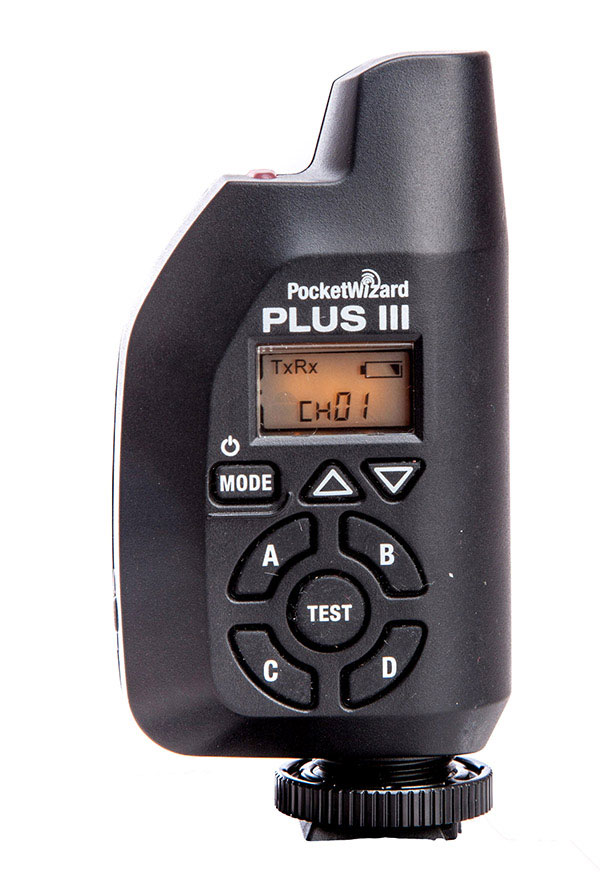
Remote flash triggers

PocketWizards

I have six PocketWizard remote flash triggers because I’ll often have three different sets running. I love the PocketWizards because they are reliable and rarely misfire.

Light meter

This model isn't available any more, try one in the Sekonic line

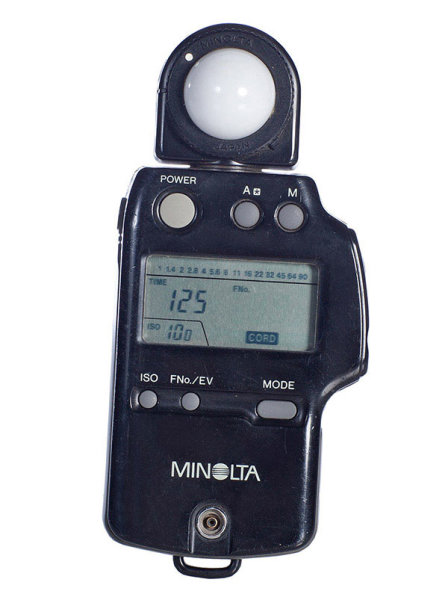
I believe the light meter is an essential tool in good portrait photography and would never leave home without one. When you use a light meter you know you have most accurate readings.

Minolta IV (not available any more) – I’ve had this light meter for over 23 years now and I’ve grown rather fond of it. As a basic meter it’s excellent, reading ambient light or flash, and it’s perfect for most lighting conditions.

Lighting

Speedlights

portrait-gear-essentials-01
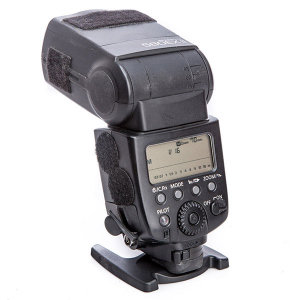
I use a speedlight off camera for about 20%-30% of my photo shoots. Like any piece of gear, they have their pros and cons, but they can light you out of some tight spots (quite literally).

I use Canon 580EXii speedlights as my preferred lighting when I am travelling or need to work quickly or in tight locations. I will also use a Photoflex medium size softbox that folds flat, and is perfect for lighting one person and couples.

portrait-gear-essentials-09

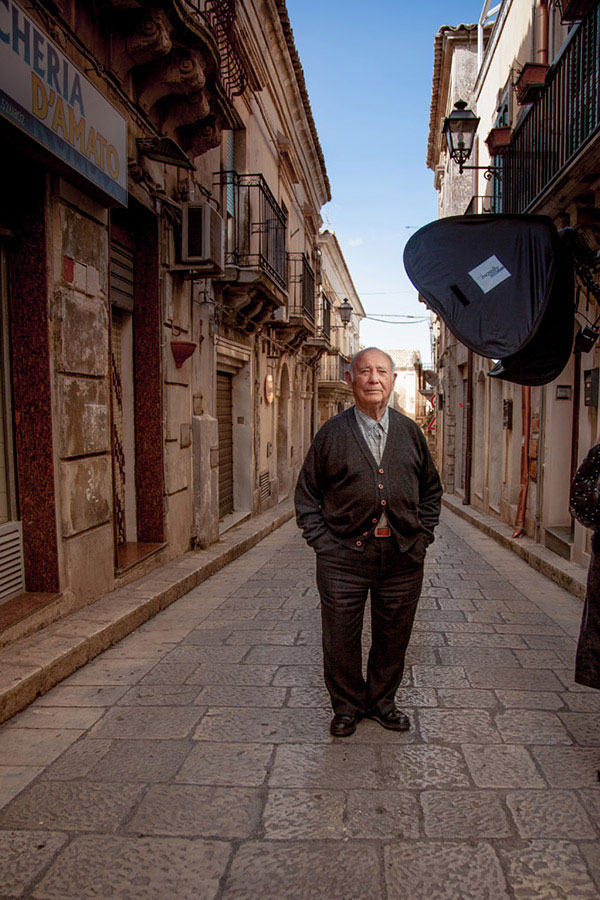
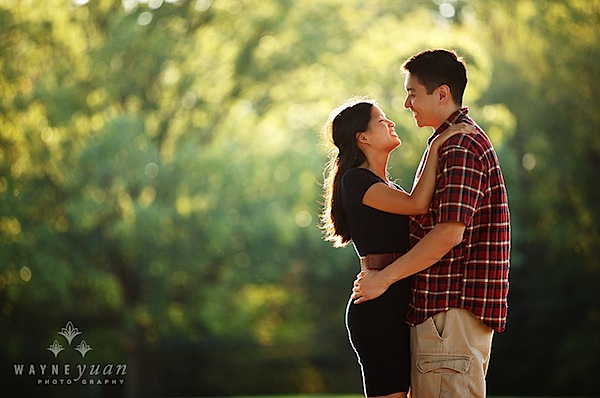
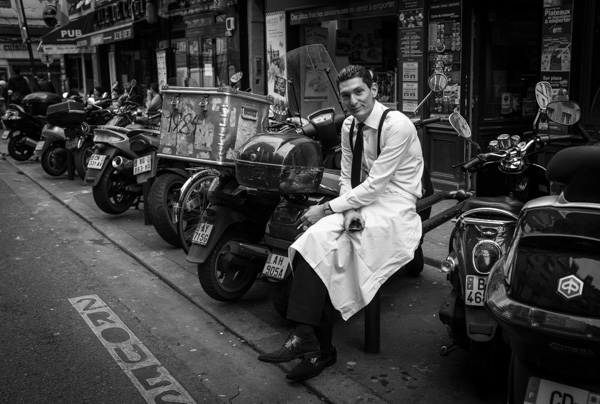
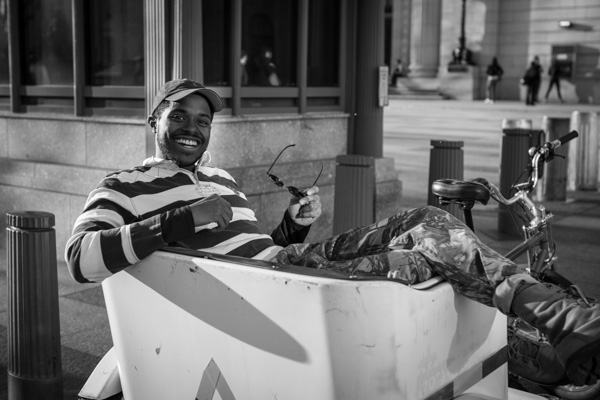
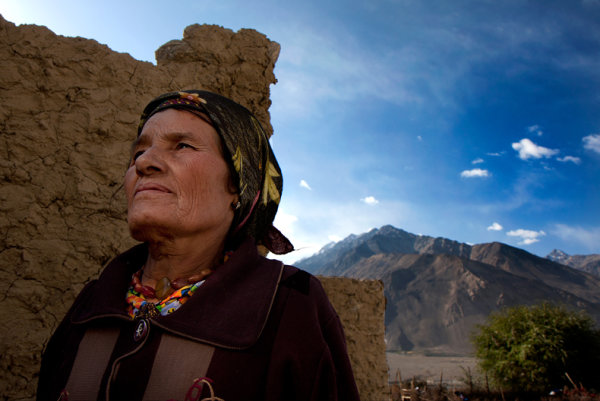
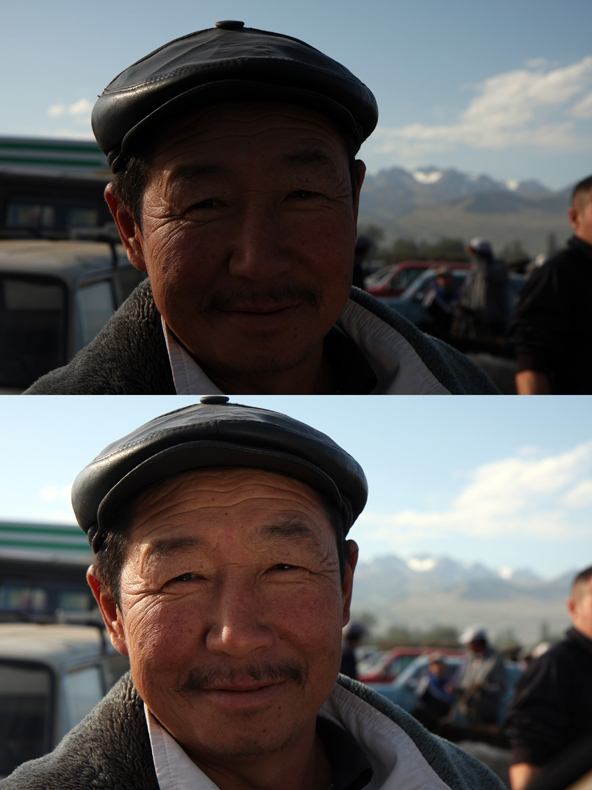
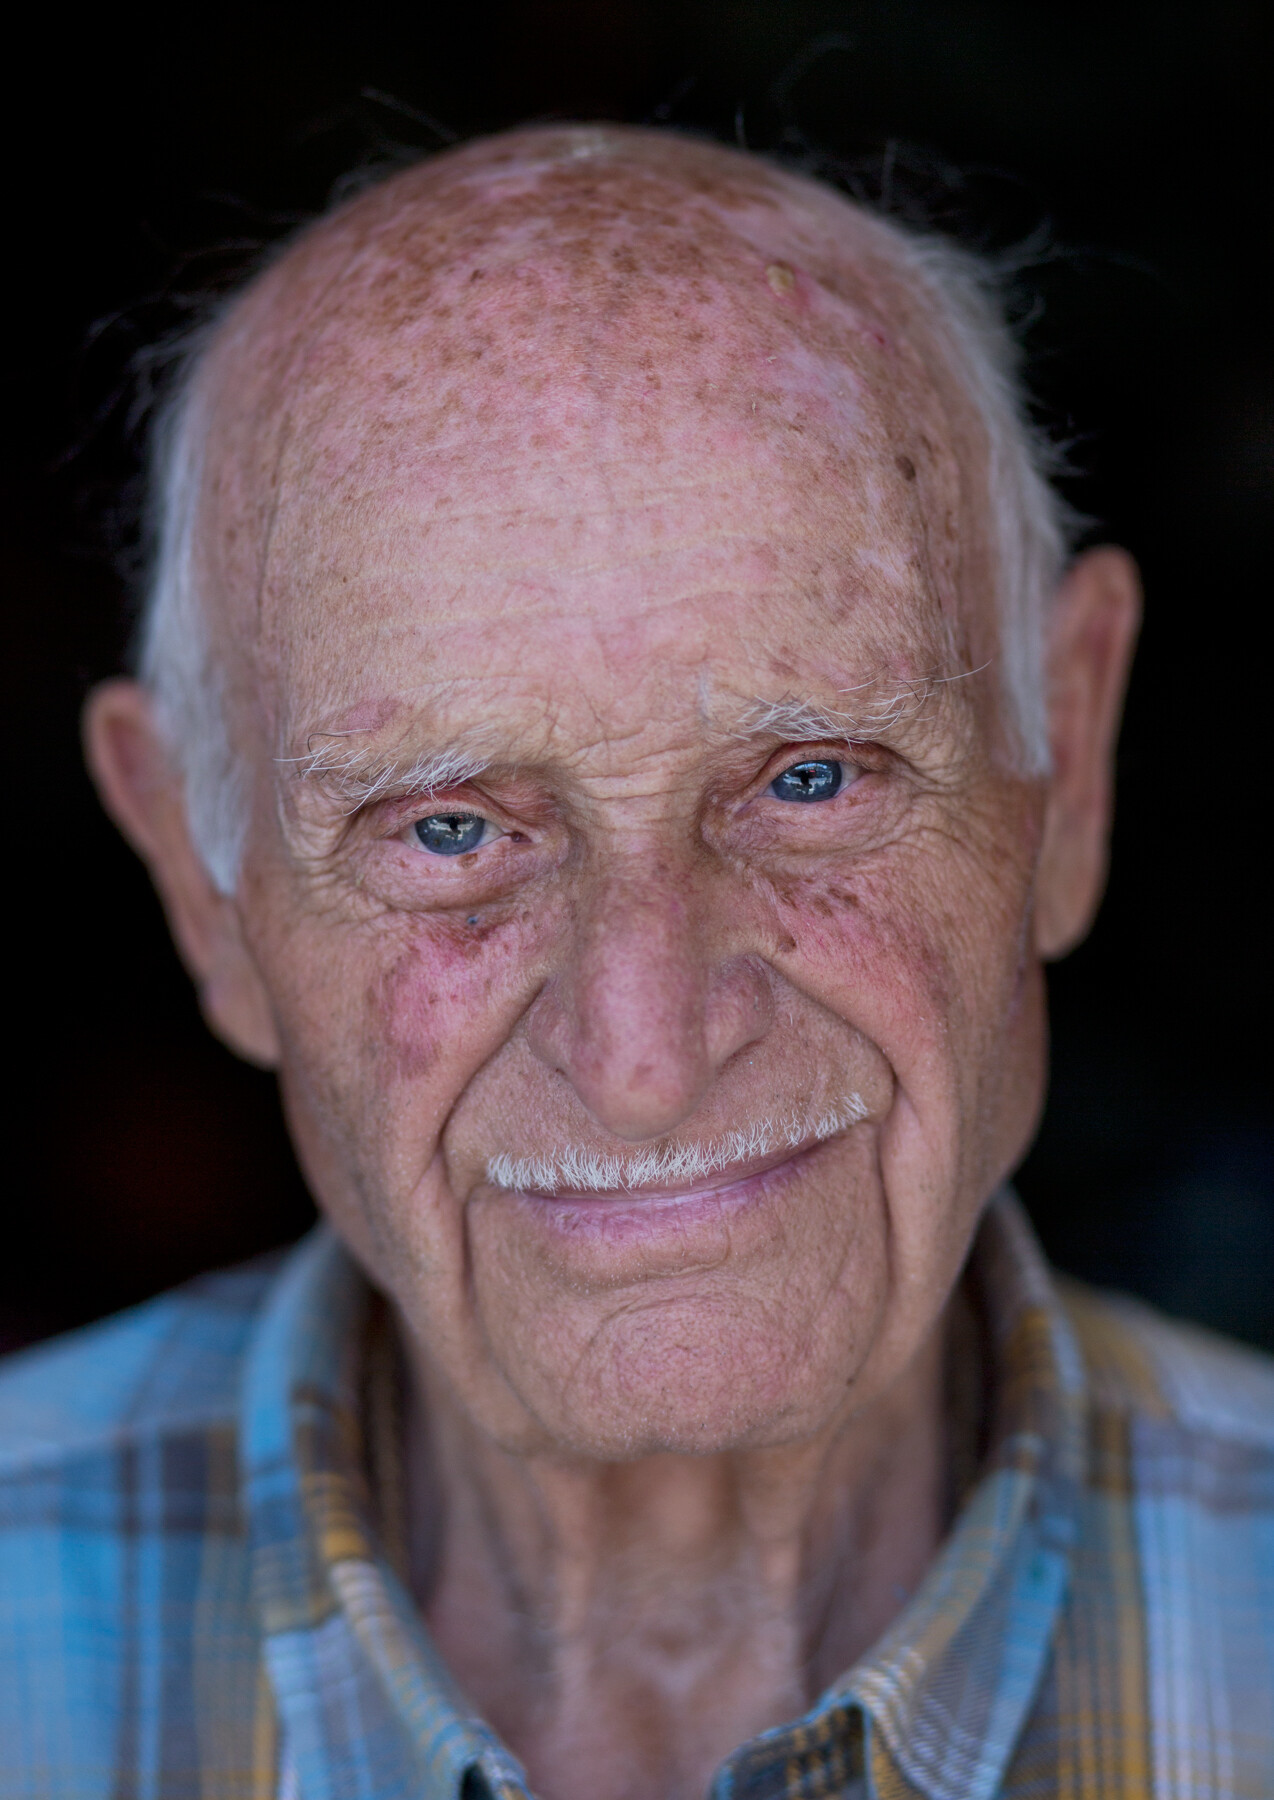
Portrait of Vito shot on location at my Sicily Photography workshop

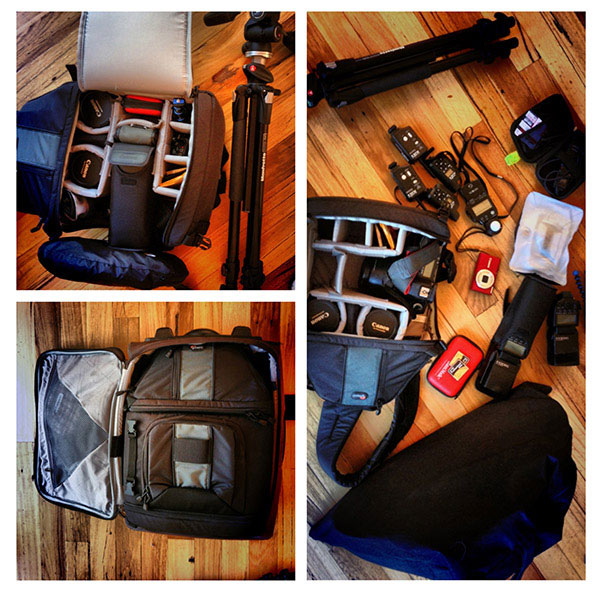
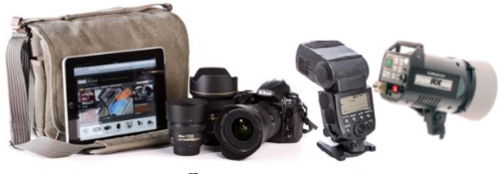
My complete travel location portrait photography kit:

  • One Canon 5D MKII (much lighter than the Canon 1Ds Mark III 
  • Two Canon 580EXii speedlights
  • Four PocketWizard remote flash triggers
  • Six 8GB memory cards. I prefer smaller cards because I don’t like to have an entire day’s worth of images on one card. I’ve had several cards fail over the years ,and also lost one once.
  • Minolta IV light meter (this model is no longer available, try one in the Sekonic line)
  • Canon EF 24-105mm f/4L IS lens
  • Canon EF 85mm f/1.2L lens  or Canon EF 70-200mm f/2.8L IS lens

portrait-gear-essentials-04

Studio lighting

Elinchrom Lights

60% of my shoots require studio lighting, so I need heavy duty monolights with fast recycle times, and a high quality of light. When I’m working on location, I still need a great quality of light and I give my Elinchrom Rangers a work out in those situations.

portrait-gear-essentials-06

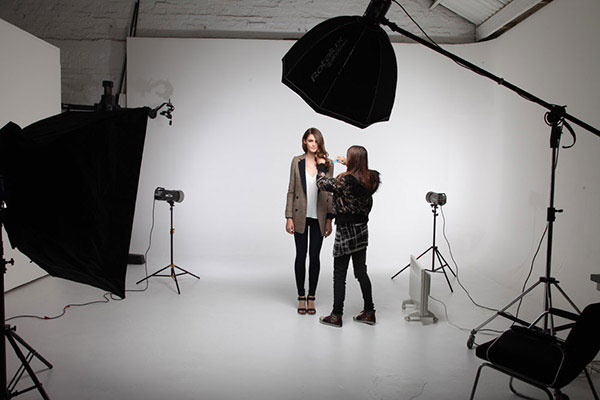
Behind the scenes for Piperlane.com
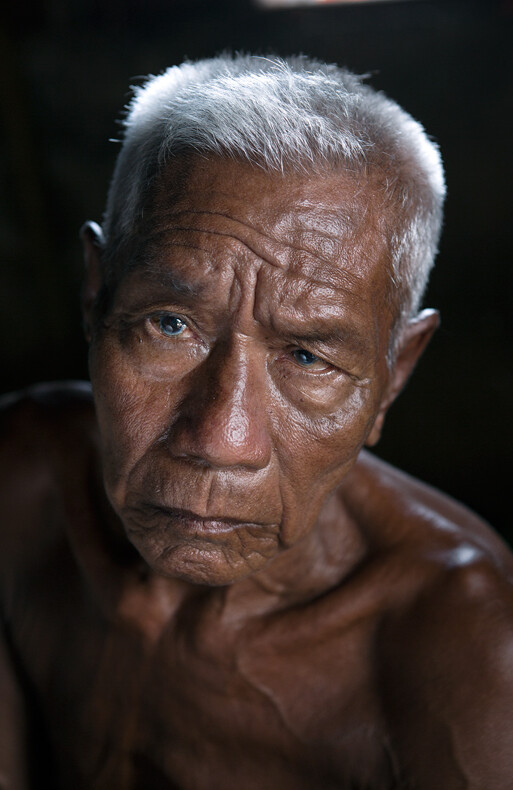
Large Softboxes

portrait-gear-essentials-08
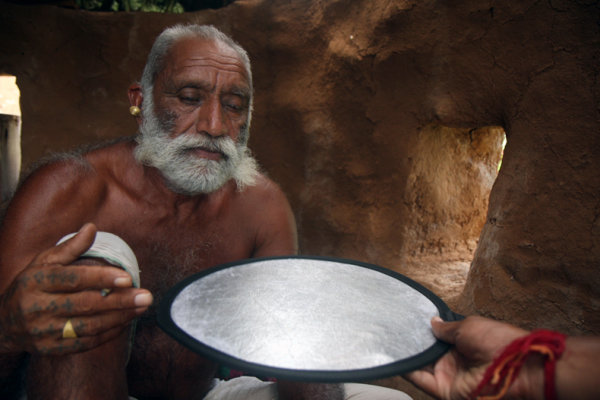
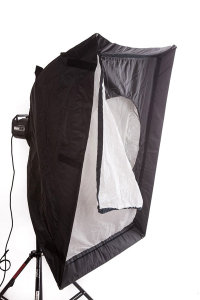
If I could only pick one light modifier to take to a deserted island, it would have to be a softbox. Small, medium or large this little puppy is my go to light source for 80% of my shoots.

Why? The quality of light is soft, flattering and malleable. Changing the angle and proximity of the softbox to the subject, easily changes the quality and direction of light.

A softbox, I feel, recreates the effect of soft daylight through a window.

I think what I like most about softboxes is that they are subtle. Highlights gently merge to shadows.

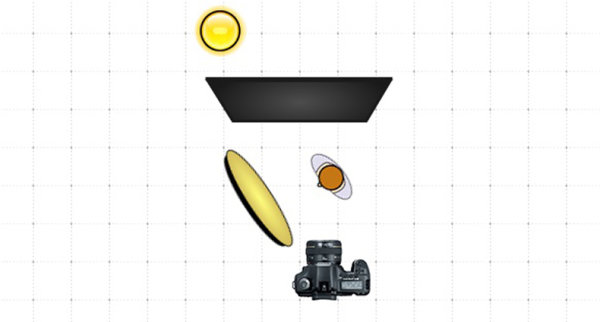
If it’s a studio shoot I love using my Chimira Medium softbox, with white reflective interior. The white interior creates a softer light and this particular softbox has an extra layer of diffusion on the inside, adding even more softness to the light.

portrait-gear-essentials-05
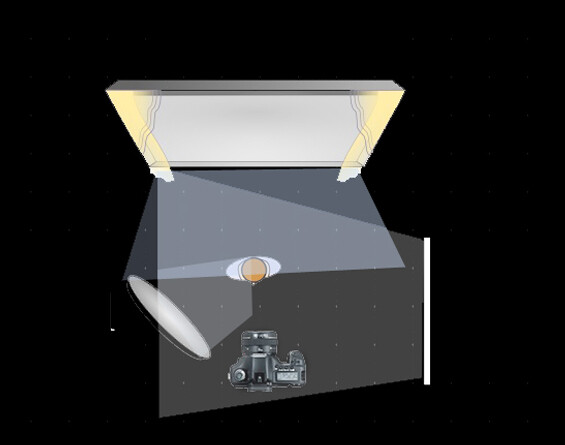
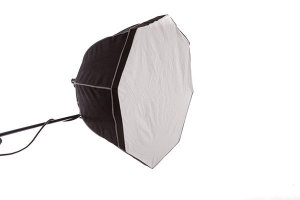
Rotalux Deep Octabox

Rotalux deep octabox would be the result if a softbox married a beauty dish and made babies. This, as far as I’m concerned, is a match made in heaven for lighting single person portraits.

Laptop

MacBookPro 15”

portrait-gear-essentials-10

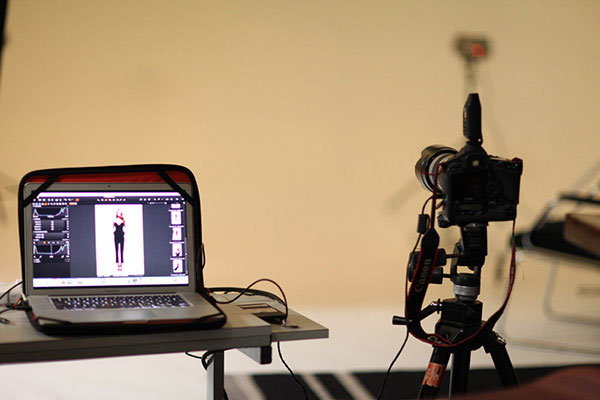
Shooting tethered to a computer has made my life as a photographer so much easier, because I can use my computer as a teaching tool. ?I can show my model a series of great images, with slightly different poses. We can talk about how the poses are different and what I want them to do in the next series. They can see what I mean and it makes more sense, straight away.

Note from the Editor

For more information on how Gina works and does her portraits, pick up her dPS eBooks “Portraits Lighting the Shot” and “Portraits Making the Shot”

You also might want to grab our brand new eBook “Photo Nuts and Gear – know your gear and take better photos” if you’re trying to decide what equipment you need to purchase. Spend a little on an eBook, so you don’t spend a lot on the wrong gear.

Post originally from: Digital Photography Tips.

Check out our more Photography Tips at Photography Tips for Beginners, Portrait Photography Tips and Wedding Photography Tips.

Portrait Gear Essentials – by dPS eBook author Gina Milicia

The post Portrait Gear Essentials – by dPS eBook author Gina Milicia by Gina Milicia appeared first on Digital Photography School.


Digital Photography School

 
Comments Off on Portrait Gear Essentials – by dPS eBook author Gina Milicia

Posted in Photography


Creating a Black and White High Contrast Portrait Edit in Lightroom

17 Nov

Introduction

The Following is an excerpt from the SLR Lounge Lightroom Preset System v5 and accompanying workshop from the Lightroom Workshop Collection v5.  The Lightroom Preset System is designed to take you from Ordinary to Extraordinary photos in just a few seconds and clicks within Lightroom 4 and Lightroom 5.

Overview

In this tutorial we’re going to go over how to turn a regular color portrait into a nice high contrast black and white image. For this tutorial we have a portrait of a baby out in a field. The overalls, details in the field, and overall background blur will be complimented by a high contrast black and white edit. The SLR Lounge Lightroom Preset System v5 has presets specifically for high contrast black and white portraits which we are going to apply to this photo. If you don’t have the preset system, we’ll list all of our Develop settings so you can achieve the same look.

Here’s what our photo will look like before and after we’re done with the edit.

beforeafter

Unedited Photo on Left | High Contrast Black and White on Right

Lightroom Preset System v5 Mixology

For those who have the Preset System, you can follow the Mixology Recipe below to get to the same results. If you don’t have the Preset System, please read the article or watch the video below to see exactly how this look was achieved.

Develop Mixology

  • 01-10 BASE – SOFT: 13b. Light Crush – B&W
  • 03-70 ADJUST – VIGNETTING: 71c. Neutral – Zeroed

Written Tutorial

Step 1: Checking The EXIF Data

exifdata

We press “i” to pull up our EXIF data so we can see exactly how this image was shot. This image was shot with a 50mm lens at f/2. We want to keep in mind that the depth of field is shallow, and we may have to add sharpening to this image.

Step 2: Apply Preset

We’re starting with our “01-10 BASE – SOFT: 13b. Light Crush – B&W” preset, and after we lower the Exposure to -0.10 we have a nice high contrast black and white look. Then we apply a “03-70 ADJUST – VIGNETTING: 71c. Neutral – Zeroed” vignette preset so we can get a subtle edge darkening.

In the develop settings the Contrast was raised and the Shadows and Blacks have been dropped. This is giving our nice deep shadows and blacks, and adding to the high contrast look we’re editing for. The Highlights and Whites have also been dropped in order to bring the highlights in the skin closer to the mid tones.

developpanel1

With Settings Zeroed Out

Here’s what our image looks like with a simple black and white conversion (convert by hitting “V”), without the adjustments in Contrast, Highlights, Shadows, Whites, Blacks, and Tone Curve.

Before High Contrast Settings

With High Contrast Settings

Here’s our image with Contrast, Highlights, Shadows, Whites, Blacks, and Tone Curve adjustments applied.

High Contrast Develop Settings

In the image below you can see a huge difference that the adjustments make. The eyes stand out, there’s more details in the hair and grass, and there’s more texture in the clothes.  All these subtle details combined add quality to an otherwise flat black and white image.

beforeandafter

All Settings Zeroed On Left. High Contrast Adjustments on Right


In our Sharpening settings our preset applied our standard amount, but the image is still a bit soft because of the shallow depth of field caused by shooting this image at f/2.0. To get a nice sharp portrait we raise the Amount, Radius, and Detail. The preset also adjusted our Noise Reduction settings, giving the subject in our portrait nice soft skin. All of the “SOFT” presets have this standard amount of Noise Reduction applied in order to soften and smooth out skin without going so far to kill fine details.

sharpening settings

Here’s what our image looks like before and after our presets are applied.

Before

lightroom-5-tutorial-high-contrast-b&w-newborn-0001

After

lightroom-5-tutorial-high-contrast-b&w-newborn-0002

Watch the Video Tutorial

If you would like to see exactly how all of the settings and adjustments were applied, please watch the video from the SLRLounge YouTube Channel.

Conclusion and Learn More

We hope you all enjoyed this tutorial. If you are interested in learning more or purchasing the SLR Lounge Lightroom Preset System v5 or the newly released Lightroom Workshop Collection v5, please click any of the links in this article.

Post originally from: Digital Photography Tips.

Check out our more Photography Tips at Photography Tips for Beginners, Portrait Photography Tips and Wedding Photography Tips.

Creating a Black and White High Contrast Portrait Edit in Lightroom

The post Creating a Black and White High Contrast Portrait Edit in Lightroom by Post Production Pye appeared first on Digital Photography School.


Digital Photography School

 
Comments Off on Creating a Black and White High Contrast Portrait Edit in Lightroom

Posted in Photography


Lighting a Classic Wedding Portrait by Matt Foden

13 Nov

We shot this image at a wedding at Wotton House, a classic old country-style house in Dorking in the middle of the Surrey Hills (where the Olympic Road Race took place last year). As a portrait it’s a little different from our usual style (which is quite relaxed) but we wanted a classic, formal portrait […]
dslrBlog

 
Comments Off on Lighting a Classic Wedding Portrait by Matt Foden

Posted in Photography


Reflectors: Your Secret Weapon for Amazing Portrait Photography

23 Oct

By: Oded Wagenstein

There is no doubt that using natural light in portrait photography can get you the best results.

However sometimes, as you all probably know, natural light does not do what he’s told. So here comes into action what I like to call my secret weapon in outdoor Portrait Photography.

It is cheap, easy to carry and especially does not frightens my subjects, who themselves can be a little intimidating at times.

Reflector

 
It is just that! It reflects light. There are hundreds of different types of reflectors, which differ in sizes and colors (i.e. white, silver, gold, etc.). A reflector is usually a reflective fabric, stretched over a bendy ring, allowing it to fold, and easy to carry.

With so many types of reflectors on the market, I cannot review them all. This mini-guide will focus on the main reflector I use for my work.

12 ” in size, and costs less than a movie theatre ticket.

I sometimes use other larger reflectors (mainly in cinematography productions), but this 12? reflector suits my needs in travel photography; mainly because it is small enough, allowing me to hold it with one hand and the camera with the other.

To Fill up Shadows:

We all love taking pictures at sunrise and sunset. But when dealing with the harsh mid-day light, a reflector is almost a must.

Fstop of 2.8, shutter speed@ 1/100 and ISO 200

Fstop of 2.8, shutter speed@ 1/100 and ISO 200

In the above picture, taken in the western Indian Rabari tribe, for the National Geographic Traveler magazine (Israeli edition), our model was sitting in a dark mud house. He was sick; therefore it was not an option to move him outside.  On the left wall of the house, there was a small window (as can beautifully seen illuminating in the background), My trusty camera assistant Hardik Pandaya, held a silver colored reflector below the subject ‘s face in order to fill any shaded areas such as under the eyes.

reflectors portraits 2

The above picture was taken on the border of Afghanistan and Tajikistan. Please note that although the woman is standing in the shade and the background is bright, the woman is not a black silhouette and the background is not burned out.  I measured the light from the background (using spot metering). In such a situation, without using a reflector, the character will turn out completely black (silhouette) but with a reflector held on my left hand, I was able to light up her face.

Fstop of 8, shutter speed@ 1/250 and ISO 100

Fstop of 8, shutter speed@ 1/250 and ISO 100

reflectors portraits 4

Below is 80 years old Getho. A fisherman from the small community of Sea Gypsy living in, Thailand. This image is a little bit complex in terms of lighting, because there are three sources of lighting here. Just like in the studio, my main light source (key light) was the house door (right side of the frame). The light was coming from a 45 degree angle, creating this dramatic volume on Getho’s face (you can read more about “sculpturing” with 45 degrees light in this post here).

In my left hand I held the small Silver color reflector, filling the shadows (fill light) on his face? and behind him was an open window for additional  light on his beautiful white hair (back light).

Fstop of 4, shutter speed@ 1/100 and ISO 320

Fstop of 4, shutter speed@ 1/100 and ISO 320

refectors portraits 6

Sometimes a reflector is the only option to shoot under strong sunlight, as you can see in this picture.

reflectors portraits 7

Choose the Right Color

Most reflectors come in multiple colors. In this picture, taken in Western India for the National Geographic Traveler magazine (Israeli Edition), I wanted to preserve the golden- brown color which was dominate in this scene. So I asked Hardik to hold the reflector on its golden side giving the woman’s face a golden glow.

Fstop of 4.5, shutter speed@ 1/80 and ISO 100

Fstop of 4.5, shutter speed@ 1/80 and ISO 100

reflectors portraits 9

Choosing the right distance

It is important to keep in mind that the closer the light source is to the photographed subject, the stronger and less soften it will appear. Thus, a small reflector is easier to carry and hold; however it will be not as soft as a large reflector.

A “catch light” is an interesting spark in the eyes of the subject, “pulling” the audience to look straight at them. There are lots of methods to create a catch light in the subject’s eyes. For example using a flash or a flashlight. However, as we are discussing on the usage of natural light, a reflector can become a great tool for creating a catch light. Just place the reflector under the person’s face.

You can see some catch light examples here:

Fstop of 3.5, shutter speed@ 1/640 and ISO 250

Fstop of 3.5, shutter speed@ 1/640 and ISO 250

reflectors portraits 11

Fstop of 2.8, shutter speed@ 1/200 and ISO 100

Fstop of 2.8, shutter speed@ 1/200 and ISO 100

One of the most useful techniques, in order learn how to work with natural light in my opinion, is by observing the images of other photographers. Try to guess the direction of the light and the position and color of the reflector in the images below:

Fstop of 2.8, shutter speed@ 1/320 and ISO 3200

Fstop of 2.8, shutter speed@ 1/320 and ISO 3200

Fstop of 4.5, shutter speed@ 1/160 and ISO 100

Fstop of 4.5, shutter speed@ 1/160 and ISO 100

Fstop of 3.5, shutter speed@ 1/320 and ISO 1000

Fstop of 3.5, shutter speed@ 1/320 and ISO 1000

Fstop of 2.8, shutter speed@ 1/15 and ISO 200

Fstop of 2.8, shutter speed@ 1/15 and ISO 200

Fstop of 3.5, shutter speed@ 1/320 and ISO 160

Fstop of 3.5, shutter speed@ 1/320 and ISO 160

Fstop of 2.5, shutter speed@ 1/1000 and ISO 250

Fstop of 2.5, shutter speed@ 1/1000 and ISO 250

The diagrams were created by http://www.lightingdiagrams.com

Oded Wagenstein is a Travel photographer and writer. He is a regular contributor to the National Geographic Traveler magazine (Israeli Edition) and he is known for his intimate portraits from around the world. You can join his Portrait & Travel Photography Facebook page and continue to discuss on travel and people photography and get more amazing tips! –

Post originally from: Digital Photography Tips.

Check out our more Photography Tips at Photography Tips for Beginners, Portrait Photography Tips and Wedding Photography Tips.

Reflectors: Your Secret Weapon for Amazing Portrait Photography

The post Reflectors: Your Secret Weapon for Amazing Portrait Photography by Guest Contributor appeared first on Digital Photography School.


Digital Photography School

 
Comments Off on Reflectors: Your Secret Weapon for Amazing Portrait Photography

Posted in Photography


McCurry’s famous ‘Afghan girl’ portrait almost never published

21 Oct

Afghan-Girl-McCurry.jpg

Nearly everyone has seen photographer Steve McCurry’s striking 1985 National Geographic cover portrait of Afghan refugee Sharbat Gula, but it was nearly left on the cutting room floor. He revels the story behind the picture in his new book, “Untold: The Stories Behind the Photographs.” McCurry only took a handful of frames before the young girl got up. Editors at National Geographic came close to picking a different image for their cover, but made a change at the last minute.

News: Digital Photography Review (dpreview.com)

 
Comments Off on McCurry’s famous ‘Afghan girl’ portrait almost never published

Posted in Uncategorized


The Secrets of Great Portrait Photography – Great Video from Brian Smith

07 Oct

Late last year I was giving a copy of celebrity portrait photographer Brian Smith’s book – Secrets of Great Portrait Photography: Photographs of the Famous and Infamous. It was a great read and one that gave me load of ideas for my own portraiture.

Today I was surfing on YouTube and came across a great lecture that Brian Smith gave at B&H Photo that really is a great walk through of the book and many of the tips in it. While long – the video is really useful on many levels.

The video goes for almost an hour and a half so grab yourself a beverage and snack and make yourself comfortable – it really is a great watch!

Get Brian Smith’s Book – The Secrets of Great Portrait Photography

Grab Brian’s book here and check out more of Brian Smith’s work on his website.

Post originally from: Digital Photography Tips.

Check out our more Photography Tips at Photography Tips for Beginners, Portrait Photography Tips and Wedding Photography Tips.

The Secrets of Great Portrait Photography – Great Video from Brian Smith

The post The Secrets of Great Portrait Photography – Great Video from Brian Smith by Darren Rowse appeared first on Digital Photography School.


Digital Photography School

 
Comments Off on The Secrets of Great Portrait Photography – Great Video from Brian Smith

Posted in Photography


Last Chance to Save 25% on our Portrait Lighting eBook [and Go into the Draw for a $1000 Prize]

02 Oct

Portraits_lighting_cover

Just over a month ago we launched our brand new eBook – Portraits: Lighting the Shot – an eBook about Lighting Portraits (as the name suggests).

The 25% off Early Bird special and bonus competition end in just over 72 hours time.

When we launched this eBook we knew it was on a topic we get a lot of questions about but we didn’t realise just how much positive feedback we’d get about it.

What’s People Are Saying About This eBook

“If you want to limit yourself to only ever shooting natural light portraits, be my guest. If you want to level-up your portrait photography skills by learning how to light your subjects well, you can’t go past this book!” – Rowan Sims

“It is amazing!  If you are a portrait photographer this book is a must.  I read this for the first time on Friday, and was able to put what I learned into practice at a wedding I shot the following Sunday.  You don’t want to miss this one.” – photographytipshq.com

“My overall opinion of this book is that it is very worth it. If you already have some experience in portrait photography, and want to take it to the next level by introducing lighting. You will learn a lot from this very experienced professional.” – Pedro Mendes

That’s just scratching the surface of the lovely things we’ve heard about Portraits: Lighting the Shot.

Last Chance to Save and Go in the Draw to Win a $ 1000 Lighting/Lens/Bag prize pack

Order a copy of Portraits: Lighting The Shot before the 4th of October EST and you could win a Beautiful Retrospective 7 Bag and $ 1000 to spend on lighting and lenses!

The winner will receive a Retrospective® 7 (Pinestone)  (worth $ 162) from ThinkTankPhoto.  Plus you can choose lighting or a combination of lenses or to suit your needs up to the value of $ 1000 USD (after reading the eBook you’ll have a good idea of what you need).

lightingtheshotprize

We’ll draw and notify the winner on the 5th of October and then publish their name here on the dPS blog. If the winner doesn’t respond within 7 days we’ll draw another winner and publish their name on the blog.

Grab Your Copy of Portraits: Lighting the Shot here.

Post originally from: Digital Photography Tips.

Check out our more Photography Tips at Photography Tips for Beginners, Portrait Photography Tips and Wedding Photography Tips.

Last Chance to Save 25% on our Portrait Lighting eBook [and Go into the Draw for a $ 1000 Prize]


Digital Photography School

 
Comments Off on Last Chance to Save 25% on our Portrait Lighting eBook [and Go into the Draw for a $1000 Prize]

Posted in Photography


Das viktorianische Portrait

27 Sep

Die viktorianische Fotografie hat ihren Namen von Königin Viktoria. Das Königshaus war begeistert von der neuen Technik und förderte sie stark. Dadurch wurde die Fotografie jedoch auch sehr von den Werten und Prinzipien dieser Epoche Englands geprägt.

Die königliche Familie verkörperte Stabilität und Fortschritt, Sitte und Tugend. Der Mittelschicht im England des 19. Jahrhunderts ging es langsam besser und sie eiferten diesen Werten gern nach.

Die Menschen auf viktorianischen Portraits sehen ernst in die Kamera, sind diszipliniert und auf gute Etikette bedacht. Sie sitzen stets aufrecht, die Kleidung ist hochgeschlossen. Fast ein bisschen unheimlich, aber auf jeden Fall unnahbar wirken die Menschen auf den Fotos.

So einfach ist es natürlich nicht und zum Beweis seht Ihr diese wunderbare Bildreihe hier. Ich finde sie großartig, weil sie zeigt, wie stark die gängigen Fotografien aus der Zeit auch unser Bild der Menschen von damals geformt haben. Dass die Leute nicht viel anders waren als wir, ist natürlich klar, aber so richtig schön zeigt es erst dieses Pärchen, das sichtlich Spaß bei den Aufnahmen hatte.

Wahrscheinlich wurden im Familienalbum nur die oberen beiden Aufnahmen gezeigt, aber umso schöner ist es, dass auch die anderen beiden erhalten geblieben sind.

Die Gründe für die vielen ernsten Bilder sind unter anderem die noch recht langen Belichtungszeiten. Es ist unglaublich schwierig, länger still in die Kamera zu lächeln und der kleinste Wackler führte schnell zu Unschärfen im Bild. Zudem waren Fotografien damals noch sehr teuer. Da war es sehr ärgerlich, wenn das Portrait durch eine unbedachte Bewegung unscharf wurde.

Und gerade, weil Bilder so teuer waren, ließ man sich aus unserer heutigen Sicht sehr skurril wirkende Konzepte für sie einfallen. Die Bilder sollten etwas Besonderes werden. Und so gibt es neben den typisch ernsten Portraits auch diese seltsam humorvollen Fotos.

Familienportrait. Unbekannter Fotograf.

old-funny-and-weird-photos11

Aber es gab neben den typisch strengen und selteneren humorvollen Fotos noch eine ganz andere Art von Bildern. Fotos, die auf uns heute sehr unheimlich wirken: Die Post-Mortem-Fotografien. Man fotografierte Verstorbene nach ihrem Tod, oft auch in einem gemeinsamen Familienportrait.

Da die Kindersterblichkeit damals noch sehr hoch war, zeigen diese Aufnahmen meist Babys und Kinder. Oft waren dies die einzigen Fotos für die Familien, die ihnen von ihren Liebsten blieben. Unter diesem Gesichtspunkt versteht man diese etwas gruseligen Bilder auch etwas besser.

Im viktorianischen Zeitalter war man begeistert von Fotografien. Oft hat man heute nur die strengen Portraits im Kopf, aber die Freude an der Fotografie ließ die Menschen damals experimentieren und sie erschufen verschiedenste Aufnahmen. Viktorianische Fotografie ist nicht nur steif und streng, sie ist vor allem eins: Vielfältig.

~

Quellen:
• Baatz, Willfried: Geschichte der Fotografie. Ein Schnellkurs. Überarbeitete und aktualisierte Neuausgabe. Köln 2008.
• Lomography.de
• the-gaiety-girl.blogspot.de


kwerfeldein – Fotografie Magazin

 
Comments Off on Das viktorianische Portrait

Posted in Equipment