RSS
 

Posts Tagged ‘Portrait’

A Portrait of Invention: David Friedman’s ‘Inventor’ Series

06 Jul

Photographer David Friedman has been photographing inventors since 1998. During the course of that time he has sat down with 47 men and women who have their names on patents for products as diverse as cellphones, US Navy antennas and ‘Squirt-gun Shoes’. We spoke to David recently about his project – read what he has to say and take a look at a selection of images. See gallery

related news: Digital Photography Review (dpreview.com)

 
Comments Off on A Portrait of Invention: David Friedman’s ‘Inventor’ Series

Posted in Uncategorized


Aileens Equipment für Portrait und Dokumentation

20 Jun

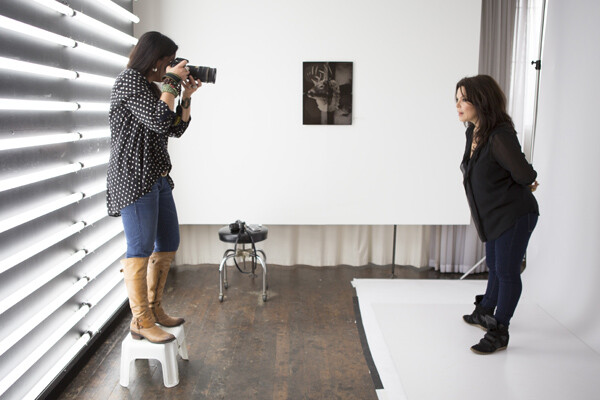
Weil wir möglichst abwechslungsreich sein wollen, haben wir uns zu Beginn unserer Equipment-Serie überlegt, in welcher Reihenfolge wir unsere eingesetzte Technik vorstellen. Ich war skeptisch, weil ich fand, dass sich mein Ansatz und meine Ausrüstung kaum von dem unterscheiden, was Katja Euch in der letzten Woche vorgestellt hat. Bei genauem Hinsehen erkannte ich aber: Dem ist gar nicht so.

Die Ähnlichkeit in Katjas und meiner Herangehensweise liegt vor allem darin, dass auch der Kern meiner Ausrüstung aus einer Kamera und zwei Objektiven besteht. Danach geht es aber auch schon los mit den Unterschieden. Zum Beispiel beim Kameramodell, denn das Herzstück meiner Fotos ist die Canon EOS 5D Mark II*.

Bis vor etwa fünf Wochen hätte ich in jedem Gespräch, in dem es sich angeboten hätte, das gesagt, was ich seit der Anschaffung dieser Kamera vor gut vier Jahren immer gesagt habe: Wenn es sich zu diesem Zeitpunkt nicht angeboten hätte, sie zu kaufen, wäre ich auch noch sehr lange mit meiner Canon EOS 400D glücklich gewesen.

Mehrere Personen hantieren an einer Kamera.

Projekt: Urban Media Festival

Anfang Mai habe ich aber bei einem Ausflug die Kamera unbeabsichtigt in einem See versenkt, woraufhin ich sie die folgenden drei Wochen in einem Beutel voll Reis lagerte, in der Hoffnung, er möge die eventuell eingedrungene Flüssigkeit aufnehmen und die Kamera unbeschadet wieder entlassen.

In der Zwischenzeit fotografierte ich mit einer geliehenen Canon 650D und meinem alten Canon ED 50 mm f/1.4, das ich zwischenzeitlich durch ein neues Exemplar ersetzt hatte, weil es gefühlt nicht mehr so knackscharf war wie am Anfang (was ich auf ein paar Stöße im Einsatz zurückgeführt habe).

Dabei habe ich erst gemerkt, wie sehr ich mich seit 2010 an die Kombination aus Kamera und Objektiv gewöhnt hatte. Ich stand bei dem einen Auftrag, den ich fotografierte, ständig viel zu nah an der Bühne, weil mir inzwischen in Fleisch und Blut übergegangen war, in welcher Entfernung zu Szene und Komposition ich stehen muss, um sie passend mit 50 mm an Vollformat aufzunehmen.

Mehrere Personen stehen auf einer dunklen Bühne, nur ein weißer Schleier ist von UV-Licht erhellt.

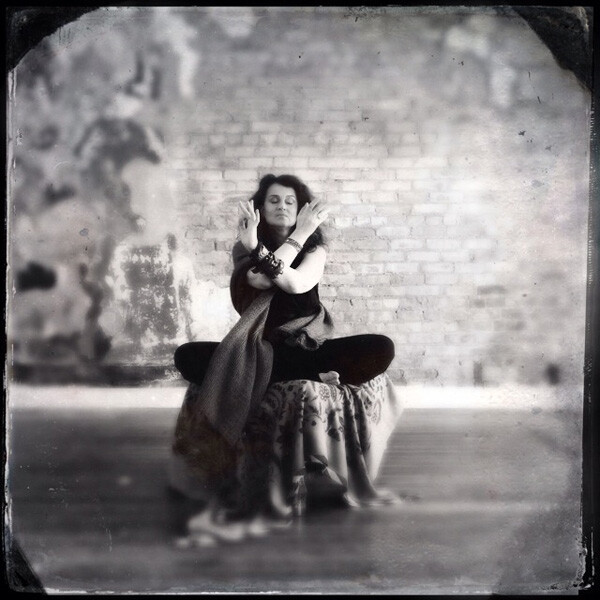
Projekt: T(r)anzparenz

Dazu kamen die Bauchschmerzen, als ich in dem dunklen Aufführungsraum die ISO mehr und mehr hochdrehen musste, als die einzige Beleuchtung auf der Bühne aus spärlichem UV-Licht bestand. Zugegeben: Das Rauschverhalten der geliehenen 650D war super, meine alte 400D hätte da aber nicht mitgehalten.

Was aber nicht mithalten konnte, war der Auto-Fokus. Da ich exakt dieses Objektiv bis vor ein paar Monaten an meiner 5D verwendet hatte, wusste ich, dass die Kombination mit der 650D hier das Problem war: Einfach nicht so reibungslos, wie ich es gewohnt war. Am Ende hatte ich viele unscharfe Bilder.

Umso glücklicher war ich also, als meine 5D voll funktionstüchtig aus ihrem Reis-Bett stieg. Für mich ist klar: Ich möchte nicht mehr ohne Vollformat, ohne exzellentes Rausch-Verhalten für spärlich ausgeleuchtete Veranstaltungen wie Bälle, Hochzeiten und Aufführungen, ohne RAW-Dateien für ausgedehnte Nachbearbeitung und ich möchte nicht ohne die schön große Auflösung der Fotos.

Verkrustete Erde in Nahaufnahme.

Experiment: Fokus-Stacking aus 29 Makro-Fotos, aufgenommen mit dem Canon EF 100 mm f/2.8.

Wie bereits erwähnt, verwende ich zwei Objektive an der 5D. Anfangs waren es drei, weil ich zu dem Zeitpunkt der Meinung war, mich breit eindecken zu müssen. Also kaufte ich ein Weitwinkel, eine Portraitlinse und ein Makro-Objektiv.

Das Weitwinkel verkaufte ich nach einem Jahr und nur einer Handvoll Testbilder einem Freund. Das Canon EF 100 mm f/2.8* habe ich noch, verwende es aber fast ausschließlich zum Abfotografieren von Negativen. Einmal habe ich es bei einer Portrait-Session direkt mit dem 50 mm f/1.4 verglichen und mein Urteil gefällt:

Nicht ganz so viel und schönes Bokeh und ich bin zu weit weg vom Modell, mit dem ich kommunizieren möchte, um es zu lenken. Nicht selten heißt das, dass ich es in eine gewünschte Pose bringe, indem ich selbst Hand anlege, um Körper, Kopf oder Arme in eine bestimmte Richtung zu bewegen. Bei 100 mm hieße das ständiges Hin- und Herlaufen.

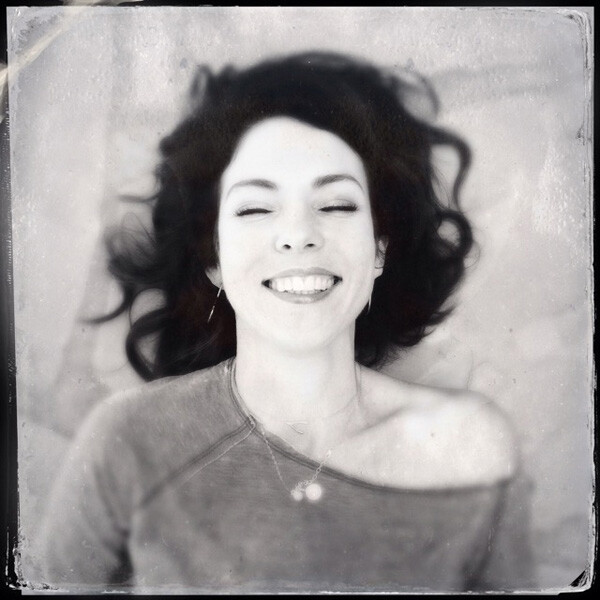
Von cremigem Bokeh mag man halten, was man mag, aber für mich persönlich ist es neben entsprechendem Bildaufbau das hauptsächliche Mittel für Blickführung und Reduktion auf das Wesentliche. Meine Bildästhetik und meine eigene Wahrnehmung funktionieren einfach so. Bilder, die von vorn bis hinten scharf sind, machen mich unruhig und unzufrieden.

Eine lachende Frau zwischen vielen weißen Blüten.

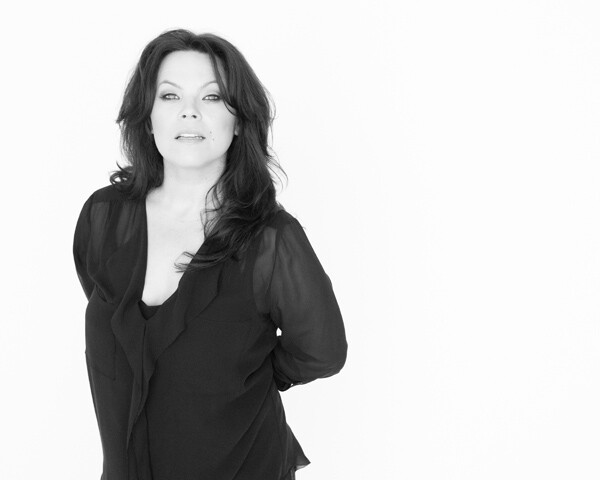
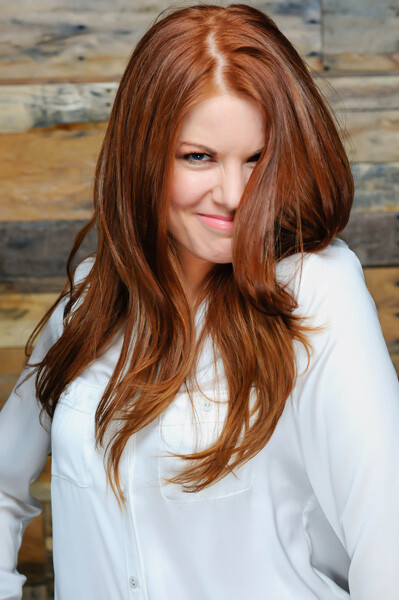
Das Objektiv, mit dem ich mindestens 99,99 % meiner Fotos mache, ist also das Canon EF 50 mm f/1.4* und es ist zu 99 % der Zeit auch voll geöffnet – Blende 1.4. Was mache ich damit? Vor allem: Portraits. Meine freien Arbeiten kennen die meisten wahrscheinlich.

Außerdem fotografiere ich damit Aufträge. Das sind in meinem Fall vor allem Veranstaltungen. Ich dokumentiere Workshops, Feiern (z. B. Bälle und Hochzeiten) und Bühnenshows. Dabei ist meine Arbeitsweise eine Mischung aus einer „50 mm ist mein Blickwinkel“-Grundeinstellung und Anpassen an Gegebenheiten. Das sieht so aus:

Bei Veranstaltungs-Dokumentation wie Feiern oder Workshops mache ich vor allem von den Portraitierten unbemerkte, aber relativ nahe Stimmungs-Portraits. Da meine verinnerlichte Brennweite 50 mm beträgt und schon an ein automatisiertes Entfernungs-Bauchgefühl gekoppelt ist, komme ich so gut wie nie in Situationen, in denen ich mir eine längere oder kürzere Brennweite wünsche.

Ein Brautpaar lehnt an einer alten Mauer.Ein Brautpaar sitzt vor einem Hauseingang an einer Mauer.

Brenizer-Collagen aus neun bzw. drei Bildern und jeweils mehreren Belichtungen für Zeichnung in Lichtern und Tiefen.

Für den Fall, dass der Raum einmal so beengt ist, dass ich doch ein Weitwinkel bräuchte, bediene ich mich der Brenizer-Technik und setze ein großes Bildfeld aus mehreren Fotos zusammen. Aufgrund des Aufwands mache ich das eher selten, zum Beispiel für das Paar-Foto einer Hochzeit.

Außerdem passe ich die Gegebenheiten meiner Arbeitsweise an: Wenn ich also etwa eine Aufführung fotografiere, ist das immer die Generalprobe und nicht die eigentliche Aufführung. So versprerre ich niemandem im Publikum die Sicht, wenn ich direkt vor der ersten Reihe hin und her laufe.

Und ich kann durch diese Proben-Aufnahmen herausfinden, welche die beste Position ist, um während der Aufführung ergänzende Fotos zu machen. Oft ist hier ja die Frage: Sich auf eine Position links oder rechts der Bühne festlegen? Wenn ich die Aufführung während der Proben schon mehrfach fotografiert habe, habe ich auf diese Frage eine Antwort.

Mehrere Personen stehen in buntem Licht auf einer Bühne.

Projekt: ROOTS & ROUTES EUtropia

Zusätzlich verwende ich noch ein paar weitere für mich wichtige Geräte rund um die Aufnahme: Ein klappriges Stativ, einen Reflektor, eine Sucherlupe und eine Mattscheibe mit Schnittbildindikator und Mikroprismenring. Nicht alle davon sind mir gleichermaßen wichtig, aber gemeinsam ist ihnen, dass ich ohne sie nicht könnte – oder zumindest nur unter Fluchen.

Mein Stativ ist das Walimex WT-3131, das sich nur dadurch auszeichnet, dass es extrem leicht, klein und billig (Geschenk zu einem Foto-Zeitschrift-Testabo) war. Da ich es nur selten nutze, kann ich verschmerzen, dass es voll ausgezogen unter Augenhöhe bleibt und fast umfällt, wenn die 5D hochkant gedreht drauf sitzt. Das Nachfolgemodell* hat einen Haken an der Mittelsäule, sodass sich das Ganze leichter beschweren lässt.

Öfter als mein Stativ nutze ich meinen Reflektor*. Dabei handelt es sich um eine faltbare, runde Ausführung mit 110cm Durchmesser, Diffusor und vier verschiedenen Oberflächen (weiß, schwarz, silber, gold) zum Drüberziehen und Wenden.

Da ich nur mit vorhandenem Licht arbeite, suche ich mir die Orte und Hintergründe für Portraits meistens eher im Schatten und entscheide vor allem zugunsten der Komposition. Starke Schatten helle ich dann mit der Silberoberfläche (nur selten: gold) auf oder leuchte eine Szene, die ohnehin im Sonnenlicht spielt, von unten oder der anderen Seite zusätzlich aus, was manchmal zu einer schönen, künstlichen Atmosphäre führt.

Abgesehen davon dient der Reflektor auch gern einmal als Regenschirm, Unterlage für Accessoires auf schmutzigem Boden oder Fächer für kräftigen Wind. Auch hier war mir also ein kleiner Preis wichtiger als etwa zwei weitere Oberflächen, die ich nie brauche.

Portrait einer Frau.

Mit der goldenen Seite aufhellen, macht einen wärmeren Hautton und erhöht hier den Kalt-Warm-Kontrast zwischen Haut und Hintergrund.

Eine Frau hält einen Straus weißer, ballförmiger Blumen.

Portrait im Gegenlicht stark von vorn unten aufgehellt.

Wichtiger ist da schon meine Sucherlupe*: Sie wird statt der standardmäßigen Mini-Gummierung direkt hinter den Sucher geschraubt und hat eine großzügige Augenmuschel. Die Lupe erreicht eine 1,3-fache Vergrößerung des Sucherbilds, sodass ich weniger das Gefühl habe, beim Blick durch die Kamera auf ein winziges Bild am Ende eines langen, schwarzen Tunnels zu blicken.

Allerdings muss man sich an die Verwendung etwas gewöhnen, da durch die Vergrößerung nicht mehr das komplette Bild im Sucher sichtbar ist bzw. nur, wenn man das Auge wirklich an die Augenmuschel drückt und gegebenenfalls den Kopf leicht bewegt, um alles zu sehen.

Das klingt jetzt erst einmal kompliziert, aber ich habe mich nach der Anschaffung so umgehend dran gewöhnt, dass mir dieses Phänomen erst aufgefallen ist, als mal jemand mit Brille meine Kamera benutzte und sich beschwerte, dass das Bild auf dem Display nicht mit dem Ausschnitt im Sucher übereinstimmt.

Ein Besprechungsraum mit fünfeckiger Decke.

Brenizer-Collage aus elf Bildern und mehreren Belichtungen für den Blick nach draußen.

Nachdem ich von meiner analogen Canon AE-1 gewohnt war, mit Hilfe der Mattscheibe mit Schnittbildindikator und Mikroprismenring* im Sucher manuell zu fokussieren, habe ich so eine Möglichkeit auch für die 5D gesucht. Zwar fokussiere ich damit so gut wie nie manuell, hatte aber vor einigen Jahren mit dem ersten Exemplar meines 50-mm-Objektivs immer wieder Probleme mit fehlerhaft fokussierten Bildern.

Klar, wenn ich ein sehr nahes Portrait mit Offenblende aufnehme, ist die Schärfe-Ebene extrem dünn. Je nachdem, ob noch Haare oder Accessoires ins Gesicht des Modells ragen, liegt der Auto-Fokus schnell nicht mehr auf den Augen. Mit Hilfe des Schnittbildindikators sehe ich das Problem sofort und kann manuell nachfokussieren oder den Auto-Fokus ganz neu ansetzen.

Eine Frau hinter Stängeln von vertrockneten Mohnblumen.

Nach der Aufnahme gibt es neben der Software und einem etwas älteren Eizo-Monitor*, die ich verwende, noch ein überlebenswichtiges – oder zumindest Lebenszeit sparendes – Tool für die Nachbearbeitung: Ein Grafik-Tablett*.

Ich habe zwar auch schon mit der Maus digital komplette Bilder gezeichnet, aber um ganz ehrlich zu sein, ist es mit einem Stift einfach angenehmer. Bis vor ein paar Monaten hatte ich ein normales Tablett von Aiptek, das mir die Retusche und Collage von Fotos sowie gelegentliches Zeichnen am PC erleichtert hat.

Jetzt habe ich das Wacom Cintiq Companion, das nicht nur ein Grafik-Tablett, sondern auch ein Tablet-Computer ist und sich damit auch für kreative Aktionen unterwegs eignet. Vor allem aber erhöht es die Präzision dessen, was ich mache, da meine Augen und die Stiftspitze auf den gleichen Punkt gerichtet und nicht wie bisher nur über die Hand-Augen-Koordination meines Gehirns miteinander verbunden sind. Dazu aber bald mehr in einem eigenen Artikel.

Zwei Portraits in schwarzweiß mit einer weißen Zeichnung.

Selbstportraits mit einer Papp-Lochlinse an der 5D und Kritzeleien mit dem Wacom Cintiq Companion.

Die meisten wissen wahrscheinlich, dass ich auch einige analoge Kameras besitze. Um genau zu sein sind es über 20 vor allem ältere Modelle für verschiedene Filmtypen und -formate. Durch mangelnde Zeit zum „Einfach mal so einen Film füllen“ und meinen um sich greifenden Veganismus habe ich die analoge Fotografie aber stark eingeschränkt.

Wenn ich analog fotografiere, dann knipse ich nicht mehr rum, weil das Gefühl so wunderbar ist, sondern ich fülle gezielt einzelne Bilder oder einen Film für ein Projekt oder bei einer Portrait-Session, deren Konzept für mich analoges Material verlangt.

So richtig essentiell ist daher für mich nur meine Canon AE-1* mit den zwei Objektiven, die ich meistens einsetze. Das eine ist das Canon FD 55 mm f/1.2, was in Brennweite, Blende und Bildqualität in etwa dem entspricht, was ich digital von meinem 50er gewohnt bin.

Eine Frau steht im Wald.

Das zweite Objektiv ist das Canon FD TS 35 mm f/2.8, das über Tilt- und Shift-Möglichkeiten verfügt. Mit diesen lässt sich der Blickwinkel verändern, ohne sich vom Fleck zu bewegen und die Schärfeebene kann geschwenkt und gedreht werden, sodass sie nicht mehr zwingend genau parallel zur Filmebene verläuft.

Gerade mit dem Tilt-Shift-Objektiv arbeite ich gern, es erfordert aber ein wirklich geduldiges Modell vor der Kamera, da es eine Weile braucht, bis ich an allen Rädchen so gedreht habe, dass ich schlussendlich mit der Lage der Schärfe im Bild zufrieden bin.

Eine digitale Tilt-Shift-Linse* wäre mir dann aber zu teuer, gemessen an der Anzahl möglicher Einsätze. Allerdings habe ich gerade gesehen, dass es wohl Möglichkeiten gibt, die analoge Linse mit Adaptern auszustatten, um sie an der 5D einzusetzen – bei Gelegenheit werde ich das ausprobieren.

Ein umgestürzter Baum liegt im Wald.

Nachdem ich mich für diese Zusammenfassung also einmal genauer mit der Technik beschäftigt habe, mit der ich meine Fotos aufnehme, würde ich mein Equipment-Verhalten so charakterisieren:

Ich scheue mich nicht davor, ziemlich viel Geld für einzelne Geräte auszugeben, die ich oft brauche und die mir bestimmte Effekte, Bildeigenschaften oder Zeitersparnis liefern. Andererseits beschränke ich mich in meiner Ausrüstung auf wenige Teile und spare bei denen, die ich selten brauche.

Danke für das Titelbild an Marcel Pommer!

* Das ist ein Affiliate-Link zu Amazon. Wenn Ihr darüber etwas bestellt, erhält kwerfeldein eine kleine Provision, Ihr zahlt aber keinen Cent mehr.


kwerfeldein – Fotografie Magazin | Fotocommunity

 
Comments Off on Aileens Equipment für Portrait und Dokumentation

Posted in Equipment


Melt: Portrait of an Iceberg

18 May

014.jpg.CROP.original-original.jpg

Inspired by the Titanic ship sinking, photographer Simon Harsent’s book, Melt: Portrait of an Iceberg, explores how these huge chunks of ice change over time. Often photographs of icebergs are saturated with color and bright light – looking like postcards – but Harsent took a different approach. The result is a series of images that have a timeless, abstract feel, with a focus on texture and shape. See gallery

News: Digital Photography Review (dpreview.com)

 
Comments Off on Melt: Portrait of an Iceberg

Posted in Uncategorized


10 Portrait Tips to Take Your Photography to the Next Level

13 May

You have all the makings of a beautiful photograph: the perfect client, an overcast day for soft natural lighting and a gorgeous landscape as the backdrop. You’re taking photos but noticing that something’s not quite right. The photos look underwhelming. Believe me, I’ve been there. Here are 10 tips to take your portraits to the next level.

Cjust_tip1

Photographing Danielle LaPorte – author

Portrait of Danielle LaPorte - author

Portrait of Danielle LaPorte – author

Tip #1 – have your subject look up at you

It’s slimming and flattering (see images above). Bring a small step stool to stand on and photograph your subjects from slightly above their eye line. Watch double chins disappear. Keep a step stool in the trunk of your car so you don’t even have to think about adding it to the list of gear to bring when you prep the night before. It’s there, ready to go.

Tip #2 – capture the moments in between poses

Cjust_tip2

Personally this is a favorite of mine. If you’re noticing the images look too posed, or your subject is uncomfortable in front of the camera, shake things up. Ask them to do the most ridiculous pose or ask them to pretend to laugh really hard. Take that photo, but keep the camera up and wait. The moment after that photo happens you’ll find their guard will come down, they will laugh authentically or give you a moment that feels much more real.

Tip #3 – turn the subject’s body slightly

Have them turn their body slightly away from the camera and their face still looking straight at you. This is not only slimming, it also gives the photograph more depth.

Tip #4 – flattery

Always tell them how beautiful they look. It’s unnerving to have someone pointing a camera at you and not know what the photos look like. Tell them. It will help calm their nerves and you will notice a difference in the photos because they will feel more confident and attractive.

cj_tip9

Tip #5 – connection

This is the key to everything really. If there’s a connection between you and the person you are photographing, there’s a magic that happens that’s unexplainable. Sure, you can have the right lens, the right camera, and the right lighting, but an authentic connection between the two of you takes it up a notch. You can see it in their eyes. They connect with you, and it shows with a different authenticity that can’t be faked. Ask questions, become curious about who they are. Get to know them on a more personal level. Keep that conversation going throughout the photo session. Laugh with them.

cjust_tip6

Tip #6 – tell your subject to flirt with the camera

Ok, that sounds weird but it can work. Ask them what celebrity crushes they have. That changes the look in their eyes and on their face. Have them pretend that the camera is that person. Seriously. It makes them laugh, which goes with tip #2, and helps them loosen up as well. If they are in a relationship, ask them when they met, how they met, or some other stories about their partner that lights them up. Watch the shift happen and take photos throughout the conversation. You’ll capture moments that are real and off guard.

Cjust_tip7

Tip #7 – have them bring a playlist of their favorite music

I bring a portable wireless speaker and play their music, which creates a mood they are comfortable with. You can also play your own music. It helps give them something else to pay attention to and can lighten the mood. Get playful with it and dance around with them. Let them express themself and just pay attention with your camera ready. You can take photos of those moments as well. You can try a longer shutter speed while they dance for some variety and movement. A little blur can add more of a story to the series of images.

Tip #8 – clothing selection is important

Have them pick out clothing from their wardrobe that makes them feel like a rock star. It must be clothing that they feel comfortable in and which allows them to move easily. No crazy patterns or bright colors. The emphasis is on their eyes and their expression not the bold neon stripes on their top.

cjust_tip10

Tip #9 – lighting

If you’re outside, open shade is extremely flattering. This is best early in the morning, late afternoon and close to sunset, when shadows are being created from trees and buildings. Have your subject stand in the shade. A great place to explore this is in doorways. Try just inside an open garage door. Stairways inside parking garages can also provide a shade that’s not too dark, with the brightness outside reflecting on them perfectly. If you’re inside, you can still use natural lighting by turning off all the overhead lights and lamps and having your subject move close to the window. When it’s overcast it’s best because again, it will be even soft light on their face without any shadows or harsh light making them squint.

Tip #10 – break the rules

cjust_tip10b

Allow the flare from the sun to fill the lens. Use alternative cameras like a Polaroid SX-70 or your iPhone. Try out the iPhone apps. It helps you expand as a photographer when you stretch yourself in new unchartered ways. Only bring one lens to the photo shoot. Bring the one you know is the most flattering. My favorite portrait lens is the Nikon 85mm 1.4 lens. ( yep, I’m a Nikon girl ). Think of this as more than a portrait shoot but as a fine art project. Have your subject create a Pinterest board of their favorite portraits before the photo session and play with those ideas. Try unconventional poses. They can lead you to unexpected moments of greatness with your portraits.

Next steps

Allow yourself to go on a journey of exploration during the photo session. There are so many ways to go from ordinary to extraordinary. Paying attention to the basics of composition, lighting, posing can help. Incorporating your own authentic personality into the session will help your client be more relaxed and open to try new things. This will bring you better results in the end.

So, what is one tip you’ve learned along the way that has helped you create better portraits? Share it with us in the comments below.

The post 10 Portrait Tips to Take Your Photography to the Next Level by Catherine Just appeared first on Digital Photography School.


Digital Photography School

 
Comments Off on 10 Portrait Tips to Take Your Photography to the Next Level

Posted in Photography


How Peter Hurley became a top portrait photographer

10 May

Screen_Shot_2014-05-08_at_12.28.16_PM.png

Renowned advertising and commercial shooter Peter Hurley is the subject of a video in a series called #BehindtheGlass, where the New York and Los Angeles based photographer talks candidly about his non-traditional path into the industry. It’s one of those head-smacking, jaw-dropping stories that shows photography is part skill, some chance and a lot of hard work. Learn more

News: Digital Photography Review (dpreview.com)

 
Comments Off on How Peter Hurley became a top portrait photographer

Posted in Uncategorized


How to Plan the Perfect Portrait Shoot

22 Apr

Natural lIght portrait

In my last article I gave you five reasons to use natural light for portraiture. The next step in creating the perfect portrait shoot is planning. The more details you figure out in advance, the more likely you are to come away from the shoot with some beautiful portraits to make you proud.

Generating ideas

The creative side of portrait photography is something that some photographers seem to find easy, and others really challenging. One approach to generating ideas is to look at the work of others and let their portraits inspire you.

You’re probably familiar with the main photo sharing sites already (Flickr, 500px and 1x) and there’s no doubt that you will find plenty of inspiration if you take the time to search them. To help you out I’m going to give you a short list of portrait photographers and websites to look at. The work you will see here will open your eyes to the possibilities within the world of portrait photography.

For high quality black and white portraits take a look at the work of Betina la Plante, Eduardo Izq and Phil Sharpe (Phil has a lot of colour portraits in his portfolio too).

For beautiful colour portraits view the portfolios of Cristina Hoch, Alex Benetel, Alessio Albi, Emily Soto, Ling Li, Anna Karnutsch and Sarah Ann Wright. You can gain greater insight into how some of these photographers work by checking out my interviews with portrait photographers.

Other websites where you can see more work by portrait photographers are Faded & Blurred (leans towards the fine art and documentary side) and The D Photo (leans towards the creative side).

Creating mood boards

If you’ve had a good look through some of those links you’re probably feeling a little confused. That’s no surprise, I selected the photographers because they represent a wide variety of styles and techniques. So, how do you make sense of it all?

My favourite technique is to create a mood board with Pinterest. A mood board is a place where you gather photos that you like in order to communicate the feel or mood that you want to create. You’re not copying the photos you’ve added to your mood board, but using them for inspiration and to communicate to potential models what you’d like to achieve.

Creating mood boards is easy with Pinterest. You can make as many as you like, pin photos and move photos between different boards. Here is one of mine as an example, containing black and white portraits of men or this one on the dPS board – Portrait Inspiration.

Mood boards are also a good way to get a handle on what sort of portraiture appeals to you. When I look at my mood board of black and white portraits of men, it tells me that I like dark, moody portraits taken with natural light. As you look at your own mood boards you will see patterns emerge as to what style of portrait appeals to you. Use this feedback to inspire your portrait shoots.

Finding locations

Finding locations depends on where you live and the style of portrait photography you’d like to pursue. You may shoot in a studio and that makes the decision easy. Others may prefer to shoot outside, utilizing local beauty spots and other interesting locations. Here are some things to consider:

Are you looking for an urban environment or a rural one? If your mood boards contain photos taken in natural environments like forests or fields, then that is the sort of location you should look for. Going back to my mood board of black and white portraits, I can see that I have mostly chosen ones taken in gritty urban environments. I need a similar location to create portraits consistent with the feel of the images in this mood board.

Natural lIght portrait

The background in this photo was a bush, giving it a rural feel. Can you imagine how different this portrait would be if it had something like a concrete wall as a background? The atmosphere would be completely different.

How public or private is the location? You may prefer quiet places without many people around where you can concentrate on your portrait shoot.

Choose a lens

What lens will you be using? This is important when choosing a location. If you use a wide-angle lens, you will be including a great deal of the location in the photo. If you use a telephoto lens, you may only utilize a small part of the location, and that may be out of focus if you shoot at a wide aperture. Telephoto lenses give you more freedom when selecting locations because they can transform a small area such as a fence or wall into a beautiful background.

Natural lIght portrait

The portrait on the left was taken with a wide-angle zoom (focal length 26mm) and the one on the right with a short telephoto lens (85mm). Can you see how the focal length affects the background? Wide-angle lenses include more of the background, therefore you need a location suitable to this approach. Telephoto lenses include much less, and can turn mundane locations into interesting backgrounds.

Read my article How to Choose the Perfect Portrait Lens for more information on this topic.

What will the light be like at your location when you are there? Think about what time of day you will be shooting, and where the light will be coming from. The weather is a major factor, the nature of a location and its suitability for portrait photographer depends on both the weather conditions and time of day.

Natural lIght portrait

This portrait was taken at the end of the day as the sun was setting, casting a beautiful soft light with a red glow over the scene.

Build a dossier of locations

With these things in mind build up a mental dossier of locations close to where you live that you can use for portrait shoots. Keep your eyes open when you are out and about and you will find yourself seeing the potential of locations in a new way.

Natural lIght portrait

I took this portrait in a children’s playground. Every day places like this can become interesting locations. Take note whenever you find somewhere new that could one day be used for a portrait shoot.

Finding models

The final step is finding models to work with. By now you should have a fairly good idea of what type of portraits you’d like to create, and where you’d like to take them. Now you need a model to make that happen.

You may be lucky enough to have friends or family members who would make good models. If have to search a little harder, a good place to start is Model Mayhem. There are other websites where models and photographers can connect, but Model Mayhem is my favourite because it lets you search by location. You can centre the search around the city or town you live in, and save time wading through profiles of models from other parts of the country.

The good thing about websites like Model Mayhem is that its members are people genuinely interested in modelling. You will find that the models who come up in your search range from inexperienced to professional. You may feel most comfortable looking for somebody whose experience matches yours. For example, if you are new to portrait photography then you may feel a little intimidated by an experienced model, and prefer to approach somebody who is also starting out.

Bear in mind that if you have the budget, one advantage of using professional models is that you will benefit from their experience and expertise with posing. Inexperienced models will expect you to direct them. Depending on the style you are pursuing, you may learn quicker and create better portraits with a professional.

There are downsides to websites like Model Mayhem. Some of the models you approach won’t respond and others won’t like your style of photography. Some might let you down at the last minute. But on the whole, my experience has been positive, and I’ve found some of my best models here.

Here are a couple of other ideas that photographers I know have used successfully for finding models. One put up a sign at her local university (where she was also a student) and found models that way. Another friend of mine had some business cards made and approached people in the street to ask them if they would like to model for him. Not all responded, but he found a few good models that way.

By the way, if you’re a model based near Wellington in New Zealand, then feel free to get in touch. Contact details on my website (link below).

Perhaps the readers can share some of their experiences about searching for models. I would like to hear your stories, both the positive experiences and the negative.

Putting it all together

Hopefully these ideas have given you a head start in planning the perfect model shoot. What are your experiences with creating portraits? What advice would you give other photographers? Let us know in the comments.


The Natural Portrait photography ebookThe Natural Portrait

My ebook The Natural Portrait teaches you how to take beautiful portraits in natural light. This 240 page ebook, published by Craft & Vision, takes you through the entire process of natural light portrait photography through from finding a model, deciding where to shoot, working with natural light and post-processing your images. Click the link to learn more or buy.

The post How to Plan the Perfect Portrait Shoot by Andrew S. Gibson appeared first on Digital Photography School.


Digital Photography School

 
Comments Off on How to Plan the Perfect Portrait Shoot

Posted in Photography


Grab our 67 Portrait Posing Printables Set for Just $10

13 Mar

A little over a month ago here at dPS we launched Striking the Pose – an eBook all about posing portraits – our fastest selling eBook ever.

As an Early Bird bonus for those who picked up that eBook we gave everyone who bought it in the first month a Posing Printables bonus that contained 67 Poses that you could use in your posing shoots.

Printables graphic

This early bird offer is now over but we had so much positive feedback about these printables that we’ve now made them available for you to purchase as a stand alone product for just $ 10.

It includes 67 poses which are broken down into 7 different sets. There’s a set for each of the following categories:

  • Posing Women
  • Posing Men
  • Posing Kids
  • Posing Groups
  • Posing Couples
  • Posing in Corporate Settings
  • Lifestyle Portrait Posing

When you order you’ll receive two versions:

1. A printable version that is designed for you to print, fold up and pop in your camera bag for use at your next shoot

NewImage

2. A digital version that is designed for you to keep on your phone or tablet for screen viewing.

NewImage

While we designed these printables as a companion for the larger Striking the Pose eBook where we do a heap more teaching on the topic – they’re going to be useful for anyone shooting portraits who wants a little inspiration.

Grab your Posing Printables Here for just $ 10

How One Reader Used These Printables to Become a ‘Cool Uncle’

A few weeks back we got this feedback about the printables from one of our readers – John Warren.

“I just wanted to swing back here and let you know that last week I was asked to photograph my niece (16) and was very worried I wouldn’t be able to pose her in a way she’d want to be photographed. Reading this book gave me the confidence I needed to work with her and let me approach the shoot knowing what I wanted to do.

The printables were a life saver. Between each setup I’d show her a pose and she found being able to visualise what I was asking her to do helped a lot.

The results of her beyond anything I expected and now all her friends want me to photograph them too! I just became the ‘cool uncle’!”

Get Your Posing Printables Here

The post Grab our 67 Portrait Posing Printables Set for Just $ 10 by Darren Rowse appeared first on Digital Photography School.


Digital Photography School

 
Comments Off on Grab our 67 Portrait Posing Printables Set for Just $10

Posted in Photography


Boat Portrait – Penobscot 16 Canoe from Old Town Canoes

10 Mar
red canoe on Poudre River

Red Penobscot 16 canoe on the Cache la Poudre River in Fort Collins, February 2014

This red Penobscot 16 from Old Town Canoes is a new addition to my paddling fleet. I got it from in Cheyenne. Right now, it is my only tandem boat, although, the Badfish SUP can accommodate two people.

This is the first boat bought as a photography prop. Now, I need to produce 50-100 saleable pictures to recover the cost. Red canoe on a calm lake with snowy mountains in a background comes to my mind. Maybe, Grand Teton or Clacier National Park? Well, after some abstracts shot in a garage, the first field photo sessions took place in February 2014 on the Poudre River in Fort Collins. There is up to 0.5 mile of calm or slow water behind a diversion dam accessible from the Kingfisher Point Natural Area near Nix Farm. This river section can be paddled even at a minimal river flow including winter time if it is not frozen.

You are welcome to check new paddling pictures to my stock photography portfolio. There are available for immediate download and licensing as royalty free images.

I will try to photograph other boats from my paddling fleet: kayaks, canoes, SUPs (stand up paddleboard) and a packraft. I am really waiting for some green color …

Related posts:
Waterproof Duffels, Canoe Paddle and Hat …
Carbon Fiber and Wood Canoe Paddles in Royalty Free Pictures


paddling with a camera

 
Comments Off on Boat Portrait – Penobscot 16 Canoe from Old Town Canoes

Posted in Photography


5 Street Portrait Tips to Overcome Your Fear of Approaching Strangers

21 Feb

It can be scary to start taking street portraits, especially if you’re an introvert. You like being quiet, people are busy and you don’t want to bother anyone. But you’re a photographer, so you see all of these “decisive moments,” and every time they slip away, it hurts a little. With practice and a few tips, though, you can shoot Continue Reading

The post 5 Street Portrait Tips to Overcome Your Fear of Approaching Strangers appeared first on Photodoto.


Photodoto

 
Comments Off on 5 Street Portrait Tips to Overcome Your Fear of Approaching Strangers

Posted in Photography


Weekly Photography Challenge – Portrait of a Child

15 Feb

Over the last couple weeks we’ve featured several articles on photographing people and doing portraits. Our newest eBook on How to Pose Portraits is a smash success – grab it here now!

The weekly challenges have also been portrait related, so to continue that theme and finish off our portrait deep dive, this week’s challenge is Portrait of a Child.

By CIFOR

Last week we had Portrait of a Man as the challenge – you can see the great submissions on that post, and some manly portraits in The Essence of Masculinity – Portraits of Men.  The previous week it was the ladies in the challenge, well ladies first you know right? See some Inspiring Portraits of Women here for ideas.

Here are a few children’s portraits to get you started:

By Ahdieh Ashrafi

By Barbara Piancastelli

By Kalani Odum

By cheriejoyful

By Marcos de Madariaga

By Alexandre Baron

By Elizabeth Donoghue

Share your Portrait of  Child images!

Whether it be a posed portrait in the studio, or a candid shot of the child in action. Show us your Portrait of  Child images in the comments below!

Simply upload your shot into the comment field (look for the little camera icon in the Disqus comments section as pictured below) and they’ll get embedded for us all to see or if you’d prefer upload them to your favourite photo sharing site and leave the link to them.

Need more tips – try these articles:

  • 7 Tips for Photographing Kids
  • Cut the Cheese: 5 Tips for Photographing Kids
  • How to go Beyond the Regular Composition Advice for Getting the Best Shots of your Kids
  • 5 Photography Rules Moms [and Dads] Can Ignore

The post Weekly Photography Challenge – Portrait of a Child by Darlene Hildebrandt appeared first on Digital Photography School.


Digital Photography School

 
Comments Off on Weekly Photography Challenge – Portrait of a Child

Posted in Photography