RSS
 

Posts Tagged ‘Portrait’

7 Ways to Take Advantage of Autumn in Your Portrait Photography

29 Sep

Fall is my favorite. At least it used to be before it was Pumpkin Spice Everything. I’m so tired of Pumpkin Spice Everything, but I’ll never tire of chilly weather, or scarves, or leaf piles. Or even shorter days, mainly because long summer days are just too much pressure for me.

lynseymattingly1

I like everything about fall including, maybe especially, that it’s ripe for portraits. Here are seven ways to help you take advantage of all of autumn’s goodness in your portrait photography.

lynseymattingly2

1) The light is phenomenal 

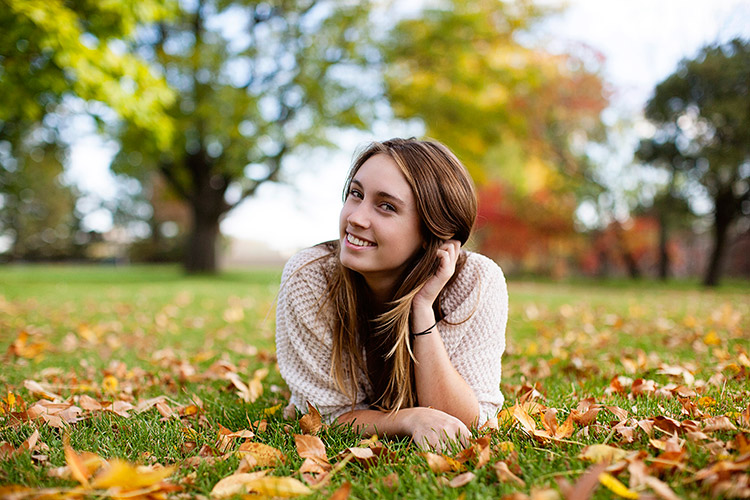
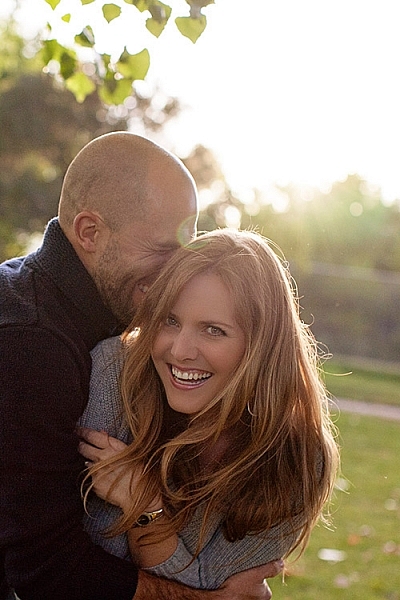
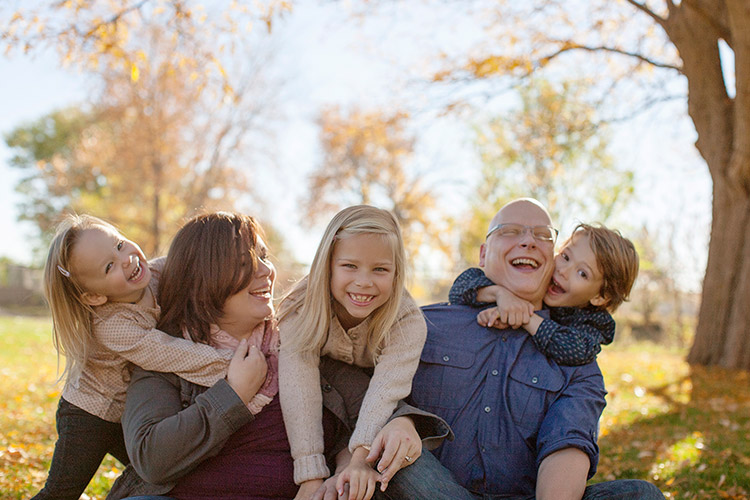
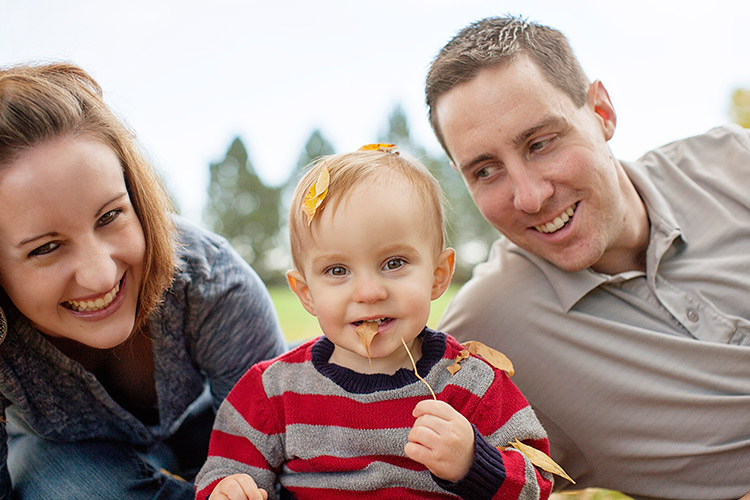
Yes, there is less of it, but it is so golden and delicious. I’m sure there is a very scientific reason for that, which of course I know and understand exactly, but I don’t want to bore you. I like a warmer image, so to get one without having to add a filter is fantastic. I prefer to shoot in the morning and early evening hours but in the fall, the light reflecting off of the warmer tones in the trees make even the deadest of shady patches come alive.

While people don’t normally wear yellows and oranges for picture day, the golden tones found in nature compliment all skin tones. This is why I always tell my clients to dress in colors that are found naturally outside—not only does it keep people from showing up in lime green, but the palette works for whatever background we find that day, and this time of year dressing in earth tones can really make a portrait pop.

lynseymattingly4

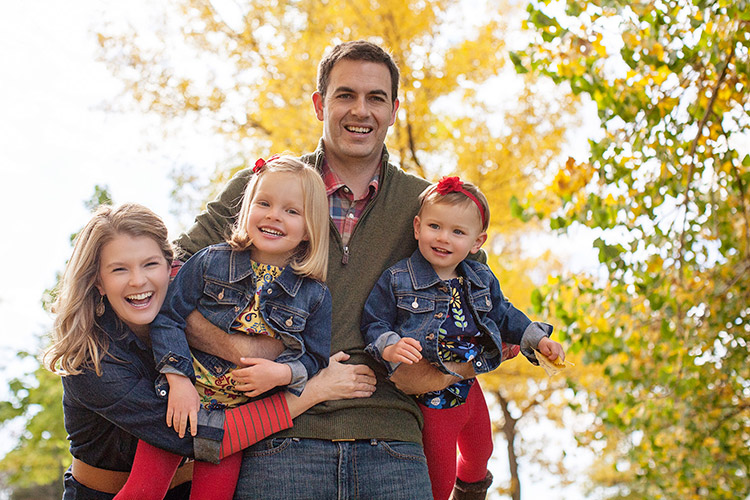
2) Clients dress in their finest

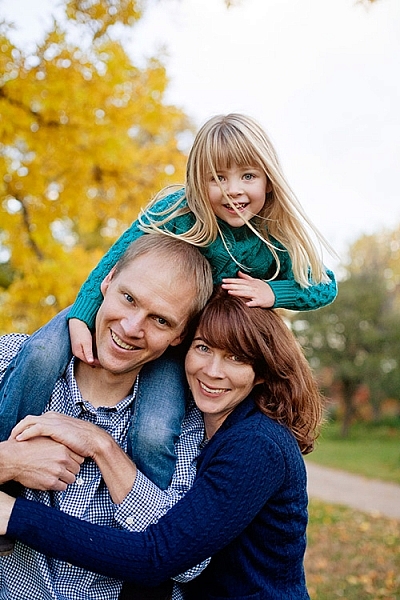
I’m not big on fancy clothes, but even I agree that flip flops take a back seat once we can bust out boots and scarves. Fall is when people tend to take it up a notch, plus it’s layering season. Layering is the best way to achieve portraits that look high-end or even fashion shoot-like. You won’t ever find me in boots, a t-shirt, a jacket, a skirt, tights, a scarf and a hat in real life….but on picture day, I’ll happily dress everyone in five layers and make them stick with it for 20 minutes if it makes my ragamuffin family look like we bathe regularly. I’ve found that my clients feel the same. Which is not to say that my clients are ragamuffins, I’m sure they always look as sharp as they do on picture day.

lynseymattingly3

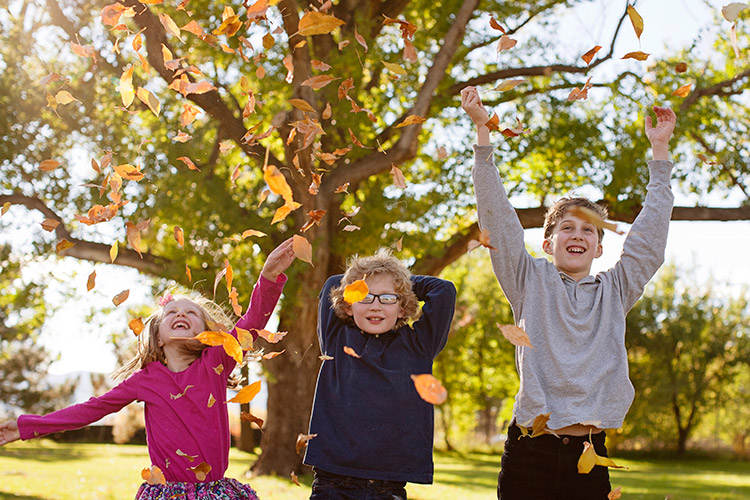
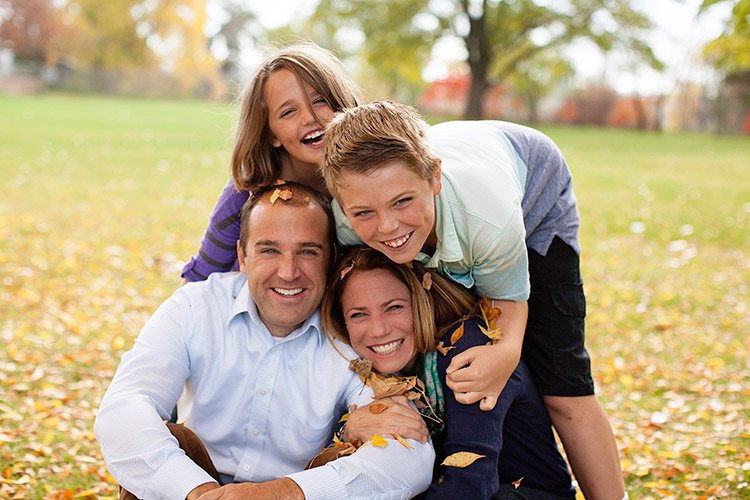
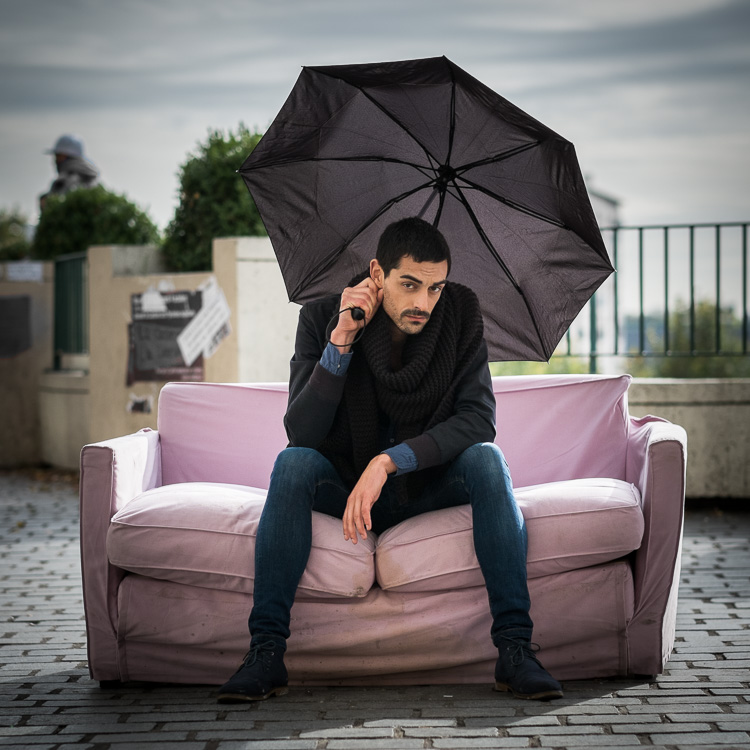
3) Fall adds a playful feature to portraits

I don’t like traditional posing so fall adds so many more options: throw leaves, lay on leaves, climb in colorful leaves, throw leaves at me! (Try to watch out for sticks please) You get the idea. The colors are almost like an extra family member that matches everyone, and isn’t making things more difficult. Use it to your every advantage. It’s not possible to look like you’re miserable in five layers of fancy-pants clothes when you are having a leaf fight. I know, I’ve done the research.

lynseymattingly5

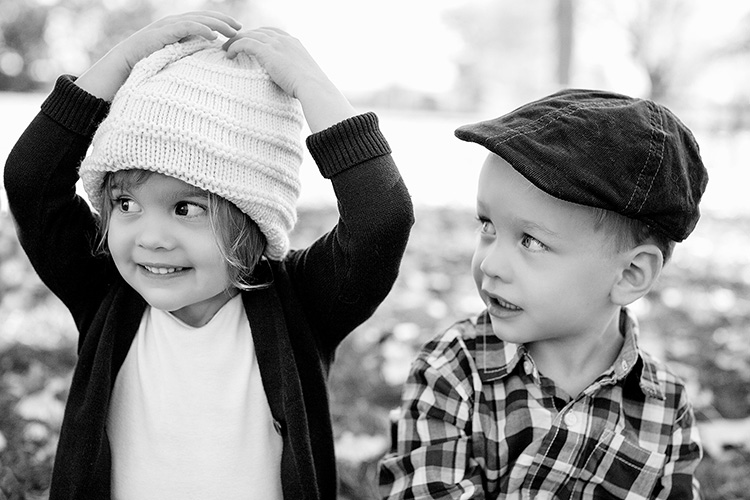
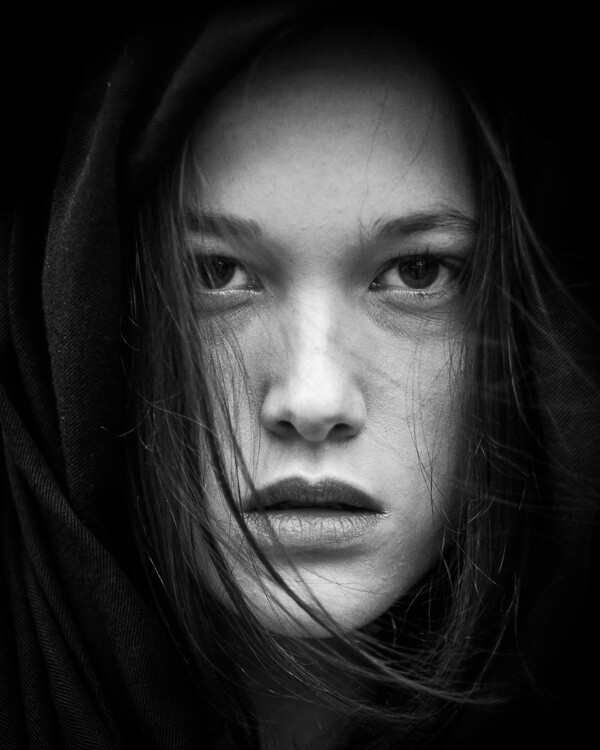
4) Don’t forget black and white

While the changing fall season offers colors, it also offers texture. Black and white portraits can still feel the magical spell of autumn through texture, tone, and playfulness. Plus, that phenomenal light thing goes for black and white too (see #1). I love black and white portraits, and while I am likely to do more color this time of year, I still proof a few black and whites for all of my clients.

lynseymattingly6

5) Compensate for the warmer tones

Sometimes if I am hitting the light just right, and my subjects are in perfect clothes, and the moon isn’t void of course, I find that images can get too warm. I know that sounds crazy, but it can happen. A custom white balance can help you on the front end, but if you didn’t notice it until after, don’t despair. An auto color run (under Image in Photoshop) or a cooling filter can fix everything. For as much as warm tones are flattering, no one wants to look like a seasonal gourd.

lynseymattingly9

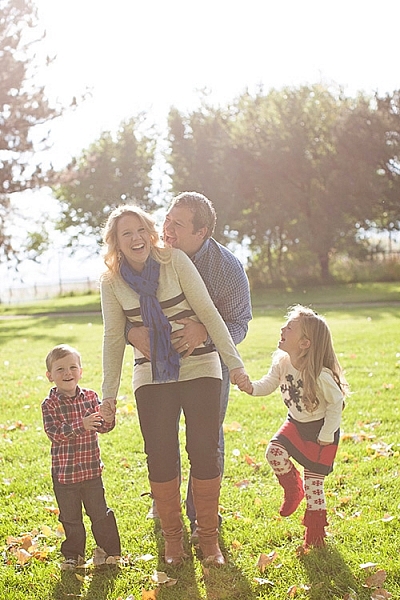
6) Fall weather is perfect for cuddling

Now I’m not one to cuddle, much to my husband’s dismay; I can’t take people in my personal space for an extended period of time. Last weekend a client that knows how I feel about hugging and all that, giggled at how often I tell people to “snuggle up” when I’m shooting family portraits. I guess I figure that most people enjoy it. Or are at least willing to pretend they do for the sake of the pictures (even I am willing to do that for a good Christmas card), especially if it’s not 100 degrees F (30c) outside. And a snuggle feels like a lot less pressure than cuddling, now doesn’t it?

lynseymattingly8

7) The holidays are around the corner

In the US, the changing colors of the trees means that winter is almost here, which puts portrait photographers square into Holiday Card Season. Most of the clients I photograph this time of year are planning on using their images for sending out cards, or even creating holiday gifts.

So this is the only time of year I’m likely to offer a sale or special on portrait sessions, and every time I do, they sell out. That also means that this is the time of year that I can lose my mind in a pile of editing if I am not careful. To try to prevent both a nervous breakdown and spending a month staring at my computer screen, I usually offer mini sessions—10 to 15 minute shoots where I promise five or so pictures that I deliver as high resolution files. This takes any printing or card creating out of the equation, and also limits the amount of images I promised, rather than a full session which for me can be 50 or more. In turn, my clients get a few choices of images for their holiday cards and gifts, including that one great picture that was likely the whole reason they wanted portraits anyway. And I don’t have a nervous breakdown. Probably.

lynseymattingly7

So throw back a pumpkin spice latte and put on a pair of boots and go shoot some portraits, even if you usually don’t. Everything is on your side in the fall – great light, fabulous surroundings, and more clients than any other time of year. That doesn’t happen very often (well, it happens once a year, but still).

lynseymattingly10

googletag.cmd.push(function() {
tablet_slots.push( googletag.defineSlot( “/1005424/_dPSv4_tab-all-article-bottom_(300×250)”, [300, 250], “pb-ad-78623” ).addService( googletag.pubads() ) ); } );

googletag.cmd.push(function() {
mobile_slots.push( googletag.defineSlot( “/1005424/_dPSv4_mob-all-article-bottom_(300×250)”, [300, 250], “pb-ad-78158” ).addService( googletag.pubads() ) ); } );

The post 7 Ways to Take Advantage of Autumn in Your Portrait Photography by Lynsey Mattingly appeared first on Digital Photography School.


Digital Photography School

 
Comments Off on 7 Ways to Take Advantage of Autumn in Your Portrait Photography

Posted in Photography


Portrait Photography Tips: Tapping The Tween Market

21 Sep

Who’s fun, adorable, up for anything, happy, laughing, totally decisive, and the most undershot market on the planet? They’re the new Seniors… they’re Tweens! This summer I had the privilege of working with the 9-13 set quite a bit, and I absolutely loved it. As a group, tweens will try just about anything once, and it’s so much fun for Continue Reading

The post Portrait Photography Tips: Tapping The Tween Market appeared first on Photodoto.


Photodoto

 
Comments Off on Portrait Photography Tips: Tapping The Tween Market

Posted in Photography


Portrait Pro v12 Studio Max Editing Software Review

16 Sep

V12-boxshot-750px
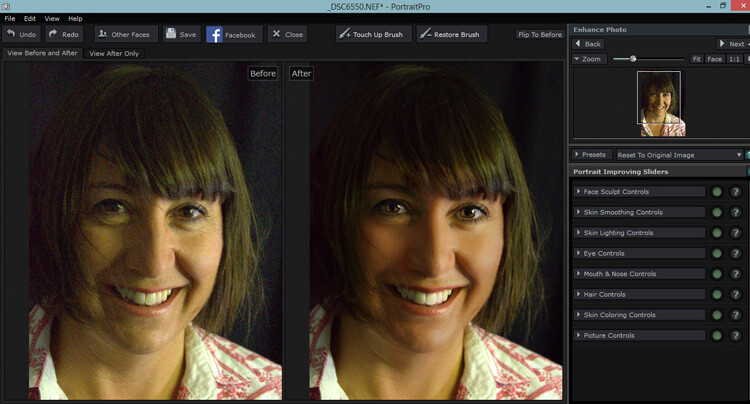
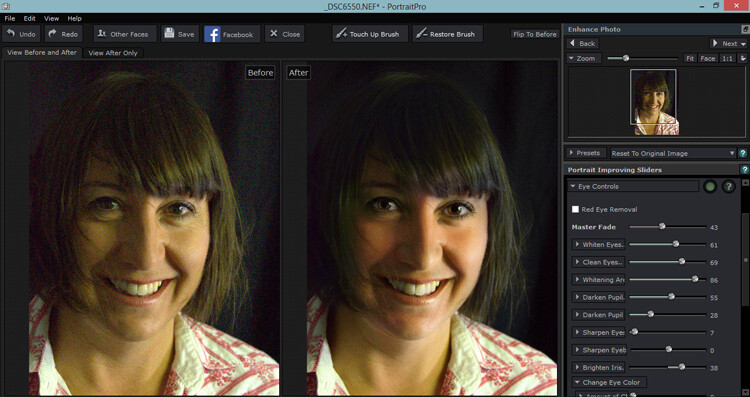
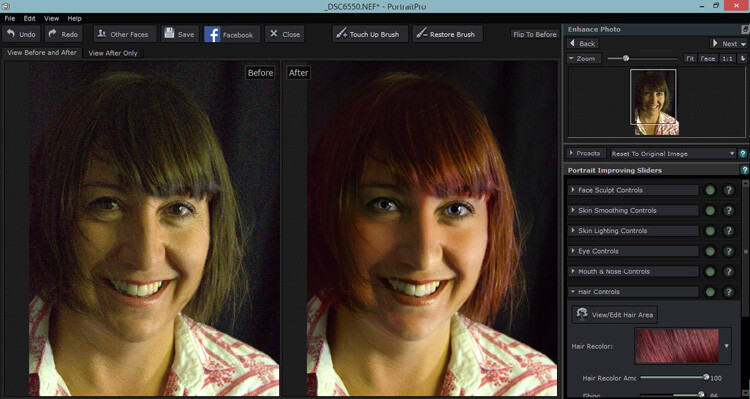
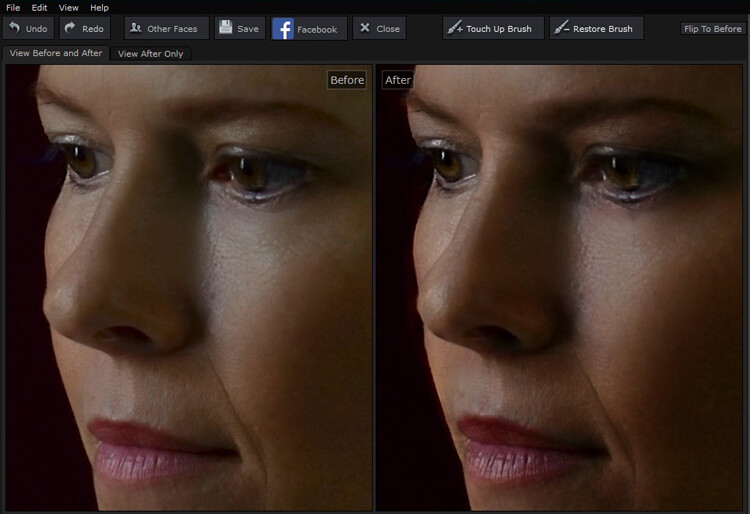
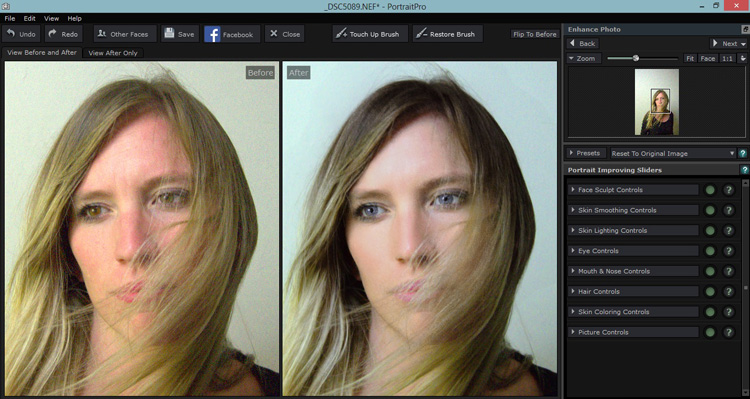
Working mostly in fine art portraits I’ve never felt the need to try a retouching program.  I like to keep a natural look, using Photoshop only for any minor retouching needed. I had looked into a retouching program briefly, but after clicking on a few sites I never got further than looking at the before and after samples. I always preferred the natural before image to the over processed, plastic looking after images. I want my subjects to look like themselves, in their best light of course, but not like some barbie doll cyborg with lifeless eyes.
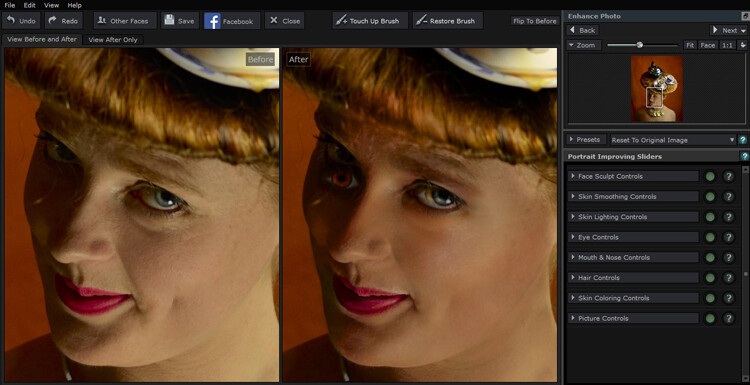
When our Digital Photography School editor offered a free download of Portrait-Pro 12 Studio Max to test out and possibly review I figured this was a perfect opportunity to see if this kind of thing is something that a cynic like me, I might actually find useful.

Getting started

The download and install were super easy, off to a good start. There are instructional videos, tutorials, a forum, a support page, and a manual to download on the website. All good things, but I’m not one for instructions and just opened the program with a test image.

Portrait Pro did its thing and opened the before and its auto processed after image. It came up with an interesting eye situation and I thought, oh dear, this is not good.

My first attempt , not so great.

My first test image didn’t go so well, if I was going for a Picasso look, this would be great, but it wasn’t exactly what I was after.

Second attempt

Rather than succumb to instructions I tried another image. This one had the correct number of eyes, so I started playing around. The simple interface, and pop up instructions made it easy to just jump right in. I tested out the sliders and their effects, then went to town. It was pretty fun, with a bit of practice I eventually turned my blonde, brown-eyed, no make-up friend into a saucy red lipped, blue eyed, red head vixen with an uncanny resemblance to pop star Kylie Minogue.

I won’t show you the results, because the before shot was a not exactly flattering lighting test, when I say not flattering, a beautiful woman looked more like a potato than herself, and I would like to keep the friendship. I did show my friend both images and she really liked the after shot.

That had me thinking this program certainly has potential. I had only been mucking about and I turned an unusable portrait shot into something the subject of the portrait really liked.

Testing on a tough shot

So I decided to put the program through its paces with a poorly lit, overly grainy, weirdly white balanced shot of a dear friend who looks lovely no matter how terribly I might light her. Portrait Pro popped up with the auto version, it gave her quite the tan and sparkly, but kinda spooky eyes.

The auto edit can make for spooky eyes

Portrait Pro helps out by offering up an auto edited version to work from.

But this where the easy to use sliders come in. You can adjust how much the skin is smoothed, colored, alter lighting, or how much cyborg look you want in the eyes. I was pleased to see you could just use this program subtlety. I could do a fair bit of gentle retouching, even on this poorly photographed shot that I either would have been unable to, wouldn’t have been bothered to, or taken for ever to do in Photoshop.

Much less spooky looking with less slider action.

Pulling back the sliders to get a more natural look.

Of course after that I couldn’t help myself with pushing it a bit further.

The sliders can also smooth, lighten,add shine to hair.

It was super fun playing around with the hair/eye color adjusters. I can see this being handy for some of my more surreal fine art images. After showing this version to my friend, she is now considering this new hair color!

Testing on a saleable shot

I was pretty impressed that I could pull something out of a rejected shot with this program, but what about a shot I would use? Would it be subtle enough to be useful for my regular work? Turns out yes, the sliders make it possible to add very slight retouching, and still maintain the natural look of the portrait.

Subtle is best in my books. I like to see wrinkles and pores!

While Portrait Pro can smooth out wrinkles and pores, it can also be used very subtly without loosing the natural look of your subject.

After playing with some faces, I thought all well and good but now the neck looks weird and the face and body don’t match, but turns out you can adjust those too. You can also batch process with the Studio Max version and work directly with Raw files.

I was pretty much sold on the program by this point, but I had a free version, would I actually pay for it? I was pretty surprised to see that it sells for around A$ 100, depending on which version you choose. For that price, I absolutely would buy it, even as a photographer who likes to keep programs to a minimum, and doesn’t like to fork out for new ones.

Any issues?

My only issues were finding the face alignment tool a bit tricky on some images, but then again, I still haven’t actually read the instructions. That was the only issue I had with the program itself, I took a slight offence with the promotional line “Slimmer subjects result in happier clients and more revenue“ in reference to the program’s ability to change face and body shape.

I’m sure that is true, but do we as photographers, really want to make money out of peoples insecurities? To edit distracting parts of a photograph and improve lighting flaws, sure, but to pander to the illusion of perfection created by modern media, not so much. I’d prefer my subjects to see themselves in their portrait as they are and still like what they see with the only retouching being to fix faults in my camera work, not in them. Portrait Pro can do both.

I have no doubt I will continue to use this program, both in my fine art and regular portraits. It will clearly save some editing time and in some cases does a better job that I would in Photoshop. I particularly liked the ability to adjust the lighting and skin tones. I’m even inclined to read the instructions and check out a few tutorials to really get to know the program. In fact I wish I had found it sooner.

Having fun with eye color!

My favorite part of this program was how much fun I had playing with it and how easy it was to use straight away, with impressive results even on not so great original images.

I can’t compare Portrait Pro to any other retouching programs, but as someone who has been against them in general and preferred to stick to Photoshop, I’m converted. It’s simple and fun to use, you have a lot of control of the subtlety with the sliders and it produces great time saving results. It’s a thumbs up from me.

How do you feel about retouching? Would you use a program like this? Have you ever tried a program like this? Tell us about your experiences and results.

googletag.cmd.push(function() {
tablet_slots.push( googletag.defineSlot( “/1005424/_dPSv4_tab-all-article-bottom_(300×250)”, [300, 250], “pb-ad-78623” ).addService( googletag.pubads() ) ); } );

googletag.cmd.push(function() {
mobile_slots.push( googletag.defineSlot( “/1005424/_dPSv4_mob-all-article-bottom_(300×250)”, [300, 250], “pb-ad-78158” ).addService( googletag.pubads() ) ); } );

The post Portrait Pro v12 Studio Max Editing Software Review by Lea Hawkins appeared first on Digital Photography School.


Digital Photography School

 
Comments Off on Portrait Pro v12 Studio Max Editing Software Review

Posted in Photography


National Portrait Gallery announces shortlist for Taylor Wessing Portrait Prize

15 Sep

The four images in the running for the £12,000 Taylor Wessing Photographic Portrait Prize have been revealed by Great Britain’s National Portrait Gallery. The often-controversial award is again set to spark some debate as one of the shortlisted images features a naked boy that many media outlets will have to think twice about reproducing. Read more


Articles: Digital Photography Review (dpreview.com)

 
Comments Off on National Portrait Gallery announces shortlist for Taylor Wessing Portrait Prize

Posted in Uncategorized


Sepp Werkmeister: Ein Portrait

14 Sep

© Sepp Werkmeister

Das Erste, was auffällt, wenn man Sepp Werkmeister begegnet, sind diese hellen, sehr wachen Augen, denen nichts zu entgehen scheint, die ihr Gegenüber mit freundlichem Interesse mustern. Zusammen mit meiner Frau bin ich heute bei Sepp Werkmeister, um ihn zu seinem fotografischen Schaffen zu befragen, speziell auch zu seiner Straßenfotografie, die in einer Ausstellung derzeit im Münchner Stadtmuseum zu sehen ist.
kwerfeldein – Fotografie Magazin | Fotocommunity

 
Comments Off on Sepp Werkmeister: Ein Portrait

Posted in Equipment


Outside of the box: Instagram now allows landscape and portrait formats

28 Aug

Instagram’s latest update brings a fundamental change with it. Since the app’s launch in 2010 users have been limited to posting images in square format. However, today this has changed. After installing version 7.5 of the app, you can post your images in portrait and landscape formats. Read more

Articles: Digital Photography Review (dpreview.com)

 
Comments Off on Outside of the box: Instagram now allows landscape and portrait formats

Posted in Uncategorized


7 Tips for Black and White Portrait Photography

14 Aug

Why would you choose to create black and white photographs in the era of digital cameras that are capable of accurately capturing millions upon millions of colors? Black and white photography seems to be a constant in the history of the medium, with color technology only propagating itself into wide use around halfway between Nicéphore Niépce’s first heliograph and today.

Black and white portrait tips 3201

There’s a lot of debate on both sides of the argument, but for me and many others it’s a simple matter of aesthetics. A good black and white treatment has a way of stripping unneeded information from an image, helping you to emphasize specific elements to your viewer without the distractions color can provide.

Portrait photography is a genre where black and white images can really shine. Like any technique, there are considerations that you should regard that can help to make sure your images have the most impact.

1 – Start with black and white in mind

For many photographers, black and white is more than a creative choice at the post-production stage; it’s a mindset. If you can start the creation of an image knowing that you intend it to be black and white, you can take steps to ensure that all of the elements of a good monochrome image are in place before you press the shutter. Things like contrast in tonality, contrast in lighting, and appropriate expressions from your subjects are all elements that are difficult, if not impossible, to fix after an image is taken.

If you have trouble imagining how an image may look in black and white, try setting your camera to a monochrome setting. While it isn’t recommended to do this for a final image, as long as you shoot in RAW file format, then all of your image’s color data will still be present in the file, and Lightroom and Adobe Camera Raw will reset the photo back to color once it’s imported. Doing this will allow you to have an idea of how an image will work in black and white, while still providing the highest amount of versatility in post-production.

2 – The eyes are more important than ever

Black and white portrait tips 3088

The most important part of the majority of portraits are the eyes. They are usually the focal point that the rest of your image is built around. This is especially true with black and white. With the omission of color, a black and white image often breaks down into graphic forms and shapes. Eyes are shapes that everyone recognizes and they draw immediate focus from your viewers. Make sure that your subject’s eyes are well lit, and focus is critical.

3 – Expressions are emphasized

Black and white portrait tips 3191

Like the eyes, other facial features become more prominent in a black and white portrait. You can use this to your advantage by conveying emotion in your images. Even tiny changes in your subject’s expression can make a difference. Things like a raised eyebrow, a twitch at the corner of a mouth, and smile lines under the eyes can all be used to great effect.

Here is an exercise you can do with your portrait subjects to get a mixture of great expressions. Prepare a list of words or phrases and ask them to react to how they feel to each one. The words you choose can be simple descriptors of emotion like: love, sad, joy, angry and melancholy. For more diverse expressions try more abstract words, or funny ones like: cheeseburger, politics, Teletubbies or Hulk smash. As a bonus, this sometimes works extremely well to lighten the mood when you have a subject who’s tense or nervous during a sitting.

4 – Lighting considerations

Black and white portrait tips 3335

When it comes to lighting a black and white portrait image, there are no hard and fast rules. If you like high contrast images with hard gradations in tone, then choose a harder source of light. If you like soft tones and subtler images, then you want a softer light source.

It’s all about personal preference here. If you’re not sure what yours is, try finding the first ten black and white portraits that stand out to you the most and see if you can deconstruct them in terms of lighting.

5 – Add contrast with light

Black and white portrait tips 3107

If you’re going to create high contrast black and white photos, the best advice is to add it with light, not in Photoshop. Small global adjustments are okay and won’t hurt your images, but definitely do not crank the contrast slider to 100. Try to limit it between +15/-15. For local adjustments, use a dodging and burning technique of your choice. The key point in this, and all post-production, is subtlety.

6 – You can’t save a bad image with black and white

If you’re working on an image that you feel isn’t up to scratch and you ask yourself if it will work in black and white, the answer is probably no. A black and white treatment will often emphasize the flaws that made you question the image in the first place, and a bad photo is a bad photo regardless of its color scheme or lack thereof.

7 – Choose black and white in spite of color

Certain subjects scream out to be shot in black and white. Other subjects may not be so obvious. Bright, punchy colors obviously make for vivid color photos, but by removing the color element you can completely change how a subject or scene is perceived. When you want to ensure your viewer is focused on a particular element, color as a graphic element, can become a distraction. Try removing it.

This can be a difficult concept to understand without seeing it, so I have included an example of a color version of one the images above. Ask yourself: How did your perception of the photos change? What did you notice first in each of the images? Do you feel differently or think differently of it when you view it in color than in black and white?

Black and white portrait tips 3088 colour

Hopefully, you can see that even though bold colors can make for vivid imagery, their absence can as well.

If you’re new to black and white photography, do remember that these are guides and not rules. If you need to stray from them to get the result you’re after, do so without hesitation.

Finally, if you try black and white and you like it: welcome to the addiction!

Editor’s Note: This is one of a series of articles this week featuring black and white photography tips. Look for earlier ones below and more daily over the next week.

  • 5 Simple Ways to Create Expressive Photos in Black and White
  • Tips for Black and White Wildlife Photography

googletag.cmd.push(function() {
tablet_slots.push( googletag.defineSlot( “/1005424/_dPSv4_tab-all-article-bottom_(300×250)”, [300, 250], “pb-ad-78623” ).addService( googletag.pubads() ) ); } );

googletag.cmd.push(function() {
mobile_slots.push( googletag.defineSlot( “/1005424/_dPSv4_mob-all-article-bottom_(300×250)”, [300, 250], “pb-ad-78158” ).addService( googletag.pubads() ) ); } );

The post 7 Tips for Black and White Portrait Photography by John McIntire appeared first on Digital Photography School.


Digital Photography School

 
Comments Off on 7 Tips for Black and White Portrait Photography

Posted in Photography


The Essence of a Great Portrait

09 Jul

If you find portrait photography difficult, then you’re not alone. Interacting with another person at the same time as using a complex camera, and combining the two activities to make a pleasing image isn’t easy. There’s a lot to think about, even if you’re already familiar with your camera and have put in some good preparation time.

DSCF0048

Aside from the lighting, the background, the composition, the pose and the expression, there is also the question of what even makes a pleasing image. Will the subject like the way they look, which is their best side, is their hair perfect, what’s the best angle to shoot from for their particular shape of face? Your subject might have other things to do, a meeting to go to or kids that need to be picked up from school. Landscapes usually tend to be more patient models.

A great portrait isn’t all about making somebody look beautiful though. You could photograph the most immaculate, styled, posed model in a wonderful location in beautiful light, but it wouldn’t necessarily make a good portrait if it doesn’t tell the viewer anything. People aren’t perfect, and a portrait should be more about leading towards an element of truth, more about the person being photographed.

DSCF9654

As photographers, we are in some ways, freed by our limitations. We can only only capture moments, glimpses. A single expression can never tell the whole story of a person in all their complexity, so we are free from the obligation of trying to do so. But it can hint at who a person is in reality. It can suggest a story, and it’s those subtle hints and suggestions that can make a portrait more intriguing.

It can help if you know the person, or at least a little about them. It helps not only in thinking about what you might want to show in the photograph, but also in your interaction with them. If you know something about their interests, their views, their hobbies, what’s going on in their lives at the moment, you’re more likely to be able to understand their perspective. You might aim to help them relax, or discuss a passion of theirs that might stir an emotion that animates their features.

DSCF9903

Here are three other exercises you can try:

1. Use your camera screen rather than the viewfinder. Sometimes the camera inevitably gets in the way. Holding a box in front of your face isn’t the best way to interact with someone, so try a different way. Keep the camera ready, glance at the screen for composition, but watch your subject and their expressions and reactions, watch for the moment you want to capture.

DSCF3931

2. Distract your subject. Not many people are immediately comfortable being photographed. It’s difficult to ignore a camera being pointed at you, so sometimes a distraction can help. You could try providing another point of focus, suggesting something else to look at or think about. A prop can work well too, especially if it’s in keeping with the portrait. An object of some sort to take attention away from the camera.

3. Wait. Sometimes we try too hard to make something happen, and instead of going searching we have to let it come to us. Wait for a few moments and see what happens. Something will change,a pose, an expression, and you might be more pleased with the results.

DSCF4682

There is no formula for a great portrait, other than patience, practice, determination, and probably a slice of good fortune too. But there are also a whole lot of very good, honest, storytelling, memorable and joyful portraits to be made along the way. Remember that you’re making a portrait of a person, and people have imperfections. Some of the greatest portraits have even looked awkward or uncomfortable; not to attempt to demean or embarrass, but to be real. People that program electronic drum machines include tiny imperfections in the rhythms they create because they sound more natural, more pleasing to the ear, more like real drummers. You might try to make the perfect portrait but it’s likely that it’s exactly the imperfections that might make it great.

googletag.cmd.push(function() {
tablet_slots.push( googletag.defineSlot( “/1005424/_dPSv4_tab-all-article-bottom_(300×250)”, [300, 250], “pb-ad-78623” ).addService( googletag.pubads() ) ); } );

googletag.cmd.push(function() {
mobile_slots.push( googletag.defineSlot( “/1005424/_dPSv4_mob-all-article-bottom_(300×250)”, [300, 250], “pb-ad-78158” ).addService( googletag.pubads() ) ); } );

The post The Essence of a Great Portrait by Alastair Arthur appeared first on Digital Photography School.


Digital Photography School

 
Comments Off on The Essence of a Great Portrait

Posted in Photography


One Speedlight Portrait Lighting Tutorial

25 Jun

If you’ve ever wondered how to improve the look of your portraits using only one speedlight, then make sure you read every single word on this page. It isn’t so much the type or quality of the speedlight you are using; it is more about how you modify and shape the light, that will help you to improve the overall look of your portraits.

Craigbecktabts

Let’s break speedlight portrait lighting down into three simple action steps that are easy for you to follow:

Step 1: Get the speedlight off-camera

Start by first getting your speedlight off of your camera. In order to trigger your strobe once it is off of your camera, you will need a remote trigger such as a Cactus V6 that I am using in the video below. You can also use a Pocket Wizard or any number of different triggers that are available on the market. The key is to be able to remotely fire your speedlight, so you are free to modify, and position your light source for more flattering results.

Check out the video below for a video demonstration of a one light, speedlight beauty lighting set up.

Step 2: Add a light modifier

Next step is to increase the size of your light source by using a speedlight modifier. The key to improving the quality of the light is this; the larger the light source and the closer the light is to your subject, the softer the light will appear. As a general guideline for a starting position, I suggest you put your light roughly the same distance as its diameter from your subject.

CraigBeckta1

For example if your speedlight modifier is three feet (36″) in diameter (or 91cm), you can start by placing your modifier the same distance from your subject. In the image above I placed my light in the butterfly lighting position and used a white reflector for fill. This type of lighting is often referred to as ClamShell lighting or Beauty lighting.

Craigbeckta2

Step 3: Place your focus on the subject

Once you have your lighting in place, shift your focus to making a connection with the person you are photographing. Pay close attention to the pose and the expression; tests have shown that 60% of people look more attractive from their left side. So make sure you experiment with your subject to find their most flattering side right at the beginning of the portrait session. You can ask them if they have a side they prefer, or you can make a guess based on where they part their hair.

Once you have that figured out, focus on capturing an expression that makes them appear confident in from of the camera. You can have the best lighting in the world ,but if you don’t nail the right expression, you will miss the shot. Look for the position of their eyes and mouth, confidence is portrayed from the eyes and it is something that can make or break a shot.

Craigbeckta3

Any article about photography isn’t complete unless we talk about the gear used to create the shots. The first image in this series was shot on the Canon 5D MK III with the Canon 100mm Macro lens at ISO 100, f/5.6 and shutter speed 1/160th. The reason you should use a shutter speed of 1/160th on the Canon 5D MK III is to stay within the flash sync-speed. If you shoot at a shutter speed of 1/200th, or faster, you may see a black line in your image because are shooting at a faster shutter speed than your camera can handle when using flash.

Screen Shot 2015 06 01 at 8 19 33 AM
Lighting diagram showing the setup for these images.

The other two images in this series were both shot on the Canon 5D MK III with the Canon 135mm f/2 lens. Both lenses are tack sharp and are great portrait lenses but if you prefer a better bokeh, then I would choose the Canon 135mm f/2. The reason is that the lowest aperture is f/2, and the longer focal length of 135mm will give you a more out of focus background when shot at f/2.

CraigBecktaDPS

If you have any questions about the video or article above, I would be more than happy to answer them for you. Just post your questions in the comment section below.

googletag.cmd.push(function() {
tablet_slots.push( googletag.defineSlot( “/1005424/_dPSv4_tab-all-article-bottom_(300×250)”, [300, 250], “pb-ad-78623” ).addService( googletag.pubads() ) ); } );

googletag.cmd.push(function() {
mobile_slots.push( googletag.defineSlot( “/1005424/_dPSv4_mob-all-article-bottom_(300×250)”, [300, 250], “pb-ad-78158” ).addService( googletag.pubads() ) ); } );

The post One Speedlight Portrait Lighting Tutorial by Craig Beckta appeared first on Digital Photography School.


Digital Photography School

 
Comments Off on One Speedlight Portrait Lighting Tutorial

Posted in Photography


Easy Portrait Retouching Tutorial without Losing Skin Texture

18 Jun

When it comes to skin retouching, less is more. Retouching skin is tricky. You want to enhance it, not beat it to death, make it fresh and glow-y, while still keeping the integrity of the skin. You want to soften wrinkles, not obliterate them. And to bring out their eyes and natural beauty while keeping them looking like themselves. Even Continue Reading

The post Easy Portrait Retouching Tutorial without Losing Skin Texture appeared first on Photodoto.


Photodoto

 
Comments Off on Easy Portrait Retouching Tutorial without Losing Skin Texture

Posted in Photography