RSS
 

Posts Tagged ‘Photos’

Flickr Users Uploading 71% More Photos to Flickr Since New Design Rolled Out

28 May

Founder of Flickr Likes the New Flickr

Recently I blogged about the new design on Flickr noting that engagement on my own personal photostream had skyrocketed. By my own estimation, activity (comments/faves) have increased approximately 294% on my stream since the redesign.

Despite a loud, vulgar, disrespectful chorus, by a small group of torch and pitchfork type haters in the Flickr Help Forum, I’ve wondered how the larger Flickr community has felt about the site changes. To hear it told by the haters, *everybody* on Flickr hates the new design and they are all leaving in droves for other sites on the web.

One of the interesting things about Flickr, is that each photo on Flickr is assigned a unique ascending number on upload that signifies its numerical place as a Flickr upload. Because of this structure, it is fairly easy to measure the pace of uploads at any given time on Flickr.

I wanted to see if users were uploading more or less photos since the changes.

My measurement is approximate, but would seem to indicate that the number of uploads to Flickr since the site redesign have increased *dramatically*, about 71%.

To measure this, I tried to find a photo about as close to the redesign implementation as possible. In this case I found this photo taken by Veronica Belmont posted at about 3pm PST on the date of the change, May 21. This was within minutes of the change as implemented on Flickr. This is what I’m using as a baseline image. It is Flickr photo number 8,776,546,808 (you see this number in the url of the photo).

Next, I went and looked at a recent photo uploaded today. This photo by my contact rollerphoto works. This photo is upload number 8,855,853,505

So roughly between today and the changes made by Flickr, users have uploaded almost 80 million photos to the site. The time measured is about six hours short of six days.

Next, I went and found an older photo uploaded about six days *before* the change was implemented. In this case I found this photo taken by my contact Jazzyblue TR. This photo is one hour short of six days from the changes. This photo is upload number 8,730,146,140.

So, in the 6 days prior to the change, users uploaded about 47 million photos to the site.

So, roughly, as measured in the six days before and the six days after Flickr’s new site design, uploads are up about 71% site wide.

Now, number of photos uploaded is only one metric to measure when looking at the effect of this change. As I mentioned earlier, personally my own engagement numbers are up even higher — but to hear it told by a loud, vocal contingent of about 3,000 members in the Flickr Help Forum, 99% of users hate this change. This simply is not true. The vast silent majority of Flickr users are chugging along just like they always have been and I suspect Flickr signups have *far* exceeded deletions since the change has been made.

Flickr can view much more data internally than I can from the outside, but I suspect that by every way they measure success on the site, this most recent change has been an absolute homerun for them.

Unfortunately, with all change comes haters. Flickr would do well to ignore these haters. Of the almost 100 million Flickr users, we may lose a few thousand of the most vulgar and vitriolic accounts on Flickr, but I suspect what we gain in terms of new users is far greater.

Interestingly enough, earlier last week, the Founder of Flickr himself, Stewart Butterfield, had high praise for the new design on Flickr. Butterfield left as General Manager of Flickr back in 2008, but remains a user still today. In a tweet, Butterfield described the new design as “fantastic,” noting that history will ultimately vindicate the work as “nicely done.” I posted about this praise by Butterfield in the hatefest in the Flickr Help Forum and it only took about 21 minutes for one of the haters to compare his words with Adolph Hitler.

Hopefully the worst of these haters *do* actually leave the site as they keep threatening to do over and over and over and over again, and let the rest of us who *do* like the changes enjoy the new design for what it is, a new, better, fresher version of Flickr.


Thomas Hawk Digital Connection

 
Comments Off on Flickr Users Uploading 71% More Photos to Flickr Since New Design Rolled Out

Posted in Photography


Make your Photos Sparkle with GIMP

19 May

A Guest Contribution by Anotherphotograpbynoob.com.

What this tutorial will show you
In short: how I made the photo on the right become the photo on the left.

before_and_after_gimp_dps_tuts.jpg

In this tutorial, we will cover basic tools of the free photo editing software GIMP.
Here is a quick rundown of the features covered in this tutorial:

  • Crop a photo in GIMP
  • Increase contrast with the Levels panel
  • Make the colors pop with the Hue & Saturation panel
  • Adjust colors with the Color Balance panel
  • Add a color filter to boost the warm colors in your photo.

Sound hard? Don’t worry. I’ll guide you through the whole process, step by step.

Resources

First of all, you need to have GIMP installed. Click here to download GIMP, and then follow the instructions provided with the software.

If you want to follow along with me in this tutorial, the original photo can be downloaded here. I shot the photo myself last year. The sportscar is a racing green Volvo P1800, just like the one Roger Moore drove in The Saint – yep, my dad tells me the story every time we ride in that car.

You are free to use the photo for whatever you may want, as long as it isn’t illegal of course.

If you are interested in the specifications of my camera, it is:

  • Nikon D3000
  • Nikon DX AF-s NIKKOR 35mm 1.8G
  • Shot at f/3.2, 1/200 seconds and ISO 100
  • The exposure compensation was set to -2.7

Enough with the anecdotes; let’s start editing.

Start it all Up

After you have started up GIMP, open up the image you want to edit. If you have chosen to follow along and you haven’t changed too much in the standard layout in GIMP, it should look like this.

gimp-dps-tut-1.jpg

Fixing the Composition

The first thing I want to fix is how I composed the image. I don’t like the license plate showing in the original photo. Ideally, I would like to see no license plate and at the same time as much as possible of both the car and sky.

The easiest way would be just cropping off the right of the photo until the license plate is gone.

But…

I know my mother will most likely print this photo – just as with all the other photos I’ve sent her. In order to make the process of printing the images as smooth as possible, I need to keep the proportions of the image in tact (I don’t want the print service computer system to decide how the photo is cropped).

With that in mind, choose the Crop tool from the toolbox on the left (Shortcut Shift + C).

To make sure proportions are kept, check the box labeled Fixed. From the drop-down menu, you should select Aspect Ratio and the value should be set to current. Like this:

gimp-dps-tut-2.jpg

Now you can drag out the area you want to keep. You can adjust it by dragging the corners around the image. When you are satisfied, hit enter and your photo is cropped.

gimp-dps-tut-3.jpg

So far, so good. The image is still dull, I know. Let’s get moving.

Quick Tip – Duplicate the Background Layer

When you open up a photo in GIMP, a background layer will be created automatically. Don’t edit directly on that. Instead, you should make a copy of the layer by pressing Ctrl + Shift + D (Mac: Cmd + Shift + D).

Now you have the original background layer for reference while editing, and no matter the mess you make, you can easily start from scratch.

And now we must go back to the sports car!

Use Levels to Increase Contrast

The first thing I want to do is increase the contrast. This is mainly to darken the ugly details on the back of the car, in order to let the more shiny parts sparkle.

First, open op the Levels panel Color > Levels:

gimp-dps-tut-4.jpg

I’ve made a simple move. I just increased the darks by 10 and kept the whites at 255. I kept the whites at 255 to ensure most details are preserved in the sky; we’ve now set the best base for boosting the color of the image.

Work the Colors

The first panel I use in this process is Adjust Hue/Lightness/Saturation.
Go to Colors > Hue-Saturation:

gimp-dps-tut-5.jpg

I won’t be explaining every panel I use in detail. Instead, I’ll focus on the settings I needed for this tutorial. I’ve only adjusted the master channel in this panel.

Hue
I’ve increased the hue a little. Six steps up isn’t a lot, but you’ll easily notice the difference. Increasing the hue removes the slight magenta shade in the sky.

Lightness
Even though I adjusted the Levels before, I want an even more warm and dark feeling. Almost like a classical sunset-silhouette – just keeping the details in the photo.

By decreasing the Lightness, I darken the photo and turn up the colors even more in the sky. The Volvo P1800 even starts looking right with dark green colour (the actual name is British Racing Green – another dad anecdote).

Saturation
The final step in the Hue-Saturation panel is increasing Saturation – a lot! I’m putting the pedal to the metal now. All in on sunset.

gimp-dps-tut-6.jpg

The Color Needs more Attention

This is much better. But, I want to adjust it a little bit more. Next stop: the Color Balance panel.

Go to Color > Color Balance:

gimp-dps-tut-7.jpg

Again, I’m not going into detail on all functions. Just the ones I altered. In this case, it’s the Color Levels of the Midtones.

Cyan <> Red

Everything got a little too blue when I boosted Saturation – especially the car. The first step is decreasing Cyan (by increasing Red). Now the car is getting warmer.

Magenta <> Green

One step down is not doing much, but I really think it helped. It needed some compensation after increasing Red and Yellow.

Yellow <> Blue

Let’s add even more color to the sky and some warmth to the chrome on the car.

gimp-dps-tut-8.jpg

Adding a Color Filter is the Last Thing

I still don’t like the blue shade on the chrome. The last step is to add a color filter. It’s really simple.

First, add a new transparent layer. Just go to Layer > New Layer (Ctrl + Shift + N).
Name the layer “Warm Color Filter.” Choose a transparent layer and click Ok.

gimp-dps-tut-9.jpg

Now select the foreground color and set it to #F4B905. Actually, I just went for a warm orange and landed on this. Not freakishly important. Just go for a warm orange color.

Select the Bucket Fill Tool (Ctrl + B) and fill your new transparent layer with warm orange.

This should turn your entire image warm orange. Looking great, ay?

Ok. Now change the layer opacity to 10%, and set the blend mode to Dodge.

gimp-dps-tut-10.jpg

The result is a nice and warm feeling to the overall photo. And it also got us rid of that blue trouble in the chrome details. Nice.

Saving is now Exporting

As you may already know, GIMP does no longer save in JPEG. But don’t worry, the good people working with GIMP has just moved the function a bit and it is now called Export (Ctrl + E) and Export As (Shift + Ctrl + E), if you need to rename the file.

The Final Result

VolvoP1800-sunset-original.jpg

My mom actually ended up printing all the photos of my dad’s sports car. If you want to check out the rest of the sports car photos and even more GIMP tutorials, head over to my blog at http://anotherphotographynoob.com.

More specifically, the images of the sports car are here: http://anotherphotographynoob.com/sportscar/

And all my tutorials for GIMP are here: http://anotherphotographynoob.com/gimp-tutorial/

Anotherphotographynoob is a European blogger and photo enthusiast, blogging daily at Anotherphotograpbynoob.com. It all started as a simple blog posting a photo a day, but recently the blog has moved to a self-hosted solution and now tutorials are being written on a daily basis to help other photo nerds.

Post originally from: Digital Photography Tips.

Check out our more Photography Tips at Photography Tips for Beginners, Portrait Photography Tips and Wedding Photography Tips.

Make your Photos Sparkle with GIMP


Digital Photography School

 
Comments Off on Make your Photos Sparkle with GIMP

Posted in Photography


Using Water to Lighten Landscape Photos

17 May

Water-LandscapePhoto by peter bowers

Most Pro landscape photographers recommend shooting either at (or around) dawn or dusk in order to capture their scene in the ‘golden hours’ when the light is at it’s best (in fact some will rarely shoot at any other time of day).

However, one of the problems associated with shooting at this time of day is that while the sky will often have enough light in it the foreground of your images can sometimes end up being a little underexposed and featureless.

One way to get around underexposed foregrounds is to include water in that area of your shot and to get it reflecting light from the sky.

This is a particularly effective technique at sunrise or sunset when there’s color and interesting cloud formations in the sky (and reflections in the water).

It may take a little experimentation with different positions to shoot from in order to get the right part of the sky in the reflections but with a little trial and error the effect can be quite stunning and a much brighter and more balanced image.

Even if you don’t get perfect reflections the light coming from the water can help balance the shot and help you overcome underexposed foregrounds.

Landscape-WaterPhoto by IrenaS

LandscapePhoto by Bram & Vera

Post originally from: Digital Photography Tips.

Check out our more Photography Tips at Photography Tips for Beginners, Portrait Photography Tips and Wedding Photography Tips.

Using Water to Lighten Landscape Photos


Digital Photography School

 
Comments Off on Using Water to Lighten Landscape Photos

Posted in Photography


Google Unveils Cutting Edge Photography Tools to Make Your Photos Look Better and the World A More Beautiful Looking Place

16 May

Through Glass

Google unveiled significant new innovation in the world of online photography this morning, continuing their rapid development pace on Google+. All in, Google+ pushed out 41 new features today.

Much of the new work is focused on post production photography to make people’s photographs look better than they can straight out of the camera.

Some have suggested that part of Instagram’s success has been their ability to enhance users’ photos with very simple, one touch filters. Instagram has focused on a faux film aesthetic which actually highlights the flaws in many photos to give them more of an artistic, old school feel. By contrast, Google’s easily and automatically applied post production tools, released today, work to make photos look more vivid, life like and realistic.

By using simple techniques like skin softening, clarity adjustment, smart vignetting, HDR and other enhancements, Google, by default, now offers an enhanced photo for every photo uploaded by users to Google+. Also, with this new tech, Google will give you the ability to view the before and after results and decide which you prefer to use. For photographers who do not want their photos altered in any way, these users can turn this default functionality off.

Google Releases New Tools for Photographers Using Google+

As a photographer, I have long been a believer of photo manipulation and post processing technology. Ansel Adams said “you don’t take a photograph, you make it,” as highlighted in Google Social Chief Vic Gundotra’s keynote this morning. Much of Ansel Adams’ genius has been attributed to the work that he did in the darkroom with his photos, his zone system, his post production technology of his time.

I post process all of my photos. The photo at the top of this post is the very first photo that I made with my new Google Glass that I bought yesterday. While I was able to get the composition to a point where I wanted in camera, much of the pop of that image is done with my own post production technique and style.

Many of my photographer friends also spend a great deal of time post processing their images — but the vast majority of the people out there really don’t post process at all. These people don’t own Lightroom and Photoshop or Nik Suite or Aperture or whatever else they might use to improve their photos. These are every day non-photographers who are still enamored with photography and imagery.

By applying some very basic algorithmic based enhancements, Google can make photos for the masses look much better than straight out of the camera. This is a very smart move on Google’s part. Where Instagram makes your bad photos look purposefully worse, Google now makes your bad photos look purposefully better! I stole that line from an unnamed source, btw. ;)

Where this new tech is especially powerful is in photos of people. By using basic skin softening post production tech, photos of people will look better on Google+ than on other social networks. By appealing to our vanity, this gives Google a big advantage. If people can post photos of themselves on Google+ that make them look BETTER than on other networks, many more people will choose to post their photos on G+. Just watch as people post photos of themselves on G+ for auto beautification and even download and post them to other networks I bet.

All of this sort of fancy post production *can* be done today by skilled post production photographers who spend hours and hours behind Photoshop. Now much of it will be automated and released to the masses.

There will undoubtedly be some naysayers about this tech. The same folks who moaned about the Instagramification of mobile photography will probably also complain about this new tech too. Google was smart here by giving users a very simple way to deal with this, by simply turning off this feature.

While the photo enhancements were the sizzle of Google’s announcements today, there were many other significant enhancements added to Google Photos.

Google will now begin to analyze your images and auto tag them. This is no trick where low paid overseas workers are manually reviewing your images; Googles’ algorithms now can look at the context of your photo and the actual subjects in your photos to identify possible tags for the images. If you post a photo of the Eiffel Tower, Google can detect the Eiffel Tower in your photo and add that tag for you. If Google gets the tag wrong, for whatever reason, it’s simple for you to just remove it.

What this means is that more of your photos will be seen in search by people using Google products. Many photographers are looking for more traffic and views on their photos. Who better to provide this traffic than Google Search, yes, using Google auto applied tags. This is the future of image search. If you are a photographer, especially one who depends on photography for your living, you cannot afford to ignore the significance of Google Search. Many of my own photo sales are made by people finding my photos while searching on Google. By uploading your photos to Google+, your photos will rank better in search and now even moreso with this new auto-keywording functionality.

Google Releases New Tools for Photographers Using Google+

Google also introduced a new smart algorithm that can analyze your photos and show you which ones Google thinks are the best of the batch, offering you highlights. Oftentimes we will “spray and pray,” taking 20 images of one person or subject. Google will analyze all of the images and suggest the best one for you. Google uses not just technical information about a photo (is it blurry or underexposed?) but they are using human tested aesthetics to look for what is most appealing.

But there’s more! In addition to the tech released above, Google has also added some very easy tools which will auto generate gifs for you of your photos, auto HDR bracketed shots, and suggest other compelling ways for you to present your photography to the world. Almost miraculously, Google can even look at photos of multiple people and merge the photos into a single photo that takes the best expression of each individual from *different* photos.

All of this also comes with an awesome new look and layout of Google+ which better highlights photography on the network. Popular photos will now be featured in jumbo new oversized form across a three column layout. For non highlighted photos, Google also made portrait oriented photos, especially, look better and bigger. In the past, the portrait format was the worst looking photo format on Google+, now it’s the best — that’s worth noting. ;) For folks who don’t like the three column layout, they can switch back to a single column if they’d like.

A couple of other notes: all of this work that Google does with your photos is done behind the scenes for your eyes only. You can use the tech or not use the tech. If you use the tech and like it, *you* then choose to share the image to Google+. Nothing is shared until you choose to share it.

The new technology will only work with the JPG format (hopefully Google comes out with RAW support down the road). Google increased everyone’s storage to 15GB of online storage, but note that any photo sized 2048 px or smaller does not count towards your 15GB storage limit (you can also buy more storage if you want to). Google allows unlimited uploading of photos that you either manually resize or allow Google to resize to 2048 px. There is an option on Google where you can set whether or not you want to upload full high res photos or resized 2048 sized images.

I upload some of my photos full res, and many of them I resize manually myself to 2048 px.

Google also introduced a free, stand alone hangout app that you can now use with your mobile phone or desktop device bridging text, photos and real time group video into a single app that preserves conversations (at your choice) over long periods of time. Hangouts have been one of the most popular Google+ feature and several photography related shows have been built around them.

More detail on these changes at Google here. More from Matthew Hanley here. Trey Ratcliff wrote insightful commentary here.


Thomas Hawk Digital Connection

 
Comments Off on Google Unveils Cutting Edge Photography Tools to Make Your Photos Look Better and the World A More Beautiful Looking Place

Posted in Photography


15 Fantastic Freckle Photos

15 May

You can put this image collection down into the slightly silly category but I just spent a fun hour looking at portraits that feature people with freckles.

A young stranger: Quebec Rainbow gathering 2009: Gäya 7 years old

I’m not sure why I ended up on this quest – perhaps it’s some subconscious therapeutic activity from growing up as the red headed kid with freckles – but I love some of these shots.

While the freckles in many of these shots have been highlighted a little with some post production – hopefully they provide some of you fellow freckle faced photographers with some inspiration :-)

Click the images to be taken to the photographers Flickr page to learn more about them and the images in this post.

Project: Art Installation Japan

mermaid

Stranger #77

grazie.

La réalité est lente, changé de direction

ninel

Infinity

The future is bright

the freckled boy

Passin' the Time

indian summer

La réalité est lente, changé de direction

little merman

Untitled

Post originally from: Digital Photography Tips.

Check out our more Photography Tips at Photography Tips for Beginners, Portrait Photography Tips and Wedding Photography Tips.

15 Fantastic Freckle Photos


Digital Photography School

 
Comments Off on 15 Fantastic Freckle Photos

Posted in Photography


Keep Track of Your Life Through Photos with the Days App

14 May

You had a journal once.

Then, your little sister found it and told your crush all about your dreams of running away to Disneyland to fulfill your dream of meeting Ariel IRL.

That was embarrassing.

Days is totally not that. It’s a journal (disguised as an iOS app) that you’ll *want* to share with friends.

The goal behind the app is to have you document your life in photos as it happens.

Shoot photos throughout the day, and publish your post of photos the following day in a visually delightful grid of time-stamped pics.

How the heck is this different from Instagram? So many ways. Cool ways, too.

  1. You can’t upload photos. Your photo must be taken at that very moment.
  2. No filters. Just pure, raw, unadulterated snaps.
  3. GIFs! You can make real life, honest-to-blog moving images.
  4. The interface is so adorable, you’ll want to break something.

Documenting your life is so much more fun in photos, and your little sis won’t have any ammo against you. Win.

Photograph Your Days with Days

p.s. WE ARE HIRING A WEB DEVELOPER. If you love photography and San Francisco and codes, APPLY HERE.

p.p.s. WE ARE ALSO HIRING AN EVANGELIST/BIZ DEV HERO. Creative deal-maker types, APPLY HERE.

Related posts:

  1. Simplify Your Life: Send Photos to Different Sites at the Same Time Thanks to returning sponsor MailChimpfor making this week’s Photojojo possible….
  2. Polaroid: R.I.P. in 14 Days 🙁 Orders placed in the Photojojo Shop today will arrive for…
  3. Track the Worldwide Photographic Zeitgeist with Flickrvision Astronauts have it tough. Sure, they get to float in…


Photojojo

 
Comments Off on Keep Track of Your Life Through Photos with the Days App

Posted in Equipment


GIF-fiti: Trippy Animated Street Art Photos by INSA

10 May

[ By Steph in Art & Street Art & Graffiti. ]

giffiti insa 4

Unlike most street art, INSA‘s murals weren’t made to be seen in person – they’re best viewed online. That’s because the UK-based artist painstakingly paints, photographs and re-paints each of his works several times over in order to create these amazing animated GIF images.

giffiti insa 1

Each piece is created with movement in mind, with the artist envisioning the final animated result as he paints each step. What looks like a relatively ordinary mural when passed on the street becomes mesmerizingly kinetic when seen as a final work of art.

giffiti insa 3

These made-for-the-internet works of physical street art defy the conventional wisdom that art is best appreciated in person, though it would still be nice to check out all of the details up close. The internet brings what was once hyper-local to the masses.

giffiti insa 2

In an interview with Adobe, INSA says “I realized I was viewing more paintings online than in real life, the majority of art I was accessing was on the internet. Whether that was street art from around the world, or exhibition openings on blogs, and it disheartened me a little, because although it was great to be able to see so much work, I realized this was never the way the artist would have intended for their work to be seen. So I thought an interesting way to play with this idea was to create art specifically to be viewed online: to the point that you could not actually see it in reality. So, in fact, the internet becomes the best viewing platform for the work.”

Share on Facebook


[ By Steph in Art & Street Art & Graffiti. ]

[ WebUrbanist | Archives | Galleries | Privacy | TOS ]


WebUrbanist

 
Comments Off on GIF-fiti: Trippy Animated Street Art Photos by INSA

Posted in Creativity


Abandoned Asylums in Focus: Photos by Jeremy Harris

07 May

[ By Steph in Abandoned Places & Architecture. ]

Abandoned Asylum Photos 1

It’s not just the morbid and macabre horror movie ambiance of abandoned psychiatric facilities that makes them so haunting and fascinating; it’s the shadows of the people who often lived their entire lives there. Toothbrushes hanging on hooks, bedding still wadded on cots, wheelchairs and patient records are stark reminders of the humanity that once existed between these walls. Photographer Jeremy Harris has documented many of the structures still standing in a series called ‘Abandoned American Asylums: The Moral Architecture of the Nineteenth Century.’

Abandoned Asylum Photos 2

Abandoned Asylum Photos 4

Harris has been sneaking into abandoned asylums since 2005 to take his photos. The series includes just about everything you’d expect: peeling paint, foreboding hallways and a whole lot of rusting metal. But there are also faded murals, grand theaters and bowling alleys.

Abandoned Asylum Photos 3

In the 19th century, a large number of people – whether seriously mentally ill or not – were institutionalized against their will, often left in hospitals their entire lives without visits from family. At the time, mental illness was often thought of as a moral or spiritual failing. Circumstances improved by the 20th century, in most facilities.

Abandoned Asylum Photos 5

Mother Jones produced a video about the photo project. You can also read more about early psychiatric hospitals and asylums at the U.S. National Library of Medicine, and see the rest of the photos at Jeremy Harris’ website.

Share on Facebook


[ By Steph in Abandoned Places & Architecture. ]

[ WebUrbanist | Archives | Galleries | Privacy | TOS ]


WebUrbanist

 
Comments Off on Abandoned Asylums in Focus: Photos by Jeremy Harris

Posted in Creativity


You are My Wild — Great Kid Photography That’ll Inspire Your Own At-Home Photos

25 Apr
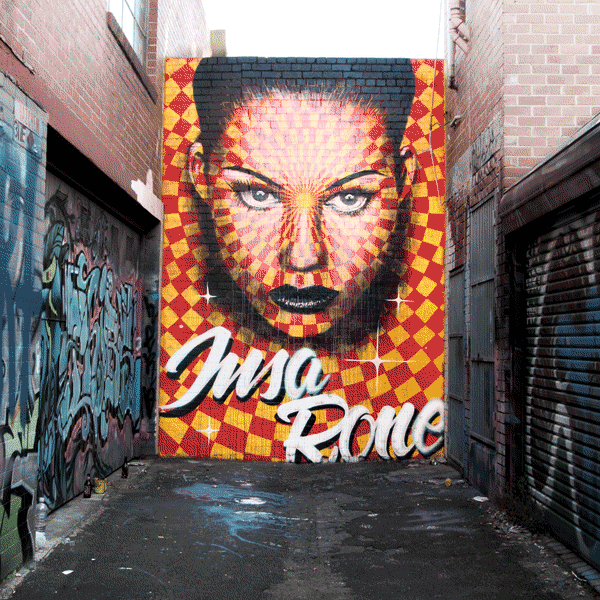
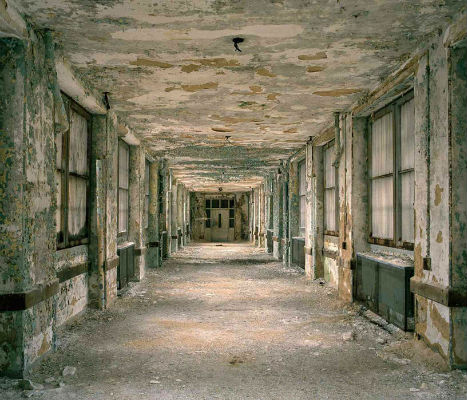
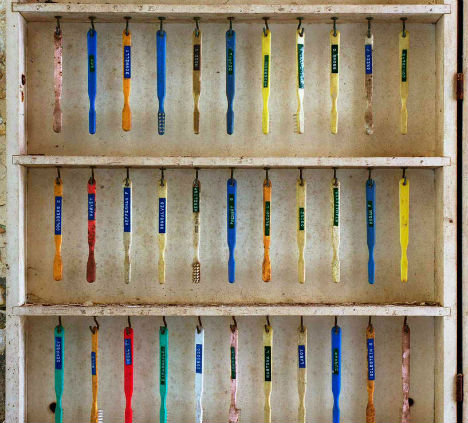
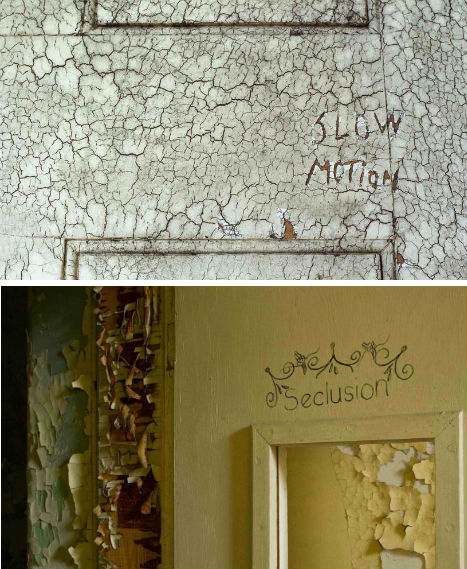
Photo by Brooke Schwab

When you were a kid, having a camera in front of you was just a little less scary. You probably didn’t even notice it was there most of the time.

It’s that enviable carefree ‘tude kids have that makes taking portraits of them so much fun.

That’s just what You are My Wild is all about. 14 photographers document how they see their kids by submitting one remarkable portrait each week.

Meaghan Curry explains how it started:

Right after the new year, and in sort of a creative lull, we were brainstorming about starting a project to force ourselves to put down our phone cameras down and pick up our other cameras more regularly…

Ironically, Instagram is the common thread between us. It is where we found other people documenting their children in really loving, beautiful and respectful ways.

We hoped that some of these other IG photographers would be interested in using their higher quality cameras to “see” the same way that we were using our phone cameras.

And it seems to have worked! Check out their portraits, and may they inspire you to photograph your loved ones in a new light.

You Are My Wild — Beautiful Kid Photography

p.s. INK361 has a special offer for you guys! Get 25% off their Instagram prints and more by using code PJJ25.

Related posts:

  1. Rockin’ Photography: How to Shoot Great Concert Photos It’s all about the D&B. (Dark and blurry.) If you’re…
  2. Alternative Prom Photography — Ideas & Tips for Truly Great Prom Photos Extra photos for bloggers: 1, 2, 3 Prom photo-ops have traditionally come in…
  3. Worldwide Pinhole Day, 5 Amazing Cameras to Inspire You + Tips Extra photos for bloggers: 1, 2, 3 Every year, a…


Photojojo

 
Comments Off on You are My Wild — Great Kid Photography That’ll Inspire Your Own At-Home Photos

Posted in Equipment


How taking tablet photos can look even sillier: Just add a telephoto lens

23 Apr

ipad_telephoto_lens.jpg

If taking a photo with a nearly 10-inch tablet didn’t look silly enough, you can now pair your iPad with a telephoto lens to expand tablet photography horizons. Regardless of the awkward appearance of the iPad as a camera, shooting with the tablet has grown in popularity. The new 10x zoom accessory for the iPad 3 and 4 and 12x zoom for the iPad Mini is a further proof. Read more about the lens at connect.dpreview.com.

News: Digital Photography Review (dpreview.com)

 
Comments Off on How taking tablet photos can look even sillier: Just add a telephoto lens

Posted in Uncategorized