A couple of weeks ago I had the pleasure of meeting the Digital Photography School headmaster, Darren Rowse, in person at a conference we both attended called the World Domination Summit in Portland, OR. The message of the conference (yes, the name invokes much curiosity) is simple: community, adventure, and service. It’s a large group of people that enjoy life, live adventures constantly and give back in service of others. That’s one of the reasons why I love writing on this site so much, I get to share my experience and knowledge and help you!
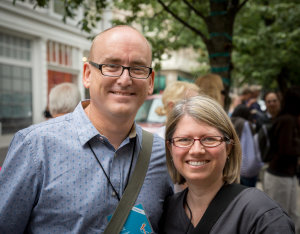
Me and Darren Rowse
Darren was one of the keynote speakers and he most of the attendees (3000+) inspired to move forward and live our dreams. He even fulfilled one of his childhood dreams on stage, but I’ll leave that for Darren to share with you!
One thing I’ve always wanted to do is visit the Sea Lion Caves in Oregon. So after the conference my husband and I headed to the coast for a few days. We camped in one of the state parks, in the middle of the woods and sand dunes, it was awesome being in nature. But, being a photographer I couldn’t just sit around the campfire and do nothing, so out came the camera!
It’s really not that hard to create some really cool images that will impress your friends. I’m going to walk you through my process for creating the image above and how I adjusted as I went to get the desired result. Remember photography is a journey, not a destination, don’t expect to get it perfect on the first shot – I never do!
Here are my 5 tips for you on creating some fun campfire images.
#1 USE A TRIPOD & SELF TIMER OR REMOTE TRIGGER
A tripod is essential for doing this type of photography as you’ll be dealing with some really long exposures, mine ranged from two to ten full seconds. Make sure you have a sturdy tripod and if you want to get in some of the photos you can either use the self timer, as I did and run into the scene, or get yourself a handy wireless remote you can put in your pocket and fire the camera from your spot in the image.
#2 WAIT UNTIL IT’S DARK ENOUGH OUTSIDE

ISO 400, f/4, 1/8th of a second
The image above is the first one I made and I wasn’t happy with it. It didn’t have the mood I wanted and the sky was too light. So I had a snack and waited about an hour then made the following image. I’ve given the exposure data for each shot so you can see how I adjusted it as the sun went down and the amount of light diminished.
#3 EXPOSE FOR THE BACKGROUND, KEEP IT DARK
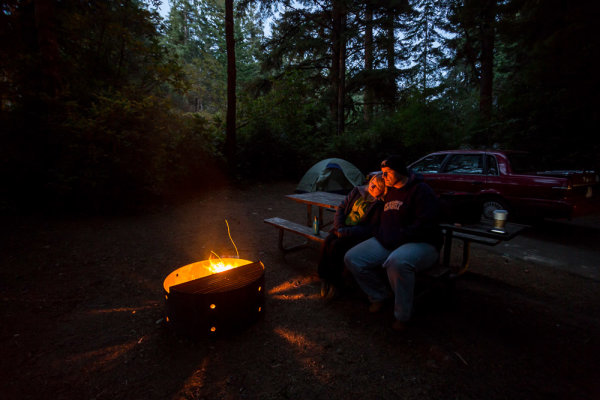
ISO 1600, f/4, 2 seconds
Okay, so that’s way better but I felt it was still missing something. I really liked how the light was streaming out of the holes in the rim of the fire pit. The exposure is just right on the background but it seemed a bit boring.
Notice also that I increased the ISO to 1600. If I hadn’t my exposure at ISO 400 would have been 8 seconds. It’s pretty hard to keep perfectly still for 8 seconds so I sacrificed gaining a little bit of noise to get what I felt was a more reasonable 2 second exposure time.
#4 ADD SOME ADDITIONAL LIGHT INTO THE SCENE
Going from the last image, I knew wanted to add a bit of a light to to the tent, to make it look like it was glowing. So I took my headlamp (get one at a camping supply store or use a flashlight) and turned it on inside the tent. I aimed it at the back wall facing away from the camera so I didn’t get a hot spot, and it lit up the whole tent quite evenly. If you have a larger tent you may need more than one light inside.
**NOTE: do NOT put fire or a gas lantern inside your tent! Please practice good fire safety habits at all times.**
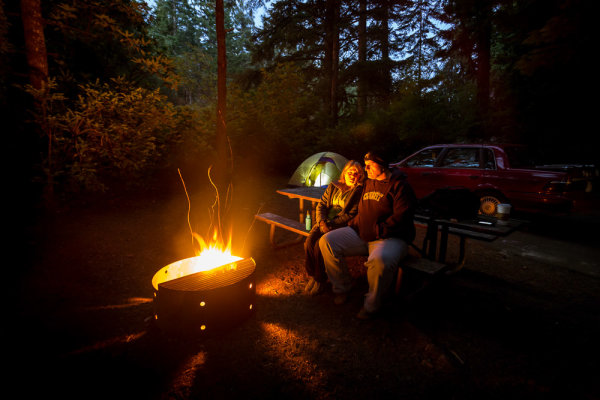
ISO 1600, f/4, 2 seconds
Okay almost perfect, except for a couple of little things. As we had just put a log on the fire it was pretty intense and bright. That brings me to the last tip.
#5 SHOOT WHEN THE FIRE BURNS DOWN IF IT’S TOO BRIGHT
There’s no way to control the intensity of the fire except by darkening the whole image, but if I do that then my background will basically disappear into a black abyss. So we waited a while before doing the next image. I also added a second head lamp, this time on the picnic table seat behind us. It is pointed back towards us and I placed it careful so we’d be in front of it and the light itself wasn’t hitting the lens directly.
Here’s a couple of the final shots, with which I was quite pleased. I changed my camera angle a bit and re-cropped but otherwise they are very similar. Notice these last exposures were a bit longer. The light in the sky was almost completely gone so in order to get any detail in the background I had to increase the overall exposure, taking care to not overexpose the fire.
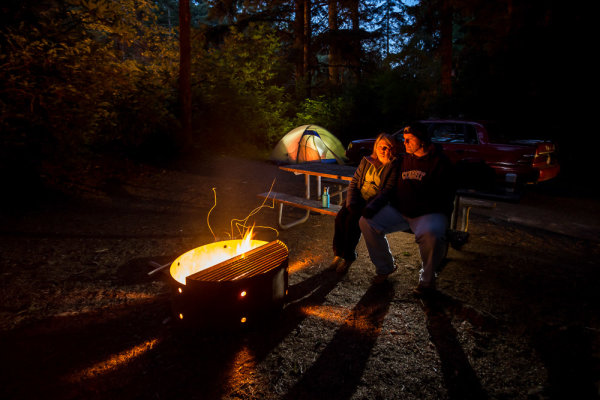
ISO 1600, f/4, 5 seconds
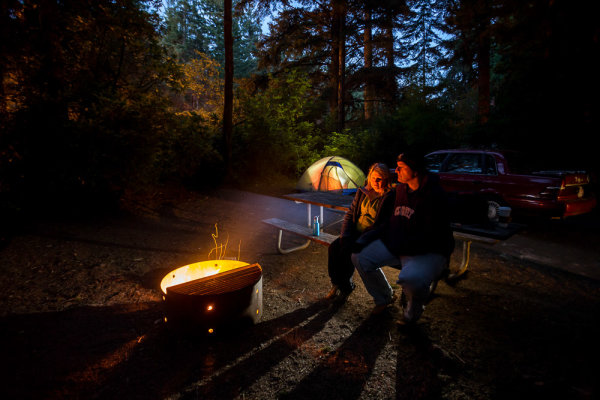
ISO 1600, f/4, 5 seconds
#6 BONUS TIP – MAKE SURE TO FOCUS THEN TURN IT OFF
Focusing at night is very tricky because your camera can’t see in the dark, neither can you! The best way to focus is to have your friend hold a light where you’re going to sit (or put it on a chair). Aim the light directly at the lens, which will allow the camera to “see” it and lock focus on that spot. Once it’s locked, just switch to manual focus, taking care not to bump the camera or accidentally turn the focusing ring. If you move the camera or recompose the scene, just do the same procedure over again.
ADDITIONAL READING
If you want to read more about other night photography techniques I’ve done a couple of article on Light Painting and some special effects. Links to them below:
- Light Painting Part one – the photography
- Light Painting Part two – photoshop
- Three Special Effects for Night Photography
ACTION PLAN
Since we still have a little bit of summer left in the Northern Hemisphere, if you plan on doing a little camping take the camera gear along and give this a try! You may find your travel companions get into it and have a little fun with it as well. Also gives you a great way to do some fun group photos. You can also use flash if you’re so inclined and skilled. Please do share your images with us and any other tips you want to add that I may have missed.
Cheers, Darlene
Post originally from: Digital Photography Tips.
Check out our more Photography Tips at Photography Tips for Beginners, Portrait Photography Tips and Wedding Photography Tips.
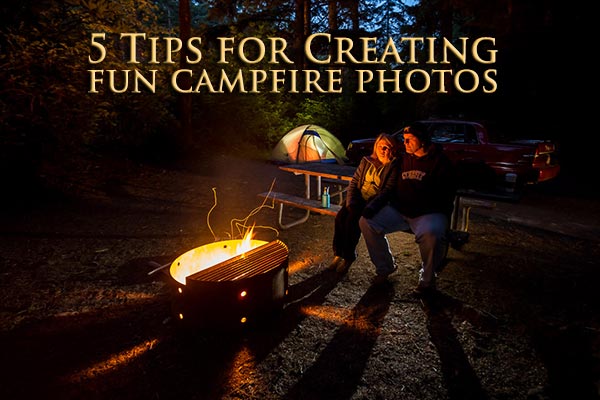
5 Tips for Creating fun Campfire Photos

Digital Photography School


You must be logged in to post a comment.