RSS
 

Posts Tagged ‘Photos’

6 Tips for Creating Unique and Emotion Filled Wedding Photos

15 Sep

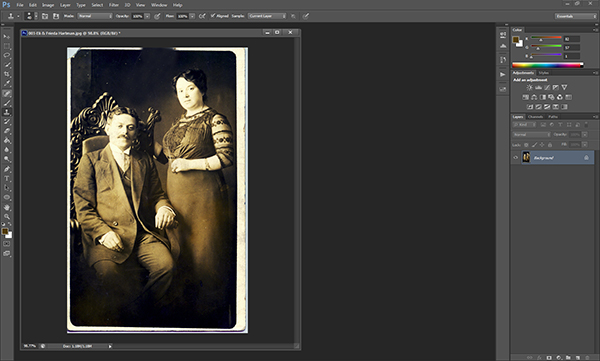
A post by wedding photographer Susan Stripling – one of the course presenters in this weeks Creative Live Photo Week – an event that showcases teaching by 50 photographers across 3 tracks including Weddings and Family.

The best wedding photographers know how to create not only beautifully composed images, but also the moments of emotion and connection at the core of every dynamic wedding story. Focusing on capturing these unique, organic moments allows you to tell a story that’s true to the couple you’re working with. Here are some tips for finding and capturing the images that keep a wedding story dynamic and fresh.

Wedding photography emotion

1. Build the Right Relationship with the Right Client

It’s important to assess whether a client is the right match for your photography style and the stories you’re good at capturing. When you’re consulting with clients, ask questions about what exactly they want, and consider whether you’re prepared to offer the services they want. Once you’ve decided to work with a couple, cultivate a positive, communicative relationship. You don’t have to be best friends with every couple that you shoot, but a basic level of trust helps clients to be themselves on the wedding day. The more comfortable they feel with you, the more moments you’ll be invited to shoot.

2. Be Prepared

To capture unique moments, preparation is essential. Before you show up to shoot a wedding, think through the choices you’ll make about gear, lenses, equipment, and lighting. It’s inevitable that plans will change on the day of the wedding, and that’s okay. Being prepared doesn’t mean you have to be inflexible.

Wedding photography emotion 1

3. Check your Composition

If an image is too soft or technically imperfect, you can’t share it with clients. A poor image of a great moment is essentially the same thing as no image at all. Remind yourself of the basics both before and during a shoot. Be mindful of focusing and recomposing with the f-stops you choose, and make sure your shutter speed correlates with the lens you’re using.

4. Be aware of the Background

Nothing spoils a dynamic image more than a random person wandering through the background or an angle that makes everyone in the room look like they have lampshade hats on. Don’t just focus on the subjects of each image – focus on the entire frame.

Choose backgrounds that either enhance an image or that are clean and simple. For example, you might decide to photograph rings against the background of other sparkly jewellery the bride plans to wear. Or you might decide that it’s better to have a clean, simple background instead.

Wedding photography emotion 2

5. Challenge Yourself

When I’m photographing a wedding, I like to challenge myself to see how many unique moments I can capture in one single frame. This allows me to tell stories that are more complex. I might be able to catch the mother of the bride’s reaction as the bridesmaids help her daughter into her dress, or I might capture the flower girls dancing along to a couple’s first dance.

If you’re telling multiple stories in a single frame, each aspect of the story has to be dynamic and engaged. Make sure everyone in the frame is doing something interesting; no couple wants an image from their wedding day where half the people look bored. Know when to focus on a single, super-impactful image instead.

6. Watch and Wait

Watch for shots that both capture a unique moment and help advance the overall wedding story you’re telling. The balance between patient and proactive can be hard to strike, but it’s important.

Create a calm atmosphere and be a chilled presence – don’t constantly have cameras in people’s faces and shutters consistently going off. When a moment starts developing, be assertive about getting the shot you need, but find a way to do so without being intrusive.

Give the couple space to emote, but also be aware that some people might not be outwardly emotional, and that’s okay too. Capture the couple as they are, without trying to force specific moments, reactions, or feelings.

For more wedding photography tips, check out Susan’s upcoming creativeLIVE course during Photo Week which starts on Monday.

Photoweek logo

Susan Stripling is a world-renowned wedding photographer. She has won some of the photography industry’s most prestigious honors including 1st place in WPPI’s Wedding Photojournalism category and the Grand Award for Photojournalism. Susan has photographed weddings all throughout the US, the Caribbean, South America, Finland, France, and the Bahamas.

Post originally from: Digital Photography Tips.

Check out our more Photography Tips at Photography Tips for Beginners, Portrait Photography Tips and Wedding Photography Tips.

6 Tips for Creating Unique and Emotion Filled Wedding Photos


Digital Photography School

 
Comments Off on 6 Tips for Creating Unique and Emotion Filled Wedding Photos

Posted in Photography


Street Art, Decades Apart: 40 Then & Now Graffiti Photos

12 Sep

[ By WebUrbanist in Art & Street Art & Graffiti. ]

then now

We tend to notice as buildings come and go, skylines change and grow with planning and oversight, but what about the spray-painted wall art the adorns the sides of these structures, sometimes persistent but often fragile and ephemeral?

graffiti past and present

graffiti then and now

OldWalls, a project by Alberto Boido, documents past and present layers of street graffiti, meticulously tracking the artists responsible for the works as well, whenever possible. Most of the pairs are taken from the same vantage point, first in the 1990s, then again in the 2010s.

before after blu graffiti

before after wall murals

Sometimes, the creators in question are famous (or infamous) local creators either adding their mark or being painted over. The above murals in Milan were made more recently by the well-known Italian artist Blu, but the walls,  as you can see, were originally covered in the 1990s. Other artists featured here include Robx, Prof Bad Trip, Maox, Inox, Kino, Bach, Zoc, Kalimero, Kayone, Yazo, Loze, Kid, Zen, Airone, Krema, Pergola, Steezo, Teatro, Mec, Oze, and Area Pozzi. 

Next Page:
Street Art Decades Apart 40 Then Now Graffiti Photos

Share on Facebook


[ By WebUrbanist in Art & Street Art & Graffiti. ]

[ WebUrbanist | Archives | Galleries | Privacy | TOS ]


WebUrbanist

 
Comments Off on Street Art, Decades Apart: 40 Then & Now Graffiti Photos

Posted in Creativity


Shoot Great Concert Photos & Win a Trip to Way Over Yonder Music Festival

10 Sep

Whether you’re a festival fanatic or haven’t seen a concert in years, we’ve got something you might like.

We’ve teamed up with Scoutmob, Paste Magazine and Hotel Tonight to send one lucky winner (& pal) to Way Over Yonder festival in Santa Monica, California.

Flights, hotel, festival tix (VIP, natch) and gift cards to the Scoutmob and Photojojo stores are included. And it takes all of 5 seconds to enter!

Enter to go to Way Over Yonder, free!

And… while you’re waiting to see if you won, improve your concert photography skills with a few of our favorite guides:

  1. Music Photography Made Simple
  2. Music Photographer’s Guide to Festival Photography
  3. Concert Photography Tips From Digital Photography School

p.s. A new iPhone is coming! To celebrate, every checkout in the shop gets free enrollment into our Phoneography 101 course today.

Related posts:

  1. Rockin’ Photography: How to Shoot Great Concert Photos It’s all about the D&B. (Dark and blurry.) If you’re…
  2. Get Out and Shoot! — 3 Great Ideas for Shooting Outside in Your Town or City There’s one sure-fire way to improve all of your shots:…
  3. Shoot to Sell: Taking Better Photos for eBay, Etsy & Instructables   We’ve teamed up with our buddies at Instructables to…


Photojojo

 
Comments Off on Shoot Great Concert Photos & Win a Trip to Way Over Yonder Music Festival

Posted in Equipment


How To Take Ridiculously Unique Photos

08 Sep

Take ridiculously unique photos 1

by Steven McConnell

How do you make your photography more meaningful, moving and unique?

Lately, I’ve been fascinated with the idea that our motivations significantly influence the quality of photography we create.

This sentiment is expressed particularly well in The Foutainhead by Ayn Rand. The character is an architect, rather than a photographer, though his lessons apply to any artist who wants to create great work:

“Nothing can be reasonable or beautiful unless it’s made by one central idea, and the idea sets every detail. A building is alive, like a man. Its integrity is to follow its own truth, its one single theme, and to serve its own single purpose.”

Pleasing Everyone Doesn’t Work

In the novel, the hero makes a strong point that, when artists attempt to fulfil on competing needs they tend to create uninspiring, soul-less compromises.

In the context of architecture it might look like this:

  • A building gets an impressive facade, because the owners want to impress the neighbours.
  • It adheres to rules of traditional architecture, because that’s what the architect’s boss wants.
  • It features a striking look, because the architect knows its a good way to attract some publicity to himself.
  • Its materials are dictated by the budget, rather than their suitability for the task.

And so on.

The hero’s point is that the most beautiful building is one which follows a single, unyielding purpose: to create most liveable space for the people who will inhabit it.

Take ridiculously unique photos 2

Why Do We Take Photos?

I think as photographers, we often fell into the same trap. We are either unconscious to our motives, or we consciously lose focus because we try to satisfy too many ends.

In doing so, we cease creating art and start creating generic commodities.

What Drives Us?

I’ve been paying a lot of attention lately to what drives me and how it affects the photography I create.

For me personally, I notice that photography serves as a means to these ends:

  • A way to escape from something.
  • A way to get approval.
  • A way to challenge myself.
  • A way to make a difference.

Neither one of them are right or wrong, better or worse. But some are more conducive to a more powerful focus. Which, in turn, brings about stronger results.

Photography Assignment

Let’s say I have a day off and I decide to spend it taking photos. Where do I go? What do I photograph? Who do I show the photos to?

If I approach the day from a space of needing approval, for example, then my focus will be extremely broad. Anyone or anything which gives me recognition will satisfy that need.

I am free go take snaps of everything from the Opera House to my neighbour’s cat, and show off what I did to my friends, family, other photographers on online forums and so on.

Take ridiculously unique photos 3

Narrowing Focus

However, if I consciously decide to make this day about making a difference to someone, then my focus narrows significantly.

I can still go take a photo of the Opera House, for example. But a pretty picture, which has also been taken by millions of people, won’t do now.

If I’m going to hold myself to account and really make this day about making a difference to someone through my photography, I’ll need to dig much deeper.

Creating Art

I’ll probably look at the issues surrounding it today (art vs politics, need for funding and redevelopment, modern society vs art, budget cuts, people who make it all work) and attempt to take photos which tell those stories in a powerful way.

My audience would also be much more narrow – I’ll have to connect with people who have a need for such photos and offer it to them as a gift.

In the end, 99.999% people in the world would never see, or appreciate those photos. But those who do, because they really have an interest in the story I’ve told, will be touched forever.

Default Isn’t Good Enough

If left to our own devices, our brain will pick a purpose for us, depending on the wiring from our past.

Because we’re human, most of the time we default to the “escape” and “get approval” kind of space. Unfortunately, that headspace gives rise to generic kind of results.

Escape is a powerful motivator, but it’s vague. You can escape anywhere, doing just about anything you’re trying to escape from.

Desire for approval is even more powerful, but it comes hand in hand with a fear of disapproval, which makes it difficult to say something original.

I find that I produce best photography when I consciously come from “challenge myself” or “make a difference” type of mindsets.

Take ridiculously unique photos 4

Purpose Is Changeable

We are in control of our motives – not the other way around. Which means we’re entirely in control of the level of photography we produce.

The first step is awareness. Moment by moment, we can ask ourselves – what’s driving me now? What end am I serving?

The second step is change. If we discover that we’re serving too many masters, we can change our purpose to one which gives us a more powerful focus.

So, what’s your photography assignment for today? And, more importantly, why?

Steven McConnell is a family photographer at Family Photography Sydney. You can connect with him on Google+. and Twitter.

Post originally from: Digital Photography Tips.

Check out our more Photography Tips at Photography Tips for Beginners, Portrait Photography Tips and Wedding Photography Tips.

How To Take Ridiculously Unique Photos


Digital Photography School

 
Comments Off on How To Take Ridiculously Unique Photos

Posted in Photography


Destroyed Cathedral: Rare Photos Offer Glimpse Into WWI

06 Sep

[ By Steph in Architecture & Public & Institutional. ]

Destroyed Cathedral France WWI 1

Seen from the eyes of a German officer, these dramatic photos depict the St. Quentin Cathedral in northern France, which was almost completely destroyed during World War I. They’re part of a collection of over a thousand photos, stereographs and negatives saved by Lt. Walter Koessler’s family and shared by his grandson on Tumblr and in a forthcoming Kickstarter-funded book.

Destroyed Cathedral France WWI 2
“Walter’s training as an architect drew him to photograph and sketch many buildings throughout the war,” writes Dean Putney, who has taken on the task of preserving and printing the photos. “Churches were a particular favorite, and with their roofs blown off by battle these were probably rare opportunities to capture their insides on the insensitive film of the time.”

Destroyed Cathedral France WWI 3

Destroyed Cathedral France WWI 4

The church was constructed over a period of nearly two hundred years, starting in the 12th century, and survived damage from both fire and invaders’ artillery several times prior to World War I. In 1916, a bomb dropped nearby blew out many of its stained glass windows, and in 1917, a fire destroyed everything within its walls, causing the vaulting of the central nave to collapse, and destroying parts of the flying buttresses.

Destroyed Cathedral France WWI 6

In 1918, the Germans almost succeeded in blowing the whole thing to dust. Having chased out the occupiers, French soldiers entered the cathedral to find that ninety-three holes had been drilled in the walls and pillars and filled with explosives. A German engineer captain was left behind to finish off the task, and stopped just in time. The church has since been restored.

Destroyed Cathedral France WWI 7

Koessler’s photos offer a unique glimpse not only into the German side of the war (as Putney points out, most surviving photos were taken by the Allies) but the personal viewpoint of a photographer who had been trained as an architect. See the whole series at the Walter Koessler Project.

Share on Facebook


[ By Steph in Architecture & Public & Institutional. ]

[ WebUrbanist | Archives | Galleries | Privacy | TOS ]


WebUrbanist

 
Comments Off on Destroyed Cathedral: Rare Photos Offer Glimpse Into WWI

Posted in Creativity


Turn Photos into Paper Flowers

05 Sep

Extra photos for bloggers: 1, 2, 3

If romantic comedies have taught us anything it’s that getting a beautiful bouquet of flowers is pretty darn special.

Flowers brighten up your day, but they tend to do that one pesky little thing — dying once they’re cut.

Making flowers out of photographs is a fun and cheeky way of telling that special someone you are smitten.

Plus, these flowers will go on living as mini photographic reminders of beautiful things that have happened in your life.

Learn how to make a super fun and simple bouquet of photo flowers to cheer up your living space, a loved one, or a stranger on the street. (Because we’d all like to feel like we’re in a romantic comedy once in a while.)

Learn How to Make Flowers out of Photographs

Why It’s Cool

Flowers are beautiful and the tend to make everyone pretty stinkin’ happy.

It’s awesome how placing a vase of flowers in a room makes it feel a little more put together than it did before.

These photo flowers will achieve that higher level of design sophistication all the while displaying images of things you love.

They’re simple and elegant with a touch of whimsy that’ll make all your friends ask “How did you do that?”

The best part of the photo flowers is that they will live forever. They wont go rotting away in a vase that you just keep “forgetting” to clean out.

Ingredients:

  • Photos you want to turn into flowers*
  • Scissors
  • Floral Wire
  • Floral Tape
  • Glue
  • Pen or Pencil
  • Circular object for tracing

*Photos printed on computer/copy paper or vellum work the best.

STEP 1: Round and Round

beforeUse a circular object to trace a circle on your printed image.

Choose carefully where you trace, as the middle of the circle will be the middle of the flower.

STEP 2: Get to Cutting

beforeTime to get crafty. Take up your scissors!

Cut out the circle you just traced.

Don’t worry if it’s not perfectly cut out. The imperfection will add to the charm of the flower.

STEP 3: Go Halfsies

beforeFold the circle in half.

STEP 4: And Again…

beforeFold the half-circle in half.

You’re getting so good at this.

STEP 5: One more time

beforeFold it in half again.

Your circle will now look like tiny little fan.

STEP 6: Shape it up

beforeCut the top of the circle from end to end to create a cone shape.

The finished result will look an ice cream cone.

You can play around with how you cut the top as this will be your petal shape. Try a few shapes to see what petal cut out you like best.

STEP 7: Make Your Mark

beforeUnfold your circle and you will find 8 petals.

Mark off your least favorite petal and the top half of the petal next to it with a pen or pencil.

STEP 8: Just a Little off the Top

beforeCut out those one and a half petals. Buh-bye petals.

You will be left with 6 and a half petals.

The half petal will be the anchor of your flower (and it will look a little like a triangle).

STEP 9: It’s all Coming Together

beforePut a dab of glue on the half petal.

Glue the petal next to it (across the gap) on top of the triangular half petal.

STEP 10: Create Some Texture 

beforePinch each petal, making a crease down the middle to give them a little extra texture and shape.

STEP 11: A Little Loopy

beforeMake a simple loop in the top of the floral wire with your scissors.

STEP 12: A Flower Grows

before
Poke the end of the floral wire that does not have a loop in it through the center of the flower.

STEP 13: The Finishing Touch

beforeCut a 2 inch strip of the floral tape and wrap it around the base of the flower to secure it to the top of the wire.

Yippee! You just made your first flower out of a photo! Feels good, right?!

If you aren’t super stoked on your first attempt don’t give up hope. It may take a couple of tries to get the hang of this. Don’t discard the flowers you don’t like ’cause they will look cute among the flowers you do like when they are all put together in a bouquet.

Taking It Further

  • Print your photos double sided so that you will have images on the top side of the flower as well as the bottom side of the flower.
  • Make a garland of photo flowers by twisting the wire together.
  • Make all types of flowers. A quick google search on how to make paper flowers will give you a plethora of tutorials on crafting different types of flowers.
  • Make a wreath or head piece of photo flowers.

Related posts:

  1. DIY: Turn Digital Photos into Vintage-like Prints with Mulberry Paper Extra photos for bloggers: 1, 2, 3 What is it…
  2. Frame Your Photos with a Paper Craft Photo Globe Extra photos for bloggers: 1, 2, 3 With the holidays…
  3. DIY Photo Wrapping Paper — Wrap Gifts in Your Very Own Photos! Extra photos for bloggers: 1, 2, 3 Free shipping on orders over $ 100!…


Photojojo

 
Comments Off on Turn Photos into Paper Flowers

Posted in Equipment


Soak in the season with these vivid summer photos

25 Aug

isac_goulartinvincible_2.jpeg

Summer’s fast on its way out, something we’re acutely aware of in the Pacific Northwest. We’re trying to make the most of our sunny days before the clouds and drizzle set in. For a healthy dose of Vitamin D any time of year, take a look at photographer Isac Goulart’s sun-soaked images. The Brazilian photographer’s colorful beach photos aim to capture the very essence of long summer days. Check them out – and maybe take a few of your own before the weather’s gone.

News: Digital Photography Review (dpreview.com)

 
Comments Off on Soak in the season with these vivid summer photos

Posted in Uncategorized


How to Restore Old, Damaged Photos

22 Aug

Perhaps one of the most important things we do as portrait photographers is preserve memories.  While the digital era and its ever-evolving technology have made it easier to ensure that the photos we take today will last longer than their analog counterparts, there are still things we can do to help preserve memories captured before the advent of the pixel.  Several years ago, I came across a sizable collection of very old family photos and started scanning them.  Unfortunately, some had already been damaged to one degree or another.  Fading, creasing, staining, and tearing had all left their marks, and the fact that some of these photos were close to 100 years old did not help their cause.  At first I wasn’t sure what to do about them, but closer inspection made it clear that restoring many of these photos would not be as difficult as I initially thought.  With the help of only three or four Photoshop tools, I was able to bring this photo of my great grandparents back to life.

STEP 1 – ASSESS THE DAMAGE

Once the image has been scanned, open it in Photoshop to assess the damage and formulate a plan.  A good rule of thumb when editing any sort of photo is to tackle your global edits first, before worrying about specific target areas.  I like to make overall tonal adjustments first.  If I clean up dust, rips, and creases first, I run the high risk of those imperfections reappearing later when I adjust tone and contrast to the entire image.

Step 1.  Open the image in Photoshop and assess the damage.

Open the image in Photoshop and assess the damage.

STEP 2 – LEVELS & CURVES

As with almost everything in Photoshop, there are so many ways of doing just about everything.  When I first started doing this kind of work I used the Levels adjustment.  I prefer using the Curves adjustment, though, because it lets me set the levels and adjust the contrast from within the same dialog.  By using the droppers below the graph, you can do a quick Levels adjustment, bringing the tone of the image back under control.  Using the black dropper, I click on what I see as one of the darkest points in the image.  You’ll see an immediate improvement in the overall appearance of the photo.  For purposes of fixing this photo, I don’t need the white or gray droppers.   Once I’ve adjusted the levels by setting the black point, I tweak the contrast of the entire image by creating a slight “S” curve.  Don’t panic if you push the adjustment too far.  You can turn the “Cancel” button into a “Reset” button in any Photoshop dialog box by holding down the ALT/OPTION key.

Select the black dropper on the left and click on the darkest part of the image to adjust the levels.

Select the black dropper on the left and click on the darkest part of the image to adjust the levels.

Adding a slight “S” curve will add some needed contrast.

STEP 3 – TACKLE THE DETAILS

As far as global adjustments go, this particular image really only needed a small levels and curves adjustment.  Once that’s been addressed, we can zoom in on the image and start addressing the details.  For this photo, the next step is dealing with that big tear at the top.  For this part of the repair I’m relying on the Clone Stamp tool (keyboard shortcut: S).  Be sure to zoom in kind of tight to make sure you have a good view of the area.  You’ll be using the tool to sample similar nearby pixels to copy and fill in the damaged area.  Start with the edges and work your way in towards the middle and then up towards the top.  Be sure to change your sample area as you cover more of the tear in order to ensure that the tones and shading are consistent.  Don’t worry about keeping a straight edge at the top of the photo.  We’ll be cropping that out later.

006-Repair Rip1007-Repair Rip2

Now it’s time to zoom in really tight and deal with small things like dust, scratches, stains, and creases.  In earlier versions of Photoshop, the best tool for this part of the job was the Clone Stamp, and in some situations that might still be your best bet.  Ever since the introduction of the Spot Healing Brush, however, cleaning up dust and scratches has never been easier.  The spot healing brush reads the surrounding pixels and uses that information to cover up and repair minor damage.  As with all detail adjustments, be sure to zoom in pretty tight.  This will let you make the repair with fewer and– more importantly– less noticeable clicks.

Use the zoom tool to make sure you get rid of the small imperfections.

Use the zoom tool to make sure you catch all of the small imperfections.

010-Dust Cleanup

STEP 4 – CROP FOR A CLEAN EDGE

Once we’ve addressed the damage we’ll zoom back out and use the Marquee tool to crop out the extraneous edges of the original scanned photo, creating new, clean edges.

013-Crop Image

STEP 5 – ADMIRE YOUR RESULTS

Rescuing a memory is always gratifying.  I never knew the people in this photo, but I know that without them I wouldn’t be here.  That alone makes the time spent restoring this photo well worth it.  With a little practice, edits like this will become a streamlined process.  Don’t be afraid to try it.

015-Before & Aftercopy

Post originally from: Digital Photography Tips.

Check out our more Photography Tips at Photography Tips for Beginners, Portrait Photography Tips and Wedding Photography Tips.

How to Restore Old, Damaged Photos


Digital Photography School

 
Comments Off on How to Restore Old, Damaged Photos

Posted in Photography


Catch the Moon: 100 Magnificent Moon Photos You Have Never Seen Before

21 Aug

The moon is at her full, and riding high, Floods the calm fields with light. The airs that hover in the summer sky Are all asleep tonight William C. Bryant Since the beginning of the world the Moon has always attracted humans with its magic light. So many years of history had passed before the first step on the Moon Continue Reading

The post Catch the Moon: 100 Magnificent Moon Photos You Have Never Seen Before appeared first on Photodoto.


Photodoto

 
Comments Off on Catch the Moon: 100 Magnificent Moon Photos You Have Never Seen Before

Posted in Photography


Sanna Dullaway Adds Color to the Most Iconic Photos in History

19 Aug

Screen_Shot_2013-08-13_at_6.14.49_PM.png

General-interest blog The Roosevelts has posted a selection of artist Sanna Dullaway’s colorized images, showing what iconic images might have looked like to the photographer that captured them. Among the (exceeding well-done, it must be said) adjusted images are Malcolm Browne’s iconic shot of monk Thich Quang Duc’s self-immolation, Alfred Eisenstaedt’s famous image of the kiss in Times Square on VJ Day, and Anne Frank’s haunting 1942 portrait. Click through for a selection of shots, and links to both the full article and Sanna’s website.

News: Digital Photography Review (dpreview.com)

 
Comments Off on Sanna Dullaway Adds Color to the Most Iconic Photos in History

Posted in Uncategorized