RSS
 

Posts Tagged ‘Photos’

7 Tips for Shooting Alluring Photos of Your Girlfriend

15 Jul

What can I say…I’m a sucker for a pretty girl. Not so much the super-airbrushed models who look inhuman as much as real women in everyday situations, just being themselves. This is why I’ve often photographed the girl I was dating. At first though, I remember being to shy to ask. Too worried about offending her, making her feeling like Continue Reading

The post 7 Tips for Shooting Alluring Photos of Your Girlfriend appeared first on Photodoto.


Photodoto

 
Comments Off on 7 Tips for Shooting Alluring Photos of Your Girlfriend

Posted in Photography


Four Reasons to Display Photos of Your Children

14 Jul

As parents and photographers, we take thousands and thousands of photos of our children every year. Looking at my Lightroom catalogue from last year, I have over 3000 photos of the kids, and that doesn’t include all the pictures I took with my phone camera!

Amy lee 3

In our house, the camera is always out. I take pictures of them throughout the day, no matter what they’re doing. The kids know the camera is a part of our lives, and they don’t act differently when they see me taking pictures of them, as some adults would.

I’m a big believer that photos are too precious to live on computers. Hard drives fail and images can get lost so your best insurance is having the tangible photo right in front of you. Twice a year I go through thousands of our photos to print a few for display, I recommend you do this also.

Amy lee 2

In our house, we use photos as home decor. We have a couple large collections of photos throughout the house, smaller prints displayed everywhere, as well as photobooks alongside the framed photos.

These photos really are a gift because it helps us remember how much we are loved, and it reminds us how blessed we are to have each other. There are times when I have had a bad day and seeing a photo of us laughing and hugging each other reset my mind and helped me remember what is most important.

Aside from these reasons, here are four other reasons why you as parents (or grandparents) should display photos of your kids.

Self-Esteem

It is amazing to see what a boost of confidence and self-esteem comes to the child whose parents display a lot of photographs of them around the home. Your children understand that you have taken the time to hang, frame, and display their photos, and it makes them understand that you value them, find them to be beautiful, and want to see them each day.

Amy lee 1

Memories

In the hectic pace of modern family life we can forget what kids looked like only a year earlier. Images not only give us a glimpse into the past, but they can also bring us back to the moment in an instant. Remember how proud you felt when your child was a newborn and how perfectly they fit in your arms? Photos bring you back to those feelings when the photos were made.

Forgotten

How often do you scroll through your phone’s photo roll or look at the folders full of images on your hard drive? Hard drives could fail and images could be forever lost. Why lose out on the opportunity to put all of those smiling faces on your walls? You have a museum full of gorgeous artwork just waiting to be printed.

Sharing

When you print out and display these images in your home it opens a dialogue and creates a habit of sharing memories. Kids may not look at certain photos for a long time, and then suddenly lean in and remember something important. When some of these photos were taken during the best moments of your lives, it is worth reliving and remembering.

I could go on with the list, but these are the reasons I continually hang new photos on the walls and update my displays. Do you have others? Do you display your photos in your home?

Other related articles:

  • How to Create a Family Photo Essay
  • Click! How to take gorgeous photos of your kids – a dPS ebook
  • How to photograph children {and other stuff} indoors


Editor’s challenge: this is something I feel strongly about as well, so I challenge you. If you have not got any printed photos of your own family around your house – do it now. Go select a few, order the prints, and get them framed. Or make a photo book. Or both! Involve your kids in helping select the images, make it a family project. Then take a photo of your newly hanging family artwork and share it with us here in the comments.

The post Four Reasons to Display Photos of Your Children by Amy Lee appeared first on Digital Photography School.


Digital Photography School

 
Comments Off on Four Reasons to Display Photos of Your Children

Posted in Photography


In Photos: Cincinnati’s impressive ‘Old Main’ public library

13 Jul

Cincinnati, Ohio’s current downtown public library is grand in its own right as one of the busiest branches in the country. But its predecessor, demolished in 1955, was nothing short of stunning. Built in 1874, the ‘Old Main’ library was originally intended to be an opera house, with a towering atrium that instead became home to five tiers of stacked bookshelves. These photos capture the grandeur of the library and its popularity in its own time. See gallery

Articles: Digital Photography Review (dpreview.com)

 
Comments Off on In Photos: Cincinnati’s impressive ‘Old Main’ public library

Posted in Uncategorized


Actionable Tips to Get Sharper Photos Every Time

11 Jul

There’s almost nothing (besides maybe losing a memory card) that hurts more than having a great shot that ends up poorly focused! And even though sometimes we can blame our equipment, there are other factors that come into play when focusing. Sharper and crisper photos are the goal of every photographer, so it’s time we cover  the basics to achieve Continue Reading

The post Actionable Tips to Get Sharper Photos Every Time appeared first on Photodoto.


Photodoto

 
Comments Off on Actionable Tips to Get Sharper Photos Every Time

Posted in Photography


Create Better Black and White Photos Using Local Adjustments in Lightroom 5

08 Jul

Local adjustments in Lightroom

I showed you how to convert your photos to black and white in Lightroom in an earlier article. But, considering it dealt purely with global adjustments, the piece only gives you half the story. Global adjustments get you started, but in order to get the best black and white conversion possible you need to make local adjustments as well. This article will show you how to do this.

First, a couple of definitions:

Global adjustments: Any adjustments (to brightness, contrast etc.) that affect the entire image.

Local adjustments: Adjustments that affect only part of the photo.

Before I show you how to make local adjustments, let’s think about why you would do so. Certain things pull the eye more than others. For example, when you look at a photo with people in it, your eye will go straight to them, even if they are small in the frame. This is probably down to human curiosity more than anything, but it works.

Two other things that pull the eye are highlights and contrast. The idea behind making local adjustments is that you can alter the brightness or contrast of certain areas in the frame to influence where the eye goes. This creates a better, more beautiful photo.

Dodging and burning

Here’s the photo we’re going to work with in today’s article. I’ve already converted it to black and white using global adjustments.

Local adjustments in Lightroom

As you can see, it lacks a focal point. It also contains lots of beautiful textures which will look great in black and white if we can bring them out.

In order to make effective local adjustments you need to decide what you want to achieve before you start. Here, I decided to make the central watermelon the focal point of the composition. Decision made, it’s just a question of how to achieve it.

Dodging and burning

Although Lightroom itself doesn’t use these terms, you will find them referred to time and again in post-processing. Dodging is the act of making part of the photo lighter, and burning is the act of making it darker. They originated in the chemical darkroom and are also done in photo editing programs like Photoshop.

The first step to achieving my aim of making the central watermelon the focal point, is to make the rest of the photo darker. I did that by placing a Radial Filter over the central watermelon and moving the Exposure slider left.

Local adjustments in Lightroom

Note: The Radial Filter is new to Lightroom 5. If you have an earlier version of Lightroom, you can use either Post-crop Vignetting or the Adjustment Brush instead.

The two watermelons either side of the central one are a little too bright. So I used the Adjustment Brush to select (mask) them and moved the Exposure slider left to make them darker. The screenshot below shows the area covered by the mask. Note how I only painted the top parts of the watermelons as the bottom part was already dark.

Local adjustments in Lightroom

This is the result of the local adjustment.

Local adjustments in Lightroom

Contrast and Clarity

The next step is to improve the appearance of the central watermelon. I can do that by increasing contrast to bring out the beautiful textures of its skin.

I placed another Radial Filter over the watermelon (you could also use the Adjustment Brush) and ticked the Invert Mask box so the adjustment was applied inside, rather than outside, the filter. Then I increased Contrast and Clarity, and moved the Highlights slider right and the Shadows slider left. The result is a big increase in contrast, bringing out the texture of the watermelon’s skin. Here’s the result.

Local adjustments in Lightroom

Here are the before and after views so you can see the difference, which is entirely down to the local adjustments.

Local adjustments in Lightroom

That completes my overview of using local adjustments in Lightroom. As you can see, the local adjustments turned an average photo into a much stronger one. There is nothing overly complicated about it, it’s more a matter of training your eye to see in black and white and then deciding how to use the tools that Lightroom gives you to realize your vision.

I’m curious to hear how you use local adjustment when you convert your photos to black and white. Please let us know in the comments.


Mastering Lightroom: Book Three – Black & White

Masterlng Lightroom: Book Three – Black & White by Andrew S Gibson
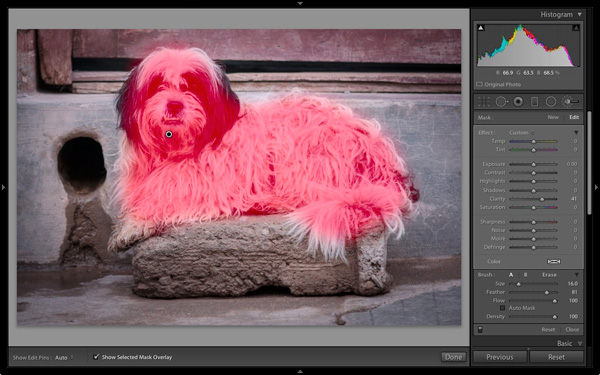
My ebook Mastering Lightroom: Book Three – Black & White goes into the topic of black and white in depth. It explains everything you need to know to make dramatic and beautiful monochrome conversions in Lightroom, including how to use the most popular black and white plug-ins. Click the link to visit my website and learn more.

The post Create Better Black and White Photos Using Local Adjustments in Lightroom 5 by Andrew S. Gibson appeared first on Digital Photography School.


Digital Photography School

 
Comments Off on Create Better Black and White Photos Using Local Adjustments in Lightroom 5

Posted in Photography


Reflection Photos to get you Motivated

04 Jul

A puddle in the road, plate glass windows, or a shiny car – what do they all have in common? They provide great opportunities to get reflection photos.

This set of images of reflections is to give you some ideas to go shoot your own reflection photos.

Enjoy!

Photograph Black Lotus by Mathijs van den Bosch on 500px

Black Lotus by Mathijs van den Bosch on 500px

Photograph Arc de Triomphe Etoile Water Mirror Reflection by Loïc Lagarde on 500px Arc de Triomphe Etoile Water Mirror Reflection by Loïc Lagarde on 500px

Photograph Dawn by David D on 500px

Dawn by David D on 500px

Photograph In the Morning Light by Teguh S on 500px In the Morning Light by Teguh S on 500px

Photograph Louvre at dusk by Tomáš Vocelka on 500px

Louvre at dusk by Tomáš Vocelka on 500px

Photograph Reflections by Marco Britto Photography on 500px Reflections by Marco Britto Photography on 500px

Photograph Louvre Pyramid by Night by Csilla Zelko on 500px

Louvre Pyramid by Night by Csilla Zelko on 500px

Photograph brooklyn.bridge.two by Robert Pfeuffer on 500px brooklyn.bridge.two by Robert Pfeuffer on 500px

Photograph St. Peter's reflection by Daniele Forestiere on 500px

St. Peter’s reflection by Daniele Forestiere on 500px

Photograph Watercolours by Whatshisname  on 500px Watercolours by Whatshisname on 500px

Photograph Atmaniksepa by Josep Sumalla on 500px

Atmaniksepa by Josep Sumalla on 500px

Photograph Blue Honey by Lorenzo Cassina on 500px Blue Honey by Lorenzo Cassina on 500px

Photograph Who?... by Ewa Frye on 500px

Who?… by Ewa Frye on 500px

Photograph Positive Vibes by Josep Sumalla on 500px Positive Vibes by Josep Sumalla on 500px

Photograph My Sky... by Ewa Frye on 500px

My Sky… by Ewa Frye on 500px

Photograph Surreal by Lorenzo Cassina on 500px Surreal by Lorenzo Cassina on 500px

Photograph Huntington Beach Pier at Sunset by Nhut Pham on 500px

Huntington Beach Pier at Sunset by Nhut Pham on 500px

Photograph illusion by Vasilis  Athanasopoulos on 500px illusion by Vasilis Athanasopoulos on 500px

Photograph Dreamworld by Matt Payne on 500px

Dreamworld by Matt Payne on 500px

Photograph Couple by Joanna Lemanska on 500px Couple by Joanna Lemanska on 500px

Photograph Kad?köy Vapuru by Hakan Akkuzu on 500px

Kad?köy Vapuru by Hakan Akkuzu on 500px

Photograph The Biking Dutchman by Roeselien Raimond on 500px The Biking Dutchman by Roeselien Raimond on 500px

Photograph Ride on Mirror by Praveller B.S on 500px

Ride on Mirror by Praveller B.S on 500px

Photograph Captured Clouds by Petter Lidbeck on 500px Captured Clouds by Petter Lidbeck on 500px

Photograph Flipping Lifestyles by Drew Hopper on 500px

Flipping Lifestyles by Drew Hopper on 500px

Photograph En el calor de la noche by Gemma  on 500px En el calor de la noche by Gemma on 500px

Photograph reflection in the water by Ali ilker Elci on 500px

reflection in the water by Ali ilker Elci on 500px

Photograph Back to the HotRod by KAMERAKIND  on 500px Back to the HotRod by KAMERAKIND on 500px

Photograph two ropes by Brian Denton on 500px

two ropes by Brian Denton on 500px

Photograph trio . . . by Brian Denton on 500px trio . . . by Brian Denton on 500px

Photograph 'Cuda by Brian Krouskie on 500px

‘Cuda by Brian Krouskie on 500px

Photograph Hot Air Reflection by Gladner  on 500px Hot Air Reflection by Gladner on 500px

Photograph Reflection by Gavriela Marantidi on 500px

Reflection by Gavriela Marantidi on 500px

Photograph Morning Glory by Samuel Sharpe on 500px Morning Glory by Samuel Sharpe on 500px

Photograph Car Reflections by Simon Cresdee on 500px

Car Reflections by Simon Cresdee on 500px

Photograph GT Sunset by Simon Brown on 500px GT Sunset by Simon Brown on 500px

Here’s some ideas on using reflections:

  • How To Photograph Reflections In Water
  • 5 Reasons Why Bad Weather Days are the Best Times for Photography

The post Reflection Photos to get you Motivated by Darlene Hildebrandt appeared first on Digital Photography School.


Digital Photography School

 
Comments Off on Reflection Photos to get you Motivated

Posted in Photography


How to use Texture to Improve Your Photos

30 Jun

texture in composition

I recently wrote about the importance of texture in my article about converting photos to black and white in Lightroom and my review of MacPhun’s Intensify app. Today I thought it would be interesting to take a closer look at this compositional element, and how becoming more aware of it can help you create stronger images.

Why is texture important? The primary reason is that it helps you create a sense of depth and tactility within your photos.

Let’s look at some practical examples.

Photo with lots of texture

Here’s a photo I took in a Bolivian town.

texture in composition

Look at all the beautiful textures; in the dog’s fur, the stone he is laying on, the concrete step and wooden door behind him. Can you imagine what the dog’s fur is like to touch? Or the stone, concrete or wood? The textures of those objects help you do that, and bring a two-dimensional image to life.

Photos with some texture

Here’s another photo taken in South America.

texture in composition

There are several contrasts that make the photo interesting. One is the difference in brightness between the church and the sky (tonal contrast). The other is the contrast in texture. The stonework has a rough surface and a lot of texture. The sky has none. The contrast between the rough and the smooth adds an extra layer of interest.

Portraiture is another subject where you can exploit the contrast in texture between the relatively smooth surface of someone’s skin, and a highly textured background. The portrait below is an example of that. The lack of texture in the model’s skin contrasts with the textures in his sweater, hair, and the background.

texture in composition

The contrast between rough and smooth is also common in long exposure photography, where photographers use shutter speeds of a minute or longer to blur the motion of the sea, or other body of water. The result is a photo containing both still elements (such as the concrete jetty and the island in the photo below) and moving elements that have recorded as a smooth, even tone, thanks to the long exposure.

texture in composition

Post-processing and texture

One of the benefits of digital photography is that you can use the tools available in programs like Lightroom to emphasize texture. Or in the case of portraits, to de-emphasize it by applying a local adjustment to smooth skin (my article Four Ways to Improve Your Photos With the Clarity Slider in Lightroom shows you how to do that in more detail).

Here’s a quick tip. Think about enhancing texture as a local adjustment rather than a global one. In the example of the dog above I made two Clarity adjustments in Lightroom. The first was a global adjustment made by setting Clarity to +12 in the Basic panel. The second was a local adjustment made by using the Adjustment Brush to select the dog (see below) and setting Clarity to +41. The result is that the textures of the dog’s fur and the background don’t compete.

texture in composition

The red mask shows where the Adjustment brush has been applied locally to only the dog

Practical Exercise

The aim of this article is to get you thinking about texture and how you can use it to make your photos better. Here are a couple of exercises to help train your eye to see texture:

1. Street photography

Take a walking trip around your neighbourhood, looking for subjects with lots of texture. Think of things like doorways, letterboxes or anything made from concrete or stone. They don’t have to be fantastic photos, the aim is to raise your awareness of texture and get you thinking about how you can use it in your photos.

2. Portrait photography

Find a friend or a model to be your subject and find backgrounds with interesting textures. This could be anything from a wall, a doorway, or a large rock. The idea is to play with the contrast between the relative lack of texture (on skin) and the texture of the background.

Once the exercise is complete, the next step is to experiment with emphasizing texture in post-processing. Whether you use Lightroom, Photoshop or a plug-in like Intensify or Silver Efex Pro2, think about how can you use these tools to emphasize texture, or the contrast in texture between skin and a textured background.

Your turn

Now it’s your turn. How do you use textures in your photos? Do you have any tips for our readers, especially when it comes to post-processing? Let us know in the comments.


Mastering Lightroom: Books One, Two and Three

Mastering Lightroom ebook bundle
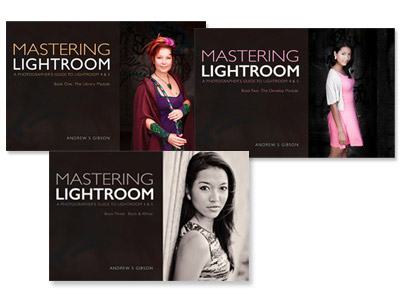
My Mastering Lightroom ebooks are a complete guide to using Lightroom’s Library and Develop modules. Written for Lightroom 4 and 5 books One and Two take you through every panel in both modules and show you how to import and organise your images, use Collections and creatively edit your photos. Book Three shows you how to create stunning black and white images in Lightroom.

The post How to use Texture to Improve Your Photos by Andrew S. Gibson appeared first on Digital Photography School.


Digital Photography School

 
Comments Off on How to use Texture to Improve Your Photos

Posted in Photography


Making a splash: Photos capture colorful liquids frozen in time

28 Jun

Jeremy Floto and Cassandra Warner are the husband-and-wife duo behind Floto+Warner, a New York-based photo studio. Their aptly titled ‘Colourant’ series features Western and Midwestern US landscapes with – literally – a splash of color. Fast shutter speeds freeze the action and give them the appearance of sculptures, suspended in time for only a moment. They answered some questions about the series – see more of their work and find out how it came together. See gallery

related news: Digital Photography Review (dpreview.com)

 
Comments Off on Making a splash: Photos capture colorful liquids frozen in time

Posted in Uncategorized


7 Proven Ways to Come Home with Better Travel Photos

26 Jun

It s all about the light

Your next vacation or around-the-world escapade is the perfect time to brush up on your photography skills.

After all, taking a great photograph is never more important than when you’re seeing people and places you may never see again. Travel opens your eyes to other cultures, and if you prepare before you leave, it can also open the eye of your camera lens to infinite possibilities.

But first things first – let’s make sure you have a basic understanding of photography before you step onto the plane. Here’s a list of seven proven ways to come home with better travel photos.

#1 Take a good look at your gear

You don’t need to spend a million dollars on crazy-expensive gear. However, you do need a camera from this century. Better yet, a camera that was made in the last five years. Technology is changing so rapidly that you’re really going to notice a difference with newer cameras.

Also, don’t be afraid to check out the new lightweight DSLR cameras that are all the rage. You may feel cooler hauling around a huge Nikon D5300, but a more compact model can take great pictures too (plus compact is always better when you’re traveling).

#2 Get intimate with your settings

Get intimate with your settings

You haven’t just been leaving your camera in Auto mode, have you? What fun is that? Now I’m not saying you have to learn how to manually focus before you take-off for say, Fiji, but at least get familiar with these three need-to-know settings (the Exposure Triangle) on your DSLR camera.

#3 Do your research

Dive into Google Images, Flickr, or 500px to look for photos (and photographers) you love. Choose at least three travel photographers and follow their blogs.

Not only will get some great ideas for photographs, you’ll be able to find tips and techniques for getting specific effects you’ve seen in the photos you admire.

#4 Get to know your subject

Get to know your subject

Photographing people is one of the most exciting parts of travel photography. Imagine getting great shots of Buddhist monks in Laos, a tribesman in the African bush, or mountain people in the Himalayas. But you’re not just going to walk up to someone you’ve never spoken to and stick a camera in their face (promise me you won’t do that).

So how are you supposed to approach your subject? The #1 tip is to make friends first. That can be tough in and of itself when there is a language barrier, but it’s not impossible. Read: Practical tips to build your street photography confidence (which also applies when travelling).

#5 Get lost

Get Lost

You’re not going to get great travel photographs taking pictures of the monuments and sites that every other tourist on earth has already photographed. When you travel, get lost! Venture out into villages and unknown areas that no one else goes to. Don’t be afraid to get off the beaten path.

The most exciting photos you’ll take won’t be of the Empire State Building, they’ll be of the ancient bartender in that random dive bar in Astoria, Queens (the one you never would have found if you hadn’t gotten completely lost).

#6 Get close

Repeat after me: “I will not be a lazy photographer.”

Get close

Lazy photographers use lenses instead of legs. I want you to use those legs of yours to walk, run, jump, swim, crouch, bend, and move any way you can to get close to your subject. Why? Because the simple act of getting close to your subject will drastically improve your travel photographs.

Once you’ve followed step #4, don’t be afraid to put your camera as close as possible to your subject, sometimes right in their face even.

Disclaimer: this tip does NOT apply to house fires, political violence, or wildlife safaris.

#7 It’s all about the light

It s all about the light

The other day a student of mine showed me a photograph that was taken in the middle of the day, under the hot Hoi An sun. There were several problems with the shot, but the main reason it looked flat and lifeless was simply because of the time of day it was taken.

I told her what I tell everyone; don’t bother getting out your camera between the hours of 8 a.m. and 4 p.m. The light is too harsh. Get up before the sun and/or wait until the sun is about to set, and you’ll enjoy amazing light that will work wonders for your photographs.

That same student sent me a photo the following day, this time taken just before sunset. It was 10x better. Had she suddenly become a better photographer in less than 24 hours? Yes. But only because she learned to tell time.

Follow these seven tips and I have no doubt you’ll be taking amazing travel photographs on your next trip. Have any additional tips you’d like to share? Please do so in the comments below.

Safe travels!

The post 7 Proven Ways to Come Home with Better Travel Photos by Etienne Bossot appeared first on Digital Photography School.


Digital Photography School

 
Comments Off on 7 Proven Ways to Come Home with Better Travel Photos

Posted in Photography