RSS
 

Posts Tagged ‘Photos’

5 Tips for Creating Creepy Halloween Photos

30 Oct

It’s the most wonderful time of the year! For some people that is Christmas, but for other’s it means that it’s time for the goblins and ghosts and all of the scary creatures to come out of hiding and find their way into our everyday lives. Theme parks have Halloween themed nights, scary movies are on television, haunted house tours start having people waiting in line and of course, it’s time for photographers to break out of their everyday subjects and come up with something dark and sinister to shoot.

Here are some tips to help you when you are  preparing to shoot some creepy Halloween photos.

CreatingaHalloweenPhotoshoot_DigitalPhotographySchool_LoriPeterson

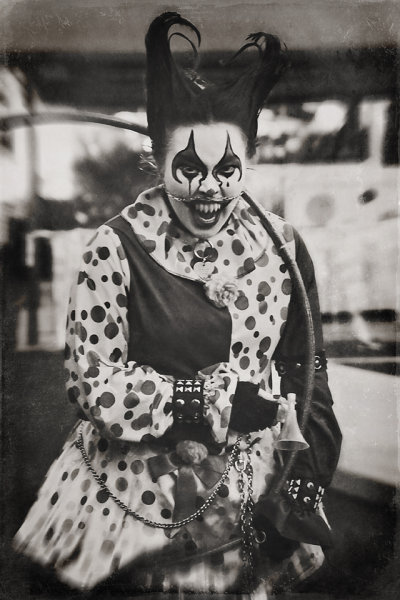
The fear of clowns is called Coulrophobia.

#1  Pick a theme

When you choose your theme make sure it is one that you know that you can do without scaring yourself. If you have a fear of something, picking that as your theme may not be the best idea. Just because the theme is for Halloween does not mean that you need to bring zombies or blood into the shoot if you do not want to. Your theme could encompass some of the phobias that people have, including clowns, spiders, cemeteries, dolls, or death.

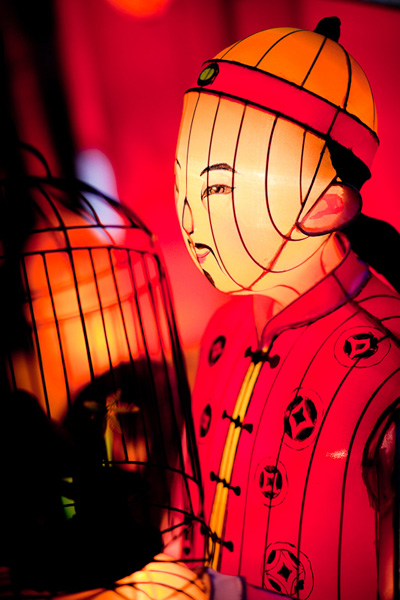
You can make your theme as twisted and as dark as you feel comfortable doing. Remember that there are more themes out there than just clowns, ghosts, and witches. You might even use the photoshoot as a way to get over the things that scare you. Your fears of clowns might be a little more alleviated if you are helping a clown with their costume and makeup and then watching them use their iPhone during breaks.

#2  Scout your location

CreatingaHalloweenPhotoshoot_DigitalPhotographySchool_LoriPeterson_DiadelosMuertos

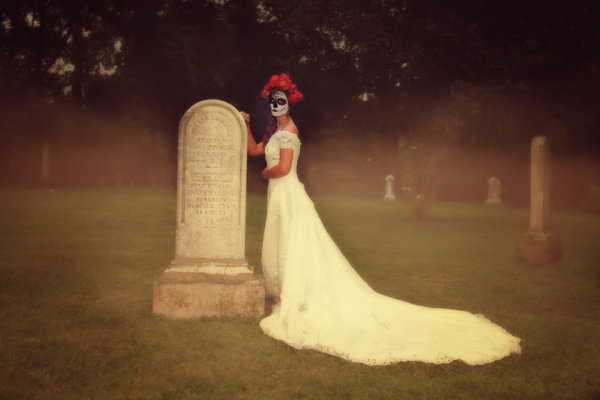
The fear of the dead is called Necrophobia and the fear of bones is Cartilogenophobia.

Find a spot that is in the woods (if you can) so that you can shoot without being disturbed. You can also do a photo-shoot in a cemetery, but remember that most cemeteries close at dusk and please be respectful of the gravesites. While you may not know the people, that is the final resting place of someone’s loved one. Don’t climb on the headstones as some are very fragile. Wherever you decide to shoot make sure you leave the place as you found it. If the perfect location is on private property, ask for permission to use it. Stay off train tracks (that’s dangerous and illegal in most states). If shooting in a cemetery, be mindful that on the day you decide to shoot that there might be people there for a funeral. Move away from them and be respectful of their grief and what they are going through that day. If you are shooting in a park or in the woods and are approached by people, explain what you are doing. Some people will ask for your business card so they can look for the images online.

# 3 Will you need costumes or props?

You need to figure out (based on your theme) if you will need to find costumes that are already made or create costumes yourself.  The best costumes are usually the ones you make. Take elements of your idea and figure out what parts of it you can create yourself. Then the costume is customized and won’t resemble anyone else’s work. You can also add props to really create your look and pull it together.

Sometimes your models for your shoots will have pieces that will work and you can add jewelry or scary elements. You can find fake blood or for some photo-shoots you can even call your local butcher shop and they may be willing to help you out with some real props. They won’t be as surprised as you might think if you tell them you are a photographer and you need a pig heart for a photoshoot. You might be the one surprised when they ask “Do you want the heart with the valves attached or not?”.

CreatingaHalloweenPhotoshoot_DigitalPhotographySchool_LoriPeterson_EvilQueen

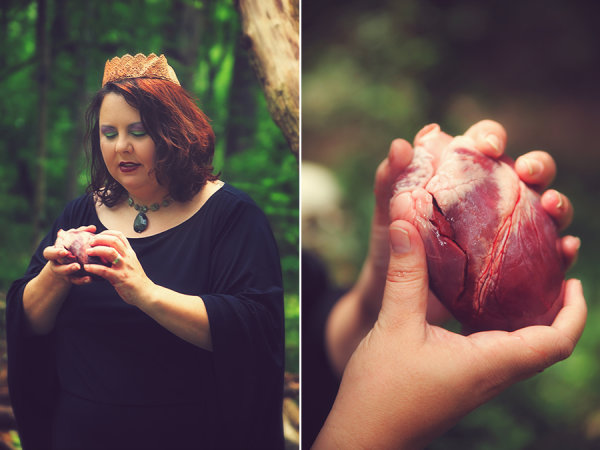
The fear of blood is called Hemaphobia.

#4  Find Your Models

Most photographers have at least a handful of models that they call for photoshoots. Ask your models if they are interested in doing something different from their regular sessions. If you are using children, make sure that their parents understand how the shoot might be scary. When they arrive talk to them about what you are doing and make it fun for them. They are less likely to be frightened once they see any masks or props before they are used. Give your models breaks if they are wearing masks. They can get hot no matter what time of year it is and some vintage masks have a very rubbery smell to them. Let children handle the props being used before you even pick up your camera so that they are familiar with them. You can even show them how you want them to be held and what you are wanting to get from the images. Some children actually enjoy scary stuff and will be more than happy to jump in. Some might need a little more guidance and support from you, so make sure you are paying attention to them.

aubrey bw fb

Lori_Peterson_Unconditional

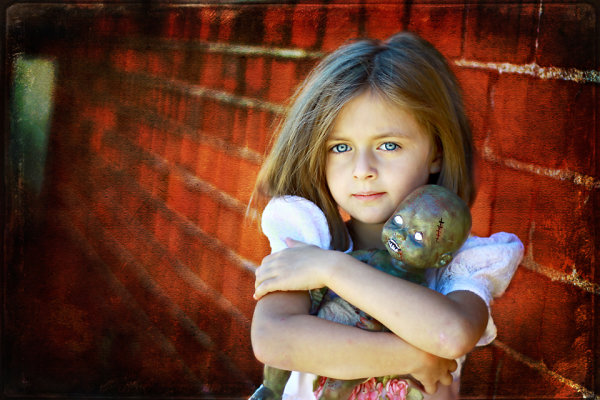
The fear of dolls is called Pediophobia.

#5 Think Outside of the Box

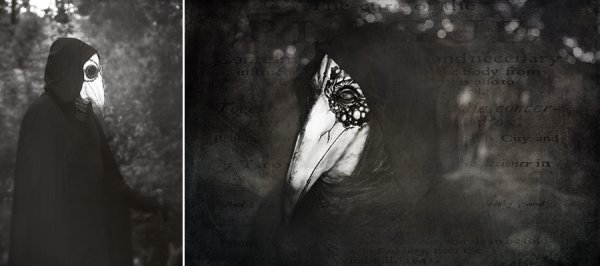
Witches, ghosts and other Halloween ideas might not be your cup of tea because they are always associated with Halloween. Start thinking of things that fall outside of the typical Halloween realm. In the Halloween movies you were scared of Michael Myers because you could not see his face (and for other reasons too, but you had no idea what lurked under that Shatner mask.). Find some scary masks at a costume shop or online. Look for a gas mask, Plague Doctor, or clown mask. You can even use your own imagination and modify them to make them even scarier. When you can’t tell the identity of the person under the mask there is mystery and a little fear too. Don’t be afraid to create your own props or take old dolls or masks and modify them for your photoshoot.

CreatingaHalloweenPhotoshoot_DigitalPhotographySchool_LoriPeterson_ThePlagueDoctor
The wonderful thing about doing these types of shoots is that you don’t just have to do them close to Halloween. You can work on your ideas at any point through the year and accumulate the props, masks, costumes, or whatever you need and build up to the shoot. You can scout for your location to figure out where you want to do your shoot and what time of year. Exploring your creative side with Halloween photo shoots can bring a new insight into the work you do and you can have a lot of fun with these types of shoots.

Use these tips to participate in the weekly photography challenge: Spooky images for Halloween

The post 5 Tips for Creating Creepy Halloween Photos by Lori Peterson appeared first on Digital Photography School.


Digital Photography School

 
Comments Off on 5 Tips for Creating Creepy Halloween Photos

Posted in Photography


Fall Foliage Photography Guide for Taking Better Autumn Photos

29 Oct

The world is filled with Red and Gold…Get out there and Shoot!!! So, as many of you know, I have never actually lived in a place with true fall. I’m from Los Angeles, lived in Hawaii, both of which basically are perfect always, did an eight year stint in North Dakota, where it’s frigid for ten months, then there’s a Continue Reading

The post Fall Foliage Photography Guide for Taking Better Autumn Photos appeared first on Photodoto.


Photodoto

 
Comments Off on Fall Foliage Photography Guide for Taking Better Autumn Photos

Posted in Photography


3 Factors to Think About When Composing Your Photos

28 Oct

The way you frame a photo is an important part of the composition. There are several key decisions to make when composing your photos:

  1. What to exclude from the frame
  2. What to include in the frame
  3. Where to place the main subject

The best way to learn about this is to look at several photos and explain how these principles apply. Let’s look at how they all apply:

Natural light portrait – what to exclude

Framing and composition

I took this photo of a local singer in Wellington’s Botanical Gardens. I knew what I wanted to include in the composition: the singer herself (she is the main subject of the photo and should take front stage in the composition) plus a hint of the background.

I achieved this by using a short telephoto lens (85mm on a full-frame camera). Telephotos are lenses of exclusion – their narrow field-of-view means they don’t include as much of the background as wide-angle lenses do.

I was also able to blur the background by using an aperture of f/2.8. This is another form of exclusion. While the leafy trees in the background are still recognizable, they don’t pull the eye as much they would if they were in sharp focus. This helps direct attention to the singer.

I placed her centrally in the frame. Central compositions work well when the subject is quite prominent in the frame. There is only focal point, the person in the portrait, so she doesn’t have to be on a third (following the Rule of Thirds).

Of course, this is subjective, and I know some people will disagree, so I’m going to provide a second version of this photo, cropped so the singer is on a third. It’s an important point because in an ideal world we will frame our photos perfectly when we take them, there are always times when a crop in post-production may improve the composition. Here are the two versions side-by-side.

Framing and composition

Which do you prefer? For me, I feel the original version has a better balance between the singer and the background.

The cropped version includes less of the background, however, the singer is larger in the frame, which will make it more attractive to some people.

There is no right or wrong here, like many aspects of composition it is completely subjective. But isn’t it interesting how a relatively small change in composition (a different crop) can make such a big difference to the same photo?

Beach portrait – what to include

Framing and composition

In the first example I minimized the amount of background in the photo, but in this one I included a lot more. The environment is an important part of the portrait. It was a cold, cloudy, wintery afternoon. I included the houses and hill in the background to emphasize the bleakness of the weather and the location.

The idea is for the viewer’s eye is to move between the girl in the foreground (the main subject of the portrait) to the houses and the hill in the background, taking in the detail along the way.

To achieve this I used a wide-angle lens (24mm on a full-frame camera). I was standing quite close to my model, yet this lens still included a large amount of the background. I used an aperture of f/2.8 to make the background slightly out of focus.

The placement of the model is an important part of the composition. If you have used a wide-angle lens you will know that a slight change in viewpoint makes a dramatic different to the composition. I made sure I held the camera high enough so that the model’s head was lower than the houses. If I crop the photo you can see that the only thing behind the model is the beach.

Framing and composition

I took care to prevent the model and the houses overlapping because they are separate elements of the photo. The composition is stronger if they are separated.

Chinese Lantern Festival – where to place the subject

I took this photo at a Chinese Lantern Festival in Auckland. There were hundreds of elaborate Chinese lanterns on display, and they made wonderful subjects.

Framing and composition

I like to take the simple approach to photography and for this shoot I used just one camera and one lens, an 85mm short telephoto. My aim was to focus on the subject and practice using wide apertures to throw the lights in the background out of focus. This is one of my favourite photos from the evening.

I framed the image in such a way that the face of the lantern man was clearly the main focal point of the image and the lanterns in the background were out of focus. The question was just how much of the lantern should I include? The full lantern shows a Chinese man holding a bird cage. Including too much may weaken the composition. Getting too close risks cropping too tightly.

The solution, which is easy to apply with a static subject like this, is to take a variety of photos. Take some time and explore it from different angles, moving closer or farther away to change the subject’s size in the frame. Then you have the luxury of deciding which composition works best when you get back home.

The more photos you take, the more possibilities you see. It’s as if the act of taking photos warms up the part of your mind that works visually. It helps you see different and more effective ways of composing the image. It is normal to find that the last images you took are some of the best in the sequence. You end up with stronger photos than if you had taken just one or two then moved on.

Here are some of the other photos I took of the same lantern as I worked the subject.

Framing and composition

Your turn

Now it’s your turn. How do you use framing in your photos, and decide what to include or exclude from the frame? Let us know in the comments and feel free to add photos to illustrate your point.


Mastering Photography

Composition and line

My latest ebook, Mastering Photography: A Beginner’s Guide to Using Digital Cameras introduces you to digital photography and helps you make the most out of your digital cameras. It covers concepts such as lighting and composition as well as the camera settings you need to master to take photos like the ones in this article.

The post 3 Factors to Think About When Composing Your Photos by Andrew S. Gibson appeared first on Digital Photography School.


Digital Photography School

 
Comments Off on 3 Factors to Think About When Composing Your Photos

Posted in Photography


Tips, Tricks and Treats for Your Halloween Photos

15 Oct

This week, when my fearless leader, Photodoto Head Honcho Nancy Young, asked me to write a story on shooting Halloween, I must admit that I kind of had a freak out attack. I’m just not a Halloween person. I mean, bobbing for apples? Totally unsanitary. Haunted houses? They’re SCARY. But of course I take pictures of my children in their Continue Reading

The post Tips, Tricks and Treats for Your Halloween Photos appeared first on Photodoto.


Photodoto

 
Comments Off on Tips, Tricks and Treats for Your Halloween Photos

Posted in Photography


A Common Misconception About Street Photography – Just Take Photos of People Walking

15 Oct
Dior, 5th Avenue.

Dior, 5th Avenue, NYC

A common misconception about street photography is that it is that it is about capturing any person that looks slightly interesting walking down the street in front of an interesting background. It’s actually about trying to capture a story, idea, or emotion through an image. While this largely can take place on the street, it can be captured anywhere.

What comes to mind when you see the term street photography? Is it a person walking down the street?

Whether or not you you have practiced street photography, I am assuming that you have come across this idea or seen images like this – a person with a blank look just walking down the street. Maybe they have some interesting clothes, beautiful hair, or the background looks interesting. But nothing is happening. There is no idea or emotion present.

Go beyond shots of people walking

Good street photography, and good photography in general, goes beyond that. Street photography is not just about capturing images of people. It is about capturing candid and natural photographs about life. There has to be something there.

My favorite street photographs make me feel like there’s something behind the curtain. Of course there needs to be something interesting and beautiful on the surface. There has to be a mix of both content and form, but behind the curtain there is some sort of idea or feeling, something that makes you think.

I can’t tell you how many boring shots I have of a person with a blank look walking down the street. We all take these kinds of images. There is a lot of spontaneity and hand-eye coordination in this type of photography and most of the time you see the potential for the shot, react to take it, but there’s just nothing there. That is normal.

Go for the expression

SoHo

The above image has a lot going for it. The main subject is up close and sharp, the angle is dynamic, the woman looks interesting and fashionable, the lighting is great, and the background is colorful and interesting. However, this image lacks for me what the top image has. There is no expression or emotion. It’s tough for me to feel anything under the surface of the image. Because of this I consider this image to be good but not great.

What we are looking for however, is something to be there. This could be a strong facial expression whivh is one of the first things that I look for when I’m out there doing street photography, particularly the look in someone’s eyes. Fashion, the background, the light, are all important elements of a strong photograph and you should pay attention to them, but in my opinion, a good expression can trump them all. The photograph at the top of this article is a person walking down the street, but there is so much more to the photo than that, because of her facial expression.

Watch for gestures

Gesture, SoHo

An example of gesture, SoHo. NYC

Gesture is also very important. I prefer to think of gesture as an expression with the body. Pay attention to how people carry themselves and what hints that might give us about them. A facial expression could be considered a gesture as well, but look at the hand in the top image. The way the hand is position with the sharp nails makes it look like a claw. When you mix that with the facial expression, this becomes a very frightening image, at least to me. Or take a look at the gesture of the legs above with the weight all on one leg and the other turned gracefully. You can get a sense of this person just from that body position.

Also, a street photograph does not have to have people in it. This goes beyond an urban landscape. Search for images that have the same effect as a good street photograph with a person. Search for an image that give us hints about life or makes us think or feel something, without people in the shot.

Gowanus

Gowanus, Brooklyn NYC

The more you get involved with this type of photography, the more you will notice themes and consistency in your work and hints beneath the surface of your photographs. Focus on this when editing and group similar photographs together. This all takes time to develop and the more you think about your photography in this way, the more it will improve.

What do you focus on when you do street photography? Do you have any other tips to share? Please do in the comments below.

The post A Common Misconception About Street Photography – Just Take Photos of People Walking by James Maher appeared first on Digital Photography School.


Digital Photography School

 
Comments Off on A Common Misconception About Street Photography – Just Take Photos of People Walking

Posted in Photography


Taking out the Garbage – 7 Tips for Choosing Your Best Photos Fast

07 Oct

style2

One of the most time-consuming and difficult things in photography is going through all the unedited images you took and choosing your best photos, the ones to keep, and which images to pass by. When I first started out as a photographer, I’d get hung up on this every time. I’d spend way too much time agonizing over every photo, and worrying so much about throwing away a good one. If this sounds like you, then read on, maybe I can save you a lot of time and headaches with a few simple tips!

#1 Don’t take so many in the first place

When you take hundreds of images at a time, the idea of looking through every photo and choosing the best is daunting! If you take each photo with intent, and wait for the right moments before pushing the shutter, you won’t have so many throw-aways to wade through. Be careful to notice composition as you shoot, and focus carefully. Time is money (and if not money, time is sanity), so don’t waste your time with so many extra images to go through.

#2 Choose images that reflect your style

It’s actually quite surprising how much the images you choose reflect who you are as a photographer. Two different photographers could take the same set of images and they’d choose completely different images to keep or toss. This is actually a great thing. It’s what makes you stand out from all the rest, and it lets your heart and soul shine through. I might keep images that others wouldn’t, and toss some that they’d keep, but many people have told me that they can always tell a Melinda Smith, and that is one of the greatest compliments anyone could give me.

#3 Watch for distractions

style

You may notice something in the photo that you know you’ll have to fix in post-processing. You have to decide if this is a deal-breaker, or if it’s worth the fix. In the image above, there was a garden hose (I should’ve moved it before we took the photo, but it was someone else’s home, and I didn’t know how much I should disturb). I decided that I loved the style of the image (my style) enough that it was worth fixing the garden hose. Other times I might decide that I have enough images that don’t require extra work, and it’s not worth the hassle. It’s your call, but try not to keep too many that require extra time.

 #4 Blurry photos go

blurry

If any photos have softness, or blurriness, they’re automatically out. What if the client wanted to print that particular image on a huge canvas? I don’t want to be the one to have to tell them that yes, the expressions are adorable, but it’s going to look horrible when it’s blown up big. It’s so hard sometimes when everything else is great, but if you missed it, you missed it. You can’t fix blurry. You might have to pick a second choice photo, but do you want to be the photographer that gives out blurry photos? There are rare exceptions to this; sometimes a photographer will shoot out of focus on purpose, or a particular photo will work as an abstract blurry image, but be very picky. This rule can also apply to any photos that are way off with exposure. Just let them go!

#5 Eliminate similar photos

same

You may have two (or more) photos that are very similar. They might both be cute, but one must go. You will lose a lot of impact with your collections of photos if many of them look the same. I know that it can be hard to give up a photo that you like, but nobody needs five photos of nearly the same look and pose. Decide which one speaks to your style better, check sharpness, or choose the one that shows the subject’s personality a little better. In the above set I chose the photo on the right. They are almost the same photo, but the one on the right was slightly more enthusiastic, and this little girl was FULL of enthusiasm! I had to keep it.

#6 Don’t miss the hidden gems

potential

You might have a photo that you know could be really great with just a little bit of work. Maybe a head swap, or a little bit of magical editing will make it into a photo you absolutely love. Sometimes photos that you might pass by initially may end up being your favorite. Watch for those photos that might be your favorites with a little wave of your editing wand.

#7 Be ruthless, be quick

ruthless

I know, this sounds like a contradiction of the last tip, but unless you want to be agonizing over every photo for hours, you have to move quickly. You have to be somewhat ruthless as you go through your photos. You can’t edit every single one, and sometimes you just have to make quick judgment calls and move on. In the photos above, the one on the left is cute, but I decided that I liked the connection in the one in the middle the best, so that’s the one that I kept. If I’m having a really hard time giving photos up, I will give them star ratings as I go through them; five stars for definite keepers and four stars for maybes. I usually end up with more five stars than I need, so the four stars automatically go. Sometimes it’s easier to let them go after you’ve given them a fair trial.

What are some strategies that you use to choose which photos to keep and which to toss? I’d love to hear your ideas in the comments:

The post Taking out the Garbage – 7 Tips for Choosing Your Best Photos Fast by Melinda Smith appeared first on Digital Photography School.


Digital Photography School

 
Comments Off on Taking out the Garbage – 7 Tips for Choosing Your Best Photos Fast

Posted in Photography


Western Digital’s My Book Thunderbolt Duo, An Awesome Way to More Securely Store Your Photos

06 Oct

Western Digital's My Book Thunderbolt Duo, An Awesome Way to More Securely Store Your Photos

For the past month or so I’ve been testing out one of the 8TB Western Digital My Book Thunderbolt Duos and I have to say I dig it. Before trying this out, my entire storage setup was built around Drobos. I’ve got 2 Drobo 5Ds with 15TB each in them and a Drobo Mini.

I was interested to see what the performance would be like with Western Digital’s large storage solution and I have to say I’m a fan.

What I like about it:

1. It’s quiet. So quiet. My Drobos are not bad, but the Western Digital My Book Thunderbolt Duo is even quieter. You don’t even know it’s on or there, except for the tiny little pinhole light that is on in the front, and of course you see it on your Mac. For some reason one of my Drobo 5Ds feels like it almost goes to sleep sometimes. When I try to access it in the finder I have to wait a few seconds and I hear it powering up a bit. This doesn’t happen with the My Book Thunderbolt Duo.

2. Thunderbolt is sooooo fast. Whoever invented Thunderbolt should get a Nobel prize for speed. I can’t believe how quickly I can copy hundreds of gigabytes of photos around.

3. The Duo is a bit cheaper than the Drobo for those who may be on more of a budget and need less storage. To get 4TB of replicated storage on a Drobo 5D I’d have to buy about 6TB worth of drives. This would cost me about $ 800. You can buy an 8TB My Book Thunderbolt Duo for about $ 650 or so. You can mirror the drives so that you get two copies of everything or about 4TB of replicated storage. Because the Western Digital My Book Thunderbolt Duo doesn’t rely on a proprietary format for replication, if one drive fails, you would always have a perfect backup copy on the other. I haven’t had a problem with Drobo’s proprietary format before, but it’s something that some folks have criticized in the past.

4. Primary data is automatically backed up. I can’t use a backup strategy that requires my manual contribution. With both the Drobos and the My Book Thunderbolt Duo your primary versions of photos are more secure.

5. The Western Digital My Book Thunderbolt Duo is smaller than the Drobo 5D and much lighter.

Setting up the My Book Thunderbolt Duo was easy. It’s just plug and play. Similar to my Drobos.

I know a lot of people will probably comment on this post about how they are doing things even cheaper by building their own solution with their own replicated in home RAID servers, etc. That’s just great, but I’m not a very technical guy when it comes to computer hardware and I’d wayyyyy rather pay a little bit more and have a Thunderbolt solution that is just plug and play, without me having to do any work, or do any coding, or manually buying and installing drives into a server body and all that. Different strokes for different folks though and each person should do whatever works best for them.

There is also a 4TB and 6TB version of the My Book Thunderbolt Duo. You can learn more about them including all of the technical specs on Western Digital’s site here.

Mmmmm... 8TB of @westerndigital storage.  Looking forward to trying this puppy out!

A HUGE disclaimer on any device like the Drobo or My Book Thunderbolt Duo. These solutions may protect you against hard drive failure, but they will not protect you against fire, theft, etc. For that reason you may also want to incorporate both offsite and/or cloud storage to whatever your backup strategy may be. I see replicated hard drives really only as a first line of defense. In my own case I also purchased a large fireproof gun safe and when I’m out of the house or on a trip or something I usually lock my drives up in there. I also have off site backup storage for my images and I’m actually working on a plan this year to begin moving my offsite storage into a bank security deposit vault.

The book next to the My Book Thunderbolt Duo by the way to compare size is the excellent expanded edition version of Robert Frank’s The Americans which was reissued a few years back and is *highly* recommended. One of the best photography books ever published. It’s one I go back to and revisit over and over again.


Thomas Hawk Digital Connection

 
Comments Off on Western Digital’s My Book Thunderbolt Duo, An Awesome Way to More Securely Store Your Photos

Posted in Photography


How to Recover Photos After a Data Loss

05 Oct
Frank Grießhammer

By Frank Grießhammer

One of the worst things that can happen to you as a photographer is data loss, but there are ways to resolve it. This guide will talk you through how to recovery those all-important photos easily and quickly.

Whether it’s a quick snap of your pet or a scenic landscape shot, chances are most of the photos you take are precious and important to you. Photos capture memories and moments; losing these would be disastrous. Sadly, photo loss is not an uncommon event. In fact, either it’s already happened to you in the past or it likely will in the future.

Losing your photos can occur for a variety of reasons, one of the most common being simply human error. It could be something simple like accidentally deleting the wrong file or pressing the wrong button. However, as wonderful as technology is, it too is prone to failure. There are many stories of people unloading their memory cards from their cameras, putting it on their computer and then finding their files can’t be opened or are missing altogether.

If you’ve discovered that you’re a victim of data loss then one of the most important steps to take is to stop using the card immediately, and remove it from your camera, just to make sure that no activity takes place on it. It’s crucial that no further data is written to the card.

Jorge Quinteros

By Jorge Quinteros

When a photo is deleted, the data on the card isn’t immediately purged. There are two main types of data on an SD card: information about the files on the card and the data for the files themselves. When you delete a file, it’s that information about the files that is removed. The data for the files remains on the card until the space is needed for another file. As such, a new photo on the card could be assigned to the place where a deleted photo once was, wiping it out permanently.

It’s now time to try and get your data back, so mount your SD card to your computer. Depending on the condition of the card (e.g. if it is corrupted or uses an unrecognizable file system), your system may automatically detect that there’s a fault with it. You might perhaps be suggested to use the manufacturer’s software to try and resolve the problem. Alternatively, a pop-up box could encourage you to format the card. Do not do any of this.

Bridget AMES

By Bridget AMES

Formatting the card is especially dangerous and will lower your chances of successful data recovery to sinking level. It’s a last resort tactic. Your computer means well by suggesting a card format. It’s essentially saying “Hey, I can’t seem to locate any data, shall we wipe everything and start afresh?” However, just because your operating system can’t find the data it doesn’t mean it isn’t there, lurking under the surface.

DO: stop using the card literally the moment you realize there’s a problem; remember to breathe and stay calm!

DONT’T: browse the photos on your camera, take ‘just one more’ snap, or format the card.

The next stage is to download a program that’s going to help you get your data back. For the purposes of this tutorial we’ll be using R-Undelete. There are other programs available, but this one is entirely free for home users and works really well. The only limitation is that it only works for FAT formatted SD cards—fortunately, practically all camera SD cards are FAT formatted. There are also some professional data recovery companies who will charge you to recover data, but frankly, in this circumstance, using something like R-Undelete will do the same job for none of the cost.

Step One

The first screen you’ll be presented with a list of all the drives mounted to your computer. All you need to do is place a tick in the checkbox next to your SD card and click ‘Next’.

Step1JPG

As you can see, the example image above shows an internal drive, a DVD drive and an SD card. The SD card being used is called ‘Generic Storage Device’, but yours might have a more unique name. Refer to this or match up the size of your card to the ones listed (1.87 GB in the example).

Step Two

This step is a simple one. The program will automatically select a detailed scan for lost files, which is precisely what you want. You can ask for the program to only search for specific types of files (like videos or pictures) by clicking ‘Known File Types…’, but it’s better to leave it on the default setting to scan everything.

Step2JPG

The scan information is going to be saved to Documents by default, but feel free to change that file path to whatever you wish by checking the box alongside. Remember that you must not save anything to the card that you’re recovering from, so it’s easiest to keep things on your internal drive.

When you’re ready, click ‘Next’ and the scan will begin.

Step Three

Step3JPG

The scan will then begin. This screen might look a bit scary at first, but there’s no need to worry. It’s just a visual representation of the type of data that is being scanned. Just wait for the scan to finish (it’ll be quick, but will vary depending on the size of your card) and click ‘Next’ when that option is available.

Step Four

You’ll be presented with a list of all the data that the program has found on the card. On the left are the folders, which show the contents on the right when they are clicked.

Step4JPG

The great thing is that you can sort the results by filters such as the file extension, the time the data was created, or when it was accessed. If you’re trying to hunt down specific files, then there’s also an advanced search tool where you can input variables to search for, like the size of the file or when it was last modified.

One symptom of data loss is that the original file name is often lost, so don’t worry if you don’t recognize any of the file names. If you’re not sure where the data you seek is, go ahead and recover everything the program has found – you can recover as much or as little data as you want without issue.

Once you’ve got the data you want to be recovered selected, click ‘Next’.

Step Five

Nearly there! First, select the folder where you want all your recovered data to go. Handily, the program reminds you not to choose anywhere on your SD card – but of course you know that by now!

Step5JPG

There are also some advanced options available. The example above asks the program to try and recover the original folder structures, bear in mind however, this isn’t always possible. Providing you selected all the required files in step four, this should be the only option you might want to select.

Are you ready to get your pictures back? Click ‘Recover’ and the program will begin to work its magic. The time it takes will depend on how much data you’ve asked to be recovered, but the process is relatively quick.

Success!

R-Undelete successfully recovered every image that I asked it to and hopefully it performed the same way for you.

Try and remain calm throughout the whole process. Understandably, that’s probably easier said than done, but data recovery is entirely possible and if you follow the advice given then it should hopefully be pretty effective.

You may aware of how important it is to back up your files, but don’t actually practice it. If possible, ensure your photos are being consistently backed up to another location. Whether you’re just transferring them to your computer at the end of the day, or sending them to cloud storage services like Dropbox or OneDrive, having multiple copies of your photos will mean that it’s less of a problem if data loss does occur.

Best of luck and enjoy those recovered files!

Editor’s note: please be aware the software mentioned only works on a PC. Just do a google search for: photo recovery Mac free and you’ll find a whole bunch that work similarly to the one mentioned in this article.

The post How to Recover Photos After a Data Loss by Joe Keeley appeared first on Digital Photography School.


Digital Photography School

 
Comments Off on How to Recover Photos After a Data Loss

Posted in Photography


A Collection of Stunning Photos of Birds

03 Oct

Birds are a tricky subject to photograph. They move to fast and erratically, getting sharp images of them in flight is a challenge. But the large birds so majestic looking, and the tiny ones so delicate even shots of them in a flock or sitting still can be great.

So let’s have a look at some photographers that are doing it right, and some stunning photos of birds in this week’s image collection.

The Birds

Photograph HELP !! by Henrik Nilsson on 500px

HELP !! by Henrik Nilsson on 500px

Photograph Look at me! by Marco Redaelli on 500px

Look at me! by Marco Redaelli on 500px

Photograph Flying Kiss 14 by Marco Redaelli on 500px

Flying Kiss 14 by Marco Redaelli on 500px

Photograph Phantom of the Opera by Max Rinaldi on 500px

Phantom of the Opera by Max Rinaldi on 500px

Photograph Sunrise Journey by Mostafa Ammar on 500px

Sunrise Journey by Mostafa Ammar on 500px

Photograph Taiwan blue magpie flying by FuYi Chen on 500px

Taiwan blue magpie flying by FuYi Chen on 500px

Photograph Carry Out by NHLinh on 500px

Carry Out by NHLinh on 500px

Photograph To The Moon by cherylorraine smith on 500px

To The Moon by cherylorraine smith on 500px

Photograph Eyes on You.. by Phoo (mallardg500) Chan on 500px

Eyes on You.. by Phoo (mallardg500) Chan on 500px

Photograph 73A2325 Follow The Leader by David Orias on 500px

73A2325 Follow The Leader by David Orias on 500px

Photograph Dove Love by Jon Rista on 500px

Dove Love by Jon Rista on 500px

Photograph Bath by Michaela Smidova on 500px

Bath by Michaela Smidova on 500px

Photograph Bathing Blackbird by Csilla Zelko on 500px

Bathing Blackbird by Csilla Zelko on 500px

Photograph Refreshment by Geoff Powell on 500px

Refreshment by Geoff Powell on 500px

Photograph Cooling down by Ronald Kamphuis on 500px

Cooling down by Ronald Kamphuis on 500px

Photograph An angry little bird by Jan M. on 500px

An angry little bird by Jan M. on 500px

Photograph Portrait by Ben Canavaggio on 500px

Portrait by Ben Canavaggio on 500px

Photograph Wrong way by John Purchase on 500px

Wrong way by John Purchase on 500px

Photograph tree and birds by ahmet  harmanc? on 500px

tree and birds by ahmet harmanc? on 500px

Photograph butter up >.< by Matcenbox  on 500px

butter up >.< by Matcenbox on 500px

Photograph Bird :) by Alexander Lazarov on 500px

Bird :) by Alexander Lazarov on 500px

Photograph siblings! by Itamar Campos on 500px

siblings! by Itamar Campos on 500px

Photograph Discussing!  by Itamar Campos on 500px

Discussing! by Itamar Campos on 500px

Photograph barn owl by Detlef Knapp on 500px

barn owl by Detlef Knapp on 500px

Photograph Mirror. by Geir Magne  Sætre on 500px

Mirror. by Geir Magne Sætre on 500px

Photograph Kussharo Swans 1 by Jon Cornforth ? Cornforth Images on 500px

Kussharo Swans 1 by Jon Cornforth ? Cornforth Images on 500px

Photograph Me! Me! by Sue Hsu on 500px

Me! Me! by Sue Hsu on 500px

Photograph We're Going On An Adventure by Justin Lo on 500px

We're Going On An Adventure by Justin Lo on 500px

Photograph oo00o by Prachit Punyapor on 500px

oo00o by Prachit Punyapor on 500px

Photograph Feeding Time by Chris Lue Shing on 500px

Feeding Time by Chris Lue Shing on 500px

Photograph Mom! Timmy won't move over! by Jim Cumming on 500px

Mom! Timmy won't move over! by Jim Cumming on 500px

Photograph I believe i can fly! by Remco van Daalen on 500px

I believe i can fly! by Remco van Daalen on 500px

Photograph Parents Love by Anneliese & Claus Possberg on 500px

Parents Love by Anneliese & Claus Possberg on 500px

Photograph Rockhopper Showering by Will Burrard-Lucas on 500px

Rockhopper Showering by Will Burrard-Lucas on 500px

Photograph Dippy on Compton Bay by Jeremy Cangialosi on 500px

Dippy on Compton Bay by Jeremy Cangialosi on 500px

Photograph Is this pose fine?? by Samrat  Mukhopadhyay on 500px

Is this pose fine?? by Samrat Mukhopadhyay on 500px

Photograph 3 Part Harmony by Ben Page on 500px

3 Part Harmony by Ben Page on 500px

Photograph Puffin with Sandeels by Ian Schofield on 500px

Puffin with Sandeels by Ian Schofield on 500px

Photograph Harmony by Photosequence  on 500px

Harmony by Photosequence on 500px

Photograph Left outside by Gilad Hazan on 500px

Left outside by Gilad Hazan on 500px

Okay so that ended up being a lot of photos. I like birds, what can I say?!

The post A Collection of Stunning Photos of Birds by Darlene Hildebrandt appeared first on Digital Photography School.


Digital Photography School

 
Comments Off on A Collection of Stunning Photos of Birds

Posted in Photography


7 Tips to Help Improve Your Seascape Photos by Controlling the Waves

18 Sep

When photographing outdoors, you generally take the world as you find it, and you have very little control over the elements. You cannot control the weather. The terrain is a given. You certainly cannot control the skies or the clouds.

But when photographing seascapes there is one thing you can control, and that is the waves. At least, you can control the appearance of the waves. This is a fundamental difference between landscapes and seascapes.

Picture1 Pier

In landscapes you have generally static ground and foreground elements, while in seascapes you are dealing with a fluid substance that is in constant motion. If you just treat a seascape as a landscape, you will get an ordinary photo, but with some attention to the waves you can get extraordinary pictures.

You can actually control the appearance of the waves in order to add just the right mood and interesting effects to your photos. It is actually very simple to do; it’s all about controlling your shutter speed. In general, the slower the shutter speed, the more calm and serene the water will appear, while a very fast shutter speed implies power and action.

In this article, I will walk you through some shutter speed ranges that you might try in your own seascape photography next time you are at the coast. So here are some tips to help you take better seascape photos:

#1 Minimal Gear Needed

To photograph moving water successfully at various speeds, you will not need much in the way of extra gear. Other than a camera, a tripod, and perhaps a remote shutter release, the only necessity is a neutral density filter.

It is best to have a few different strengths of neutral density filters. A 10-stop filter is a must, and from there I recommend adding a 3-stop and a 6-stop filter. In a pinch, remember that polarizing filters typically reduce the amount of light reaching the camera by two stops, so you can use a polarizer as well.

Picture2 AcadiaRocks

#2 Controlling Shutter Speed

Coastal pictures are all about controlling the shutter speed, and you will usually find yourself trying to slow down the shutter speed. If you are shooting in one of the automatic modes, this is a good opportunity for you to step up Manual (M) mode. Just set the shutter speed where you want it, then if you can get the proper exposure by changing the aperture settings, great. But if not, use your neutral density filter to cut down on amount of light entering the camera.

This is also a rare instance where you might consider Shutter Priority (Tv or S) mode. Once you set the shutter speed, the camera will set the aperture for you. Of course, you could also use Aperture Priority (Av) mode and set the aperture with an eye toward where the camera is setting the shutter speed.

When you get to the coast, take a few test shots, Keep an eye on the histogram to make sure your exposure settings work for the mood you are trying to create.

Picture3 SchoodicSunset

#3 Creating Flat Seas with Extremely Long Shutter Speeds (at least 10 seconds)

Most of my favorite seascapes were taken at shutter speeds of 10 seconds or more (sometimes a lot more). Under calm conditions this adds a sense of serenity to the seascape. Under other conditions the slow shutter speed can add some drama to the scene.

Picture4 DavenportCliffs

To accomplish this effect, you are probably going to need to use the 10-stop neutral density filter. If you are set up for a proper exposure before you put the filter on the lens, you will need to add 10 full stops of light to get the proper exposure once the lens is on the camera. If your camera is set up to adjust in 1/3-stop increments, that will mean 30 clicks (of your dial) of additional light.

This filter is so powerful that it leads to some challenges. You are going to need to focus and set your exposure before you put the filter on the camera. Once you put the filter on, you will not be able to see anything or focus. A great process for these long exposures is this article: Step-by-step Guide to Long Exposure Photography

In addition, keep in mind that the exposure will be quite long and the camera will need to be very stable. If you are on sand or other unstable surface, be sure to jam the legs deep into the sand to make it as stable as possible. If you are near the water, let a wave or two touch the tripod’s feet before shooting because the first wave will shift the tripod a little bit.

Picture5 PortlandHeadLight

#4 Ocean Trails: Long shutter speeds (2-8 seconds)

Another great way to capture the sea is with a long shutter speed of at least a few seconds, but not so long as to blur everything out. The advantage of the speed is that it gives the viewer an idea of the rhythm, or currents, of the ocean. This range of shutter speed will often show trails in the ocean and give a general sense of the location of the waves.

Picture6 DavenportSurf

To capture this look, the shutter speed will ordinarily be between two seconds and eight seconds. That also means a neutral density filter, but often not the 10-stop filter. If you have a 3-stop or 6-stop density filter, those usually work best in this situation, depending on the amount of light available.

Picture7 WaveApproaches

#5 Motion and Power: Moderate shutter speeds (1/8 – 1/2 second)

Sometimes you want the viewer to see the actual wave. It still helps to have a little motion to the wave though. This will convey both a sense of motion and give a sense of the power.

To accomplish this, you will typically need to slow the shutter speed down just a little bit. You will find the best shutter speeds for this range are between 1/8th and 1/2 of a second. At these speeds, you can still clearly see the waves, but the slower shutter speed takes the jagged edges off of them.

Picture8 AcadiaWave

While you will still need a tripod at these shutter speeds (they are too slow to hand-hold your camera and get sharp images), you can often get away without using a neutral density filter by stopping down the aperture.

Picture9 DunDochathair

#6 Pure Power: Fast shutter speeds (1/500 and up)

Finally, there are days when the ocean is very active where you will want to stop the motion and really capture the power of the sea. A great way to do that is with a fast shutter speed. Speeds of 1/500 of a second and faster work best.

Picture10 CrashingWave

The good news here is that you will not need to use a neutral density filter. You can also ditch the tripod and just hand-hold your camera. These shots offer maximum flexibility and mobility.

A fun thing to do is try to time the wave at it crashes into a rock or the surf. This means a lot of trial and error, but when you hit one, the results can be spectacular.

#7 Before You Go

Remember that the sea coast is a harsh and unforgiving environment. Salt water and electronics do not mix very well, and just the spray of the ocean can lead to serious camera problems (which, unfortunately, I have experienced firsthand). In addition, the terrain can be slippery and treacherous. If you are not careful, you can also find yourself stranded on some rocks in a rising tide (learned this one the hard way too, I’m afraid).

But if you are careful about what you are doing, there is no better place to be than on the coast at dawn or sunset. So get out there and give it a try, and if you have questions or need additional information just use the comments below.

The post 7 Tips to Help Improve Your Seascape Photos by Controlling the Waves by Jim Hamel appeared first on Digital Photography School.


Digital Photography School

 
Comments Off on 7 Tips to Help Improve Your Seascape Photos by Controlling the Waves

Posted in Photography