It seems like virtually all outdoor or landscape photographs suffer from the same illness when they come out of the camera. The symptoms are:
- An overly bright sky
- Foreground that is too dark
- A general lack of color and contrast.
Sound familiar?
Fortunately, there is a cure for this ailment. Actually, as anyone who has worked with post-processing software for any length of time knows, there are a lot of different cures. But I want to show you a super simple way to fix pictures with these problems. I performed these fixes in Lightroom, but you can also do them on the Adobe Camera Raw screens of Photoshop or Photoshop Elements.

The quick-fix shown here will involve nothing more than moving six sliders, each of which is in the Basic panel of Lightroom’s Develop module. The edits will take less than 30 seconds of your time. I performed these edits – and only these edits – to the pictures you see throughout this article to show you the effects.
The Steps
Let’s not dally with a lot of explanation just yet. Here are the steps to perform a quick-fix of landscape photos. The first three steps are the most important, where you will see about 90% of the changes to your pictures. After walking you through these steps I will explain the process in a little more detail.
- Decrease the Highlights: Just pull the highlights slider to the left as much as is needed to add more detail to your sky.
- Increase the Shadows: Pull the Shadows slider to the right to brighten the foreground. Don’t worry if it looks a bit washed-out after this step.
- Reduce the Blacks: Pull the Blacks slider to the left. This will add contrast back to the picture, and will fix the washed-out look that might have crept into your picture after the last step.
- Increase Vibrance: Pull the Vibrance slider to the right a bit to add more color to the picture.
- Increase Contrast: Pull the Contrast slider to the right a little bit to increase overall contrast. Don’t go too far, or it might start to undo the changes you just made above.
- Increase Clarity: Pull the Clarity slider to the right to add some clarity (edge contrast) to your photo and make it appear less soft.
That’s it. Just move these six sliders and you should see a vast improvement in your landscape pictures. This might seem more complicated than it actually is, because there are six steps. But after a while you will be able to do all of it in a matter of seconds.

What’s Going on Here
Now that I’ve shown you the steps and a few examples, let’s talk about this process.
What you are doing first is reducing the tones in the sky by using the Highlights slider. The sky is typically the brightest part of landscape photos. The Highlights slider will ONLY affect the brightest tones in the image, so decreasing it should tone down your sky but not touch the darker portions of your picture. Decreasing the highlights will not only keep the sky from being too bright, but will also add detail and texture to the clouds.
After the change to the sky, step 2 is to increase the brightness of the foreground. The foreground is almost always too dark in outdoor photos, and you need to brighten it up and add detail there. As you pull the Shadows slider to the right, you should see your foreground brighten up. The sky, which is not among the shadows of your photo, should remain largely unaffected. Your photo should be looking a lot better at this point.
Many times, when you make the change to the foreground in step 2, that area starts to look a little bit washed-out. Therefore, step 3 is the pull the Blacks slider to the left. Whereas the previous step brightened the shadows, we are now taking the very darkest tones in the photo and bringing them closer to black. The shadows were made brighter in the last step, and now the blacks are made even blacker. That adds more contrast to the foreground and eliminates that washed-out look. It often adds a little bit more contrast to your sky as well.
Note: For a handy tip on using sliders, read The Magic Alt Key article here.
At this point, your photo should be looking pretty good. In fact, about 90% of the effect is applied to your photo after step 3. Now you will just clean up by making the photo a little clearer, and more colorful.

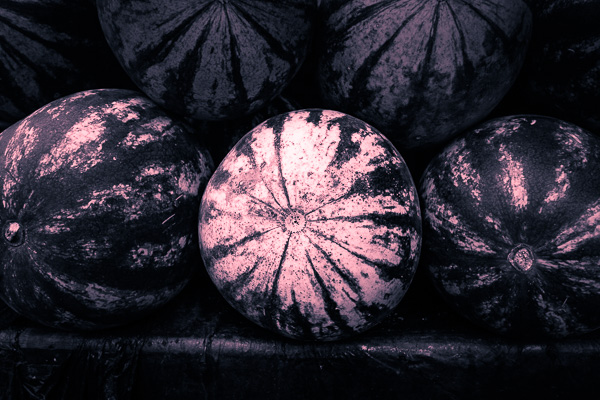
In step 4, we will just increase the vibrance of the photo to add more color to the scene. The Vibrance slider is just below the sliders you have been working with. Pull it to the right to add more color to the picture. You can adjust this slider however you want, but don’t overdo it.
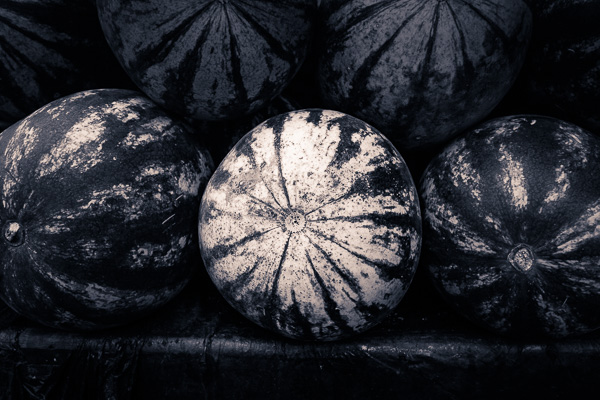
You might wonder why you should use the Vibrance slider instead of the Saturation slider. The answer is that vibrance is designed to have a higher impact on less saturated colors. Saturation adjustments apply to all colors equally, so an increase in saturation can make certain highly saturated colors look garish. Vibrance, by focusing on colors that are less saturated, lets you increase the overall saturation of your colors without overdoing any colors.
Next, you add a little contrast. Pull the Contrast slider to the right a little bit. You have to be careful here because essentially what you did in the first three moves of this process was reduce overall contrast (making the bright sky darker and the dark foreground lighter). If you crank the contrast up now using the Contrast slider, you will be working against the moves you previously made. A small or moderate increase in contrast, however, can add more texture to the photo, so I recommend you do that.
Finally, a small to moderate increase in Clarity usually makes the photo look sharper and clearer. Don’t overdo this, as clarity is a powerful tool. Just add a little bit by pulling the Clarity slider to the right, and this final step can really make your photos pop.
After having gone through this process, there is nothing stopping you from continuing with additional editing, if you wish. You can take your photo into Photoshop and make a lot of other changes, or you can use the plug-in of your choice. But even if you decide to do additional editing, the process I have described in this article can still be a good starting point for your landscape photos. It also works really well when you are in a hurry or you’d like to process a lot of photos at once.

Bonus Tip
I want to keep this process as simple as possible and not confuse it with a bunch of other things, but there is just one more tip I want to pass along in this article. It is a way to add more contrast to your skies in Lightroom (or in ACR in Photoshop).
Scroll down to the HSL/Color/B&W panel in Lightroom’s Develop module, where you will see sliders for eight different colors. Go to the Blue slider and make sure the Luminance tab is selected just above the colors. Decrease the luminance of the blues in your picture by pulling the Blue slider to the left. This will make the color in your sky a deeper, richer blue.
Recall that Step 1 of the process above was to decrease the highlights in an effort to tone down and add detail to your sky. If you decrease the luminance of the blues, you might find that you don’t need to do Step 1 (or at least that you do not need to pull down the highlights as much). In fact, keeping the highlights nice and bright, while decreasing the luminance of your blues, can really add some nice contrast to your skies.

Conclusion
This is one simple way to make super fast changes to your landscape photos. After you have done it a few times, you can make these changes in mere seconds. I know we are all sensitive to falling into ruts and doing the same thing over and over again, so you don’t want to do this process all the time. But it is great when you just want high impact in a short amount of time, or as a quick baseline for further changes.
googletag.cmd.push(function() {
tablet_slots.push( googletag.defineSlot( “/1005424/_dPSv4_tab-all-article-bottom_(300×250)”, [300, 250], “pb-ad-78623” ).addService( googletag.pubads() ) ); } );
googletag.cmd.push(function() {
mobile_slots.push( googletag.defineSlot( “/1005424/_dPSv4_mob-all-article-bottom_(300×250)”, [300, 250], “pb-ad-78158” ).addService( googletag.pubads() ) ); } );
The post A Super Simple Way to Make Landscape Photos POP Using Lightroom by Jim Hamel appeared first on Digital Photography School.

 My ebook Mastering Lightroom: Book Three – Black & White goes into the topic of black and white in depth. It explains everything you need to know to make dramatic and beautiful monochrome conversions in Lightroom, including how to use the most popular black and white plug-ins. Click the link to visit my website and learn more.
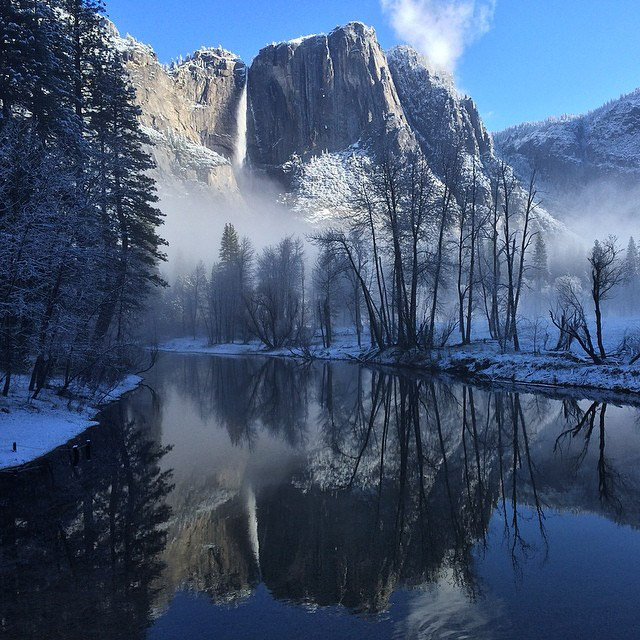


 Christmas tiramisu by Darius Dzinnik on 500px
 x mas cocktail by Peter Harasty on 500px
 Christmas gingerbread cookies by Sergey Kumer on 500px
 Christmas duck by Darius Dzinnik on 500px
 Traditional Sliced Honey Glazed Ham by Brent Hofacker on 500px
 Champagne glass by Vadim Kolobanov on 500px
 ????????? ? ????????? ???? by Natalia Lisovskaya on 500px
 Christmas traditionals by Delia Cozma on 500px
 ?????????? ?????????? by Natalia Lisovskaya on 500px
 Whishes by Szabolcs Szlavik on 500px
 Christmas Fruits by Pete Franks on 500px


You must be logged in to post a comment.