RSS
 

Posts Tagged ‘Photos’

Google rolls out standalone Photos app with unlimited free storage

29 May

Confirming rumors from earlier in the week, Google has announced its new Photos app – a standalone service that separates the photo component of its Google Plus app. It’s available now for Google and iOS and comes with unlimited free storage of 16MP or smaller images. Read more

Articles: Digital Photography Review (dpreview.com)

 
Comments Off on Google rolls out standalone Photos app with unlimited free storage

Posted in Uncategorized


4 Ways to Make Your Photos Stand Out with the Clarity Slider

28 May

Clarity - Bay Bridge example

You want your photos to be as sharp as possible. Of course, there is no substitute for good technique in the capture phase, but you would like to add something in the post-processing to make the pictures clearer and sharper. You may already be adding sharpening, but how to add that extra crispness to make your pictures pop? The answer is clarity. This article will show you how to add that to your photos.

Clarity - before and after

What Exactly Is Clarity?

What is clarity? Clarity is a local contrast increase that focuses on the mi-tones of the image. If differs from sharpness, because whereas increasing sharpness increases the contrast between dark and light tones, clarity increases the contrast within the middle tones of the image. The effect is similar to sharpening, but it brings out textures a bit more. In addition, digital noise isn’t as much of a problem as it is with sharpening increases.

Adding Clarity in Lightroom (or ACR)

How do you add clarity to your photos? The best-known, and simplest way, to add clarity is to use the Clarity slider in Lightroom (there is an equivalent in Adobe Camera Raw – or ACR). To do that, just find the Clarity slider in the Basic panel of the Develop module. Increase the clarity by moving the slider to the right a bit. That’s all there is too it.

Clarity - Lightroom slider

The Clarity slider makes a global adjustment to your image (meaning it affects the entire image). If you want to add clarity only to specific portions of your image (referred to as local adjustments), you can do so by using the Adjustment Brush (or Radial or Graduated filters). When you select that brush, you will see clarity among the sliders that you can use. Increase the clarity to the desired amount and brush the effect where you want it, on your image.

I find it best to apply a slight, to moderate amount, when making Lightroom adjustments. Think of it as a baseline. Other areas of the image that you want to draw out can be targeted later. You may find it easier, and more precise, to make local adjustments using Photoshop, so that will be the next topic.

High Pass Filter in Photoshop

Within Photoshop, there is no Clarity slider. If you want to add clarity to your photos within Photoshop, there is still a way to do it. It is called the High Pass filter.

Why should you use this filter, and not the Clarity slider in Lightroom (assuming you have both)? Mostly because, with the High Pass filter you can take advantage of all the masking and blending tools available within Photoshop. The primary reason is the ability to mask the changes, which is a much more precise and powerful way to create localized adjustments, than using Lightroom’s adjustment brush. Use the High Pass filter for targeted adjustments to specific areas that you want to draw out in your picture.

It takes a few steps to use this tool, so follow this process:

  1. Make a copy of the background layer (Ctrl+J) of your picture.
  2. Set the blend mode of the new layer to Overlay. The picture will look terrible for now, but don’t worry about it.
  3. Select the High Pass Filter by going to Filters – Other – High Pass.
  4. Set the radius, which is the equivalent of setting the strength of the effect.

Clarity - high pass filter

Note that this process will create a global adjustment to your image. To turn it into a local adjustment, create a layer mask to apply the effect only where you want it. To do that, with the new layer selected go to Layer – Layer Mask – Hide All. That will create a black layer mask. A black layer mask hides the effect everywhere. Now use a white brush to paint (on the mask) in the effect where you want it. Use the Opacity slider to control the degree to which the effect is applied by your brush (you can also adjust the layer opacity).

Local Contrast Adjustments in Photoshop

Another way to add a degree of clarity to your photos is to increase the local contrast, with the best way being a Curves Adjustment Layer. You’ll be surprised at how much clearer and more detailed things look after you increase local contrast in this way. This is another tool for making targeted adjustments.

They key here is to select an area and then increase the contrast just within that area. Here’s how:

  1. Select the area you want to affect. Use the Quick Selection tool to select those pixels.
  2. Create a Curves Adjustment Layer (Layer – New Adjustment Layer – Curves) with those pixels selected. When you do so, Photoshop will create a new adjustment layer, but it will mask off all the pixels except those you previously selected. Therefore, the changes you make will only apply to your selection.
  3. Increase the contrast of your selected area. You can either drag in the endpoints of the curve, or you can push down the line on the left (dark) side and pull up the line on the right (bright) side of the histogram. (You can also use Levels to increase the contrast, if you are uncomfortable with Curves).
  4. Clean up with your brush tool. If there are harsh transitions, use a soft brush to feather out the change (paint ON the mask only, not on the layer). You can increase or lessen the effect using the brush tool as well.

Clarity - Photoshop curves adjustment layers

Be sure you select targeted areas and use this method to draw out the contrast. It will add clarity and texture to that portion of the picture you want only, not the entire image.

Clarity by Topaz

There is another tool you can use to add clarity to your photos. It is a plug-in by Topaz that is named, appropriately enough, Clarity. It costs $ 50 and acts as a plug-in to Photoshop or Lightroom.

Clarity by Topaz divides contrast into different components ranging from Micro contrast, to High contrast, and provides a slider for each. That allows you to reach different parts of the picture and affect contrast in different ways.

The best part of Clarity is the Micro contrast, although this often requires offsetting adjustments to other areas of contrast. That is the greatness of this plug-in: you are not confined to a simple contrast adjustment that pushes all bright areas toward white, and all dark areas toward black. It allows you to add some clarity and texture to your pictures without blowing out your highlights or losing your shadow detail. You can also effect saturation, brightness, and other controls from within Clarity.

Clarity - using Topaz Clarity

The best way to use Clarity is by creating a duplicate layer of your image in Photoshop (Ctrl+J) and then opening the plugin. That way, after you have made your changes in Clarity and you have gone back to Photoshop, you can mask in or out the effect to whatever degree, and in whatever areas of your image, you wish.

Clarity - Davenport example

Application

The best part about these tools is that you can combine them to get exactly the effect you want. For example, you might make a minor global adjustment to Clarity in Lightroom, then take it into Photoshop and make a series of Curves Adjustment Layers to bring out certain areas. You might also do the same with Topaz’s Clarity and mask off the effect. When you are done, you can use the High Pass filter to highlight key areas of your photo in Photoshop. Of course, you’ll need to be careful not to overdo the effect, which can happen quickly, especially if you use multiple tools listed here. But judicious use of these tools, in conjunction with your normal input and output sharpening, can really make your photos pop.

googletag.cmd.push(function() {
tablet_slots.push( googletag.defineSlot( “/1005424/_dPSv4_tab-all-article-bottom_(300×250)”, [300, 250], “pb-ad-78623” ).addService( googletag.pubads() ) ); } );

googletag.cmd.push(function() {
mobile_slots.push( googletag.defineSlot( “/1005424/_dPSv4_mob-all-article-bottom_(300×250)”, [300, 250], “pb-ad-78158” ).addService( googletag.pubads() ) ); } );

The post 4 Ways to Make Your Photos Stand Out with the Clarity Slider by Jim Hamel appeared first on Digital Photography School.


Digital Photography School

 
Comments Off on 4 Ways to Make Your Photos Stand Out with the Clarity Slider

Posted in Photography


Photobook Albums: How to Get the Best Design from Your Photos

27 May

Photobooks are gradually replacing traditional albums as the photo-viewer’s medium of choice. These digitally printed albums offer a host of advantages, one of which is a greater flexibility of design and layout. But when you’re faced with lots of blank pages to fill, where do you start? In principal it’s easy to click and drag digital photos onto a virtual Continue Reading

The post Photobook Albums: How to Get the Best Design from Your Photos appeared first on Photodoto.


Photodoto

 
Comments Off on Photobook Albums: How to Get the Best Design from Your Photos

Posted in Photography


How to Make Your Photos More Interesting with a Human Element

21 May

The human element in photography

I believe that when someone asks how to improve their composition, that what they’re really asking is how they can make their photos more interesting.

The skill of composition is in arranging the elements of the scene in such a way that the resulting image is aesthetically pleasing, and interesting to look at. Composition involves using techniques such as including leading lines, isolating the subject, exploiting tonal contrast, deciding what to leave out of the frame, and so on. But none of this matters much if your subject matter is boring.

The most effective way to create interesting images is to find an interesting subject. Composition becomes much easier when your subject is interesting. You are more likely to be enthusiastic about the photos, and put more effort into finding a good composition, if you are engaged with, or passionate about the subject.

Luckily, there are lots of interesting things to take photos of. But for me the most interesting subject of all is people.

The human element in photography

Unlike static subjects like the landscape, which change slowly or not at all, people are transient. They change. Jobs change. Towns and cities change. The ebb and flow of life creates many interesting and varied subjects for the curious photographer.

Many of the great photographers (and yes, there are exceptions) built their reputations taking photos of people. Masters like Steve McCurry, Sebastião Salgado, David Bailey and Annie Leibovitz predominantly photograph people and their affect on the world.

So, how do you add the human element in your photos? Here are some ideas.

1. Include human figures in the landscape to show scale and context

Including human figures in the landscape provides both a focal point and a guide to scale.

I took the following photo in a remote region of northwest Argentina. The scene caught my eye not just because it is spectacular, but because of the people walking in the middle ground. The presence of the figures reveals the height of the cliff face behind them. We know how big it is because we can compare its size to the them.

Even though the people are small in the frame they are still large enough for you to see they are wearing traditional dress. There are also some stone walls in the foreground, which are animal pens.

The human figures, and evidence of human activity, adds information, providing context about the relationship between the individuals in it and the landscape.

The human element in photography

2. Take environmental portraits

One way to create interesting photos of people is to take environmental portraits – photos that include information about the person’s surroundings. The person will be the focal point of the photo but really there are two stories being told here; one about the person, and another about their environment.

The photo below came about after I asked a friend of mine if I could take some portraits with her new gypsy caravan that she built herself from scratch. She loved the idea. This photo is as much about her caravan and the way she created a unique place for herself to live, as it is about capturing her likeness.

The human element in photography

3. Find interesting people to photograph

The easiest way to find interesting people to take photos of is to set yourself a project. One of my current projects is to take photos of local craftsmen. This led me to take photos of Eoin in his glass blowing studio.

After I had taken some photos of him blowing glass, we went outside to take some portraits. You can see one of the images below. He has a very interesting face, and was a great subject, but I would never have found him if it hadn’t been for the project.

The human element in photography

You may have read the story where a student asks photographer Jay Maisel how to take more interesting photos. The reply was,

“If you want to make more interesting pictures, become a more interesting person.” – Jay Maisel

Another way to find interesting people is to lead a more interesting life. The more hobbies and activities you participate in, the more people you will meet in everyday life. Some of them may make interesting subjects.

Your turn

Do you agree with my idea that people are the most interesting subject for photographers? Please let us know in the comments, I’m looking forward to hearing what you think.


Mastering Composition ebookMastering Composition

My new ebook Mastering Composition will help you learn to see and compose photos better. It takes you on a journey beyond the rule of thirds, exploring the principles of composition you need to understand in order to make beautiful images.

googletag.cmd.push(function() {
tablet_slots.push( googletag.defineSlot( “/1005424/_dPSv4_tab-all-article-bottom_(300×250)”, [300, 250], “pb-ad-78623” ).addService( googletag.pubads() ) ); } );

googletag.cmd.push(function() {
mobile_slots.push( googletag.defineSlot( “/1005424/_dPSv4_mob-all-article-bottom_(300×250)”, [300, 250], “pb-ad-78158” ).addService( googletag.pubads() ) ); } );

The post How to Make Your Photos More Interesting with a Human Element by Andrew S. Gibson appeared first on Digital Photography School.


Digital Photography School

 
Comments Off on How to Make Your Photos More Interesting with a Human Element

Posted in Photography


Stock Photos That Don’t “Suck”: the Basics of Stock Photography

20 May

As a freelance stock photographer, I have to admit I am insulted when I see articles written about how horrible the market is for stock photography. Has the bar been lowered so far that we are forcing consumers to seek out photographs that simply “don’t suck”? I don’t think so. Some people feel that the proliferation of digital cameras and Continue Reading

The post Stock Photos That Don’t “Suck”: the Basics of Stock Photography appeared first on Photodoto.


Photodoto

 
Comments Off on Stock Photos That Don’t “Suck”: the Basics of Stock Photography

Posted in Photography


Leica’s Red Dot Forum warns of crash risk with Monochrom Raw files in Apple’s Photos App

15 May

Users of the new Leica Monochrom (typ 246) risk wiping out their Apple Photos library if they try to use it to store the DNG Raw files created by the camera, according to a statement from Leica’s Red Dot Forum. Mac computer owners running OS X Yosemite will find the files cause the library to crash, which Leica says could lead to all images saved in the library being destroyed. Read more

Articles: Digital Photography Review (dpreview.com)

 
Comments Off on Leica’s Red Dot Forum warns of crash risk with Monochrom Raw files in Apple’s Photos App

Posted in Uncategorized


MIT algorithm aims to eradicate reflections from photos taken through windows

14 May

Researchers at the Massachusetts Institute of Technology claim to have developed a method for eliminating reflections in glass via digital processing. It is hoped that with further development the idea could see its way into digital cameras, allowing reflections to be automatically removed when they interfere with the view through a window. Read more

Articles: Digital Photography Review (dpreview.com)

 
Comments Off on MIT algorithm aims to eradicate reflections from photos taken through windows

Posted in Uncategorized


Organizing and Archiving Your Photos

13 May

It’s spring cleaning time and that means organizing a lifetime or two worth of photos! Whooo! (Guh.)

Let’s break this daunting task into bite-size pieces, yeah?

Step 1: Choose a place to store photos
Pick one place to stash your snaps and stick to it! This Wall Street Journal article makes it easy to find your perfect storage fit, whether you’re a simplicity-lover or tech-savvy pro.

Step 2: Organize at a reasonable pace.
Set aside just 5-10 minutes a day to organize your photos. Then treat yourself to a cupcake, you’ve earned it!

Step 3: Preserve your favorites.
As you go along organizing, you’ll find a few photos that you want to save – maybe even for generations. Like of your parent’s wedding or that time you met Justin Bieber. In the ever-changing digital age, it’s hard to know what the best archival solution is. Take a few minutes to read through this write-up from Photo District News which covers a 3-point consideration for saving your best shots. *Spoiler alert*: Prints are still king.

Whew, that wasn’t so bad was it? Now … about your closet …

Photo by Geoffrey A. Fowler


© Erin for Photojojo, 2015. |
Permalink |
No comment |
Add to
del.icio.us

Post tags:


Photojojo

 
Comments Off on Organizing and Archiving Your Photos

Posted in Equipment


Flickr Users Unable to Upload Photos All Weekend Long While Flickr Staffers Take the Weekend Off

11 May

Flickr Weekend Upload Problems

Usually I publish photographs to Flickr twice a day, in the morning and in the evening — random batch of 16 photos in the a.m. and in the p.m. This morning I cannot upload a single photo. For the entire weekend I have not been able to batch upload to Flickr at all and have resorted to uploading photos one by one by one with consistent upload failure with each new attempt.

If this were happening at Facebook, it would be the top story on Techmeme — but because it’s just Yahoo and Flickr, it doesn’t get that sort of attention.

It’s not just me that this is happening to. The Flickr Help Forum has been littered with threads all weekend long where users are angry about not being able to upload photos to the site.

Failed to Upload

Cannot Upload Any Photos!
Video upload problems
Consistent upload failures and disconnect errors
Very slow upload speed
Uploadr gives error when attempting to Sign in
UPLOAD Servers speed DOWN to 3 %(max)
Can’t Upload Photos with Mac Yosemite
Upload Problems
Uploading not possible at 2/3 it stops
[BUG] Upload speed
Can’t upload

These are all Flickr discussions in their help forum active over the course of the last 3 hours. If you go back further, you will find that for the entire weekend a large chunk of Flickr users have been able to upload images reliably to Flickr.

Files Not Uploading

While being unable to upload photos to a photo sharing site is a problem, to me the bigger problem is that at a company with Yahoo’s resources not a single Flickr staffer seems to be assigned to review their active and public help forum.

While I get that Flickr staffers deserve a weekend off like everyone else, someone at Flickr should be assigned to the company’s very public help forum 24/7. An acknowledgement from staff that they are aware of the problem and working on it goes a long way — but to leave frustrated users twisting in the wind all weekend long just makes a bad situation that much worse.

This uploading problem is a bad technical problem to deal with I’m sure, but basic customer service should be something that Flickr is capable of given the deep resources of Yahoo behind them. Flickr/Yahoo can and should do better.

The only thing that in any way resembles any source of staff involvement comes from one of the help forum threads where a Flickr staffer who goes by the name “Alex” reportedly claims in response to a service inquiry that everything is fine on his end and that he’s able to upload 100 photos in under 5 seconds.

Even when Flickr was at it’s peak, you cannot upload 100 photos in under 5 seconds. No service on the internet would do such a feat, not Google, not Facebook, nor any other site. The fact that this is allowed to stand as the closest thing to staff response is unfortunate.

Flickr just rolled out a wonderful new version of Flickr this past week. Especially the weekend after a major new effort such as this, Flickr/Yahoo should be watching things closer and be much more responsive to their users. Hopefully Flickr doesn’t now let an entire Monday go by without acknowledging such a disruption to their service.


Thomas Hawk Digital Connection

 
Comments Off on Flickr Users Unable to Upload Photos All Weekend Long While Flickr Staffers Take the Weekend Off

Posted in Photography


Today’s New Version of Flickr Implements Bulk Downloading of Your Photos — Your Photos Really Do Belong to You

08 May

Flickr Rolls Out New Search, Camera Roll and Batch Download Improvements

Today Flickr is launching a number of new improvements to their service. I’ll review what they are in this post, but in my mind the most significant change coming today is that Flickr is introducing the ability for you to bulk download your photos from their site.

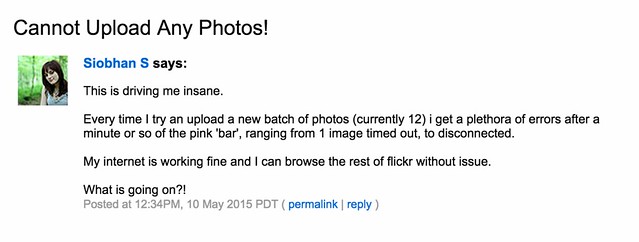
I’ve been critical of Flickr in the past over the inability to easily get your photos back out of the service. While not a silo, Flickr’s never made it exactly easy to get your photos back after you upload them.

You’ve always been able to download your photos on a photo by photo basis, but for someone with a ton of photos, downloading each and every one individually isn’t very practical or user friendly. For a while Flickr had partnered up with a company called Qoop (now out of business) that would bulk load your photos to CDs or DVDs and sell them back to you, but that never sat right with me either — why should you have to pay to get your own photos back? Also for someone like me with over 100,000 photos on the site, how many CDs would that take and how much would *that* cost?

Several third party developers had developed apps that claimed to be able to use the Flickr API to bulk download your photos for you. I tried many of these apps with names like bulkr and migratr and flickrsync over the years and never found any of them very reliable or easy to use.

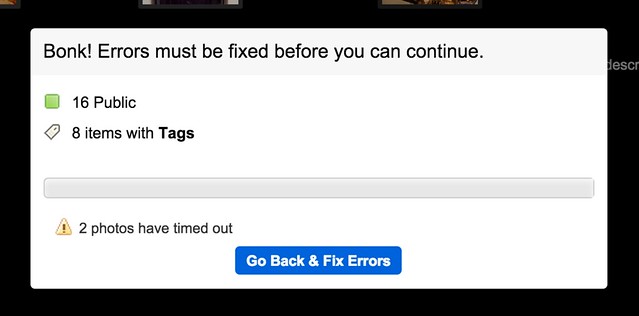
All that changes today though as Flickr rolls out official support for batch downloading your photos from Flickr.

Now you can fill up that free 1 terabyte (or unlimited terabytes if you’ve got a grandfathered Pro account) with confidence knowing that if you ever want/need those photos back from Flickr you’ll be able to get them back much more easily. As I understand it, there still may be photo limits for how many individual photos you can select in camera roll for a single download for performance reasons, but you can select large batches of photos from the new camera roll and Flickr will convert those photos into a zip file for you and send them right back to you on your computer. The number of photos you can download is unlimited. You can download multiple zip files effectively accessing 100% of your photostream.

Today’s new support for downloading is a very consumer friendly thing for Flickr to do. It is already very generous for Flickr to give people 1 terabyte of free cloud storage for your high res original photos, but now allowing you to get them back as easily as you upload them there makes this even more generous. Kudos to Flickr.

This new download support is part of a new section on Flickr called “Camera Roll.” Camera Roll has been in beta testing for several months now, but this downloading feature is newly available today.

In addition to download support, Flickr also now allows you to easily grab a batch of photos from your camera roll and share them as sort of an album on the fly via url. This can be helpful if you have a batch of recent or specific photos that you want to email to one person, or share on Facebook or Twitter or elsewhere — with this new feature you just select them in camera roll and create a shareable url. Even if you have photos marked private you can share them with others with these special url links — sort of like a shareable guest pass but much easier to generate on the go.

Flickr is also going deeper now with deep machine learning with Camera Roll. In addition to viewing your photos by date taken or posted, Flickr is now adding in a New Magic View, where Flickr will auto tag many of your photos and build them into commonly grouped albums. You can see all of your sunset photos in one place, or all of your group photo shots in one place, or all of your photos of automobiles, etc.

Some of you who go wayyy back with Flickr, might remember the old Tag Cow company which would do similar tagging for you of your photos. In Tag Cow’s case though they were actually using Amazon’s Mechanical Turk and hiring people in places like India and China to manually review and tag your photos for pennies.

Magic View is no Tag Cow though. Instead Flickr is actually using image recognition technology (remember this acquisition?) and algorithms to determine what your photos are of and then auto-tagging them based on this technology. If Flickr gets a tag wrong you will always be able to manually remove the automated tag. The tags that you add will be in a different shade than the auto-tags making it easy to see which ones you added and which ones Flickr added based on this technology.

One of the benefits of having more/better tagged photos on Flickr is that it will allow more public photos to be findable and searchable. This public/private distinction is important because private photos on Flickr are never searchable, except to you.

Which brings me to search.

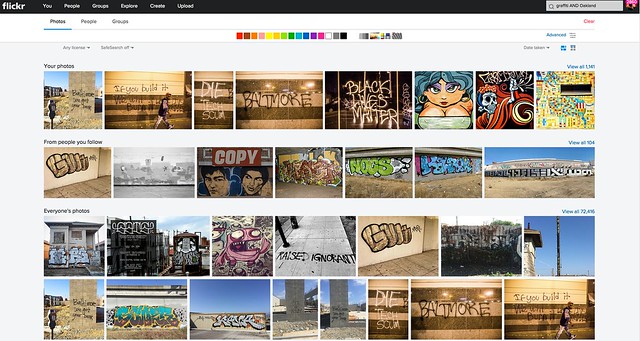
I am a HUGE fan of the new Flickr search experience. I’ve spent hundreds if not thousands of hours using the search functionality of Flickr. I routinely use Flickr search to scout photo locations, find people shooting in a particular area, stay on top of events happening around the San Francisco Bay Area, and tons of other ways. The new search page is clean and fast. In addition to date posted, interestingness and relevancy you can also now search Flickr photos by date taken.

Flickr’s done an entire rebuild of the back end of the search page to make it super fast and responsive — they will also be porting this new rebuilt page technology to other pages in the weeks and months ahead to improve performance on many other popular Flickr pages.

Although I consider myself a fairly advanced search technician when it comes to Flickr, for many who are not as sophisticated, basic text searches will be smarter. In the past if you wanted to search for the London Eye you’d have to search for “London Eye” with quotes, or merge the two words together as londoneye. With the new search if you type London Eye just as plain text, Flickr is smarter and will realize that you want to see photos of the London Eye not random photos of London mixed in with random photos of eyeballs.

Flickr has also introduced some slick filters which will allow you to filter by colors (or black and white), photo styles such as depth of field photos or minimalistic photos or heavily patterned photos. Unfortunately there still is no filter to only show me photos without those pesky and ugly signatures and watermarks though. ;)

In addition to Camera Roll and improved search, Flickr is also updating their mobile apps for iOS and Android, to provide a more consistent experience. My iOS experience on Flickr has not been good the past few months. Recent activity for me has become completely jumbled and unusable, which is more of a power user problem I think than anything. I’m hoping that the refresh fixes this bug for me — maybe not though. I do like to use the mobile version when I have a few minutes for looking at and favoriting photos of my contacts and it will be interesting to see what this is like once I upgrade.

The changes Flickr is rolling out today continue to make Flickr better and better — a trend that’s continued over the past several years as Flickr has ramped up staff and built a better and stronger team.

No other company today will give you a free terabyte of photo storage for your high res photos.

It always boggles my mind that people actually pay for storage of their photos on things like iCloud, when they could just send everything to Flickr for free. Especially now that you can get your photos back so easily, there really is no reason why everyone in the world should not use Flickr as a free cloud backup storage for all of their photos. Even if you don’t want to mix up every photo on your hard drive or phone with your current carefully curated Flickr presentation, you can just set up a second account and call it backup to Flickr and have a free backup site for your photos.

Are you one of those people who are constantly running out of space on your phone because of all of your photos? Then why aren’t you using Flickr?

More from The Verge, Wired, TechCrunch.


Thomas Hawk Digital Connection

 
Comments Off on Today’s New Version of Flickr Implements Bulk Downloading of Your Photos — Your Photos Really Do Belong to You

Posted in Photography