Brilliant black and white photos are created in two steps. The second of these is post-processing, and is very important. But before you get to that stage, you have to learn how to see and compose photos in black and white. This is just as important as processing – it doesn’t matter how creative or clever you are in Lightroom or Photoshop, if the image is badly composed, or the subject just isn’t suitable for black and white, then you are going to struggle to make a half-way decent monochrome conversion, let alone a great one.
I thought it would be interesting for you to look at some of my favourite black and white photos and learn why they work in terms of composition.
Wooden boats – Puerto Aysen, Chile
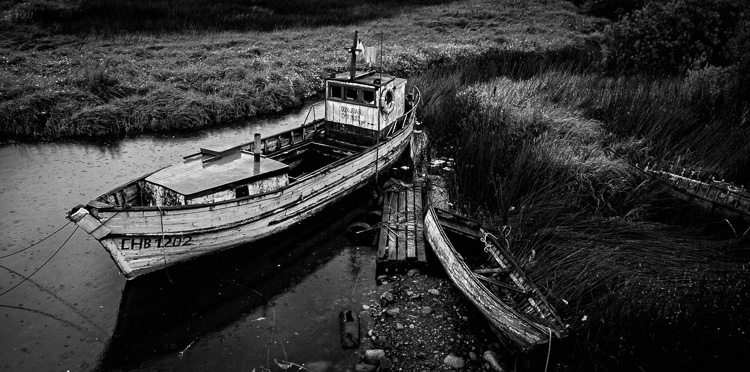
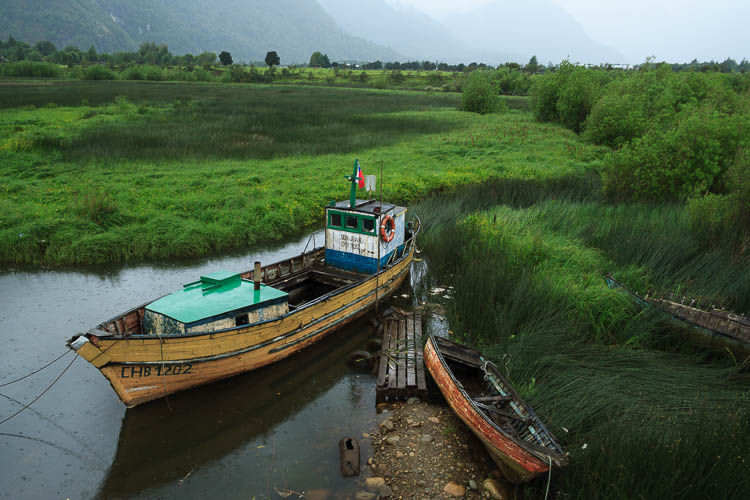
Puerto Aysen is a small port town in south-west Chile. The weather is often cold and miserable, even in summer. It rains a lot. I was wandering around the outskirts of the town when I came across these old wooden boats. Initially I was attracted to the atmosphere of the scene – there was a soft rain, and in the original uncropped photo you can see the hills on the horizon fading through the drizzle. The scene worked in colour (see below), but in the post-processing stage I also realized that it would come out beautifully in monochrome.
The reasons the image works well in black and white are:
- Tonal contrast: The boats are painted light tones and the background is mainly comprised of dark tones. The eye is naturally pulled to the largest boat in the scene which becomes the focal point of the photo.
- Texture: The weathered surfaces of the boats and the grass are beautiful textures which tend to be more effective in black and white than colour. This image wouldn’t have worked nearly as well if the boats were brand new.
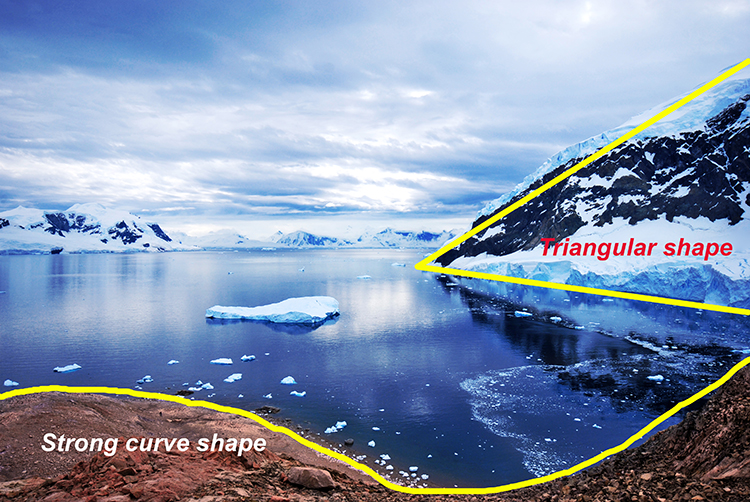
- Lines: The position of the boats in the scene creates two diagonal lines. The first moves from the bottom left through to the top right, and the second line, formed by the rowboat, creates a second diagonal line that meets the first. Diagonal lines pull the viewer’s eye through the photo and help add a sense of movement to the composition.
- Panoramic crop: I decided the hills in the distance were a distraction and cropped the photo to concentrate attention on the boats. This took place in post-processing and strengthened the composition by focusing attention on the boats.
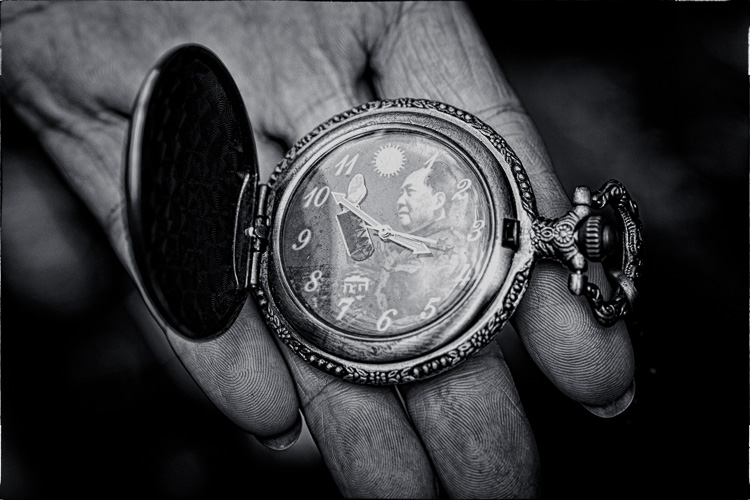
Chairman Mao watch – Shanghai, China
I went to Dongtai Road antiques market in Shanghai, an open-air street market comprised of stalls and shops where you can buy a variety of genuine and fake antiques, plus kitsch ornaments and souvenirs. I found the watch that this vendor was offering quite amusing. I didn’t want to buy the watch, but I asked if I could take a photo. The answer was yes.
Why the image works in black and white:
- Strong use of shape: The watch face is a circle. It is placed in the centre of the composition and dominates it.
- Lots of texture. The textures of the watch and the vendor’s hand are very strong.
- Strong diagonal lines. The vendor’s fingers create lines that pull the viewer’s eye up from the bottom of the frame. I deliberately framed the photo so the fingers ran at an angle across the frame rather than parallel with the edges. This creates a more dynamic composition.
- Simple composition. I moved in close to create a simple composition that emphasized shape, line and texture, the dominant elements of the photo. Another benefit of moving in close and using a wide aperture was that the background went out of focus, eliminating potential distractions.
John – Wellington, New Zealand
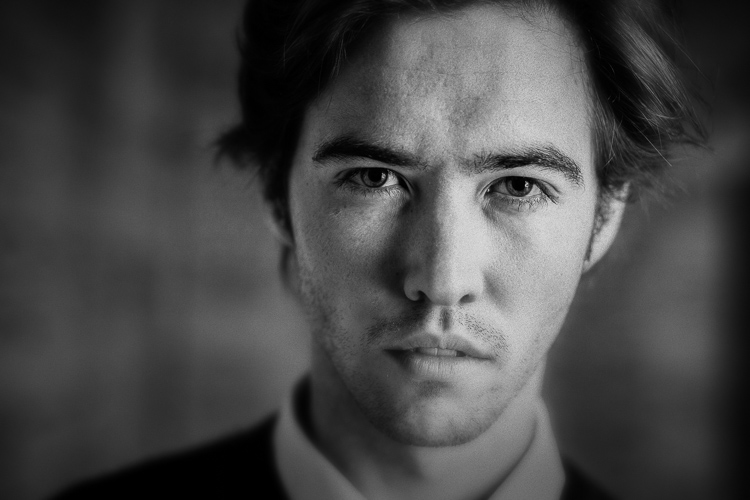
I got in contact with John via Model Mayhem and we arranged a portrait shoot. The setup was simple – I used an 85mm lens (with a full-frame camera) and a wide aperture of f/2.8 to blur the background. The portrait is lit by natural light – John stood underneath an archway so the light fell from his left (camera right).
Men can be great subjects for black and white portraits because there is no pressure to retouch skin. Black and white emphasizes texture – the texture of skin can be a beautiful thing that doesn’t (or perhaps shouldn’t) need retouching as often as some people think it does.
Why this photo works in black and white:
- Strong eye contact. The strength of this portrait is in the eye contact. John is gazing directly at the camera which creates a powerful connection with the viewer. His face is level with the camera so I could use a wide aperture to defocus the background, while keeping both eyes in sharp focus.
- Texture. The texture of John’s skin, especially in the sharpest areas around his eyes, renders beautifully in black and white. The background is out of focus and lacks texture, and this sets up a contrast between the sharp areas of the model’s face and the heavily blurred background.
- Tonal contrast. The model’s face is a lighter tone than the background. Light tones pull the eye, and the tonal contrast here (combined with the strong eye contact) establishes the model’s face as the focal point of the composition. The side lighting effect, created by asking the model to stand in an archway, means that one side of his face is lighter than the other. This creates depth, by revealing the shape of this face.
Common themes
Analyzing these photos is a simple exercise but it brings up several elements that work well in most black and white photos – texture, line, shape, tonal contrast, and simple composition. When you find a subject where these elements come together, you know you have the potential for a great black and white photo.
What do you think is important for a brilliant black and white photo? Please let us know in the comments. I’m looking forward to hearing what you think.
Editor’s Note: We recently ran a series of articles this week featuring black and white photography tips. Look for more on this topic below.
- 5 Simple Ways to Create Expressive Photos in Black and White
- Tips for Black and White Wildlife Photography
- 7 Tips for Black and White Portrait Photography
- 28 Images with Strong Black and White Compositions
- Weekly Photography Challenge – Black and White Techniques
- Tips for Black and White Wildlife Photography
- How to Convert Images to Black and White and Add a Color Tint in Photoshop
- Shooting all Black and White for a Day to Improve Your Photographic Eye
- Split Toning Black and White Images in Lightroom
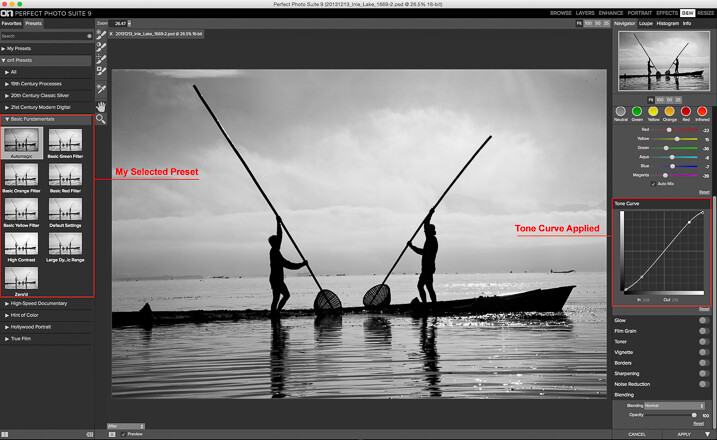
- Processing Black and White Photos with OnOne Perfect B&W
- Color or Black and White for Street Photography?
 Mastering Composition
My new ebook Mastering Composition will help you learn to see and compose photos better. It takes you on a journey beyond the rule of thirds, exploring the principles of composition you need to understand in order to make beautiful images.
googletag.cmd.push(function() {
tablet_slots.push( googletag.defineSlot( “/1005424/_dPSv4_tab-all-article-bottom_(300×250)”, [300, 250], “pb-ad-78623” ).addService( googletag.pubads() ) ); } );
googletag.cmd.push(function() {
mobile_slots.push( googletag.defineSlot( “/1005424/_dPSv4_mob-all-article-bottom_(300×250)”, [300, 250], “pb-ad-78158” ).addService( googletag.pubads() ) ); } );
The post How to Compose Brilliant Black and White Photos by Andrew S. Gibson appeared first on Digital Photography School.


You must be logged in to post a comment.