RSS
 

Posts Tagged ‘Photos’

6 Advanced Composition Techniques to Improve Your Photos

27 Jan

When you think of composition in photography, what is the first idea that pops into your head? Let me guess – the rule of thirds?

Likely that was true for many of you who reading this, why do you think that is? The rule of thirds is probably the most widely known, and well used compositional tool in photography. Most often, it is the first composition tool we are taught (it was for me anyway). Once we know it, and use it, we don’t really think about it, or about any other compositional techniques.

There are other methods though, using visual design techniques that talk about texture and colour, amongst others. Many photographers simply default to the rule of thirds and take the shot, without trying other compositions. These other techniques can make a difference in your images. This article is about six techniques you can use to improve your compositions, and your photos Some of these would be known as advanced techniques, but once you understand them, they are pretty self explanatory.

1. The Golden Ratio or Fibonacci Spiral

Use the Golden Ratio to enhance your composition

Use the Golden Ratio to enhance your composition

This is a tool that has been used for centuries, as a design principle. Many famous works of art use the Golden Ratio in their composition and it is often seen in nature’s own designs. Think of the spiral of a snail shell, how it curls in on itself. That shape conforms to the Golden Ratio. It is a ratio of 1:1.618 which seems to work really well in design and photography. To read much more detail about this technique check out: Divine Composition With Fibonacci’s Ratio (The Rule of Thirds on Steroids).

2. Unity

Unity is about order. Repetition can be very powerful in this regard. You can repeat shapes, lines, or colours in your image. By doing so you create a unified view of the scene, and this in turn gives a very powerful compositional effect. Unity can bring a calming feel to the image, try and find a subject that portrays this.

The lines and the rivets in the image make it feel uniform, as does the lack of colour

The lines and the rivets in the image make it feel uniform, as does the lack of colour

3. Coherence

Different from unity, coherence is more about similar types of elements or shapes in your scene. Think of a rocky river bed with similar sized rocks and pebbles. This scene would be coherent if the rocks and pebbles are a similar size, shape, and colour. Coherence appeals to the viewer’s sense of order, and can make for very interesting images.

Similar shapes and colours make this image feel more coherent

Similar shapes and colours make this image feel more coherent

4. Balance and Rhythm

Balance is pretty much as it says, the idea here is to try and arrange the elements in your scene so that the image is symmetrical. This can be done using lines and shapes. The ideas is to create a sense of equality in the scene. Rhythm is similar in a sense, but is about a repeating pattern in the scene. These are a little more difficult to find, but often a close up or abstract image can showcase this technique well.

The centred composition of this image of a theatre shows the balance in the scene

The centred composition of this image of a theatre shows the balance in the scene

The curved shapes of the glass buildings gives a great sense of rhythm

The repeated curved shapes of the glass buildings gives a great sense of rhythm

5. Space

Open, or negative space, in your image is sometimes as important as the subject. Negative space gives your subject context, and shows the viewer where or how your subject relates to its surroundings. Quite often, negative space is the sky. It can be tempting to ignore this one, but if it’s used correctly, this can be a very powerful compositional tool.

The texture in the clouds in give this image some gravity. If the sky were simply blue, it would not be as impactful

The texture in the clouds in give this image some gravity. If the sky were simply blue, it would not be as impactful

6. Breaking the Rules

Now that you have some new ideas about how to make better compositions. Knowing these techniques will certainly improve some of your images, but also, knowing how to break them is just as important. In some cases, it will be obvious which technique to use, in others, you may find that putting your subject in the middle of your frame works best. You need to decide what will work for your image. Try techniques like this and see if one works. If not, break the rules and do what you think looks good.

By cropping the building quite aggressively, the image seems unfinished, but the colours and the sky make it work

By cropping the building quite aggressively, the image seems unfinished, but the colours and the sky make it work

googletag.cmd.push(function() {
tablet_slots.push( googletag.defineSlot( “/1005424/_dPSv4_tab-all-article-bottom_(300×250)”, [300, 250], “pb-ad-78623” ).addService( googletag.pubads() ) ); } );

googletag.cmd.push(function() {
mobile_slots.push( googletag.defineSlot( “/1005424/_dPSv4_mob-all-article-bottom_(300×250)”, [300, 250], “pb-ad-78158” ).addService( googletag.pubads() ) ); } );

The post 6 Advanced Composition Techniques to Improve Your Photos by Barry J Brady appeared first on Digital Photography School.


Digital Photography School

 
Comments Off on 6 Advanced Composition Techniques to Improve Your Photos

Posted in Photography


Tips for How to Find Lost or Missing Photos in Lightroom

23 Jan

Lightroom is a popular choice for post-processing software for many photographers. There are many common mistakes newbies make when using it – and losing some of their photos is one of those.

In this video Phil Steele will show you how to find lost or missing photos and prevent it from happening again:

If you enjoyed that and want to learn even more about Lightroom you can check out Phil’s Lightroom course here.

googletag.cmd.push(function() {
tablet_slots.push( googletag.defineSlot( “/1005424/_dPSv4_tab-all-article-bottom_(300×250)”, [300, 250], “pb-ad-78623” ).addService( googletag.pubads() ) ); } );

googletag.cmd.push(function() {
mobile_slots.push( googletag.defineSlot( “/1005424/_dPSv4_mob-all-article-bottom_(300×250)”, [300, 250], “pb-ad-78158” ).addService( googletag.pubads() ) ); } );

The post Tips for How to Find Lost or Missing Photos in Lightroom by Darlene Hildebrandt appeared first on Digital Photography School.


Digital Photography School

 
Comments Off on Tips for How to Find Lost or Missing Photos in Lightroom

Posted in Photography


How to Use Blender Pen to Turn Your Photos Into Art Objects

15 Jan

When you discover that you can easily transform your digital photos into some unique creative art with just the magic touch of a digital pen, it opens up a whole world of imaginative possibilities. In this article you can find some handy tips on how to use a blender pen for the best results. How it works If you remember Continue Reading

The post How to Use Blender Pen to Turn Your Photos Into Art Objects appeared first on Photodoto.


Photodoto

 
Comments Off on How to Use Blender Pen to Turn Your Photos Into Art Objects

Posted in Photography


Leave Your Mark! Customize Photos With Lumi

15 Jan

If you’re not already in love with Lumi, you will be soon. (We know we sure are!)

They’re so amazing that they wrote this article for you, with ideas on how to customize your pics: personalized stamps, signatures, and more. Your work will be even more you.

Whether you’re giving your bestie a super special photo for their b-day, or you just wanna decorate with more than a plain ol’ pic, Lumi’s got you covered.

Get ready to get creative!

(…)
Read the rest of Leave Your Mark!
Customize Photos With Lumi (427 words)


© Taylor for Photojojo, 2016. |
Permalink |
No comment |
Add to
Customize Photos With Lumi”>del.icio.us

Post tags:


Photojojo

 
Comments Off on Leave Your Mark! Customize Photos With Lumi

Posted in Equipment


Weekly Photography Challenge – Panoramic Photos

09 Jan

Panoramic or ultra wide views of scenes are popular and work well for many different subjects.

David Yu

By David Yu

David Yu

By David Yu

Weekly Photography Challenge – Panoramic Photos

If you have never done a panoramic photo now it your chance to try it. The simplest way to create one is to just crop a regular image into one that is really long and narrow. Make sure the subject fits the format and you aren’t cutting off anything important to the composition.

The other, more complex way to make a pano is to shoot a series of images and stitch them together, usually using Photoshop. We have a few articles here on dPS on how to do that if you need some tips:

  • How to do Landscape Panoramic Photography
  • How to Shoot Panoramic Photos
  • Getting Started in Panoramic Photography (beginner)
  • Step By Step How to Make Panoramic HDR Images (advanced)
  • HDR Vertorama Photography – How to Create Mind-bending Images (advanced)
  • Step by Step Using Merge to Panorama in Lightroom (beginner)
Guy Lejeune

By Guy Lejeune

David Kingham

By David Kingham

Stavros Markopoulos

By Stavros Markopoulos

Jeff Wallace

By Jeff Wallace

Vonderauvisuals

By vonderauvisuals

Inefekt69

By inefekt69

Share your images below:

Simply upload your shot into the comment field (look for the little camera icon in the Disqus comments section) and they’ll get embedded for us all to see or if you’d prefer upload them to your favourite photo sharing site and leave the link to them. Show me your best images in this week’s challenge. Sometimes it takes a while for an image to appear so be patient and try not to post the same image twice.

Howard Ignatius

By Howard Ignatius

Chuck Coker

By Chuck Coker

Don Whitaker

By Don Whitaker

Linus W

By Linus W

googletag.cmd.push(function() {
tablet_slots.push( googletag.defineSlot( “/1005424/_dPSv4_tab-all-article-bottom_(300×250)”, [300, 250], “pb-ad-78623” ).addService( googletag.pubads() ) ); } );

googletag.cmd.push(function() {
mobile_slots.push( googletag.defineSlot( “/1005424/_dPSv4_mob-all-article-bottom_(300×250)”, [300, 250], “pb-ad-78158” ).addService( googletag.pubads() ) ); } );

The post Weekly Photography Challenge – Panoramic Photos by Darlene Hildebrandt appeared first on Digital Photography School.


Digital Photography School

 
Comments Off on Weekly Photography Challenge – Panoramic Photos

Posted in Photography


DxO brings OpticsPro extensions to Apple’s Photos software for OSX

23 Dec

DxO is bringing its OpticsPro software to Apple’s consumer-friendly Photos software for OSX. This $ 10 extension for Apple’s Photos app gives users full access to all of DxO’s Optics Modules, which can correct optical distortion and aberrations as well as improving dynamic range and removing haze from landscapes.

Also introduced is a free Photos extension for users of DxO’s ONE camera, which offers the same features mentioned above and supports the camera’s SuperRAW files.

Both extensions are available for download now from the Mac App Store. Mac OS X 10.11 (El Capitan) or later is required in order to use Photos.


Press release:

DxO OpticsPro for OS X Photos extensions add powerful one-click corrections to Apple’s OS X El Capitan

DxO’s renowned RAW image processing now available to Mac users as an extension to Apple’s Photos app.

PARIS and SAN FRANCISCO—December 22, 2015—DxO announced today the immediate availability of two new extensions for OS X El Capitan, DxO OpticsPro for OS X Photos and DxO OpticsPro for OS X Photos – DxO ONE Camera Only, that provide DxO’s advanced image processing within Apple Photos. DxO OpticsPro for OS X Photos adds seamless access to tens of thousands of DxO Optics Modules that enable DxO’s unrivaled automatic optical corrections for distortion, vignetting, chromatic aberration and lens softness for virtually all popular cameras and lenses. The extension is also available as a free download, designed exclusively to support RAW and SuperRAWTM images captured by the award-winning DxO ONE connected camera for iPhone and iPad. Both versions also feature simple, yet powerful one-click corrections that automatically improve white balance, dynamic range, reduce noise, and remove landscape haze to make your best photos look even better.

“By leveraging the new extensions in OS X El Capitan, we were able to provide Mac users with a streamlined workflow for their RAW images,” said Frédéric Guichard, co-founder and chief image scientist at DxO. “Photographers can now apply world renowned DxO OpticsPro technologies, such as Smart Lighting, ClearView, and PRIME to enhance their favorite images with no more than a click or two, and without ever leaving the Apple Photos app.”

DxO OpticsPro for OS X Photos is a paid download from the Mac App Store, which when installed automatically appears as an extension that can be accessed via the editing tools in Apple Photos. Launching the extension displays a deceptively simple, yet incredibly powerful user interface and includes access to all DxO Optics Modules currently supported by DxO’s advanced image processing software. The DxO Optics Modules automatically identify the camera and lens used to capture each photo, then use this information to instantly correct for a variety of optical flaws, such as distortion, chromatic aberration, vignetting, and lens softness.

Other corrections include: Smart Lighting (improves overall dynamic range), ClearView (instantly removes haze and smog from distant landscapes), and white balance. Users can modify the intensity of each correction in three simple levels. The extension also provides access to PRIME, the industry-leading denoising technology that analyzes thousands of neighboring pixels to remove noise while leaving important details untouched.

DxO ONE owners are invited to freely download and install the D xO OpticsPro for OS X Photos – DxO ONE Camera Only version that automatically applies these same advanced corrections to DxO ONE photos. When applied to a DxO ONE SuperRAWTM image, PRIME employs additional temporal noise reduction to render an amazingly clean, high-resolution photograph from the four RAW images embedded in each SuperRAW file.

Pricing & Availability

The DxO OpticsPro for OS X Photos extension, with support for tens of thousands of camera and lens combinations is available today at a special introductory price of $ 9.99/£7.99 via the Mac App Store.

The DxO OpticsPro for OS X Photos – DxO ONE Camera Only extension is available today as a free download via the Mac App Store for the DxO ONE.

Articles: Digital Photography Review (dpreview.com)

 
Comments Off on DxO brings OpticsPro extensions to Apple’s Photos software for OSX

Posted in Uncategorized


25 Glitzy Holiday Lights Photos to Sparkle up Your Day

18 Dec

Holiday time is almost upon us, however you celebrate. Regardless of location, it seems we all like to glam up a little and decorate. Let’s look at these glitzy holiday lights photos, including some abstract and zooming techniques:

Ginny

By Ginny

Howard Ignatius

By Howard Ignatius

Dave Wilson

By Dave Wilson

Always Shooting

By Always Shooting

Billy Wilson

By Billy Wilson

Kkmarais

By kkmarais

Robert Couse-Baker

By Robert Couse-Baker

Frank Farm

By Frank Farm

Maf04

By maf04

Matthew Paulson

By Matthew Paulson

André Mellagi

By André Mellagi

Howard Ignatius

By Howard Ignatius

James Morley

By James Morley

Nathan Reading

By Nathan Reading

Marco Ghitti

By Marco Ghitti

Vitorcius

By Vitorcius

Hernán Piñera

By Hernán Piñera

Kevin Dooley

By Kevin Dooley

Gorfor

By gorfor

Aurimas

By Aurimas

MissTessmacher

By MissTessmacher

Howard Ignatius

By Howard Ignatius

Dawn Ashley

By Dawn Ashley

Mike

By Mike

Tulane Public Relations

By Tulane Public Relations

googletag.cmd.push(function() {
tablet_slots.push( googletag.defineSlot( “/1005424/_dPSv4_tab-all-article-bottom_(300×250)”, [300, 250], “pb-ad-78623” ).addService( googletag.pubads() ) ); } );

googletag.cmd.push(function() {
mobile_slots.push( googletag.defineSlot( “/1005424/_dPSv4_mob-all-article-bottom_(300×250)”, [300, 250], “pb-ad-78158” ).addService( googletag.pubads() ) ); } );

The post 25 Glitzy Holiday Lights Photos to Sparkle up Your Day by Darlene Hildebrandt appeared first on Digital Photography School.


Digital Photography School

 
Comments Off on 25 Glitzy Holiday Lights Photos to Sparkle up Your Day

Posted in Photography


5 Tips for Better Landscape Photos

18 Dec

Landscape photography seems simple to most people – there’s a pretty scene, you walk in, take a couple shots and you’re done … and chances are that you end up with a version of the scene that everyone else has.  So how do you take your “snapshot” to the next level?  Other than the “straight horizon” suggestion that you may have heard before, here are five basic tips you can try out when next you are on the field to help you take better landscape photos:

WinterLighthouse

1. Survey Your Scene

Think about the scene differently. Is there another angle that you can shoot from? Can you get your camera higher or lower? Scouting your location to find different and more interesting vantage points is time well spent.  Also check for elements of interest in the location that can be used to give your photo a sense of scale or add texture. So take a moment, survey your scene, take a chance, shoot from a different perspective and see what you might have missed initially.

CastleHill

2. Look for the Light

Most surreal landscape photography moments happen in the golden hours (dawn and dusk). Sunrise is definitely worth getting out of your bed for in the wee hours of the morning, and sunset is a nice exercise in patience to catch that ideal, magical light. It certainly helps to do research before you head out to determine where the sun rises and sets, or even which season works well for the area you intend to shoot. If you’re still unsure about your directions, walk with a compass (a compass apps for your phone is an easy way to always have one with you).

DesertSun

SunsetBrickfield

There is no harm in light chasing during the day either – sometimes it’s the only time you have with a scene, and you have to make the most of it. You need to be aware that shooting in harsh sunlight produces very contrasty light, which means that you don’t capture much detail in the highlight and shadow areas. An overcast, or cloudy day, softens the light a bit. Outside of the golden hours, the key would be to find an angle where the light is flattering to your subject, or put the sun to your back and give it a go!

CaribbeanDay

HorseshoeBend

Note: I have found that midday sun works well for infrared landscape photography.

3. Lines and Repetition

Lines and repetition in a scene catch your viewer’s attention almost immediately, and serves to lead them into the photo. Lines also encourages their eyes to wander around the photo, especially if they start at a corner of the frame. Think about photos of roads and fences, and even the angle of the ocean when composing your shot. Repetitive items or patterns also have a way of holding your viewer’s fascination, and they are everywhere – any element that creates a nice line or geometric shape can give your images structure and form – look for them!

BeavertailLighthouse

PathwaytoGoodbye

4. Foreground Elements

Placing a foreground element in your shot gives the image extra depth and dimension. It can also be used to convey scale and distance, as well as balance out your photo. A dominant foreground object can draw your viewer in, and quite simply makes your photo a more interesting one.

SunsetWaterloo

SmokyCreek

5. Use a Tripod

There are different schools of thought on the necessity of always having a tripod, and yes there are many times you can get away without having one. However, outdoor photography comes with many elements of movement, from a gentle breeze to crashing waves, to the sun – something is always moving. Sharp images are ideally what you want, and using a tripod is one way to deal with such movements.

Tripods are also a must for when you lengthen your shutter speed. You may do this for several reasons; the most common are when using a smaller aperture (higher f-numbers equals smaller aperture opening, which equals less light hitting the sensor) or shooting long exposures (where moving elements are blurred intentionally, e.g., that silky water effect).

LighteningArches

SmokyFalls

Conclusion

Many of these may not be new to you, but the key is remembering a few when you are out there, and trying to make that scene before you, one that is your own. Maybe you’ll spend a little more time surveying the scene or perhaps looking for lines and repetition?

Feel free to share any of your landscape photos that you think successfully utilizes any one of these tips in the comments below.

googletag.cmd.push(function() {
tablet_slots.push( googletag.defineSlot( “/1005424/_dPSv4_tab-all-article-bottom_(300×250)”, [300, 250], “pb-ad-78623” ).addService( googletag.pubads() ) ); } );

googletag.cmd.push(function() {
mobile_slots.push( googletag.defineSlot( “/1005424/_dPSv4_mob-all-article-bottom_(300×250)”, [300, 250], “pb-ad-78158” ).addService( googletag.pubads() ) ); } );

The post 5 Tips for Better Landscape Photos by Nisha Ramroop appeared first on Digital Photography School.


Digital Photography School

 
Comments Off on 5 Tips for Better Landscape Photos

Posted in Photography


Scarchitecture: Aerial Photos Reveal Vanished ‘Ghost Streets’

16 Dec

[ By WebUrbanist in Architecture & Cities & Urbanism. ]

architectural scars

When thoroughfares are subtracted from city grids, subsequent urban infill is shaped by the voids of these former roadways, streetcar or rail paths, standing out like architectural scar tissue when viewed from above. The effect is all the more pronounced when the disappeared passageways cut at odd angles through city blocks, forcing particularly odd-shaped ‘scarchitecture’ to follow.

scar detail view

When architectural writer Geoff Manaugh came across this phenomena in the streets of Los Angeles, readers rapidly began sending in examples from other cities. Some are surprisingly complex and counterintuitive, like the half-circle seen below (if you look closely) that seems to arbitrarily slice across multiple city blocks.

scar pathway winding

Manaugh’s fascination is infectious: “The notion that every city has these deeper wounds and removals that nonetheless never disappear is just incredible to me. You cut something out—and it becomes a building a generation later. You remove an entire street—and it becomes someone’s living room.”

scar horizontal slice

Perhaps most remarkable of all: many of these scarchitectural expressions frequently go largely unnoticed on the ground level. Most, however, emerge immediately as visual patterns when seen from aerial vantage points, their persistently unconventional orientations going against the grain of gridded streets surrounding them.

scar residual architecture

Small buildings can completely conform to the unusual geometries these ‘ghost streets’ trace; some sides of other structures, reconfigured paths and even parking space orientations may also follow these uncanny trajectories, in part or in whole, as if aligning to secular ‘ley lines’ of invisible force. Next time you are using Google Maps, pan around your own neighborhood and you could find evidence of scarchitecture, perhaps cutting right through your own backyard.

Share on Facebook


[ By WebUrbanist in Architecture & Cities & Urbanism. ]

[ WebUrbanist | Archives | Galleries | Privacy | TOS ]


WebUrbanist

 
Comments Off on Scarchitecture: Aerial Photos Reveal Vanished ‘Ghost Streets’

Posted in Creativity


4 Good Reasons Why You May Want to Wait to Share Client Photos

14 Dec

A few decades ago the Heinz company ran a series of commercials featuring people patiently waiting for their ketchup to be poured from glass bottles, each ending with the tagline, “The best things come to those who wait.” Even though these ads seem kind of silly now, they do have a lesson for photographers: sometimes it pays to be patient, especially when sharing photos with your clients.

Almost every time I return from a photo shoot, and start going through the pictures on my computer, I get caught up in the excitement and have a nearly unbearable urge to start sending pics, previews, and first-looks to my clients. I often can’t wait to share my work with them so they can see for themselves how things turned out. However, if you take the opposite approach and apply the brakes a bit, you and your clients will have a much more positive experience, and you will be better prepared for the long run and the rewards it brings. If you are the type of person who, like me, wants to send your clients a few sneak peeks or previews before you deliver your finished pictures, here’s a few reasons you might want to reconsider that practice.

wait-to-share-photos-family-kids-park

1 – Put your best foot forward

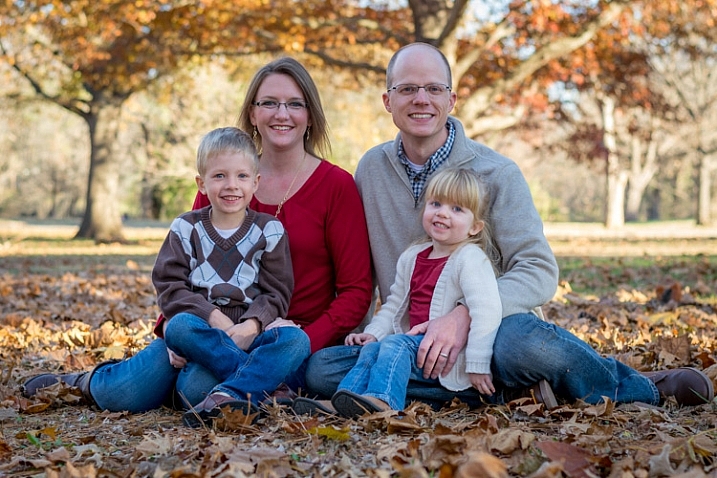
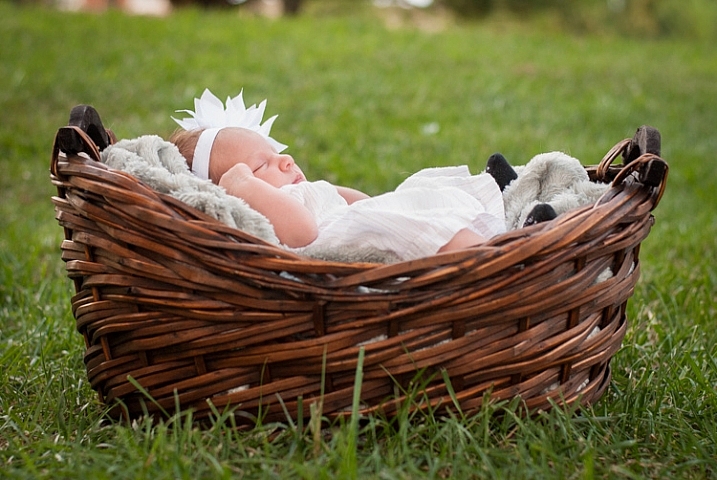
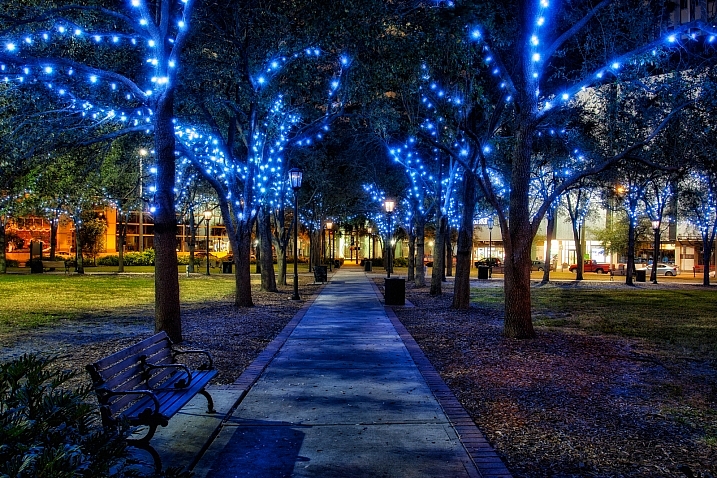
Recently I spent an hour in the park taking pictures of a family, and as I was going through nearly a thousand images in Lightroom later that evening, I came across a few that I just had to share with the parents. They were so precious, and their little girl looked like she was having the time of her life, so I knew they would be thrilled to get a couple photos right away. I sent them to the mother’s mobile phone and she responded with ecstatic adulations, and a few minutes later the pictures showed up on Facebook where they immediately got dozens of likes and a handful of comments like “Great shot!” and “Lovely family!” So far so good, right? I mean, where’s the harm in sending a few pictures the evening after a photo session if that is the result?

My goal in sending a few initial photos was to give my clients a sneak peek (that’s literally what I said when I texted her: “Here’s a sneak peek from today’s session!”) which would whet her appetite for the rest of the photos, but in doing so I essentially ruined the surprise. It’s like sneaking a peek, to use the expression, beneath the wrapping paper a week before Christmas and getting a glimpse at your presents–it’s fun, but it makes the actual unwrapping a bit anticlimactic, since you already know what to expect.

Another problem with this approach is I found a few other pictures later on that were even better, but by then the surprise had worn off. Yes the clients were still thrilled to get their images, but by the time I had the official gallery all put together, with watermarked proofs for sharing on social media, the excitement had worn off and her friends were not as interested as they were initially. I basically sacrificed quality on the altar of immediacy, and in doing so hurt my brand just a tiny bit in the process.

wait-to-share-photos-family-tree

If I had simply waited until all the photos were finished and given my clients everything when I was truly ready to do so, I would have had much better results overall. Every photo would have been personally selected, properly edited, and appropriately watermarked for sharing on social media. My client’s photos would have looked better and so would my photography operation in general. This same scenario has repeated itself time and time again, and often my wife has to talk me down from the edge. I’m eager to share a few quick photos, but if I just wait a week or two until they are actually ready for sharing, the results are always better for everyone involved.

2 – Initial edits are usually not the final edits

wait-to-share-photos-senior-brick-wallThis second lesson is more practical and less emotional, but it rings true for me every time. My initial edits to my pictures are almost never the same as my final edits, and thus rushing to share images right away inevitably leads me to getting an inferior product into the hands of my customers. My editing workflow in Lightroom looks something like this:

  1. Import all photos
  2. Apply custom portrait presets
  3. Pick out my favorites
  4. More editing
  5. Cut out more photos
  6. Edit again
  7. Cut down again
  8. Edit, tweak, enhance
  9. Export the best of the best for printing and sharing

If I share a preview of the session with my clients, it’s usually after step 4, or worse, step 3. (Which sadly has been known to happen more times than I care to admit.) That means I am giving my client, and everyone with whom they share those sneak peeks, images that are quantitatively inferior to what I am capable of producing. If you were baking a cake that you know needs 30 minutes in the oven, would you serve it after 25 minutes because you can’t wait for your guests to taste it? No way! You would serve it only when it’s done and give your friends the highest quality dessert possible as a result. We should give our photographs, and the people with whom they are shared, no less than the time they need to be the quality they deserve.

wait-to-share-photos-child-red-shirt

3 – People think things that take longer, are higher quality

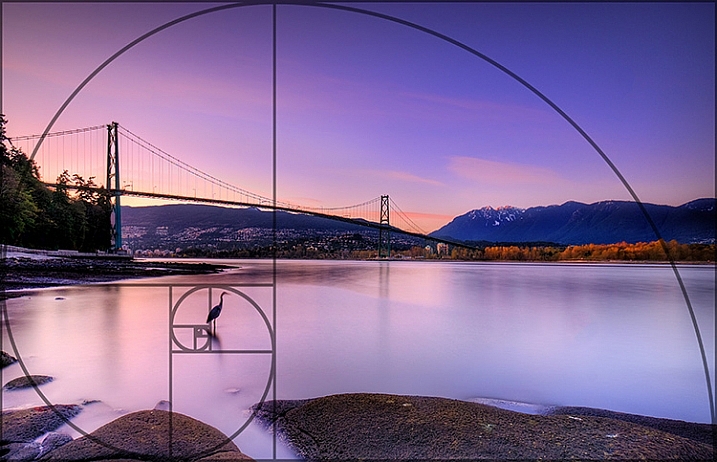
Think for a moment about something special you have in your life: a physical object, a trinket or knicknack, or something with function or purpose like a bookshelf or cabinet. More likely than not, the things we hold dear, and to which we assign greater value, have one thing in common – they were constructed with care over time. Humans often assign greater significance to things that we know took a long time to create. Spelunkers gaze in awe at natural rock formations and crystals that were formed bit by bit, over millions of years. We pay more for wines that has been aged over time, even though they are often no better than their one-year-old counterparts. Rome itself, so the saying goes, was not built in a day. Why then are we, as photographers, so quick to share photos with our clients, if people expect that quality takes time?

I know how tempting it can be to want to share a few pictures right after you are done with a photo session. It hapens to me almost every time! It might get you some immediate accolades from your clients, but can be somewhat counterproductive in the long run. Early sharing can send the wrong signal to your clients, and their friends, about the quality of your pictures. Think about it from your clients’ perspective – would you feel good about spending $ 500 on a photo session if the photographer finished editing your images in one day, or would you rather know that he or she spent a week or two to get the colors, the cropping, and other edits just right?

wait-to-share-photos-baby-basket

If your clients have to wait a week or two for their pictures they will assign a much greater value to them, because they know it took you longer to arrive at the final product. When I think about giving clients a preview or sneak peek, my wife, ever the voice of reason, usually pulls me back from the edge and reminds me that we’re only helping our business in the short term. That is not creating the type of high-quality perception we want people to have when they think about having us do their pictures.

4 – Sharing photos early cheapens your talent and skill

One of the nice things about the prevalence of smartphones is that everyone has a camera. Of course the downside to this is many people also consider themselves photographers, when they may not have all the training, experience, and skill that most of their professional counterparts possess. While I’m not one to judge, and far be it from me to say whose work has value and whose work does not, I do know that if you want people to spend money on your photography services, you need to give them a reason to do so.

Why should I pay someone $ 1500 to shoot my wedding if my friend says he can do it for half that with his new Canon Rebel and a kit lens? Why should I pay $ 300 for pictures of my kids when my sister can just use her  iPhone with its really nice camera? The reason is because you, as a photographer, are much more than just a person with a camera. People are paying you for your knowledge and skills, your ability to work with people and capture their emotions, and to create beauty and art with the press of a shutter button. You have experience shaped by years of trial and error. Sharing pictures within hours of taking them can send your clients a signal that your work is no different than anyone else with a halfway decent camera.

wait-to-share-photos-birthday-cake

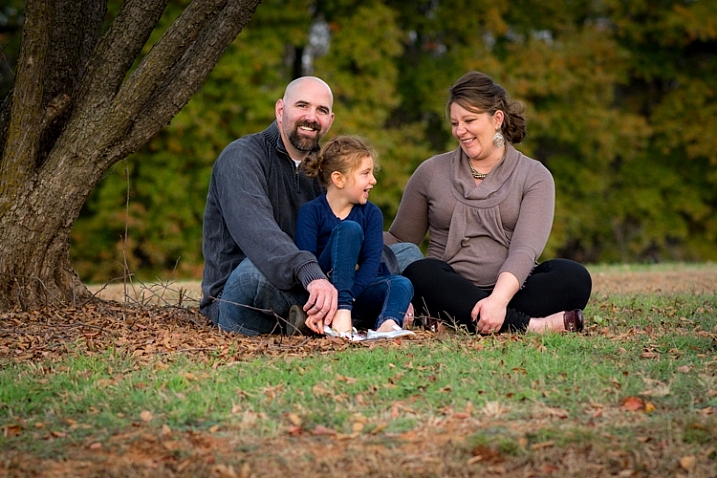
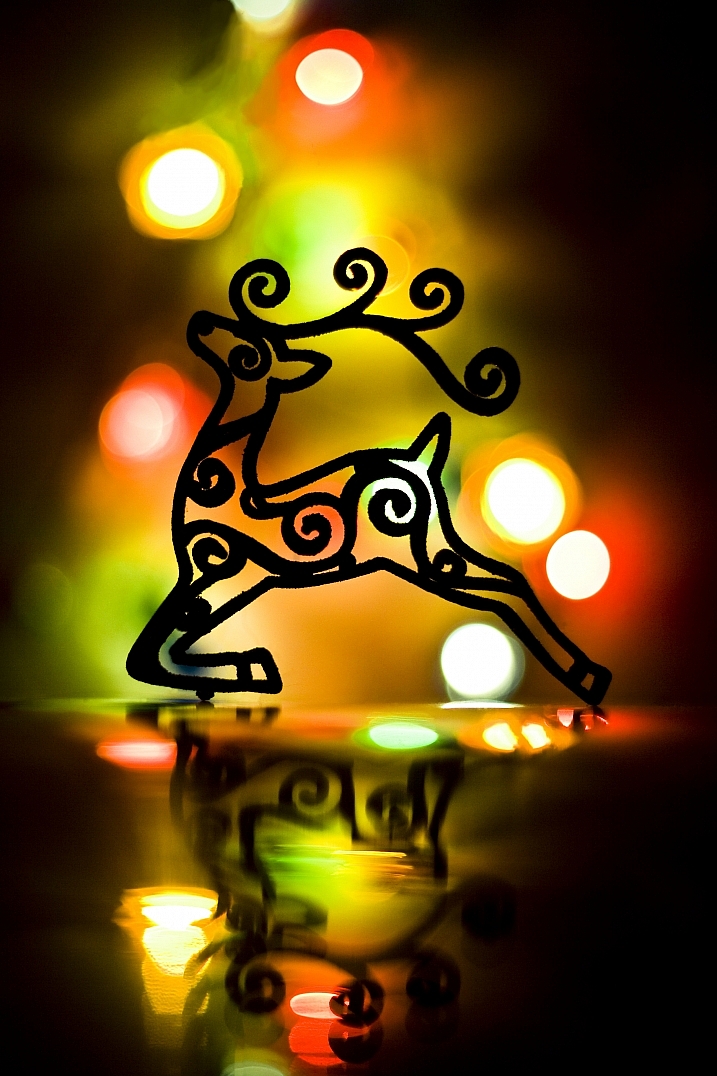
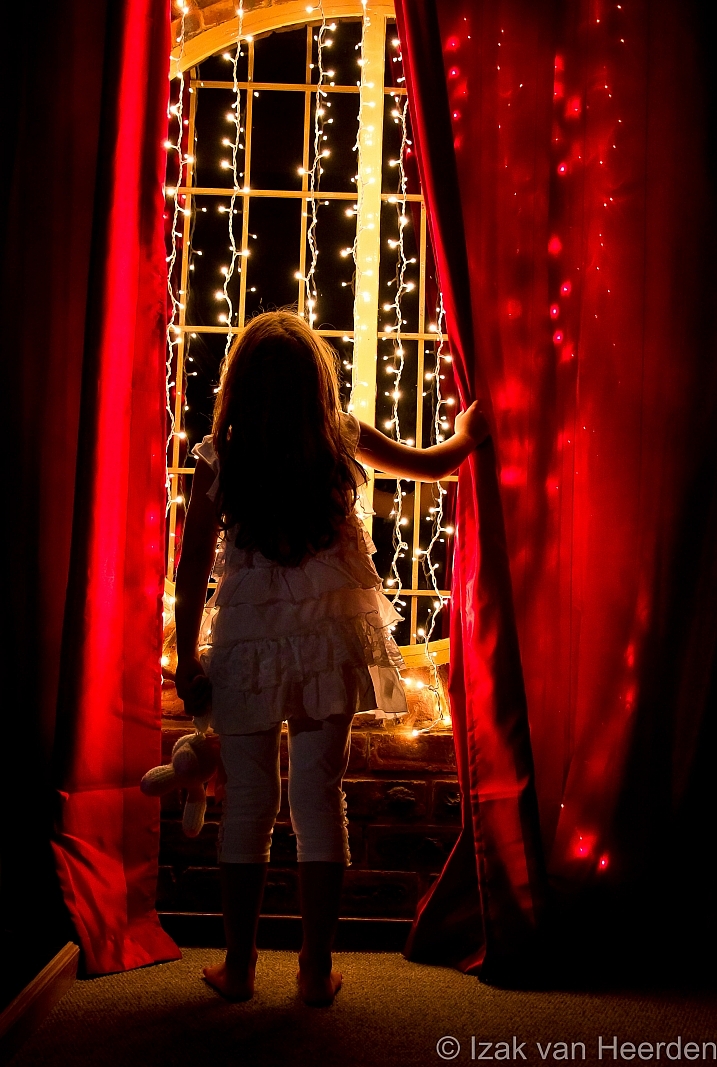
It was so tempting to share this photo with the girl’s mother right away, but after a week I had taken more time to properly edit it to where it was much better than the original.

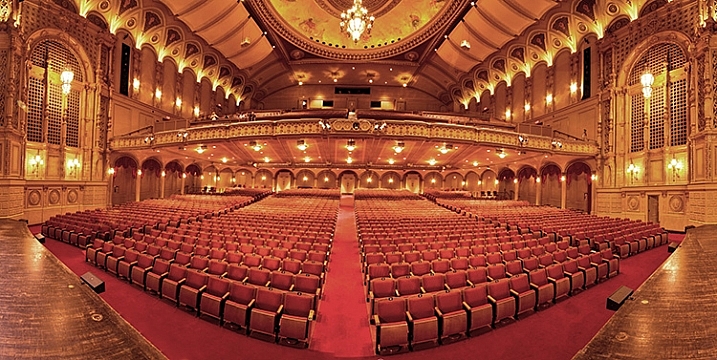
By carefully culling your photos from a session, taking time to edit them to perfection, and choosing only the best of the best to eventually give to your clients, you are sending a message that you might not be the fastest game in town, but you mean business, and do quality work. To use another food analogy, anyone can stop at a fast food burger joint and get a quick meal. For a quality top-notch hamburger you need a sit-down restaurant where your food takes a decent amount of time to prepare. Even if both establishments get their beef from the same distributor, the public perception of the latter will almost always be greater than the former, partly for the simple reason that you don’t get your food right away. The same holds true for photography – the best things come to those who wait.

wait-to-share-photos-baby-basket-park

Of course one obvious problem here is how long to wait. As a general rule I like to give my clients their images within two weeks, and often a bit sooner. Much more than that and they can get a bit annoyed, as you would also have a problem waiting two hours for a hamburger, no matter how tasty it was. Every photographer is different, and the length of time depends on many different variables, but as long as you set your clients’ expectations upfront you should be fine. You might even benefit from over-estimating the length of time it will take, and then delivering your pictures a bit sooner. This type of under-promising and over-delivering can go a long way towards building goodwill with your clients, and give them an even more positive impression of you and your work.

What about you? Do you like to share your photos online right away or take your time? I’m interested to hear your thoughts in the comments section below.

googletag.cmd.push(function() {
tablet_slots.push( googletag.defineSlot( “/1005424/_dPSv4_tab-all-article-bottom_(300×250)”, [300, 250], “pb-ad-78623” ).addService( googletag.pubads() ) ); } );

googletag.cmd.push(function() {
mobile_slots.push( googletag.defineSlot( “/1005424/_dPSv4_mob-all-article-bottom_(300×250)”, [300, 250], “pb-ad-78158” ).addService( googletag.pubads() ) ); } );

The post 4 Good Reasons Why You May Want to Wait to Share Client Photos by Simon Ringsmuth appeared first on Digital Photography School.


Digital Photography School

 
Comments Off on 4 Good Reasons Why You May Want to Wait to Share Client Photos

Posted in Photography