RSS
 

Posts Tagged ‘Photos’

How to Sharpen Your Photos using Lightroom and Nik Efex

02 Nov

Do you want to take razor sharp photos? One of the best methods for creating tack sharp images is what I call The 20/20 Technique. It’s a process that combines the editing power of Adobe Lightroom and Nik Efex to sharpen your images.

sharpen, photos, tips, photography, Lightroom, Nik Efex

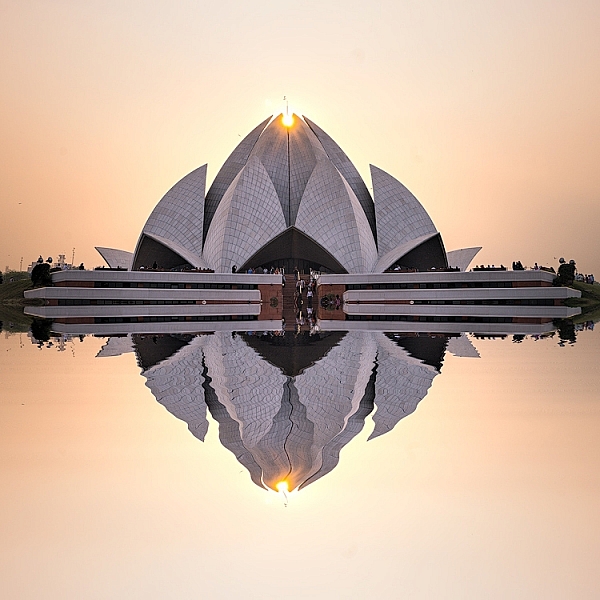
Lotus Temple, Delhi: Bringing out sharpness in architectural photos can really make them pop. © Pete DeMarco

Is sharpness overrated?

The godfather of street photography, Henri Cartier-Bresson, once quipped, “Sharpness is a bourgeois concept.” It’s true that sharpness does not turn a bad photo into a good one. In fact, some of the greatest photographs of our time aren’t that sharp. A picture that evokes emotion will always win over an image that is technically great but lacks feeling.

In the digital age, however, sharpness is another tool in the photographer’s kit that can transform an image from good to great. Have you ever seen a photo so clear that it makes you feel as if you could reach through the screen? It’s almost as if it’s not even a photograph at all but a window into another world.

sharpen, sharper photos, tips, photography, Lightroom, Nik Efex

Bundi, India: Be careful not to sharpen people too much. © Pete DeMarco

Popular advice about getting sharp images usually centers around buying expensive lenses or having the proper settings in camera, as is explained in this article; How to Take Sharp Images. Although those two factors have a major impact on the overall sharpness of the image, today’s top photographers take an additional step. They enhance the sharpness in post-processing.

Sharpen Using The 20/20 Technique

In the modern digital darkroom, there are a number of ways you can add a superior amount of sharpness to your images. I’m going to explain one of the most simple and effective methods you can use to get incredible results. Here is my 20/20 Technique workflow:

sharpen, photos, tips, photography, Lightroom, Nik Efex

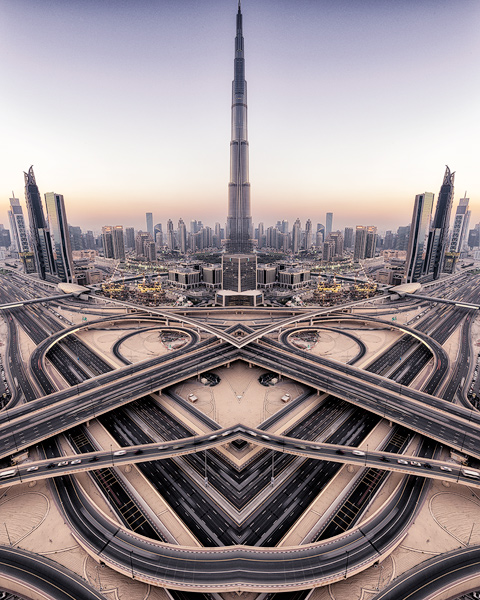
Burj Khalifa Reflection, Dubai: Nik Efex is a powerful photo editing suite you can download for free. © Pete DeMarco

Step 1. Open your image in LR

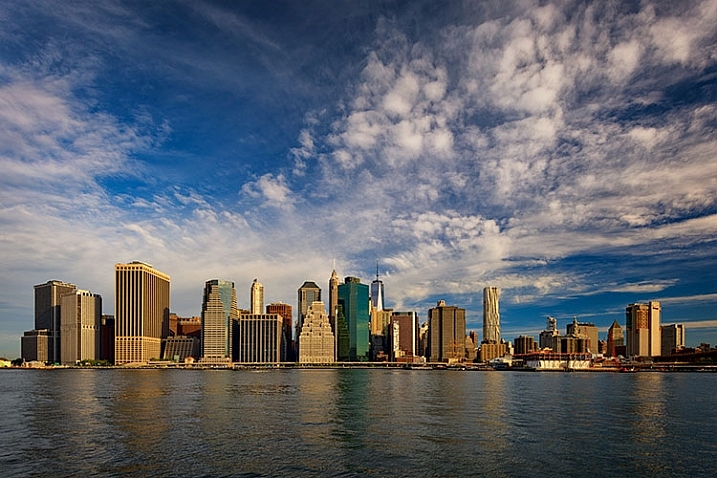
Import your image into Adobe Lightroom (or the editing software of your choice). Open the Develop Module and go to the Detail Panel, then to Sharpening. Increase the sliders up to somewhere between 40 – 50. This is just a general number to start. You’ll have to decide what works best for your image (make sure to view it full size or 1:1). Then finish editing your photo (correcting the white balance, exposure, etc.).

Step 2. Open the image in Nik Efex

For the next step, you will need a piece of software called NIK Efex. You can download NIK Efex for free here. Look for the blue download button in the top-right corner.

NIK Software is a company that develops image editing tools for others like Adobe and Google. In fact, Google bought the company in 2012. Then they copied the best editing algorithms from NIK Efex and created the photo editing app Snapseed. Sadly, NIK Efex has not been updated since then. Most assume it will die a slow death, especially after Google announced the software is now free.

sharpen, photos, tips, photography, Lightroom, Nik Efex

Busan, South Korea: Adding a slight tilt-shift blur effect to the edges of your photo can accentuate the sharpened areas. © Pete DeMarco

Anyways, once you install Nik Efex, right click on your photo in the Lightroom Develop Module > Edit in Nik Output Sharpener, and choose; Edit a copy with Lightroom Adjustments. Your photo will then open in a new Nik Output Sharpener window.

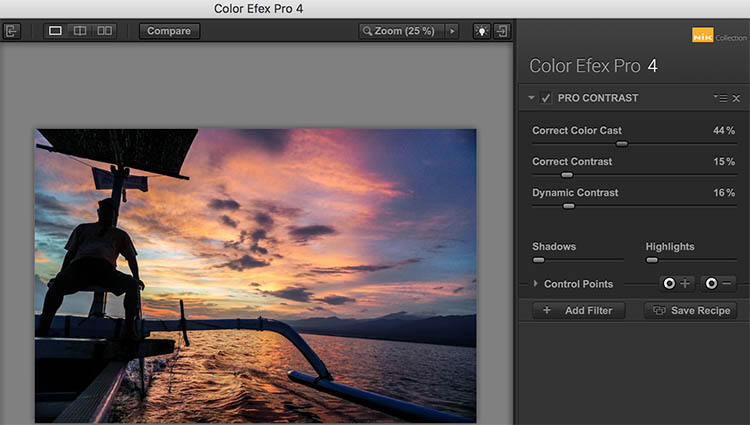
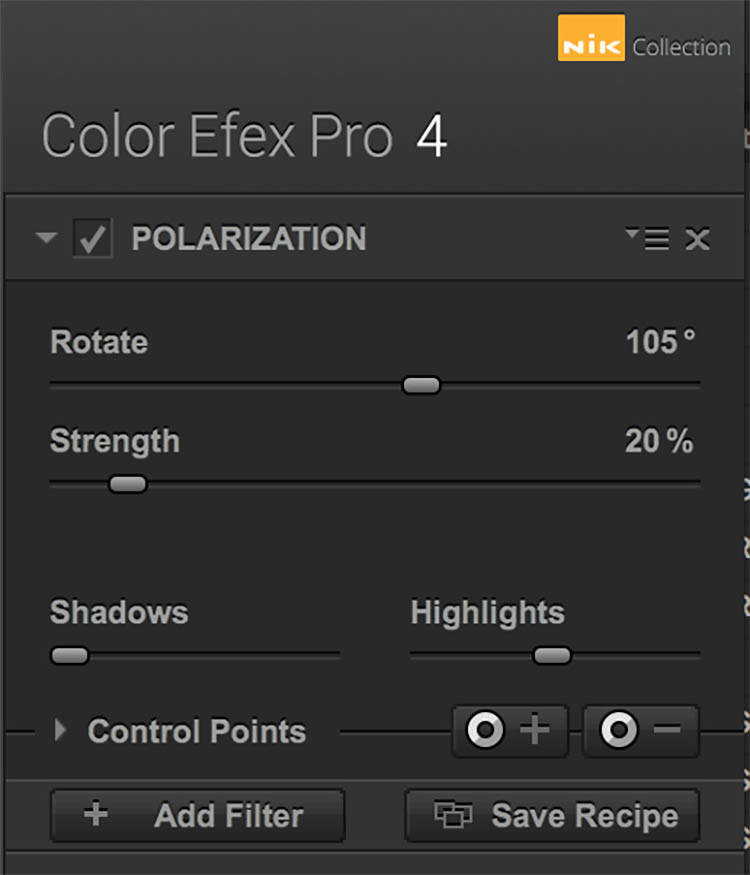
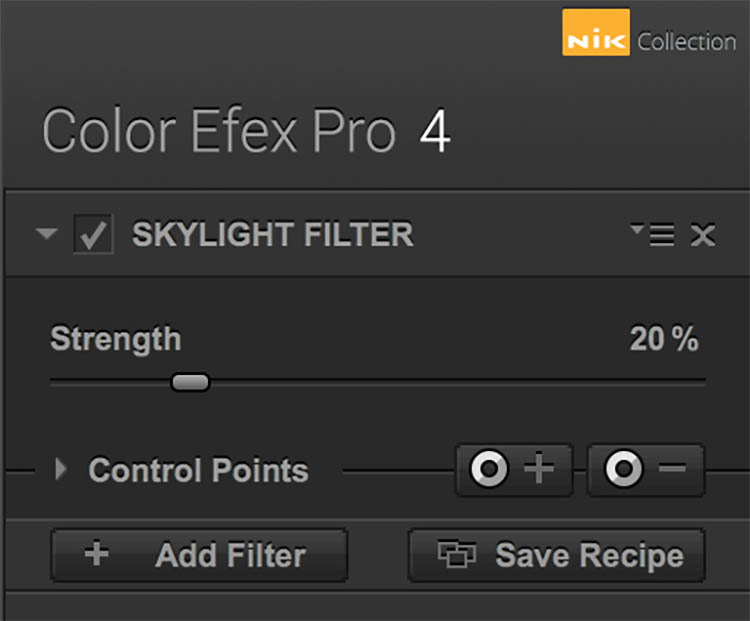
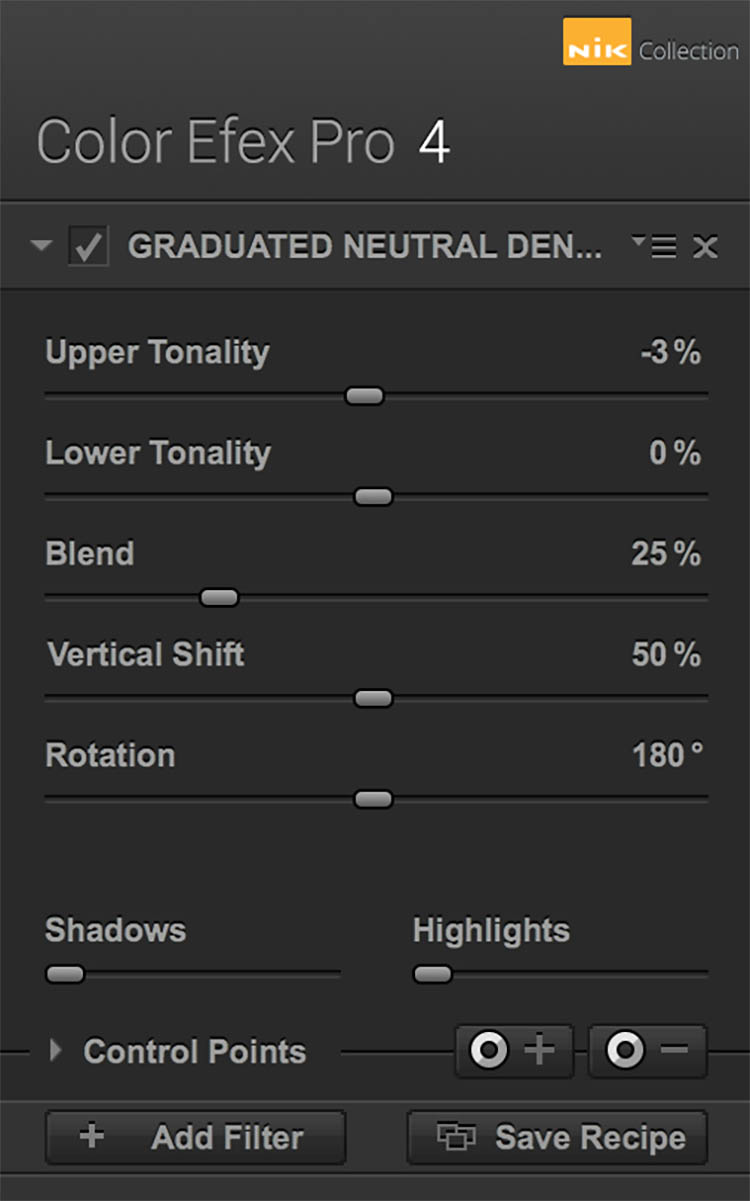
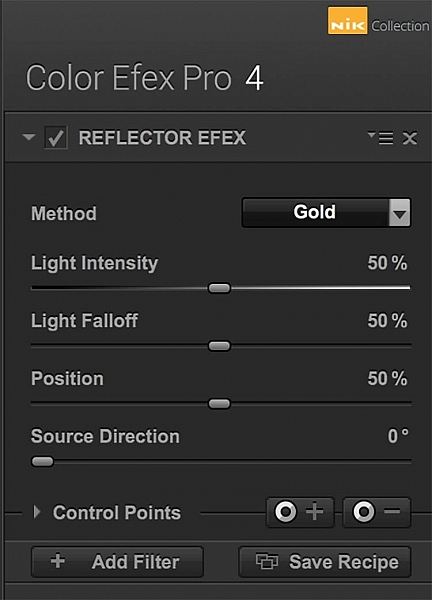
Step 3. Adjust using the Nik filters

From the Nik Output Sharpener window, move the sliders until you get the look and sharpness you are after. For me, I usually leave the “Adaptive Sharpening” at 50%. Then I increase the “Local Contrast” and “Focus” sliders up to around 15-20%.

Google, Nik Efex, sharpen, photograph, output

The Nik Efex Output Sharpener interface.

Step 4. Save and head back to Lightroom

Click on “Save” and the final version of your image will import as a new file back in Lightroom. That’s it!

Here is a video from Nik showing how to use this filter:

Words of warning

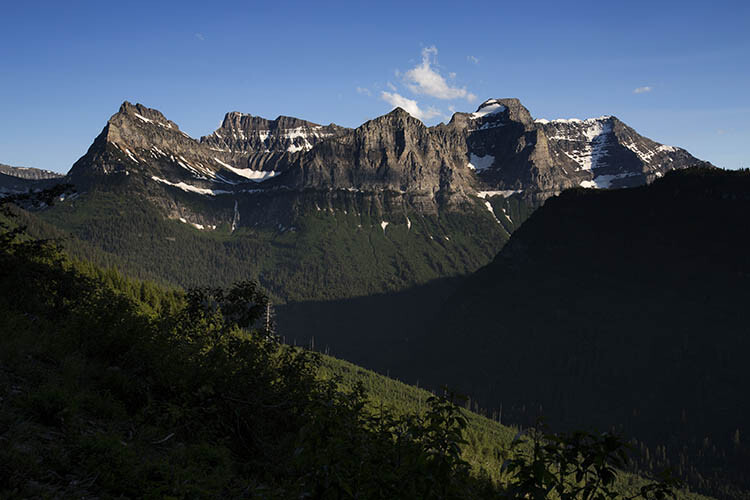
Don’t sharpen too much. Know when to pump it up or turn it down. For instance, clouds are soft so you usually don’t want to apply a lot of sharpening to them. Nature scenes usually call for less sharpening. With architecture, some extra sharpening really makes it pop (try adding a little “Structure” sharpening to those). Sharpening people can be hit or miss. It all depends on what you’re trying to achieve.

sharp, photos, tips, photography, Lightroom, Nik Efex

Xingping, China: Selectively sharpening parts of your image, like the houses in the foreground of this photo, helps to lead the viewer’s eye. © Pete DeMarco

Watch out for noise. The more digital sharpening you apply, the greater the noise in your photo. Just zoom in on your photo to see it more clearly. You can apply some Noise Reduction in Lightroom if need be. I don’t like to use it much though because it softens the image. Some noise really doesn’t matter anyways, especially if you are sharing your photo as a smaller size online.

Make sure you’re using a good monitor. If you are viewing or editing your photos on an old monitor, it’s possible that you will not see much difference in sharpness. You can get the best results on a retina display or by printing your photos.

sharpen, photos, tips, photography, Lightroom, Nik Efex

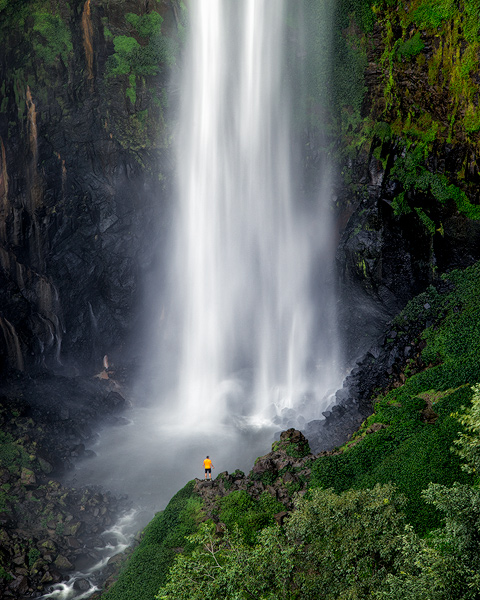
Sipisopiso Waterfall, Indonesia: Transform your images by combining the 20/20 Technique with split toning. © Pete DeMarco

Share your work

Try the 20/20 Technique and share your photo in the comments below. I’d love to see what you do with it. And if you enjoyed this article, you might also like my previous article: How To Use Split Toning to Make Your Photos Stand Out.

googletag.cmd.push(function() {
tablet_slots.push( googletag.defineSlot( “/1005424/_dPSv4_tab-all-article-bottom_(300×250)”, [300, 250], “pb-ad-78623” ).addService( googletag.pubads() ) ); } );

googletag.cmd.push(function() {
mobile_slots.push( googletag.defineSlot( “/1005424/_dPSv4_mob-all-article-bottom_(300×250)”, [300, 250], “pb-ad-78158” ).addService( googletag.pubads() ) ); } );

The post How to Sharpen Your Photos using Lightroom and Nik Efex by Pete DeMarco appeared first on Digital Photography School.


Digital Photography School

 
Comments Off on How to Sharpen Your Photos using Lightroom and Nik Efex

Posted in Photography


How to Get Stunning Macro Photos with Your Mobile Phone

01 Nov

If you’ve ever scrolled through Instagram or Flickr and seen an incredible close-up photograph of a flower, insect, or even jewelry, you may have wondered how you can get similar photos, especially if you don’t have a camera. Thankfully, you don’t have to buy a DSLR or expensive macro lens to get these kinds of shots. All you need is a mobile phone, a simple accessory, and a bit of curiosity. In this article, I’ll go through some tips to help you get stunning macro photos using your mobile phone.

how-to-get-stunning-macro-photos-with-your-mobile-phone

Busy

Lenses

While some phones have a macro mode, the best way to get amazing macro photos with your phone is to invest in an inexpensive lens (or set of lenses) that work specifically with your device. I have an iPhone 5s and initially purchased the Olloclip 4-in-1 set that includes lenses for wide-angle, fisheye, macro 10x, and macro 15x.

I quickly discovered the 10x was my personal favorite since it best suited most of my subjects. So I also got the Olloclip Macro 3-in-1 that has lenses for 7x, 14x, and 21x, as well as a couple special hoods that diffuse the lighting and make getting a good shot a bit easier. Over time, I’ve discovered that the 7x lens is my go-to for nearly all of my macro photos since it can capture a large enough area while still getting lots of detail. You can experiment and use any of these magnifications to get the types of shots you are not able to take with your phone camera alone.

Prairie

Options

There are definitely other brands and magnifications available, but make sure that the lens you buy fits with your phone and won’t get in the way of taking photos. Note that most lenses slip over your phone so you cannot typically use them with a phone case. Olloclip has special cases with openings at the camera area for easy access, or you can go without a case.

You never know when you might come across something that will make for a good macro photo. Initially, I suggest taking your lenses with you (they fit in a pocket), especially when you go outside so that you can experiment with different subjects. A garden or another area with flowers or insects is a great place to try out your new lens. Or if it’s winter, use your lens as an excuse to buy a bouquet of flowers.

Garden

Lighting

As with all photography, lighting is critically important for taking good macro pictures. Daylight is probably the best and easiest to work with, but bright sunlight can make for tricky shadows. With macro photography, sometimes you can simply move your subject to decrease shadows by gently bending a flower stem or turning a leaf toward you.

Fullsun

You can also use your body to block bright sunlight or put a hand over your subject to reduce glare. You can play around with sunrise and sunset, and catch lighting in the background of your images. With macro lenses, the light will often turn into a lovely addition to your photos in the form of bokeh, or out-of-focus areas that make your pictures appear to glow.

Bokeh

Note: you can also add light. Read: How to Create Gorgeous Flower Images using a Flashlight and a Reflector

Focus and framing

With macro photos, there are endless ways to frame your subject, but you will be limited in the depth of field or the area of the photo that will remain in focus. You want the subject to remain (mostly) in focus, depending on your magnification. The larger the magnification, the smaller the area of exact focus in your pictures. This can lead to surprisingly beautiful photos which you might not expect to get from just your mobile phone.

Sunset

Sometimes your intended subject will be too large to fully capture, even with the smaller magnification (like the 7x lens), so you may have to focus on only a part of the subject like the center of the flower, or a few petals. This is the fun part of macro photography! You can shoot the subject from directly above, from the side, or even from below. Experiment with different angles for the same subject.

Center

Other notes

When taking macro photos, any movement is your enemy. Even slight movement while shooting will result in blurriness. You will need to remain very still, and do everything you can to keep your subject from moving. A tripod for your phone can help but isn’t necessary. Just find a position that’s comfortable, stay as still as possible, and steady your phone with two hands.

Sometimes, like on a breezy day, it’s impossible to keep your subject in one place. You can sometimes hold your subject still (as with a flower), but other times you can’t, as with shooting insect photos. One helpful tip for these situations is to use the burst mode on your phone’s camera which takes many shots in rapid succession. On an iPhone, you can hold down the camera button on the side of the phone or on-screen to shoot multiple photos very quickly. Android phones usually have a way to do this, too. If you don’t have built-in burst most, just take many photos while staying as still as possible. This is how I get most of my insect photos, patience and taking many shots. It’s easy to weed out the blurry photos later.

Beebalm

Editing – especially for Instagram users

Since many people who use their mobile phones for photography also use Instagram to share them, here are a couple extra tips for Instagram users.

1. You don’t need to use Instagram’s filters to make great photos.

Adjusting color or warmth slightly can make your photos look more like real life. In the image below, the only adjustment has been to crop the image.

Original

2. Turn up the Lux

This is the little light/dark option at the top of the screen when you are on the Filter or Edit pages in the Instagram app. Using this editing trick (try moving it to the right to 50 or even 100), you increase the intensity of your images. This makes the photo a little less washed out, which can help if you’re taking photos on a very bright day. In the image below, this is turned up slightly and adds more depth to the petals.

Lux

3. Sharpen your macro photos

Using Instagram’s own built-in sharpen edit, you can bring a bit more detail out of your macro photos. In the image below, this has been adjusted and brings out the detail in the center of the photo.

Sharpen

Conclusion – your turn

Do you have any tips for getting good macro shots with a mobile phone, or with other gear that doesn’t cost a lot of money? Leave your thoughts in the comments below, and feel free to share your own macro shots, too. I’d love to see your photos.

Ladybug

googletag.cmd.push(function() {
tablet_slots.push( googletag.defineSlot( “/1005424/_dPSv4_tab-all-article-bottom_(300×250)”, [300, 250], “pb-ad-78623” ).addService( googletag.pubads() ) ); } );

googletag.cmd.push(function() {
mobile_slots.push( googletag.defineSlot( “/1005424/_dPSv4_mob-all-article-bottom_(300×250)”, [300, 250], “pb-ad-78158” ).addService( googletag.pubads() ) ); } );

The post How to Get Stunning Macro Photos with Your Mobile Phone by Beth Ringsmuth Stolpman appeared first on Digital Photography School.


Digital Photography School

 
Comments Off on How to Get Stunning Macro Photos with Your Mobile Phone

Posted in Photography


4 Secrets for How to Get Tack Sharp Photos

01 Nov

We’ve all been here before. You get home from an afternoon with your kids in the park, at the ball game, or even a formal photo session only to load your pictures on the computer and realize that many of them are fuzzy, blurry, or just plain out of focus. It’s a problem that has plagued photographers for years. While new cameras offer all sorts of features like 3D focus tracking and real-time face detection to help make sure to get the ultimate tack sharp photos, the fact remains that out-of-focus images are still an issue for just about everyone with a camera.

It’s an unfortunate reality of the way cameras work with incoming light, and until we are all shooting with Lytro-style light field cameras we are all going to have the occasional out-of-focus picture or two. Fortunately, there are a few relatively simple things you can do to make sure your pictures are indeed as sharp as possible.

tips for getting tack sharp photos

Use a fast shutter speed

The world around you is constantly in motion, and having a camera means you are equipped to freeze that motion into a single frame. Depending on what you are shooting the result can sometimes be a blurry mess, which is often the result of a shutter speed that is simply too slow. There’s an old bit of conventional wisdom that says the minimum shutter speed needed to get a sharp image of a still subject is 1/focal length. So if you are shooting with a 50mm lens you need a shutter speed of 1/50th of a second.

Note: Due to the cropped sensor on cameras like the Canon Rebel series or lower-end Nikons the formula becomes 1/(1.5x focal length), so you would need a minimum shutter speed of 1/75 second.

This might sound fast but it’s actually not, especially if you are shooting in low light conditions or with a small aperture on your lens. It gets even worse when your subject is moving, in which case you need a much faster shutter speed! This is why many mobile phone pictures end up looking blurry, in order to let in enough light to get a photo they often use slower shutter speeds.

This jittery squirrel was moving all over the place, so I shot with a speed of 1/180 second to get a sharp picture. tips for getting tack sharp photos

This jittery squirrel was moving all over the place, so I shot with a speed of 1/180 second to get a sharp picture.

Proper settings

The solution is to use a faster shutter speed, which might sound fairly obvious but it doesn’t always work unless you have your camera configured properly. If you shoot in Auto your camera might not know you want to use a fast shutter speed. So shooting in Program or Shutter Priority is a good way to control the shutter speed to make it as fast as you want.

You can also utilize higher ISO settings like 1600 or 3200, which look just fine from most modern cameras if you need a fast shutter and there isn’t much light. Most photographers would take a slightly grainy (noisy) photo that can often be fixed with software like Lightroom or Photoshop over a blurry photo that can usually not be fixed. If you find that you consistently get blurry pictures of your subjects, try increasing your shutter speed and you just may just be surprised with the outcome.

Use a smaller aperture

The lens on your camera is designed to gather incoming light and focus it so you can take a picture. The amount of light it lets in is largely dependent on the size of the physical lens opening. A bigger opening, or aperture, lets more light pass through than a smaller opening, much in the same way a bigger hole in the bottom of a bucket lets more water leak out than a smaller hole. Wider apertures let you use faster shutter speeds and also help you achieve the type of beautiful out-of-focus backgrounds, called bokeh, that are common in portrait, wildlife, or even sports photography.

tips for getting tack sharp photos - family photo

Even though my 85mm lens has a maximum aperture of f/1.8, I shot this at f/2.8 because I wanted a wider depth of field in order to make sure all three subjects were in focus.

Depth of field

One tradeoff that comes into play when using wide apertures, is that your depth of field is much shallower. That means you have a very narrow section of the image that will actually be in focus or tack sharp.  Under very carefully controlled conditions this can be fine and even quite desirable. But in many situations, a thin depth of field can result in more headaches and frustrations than it’s worth.

Shooting with a wide aperture can result in a depth of field that is so narrow a person’s nose could be in focus but her eye might not. One of the best solutions is to just use a smaller aperture. The tradeoff when using smaller apertures like f/2.8, f/4, etc., is that your background won’t be quite as blurry and you will need a longer shutter speed, but if your lighting is good the latter won’t matter. And as for the former, I like to err on the side of caution and go with a technique that will give me a higher chance of having my subject sharp and focused, even if it means a slightly less blurry background.

tips for getting tack sharp photos

Use cross-type focus points

Almost every interchangeable-lens camera has one or more cross-type focusing points. That means they look along the horizontal and vertical axes to make sure things are tack sharp before taking a picture. These points are the little dots or squares you see when you look through the viewfinder of your camera. The ones that are cross-type are usually a bit faster and give you better results than their single-axis counterparts. Of course, you will need to know which of the points on your particular camera are cross-type but a quick online search of your camera model and “cross type focus points” will usually get you the information you need.

tips for getting tack sharp photos cross-type focus points

The center focusing points on my D750 are all cross-type, so I like to use them whenever possible in order to make sure to get maximum sharpness.

Cross-type focusing points are usually limited to a certain portion of the viewfinder. This can present a bit of a problem since normal-type focusing points are what is commonly used to lock focus on objects along the outer edges. A solution I like to use for these situations is the focus-and-recompose technique. I use a cross-type focusing point, often the one right in the center, to lock focus and then recompose my shot to frame it how I want. This does not always work when shooting wide open since even the smallest amount of movement can affect your shot when the depth of field is razor thin. But as I mentioned earlier, if you want tack sharp pictures you should probably stop your aperture down a little bit anyway.

Sharpness is critical when shooting macro pictures, so I used a wide aperture (f/8) and cross-type focusing points to make sure the foreground tulip was tack sharp.

Sharpness is critical when shooting macro pictures, so I used a small aperture (f/8) and cross-type focusing points to make sure the tips of the petals on the foreground tulip were tack sharp.

Use a tripod and Live View and zoom in to 100%

If you’re like me, you spend 99% of your time looking through the viewfinder of your camera as opposed to using the Live View function (where you use the LCD screen on the back of your camera to compose your shot). DSLRs have traditionally been designed for photographers to use the optical viewfinder which is why this method is generally faster and easier to use. But Live View has some very good features as well depending on the type of photos you want to take. If you are doing a lot of action shots like sporting events the Live View function is quite frustrating. But if you shoot landscapes, products, or other types of pictures where your subject remains relatively still, Live View can be a major advantage in terms of getting the sharpest image possible.

Using Live View helped me get this small wooden duck very sharp and focused.

Using Live View helped me get this small wooden duck tack sharp and focused.

Using Live View

The trick to using Live View for getting sharp images is to frame your shot with your camera on a steady surface such a tripod, then zoom in to 100%, using the controls on your camera. This gives you an ultra-close-up look at your image, and you can then use autofocus or manual focus to make sure everything is perfectly tack sharp.

While the autofocus points in the viewfinder do a good job, this type of 100% magnification shows you precisely how in-focus your image will be and helps you get pixel-perfect images. Landscape (and macro) photographers often use this technique, combined with small apertures for a wide depth of field, to get pictures that are much sharper than they could otherwise. It’s a tip that I highly recommend you try, especially if you don’t often shoot in Live View.

tips for getting tack sharp photos long exposure image

I wanted to get this 30-second exposure as sharp as possible. So I first used Live View and zoomed in to 100% to check that the foliage was focused.

Bonus tip: Use Focus-Peaking on mirrorless cameras

Most of the items in this article are geared towards traditional DSLR shooters, but if you use a mirrorless camera there is one handy tool you probably have that gives you a leg up on your traditional-style camera counterparts.

Focus-Peaking is a way for your camera to show you precisely what is tack sharp as you focus your lens. Many, but not all, mirrorless cameras have this capability and it is a fantastic way of making sure you get everything that should be tack sharp focused properly. With Focus-Peaking enabled, as you turn the focusing ring on your lens you will see a swath of dots (usually red or green) travel across the viewfinder. These dots indicate the spots that are perfectly focused, and when you see an outline of dots around the part of your image that you want focused, you can snap a picture and rest assured that it will show up exactly how you envisioned.

You can even use Focus-Peaking in conjunction with autofocus, so it’s another tool in your repertoire to help make sure you are taking the best possible pictures.

tips for getting tack sharp photos - focus-peaking

The edges of the leaves are all outlined in red by Focus-Peaking, which indicates that they will be in focus. Image by Bautsch (Own work) [CC0], via Wikimedia Commons

Over to you

Do you have any favorite tips or tricks for getting sharp photos? Are there things I left off this list that you’d like to share with others? Leave your thoughts in the comments below!

googletag.cmd.push(function() {
tablet_slots.push( googletag.defineSlot( “/1005424/_dPSv4_tab-all-article-bottom_(300×250)”, [300, 250], “pb-ad-78623” ).addService( googletag.pubads() ) ); } );

googletag.cmd.push(function() {
mobile_slots.push( googletag.defineSlot( “/1005424/_dPSv4_mob-all-article-bottom_(300×250)”, [300, 250], “pb-ad-78158” ).addService( googletag.pubads() ) ); } );

The post 4 Secrets for How to Get Tack Sharp Photos by Simon Ringsmuth appeared first on Digital Photography School.


Digital Photography School

 
Comments Off on 4 Secrets for How to Get Tack Sharp Photos

Posted in Photography


Audi Ad Fakery: These Hyperrealistic Photos Were Made with a $40 Scale Model

27 Oct

[ By SA Rogers in Art & Photography & Video. ]

audi-ad-fakery-main

These photos may seem to depict a $ 160,000 luxury automobile zooming through sand, snow, sea foam and salt flats, but the objects on your screen are smaller than they appear. The lack of a person sitting in the driver’s seat is not an indication that the car is self-driving: it’s because the car itself stands only a few inches tall. This version of it, anyway. Photographer Felix Hernandez bought a $ 40 scale model of the Audi R8 sports car on the internet and created the sets in his studio, with astonishingly realistic results.

audi-ad-fakery-2

audi-ad-fakery-3

audi-ad-fakery-6

The automaker commissioned Hernandez to create the series as a promotion for the high-end car. As behind-the-scenes photo of his studio setup reveal, most of the work is done with miniatures and special effects rendered mostly in ordinary edible household products. Careful lighting, staging and camera angles make the models appear full-sized, so minimal Photoshopping is needed for the final effect.

audi-ad-fakery-4

audi-ad-fakery-5

audi-ad-fakery-7

“I love photo manipulation and digital art, but what’s really cool is doing as much as you can in-camera,” says Hernandez in a piece he wrote for PetaPixel. “For snow scenes, I use wheat flour. For desert scenes, I use corn flour. For atmosphere, I add smoke. For rain, I spray water. For droplets, I add corn syrup. In some photos, I add images into my background. I also use Photoshop for adding effects that are difficult or impossible to do in-camera – things like adding a sense of motion, color grading, etc.”

hernandez-the-crow-and-the-dove

hernandez-miniatures-2

hernandez-miniatures

hernandez-miniatures-4

Previous photosets have included a series in which the artist took photos of a young boy and a miniature boat and blended them together in Photoshop, as well as Stormtrooper figurines hand-painted to make them appear more rugged and worn. See them all on Behance.

Share on Facebook


[ By SA Rogers in Art & Photography & Video. ]

[ WebUrbanist | Archives | Galleries | Privacy | TOS ]


WebUrbanist

 
Comments Off on Audi Ad Fakery: These Hyperrealistic Photos Were Made with a $40 Scale Model

Posted in Creativity


How to Take Cool Food Photos in Your Refrigerator

18 Oct

Nothing gets me more excited creatively than coming up with different scenarios or ideas to further develop and hone my photography skills. For me, this is what makes photography so interesting and never dull. Yes, it can be frustrating and challenging. However, there are so many ways and endless possibilities for capturing images.

title

Bottled water in a refrigerator.

A picture is worth a thousand words, as the phrase goes. But I also like the story behind the photograph or image. Recently, I came across online the work of Mexican photographer, Felix Hernandez Rodriguez, who has a wonderful behind the scenes (BTS) video of his “The Love Car | The Making Of”.

I won’t spoil it for you by describing it in words. Instead, I feel It is best that you watch it for yourself at your leisure (see below).

Got lemons – make lemonade

Anyway, I had the misfortune back in July during a hot spell, of my refrigerator (or fridge is the term I use for this apparatus), deciding to just quit. I got a replacement and the first thing I noticed was the LED light inside. So it got me thinking, could I possibly use that one light source and produce decent enough shots with it?

led-light

An LED light inside a refrigerator.

Taking photos inside a fridge sounds a bit daft, I hear you say. However, for this article I will show you that even a daft idea can be cool. (Pun intended)

Shooting inside a fridge

I approached this project in five ways:

  1. Taking photos of the food or items just using the LED light source inside the fridge.
  2. Try to create decent food shots while working with two major constraints, time and size. Time: I couldn’t leave the fridge door open for long periods of time, which meant I had to set up my scenes and shoot fast.
  3. Size was another factor, especially in trying to get different POV shots
  4. Get imaginative and create a shot that the viewer doesn’t realise it was taken in a fridge.
  5. Just go with the flow.

Preparation

My fridge is relatively small in comparison to refrigerators in the US or Canada, so taking the food items out and storing them in a cooler bag for an hour or so wasn’t an arduous task. However, if you have a huge refrigerator, the next time time you do a clean out of your refrigerator may be the time to try out this project.

full-fridge

A packed refrigerator full of food items.

The space I was working with was really small, 19” x 19” x 33”, so I decided I would use my Sony RX100 which has a 35mm focal range equivalent of 28-100mm.

empty-fridge

The inside of my fridge which is relatively small in comparison to refrigerators in the US and Canada.

Initial shots

My initial test shots were random, in order to test the lighting and to determine what camera settings I would end up using. Shooting in RAW, I settled on an aperture of f/2.8, ISO 400 and a shutter speed of 1/50 – 1/60 and handheld the camera. I didn’t want to go higher with the ISO, as to keep noise down to a minimum. A wide open aperture allowed for the background to remain out of focus.

I left everything in the fridge and took some random shots of food items.

cherry-tomatoes-taken-underneath-glass-shelf

Cherry tomatoes taken from underneath a glass shelf in the refrigerator.

The Shots

Next was to take everything out of the fridge and start with just the top shelf left. It was nearest the light source and I wanted to see what type of shots I would get. From taking many shots at different angles, an idea sprung to mind. I wanted a slice of lemon shot from underneath the glass shelf. Later in post-production, I added in the frosted glass along with the broken glass effect to give it more zest! (Sorry pun intended again).

apple

A red apple taken sitting on a shelf inside a refrigerator.

lucy-with-turtle-beans

A test shot with Lucy and some turtle black beans.

lemon-sooc

A slice of lemon taken from underneath a glass shelf. This is straight out of the camera.

lemon-with-broken-glass

This is the same shot as above but I added a frosted glass and broken glass effect for impact in the editing process.

I also took a slice of cucumber. Notice how it appears to have a sad face?

cucumber

A poor sad looking cucumber!

Second setup

The next plan of attack was placing items on the bottom part of the fridge, as in the furthest point away from the light source. I wasn’t really expecting to get any decent shots. But I was pleasantly surprised. I felt the shots had an almost ethereal feeling to them.

jack-sprat-with-grapes

A Jack Sparrow lego figure with a bunch of red grapes.

fruit-composition

A fruit composition sprayed with a little water inside the refrigerator.

flower

A yellow flower taken inside the refrigerator.

flower-and-cucumber

The sad looking slice of cucumber looked happier against the flower!

Key Takeaway Points

Unless you have a moderately small refrigerator, this project is most likely not for you. Was it worth doing? In my opinion, any excuse to take photographs is well worth doing.

I found it was better to take the shots over a few days. This allows for planning what type of shot and what food or other items to use. Plus you need the least amount of time to have the fridge door opened. Spray water on the food so that the light catches the water droplets to add depth to the shot.

Have you had a crazy idea for a personal project? If so please leave a comment or share your images and story below.

googletag.cmd.push(function() {
tablet_slots.push( googletag.defineSlot( “/1005424/_dPSv4_tab-all-article-bottom_(300×250)”, [300, 250], “pb-ad-78623” ).addService( googletag.pubads() ) ); } );

googletag.cmd.push(function() {
mobile_slots.push( googletag.defineSlot( “/1005424/_dPSv4_mob-all-article-bottom_(300×250)”, [300, 250], “pb-ad-78158” ).addService( googletag.pubads() ) ); } );

The post How to Take Cool Food Photos in Your Refrigerator by Sarah Hipwell appeared first on Digital Photography School.


Digital Photography School

 
Comments Off on How to Take Cool Food Photos in Your Refrigerator

Posted in Photography


Google adds auto image rotation, GIF creation to Photos app

13 Oct

Google has added four new features enhancing its Photos app for iOS and Android.

The first two features are similar in that they highlight photos related to specific people. A ‘Rediscover your memories’ feature will dig up old pictures of people who have appeared in more recent images. A ‘Recent highlights’ option will bring up a ‘card’ showing the best photos of a subject you’ve taken pictures of recently, such as a baby.

Perhaps a more useful feature is the ability to rotate images to the correct orientation, as illustrated above.

Finally, the Photos app can analyze videos you’ve taken to find ‘action’ and then turn it into an animated GIF.

Google blog via Droid Life

Articles: Digital Photography Review (dpreview.com)

 
Comments Off on Google adds auto image rotation, GIF creation to Photos app

Posted in Uncategorized


How to Take Your Portrait Photos From Good to Great with a Single Click

12 Oct

Do you enjoy portrait photography? Are you a Lightroom user? You’re going to love what we’ve just released today!

It’s our all new Adobe Lightroom® presets bundle: 101 Lightroom Portrait Presets.

NewImage
With our new presets pack, transforming your portrait shots is a breeze.

And for a limited time, the pack can be yours for the special introductory price of just USD $ 20 (that’s 60% off).

Check it out here.

In this comprehensive Portrait Presets pack you’ll get the following collections:

  • Art Series (7 presets): Get the look from the early 1900’s through to the 90’s.
  • Black and White (10 presets): A variety of black and white presets to give you that b&w portrait look.
  • Film Series (8 presets): Nothing beats the authenticity of film. These presets will re-create that professional film feeling.
  • Fix (20 presets): Fix a range of of issues including contrast, grain, highlights and sharpness.
  • Tone (14 presets): Change an array of tonal qualities.
  • Traditional Series (8 presets): Tweaks to give your portraits that classic look. Including Beach,
  • Outdoors, and Worn, amongst others.
  • Touch Up Kit: 37 brushes to help you touch up eyes, hair, lips and skin.

Created by professional photographer and author Rachel Devine, she’s done all the hard work for you so you can get the perfect edit for every portrait, without the fuss.

Here’s a short video of Rachel showing how easy it is to use these presets:

Simply apply the effect and adjust as desired… it’s fast and easy!

You’ll save a whole heap of processing time, while giving your portraits an instant “pop”. See Rachel demonstrate in the video on our product page.

Transform your photos in just one click. Pick up our 101 Lightroom Portrait Presets today – while we’re still offering it at the introductory price.

Please note: a copy of Adobe Lightroom is required to use these presets.

Also: Haven’t used presets before? No worries. Full instructions are included in the pack.

Lastly: like all our products this one has a 60 day satisfaction guarantee. If you buy it and find for whatever reason that it doesn’t suit your needs simply contact our support team and we’ll arrange a refund – no questions asked.

googletag.cmd.push(function() {
tablet_slots.push( googletag.defineSlot( “/1005424/_dPSv4_tab-all-article-bottom_(300×250)”, [300, 250], “pb-ad-78623” ).addService( googletag.pubads() ) ); } );

googletag.cmd.push(function() {
mobile_slots.push( googletag.defineSlot( “/1005424/_dPSv4_mob-all-article-bottom_(300×250)”, [300, 250], “pb-ad-78158” ).addService( googletag.pubads() ) ); } );

The post How to Take Your Portrait Photos From Good to Great with a Single Click by Darren Rowse appeared first on Digital Photography School.


Digital Photography School

 
Comments Off on How to Take Your Portrait Photos From Good to Great with a Single Click

Posted in Photography


Six Tips For Using Filters to Improve Your Landscape Photos

05 Oct

One of the secrets to good landscape photography is the way in which you capture various elements of the scene. Sure, you can let your camera do the heavy lifting and figure out the exposure. But a landscape photo doesn’t have to be a literal interpretation of what you see, or of what your camera sees when left to its own devices. While post-processing can help make adjustments to an image so that it’s less literal than what you saw, making certain adjustments at the time of capture is more important, giving you something special to work with when the time comes to edit the image in post. Using filters such as polarizers, neutral density, and graduated neutral density filters can help you capture the scene in more creative ways. These tips for using filters can help you start making these adjustments and creating more dynamic images.

Filter Tips

The following tips can help you start making these adjustments and creating more dynamic images.

1 – Use a polarizer to improve the sky

Using filters - a polarizer to reduce haze in an image.

A polarizer cut through the morning mist to reveal blue sky in this shot of Great Smoky Mountains National Park.

I believe every photographer should have a polarizing filter in their camera bag because of how useful they can be. Polarizers work by filtering out light that is reflected directly toward the camera at specific angles. When photographing a landscape with a blue sky, haze can occasionally cause the sky to be less vibrant. Using a polarizer, you can minimize the haze and reveal the true blue of the sky. This will work best when aiming the camera at a 90° angle from the sun; in other words, with the sun to your side.

By rotating the polarizing filter while composing your shot, you can see the effect the filter will have. Be sure you don’t go too far. It is possible to over polarize the scene, creating a darker blue splotch in the sky that will make the use of the filter obvious and the image appear unnatural. This is especially possible with ultra-wide angle lenses that take in a huge expanse of the sky. In the image above, a polarizer was used to reduce the amount of morning mist in the valley and show the blue sky behind the mist.

2 – Use a polarizer to reveal what’s underneath the water

Using filters - a polarizer cut down on reflections on the water's surface.

A polarizer can reduce reflections on the surface of the water to allow you see what’s beneath the surface, and add visual interest to a scene.

Often when photographing a stream or lake, the light may reflect off the water’s surface to such a degree that it’s impossible to see what’s below. However, there may be times when there is something of interest underneath the surface, such as rocks, fish, or logs from fallen trees. Using a polarizer, you can reveal as much or as little of what’s beneath the surface by eliminating the reflecting light.

It doesn’t have to be all or nothing either. You can nuance the effect by rotating the filter just a little bit, to retain some reflecting light while still seeing beneath the surface. In the image above, on the left, no polarizer was used and the reflected light prevents you from seeing below the water’s surface. On the right, a polarizer was used to reduce the reflected light on the water’s surface, allowing you to see the rocks beneath the surface.

3 – Use a polarizer to reduce reflections on wet rocks

using filters - Photographing wet rocks

In this image, light reflects off of the wet rocks by the waterfall.

using filters - A polarizer can reduce the reflected light from wet rocks.

In this image, a polarizer was used to reduce the reflected light from the wet rocks.

When photographing a waterfall, where there are generally a lot of wet rocks, light can reflect off of them, making them appear shiny. On occasion, that reflected light may be so strong that it detracts from the image. Using a polarizer can reduce the reflected light and reveal more detail in the rocks, adding interest to the image.

As with the water reflections discussed above, you can nuance the effect by rotating the filter to get the right balance of reflected light and detail underneath. In the images above, you can see how the highlights on the rocks can be reduced if desired by using a polarizing filter. Again, by rotating the filter as you look through the viewfinder, or on the live view screen, you can watch the effect happen and adjust it to your liking.

4 – Use Graduated Neutral Density Filters to darken the sky

Using filters - graduated neutral density filters for a better sky.

The difference when using a graduated neutral density filter can be very apparent, as seen in the comparison of these two images.

When photographing the landscape, especially at sunrise or sunset, there is often a high amount of contrast between the sky and the foreground. That forces you to make exposure choices to determine what will be exposed properly. While digital cameras are much improved with regards to dynamic range in recent years, nature can still push your camera to its limits in terms of how much can be captured in a single image.

Graduated neutral density filters can help to reduce the dynamic range of an image, by darkening the brighter areas, like the sky, so that it falls within the range of what the camera can capture. Use Live View on your camera to see the positioning of the filter over the lens, especially when using a hard-edged ND graduated filter. Watch the way the foreground exposure changes in relation to the sky, as it is possible to overdo a good thing. If the sky gets too dark in relation to the foreground, try a less dense filter, for instance, a 2-stop ND grad rather than a 3-stop grad. Above, the image on the left was taken without the use of a graduated neutral density filter. On the right, a 3-stop,

Above, the image on the left was taken without the use of a graduated neutral density filter. On the right, a 3-stop, soft-edged graduated neutral density filter was used to darken the sky. Notice it also has the effect of brightening the foreground in relation to the sky, bringing out more detail in the darker area in the bottom left.

5 – Control the motion of water

Using filters - an ND filter to control the motion of water.

A neutral density filter can be used to help capture the motion of water in a scene.

Because of its nature, moving water is often the most dynamic part of an image. You can create a different mood simply by changing the way you capture water. Longer exposures tend to be more calm and peaceful, while shorter exposures can capture the violence of a crashing wave, or the power of a river going over the falls.

Since shutter speed controls the effect of motion, by using neutral density filters you can evoke both moods by limiting the amount of light that enters your lens. Thus, you can adjust the shutter speed to give you the effect of motion that you want. You may not need a filter for faster shutter speeds, but if it’s a bright day and you want to slow things down, you’ll need a neutral density filter to do that.

Using a 3-stop ND filter is usually fine for waterfalls to slow them down just enough to get a nice creamy look to the falls, but when capturing waves on the ocean, it may not be enough to get the effect you need. Sometimes four or even five stops of neutral density is needed to get the exposure you need to slow it down to capture water the way you want. Adding a 10-stop neutral density filter will allow you to slow down your shutter speed to a minute or more, eliminating waves completely, creating a calm scene that feels quiet and peaceful as opposed to the crashing waves pounding the rocks or beach.

In the image above, a 3-stop neutral density filter was used to slow down the exposure just enough to allow the water’s motion to be captured as it crashed on the rocks. In the image below, a 10-stop neutral density filter was used to slow down the exposure further, to a full 2-minutes, creating smooth water and a calmer looking scene.

Using filters - a 10-stop ND filter to smooth water during a long exposure.

Using a 10-stop ND filter, you can make water appear calm by using a long exposure. This is a two-minute exposure.

6 – Create motion in clouds

Using filters - Clouds appear as normal when no ND filter is used.

When no neutral density filter is used, clouds are captured as we see them.

Using filters - a 10-stop ND filter to achieve a slower shutter speed of 60 seconds, I was able to capture the motion of the clouds as they passed over New York City.

Using a 10-stop ND filter to achieve a slower shutter speed of 60 seconds, I was able to capture the motion of the clouds as they passed over New York City.

As a landscape photographer, clouds are often the focus of an image or at least a strong component in the composition. Clouds add depth and drama to a good landscape, creating background interest. But you can also manipulate the clouds to your creative advantage as well, capturing their movement and blurring them to create a sense of flight and speed in your scene. By using a strong neutral density filter, such as Lee’s Big Stopper 10-stop ND filter or Vü Filter’s 10-stop offering, you can slow down your shutter speed to allow the motion of the clouds to be captured.

The proper shutter speed to capture cloud movement will vary, depending on how fast the clouds are moving. The longer the exposure, the more movement you will capture. An exposure of 30 seconds to one minute for fast moving clouds, such as in the image above, will result in a motion blur where the clouds still resemble clouds. An exposure of two or three minutes will result in the clouds becoming streaks of color across the sky, unrecognizable as clouds anymore.

Conclusion

One of the complaints I hear about using filters is that it takes too much time to put them on the lens, or it slows you down. I prefer to think of it as being deliberate about the shot I am trying to capture, and making sure that my camera captures exactly what I want.

Do you use filters? What’s your favorite technique using on-camera filters? Please share in the comments below.

googletag.cmd.push(function() {
tablet_slots.push( googletag.defineSlot( “/1005424/_dPSv4_tab-all-article-bottom_(300×250)”, [300, 250], “pb-ad-78623” ).addService( googletag.pubads() ) ); } );

googletag.cmd.push(function() {
mobile_slots.push( googletag.defineSlot( “/1005424/_dPSv4_mob-all-article-bottom_(300×250)”, [300, 250], “pb-ad-78158” ).addService( googletag.pubads() ) ); } );

The post Six Tips For Using Filters to Improve Your Landscape Photos by Rick Berk appeared first on Digital Photography School.


Digital Photography School

 
Comments Off on Six Tips For Using Filters to Improve Your Landscape Photos

Posted in Photography


How to Shoot a Sequence of Photos That Capture a Story

27 Sep

As a photographer, you’ll often concentrate on perfecting your art at taking one perfect photo. However, there are many occasions where you’ll need to string together a sequence of photos with differing styles. Whether you’re shooting a magazine article or making a personal project, knowing how to produce photos that show details, people, and the whole scene is a skill worth having.

Shooting a sequence of photos

In the example you’re going to see in this article, a traditional puppet show will be used to produce this sequence of photos, but any number of other scenarios could apply. There is always plenty to photograph and although my example shows detail, portrait, and scene-setting images, there are other photos that could also have been taken from the same event.

In the image below you can see the area’s that are boxed. They contain the photos you’d be aiming to get from a scene such as this. Let’s talk about each of these shots and why they’re all important.

Overall image

The scene-setting photo

This is the big picture that shows your audience what’s going on, you’ll likely be using a wide-angle lens here to get as much story into your scene as you can.

The image from the puppet show below is the scene-setting photo. In this photo, the viewer can see the stage, audience, and the performers. In this case, a 50mm lens was sufficient to get the entire story needed from this scene. The aim here is not to go in too close, but to tell the whole story. The photo should capture the scale involved, and often it is helpful to do this shoot from an angle above or overhead

sequence tells a story - scene setter

This photo is the scene setter, you can see the stage and the audience watching the performance.

You’ll notice the image is almost identical to the image used to set out the example at the beginning. The left portion of the frame was a distracting element that wasn’t needed to show the action happening in front of the camera. It’s important to remember that although you want to capture a large canvas when telling your story, too much could detract from the specific story you intend the scene setter to display.

The portrait photos

Portrait photos are a real mainstay of any sequence that seeks to tell a narrative, it’s the people and their story you’re looking to show. There are many types of portraits, though, from ones that just show the face, to those that explore more of the scene around the person (often called environmental portraits).

When photographing a stage production you want to explore as much as you can, that means photographs of the stage, and if possible backstage as well. If the production is small, getting backstage may be as simple as asking the performers on the night of the event. But for large productions or things like music gigs, getting permission to shoot backstage ahead of time is advised. A lot of this work can and should be carried out with lenses best suited to portrait work, which means using primes lens in the range of 35mm to 135mm.

Sequence of photos

The layers created by a shallow depth of field act to give this photo impact, with the main focus on the puppet.

In the scene, you see photographs C (above) and D (below) are of the stage. In photograph C the image needed some compression to fit both the puppet and the puppeteer into the frame. To achieve that you’ll need to use a longer focal length, in this case, a 135mm lens was used. When using prime lenses like the 135mm f/2 you have a lot of control over the depth of field, making it possible to make your subject sharp while the background is blurred.

sequence of photos

In this photo, the interaction on stage between the puppeteers is captured.

In this case featuring the puppet, but contextualizing the image with the puppeteer in soft focus, gave the image more story, and hence more impact. Photograph D (above) shows more interaction between puppeteers and more of the stage in general. This time, the image was shot with a 50mm lens allowing for a wide part of the scene to be shown. Once again, focus is on the puppets, and the rest of the scene is softer because a large aperture of f/3.5 was used.

The photograph taken from location A shows musicians performing backstage (below). In this case, some tarpaulin was used to frame the image and give context to the photo. The woman was playing the gong as part of the music that goes with the puppet show. So although the live audience can hear this music, in terms of photography this aspect of the show can only be shown by going backstage to photograph musicians playing their instruments.

sequence of photos

This photo shows the backstage area of the puppet show. The tarpaulin background and the area being a little too cluttered for the stage can deduce this.

The detail photos

On their own detail photos can look nice, but don’t show your audience what’s happening. When added to a set of photos they can be a vital component that complements the scene setting and portrait shots. These photos are best taken with lenses that can get close to the subject, in other words, macro. You might only include details, or you could show detail but allow some background into the frame for context as well

sequence of photos

Here a line of puppets awaits use. Lines work well in detail photos, as do patterns.

sequence of photos - details

The puppets are full of intricate details, as this photo shows. The use of a macro lens at closer quarters would have enhanced this photo.

In the puppet show detail photos were taken on stage as shown in picture E (below), and backstage with two pictures taken from location B (above). At location B detail photos of the puppet were taken using a 135mm lens. Usually shooting with a macro would be better. However, walking around backstage wasn’t possible, so getting close to the subject was also not possible. The first shot shows a photo where the face of the puppet is prominent, taken in a similar manner to a portrait. The second image shows the puppets where they rest backstage between performances.

sequence of photos

Here is a detail photo that shows context.

Picture E (above) is a detail shot of one of the puppets, but with a bit more context as you can see how the puppet is being used. The shot has a minimalist feel to it, which makes it ideal for adding text above the puppet’s face. The strong light on the subject allowed me to expose for the puppet, and make the background much darker, which gave this shot its minimal tone.

How this set could be expanded on

Okay, so above there are a set of seven photos combining a number of different photos of differing styles into the one grouping that shows a puppet show. This is a snapshot of a show during a performance, could this be expanded on though? Yes, of course, it could. You could also get images of the puppeteers preparing before the show begins, you could ask if they’d let you photograph the puppets in a much more staged manner where you use lighting and select a background that would compliment the puppets. Then there could also be some staged portraits of the puppeteers with their puppets to add to the mixture of images taken during the show itself.

Other scenarios

The list of other scenarios that you could shoot to create a sequence of images is endless; it could be a rock concert, a wedding ,or a sports event. In the next example scenario, you’ll see another set of photos how a green tea field can be captured.

1
The scene-setting photo of the green tea fields, taken from a wide vantage point. On the left you can see some white bags, this is the area you’ll find portraits of the plantation workers. The field also has lots of lines and patterns that are ideal for detail photos

sequence of photos details

The fields are ideal for taking detail photos. In this case, a macro lens wasn’t needed to capture the lines and details, as the tea field required a wider lens.

sequence of photos

An environmental portrait shows a plantation worker at work, now you can see how those white bags are used.

sequence of photos portrait

Another portrait photo shows a plantation worker with his basket.

Your turn

If you have any scenario’s you’d like tips on capturing in the way described in this article please add those and any other comments in the comment section below.

googletag.cmd.push(function() {
tablet_slots.push( googletag.defineSlot( “/1005424/_dPSv4_tab-all-article-bottom_(300×250)”, [300, 250], “pb-ad-78623” ).addService( googletag.pubads() ) ); } );

googletag.cmd.push(function() {
mobile_slots.push( googletag.defineSlot( “/1005424/_dPSv4_mob-all-article-bottom_(300×250)”, [300, 250], “pb-ad-78158” ).addService( googletag.pubads() ) ); } );

The post How to Shoot a Sequence of Photos That Capture a Story by Simon Bond appeared first on Digital Photography School.


Digital Photography School

 
Comments Off on How to Shoot a Sequence of Photos That Capture a Story

Posted in Photography


Top 5 Nik Collection Filters to Improve Your Landscape Photos

25 Sep

One of the best image editing programs available right now happens to be free. The Nik Collection by Google is a desktop photo editing software that was recently declared free of charge earlier this year. Today, the Nik Collection makes available over 55 filters that do everything from old camera and film simulation, to image sharpening, noise reduction, and basic retouching and correcting of photos. Of these many filters, there are 5 within the Color Efex Pro 4 toolset  that are particularly useful for landscape photos. This article will highlight these essential filters and why they are so valuable.

Nik Collection Color Efex Pro free photo editing software

Note that all tools and filters within the Nik Collection contain certain points that can be individually controlled to apply the filter effect as little, or as much, as you desire. You can also add the effects of several different filters, so be sure to play around with as many as possible to achieve the look you’re after.

#1 – Pro Contrast Filter

Have a photo that needs higher levels of contrast without sacrificing detail? The Nik Pro Contrast filter tackles this problem with three filter settings that you can tinker with.

  1. Correct Color Cast reduces any inherent color cast in an image, such as the orange hue the sunrise casts onto the water below.
  2. Correct Contrast offers general contrast adjustment.
  3. Dynamic Contrast delivers the most pop by boosting contrast in flat areas of the photo. The latter feature is also demonstrated in the Polarization After photo below.
Nik - Pro Contrast 1

Before

Nik - Pro Contrast 2

After – with the Pro Contrast filter applied

Nik - Pro Contrast

#2 – Polarization Filter

For landscape photographers, the circular polarizer is a must-have glass filter that enhances blue skies and reduces water glare. It is often said that the effects of a polarizer can’t be replicated in post-production. But Color Efex Pro 4 offers a pretty impressive Polarization effect that can be applied to any photo, even if it was taken without a glass circular polarizer.

There are two Polarization filter settings that can be tweaked: Rotate, which simulates the effect of physically rotating the glass filter in front of your lens, and Strength, which controls how much of the filter effect is applied.

Nik - Polarizer 1

Before

Nik - Polarizer 2

After – with Polarization and Pro Contrast filters applied.

Nik - Polarizer

#3 – Skylight Filter

This handy filter simulates a glass warming filter by removing any blue color cast and applying a warming effect to your photo. Control the strength of the filter to determine how much warmth is added.

Nik - Skylight 1

Before

Nik - Skylight 2

After – with Skylight filter applied

Nik - Skylight

#4 – Graduated Neutral Density Filter

Similar to the glass circular polarizer, the graduated neutral density filter is a staple among landscape photographers as it helps lighten or darken just a portion of an image. Think about a landscape with perfectly balanced land and blown out sky. That is a job for the graduated neutral density filter.

There are five different settings to play with for this filter. Upper and Lower Tonality let you adjust the brightness of the top and bottom portions of the image, Vertical Shift controls the placement of the filter’s horizon, while Rotation adjusts the angle of the horizon filter. Finally, Blend helps integrate the filter effect in a more natural way.

Nik - ND Grad 1

Before

Nik - ND Grad 2

After – with Graduated Neutral Density filter applied.

Nik - ND Grad

#5 – Reflector Efex

Nik - Reflector FX 1

Before

The reflector is a favorite photographer’s tool that has also been simulated by a Color Efex Pro 4 filter. Use this filter to control light in your image and open up shadows.

The Method setting allows you to choose from Gold (warm), Soft Gold (milder warm), and Silver (neutral) lighting colors. Light Intensity controls the amount of reflector light added, Light Falloff controls the abruptness of the lighting effect falloff, while Position controls where the falloff starts. Finally, Source Direction lets you choose where the reflector effect begins.

Nik - Reflector FX 2

After – with Reflector Efex Soft Gold filter applied.

Nik - Reflector FX

Over to you

There you have it! Five handy filters within the Nik Collection’s Color Efex Pro. It’s again worth noting that there are many more filters within the software, and each can add as subtle or dramatic an effect as you desire. At the very least, this photo editing software is available for free, so it’s worth trying out if you haven’t already.

What are your most used filters within the Nik Collection for your landscape photos? Let me know in the comments below.

googletag.cmd.push(function() {
tablet_slots.push( googletag.defineSlot( “/1005424/_dPSv4_tab-all-article-bottom_(300×250)”, [300, 250], “pb-ad-78623” ).addService( googletag.pubads() ) ); } );

googletag.cmd.push(function() {
mobile_slots.push( googletag.defineSlot( “/1005424/_dPSv4_mob-all-article-bottom_(300×250)”, [300, 250], “pb-ad-78158” ).addService( googletag.pubads() ) ); } );

The post Top 5 Nik Collection Filters to Improve Your Landscape Photos by Suzi Pratt appeared first on Digital Photography School.


Digital Photography School

 
Comments Off on Top 5 Nik Collection Filters to Improve Your Landscape Photos

Posted in Photography