RSS
 

Posts Tagged ‘Photography’

Win One of Five Photography Courses from New York Institute of Photography

17 Oct

FDPcoursephoto
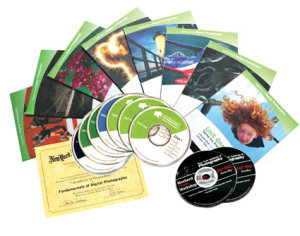
Over the last few years here at dPS, we’ve run very popular competitions with one of our partners – the New York Institute of Photography – to give away to lucky dPS readers some of their great photographic teaching.

Due to popular demand – we’re doing it again this week!

For this competition, NYIP is giving away FIVE prizes!

These five prizes are designed to be helpful for two different levels of photographers. Each will be won by a different dPS reader. Here’s what you could win:

  1. Fundamentals of Digital Photography – worth $ 499
  2. Complete Course in Professional Photography – worth $ 1,499
  3. Photoshop for Photographers – Worth $ 1,499
  4. Complete Course in Video Making and Storytelling – Worth $ 1,499
  5. Marketing for Photographers – Worth $ 999

All courses include comprehensive and illustrated lesson books, CD Audio Guides, DVD Video Training, Photo Projects and Professional Evaluation and Personal Student Advisers.

NYIcoursephoto1

Learn a little more about how New York Institute of Photography works in this video:

How to Win

To win this competition you’ll need to:

  • Visit the above five course information pages and choose which of the courses suits your needs more. Choose one that you’d like to win.
  • Leave a comment below and tell us which one you’d like to win and WHY you’d like to participate in the course. Please note: there is a limit of 1 entry per person.
  • Do this in the next 8 days and on Thursday, October 24th, the team at NYIP will choose the best 5 answers and we will announce the winners in the following days.

The deadline for entries is Wednesday, October 23rd, Midnight PDT. Comments left after deadline will not be considered.

By ‘best’ – we’re looking for people who have an understanding of what the course offers and how it suits their needs. So you’ll need to check out the course pages to put yourself in the best position to win.

There’s no need to write essay length comments to win – but we’re looking to hear what you like about the course and how it would help your development as a photographer.

This competition is open to everyone around the world no matter where you live – but there is only one entry per person.

To enter – simply leave your comment below.

Disclaimer: NYIP is a paid partner of dPS.

Post originally from: Digital Photography Tips.

Check out our more Photography Tips at Photography Tips for Beginners, Portrait Photography Tips and Wedding Photography Tips.

Win One of Five Photography Courses from New York Institute of Photography

The post Win One of Five Photography Courses from New York Institute of Photography by Darren Rowse appeared first on Digital Photography School.


Digital Photography School

 
Comments Off on Win One of Five Photography Courses from New York Institute of Photography

Posted in Photography


Check out These 3 Great Photography Deals from SnapnDeals [Limited Time]

17 Oct

This week over at our sister site – SnapnDeals – we have some great photography related deals all live for a limited time right now.

Here’s what you can get your hands on:

50% off ‘How to Photograph Kids – Naturally’ Course

NewImageThis online course by Brent Mail (recent contributor to dPS with this popular post) is all about helping you to take great photos of children.

It will help you on many levels in photographing kids – all the way from how to connect with kids, the right equipment and settings to use, best props, how to edit these images as well as how to share online and display at home, or present the finished products to clients as part of a profitable photography business.

Save 50% on Brent’s course here for the next week only.

NewImage

13% off Dan Bailey’s Zen Photographer eBook

This brand new eBook by explorer, adventurer and photographer Dan Bailey is all about turning your passion for photography into focus.

It is an 81-page collection of essays and photographs that are designed to ignite your imagination, inspire creativity and generally fill your brain with rock solid tips, insight and advice – advice that can save you time and prevent you from making many common mistakes as you travel along on your own photography path.

Grab Dan’s eBook via SnapnDeals here.

55% Off a range of C1Styles CaptureOne Presets

PresetsFor the next 6 days you can pick up their Spring Drops, Italy 1970, Hot Summer and B&W Portraits preset packs to be used in CaptureOne at under half price.

Subscribe to Get More Great Deals from SnapnDeals

Every week SnapnDeals features great photography related deals from around the web. Make sure you subscribe by adding your email address to the form below:

Post originally from: Digital Photography Tips.

Check out our more Photography Tips at Photography Tips for Beginners, Portrait Photography Tips and Wedding Photography Tips.

Check out These 3 Great Photography Deals from SnapnDeals [Limited Time]

The post Check out These 3 Great Photography Deals from SnapnDeals [Limited Time] by Darren Rowse appeared first on Digital Photography School.


Digital Photography School

 
Comments Off on Check out These 3 Great Photography Deals from SnapnDeals [Limited Time]

Posted in Photography


Fine Art of Architecture: B&W Photography by Joel Tjintjelaar

15 Oct

[ By WebUrbanist in Art & Photography & Video. ]

black white curved facade

Highly refined yet ever-evolving, the work of this photographer started with portraiture, moved through landscapes and seascapes, and has for a time now focused on architecture, capturing even conventional structures in amazing ways.

black white curved buildings

black white tension bridge

WebUrbanist recently asked Joel Tjintjelaar of BWVision more about his history, process and transition from taking photographs to also teaching photography and post-processing techniques. The resulting interview follows below.

black white up angle

black white abstract view

While the results of his recent work may look like a fine stylistic stopping point to some, Joel states: “My workflow has changed gradually over time and will continue to change. It will never stop changing and it should never stop changing. The day I stop evolving is the day I should quit creating images.”

black white vertical

black white historic skyscraper

black white ledge

In part, the evolution of that work is tied to the teaching he does in at workshops in real life and also online via master classes and videos like this one on long exposure workflow.  Teaching, he notes, “forces me to be critical at my own work as well and to try to understand my own photography better, and more importantly: what drives me to create the pictures I [take] …. I teach them that fine art photography is not so much about technical qualities and skills but more about being able to express who you really are in a way that offers a completely new point of view for the viewer and leaves him changed.”

Next Page:
Fine Art Of Architecture Bw Photography By Joel Tjintjelaar

Share on Facebook


[ By WebUrbanist in Art & Photography & Video. ]

[ WebUrbanist | Archives | Galleries | Privacy | TOS ]


WebUrbanist

 
Comments Off on Fine Art of Architecture: B&W Photography by Joel Tjintjelaar

Posted in Creativity


A Guide to Birth Photography

15 Oct

This Guide to Birth Photography was written by Lori Peterson

Few things in this world are as joyous as welcoming a new baby. Seeing such a tiny and perfect little human being stirs emotions in everyone. It’s no wonder that there has been a significant rise in the number of photographers offering their services not only for pregnancy and newborn images, but for photographing the birth itself as a way to complete the story of that particular moment in time.

Birth Photography

A Guide to Birth Photography

1. You are on Call

If you are interested in birth photography you will want to make sure that you have the time to set aside for it. Births can be short or they can be very long. There is no set time for them (not even with a cesarean because a doctor’s schedule can change if there is an emergency!). Make sure you have arranged for child care for your own children and that you can clear anything off your schedule if the need arises.

2. You Cannot Set the Scene

Nurses, doctors, techs, interns are all walking in and out of the room. You cannot ask them to stay out so you can set up the perfect shot. You have to just go with it and work within the space you have and around the people in the room.

3. No Flash Photography

Mom-to-be is working hard. Flash is a distraction. Enough said.

4. It’s not the time to Learn about Medicine or ask a lot of Questions

Asking questions about procedures, medications, or input of your opinions on childbirth or what they are doing is not necessary or needed. You are there to document, not to quiz medical professionals.

5. If at all possible, arrange to meet the Doctor before the actual Birth

Meeting the doctor ahead of time can give you an opportunity to talk to them and find out if they have any particular rules for photographing or recording labor and birth.

It also gives you a chance to talk to them about what happens if your client has a cesarean. Some doctors will arrange it with the anesthesiologist to get the photographer back into the OR in non-emergency cases. (In an emergency, you will not be allowed back there.). In most cases the anesthesiologist has the final say because you would be in their area to shoot. Don’t take it personally if they say no to a photographer in the OR. They are looking out for your client.

6. Have a back up plan in the event of a cesarean and you can’t go into the OR.

This means making sure you know where the nursery is and where your client will be brought to after delivery. The doctor will fill you in during your meeting about their standard protocol, but make sure you know where everything is once you are there.

Birth Photography OR

7. Be Prepared for the Unexpected with Birth Photography

Babies pay no attention to your time frame, the doctor’s time frame, or anyone else’s. They come when they want to. Be ready for a short labor and be even more prepared for a long one. Make sure you have battery supply for your camera and your phone and extra memory cards. Make sure you have money for vending machines.

It’s better to have all of that and not need it as it is to not be prepared and find yourself on hour 13 and needing something to snack on and your camera battery has only 10% charge left!

8. Make sure that your Images are telling the Story of that Day

Flowers, balloons, visitors….they all help tell the story. Capture the moments that you think that they will want to remember. Even take a photo of the dry erase board where their nurse writes her name and their room number. They will want to remember their nurse’s name. If there is a shift change, take a new photo of it.

Record it until the baby is born. They may have a favorite nurse and you will help them remember her name. Some parents send thank you cards to the staff and it’s nice when they can include the names of the people who took care of them.

Birth Photography Chucks

9. Remember that this Day is NOT about You

Don’t try to chat with everyone and make the focus of the day you. It’s easy to get consumed in the activity and not even realize that you have taken focus from the real star of the day….the mom-to-be. Let her know that you are there documenting everything she wants you to. That makes her job a little easier and allows her to focus.

10. Convert the images to black and white, but give them the color versions as well.

Give them color versions, but also black and white. The reason is very simple.
Some people do not like medical stuff. Some people can’t stand the sight or even the idea of blood, or even the vernix (that cheesy type substance that covers newborns).

When they put together their scrapbook for the birth, they might want black and white. Don’t let them be the ones to convert the images. Take control of the edits and make sure they have the images in black and white. They might use all the color ones, but give them the option. Make sure you capture the little details of the baby like toes and ears when you take the photographs as well.

Those are always loved and appreciated by the parents.

Birth Photography Story 2

Birth photography is unlike portrait photography. You may not get everything perfect. People may walk into the shot. Someone may turn on a light or turn off a light. Things happen. The scene can move quickly.

Make sure you are prepared with camera in hand and make sure to expect the random things that may happen. Document the moments and learn from your experience. The next birth will be easier and you will gradually learn to adapt and easily navigate your way through the whole birthing process and tell better stories each time. Your clients will love you for it and you will grow as a photographer, an artist, and as a person with each moment you help bring to life.

Lori Peterson is an award winning photographer based out of the St. Louis Metro Area. Her dynamic work ranges from creative portraits to very unique fine art photography. Lori’s work can be seen at www.loripetersonphotography.com and also on her blog at www.loripetersonphotographyblog.com. You can follow her on Facebook at https://www.facebook.com/LoriPetersonPhotography.

Post originally from: Digital Photography Tips.

Check out our more Photography Tips at Photography Tips for Beginners, Portrait Photography Tips and Wedding Photography Tips.

A Guide to Birth Photography

The post A Guide to Birth Photography by Guest Contributor appeared first on Digital Photography School.


Digital Photography School

 
Comments Off on A Guide to Birth Photography

Posted in Photography


Photography Rules and Finding Balance to Discover Your Own Style

13 Oct

By Lori Peterson

Digital photography has put the camera in more hands than ever before and everyone seems to either want to follow the standard mold of photography or they want to completely break away from it.

For instance, Ian Ruhter took a delivery van and transformed it into a giant wet plate camera. There are so many photographers out there that are wanting to copy someone else’s style instead of finding their own. Learn the rules and then use them or twist them as you need to do to make your own art and to tell your story. One part of your image may follow the standard photography rules and another part will completely be out of the norm. Not everyone sees the image or the story the same and that is fine. Don’t get so caught up in trying to make everything absolutely perfect that you lose the shot.

One of the rules that you hear a lot is to simplify your image. Sometimes, especially in street photography, you can’t simplify the scene. Sometimes the scene has to speak for itself. Whether it’s chaos or clutter, sometimes you need to just go with what you have and work with it. There are stories that can be told just by being the silent observer and recording the image at that place and time.

Photography Rules and Finding Balance

Some photographers will talk to you endlessly about the Rule of Thirds and not centering your subject. Composition of the image is really subjective, but people get too comfortable just centering the image and when they start thinking outside of that box they begin to see everything in a new way. Moving your subject slightly off to the side can actually bring the focus onto them. Just make sure that no matter where your subject is in the image that they are the focus.

Photography Rules and Finding Balance

Using patterns and lines can draw your viewer in more. It helps for them to picture the scene and even put themselves into that moment in time. S-curves work really well to draw your eyes to a particular spot in an image. You can also try a new perspective and get down really low to the ground and use whatever lines are there to your advantage. Experimenting with your shooting techniques can help you learn what works for your style and what doesn’t.

Photography Rules and Finding Balance

Use of color and tone in an image can set the scene for the viewer. Colors can bring a harmony and unity to an image or it can be used to emphasize a certain part of the image. Color can add contrast, it can help parts of the image blend in, or it can really make a bold statement. Using color in your image can convey emotion and without a written word it can tell you what time of day it is, such as sunrise or sunset.

Photography Rules and Finding Balance

You could do a Google search on photography rules and it would make your head spin from trying to follow all of them, but the important thing about photography rules is knowing when to follow them, when to break them, and when to vary them up just enough to fit your image. Learning to find that balance takes time and practice. Sometimes you just have to learn from the mistakes you make and take those lessons with you to your next shoot. Don’t forget that art is very subjective and what works for one image may not work for another. Experimenting with techniques and composition helps you to learn about photography and find your own creative balance.

Lori Peterson is an award winning photographer based out of the St. Louis Metro Area. Her dynamic work ranges from creative portraits to very unique fine art photography. Lori’s work can be seen at www.loripetersonphotography.com and also on her blog at www.loripetersonphotographyblog.com. You can follow her on Facebook at https://www.facebook.com/LoriPetersonPhotography.

Post originally from: Digital Photography Tips.

Check out our more Photography Tips at Photography Tips for Beginners, Portrait Photography Tips and Wedding Photography Tips.

Photography Rules and Finding Balance to Discover Your Own Style

The post Photography Rules and Finding Balance to Discover Your Own Style by Guest Contributor appeared first on Digital Photography School.


Digital Photography School

 
Comments Off on Photography Rules and Finding Balance to Discover Your Own Style

Posted in Photography


7 Lifestyle Photography Tips

12 Oct

By Annie Tao.

Lifestyle Photography has been around for as long as there were cameras, but it was called Photojournalism and was mostly seen only in the newspapers. During those times, most Portrait Photographers captured their subjects posed and “perfect”.

Once DSLRs infiltrated the market at lower price points, everyone and their grandmas (okay, maybe not all grandmas) had one. Digital photography allowed the birth of this new form of portraiture – Lifestyle Photography – by allowing people to shoot freely without the worry of film and film development costs. Now with smart phones and other electronics that piggyback a convenient camera, snapping photos about your life has become mainstream.

True Lifestyle Photography, however, is more than taking candid shots. It is about capturing images that reveal a story. A personality. A relationship. A feeling.

7 Lifestyle Photography Tips:

1. Anticipate what’s going to happen

Don’t wait to take the shot until you see something happening because some things last only one second and you can miss it.  Be ready.

Annie Tao Photography Tips on on Lifestyle Photography Anticipate whats going to happen

2. Capture the second before and second after an anticipated moment

Annie Tao Photography Tips on on Lifestyle Photography Capture the moment before or after

3. Know your light at all times

When capturing Lifestyle, it’s often best to not disturb what is unfolding naturally. So if your subject is not in the best light, then it is up to you to make it work. It may be changing your shooting position, your camera angle or quickly grabbing a reflector.
Annie Tao Photography Tips on on Lifestyle Photography Know your light at all times

4. Help create the mood

Just because the photo shoot started doesn’t mean your couple will instantly jump into a romantic moment or a family will burst into a fit of laughter.  Help create an environment for those scenes to happen.  Talk to them, play music, be silly, etc.

Annie Tao Photography Tips on on Lifestyle Photography Help create the Mood

5. Don’t forget the details

Get a close-up of the lace on a dress, the way someone stands or the way a baby grips a parent’s finger with his entire hand.  These shots are pieces of information that help tell a cherished story.

Annie Tao Photography Tips on on Lifestyle Photography Dont forget the details

San Francisco Bay Area East Bay lifestyle baby photography family of four portrait of their lower half baby is slipping

6. Pay attention to the environment

I carry a wide angle lens with me to all my Lifestyle shoots because I like getting a shot that includes the environment. Often we think of close-up shots when we photograph people, but step back and look at the environment too. Those are just as important.

Annie Tao Photography Tips on on Lifestyle Photography Pay attention to the environment

7. Give your subjects something to do

Lifestyle Photography is the opposite of look-at-me-and-say-cheese type of portraiture. If your subjects have something to do, then you are setting the stage for their personalities to show and they will have natural expressions.

Annie Tao Photography Tips on on Lifestyle Photography Give subjects something to do

If you have an example of a Lifestyle image, feel free to share it in the comments below. I’d love to see it!

Annie Tao is a Professional Lifestyle Photographer in the San Francisco Bay Area who is best known for capturing genuine smiles, emotions and stories of her subjects.  You can visit annietaophotography.com for more tips or inspiration and stay connected with her on Facebook.

Post originally from: Digital Photography Tips.

Check out our more Photography Tips at Photography Tips for Beginners, Portrait Photography Tips and Wedding Photography Tips.

7 Lifestyle Photography Tips

The post 7 Lifestyle Photography Tips by Guest Contributor appeared first on Digital Photography School.


Digital Photography School

 
Comments Off on 7 Lifestyle Photography Tips

Posted in Photography


Pink: Weekly Photography Challenge

12 Oct

This week your photographic challenge is to take and share a photo that fits into the theme of ‘Pink’.

Pink

It has been a while since we’ve done a colour theme so we thought this week we’d get you to keep your eye open for pink objects and settings – it might sound a slightly obscure colour choice but when you start looking for shots I’m sure you’ll find them!

Once you’ve taken your ‘Pink’ shots we’d love to see them in comments below. Simply upload your shot into the comments (look for the little camera icon in the Disqus comments section as pictured below) and they’ll get embedded for us all to see or if you’d prefer upload them to your favourite photo sharing site and leave the link to them.

If you tag your photos on Flickr, Instagram, Twitter or other sites with Tagging tag them as #DPSPINK to help others find them. Linking back to this page might also help others know what you’re doing so that they can share in the fun.

Also – don’t forget to check out some of the great shots posted in last weeks Kids challenge – there were some great shots submitted.

Post originally from: Digital Photography Tips.

Check out our more Photography Tips at Photography Tips for Beginners, Portrait Photography Tips and Wedding Photography Tips.

Pink: Weekly Photography Challenge

The post Pink: Weekly Photography Challenge by Darren Rowse appeared first on Digital Photography School.


Digital Photography School

 
Comments Off on Pink: Weekly Photography Challenge

Posted in Photography


The 3 Biggest Kid Photography Mistakes

11 Oct

The 3 Biggest Kids Photography Mistakes

A Guest Post by Brent Mail – creator of How to Photograph Kids Naturally Online (currently 50% off at SnapnDeals).

After watching many families at the beach over the school holidays, I noticed that most of the parents, as well as some professional photographers, were making the same 3 HUGE mistakes when they were photographing kids. I could see the parents getting frustrated and it looked like no one was having fun.

I guess I can summarise the 3 mistakes in one sentence. “Hey kids, please sit down over there, look this way and smile!”

Mistake 1: Asking Kids to Sit Still: “Hey kids, please sit…”

The kids are all dressed up for the photo shoot and excited, but don’t quite know what will happen, so they do what comes naturally – they run off and play.

The photographer and parents then try to round up the kids, find a place to photograph them and then ask the kids to sit down and be still and look at the photographer. Ever tried this? It goes against all the natural instincts of the kids – they are super excited and told to sit still. Very difficult to achieve!

Kid photography mistakes 1

Solution – Let the kids run & play

All kids love to run and play. It’s a natural part of being a kid, so why not let them do what comes naturally? Some of the best images I capture are when kids are allowed to run on the beach or at a park. I take this one step further and create games for the kids to play, like racing each other, or getting the parents to chase the kids.

There are 2 things that happen when kids are allowed to run & play:

  • Kids have all this built up energy that needs to be released, and now they get to use it up. It’s fun for them and they become happy, playful kids. This is what you want.
  • Parents and kids get to relax and we capture natural facial expressions, un-posed with no fake smiles.

Kid photography mistakes 2

Tip: Shoot in sports mode – use a fast shutter speed 1/500th sec or 1/1000th sec with AI Servo auto focus (tracking autofocus). When kids are racing towards you, a very fast shutter speed and tracking autofocus will mean that you capture all the action and your subjects are in focus.

Mistake 2: Asking for a Smile – “…look this way and smile!”

Wow, this is a big one. I don’t think I have ever seen a parent not say “smile” to their children when they are being photographed. “Common kids, smile. Give us a big smile!”

Yes, sometimes we get a smile, but it’s normally a fake smile. Who wants images of their children with fake smiles? Not me.

Kid photography mistakes 3

Solution – Be the Clown

Have you ever taken your kids to the circus to see a clown? A really entertaining clown, who gets the kids laughing. Go behind the clown and photograph the kids – those are real smiles!

So you (the photographer) need to become the clown.

How do you do that? When you meet the kids for the first time get down to their level and introduce yourself in a very enthusiastic and loud voice. Set the scene from the start, then, when you are photographing the kids, be loud, be funny, do funny things like roll your eyes, stumble around, dance, or get the kids to scare you! Bring along props to entertain the kids, like a clown nose.

Kid photography mistakes 4

An alternate to being the clown is the have the parents or siblings become the clown. When I’m shooting the close-ups (after the kids have run around and released all that energy) I get the parents to stand behind me and I get them to dance around. This always gets the kids smiling and laughing – seeing dad do “gangnam style” dance is hugely entertaining for the kids. It’s also a lot of fun for the parents.

Mistake 3: Standing Tall

Have you ever had someone stand over you and talk down to you? How do you feel? Inferior, small & insignificant? This is what kids feel like when someone photographs them from high-up. They feel intimidated and it’s not fun for the kids.

Also there is nothing special about the images captured from high-up, they are more like snapshots.

Kid photography mistakes 5

Solution – Get Down Low

When I first get to meet the kids I’m about to photograph, I get down low, and introduce myself. “Hey kids, my name is Brent and we are going to have so much fun today! What is your name?” I connect with the kids in a very enthusiastic voice. From then onwards the kids know that I’m on their side.
When I photograph them, I kneel down to their level, sometime I lay down flat on the ground to get a very different angle of view. Parents love these images, because they have never seen their children from this low angle, and the kids do not feel intimidated so they relax and play along with me.

Kid photography mistakes 6

Summary:

So, next time you go out and photograph kids keep these 3 tips in your mind. The photo shoot will flow and everyone will have much more fun – including you!

  1. Let the kids run and play.
  2. Be the clown and get the kids to laugh naturally.
  3. Get down low to their level.

Hope you enjoyed these kids’ photography tips. If you want to find out more then checkout my “How to Photography Kids – Naturally” course which is currently 50% off at SnapnDeals.

Who is Brent? Brent is an award-winning professional photographer who runs a successful portrait photography studio near the beach in Australia. Brent also teaches photography and has a free mini-course here, as well as
other photography training courses here.

Post originally from: Digital Photography Tips.

Check out our more Photography Tips at Photography Tips for Beginners, Portrait Photography Tips and Wedding Photography Tips.

The 3 Biggest Kid Photography Mistakes

The post The 3 Biggest Kid Photography Mistakes by Guest Contributor appeared first on Digital Photography School.


Digital Photography School

 
Comments Off on The 3 Biggest Kid Photography Mistakes

Posted in Photography


The Surreal Landscape: Long Exposure Photography

09 Oct

Long exposure photography

It seems to me that we live in a world orientated to a digital generation demanding instant gratification. This extends to photography, encouraged by the prevalence of camera phones and Instagram type apps. How many photographers, when they come across a beautiful scene, just stop and snap a photo with a camera phone and then move on?

Long exposure photography is different. It demands patience, an appreciation of beautiful light and a deep understanding of composition. It is as much about the mind-set of the photographer as it is about the subject. It’s not brash or flashy – you rarely see long exposure photographers use techniques such as high dynamic range (HDR) photography or adding texture layers.

What is long exposure photography? There is no precise definition. I think of it as involving shutter speeds of ten seconds or longer, but I’m sure some photographers will be thinking in terms of shutter speeds of a minute or more. But the aim is the same – to create beautiful and surreal images by leaving the shutter open long enough to record anything that moves within the landscape, such as water, as a blur.

That’s why most long exposure photography tends to take place along the coast. The sea creates an interesting subject, helped by natural features such as rocks and islands, and man-made ones like piers and jetties.

Painting with light is also a form of long exposure photography.

Long exposure photography

Contemplation and the landscape

You may be wondering what one does while waiting for the camera to take a photo when the shutter speed is longer than a minute.

The answer is that long exposure photography is a naturally contemplative pastime. While waiting, take some time to enjoy the beautiful location you are in. Breathe and enjoy the smell of the air. Listen to the sounds. Watch the light as it fades away. This meditative approach will help you notice things an instant gratification seeker will miss.

Getting started

Interested? How then, do you get started? One of the nice things about long exposure photography is that the basic requirements are not extensive:

  • A camera that lets you take control of the exposure settings and has a Bulb setting so that you can use shutter speeds longer than 30 seconds.
  • A tripod and a good ball-and-socket head. Beware of inexpensive models – they may be too flimsy to support your camera properly during long exposures. A good aluminium or carbon-fibre tripod is required.
  • A cable release or remote release so that you can activate the shutter without touching the camera.

Filters

A polarising filter is useful for eliminating reflections from shiny surfaces, such as a concrete jetty made wet by sea water. It also blocks between one and two stops of light, helping you obtain longer shutter speeds.

Some photographers use neutral density (ND) filters, but they are not essential. You can get started without them by turning up late in the day and taking photos as the sun sets. During twilight you can obtain shutter speeds of thirty seconds or later by setting a low ISO and a narrow aperture.

The benefit of neutral density filters is that they extend the period of time during which you can use long exposures. They come in various strengths; three, four, nine and ten stop ND filters are the most common. Nine and ten stop ND filters are designed to enable long exposure photography during the middle of the day – you won’t need them if you are shooting at dusk.

Learn more about neutral density filters.

Long exposure photography

Noise reduction

Shoot in Raw and turn off the long exposure noise reduction setting. The software you use to process your Raw files will take care of noise reduction for you.

Resources

Here are some more resources that will help:

BW Vision

Slices of Silence

Interviews with long exposure photographers

Long Exposure Photography: 15 Stunning Examples

Eight Tips for Long Exposure Photography

Photo Tutorial – Long Exposure Photography

Final thoughts

That’s a lot to take in, so don’t forget the most important thing of all – to go out and take some photos. It takes a while to get the hang of long exposure photography, so don’t be discouraged if your first attempts aren’t as polished as you would like. It takes time to master the techniques and develop the eye for graphical composition required for successful long exposure photography.

Mastering Photography

My ebook Mastering Photography: A Beginner’s Guide to Using Digital Cameras introduces you to photography and helps you make the most out of your digital cameras. It covers concepts such as lighting and composition as well as the camera settings you need to master long exposure photography and take photos like the ones in this article.

Long exposure photography

Post originally from: Digital Photography Tips.

Check out our more Photography Tips at Photography Tips for Beginners, Portrait Photography Tips and Wedding Photography Tips.

The Surreal Landscape: Long Exposure Photography

The post The Surreal Landscape: Long Exposure Photography by Andrew Gibson appeared first on Digital Photography School.


Digital Photography School

 
Comments Off on The Surreal Landscape: Long Exposure Photography

Posted in Photography


Terrified of Street Photography? So Am I! Here’s How I Do It

08 Oct

by Mridula Dwivedi.

I am truly terrified of street photography. It is such a daunting task to point my camera at a stranger’s face and click. I know in India (and many other places) not too many people mind, but I just completely freeze somehow. Yet I was fascinated by street photography. I would keep reading tips after tips thinking something would unlock the secret for me. In the end I had to discover my own way. I am still far from comfortable but I look forward to street photography as well on my trips. These are the things that got me started, even if tentatively.

My Street Photography Tips

Shooting Things

Street Photography

Since I was petrified of shooting people I started with shooting things. Most of the times, the street vendors are fine when you walk up close, exchange a glance towards their stuff and raise an eyebrow. They generally wave a hand to go ahead. I know this is not real street photography but I had to start somewhere. That is where I started and remained, for a very long time.

Use a Zoom Lens

Street Photography

I know, every self street respecting street photographer would advise you against it. But remember we are not dealing with a self respecting street photographer but terrified street photographer. I actually gathered courage only after I used a 75-300 to shoot people walking by at Phewa Lake in Pokhara, Nepal. I was sitting on a bench under shade as it was too hot. I saw boats coming and going as well as people walking by the lake. I decided to use the zoom. No one took any notice as I was a little away from the scene. It helped that I stationary as well. Using a zoom lens certainly got me started.

Framing Wider

Street Photography
So, when I found myself in the colorful border market at Aranyaprathet (Thai-Cambodia border) recently I wanted to do street photography. I was using a 50 mm prime lens which would not let me zoom anything. I wanted to click the man under the umbrella but my nerves failed me as usual. I then decided to frame the scene wider. What to do, you have to think of ways to click things when you are scared of offending people.

Clicking Busy People

Street Photography
While walking through the Rong Kluea Market at the Thai-Cambodian border I realized that the vendors were so busy doing their business they hardly had any time for nosy photographer. Now that is a good thing for scared novices like me.

Positioning Myself in a Corner

Street Photography
But what has worked best for me is positioning myself in a corner of a busy street. That way I could watch the world go by and occasionally get a picture too. I must have clicked at least 30 pictures standing at this particular corner of Rong Kluea Border Market. Not one person stopped and asked me what I thought I was doing! A very happy scenario if you ask me.

Mridula Dwivedi is a full time academician from India. She blogs at Travel Tales from India. Her blog has taken her places as she was invited by the tourism boards of South Africa, Malaysia and recently Thailand.

Post originally from: Digital Photography Tips.

Check out our more Photography Tips at Photography Tips for Beginners, Portrait Photography Tips and Wedding Photography Tips.

Terrified of Street Photography? So Am I! Here’s How I Do It

The post Terrified of Street Photography? So Am I! Here’s How I Do It by Guest Contributor appeared first on Digital Photography School.


Digital Photography School

 
Comments Off on Terrified of Street Photography? So Am I! Here’s How I Do It

Posted in Photography