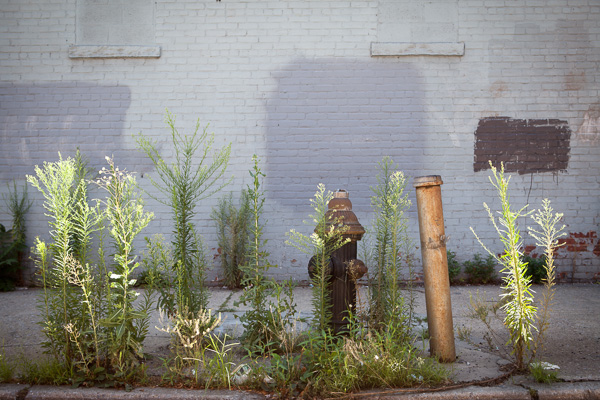
Gowanus Fire Hydrant
I have always been fascinated with great photography taken in areas that people might commonly refer to as ‘boring.’
I use the word boring because that is the specific word I most often see used as an excuse for people having trouble with their photography. Someone will say, “I wish I lived somewhere more interesting and beautiful”or “I can’t do interesting work where I live. It’s too boring.”. Can you relate to that?
What these people don’t realize is that what might seem boring and routine to them could seem fascinating to others, and by dismissing where they live they do not even give themselves a chance to try and photograph it in an interesting way. They take themselves out of the game before they even start.
When someone uses the word boring, I tend to think that they mean quiet and not traditionally picturesque, or maybe there are not many people around and the ones that are around seem uninteresting. These are not reasons that you cannot take an interesting photo. In fact, these topics all sound fascinating to me. Use these aspects to your advantage and figure out ways to make them interesting, photogenic, and appealing. Also, keep in mind that often the people that seem the least interesting, actually tend to be the most interesting.
Here are some tips to capture interesting photos in ‘boring’ places, and I hope after you read this article you will never use the word boring again.
Capture people that you come across in everyday situations
Take a camera with you on everyday excursions
Many people have the habit of only taking their camera out when there is supposed to be a picturesque moment. Maybe it’s a sunset, or to the park, or on a trip. This is a tough way to shoot because you already have the images you want to capture in your mind before you take them.
The goal here is to not stop yourself from taking images before you even start. The more ‘boring’ you think the place is, the more you should bring out your camera. Go into a situation with the mindset that you are going to figure out how to take an interesting photo no matter what happens.
Try to create interesting images in the course of your everyday life. Photograph your neighborhood. It could be at the gas station, at a roadside diner, in a supermarket, in a parking lot, or stopping on a quiet street corner at dusk. For me, this is the true fun of photography. It’s a way of helping you see aspects of your everyday world in an unique way.
Remember, if you have a DSLR that is too heavy to carry around frequently, there are alternatives. The most important one is the cellphone in your pocket. Cellphone cameras have come a long way, and while they are not close to the quality of a camera, you can still make good prints out of them. The most important reason for using a cellphone is that you are training your eye by using them when you otherwise wouldn’t take a camera with you.
Some other alternatives are to purchase a smaller prime lens or a pancake lens to lighten your DSLR for everyday use, or purchasing a mirrorless or micro 4/3rds camera. I personally love the Fuji X100s.

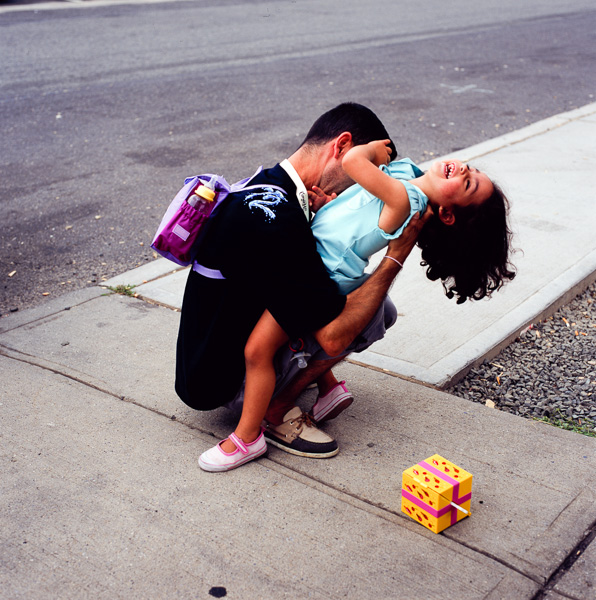
Dancer in Pharmacy. Taken with iPhone 4S.
Find beauty in the mundane
This is the most important point. Try to go beyond the safe photo. Capture something that you find interesting even though many people might not choose to put it on their walls. Don’t be afraid if other people hate it. That’s often a good sign. It only matters if you like it.
Focus on details and use everyday elements to make an image interesting. You don’t have to have a mountain, a stream, or a sunset in your photo to make it interesting. A brick wall, a parking cone, a street sign, or a bare building can all be beautiful when captured in the right way. Capture people that you come across over the course of your everyday routine. These can be the most interesting images since you will already know the subject well.
Aim to capture subtle images as part of your work. Subtle images might not jump out at a viewer right away, but they will stick with them. These images will make someone think and will become more interesting to the viewer over time as they wonder about them. Subtle images can be very powerful when done correctly.
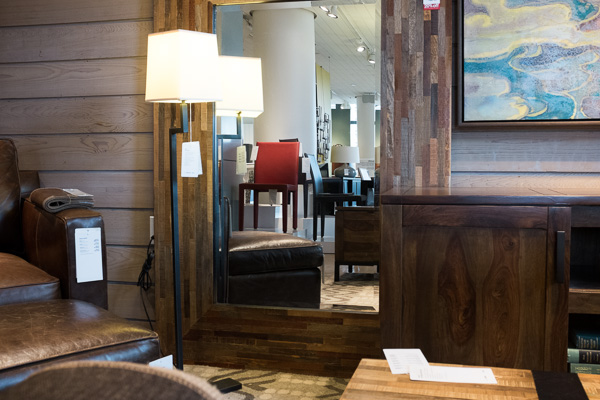
Red Chair, Crate and Barrel
To be honest, the jury is out on what I think about this image above, and I think it will have to age before I figure it out. But I had to try it. It might look completely normal and banal, especially if you live in the U.S., but it takes on a different meaning when you compare it to this image taken by William Eggleston in 1984. The ‘boringness’, the browns and muted tones become the point of this image.
Tell a story
Pretend you have a viewer that knows nothing about where you are from. Maybe you live in a quiet corner of suburbia, where all the houses look the same, or maybe you’re in the middle of a rural area.
Your photos should tell the viewer what it is like to be there. Think about it as though you are talking to the viewer through your images. Use your images to tell the stories that surround you, no matter how big or small.
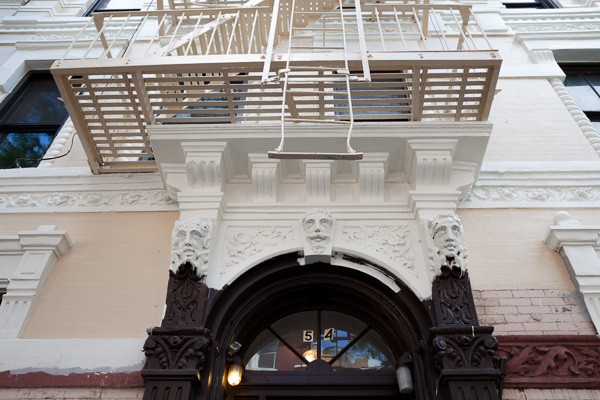
Gentrification
I have walked past this building with my camera every couple of days for almost seven years. Then, one day there was an interesting image.
Experiment
It is a hard process to learn to photograph this way and you will undoubtedly take many bad photos during the learning process. You will have a hard time figuring out what is good and even asking for feedback might confuse you further. I don’t know about you, but that sounds like fun to me.
Find a friend or two or a fellow photographer that you trust and show them your images over time. Let them grow with your work while you do. This will become invaluable feedback down the road and help you talk out your work with them.
The only constant in this process is that it takes time to succeed and to figure out what you are doing and what you are photographing. There is no roadmap for doing this type of work.
White Face
Don’t take your area or lifestyle for granted
Just because something does not seem interesting to you, does not mean it is not interesting. The way you do things and your environment are both vastly different from the rest of the world. Keep that in mind. Capture intimate aspects of your world for others and they will find those photographs fascinating, even if they might feel routine or normal to you.
Great photographers can do great photography anywhere, however it sometimes can take a little inspiration to get the wheels turning. The most important thing is to walk out the door frequently. If you think you are not going to capture any interesting images then you are not going to walk out the door.
Take a long walk, anywhere, at anytime, and challenge yourself to capture an interesting image.

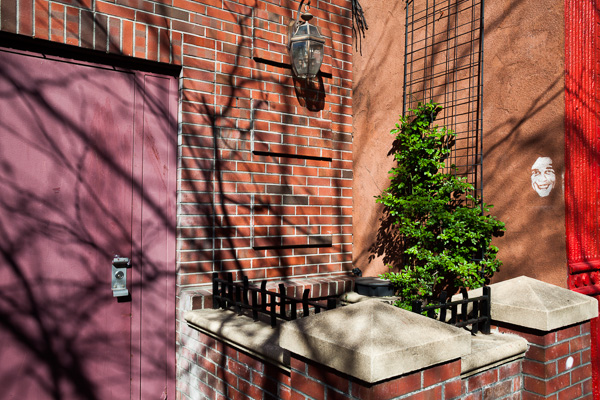
Plant, Chase Bank
Further viewing
For further viewing, I highly suggest exploring the work of Williams Eggleston, Lee Friedlander, and Stephen Shore. They are photographic masters who have spent much of their time photographing in this way.
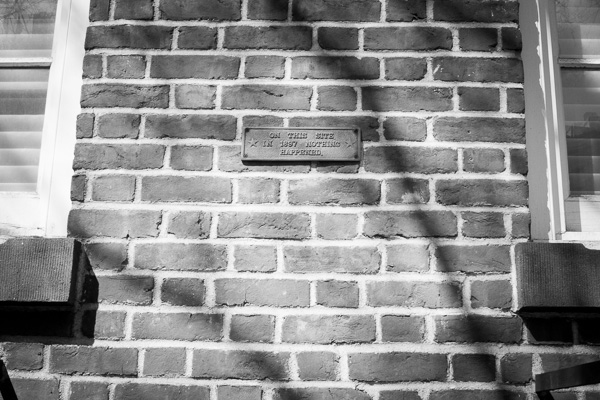
On This Site in 1897 Nothing Happened
The post How to do Great Photography Even When Your Surroundings are Boring by James Maher appeared first on Digital Photography School.

Digital Photography School


You must be logged in to post a comment.