As you enter the field of professional photography, there is one thing that will become immediately clear. One of your biggest obstacles will be fear. You will worry that you are not prepared for a job, that you are not experienced enough, that something will go wrong, or that they will not like your images.

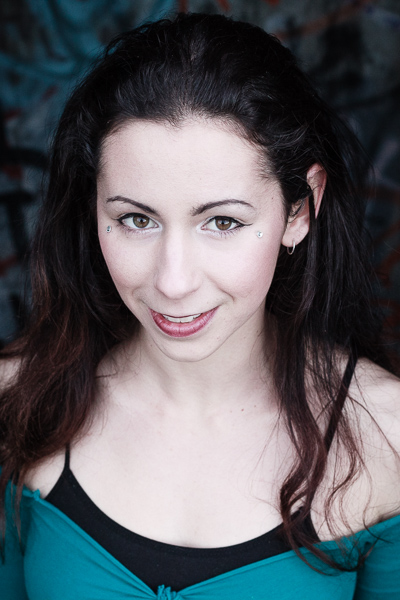
Business Portrait. Each photography job will have a different makeup and you should create a game plan going in.
This is normal and I have bad news for you; the fear will never fully go away. It will get easier however, and you will become better at pushing through it. As time progresses you will find yourself confidently going into jobs that you used to make you petrified. But even then, a whole new set of fears will arise as you move into more advanced jobs.
This can paralyze you, especially as you are starting out. It is the biggest obstacle that will stand in your way towards becoming successful. But fear not, because you are not alone. Even the more experienced photographers stay up sleepless the night before jobs.
The key is to harness that fear and understand that it is normal. It is good in fact, because it means that you are progressing and trying new things. It means you are doing something interesting that you will be proud about afterwards. As you learn, you will make mistakes, but it is how you deal with those mistakes, how you learn from them, and how you push through the fear that will be the impetus for your success.
Here is a list of my toughest fears to push through as a professional starting a photography business, and how I deal with them.
1. Is my work good enough? What if I’m not experienced enough for a job?
When you begin to think about starting a business the scariest question is whether your work and your abilities are good enough. You may have heard you are talented or that you have a gift for image making, but the reality is that being a good photographer is based on your experience and the amount of effort, thought, and study that you put into your work. Anyone can take a good photograph, but professionals learn to do it day in and day out in a variety of circumstances.
If you are starting out, no matter how good you are, you will have a lot to learn. It is important to know this. Everyone started somewhere. Spend time researching people who do the type of work that you want to do and figure out how they do it. Learn from them. Read about photography and settings and situations. Use websites like dPS to improve your skills. Before you do a job research what you want the photographs to look like and plan out how you will pull them off. Go into the job with a plan.

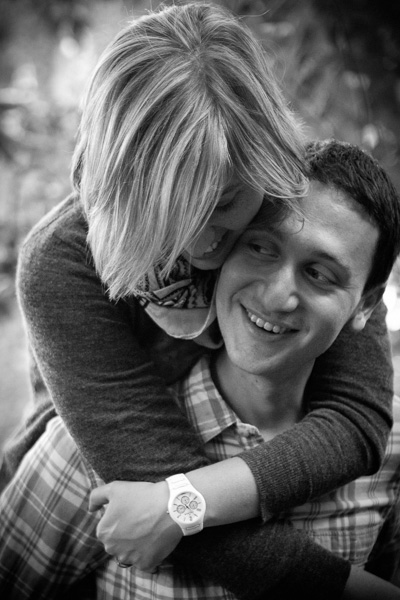
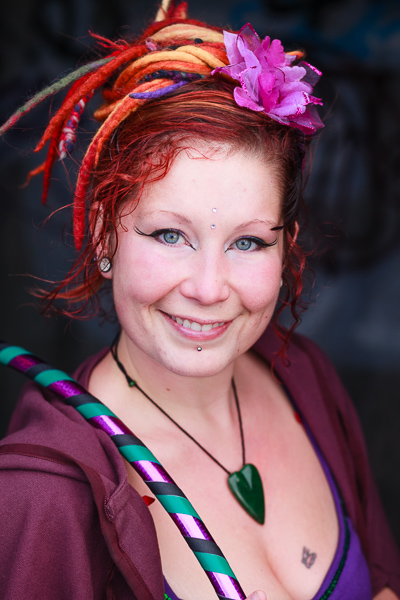
Environmental Portrait. If you are an introvert like me, interacting with subjects to get them in the right mindset will make you nervous. This will improve with experience and you should study other photographers to pick up tips on how to best interact with subjects.
If you treat your image making like this and put the work into it, even if you are not currently ready, you will be soon. The more prepared you are, the more confident you will be when going into jobs and marketing yourself. All of the information is out there for you to prepare yourself, it is just a matter of doing it.
You will most likely look back on your work two years from now and see how much better you have become, and that is the point. Everyone had to start from somewhere and it is the prepared and thoughtful photographers who ultimately become successful.
2. Am I charging the right amount of money?
Pricing is an artform based on experience. At first it can be scary because you will not have any experience with it. Also, if you are not confident in your work or your ability, then how can you be confident in pricing your work?
If you are entering the professional world you have to understand that you are starting a business. You need a business plan. You have to charge enough to make a living. If you are making the commitment to do this, even if you are not fully comfortable yet, you still have to make a living.
Research other photographers in your area or field and figure out what they are charging. Put yourself in the customer’s shoes and think about what they might be willing to pay. Create a pricing structure based on this and raise your prices as you become more experienced. Some jobs you will lose because you are too expensive. No matter what you charge, there are always people who will think you are too expensive. Do not let these people affect your opinion of what you charge. Other customers will pass you by because you are not expensive enough! That happens.

Environmental Portrait. Some jobs will be much easier than others but always plan for the worst.
Imagine you are hiring a wedding photographer with a budget of $ 5,000 and you like two photographers who seem like they have fairly similar experience, but one charges $ 2,000 and the other charges $ 4,500. Which one will you hire? Some might hire the $ 2,000 photographer but many would hire the $ 4,500 photographer because they would assume that this photographer was more experienced solely based on the price they command. They would not want to risk hiring the cheaper photographer for the most important day of their lives.
Also, if people tell you your prices are too high, educate them on why you charge what you do. Many people who hire you will not understand photography. There are a lot of people out there who think photography is just about getting a camera, showing up for an hour, going home, and sending the photos. That is so, so far from the truth. Explain what you will be doing for them, the time and knowledge that goes into the job, and why it is priced where it is. Some people will understand, be happy that you explained it to them, and will then hire you. Some will not, but then you don’t want to work with those people in the first place.
Do not be afraid to lose a job because of price. That will inevitably happen and it should not dictate your pricing strategy.
3. Will my equipment break?
This one scares the heck out of me. What if something breaks while I am on a shoot? If you are creating a photography business, you need to have backups in place. A photographer plans based on contingencies. This is not only a vital business practice, but very important for your peace of mind and confidence.
Have an organized system for your equipment and bags and a consistent way of packing them for jobs. Have a backup of everything. If you do the same job regularly, then it is worth it to purchase two of everything that you use regularly. You can consider renting equipment for jobs that you do not do as frequently.
4. The neverending job and difficult clients
I used to have a big problem taking jobs that I shouldn’t have gotten involved in. I would be flattered that someone wanted to hire me and I hated to turn down income, particularly during the lean times. This became a huge problem, especially with the difficult clients who kept changing the job parameters and asking for more. This mistake cost me a lot of time and ultimately money.
Your time is valuable and certain jobs, particularly when you are starting, will not be worth your time. If you are starting a photography business you need to build up a steady stream of clients and having one take up an inordinate amount of your time, particularly if they are not paying you well, is just not worth it. You could be spending that valuable time marketing yourself and building your knowledge and business.
Always get all of the information up front from the client before you quote a price and size them up. It can be obvious, sometimes right away, when a client will be difficult. When you get all of the details stated up front, if the parameters of the job happen to change later in the process, then you will have the grounds to ask for more money for the extra work they are asking you to do. This will keep clients from taking advantage of your time and asking for more than what was agreed upon. Sometimes they will not even remember what they had asked for at the beginning.
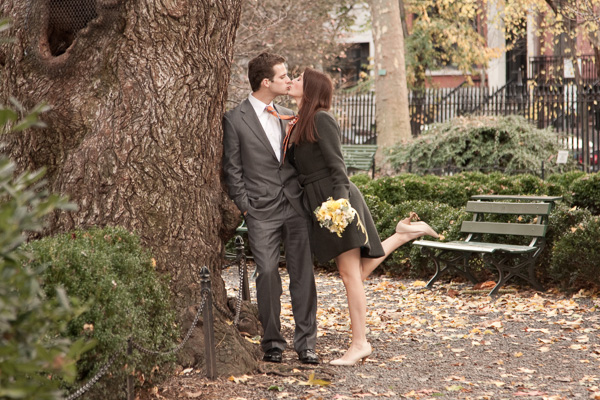
An engagement portrait. Some clients will prefer more posed portraiture that looks like it came out of a magazine. Some will want both. The better you know your clients the better you can anticipate what the will want.
5. Will the client like my work?
I have been doing photography jobs for a decade now and I still get nervous every single time I have to press the send button for the final images. No matter how confident I am in them, that fear is never going to go away for me. It might be the same for some of you.
However, it used to be more debilitating than it is now. At the beginning it would cause me to procrastinate and it would cause me to take so much longer editing the images than it should have. I notice that this happens to a lot of photographers. Newer photographers often spend much more time on the editing than the more experienced photographers. Some of this is based on speed and experience, but I find that the biggest factor is that the experienced photographers have their editing process down to a science. There is a structure to the way they do things that makes everything more efficient and having this structure also helps reduce the fear.
Create a consistent structure for how you edit jobs. Here is mine:
- I first start by choosing my final selection of RAW negatives that I will send to the client. I go through all of the images in Adobe Lightroom and star everything that I think is decent as three stars.
- I then take a break to clear my head and eyes and go through the three star images and make the best of that bunch four stars.
- The four starred images will be the ones that I will send the client.
- I do a second and sometimes a third round through, moving some of the four starred images back to three stars and making the best images five stars. The five starred images are in case I want to send a small edit of the top photos or if I want to access them later for my portfolio.

Friendly and natural business portraits. When you need to create images that feel natural you need a game plan for how you are going to make the subjects feel relaxed. Think ahead of time about what you can say or do to achieve this relaxed environment.
Once I have this done, the path to the finished product is laid out before me. I then go through all of the negatives and get them to the exact crop that I want. I do this because I want to see the whole sequence of images that I will be sending to the client before I start editing the final look of them.
Finally, I go through and edit the images. The hardest aspects for me are getting the color balance, contrast, and exposure to be perfect. Also, one of the toughest things to do is to make all of the photos feel consistent. This is why I like to have the final edit of negatives chosen and cropped before I begin to work on the aesthetics. It gives me a clear path to get to this endpoint.
Do you see how an efficient system can cut out hours and even days of editing time? It keeps you organized and this organization is meant to break through any procrastination and worry about the final photographs. Then, all you have to do is stand up for a second, take a deep breath, close your eyes, and hit the send button.
Take yourself seriously, especially when you are starting out. If you are starting a photography business, commit to it. You are a photographer, you don’t do photography. You have a product that takes a lot of effort, knowledge, and skill. Your product has a lot of value and not everyone with a DSLR can do what you do.
Need more help with business? Try these other dPS articles:
- 30 Things you Should Know to Help you Start a Photography Business
- 36 of the Best Online Tools to Boost Your Photography Business
- 5 Things to Consider Before Starting Your Photography Business
- 5 Tips to Expand your Photography Business Skills
- 5 Ways to Dip your Toe into the Business of Photography
- The Ultimate Guide to Going Pro as a Photographer
The post 5 Fears to Overcome When Starting a Photography Business by James Maher appeared first on Digital Photography School.

Digital Photography School


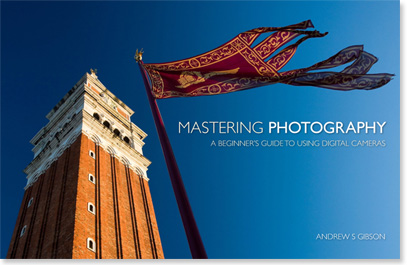 My latest ebook, Mastering Photography: A Beginner’s Guide to Using Digital Cameras introduces you to digital photography and helps you make the most out of your digital cameras. It covers concepts such as lighting and composition as well as the camera settings you need to master to take photos like the ones in this article.


You must be logged in to post a comment.