RSS
 

Posts Tagged ‘Photography’

How to Create an Incredible Street Photography Project from A to Z

20 Aug

With a camera in hand anyone can proclaim himself or herself a street photographer. However, urban imagery requires vision. Most street photographers operate in a spontaneous way, but if you take a closer look at their projects they all have a key-element at the heart of their work, an idea that drives them. Street photography translates into emotional reactions to Continue Reading

The post How to Create an Incredible Street Photography Project from A to Z appeared first on Photodoto.


Photodoto

 
Comments Off on How to Create an Incredible Street Photography Project from A to Z

Posted in Photography


Color or Black and White for Street Photography?

19 Aug

First, let’s assume that you are shooting with a digital camera and the choice of color or monochrome treatment can be made at the post-processing level. The decision of choosing color or black and white if you are shooting film is a different story, and requires a different frame of mind, as it is usually made before you leave the house.

So, the questions is this: Is street photography better in color or black and white? There is no right or wrong answer to this question, it is definitely a personal preference. Some photographers only shoot in color, others prefer black and white for all their work. For my part, I let the subject dictate the choice and that decision is usually made before I press the shutter.

Here is some of the reasoning behind that decision…

Why black and white may be a better choice:

B&W will work best if your subject already has a timeless look.

B&W will work best if your subject already has a timeless look.

You may like to use black and white for its timeless quality. If your subject also has a timeless look, a black and white processing will make your image stand the test of time, and often give it a more artistic look. This is even more true when no element in your frame dates your photograph (such as mobile phones, cars, etc.). Other times, the black and white processing will even help hide those elements.

Silhouette photographs are often stronger in black and white than in color. The human element featured should be well-defined, and there needs to be some separation to identify the shape of the body. Removing the color will help make your subject stand out more, especially if it is small in the frame. The eye will automatically be drawn to the human shape.

B&W often works best when photographing silhouettes.

B&W often works best when photographing silhouettes.

There are also some strategic reasons to favor black and white over color. As street photographers we usually do not remove elements from the frame in post-processing. Our job is to record an authentic moment in time, that never happened before, and will never happen again. A skillful street photographer makes quick decisions, and is able to remove distracting elements from the frame by moving in closer and positioning him/herself correctly, before pressing the shutter. Most of us would not resort to using post-processing tools to remove objects. There are times when bright colorful elements such as stop signs, trash cans, or cars are inevitable, and will draw the attention away from the subject. By removing the color, you are able to bring the attention back to the human element.

Compare these two images:

In this frame the subject is interesting but your eye is immediately drawn to the red and blue street signs.

In this frame the subject is interesting but your eye is drawn to the colors of the street signs.

By removing the color distraction you have a much stronger image by bringing the attention right to your subject.

By removing the color distraction it’s a much stronger image, bringing attention right to the subject.

By shooting in RAW you retain all the color information in your file, which allows you to play with the color sliders in Lightroom and turn a distracting color into a light or dark grey tone to fine-tune your final image.

There are other times when the color is amazing but also overpowering, and risks becoming the subject because the human element is lost in the chaos.

Why color may work better:

When is color preferred? The color can be an integral part of the story, which also means that a black and white conversation would take away the most important component of the image, and it would not make any sense.

Here a B&W conversion would not make any sense and the subject would lose interest.

Here a B&W conversion would not make any sense and the subject would lose interest.

Finding a great background, such as a textured wall or a colorful storefront, is a great way to anticipate a shot, by waiting for the right subject to enter your frame. It may be even more important to get the right subject in a color shot than in a black and white picture. Color harmony plays an important role in making, or breaking the image. Most importantly, color should not overpower your subject. It should be part of the story, not a distraction from it.

Finding a textured colorful background and waiting for the right subject to enter your frame makes for a strong color street photograph. The green tires and blue shoes  completed the shot.

Finding a textured colorful background and waiting for the right subject to enter your frame makes for a strong color street photograph. The green tires and blue shoes completed the shot.

Color will also often give a sense of place or time in street photography. It will evoke the feeling of a season, for example, or the time of the day – from the warm glow of the golden hour, to the cool tones of the blue hour.

Autumn in Paris would not be as well conveyed in a B&W photograph.

Autumn in Paris would not be as well conveyed in a B&W photograph.

Going out on a photo walk with a specific color in mind is also a fun way to approach street photography. You will be surprised at the creative ways you will see the world around you by focusing your vision on one color. Try it!

Choosing a color theme then you are out on a photo walk can be a fun project. Here my color theme was blue!

Choosing a color theme then you are out on a photo walk can be a fun project. Here my color theme was blue!

Conclusion:

Don’t forget that it’s your vision, and you are shooting street photography for yourself first. Don’t get stuck, try new things! If you always shoot in color, go out and train yourself to see in grayscale for a few days. If you favor black and white, take another look at the world around you and learn to appreciate and use the colors it has to offer. You may discover a whole new way to see, and you will undoubtedly grow in the process. Have fun!

This short video about Color versus B&W is part of my Street Tips series called Hit the Streets with Valerie Jardin

Editor’s Note: This is last of a series of articles this week featuring black and white photography tips. Look for earlier ones below.

  • 5 Simple Ways to Create Expressive Photos in Black and White
  • Tips for Black and White Wildlife Photography
  • 7 Tips for Black and White Portrait Photography
  • 28 Images with Strong Black and White Compositions
  • Weekly Photography Challenge – Black and White Techniques
  • Tips for Black and White Wildlife Photography
  • How to Convert Images to Black and White and Add a Color Tint in Photoshop
  • Shooting all Black and White for a Day to Improve Your Photographic Eye
  • Split Toning Black and White Images in Lightroom
  • Processing Black and White Photos with OnOne Perfect B&W

googletag.cmd.push(function() {
tablet_slots.push( googletag.defineSlot( “/1005424/_dPSv4_tab-all-article-bottom_(300×250)”, [300, 250], “pb-ad-78623” ).addService( googletag.pubads() ) ); } );

googletag.cmd.push(function() {
mobile_slots.push( googletag.defineSlot( “/1005424/_dPSv4_mob-all-article-bottom_(300×250)”, [300, 250], “pb-ad-78158” ).addService( googletag.pubads() ) ); } );

The post Color or Black and White for Street Photography? by Valerie Jardin appeared first on Digital Photography School.


Digital Photography School

 
Comments Off on Color or Black and White for Street Photography?

Posted in Photography


The Best Photography DIY Tips & Tutorials

17 Aug

When it comes to your passion, there is nothing like a good trick. Being resourceful can bring you so much satisfaction, and don’t mind all the extra learning involved! You may think that photographers take their time to research equipment, patiently saving money from all their commissioned work (haha) and finally invest $ 80 on the new flash modifier in the market. The reality is that, Continue Reading

The post The Best Photography DIY Tips & Tutorials appeared first on Photodoto.


Photodoto

 
Comments Off on The Best Photography DIY Tips & Tutorials

Posted in Photography


Tips for Black and White Wildlife Photography

16 Aug

South African photographer Heinrich van den Berg once said, “I believe that if black-and-white photography is done correctly, it can convey much more emotion and a deeper meaning than color ever could. It’s as if by subtracting color, the viewer is forced to add his own emotion to the images. Color photography is like a novel that spells everything out in detail, whereas black-and-white photography is like poetry—its strength isn’t in what’s said; it’s in what’s left out.”

Close your eyes for a moment and imagine a deer standing in a forest. Was the image you imagined in color? Most people will visualize the image in color. But are the colors necessary to produce an image of the deer? Let’s take a look at some advantages of wildlife photography in black and white.

Deer image

Original color image

Black and white deer

The black and white processing in Nik Silver Efex Pro 2 in this image converted the green foliage into a dark background.  Now the emphasis is on the deer and the texture of its coat.

Why Black and White?

Color, though admirable, may be a distraction that interferes with the viewer’s ability to see the textures, lines, patterns, and contrasts within an image. Often your wildlife subjects are surrounded by lush green foliage and blue sky backgrounds, and in color photos, the trend is to saturate them. With black and white photos we take the attention away from those colors, and draw it to the wildlife subject. Colorful images may tell a story, while black and white can reveal a more emotional portrait of the wildlife. Color may show the actuality of a scene, black and white is a perception of the captured reality. Black and white can add drama to your wildlife images that color will hide from the viewer.

It is important to note that not every image will make a great black and white one, some images and subjects will require color to make an impact. If color is the purpose of an image –  say, for instance, your subject is a red-headed wood pecker, then black and white may not work for that subject. Some photographers hold the opinion that an image lacking color is a good candidate for black and white conversion; however, even very colorful images may be hiding a dramatic black and white image.

Hawk Eye

The textures, lines and contrast of the feathers create a dramatic portrait of this Broad-winged Hawk.

DSC_5418-Edit-Edit

Shooting

Without color, the key ingredients to shaping your image are light, composition, contrast, and tones. When photographing for black and white, lighting can transform an image. Black and white works well in all ranges of lighting conditions. Even the harsh midday sun, (difficult lighting for color shots) can products some fantastic results. How many times on a gloomy, rainy day have you grumbled about terrible lighting? Well, maybe for color photography it isn’t ideal, but the great thing about shooting for black and white results, is that even overcast days can produce some great images. It can allow you to capture the tones and textures of your wild animal subject, features which may be hidden in a color image, shot on a bright sunny day.

Of course, the morning and evening glow hours are going to work great when the low angle of light brings out the textures and lines of wildlife. If you are just starting to develop your skills shooting for black and white wildlife, or you are having problems visualizing your images as you shoot, here is a helpful tip. Most DSLR cameras with allow you to set your picture style to monochrome when you are shooting in RAW. The preview will appear in black and white, but your RAW file will still contain all the image’s color information, that you can use later as you convert to black and white. Stripping out all the color from the preview will help you see the forms of the image without the distractions of color. Use this process to help train your eye to see in black and white.

Bison Portrait

In this image, the harsh mid-day sun still produced a dramatically lit portrait of a Bison.

Swan on the lake

When exposing this image to keep the detail in the swan’s white feathers, the background was exposed to nearly black. Converting to black and white required very little processing.

Composition

Composition is even more important in black and white than in color. While a colorful image sometimes hides poor composition, black and white enhances and brings out the composition of your wildlife shot. Use shallow depth of field to isolate the subject, making a dramatic portrait and bringing out the textures of the fur or skin. Remember to use the KISS theory of composition. (Keep It Simple Silly)

Fox

Original image

black-white-wildlife-photography-fox-final

Without the distractions of color this image becomes a moody and detailed portrait.

Processing

There are too many ways of converting images to black and white to mention them all. But Photoshop, Lightroom and Silver Efex Pro 2 are the three processing means I use the most. Whichever program you use for your conversion, you must learn to take control of the process. Instead of stripping the color out, use the tool in your editing program to turn colors into controlled shades of gray. Different processes applied may produce different emotional reactions to a single image.

As illustrated by the photo of the grazing zebras below, high-key processing creates a cheerful or upbeat image, while a low-key interpretation of the same image reveals a more somber or mysterious aspect to the image. Though a high-key image is very light, it should still have black areas; and conversely, a low-key image is mainly dark but should also contain some white areas.

  • Photoshop: Use a black and white adjustment layer to fine-tune how each color tone is converted to a shade of gray. This is a great starting point, but you may also want to adjust contrast, and dodge or burn areas to dramatize the subject. If you use Photoshop to convert your images to black and white, don’t be afraid to experiment. Never just use the Image Mode – Grayscale to convert your image, that is like “throwing away the baby with the bath water”! You will throw out too much useful color information that could be used to create the mood you are looking for in your image.
  • Lightroom: Using the black and white tab, similar to Photoshop, you can also adjust how each color tone is converted to shades of gray.
  • Nik Silver Efex Pro is a very powerful black and white software. One of its greatest features is the preset effects already preloaded into it. Use one of those presets as a starting point, and follow up with the powerful adjustment panel to really fine tune your images.
High Key processing

High-key processing in Lightroom creates a cheerful image of zebras grazing in a field. The same image was then opened in Photoshop and the layer was duplicated adding a motion blur.  The layer blend mode was changed to Overlay and a layer mask was added to keep the zebras from being blurred. This gives an artistic effect to the grass.

Low Key Processing

Low-Key processing in Lightroom creates a more mysterious effect.

Conclusion

The next time you are out photographing wildlife, look for opportunities to shoot black and white images. What wildlife do you like to photograph? Get out there and discover some stunning black and white wildlife opportunities!

Editor’s Note: This is the second article in a week full of features on black and white photography. Look for 5 Simple Ways to Create Expressive Photos in Black and White earlier today and more daily over the next week.

googletag.cmd.push(function() {
tablet_slots.push( googletag.defineSlot( “/1005424/_dPSv4_tab-all-article-bottom_(300×250)”, [300, 250], “pb-ad-78623” ).addService( googletag.pubads() ) ); } );

googletag.cmd.push(function() {
mobile_slots.push( googletag.defineSlot( “/1005424/_dPSv4_mob-all-article-bottom_(300×250)”, [300, 250], “pb-ad-78158” ).addService( googletag.pubads() ) ); } );

The post Tips for Black and White Wildlife Photography by Bruce Wunderlich appeared first on Digital Photography School.


Digital Photography School

 
Comments Off on Tips for Black and White Wildlife Photography

Posted in Photography


Weekly Photography Challenge – Black and White Techniques

15 Aug

This week on dPS it’s all about black and white photography. We are featuring a series of tips and articles around that topic. You can earlier ones below and more daily over the next few days.

  • 5 Simple Ways to Create Expressive Photos in Black and White
  • Tips for Black and White Wildlife Photography
  • 7 Tips for Black and White Portrait Photography
  • 28 Images with Strong Black and White Compositions

Photograph Happy Holidays! by Sam Assadi on 500px

Happy Holidays! by Sam Assadi on 500px

Photograph  One Railroader by Silvia S. on 500px

One Railroader by Silvia S. on 500px

Weekly photography challenge – black and white techniques

Your challenge this week is to try out different black and white techniques. Try any or all of the following:

  • Shoot in b/w mode
  • High contrast lighting
  • Convert to b/w in Lightroom
  • Convert to b/w using Photoshop
  • Try out a black and white plugin
  • Try out some sepia tone or split toning
  • Do a b/w portrait, landscape, macro, night shots, street photography, or flowers
  • Try a b/w silhouette

Photograph The essence of night by Liban Yusuf B&W on 500px

The essence of night by Liban Yusuf B&W on 500px

Photograph Venice Nostalgia by Csilla Zelko on 500px

Venice Nostalgia by Csilla Zelko on 500px

Photograph Time to go ... by Gaelle Lunven on 500px

Time to go … by Gaelle Lunven on 500px

Photograph The Last Ride by Rob Dweck on 500px

The Last Ride by Rob Dweck on 500px

Photograph Ways of Life by Eileen Hafke on 500px

Ways of Life by Eileen Hafke on 500px

Share your images below:

Simply upload your shot into the comment field (look for the little camera icon in the Disqus comments section) and they’ll get embedded for us all to see or if you’d prefer upload them to your favourite photo sharing site and leave the link to them. Show me your best images in this week’s challenge. Sometimes it takes a while for an image to appear so be patient and try not to post the same image twice.

googletag.cmd.push(function() {
tablet_slots.push( googletag.defineSlot( “/1005424/_dPSv4_tab-all-article-bottom_(300×250)”, [300, 250], “pb-ad-78623” ).addService( googletag.pubads() ) ); } );

googletag.cmd.push(function() {
mobile_slots.push( googletag.defineSlot( “/1005424/_dPSv4_mob-all-article-bottom_(300×250)”, [300, 250], “pb-ad-78158” ).addService( googletag.pubads() ) ); } );

The post Weekly Photography Challenge – Black and White Techniques by Darlene Hildebrandt appeared first on Digital Photography School.


Digital Photography School

 
Comments Off on Weekly Photography Challenge – Black and White Techniques

Posted in Photography


Pixbuf photography analytics tool launches as public beta

15 Aug

Pixbuf, a free social media management service for photographers, has launched a new analytics tool. With Pixbuf, photographers can upload images and then share them directly with several supported social networks, including 500px, Twitter, and Flickr. Pixbuf will then track analytics data related to the images. Read more

Articles: Digital Photography Review (dpreview.com)

 
Comments Off on Pixbuf photography analytics tool launches as public beta

Posted in Uncategorized


The Devil’s in the Details: Macro Photography for Beginners

14 Aug

The world around us, that which we often consider mundane, if we consider it at all, is infinitely detailed. The carpet beneath your feet, the grass in your front yard and along the sidewalk you stroll down each day, the corners of your cupboard behind the cereal boxes, all of these places contain mind-boggling facets and edges and curves, if Continue Reading

The post The Devil’s in the Details: Macro Photography for Beginners appeared first on Photodoto.


Photodoto

 
Comments Off on The Devil’s in the Details: Macro Photography for Beginners

Posted in Photography


7 Tips for Black and White Portrait Photography

14 Aug

Why would you choose to create black and white photographs in the era of digital cameras that are capable of accurately capturing millions upon millions of colors? Black and white photography seems to be a constant in the history of the medium, with color technology only propagating itself into wide use around halfway between Nicéphore Niépce’s first heliograph and today.

Black and white portrait tips 3201

There’s a lot of debate on both sides of the argument, but for me and many others it’s a simple matter of aesthetics. A good black and white treatment has a way of stripping unneeded information from an image, helping you to emphasize specific elements to your viewer without the distractions color can provide.

Portrait photography is a genre where black and white images can really shine. Like any technique, there are considerations that you should regard that can help to make sure your images have the most impact.

1 – Start with black and white in mind

For many photographers, black and white is more than a creative choice at the post-production stage; it’s a mindset. If you can start the creation of an image knowing that you intend it to be black and white, you can take steps to ensure that all of the elements of a good monochrome image are in place before you press the shutter. Things like contrast in tonality, contrast in lighting, and appropriate expressions from your subjects are all elements that are difficult, if not impossible, to fix after an image is taken.

If you have trouble imagining how an image may look in black and white, try setting your camera to a monochrome setting. While it isn’t recommended to do this for a final image, as long as you shoot in RAW file format, then all of your image’s color data will still be present in the file, and Lightroom and Adobe Camera Raw will reset the photo back to color once it’s imported. Doing this will allow you to have an idea of how an image will work in black and white, while still providing the highest amount of versatility in post-production.

2 – The eyes are more important than ever

Black and white portrait tips 3088

The most important part of the majority of portraits are the eyes. They are usually the focal point that the rest of your image is built around. This is especially true with black and white. With the omission of color, a black and white image often breaks down into graphic forms and shapes. Eyes are shapes that everyone recognizes and they draw immediate focus from your viewers. Make sure that your subject’s eyes are well lit, and focus is critical.

3 – Expressions are emphasized

Black and white portrait tips 3191

Like the eyes, other facial features become more prominent in a black and white portrait. You can use this to your advantage by conveying emotion in your images. Even tiny changes in your subject’s expression can make a difference. Things like a raised eyebrow, a twitch at the corner of a mouth, and smile lines under the eyes can all be used to great effect.

Here is an exercise you can do with your portrait subjects to get a mixture of great expressions. Prepare a list of words or phrases and ask them to react to how they feel to each one. The words you choose can be simple descriptors of emotion like: love, sad, joy, angry and melancholy. For more diverse expressions try more abstract words, or funny ones like: cheeseburger, politics, Teletubbies or Hulk smash. As a bonus, this sometimes works extremely well to lighten the mood when you have a subject who’s tense or nervous during a sitting.

4 – Lighting considerations

Black and white portrait tips 3335

When it comes to lighting a black and white portrait image, there are no hard and fast rules. If you like high contrast images with hard gradations in tone, then choose a harder source of light. If you like soft tones and subtler images, then you want a softer light source.

It’s all about personal preference here. If you’re not sure what yours is, try finding the first ten black and white portraits that stand out to you the most and see if you can deconstruct them in terms of lighting.

5 – Add contrast with light

Black and white portrait tips 3107

If you’re going to create high contrast black and white photos, the best advice is to add it with light, not in Photoshop. Small global adjustments are okay and won’t hurt your images, but definitely do not crank the contrast slider to 100. Try to limit it between +15/-15. For local adjustments, use a dodging and burning technique of your choice. The key point in this, and all post-production, is subtlety.

6 – You can’t save a bad image with black and white

If you’re working on an image that you feel isn’t up to scratch and you ask yourself if it will work in black and white, the answer is probably no. A black and white treatment will often emphasize the flaws that made you question the image in the first place, and a bad photo is a bad photo regardless of its color scheme or lack thereof.

7 – Choose black and white in spite of color

Certain subjects scream out to be shot in black and white. Other subjects may not be so obvious. Bright, punchy colors obviously make for vivid color photos, but by removing the color element you can completely change how a subject or scene is perceived. When you want to ensure your viewer is focused on a particular element, color as a graphic element, can become a distraction. Try removing it.

This can be a difficult concept to understand without seeing it, so I have included an example of a color version of one the images above. Ask yourself: How did your perception of the photos change? What did you notice first in each of the images? Do you feel differently or think differently of it when you view it in color than in black and white?

Black and white portrait tips 3088 colour

Hopefully, you can see that even though bold colors can make for vivid imagery, their absence can as well.

If you’re new to black and white photography, do remember that these are guides and not rules. If you need to stray from them to get the result you’re after, do so without hesitation.

Finally, if you try black and white and you like it: welcome to the addiction!

Editor’s Note: This is one of a series of articles this week featuring black and white photography tips. Look for earlier ones below and more daily over the next week.

  • 5 Simple Ways to Create Expressive Photos in Black and White
  • Tips for Black and White Wildlife Photography

googletag.cmd.push(function() {
tablet_slots.push( googletag.defineSlot( “/1005424/_dPSv4_tab-all-article-bottom_(300×250)”, [300, 250], “pb-ad-78623” ).addService( googletag.pubads() ) ); } );

googletag.cmd.push(function() {
mobile_slots.push( googletag.defineSlot( “/1005424/_dPSv4_mob-all-article-bottom_(300×250)”, [300, 250], “pb-ad-78158” ).addService( googletag.pubads() ) ); } );

The post 7 Tips for Black and White Portrait Photography by John McIntire appeared first on Digital Photography School.


Digital Photography School

 
Comments Off on 7 Tips for Black and White Portrait Photography

Posted in Photography


Freelance Photography Tips from the Experts

11 Aug

We’ve all become a world obsessed with imagery, and this couldn’t be more obvious than the simple fact that the photo heavy social network Instagram currently has 300 million monthly active users. We all see ourselves as amateur photographers, but some of us want our love for a good picture to become far more than a pipe dream. If you’ve Continue Reading

The post Freelance Photography Tips from the Experts appeared first on Photodoto.


Photodoto

 
Comments Off on Freelance Photography Tips from the Experts

Posted in Photography


Photography Etiquette – What’s the Right Approach?

09 Aug

Whether you have a DSLR, a pocket camera, or simply use your mobile phone to take snapshots, there are some simple rules of photography etiquette that you can follow to make the shooting experience more enjoyable for you, as well as everyone else around you. Some of these tips might seem obvious, but even if you think you already know what to do, or not to do, when taking pictures it might be worth reading just as a refresher.

It’s easy to notice the speck of sawdust in your brother’s eye and note when other people are violating simple rules of etiquette. But sometimes it’s difficult to recognize the plank in yours, and see if you have a few habits that could be changed. These are short and simple lessons that I have learned the painful way over the years. I hope you can benefit from my mistakes and avoid these pitfalls in your own photography.

photography-etiquette-tips-fishing

Be discrete (i.e. don’t be the center of attention)

I can recall being at weddings and parties where I thought I was the king of the room just because I had a camera, however, all the while I was only making other people annoyed or frustrated because of my behaviour. One of the most difficult thinks for new photographers to realize is it’s not about you. It’s about everyone else, and you just happen to be the one documenting things.

Have you ever stood up in the middle of a wedding to get a shot of the bride and groom? Have you muscled your way to the front of a group of kids so you could capture little Timmy opening his birthday present? Have you found yourself running back and forth on the sidelines of a high school football game trying to photograph some highlights, while pushing a few players and coaches out of the way? If so, you might have indeed gotten a good picture, but you might also have unknowingly caused some hurt feelings in the process.

photography-etiquette-tips-baseball

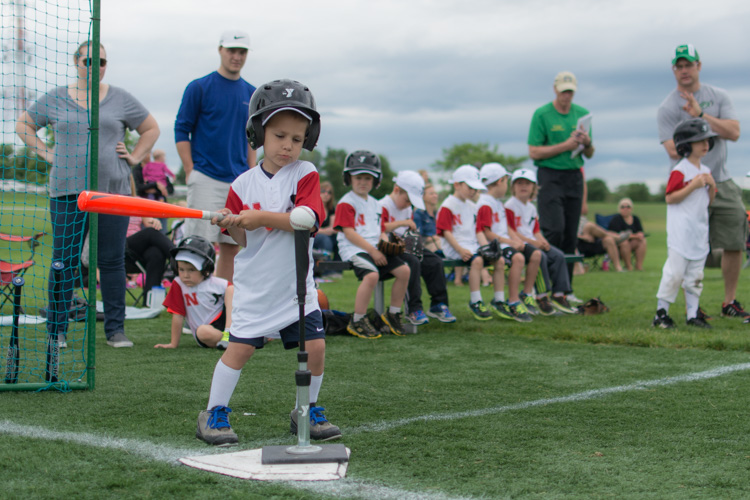
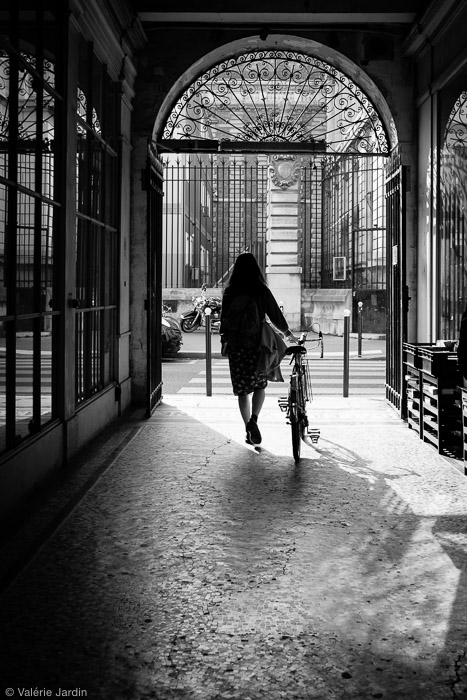
This might be a decent shot, but to get it I had to work my way through the crowd and potentially block the view of people behind me. I’m not sure it was worth the trade-off.

As photographers it can be tough to take a more discrete approach, but often that is exactly what we should be doing. It might sound counterintuitive, but staying out of the way can often yield the best results because we are taking other people into consideration. This goes double if you’re not even the official photographer, you just happen to be in attendance with your camera. Everyone around you is trying to enjoy the experience, and couldn’t care one whit about whether or not you have a camera. They just want to watch the wedding, see Timmy open his present, or experience the game-winning goal along with everyone else. From their point of view, a person with a camera who is running around frantically or blocking their field of view is an annoyance, not an asset.

A while back I went around taking pictures at a high school production of "Pride and Prejudice." I thought people would excuse my actions since I had a camera, but in reality I was likely bothering the audience and possibly even distracting the performers.

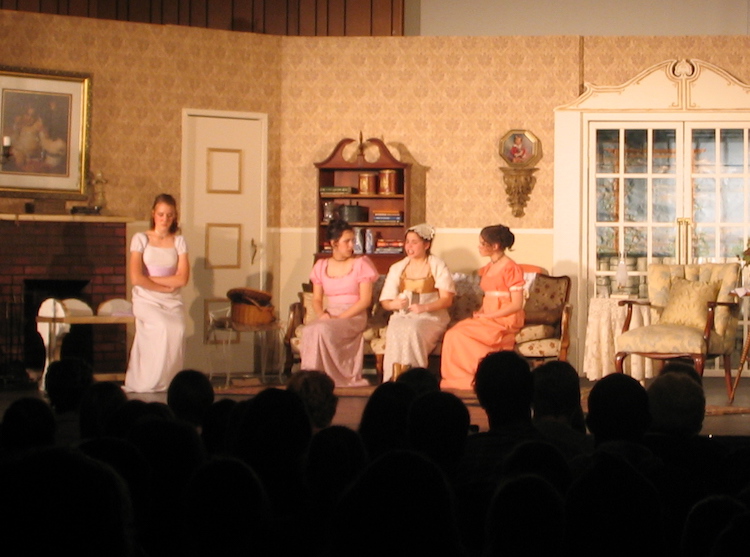
A while back I went around taking pictures at a high school production of “Pride and Prejudice.” I thought people would excuse my actions since I had a camera, but in reality I was likely bothering the audience and possibly even distracting the performers.

To remedy this situation, try to find alternative viewpoints that won’t ruin the experience for other people, but still yield good pictures. It might be good to buy or rent a zoom lens for special occasions, or do some searching online for how people have taken photos in similar situations without being rude or disruptive. You might actually find yourself getting more interesting photos, and looking at things from new angles that you had never considered, which could not only benefit you as a photographer and be a pleasant surprise for the individuals whose pictures you are taking.

Ask for permission before taking pictures

Here’s a bit of information no one told me when I first got into photography as a serious hobby – not everyone wants their picture taken. Years ago when I was a wet-behind-the-ears photographic newbie I took my camera everywhere, and photographed everything and anyone. If I was shooting landscapes or nature this was not a problem at all, but when we had friends over, or went to events, it became a bit of an issue. One that I hope you might be able to avoid.

The more I got into photography the more I realized that not everyone likes being on camera, and not every event demands hundreds of snapshots. I can recall times when we were out with friends or at a party or social event, and having people around me freeze-up or give me the cold shoulder, because I had morphed from friend to photographer. I thought that my camera gave me some kind of unwritten license to take pictures of everyone around me, but in truth most of them just wanted to go about their business and not have a camera in their face. Simply asking for permission would have solved a lot of problems, and avoided some hurt feelings along the way. Even though it can be a bit awkward, it’s worth the trouble if it avoids animosity down the line.

photography-etiquette-tips-birthday

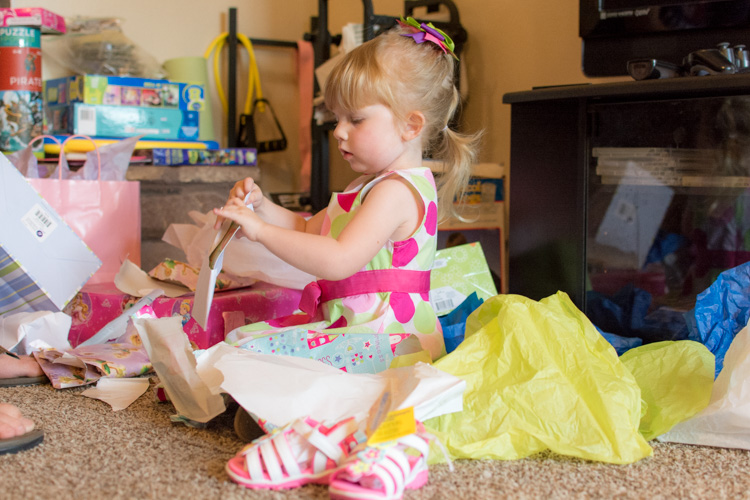
I checked with the parents before getting my camera out and snapping pictures at this birthday party.

The next time you’re at a party, celebration, or sporting event, take a minute and ask the hosts or some of the other guests if they mind you taking photos. It takes almost no time at all, and can reap incredible rewards throughout the event – Uncle Bob, notoriously shy around cameras, might appreciate that you were willing to ask his permission and not only grant it, but loosen up a bit as a result. Coach Taylor will be glad you asked, could point you to some of the better spots on the sidelines, and be willing to accommodate some special requests you might have. Grandma Agnes might not want her photo taken at all, and even though you won’t get as many good shots, you will help the rest of the guests ease up and enjoy the evening a little more.

photography-etiquette-tips-baptism

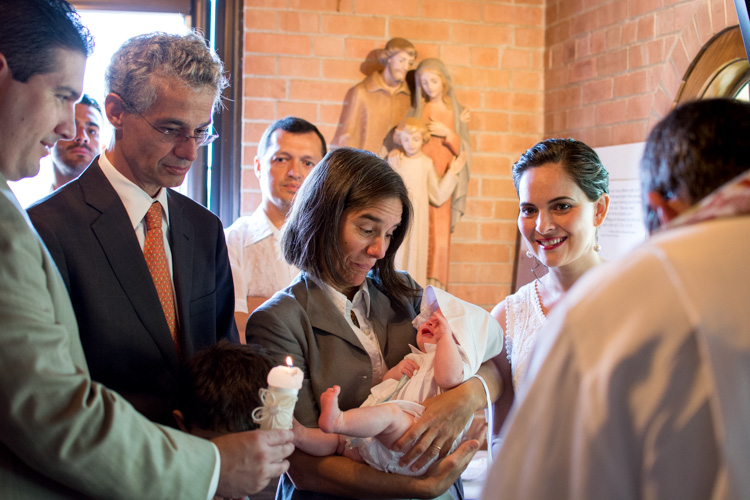
A baptism is a solemn and formal affair – definitely not the time to be annoying others with a camera. Get permission first, take a few good shots (without the flash, if at all possible) and put your camera away.

On a related note if you are a guest at a major event like a wedding it’s a good idea to check with the official photographer before you get up and start taking your own shots. He or she has likely been paid hundreds, or thousands of dollars, specifically to get good pictures. So while you may enjoy walking around with your camera and getting some pictures, you might by unwittingly annoying the couple, or the guests by your actions. My advice is to sit back and just enjoy the event or ceremony, and let the people whose job it is to capture amazing pictures do their work.

Ask for permission before sharing pics

We live in a time when almost everything is shared online, and nearly everyone has some sort of social media presence on Facebook, Twitter, Instagram, Flickr, Tumblr, and many others. The key word here is almost: not everyone is online, and not everyone wants their photos shared on social networks. Even though you might be well within your legal rights to snap pics of other people (especially in public places) and post them to your social networks, you might be inadvertently hurting some feelings, or damaging your close relationships by doing so. The solution here is simple, and only takes a few seconds – ask permission before posting. Not only is it simply a nice thing to do, it can actually help strengthen whatever bond you do have with the people in your pictures. They may have had other people post their picture online and been upset by it. Whereas, there is a very real chance that you could impress them with your honesty and candor by asking if it’s okay to share their photo online.

Even though you can't see these kids' faces in this picture, I still asked their parents for permission before sharing this picture. They appreciated the gesture and gladly agreed.

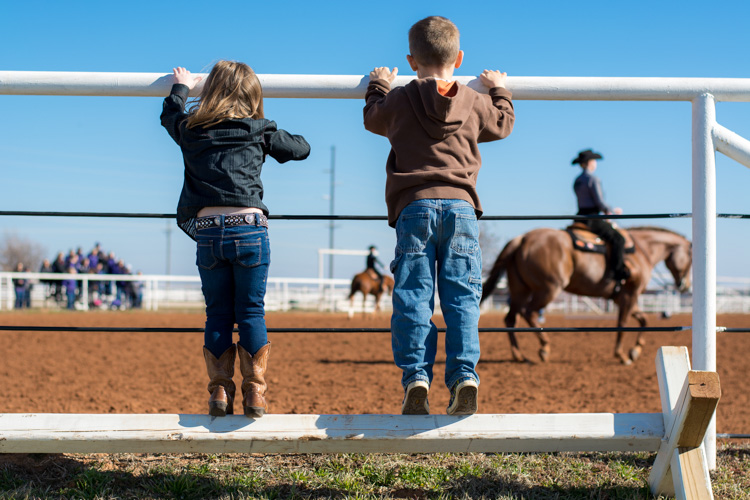
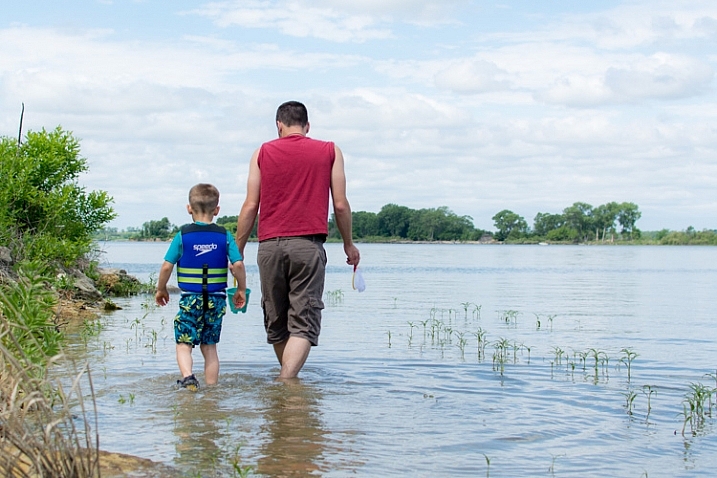
Even though you can’t see these kids’ faces in this picture, I still asked their parents for permission before sharing this picture. They appreciated the gesture and gladly agreed.

Be a participant, not a photographer

In his song “The Gambler,” the American country singer Kenny Rogers crooned,

You’ve got to know when to hold ’em, know when to fold ’em, know when to walk away. 

His logic can be applied to photography also. You’ve got to know when to take pictures, and when to put your camera away. It’s entirely possible, and I would say quite likely, that the people around you at any given event or situation don’t want someone running around snapping pictures. Were you invited to your neice’s piano recital? Great! Keep your camera in your pocket, sit back, and enjoy her performance. If you really want a few pictures you can ask her to pose by the piano after the event is over. Are you going on a road trip with some friends? Awesome! But remember they invited you because they enjoy your company and conversation, not because they wanted to see you constantly snapping pictures and inviting them to look at the screen on your camera. You might be saying things like, “Check out this great shot I just got!” but the message you’re sending to your friends is, “My camera is more important than you.”

Sometimes less is more. We were invited to a birthday party for our friend's daughter, and rather than spend the whole time on my camera I fired off a few shots here and there and spent the rest of the time visiting with adults, playing with kids, and just enjoying the celebration.

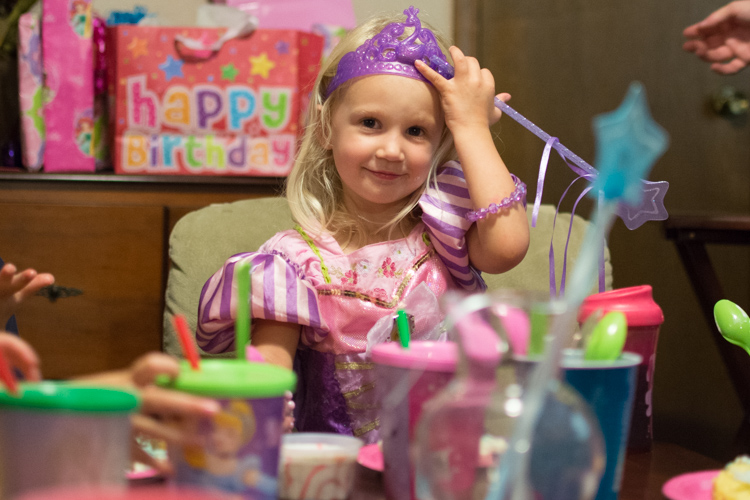
Sometimes less is more. We were invited to a birthday party for our friend’s daughter, and rather than spend the whole time on my camera I fired off a few shots here and there, then spent the rest of the time visiting with adults, playing with kids, and just enjoying the celebration.

A lot of these etiquette rules walk a fine line. It’s up to you to gauge each situation and decide where the boundaries should be placed. The bottom line is that you may want to reexamine your approach to photography in some situations, and decide if a different course of action might be better for you and everyone else involved.

What about you? What are some of the tips and etiquette rules you have learned over the years? Share your thoughts in the comment section below.

googletag.cmd.push(function() {
tablet_slots.push( googletag.defineSlot( “/1005424/_dPSv4_tab-all-article-bottom_(300×250)”, [300, 250], “pb-ad-78623” ).addService( googletag.pubads() ) ); } );

googletag.cmd.push(function() {
mobile_slots.push( googletag.defineSlot( “/1005424/_dPSv4_mob-all-article-bottom_(300×250)”, [300, 250], “pb-ad-78158” ).addService( googletag.pubads() ) ); } );

The post Photography Etiquette – What’s the Right Approach? by Simon Ringsmuth appeared first on Digital Photography School.


Digital Photography School

 
Comments Off on Photography Etiquette – What’s the Right Approach?

Posted in Photography