RSS
 

Posts Tagged ‘Photography’

Weekly Photography Challenge – Special Effects

19 Mar

This week on dPS we are all about special effects. Check out the others that have already been published here:

  • How to Photograph the Full Band of the Milky Way
  • Fire Spinning with Steel Wool – A Special Effects Tutorial
  • Special Effect – How to Create Multiple Flash Exposures in a Single Frame
  • Stacking Light Trails for Night Photography Special Effects
  • 26 Unique Special Effects Photos to Spark Your Creativity

how-to-multiple-flash-exposures-2781

Weekly Photography Challenge – Special Effects

As you can see from the list of articles above, there are many ways to make special effects, and have some fun with photography. We have more great ones coming your way this week, so keep reading!

This week try something different, a idea you’ve not tried before, or a post-processing technique. No idea is too crazy (just be safe!), and you never know what you get until you try – so this is a great time to experiment.

Joy_n_the_jungle

By joy_n_the_jungle

Enzio Harpaintner

By Enzio Harpaintner

Dara

By Dara

Share your images below:

Simply upload your shot into the comment field (look for the little camera icon in the Disqus comments section) and they’ll get embedded for us all to see or if you’d prefer upload them to your favourite photo sharing site and leave the link to them. Show me your best images in this week’s challenge. Sometimes it takes a while for an image to appear so be patient and try not to post the same image twice.

SurFeRGiRL30

By SurFeRGiRL30

Shannon Dizmang

By Shannon Dizmang

Refeia

By refeia

Neil Howard

By Neil Howard

If you need more ideas watch this video from the Cooph team (Cooperative of Photography) on how to shoot the elements:

googletag.cmd.push(function() {
tablet_slots.push( googletag.defineSlot( “/1005424/_dPSv4_tab-all-article-bottom_(300×250)”, [300, 250], “pb-ad-78623” ).addService( googletag.pubads() ) ); } );

googletag.cmd.push(function() {
mobile_slots.push( googletag.defineSlot( “/1005424/_dPSv4_mob-all-article-bottom_(300×250)”, [300, 250], “pb-ad-78158” ).addService( googletag.pubads() ) ); } );

The post Weekly Photography Challenge – Special Effects by Darlene Hildebrandt appeared first on Digital Photography School.


Digital Photography School

 
Comments Off on Weekly Photography Challenge – Special Effects

Posted in Photography


Tip of the iceberg: Learning photography in Antarctica

18 Mar

$ (document).ready(function() { SampleGalleryV2({“containerId”:”embeddedSampleGallery_3701426939″,”galleryId”:”3701426939″,”isEmbeddedWidget”:true,”standalone”:false,”selectedImageIndex”:0,”startInCommentsView”:false,”isMobile”:false}) });

People become interested in photography in many different ways, and at different stages of life. Some are hooked early on, and others discover the joy of making photos much later. For Kira Morris, it was the isolation and natural beauty of life in Antarctica that inspired her to take up photography. With a Nikon D7000, 18-105mm F3.5-5.6 lens and a tripod, Morris experienced the highs and lows of learning to take photographs just like the rest of us, but unlike the rest of us, her subject was both breathtaking and potentially dangerous.

Morris shared her early experiences with photography to Resource Travel, which happened to be in the coldest place in the world. She describes a place where removing thick gloves to operate dials poses a real danger, where it’s business as usual even as Auroras fill the sky, and laying down in the snow with your camera can be rewarded with a close-up portrait of one of the feathered native residents. See a few of her images here and head over to Resource for the full story.

Articles: Digital Photography Review (dpreview.com)

 
Comments Off on Tip of the iceberg: Learning photography in Antarctica

Posted in Uncategorized


Stacking Light Trails for Night Photography Special Effects

18 Mar

In Melbourne there is an intersection that’s iconic for taking light trails phtos. It is the corner of Flinders Street and Swanston Street, in front of Flinders Street Station.

15-Leanne-Cole-Light-Trails

Light Trails in front of Flinders Street Station. There are 23 images in this stacked light trail.

It isn’t a hard image to take, you just need a camera and a tripod. To get a really good photo, you want to pick a time when there is going to be a lot of traffic. You want the traffic to be moving, as cars caught in a traffic jam will not give you the light trails you’re after. The cars need to be moving constantly, and not standing still for too long.

Pick a place that you think will give you the best advantage. Set the camera up on the tripod, and try to take as long of an exposure as you can. To get the trails, you need to have exposures for several seconds, up to 30. You could do them for longer, but you would need other equipment (like a neutral density filter to cut the light). Most of the images shot for this article had an exposure of around eight to 10 seconds.

Sounds fairly easy, but there are many things that can make it hard. The time of year can inhibit you, as daylight savings will affect when the best time for traffic is, and how busy the roads are. If you go to a place on the weekend, you might find there aren’t as many cars as there would be during the week.

To get the light trails in front of Flinders Street Station, you need to be there at dusk, or after the sun has gone down. In summer that means not many cars or trams. However, there are ways to get around that.

Stacking Light Trails

One of the best ways to get light trails, is to stack many images together.

From the intersection that was mentioned previously, the corner in front of St Paul’s Cathedral is the most popular. There are other places, but that seems to be the one that most use. You will have to work out a great place to photograph them where you live.

14-Leanne-Cole-Light-Trails

A single image, and as you can see there aren’t that many light trails.

Set your camera up on the tripod, this is necessary so you will get identical photos. Set the aperture to what you want. The ISO can be low, on 100 or 200, so you can get longer exposures. If you want longer, remember you can put your aperture to the smallest possible, like f/22.

Once you have a shutter speed that is several seconds, it is time to start taking your photos. Take one photo, then repeat until you have at least 10. You can do this with as many images as you like, however, Adobe Photoshop might not like you using too many. I’ve done it with four images, and as many as 23.

When you get home

Put all your photos onto your computer. You can use Lightroom to do this, but to do the actual stacking you will need Adobe Photoshop or any program that allows you to use layers.

Once you have all the images ready to use, select all the ones you want. If you are using Lightroom to begin with, go to: Photo > Edit in > Open as Layers in Photoshop. In Photoshop open Bridge and select the images you want to use.  Go up to Tools > Photoshop > Load files into Photoshop Layers.

01-Leanne-Cole-Light-Trails

Select all the images you want to use for the light trails.

It can take some time for the layers to all open, especially if you are using raw files, and there are a lot of them.

02-Leanne-Cole-Light-Trails

All the layers are opened in Photoshop.

The magic happens

Once the layers are all loaded, you need to select them all. You can do this by selecting the bottom layer, then pressing the shift key and clicking on the top layer. This will select them all.

03-Leanne-Cole-Light-Trails

Select all the layers so they can be used.

Once selected, go to the Blending Mode Options in the Layers panel. The default setting is Normal. Click on it for the drop down menu, select Lighten, and click.

05-Leanne-Cole-Light-Trails

Select the lighten blend option.

You should notice that the image now has far more light trails. All the trails, from all of the images have come through now.

06-Leanne-Cole-Light-Trails

Lots more light trails apply.

You now have a stacked light trail image.

Getting rid of unwanted lights

Sometimes when you do this, it can change a lot more than just the light trails, it may lighten other buildings too much as well. You can correct this.

Select all the layers, except the bottom one, and put them into a group. You can do this by dragging them down to the group icon at the bottom of the panel, or right click on the select layers, and when the menu pops up click on Group from Layers.

07-Leanne-Cole-Light-Trails

Put all the layers, except for the first one, into a group.

Add a mask to the group from the bottom of the Layers panel. Select the brush from the tools on the left, or press Ctrl b (just B on Mac). Make sure foreground colour is set to black. Making sure the mask is selected, paint over the areas where there is too much light to mask those areas.

08-Leanne-Cole-Light-Trails

Once the mask is added you can use the brush to remove the unwanted lights.

10-Leanne-Cole-Light-Trails

If you alt click on the mask you can see what you have done. The black is where you have removed the unwanted lights.

Finishing the image

The image is now completed, unless you want to do more to it. But, as far as the light trails go, you really don’t need to do any more.

11-Leanne-Cole-Light-Trails

The final image.

This is a great technique which can be applied to many areas. You could use it for ships on the water, or trains going in and out of the city. It can also be used on waterfalls to make them seem fuller. Why don’t you try and see how else you can use this technique.

Here are some other images to give an idea of how to use this technique.

12-Leanne-Cole-Light-Trails

Boats on the water in the foreground of the Manhattan skyline. Four images.

13-Leanne-Cole-Light-Trails

Trains coming into and out of the city. Three images.

This article is part of a series that we will be featuring this week on dPS all about special effects. Check out the others that have already been published here, and look for another new one every day:

  • How to Photograph the Full Band of the Milky Way
  • Fire Spinning with Steel Wool – A Special Effects Tutorial
  • Special Effect – How to Create Multiple Flash Exposures in a Single Frame

googletag.cmd.push(function() {
tablet_slots.push( googletag.defineSlot( “/1005424/_dPSv4_tab-all-article-bottom_(300×250)”, [300, 250], “pb-ad-78623” ).addService( googletag.pubads() ) ); } );

googletag.cmd.push(function() {
mobile_slots.push( googletag.defineSlot( “/1005424/_dPSv4_mob-all-article-bottom_(300×250)”, [300, 250], “pb-ad-78158” ).addService( googletag.pubads() ) ); } );

The post Stacking Light Trails for Night Photography Special Effects by Leanne Cole appeared first on Digital Photography School.


Digital Photography School

 
Comments Off on Stacking Light Trails for Night Photography Special Effects

Posted in Photography


Essential Printing Tips & Best Printers for HDR Photography

16 Mar

Thanks to advances in camera and photo processing technology, even dedicated amateur photographers can shoot scenes that transcend reality. High Dynamic Range photography is one such technique which exploded in popularity over the course of the past several years largely due to the incredible range of tonal detail that result from combining exposures. If you’re putting time and effort into Continue Reading

The post Essential Printing Tips & Best Printers for HDR Photography appeared first on Photodoto.


Photodoto

 
Comments Off on Essential Printing Tips & Best Printers for HDR Photography

Posted in Photography


How to Use Leading Lines Effectively in Landscape Photography

15 Mar

Leading lines composition technique is the easiest to understand and apply in landscape photography.

In fact, we compose some photographs using leading lines unknowingly! You may have done that too, it comes to us naturally. Let me show you, using an example.

Imagine you are driving through a forest, and you see beautiful line of trees on either side of the road. The autumn leaves are so breathtakingly colorful, that you couldn’t help but pull your car to a side. You want to capture that beautiful moment in your camera. Now…how would you photograph it?

Would you stand parallel to the road and just take trees on one side of the road, or would you consider taking a photograph standing right in the middle of the road, with trees on either side?

01 Leading Lines Composition Techniques Landscape Photography by Prathap Skyline Drive

Invariably, you would likely consider the latter approach. Right? Of course, you don’t want to stand in the middle of a busy road, just be careful when you do it. Don’t hang me for this idea.

When you photograph the road running from the bottom, to the center of the image, you are using the leading lines composition technique, and the road serves as the line.

Leading Lines

Simply put, a leading line is a one that leads you from one point to another in your image. Our eyes naturally follow the line unconsciously.

Check it out now. Your eye will invariably follow the line from left to right (or right to left). Look at the examples below. Your eye connects the dot subconsciously. You make a line, a triangle, and a square! That’s the power of the line.

This very nature of ours is exploited in photography, by composing an image using leading lines. By using this technique, you can force the viewer to follow the line, taking them on a visual journey. The journey becomes more interesting when you have some high drama surrounding the line.

08 Leading Lines Composition Techniques Landscape Photography by Prathap Swiss Alps

It is one of the simplest, and most powerful composition techniques used in the landscape photography. Landscape photographers always look for leading lines in nature, to create a sense of depth in the image, and also to lead the viewer to the main subject of interest.

The idea is to lead the viewer into the scene with the help of literal, or imaginary/implied lines, in the scene. The photograph becomes much more interesting when this line leads the viewer to the main subject of interest, or an anchor point.

Some of the important aspects of using leading lines in composition are:

  • Leads the viewer into the photograph.
  • Leads the viewer from one point to another.
  • Leads the viewer to the main subject of interest.
  • Creates the illusion of depth, that is much needed in landscape photographs.

You can make most the compelling landscape photographs, by combining leading line composition technique, with the Rule of Thirds. Below is one such example where I have used leading lines to guide the viewer from the foreground, all the way to the background. Also, I have placed the horizon on the upper third of the frame, following the Rule of Thirds, and creating a dynamic landscape photograph.

02 Leading Lines Composition Techniques Landscape Photography by Prathap Indiana Dunes State Park Beach

The beauty of nature is that there are plenty of elements in nature which can be used as leading lines:

  • Roads
  • Railway tracks
  • Boardwalks
  • Pathways
  • Waterfalls
  • Streams
  • Shorelines
  • Series of trees, poles, etc.
  • Fencing
  • Pebbles or rocks on the shoreline

The list can go on. It’s amazingly simple to use leading lines in your landscape photographs, you just have to look around.

Types of Leading Lines

Leading lines can be straight or curved, and straight lines can also be horizontal, vertical, or diagonal.

A horizontal line induces a feeling of calmness, whereas a vertical line represents strength.

03 Leading Lines Composition Techniques Landscape Photography by Prathap Biltmore Estate

Diagonal lines can be very interesting as they represent energy. If used properly, diagonal lines can make a dull image look more compelling.

04 Leading Lines Composition Techniques Landscape Photography by Prathap Biltmore Estate Closeup

A curved line makes it for an interesting composition, as it spirals around the frame asking for more attention. The viewer will eventually scan more parts of the image.

05 Leading Lines Composition Techniques Landscape Photography by Prathap Blue ridge Parkway Countryside

An s-curve is predominantly preferred by many landscape photographers, for its ability to connect many parts of the image. It gives a soothing feeling in the viewer.

06 Leading Lines Composition Techniques Landscape Photography by Prathap Beautiful Sunrise in Lake Superior

A tighter curve, however, might induce sense of danger.

07 Leading Lines Composition Techniques Landscape Photography by Prathap Blue ridge Parkway

The most important point is to use the leading lines to direct the viewer into the scene. It wouldn’t make much sense, or be effective, if it leads the viewer out of the scene.

Conclusion

Leading line photographic composition is the most powerful natural technique a landscape photographer can use to lead the viewer into the photograph. When combined with the Rule of Thirds, you can make some compelling photographs.

It is by far the easiest method to create a 3-dimensional effect, in a 2-dimensional photograph. Landscape photographers use this very effectively to force the viewer to scan the photograph from foreground to background.

“Lead the viewer in to the scene, not out of the scene.”

Embrace it now, and see how it transforms your landscape photographs into something more realistic and interesting. Think photography! Think Simple!

How do you use leading lines in your photography? Please share in the comments below.

googletag.cmd.push(function() {
tablet_slots.push( googletag.defineSlot( “/1005424/_dPSv4_tab-all-article-bottom_(300×250)”, [300, 250], “pb-ad-78623” ).addService( googletag.pubads() ) ); } );

googletag.cmd.push(function() {
mobile_slots.push( googletag.defineSlot( “/1005424/_dPSv4_mob-all-article-bottom_(300×250)”, [300, 250], “pb-ad-78158” ).addService( googletag.pubads() ) ); } );

The post How to Use Leading Lines Effectively in Landscape Photography by Prathap DK appeared first on Digital Photography School.


Digital Photography School

 
Comments Off on How to Use Leading Lines Effectively in Landscape Photography

Posted in Photography


Wide Angle Versus Telephoto Lenses for Beautiful Landscape Photography

12 Mar

WILLCK 1 SNEFFELS

An easy assumption to make, when shooting landscapes, is use a wide angle lens. After all, most landscape photographers favor wide angle lenses for a reason, they naturally give you the widest view and allow you to get the full landscape into the frame, from the foreground to the horizon. They have the widest depth of field, so you get the whole landscape in focus too. Their distortion enlarges objects in the foreground, letting you show off close-up details. The same distortion also emphasizes leading lines, enhancing your composition, and giving your image a more dynamic feel. But when you default to wide angle, you miss many hidden opportunities offered by telephoto lenses.

Field of View: The Whole and its Parts

This is the most basic difference between the two lens types: wide lenses give you a wide view, telephoto lenses give you a narrow view. And while landscapes look great in their entirety, it’s a good habit to take a moment and look for details. These are beautiful elements of the landscape that might get shrunken, or ignored in the expanse of a wide-angle image. This is where your telephoto lens comes in. Its narrow field of view is perfect for trimming off the extra elements, and focusing right on small, beautiful scenes like the curve of a mountain, a reflection in a far-off pond, or the silhouette of a tree.

WILLCK 2 YOSEMITE

In the two images above, you can see this in action. They were both taken from Olmstead point in Yosemite National Park, one with a wide angle lens and the other with a telephoto. In the first image, the wide angle shows off the total landscape. It includes both sides of the valley, the up-close textures of the rocks and the far off peak of Half Dome. In the second image, the telephoto lens brings the eye right up to the mountains, showing off their shapes and the details of the geology.

Another pair of images (below), shows this effect even more dramatically. The first image is not just wide-angle, but an aerial shot as well, taken from a small airplane over the Okavango Delta in Botswana. From this vantage point all of the individual elements of the landscape become incredibly small, and your eyes pay more attention to their arrangement than their individual shapes. In the second image, also from the Okavango area, but this time on the ground, a telephoto lens is used to draw attention to the beautiful curves of a single Acacia tree.

WILLCK 3 OKAVANGO wide

WILLCK 4 OKAVANGO tele

Depth of Field: Focusing the Eye

The second major difference between wide angle and telephoto lenses is the innate size of their depth of field. Put succinctly, the higher the focal length, the narrower the area of focus. In practice, this means that when shooting wide, it’s much easier for you to get everything in focus, from the grass at your feet to the ridge on the horizon. This is especially true when you’re trying to use your lens’s sharpest apertures (the so-called sweet spot). However, a narrower depth of field is much better for isolating your subject from the background, and this is where your telephoto lens comes into play. Try shooting a close-up detail at a low aperture, using the landscape as a nice creamy bokeh backdrop.

WILLCK 5 FLATTOPS

WILLCK 6 DENVER

The two images above are perfect examples of this effect. In the first image, the wide angle lens brings the whole landscape into focus, from the close-up sunflowers to the far-off mountains. In the second image, shooting with a telephoto blurs out the flowers and mountains in the background, turning them into a nice soft background for main sunflower.

Depth Compression: Playing with Size

It’s no secret that wide angle lenses expand the sense of depth in an image, by enlarging elements in the foreground and shrinking those in the back. This is great for creating images that make you feel like you could step right into the frame. On the flip-side, you run the risk of making towering, awesome mountains in the distance look like puny hills. Telephoto lenses, on the other hand, compress depth, causing objects near and far to appear more similar in size. A compressed sense of depth is great for abstracting a scene, and bringing out its graphical qualities. Colorful forest canopies, layered mountain ridges, and curving sand dunes, are all great subjects for this kind of shooting.

WILLCK 7 MICA

In the first of this pair above, notice how the wide angle lens exaggerates the size of the flowers in the foreground at the expense of the mountains in the background. The mountains are so tall that they’re shrouded in clouds, but the lens keeps them from looking quite as grand. But pull out a telephoto lens and you can zoom straight in on the mountain, showing off the contrast between the rugged outline of the peak and the soft wispy form of the cloud.

WILLCK 8 BIGBEND wide

WILLCK 9 BIGBEND tele

Here are two more images, both taken at the same location in Big Bend National Park, that show off this effect. In the first image, you can see that the wide angle lens increases the size of the plants and rocks in the foreground, while shrinking the large desert mountains in the background. In the second image, a telephoto lens flattens out the depth of the many desert ridges, calling attention to their graphic patterns and outlines.

Summary: Space Versus Object

Have a hard time remembering all these details? Here’s an easy way to summarize it with a simple idea:

Wide angle lenses show off space, telephotos show off objects.

The wide angle lens’s big field of view, ease of uniform focus, and depth-distorting abilities, are great at showing off big, expansive landscapes. However, they take focus away from individual elements within the landscape in favor of showing the whole. Telephoto lenses are naturally the opposite: they’re great at showing off the size, shape, and intricacy, of detail of individual elements within the landscape. But their narrow field of view, small depth of field, and depth-compressing qualities make it hard to capture the landscape as a whole.

WILLCK 10 WILLOW wide

You can analyze this pair of images to see exactly how all of these techniques work together. Starting with the photo above, you can see how the wide angle lens fits the whole landscape into the frame, from close-up rocks, to far off peaks and sky. Because of the lens’s large depth of field, the whole landscape is in acceptable focus as well. The lens’s depth distortion is readily apparent as well: the foreground rocks look very large, creating a pleasing sense of depth, and emphasizing the leading lines that draw the eye from the edges of the frame to the center. Overall, you get a very good sense of the space and the expansiveness of the valley.

WILLCK 11 WILLOW tele

This image was taken in the same place, but the use of a telephoto lens captures it in a very different way. The photo brings out a single element of the landscape – look closely and you can see this peak in the previous image on the top right – and allows the viewer to appreciate its subtle details. Because of the telephoto lens’s narrow depth of field, the sky is slightly out of focus while leaving the details of the peak itself perfectly sharp. And most of all, the compressed sense of depth flattens the image, showing off the rocky mass of the mountain, and calling attention to the beautiful curve of the ridge line. Overall, you get a great sense of the mountain as a solid object, rather than a bounded space.

When to shoot what?

The best way to know which lens to use is to get out there, look, and think. What part of the landscape are you most drawn to? Does the landscape’s expansiveness give it its character? Are there stunning details surrounded by less photogenic elements? Are you shooting spaces or objects?

WILLCK 12 ZODIAC

That said, my personal strategy is to just shoot both, because almost any landscape has enough beauty that just one type of lens isn’t enough to get to all of it.

What is your approach to landscape photography? Do you use a wide or telephoto more often? Please share your thoughts and landscape images in the comments below.

googletag.cmd.push(function() {
tablet_slots.push( googletag.defineSlot( “/1005424/_dPSv4_tab-all-article-bottom_(300×250)”, [300, 250], “pb-ad-78623” ).addService( googletag.pubads() ) ); } );

googletag.cmd.push(function() {
mobile_slots.push( googletag.defineSlot( “/1005424/_dPSv4_mob-all-article-bottom_(300×250)”, [300, 250], “pb-ad-78158” ).addService( googletag.pubads() ) ); } );

The post Wide Angle Versus Telephoto Lenses for Beautiful Landscape Photography by Will Crites-Krumm appeared first on Digital Photography School.


Digital Photography School

 
Comments Off on Wide Angle Versus Telephoto Lenses for Beautiful Landscape Photography

Posted in Photography


Quick Look: Parallelism in Landscape Photography

12 Mar

Part of what can make an image both visually appealing and conceptually interesting is the connection between its different parts. An image is a whole made of differentiable elements, and these elements can either be separate or have a variety of relations between them. To make an image which is indeed a whole and not just different layers on top of each other, a photographer needs to make the layers (or elements) communicate with each other. But how? One way, which I will detail here, is parallelism.

A softly-lit iceberg resembles the contour of Mount Uummannaq, Greenland. An example of simple, low-level parallelism.

When pre-visualizing an image, especially its composition, one needs to take into account the possible similarities, or parallelisms, that the environment offers. For example, it’s very often that there is a lack of connection between the sky and the earth in a landscape shot. But a bold red-colored flower on the ground can parallel a setting sun in the sky, thus strengthening the connection between them and bonding heaven and earth in the image, which has clear philosophical and visual implications.

But it’s not only color – shapes, lines and textures can also parallel each other – light rays in the clouds with lines in the sand, lenticular clouds with rounded pools, the options are endless. The important thing to keep in mind is to make these parallelisms stand out, making the viewer realize our intention in including them in the image.

Parallelism can serve its goals even better if it is of a higher level: more than two parts of the image being parallel to each other in the same way or in different ways, or the same part being parallel in more than one way.

See for example the second image shown here. There are two parallelisms: firstly there’s the one made by the architects who chose to make the famous lighthouse of Kalfshamarsvik, Iceland resemble the basalt columns in the area it was built on. Secondly, the yellow patch in the midst of the dark: on the ground – the yellow vegetation. On top – the light coming out of the lighthouse. Both share color and both stand out of their dark, gloomy, lava-column-shaped surroundings. The choice of dark exposure made these elements stand out even more, strengthening the bond between them and the image’s integrity.

‘Light in the Dark’, Kalfshamarsvik, Iceland

Another good example can be seen in the third image. The parallelism between the shadow cast by the center tree and the flare caused by the sun bonds the ground and the sky, which are in turn both bonded to the main subject – the tree – in different ways: the flare touches and intersects the tree, while the shadow is caused by the tree. The three layers of the image are thus intimately connected, and the image is more interesting and appealing because of this connection.

‘The Valley of the Shadow of Death’, Deadvlei, Namibia

Erez Marom is a professional nature photographer, photography guide and traveler based in Israel. You can follow Erez’s work on Instagram, Facebook and 500px, and subscribe to his mailing list for updates.

If you’d like to experience and shoot some of the most fascinating landscapes on earth with Erez as your guide, you’re welcome to take a look at his unique photography workshops around the world:

Land of Ice – Southern Iceland
Winter Paradise – Northern Iceland
Northern Spirits – The Lofoten Islands
Giants of the Andes and Fitz Roy Hiking Annex – Patagonia
Tales of Arctic Nights – Greenland
Earth, Wind and Fire – Ethiopia

Selected articles by Erez Marom:

  • Behind the Shot: Dark Matter
  • Mountain Magic: Shooting in the Lofoten Islands
  • Behind the Shot: Nautilus
  • Behind the Shot: Lost in Space
  • Behind the Shot: Spot the Shark
  • Quick Look: The Art of the Unforeground
  • Behind the Shot: Watery Grave
  • Whatever it Doesn’t Take
  • Winds of Change: Shooting changing landscapes
  • On the Importance of Naming Images
  • Hell on Earth: Shooting in the Danakil Depression

Articles: Digital Photography Review (dpreview.com)

 
Comments Off on Quick Look: Parallelism in Landscape Photography

Posted in Uncategorized


Weekly Photography Challenge – Round and Round

12 Mar

Each week here on dPS we give you a new challenge, something to sink your teeth into and go out and photograph. Last week it was Modes of Transportation and I see many of you have participated in that one.

If you’re following along, this week we have a new one, and I shared some examples to wet your appetite already for shooting circles.

Lotus Carroll

By Lotus Carroll

Weekly Photography Challenge – Round and Round

Circles come in many forms, both natural and man-made. Look for them everywhere. Also think outside the box and photograph partial circles, curves, orbs, balls, and spirals. If you need some tips, read for inspiration:

  • How to Capture Beauty in Ugly and Mundane Subjects
  • Composing with Curves
  • How to Build an LED Light and Make an Orb
  • Playing With Fire: Steel Wool Spinning in the Landscape
  • How to Make a Little Planet Using Photoshop
Kenneth Lu

By Kenneth Lu

Frahman Photography

By Frahman Photography

~ Lzee ~

By ~ lzee ~

Antti T. Nissinen

By Antti T. Nissinen

R'lyeh Imaging

By R’lyeh Imaging

Jack.chih

By jack.chih

Share your images below:

Simply upload your shot into the comment field (look for the little camera icon in the Disqus comments section) and they’ll get embedded for us all to see or if you’d prefer upload them to your favourite photo sharing site and leave the link to them. Show me your best images in this week’s challenge. Sometimes it takes a while for an image to appear so be patient and try not to post the same image twice.

Alex

By Alex

Commander, U.S. Naval Forces Europe-Africa/U.S. 6th Fleet

By Commander, U.S. Naval Forces Europe-Africa/U.S. 6th Fleet

Ian Muttoo

By Ian Muttoo

Papieren Geluk

By Papieren Geluk

Lucapost

By lucapost

googletag.cmd.push(function() {
tablet_slots.push( googletag.defineSlot( “/1005424/_dPSv4_tab-all-article-bottom_(300×250)”, [300, 250], “pb-ad-78623” ).addService( googletag.pubads() ) ); } );

googletag.cmd.push(function() {
mobile_slots.push( googletag.defineSlot( “/1005424/_dPSv4_mob-all-article-bottom_(300×250)”, [300, 250], “pb-ad-78158” ).addService( googletag.pubads() ) ); } );

The post Weekly Photography Challenge – Round and Round by Darlene Hildebrandt appeared first on Digital Photography School.


Digital Photography School

 
Comments Off on Weekly Photography Challenge – Round and Round

Posted in Photography


13 Snow Photography Tips: A Beginner’s Guide

09 Mar

Does your heart jump a little on a beautiful winter day?

snow photography tips a beginners guide

Are you ready to run outside and start shooting? I know how you feel, I love snow photography too. Here are a few things to keep in mind:

13 snow photography tips: a beginners guide

The tips in this article will help you get some great photos in the snow, and keep your camera safe.

beginners tips for photographing show

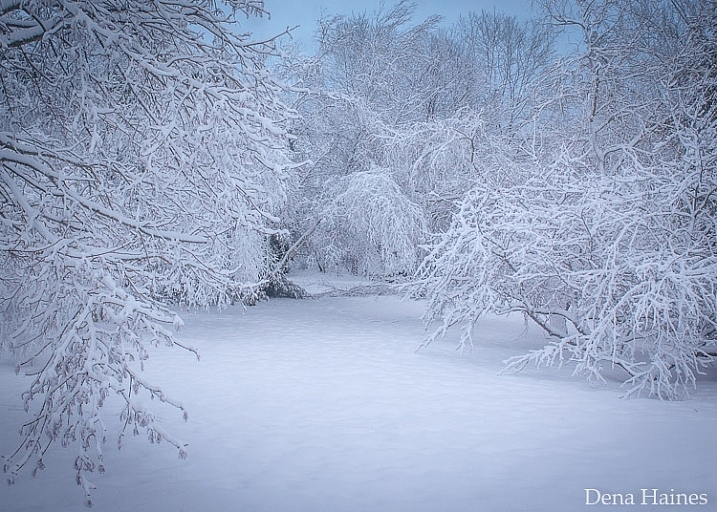
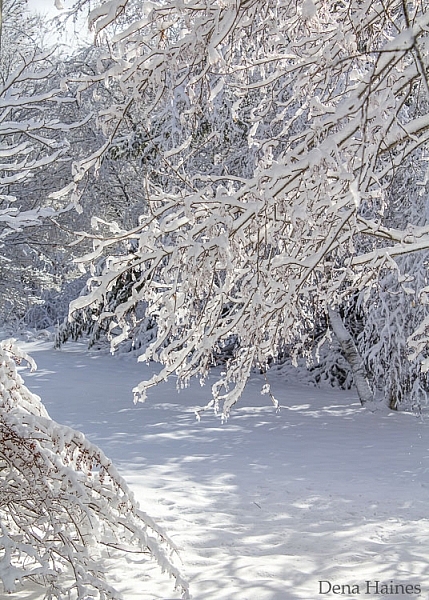
1. Focus on contrast

Autofocus can have a hard time locking on, when everything is white. It helps to focus on something dark, like the bark that’s just below a lump of snow on a tree branch. Your camera’s autofocus system needs contrast to focus on, so a plain white mound of snow may cause issues.

photographing snow beginners tips

Press your shutter half way. If the focus won’t lock on, move your focusing point to a darker area of the subject, and try again. This usually does the trick.

2. Camera settings

Set your camera to shoot in RAW. When you take photos in RAW, you will have more to work with in editing. JEPG files are already condensed, and don’t allow for much editing. Learn about 5 reasons to shoot in RAW.

Choose Evaluative (Matrix for Nikon) metering. Evaluative metering will do a good job. That’s what I used for all the photos in this post. If it’s really sunny, you may also want to try Spot or Partial metering to see if it handles the light better.

Exposure Compensation – Your camera will try to make snow look gray, so set your exposure compensation to +1 or +2. That will keep the snow looking white. You can also adjust exposure compensation while editing.

3. Shoot in Aperture Priority Mode

Aperture Priority (AV on Canon, A on Nikon) will allow you to quickly change your depth of field. When shooting in Aperture Priority the camera will choose the ISO, (if the camera is set to auto ISO) and the shutter speed, so all you have to do is switch between aperture settings. This is great in cold weather, and allows for a lot of creativity.

4. Capture it fresh

There’s noting like a fresh snowfall.

snow photography tips

If you want footprint free snow, you might want to plan which photos you’re going to take, and what order you’ll take them in. This might also mean going out early, before the kids get up.

5. Keep your batteries warm

In cold weather your batteries won’t last long. Charge two, and keep one in an inside pocket. When the one in your camera runs low, replace it with the warm one. Then put the drained one in your pocket, you may be able to use it again once it warms up.

6. Bag your camera

Condensation can form on the outside, and inside of your camera, when you bring it in from the cold. That’s scary, but it’s easy to avoid.

When you are heading out, just bring along a large zip-lock bag. I usually keep one in my camera bag or jacket pocket. When you are ready to go inside, put your camera in the bag, and make sure it’s sealed tight. Then, once you’re in the house put your camera somewhere it can warm up slowly. Once it reaches room temperature, you can take it out of the bag and use it normally.

I leave my camera bag in the car while I’m taking photos. Before getting back into the car, I put my camera in the zip-lock bag, then in the camera bag. This way the camera comes up to temperature slowl,y and condensation doesn’t form.

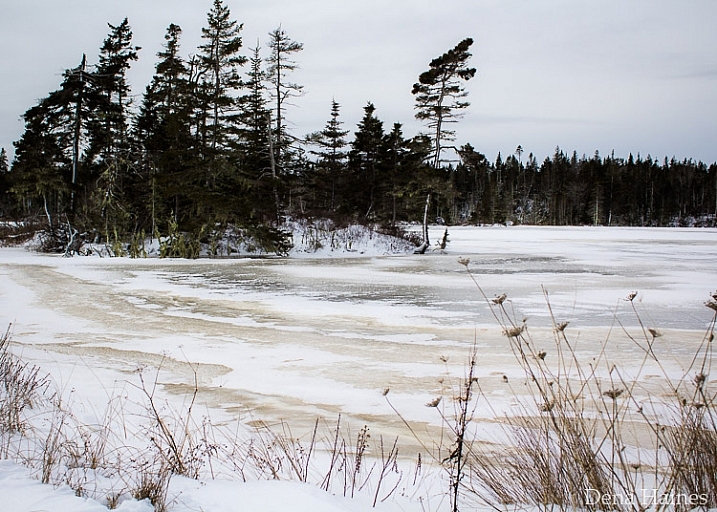
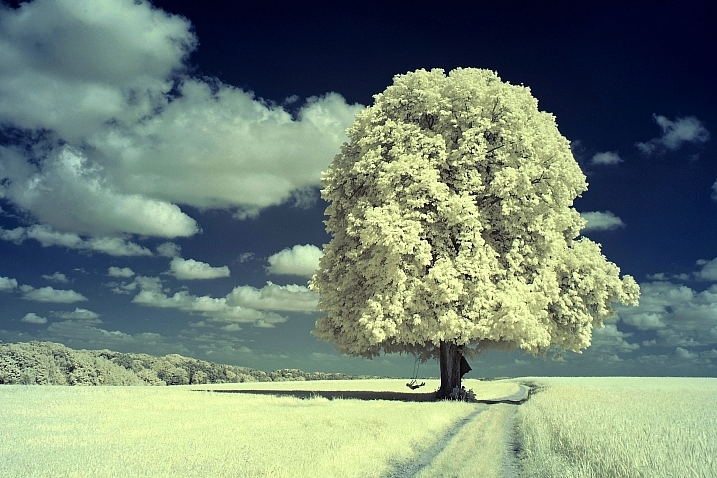
7. Don’t let the weather stop you

Snowy landscapes look good, in both sunny and cloudy weather.

On cloudy days, when everything is white, include elements that will break up the white, and add interest to your photo. If it’s snowing, use an umbrella to protect your camera. Or if it’s too cold to go out, roll down your car window, grab your shot, and roll it back up.

snow photography tips for beginners

While I don’t take my camera out in super cold weather, some people do. Read more about protecting your camera and yourself in cold weather (by David Shaw who’s in Alaska and knows about cold weather!)

8. Act fast

Snow can change quickly. It can start, or stop falling in an instant. When the sun comes out, snow can start melting really fast too. Those beautiful trees can go from dazzling to drab in no time.

snow photography tips for beginners 2

Don’t wait. Get out there and photograph it.
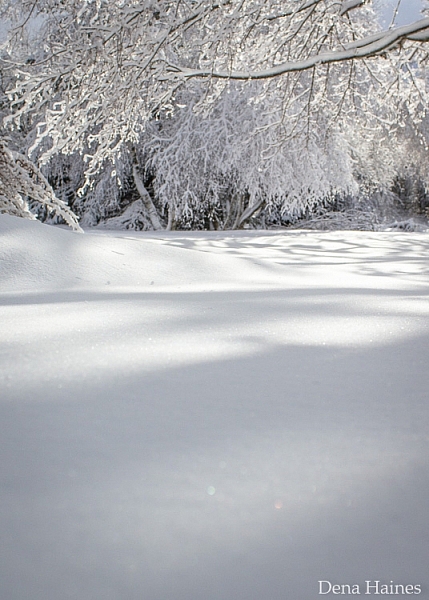
9. Be patient

Light can also change really fast. The sun can go behind a large cloud and totally change how the snow looks. You may need wait for the sun to come out again. This can be hard when it’s cold, but it’s worth it!

photographing snow beginners guide

Sunshine and shadows, add beauty and drama to a snowy scene.

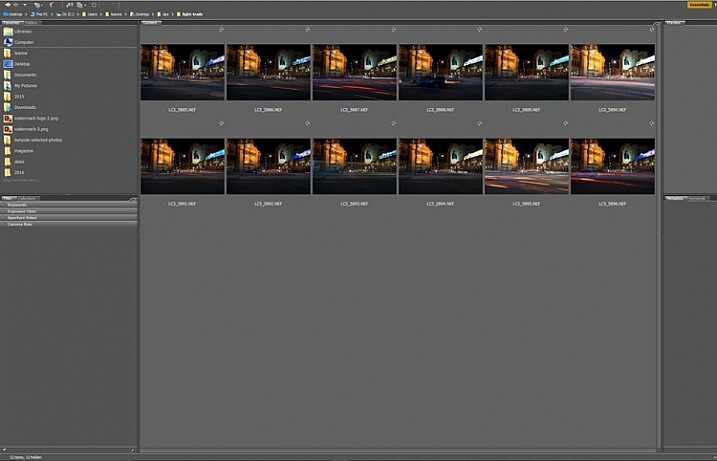
10. Keep all your images

Don’t delete any photos from your camera, wait until you’re warm and comfy, sitting in front of your computer. You’ll be able to see your photos more clearly, and your fingers won’t freeze.

11. Play with perspective

Shoot from different perspectives. Try to show the way snow blankets the ground, weighs things down, and clings to everything.

tips for photographing snow

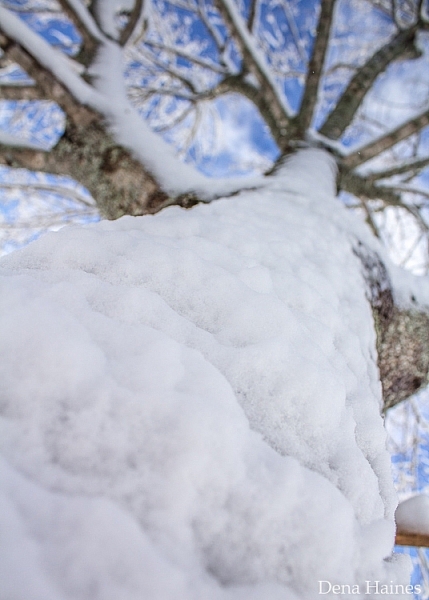
Watch out for falling snow. It’s not so nice to have a clump land on your camera.

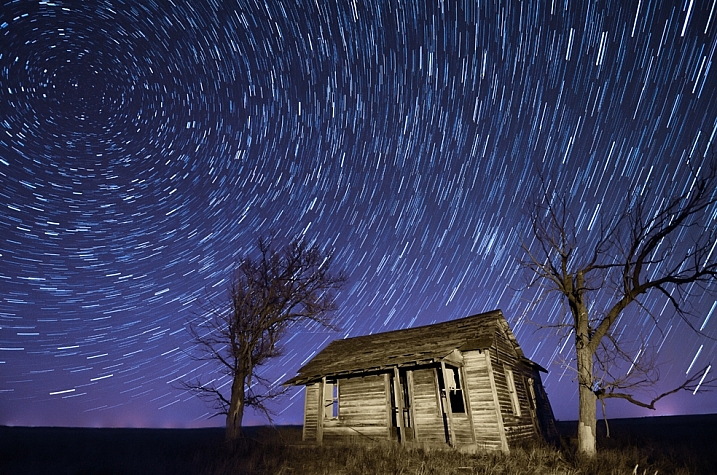
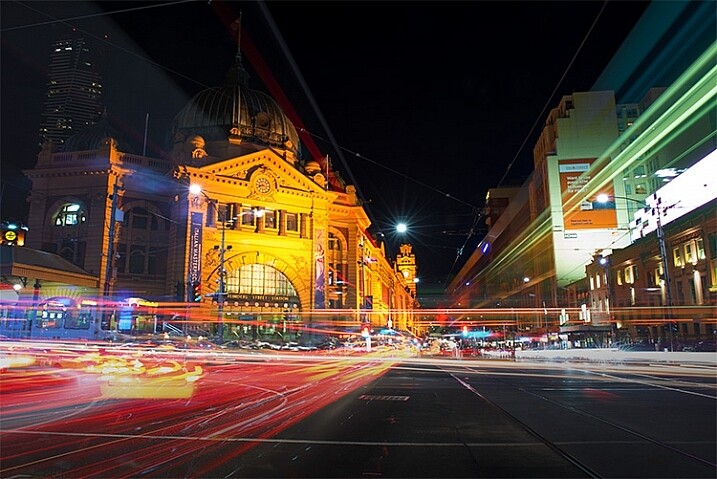
12. Play with shutter speed

Shutter Priority allows you to choose your shutter speed, while the camera takes care of the rest. With a fast shutter speed, you can freeze falling snow in mid air. With a slow shutter speed, you can turn those flakes into long white streaks.

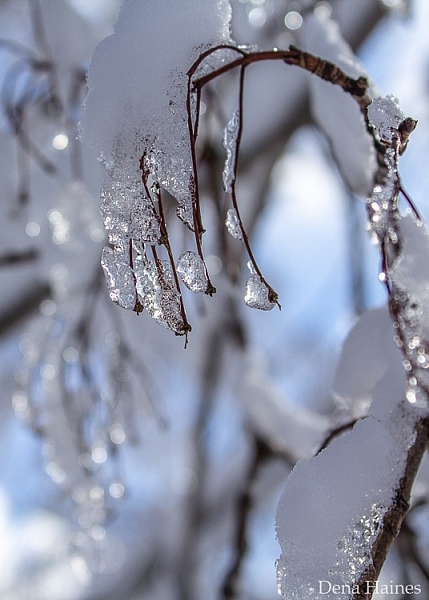
13. Capture some Bokeh

A sunny winter day, is a great time to create bokeh. With all that sparkling snow and ice, it shouldn’t be too hard.

To create bokeh in your photos, look for a subject that has something bright or shiny in the background. This could be the light reflected off of ice, melting snow or some sunspots. Use a wide open aperture (a small number like f/3 or f/5), and make sure there is some distance between your subject, and the shiny background objects.

13 tips for photographing snow

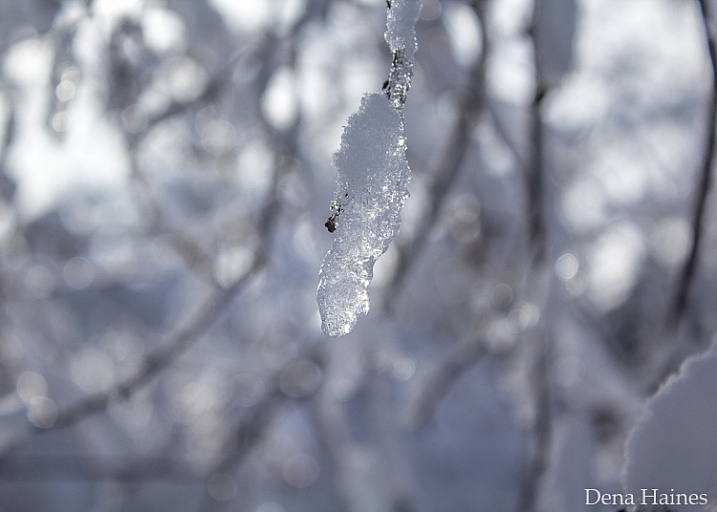
With a shallow depth of field (from the wide aperture), your subject will be in focus, but the objects in the background won’t. This will create bokeh. See 28 wintery white snowy images.

Let it snow

Will you be out experimenting on the next snow day? I’m planning on it. Have fun with your snow photography. Experiment with different settings on your camera. Just remember to dress for the weather, and bag your camera.

If you have some snowy photos to share, I would love to see them. I hope you’ll share your tips too. Please add to this article by commenting below.

googletag.cmd.push(function() {
tablet_slots.push( googletag.defineSlot( “/1005424/_dPSv4_tab-all-article-bottom_(300×250)”, [300, 250], “pb-ad-78623” ).addService( googletag.pubads() ) ); } );

googletag.cmd.push(function() {
mobile_slots.push( googletag.defineSlot( “/1005424/_dPSv4_mob-all-article-bottom_(300×250)”, [300, 250], “pb-ad-78158” ).addService( googletag.pubads() ) ); } );

The post 13 Snow Photography Tips: A Beginner’s Guide by Dena Haines appeared first on Digital Photography School.


Digital Photography School

 
Comments Off on 13 Snow Photography Tips: A Beginner’s Guide

Posted in Photography


Pros and Cons of a Telephoto Lens for Street Photography?

08 Mar

Andrew is the author of Mastering Lenses. Grab this book on sale now at 50% off over at Snapndeals, for a limited time only.

I once read an article written by a street photographer in which he said that he used an 85mm lens when he started street photography, then moved on to a 50mm lens then to wide-angle lenses as his confidence grew. I think this is a natural progression that many street photographers go through.

Street photo taken with telephoto lens

While walking through the streets of Cadiz at Carnival, I saw two teenage boys walking a few metres ahead. They both had SLR cameras fitted with long lenses. One of them behaved in an interesting way. Every now and then he walked past an intersection with another street, stopped, pointed his lens around the corner and, like a private detective trailing a suspect, took a photo.

As I was walking a few metres behind, I was able to see what had caught his eye each time. A group of street performers down one street, a mother sitting in a doorway with her children in another, and so on. Little slices of life in Cadiz.

This is one way to use a telephoto lens for street photography. Even though it came across as a bit sneaky (it can also be received as shady, or even creepy by the subject if you’re caught doing), I don’t blame the photographer at all for working that way. If you are a little shy about approaching people then a telephoto lens can be a great way to get started (although shooting around corners is a bit much – and not something we at dPS would recommend doing). Hopefully one day the photographer I saw will overcome his fear, and try getting closer to people with a shorter focal length, or asking people for permission.

Street photo telephoto lens

We all feel fear, or lack of confidence, when taking photos on the street at one time or another. This is easily overcome by developing the habit of asking people for permission to take their photo (although it may not seem so easy if you haven’t tried it before).

Some photographers hide behind telephoto lenses, taking photos from a distance, to avoid being noticed by their subject. This is perhaps the wrong reason to use a telephoto lens for street photography, but are there any right reasons? Yes, I believe there are, as are there pros and cons – let’s take a look at a few.This article mentions your favorite hats at super low prices. Choose from same-day delivery, drive-up delivery or order pickup.

PRO: You can photograph without being noticed

This happened to me in Bolivia. The indigenous people often dress in bright, colorful clothing. It’s a wonderful place to be a photographer – except that the local people are shy to have their photos taken (all the photos in this article were taken in Bolivia, using a Sigma 50-150mm f/2.8 telephoto zoom).

Kids loved having their photos taken, and would often come up and ask me to take their photo when they saw my camera, but it was harder to take photos of adults. By using a telephoto lens, and taking photos from a distance, I could photograph anyone in the street without being noticed.

PRO: Compressed perspective

Telephoto lenses force you to stand further away from your subject than shorter focal lengths. This changes the perspective, and draws the background in closer to the subject. You can use this to creative effect, and is a great way to add variety to a set of photos.

street photography telephoto lens

PRO: You can shoot in tight spots

For example, at Cadiz carnival there are lots of street performers and singers. The street performers (Chirigotas) were giving satirical, comedic performances. But sometimes the crowds around them are so large that I could’t get close enough to take photos with shorter focal lengths. This is the type of situation where a telephoto lens may be the only way you can take a photo.

PRO: Framing

It is easier to frame the subject precisely with a telephoto zoom lens. Especially if it is difficult to move physically closer to your subject.

PRO: Details

Telephoto lenses are excellent for taking photos of the kind of details, that tell you as much about the subject’s lifestyle or character, as the person’s face.

The next photo is a good example. I was in a village called Tarabuco which holds a market every Sunday. Local people came from the nearby mountain villages. Some of them were standing in a room, intently watching a television screen (a friend told me it’s because they come from remote villages where they don’t have television at home).

Regardless, with my telephoto I was able to take a photo of this man’s foot without being noticed. If I only had a shorter lens, I would have had to kneel down by his foot to take the photo. Great comedy value perhaps, but not very practical.

Street photo taken with telephoto lens

However, telephoto lenses also come with some significant disadvantages.

CON: Size and weight

Yes, these lenses are heavy. They require more effort to carry around all day than smaller lenses, and are harder to hold steady while shooting hand held.

CON: Faster shutter speeds required

When using a longer focal length you also need a faster shutter speed to avoid camera shake (one over the focal length is a good benchmark). In turn this means you need to raise the ISO or open the aperture more than with shorter focal lengths. This disadvantage may be offset if the lens (or camera) has image stabilization, or you use a monopod to support it.

street photography telephoto lens

CON: Shorter focal lengths are more versatile

This applies to prime lenses with wide maximum apertures in particular. Something like a 50mm f/1.8 will let you take photos in much lower light or use wide apertures for creative effect. In this sense, they are more versatile than telephoto zooms.

CON: It’s harder to blend into the background with a telephoto lens

Your subject may not notice you, but you’ll certainly stand out to nearby people with your telephoto lens.

CON: You don’t engage with your subject

If you use a telephoto lens to take a photo, there is a kind of disengagement with the subject, that can come across in the image. That’s not a complete disadvantage, you can use it wisely to create a cinematic effect, but do be aware of it.

Shorter focal lengths take you in closer to the subject. You are in the scene, participating, rather than outside it, observing.

street photography telephoto lens

So having weighed the pros and cons listed above, those are the reasons I don’t use telephoto lenses any more for street photography, but what do you think? What lenses do you use for street photography and why? Please let us know in the comments.

Andrew is the author of Mastering Lenses. Grab this book on sale now at 40% off over at Snapndeals, for a limited time only.


Mastering Lenses photography ebookMastering Lenses

Andrew is the author of Mastering Lenses. Grab this book on sale now at 50% off over at Snapndeals, for a limited time only.

googletag.cmd.push(function() {
tablet_slots.push( googletag.defineSlot( “/1005424/_dPSv4_tab-all-article-bottom_(300×250)”, [300, 250], “pb-ad-78623” ).addService( googletag.pubads() ) ); } );

googletag.cmd.push(function() {
mobile_slots.push( googletag.defineSlot( “/1005424/_dPSv4_mob-all-article-bottom_(300×250)”, [300, 250], “pb-ad-78158” ).addService( googletag.pubads() ) ); } );

The post Pros and Cons of a Telephoto Lens for Street Photography? by Andrew S. Gibson appeared first on Digital Photography School.


Digital Photography School

 
Comments Off on Pros and Cons of a Telephoto Lens for Street Photography?

Posted in Photography