RSS
 

Posts Tagged ‘Photography’

Weekly Photography Challenge – Neon

27 Aug

Sign Sign Everywhere a Sign – check out these images of neon signs.

Wbeem

By wbeem

Weekly Photography Challenge – Neon

If you live in an urban center or city, chances are you can find some neon nearby somewhere. Look for old diners, city center squares, movie theatres (especially old marquees like this one).

Mike Boening Photography

By Mike Boening Photography

There are a number of ways you can approach this subject, but if you choose to shoot it after dark you will most likely need a tripod and a long exposure, you may also want to incorporate some bracketing and do some HDR or exposure blending to help combat the contrast problem (the dynamic range between night sky and neon is very high, hard to keep detail in all areas).

You can also add in some extra things like car trails (as seen above) or do a zoom during your exposure. Perhaps shoot just a portion of the sign even. Those are just a few ideas to get you started.

Tip: if you want some color in the sky and background try shooting just after sunset at dusk, during the blue hour. The sky will be a dark rich blue and not totally black yet, and the lights should start to come on and show up better. It’s about finding the right balance for your exposure.

Oz Dean

By oz dean

Hernan Seoane

By Hernan Seoane

Charlie Essers

By Charlie Essers

Jeremy Brooks

By Jeremy Brooks

Share your images below:

Simply upload your shot into the comment field (look for the little camera icon in the Disqus comments section) and they’ll get embedded for us all to see or if you’d prefer upload them to your favourite photo sharing site and leave the link to them. Show me your best images in this week’s challenge. Sometimes it takes a while for an image to appear so be patient and try not to post the same image twice.

Share in the dPS Facebook Group

You can also share your images on the dPS Facebook group as the challenge is posted there each week as well.

Patrick Brosset

By Patrick Brosset

Roadsidepictures

By Roadsidepictures

Tim Carter

By Tim Carter

Brett Monroe

By Brett Monroe

Jeremy Brooks

By Jeremy Brooks

googletag.cmd.push(function() {
tablet_slots.push( googletag.defineSlot( “/1005424/_dPSv4_tab-all-article-bottom_(300×250)”, [300, 250], “pb-ad-78623” ).addService( googletag.pubads() ) ); } );

googletag.cmd.push(function() {
mobile_slots.push( googletag.defineSlot( “/1005424/_dPSv4_mob-all-article-bottom_(300×250)”, [300, 250], “pb-ad-78158” ).addService( googletag.pubads() ) ); } );

The post Weekly Photography Challenge – Neon by Darlene Hildebrandt appeared first on Digital Photography School.


Digital Photography School

 
Comments Off on Weekly Photography Challenge – Neon

Posted in Photography


Circular Polarizers Versus Graduated Neutral Density Filters for Landscape Photography

22 Aug

Whether you’re a professional or hobby photographer, odds are you’ve come across a beautiful, scenic landscape, that you absolutely had to photograph. Unless you’re an experienced landscape photographer, there’s a good chance the color in that photo wasn’t as saturated, or balanced as you were expecting. That’s because there’s generally a wide disparity in the dynamic range between the foreground and background of landscapes, as well as between the upper (sky) and lower (earth) halves of the frame. Thanks to a couple of lens filters, this hurdle can easily be overcome without having to spend hours of post-processing in Photoshop.

Drop-in and screw-in filters

What are lens filters?

Lens filters are lightweight pieces of glass that screw onto the front of most camera lenses (or drop-in using a holder system) in order to offer additional protection of your lens while also improving image quality. There are a variety of filter sizes that must match up to the size of the thread on your camera lens, so it is very important to make sure you get the correct size for the lens you plan to use it on (tip look on the back of your lens cap).

In addition to varying sizes, lens filters can also serve several different purposes. Most basic lens filters are ultra-violet (UV) reducing filters (also known as haze filters) that come with an anti-reflective coating to cut through the effects of atmospheric haze, thereby improving overall image quality. Besides UV/haze filters, there are two others that are particularly useful for landscape and outdoor photography – polarizers and graduated neutral density filters.

From left to right: A clear UV filter, a polarizing filter, and a Graduated Neutral Density filter.

From left to right: A clear UV filter, a polarizing filter, and a Graduated Neutral Density filter.

What is a polarizing filter?

The next filter we’ll discuss is the polarizing (usually circular) filter, which attaches to the front of a lens and can be spun around to produce varying degrees of saturation throughout an image. This quality of the polarizing filter is important to pay attention to, because it’s easy to produce uneven shades of saturation if the polarizer is even slightly off, such as in the example below.

Circular polarizer versus ND grad filter

Landscape photo with uneven polarization. Notice how the sky is very uneven in color.

Sony a6300 camera with bare kit lens - no filter applied. UV and Polarizing filters on the table.

Sony a6300 camera with bare kit lens – no filter applied. UV and Polarizing filters on the table.

Polarizing filters do two things: first, they help reduce glare or reflections cast by non-metallic reflective surfaces such as glass or water. Second, they saturates colors and enhances image clarity by reducing the overall exposure of an image. The benefits of the polarizing filters are best seen when you are shooting at a 90-degree angle to the sun.

Take a look at the landscape photo below that was taken with no filter, the colors are muted and not very exciting. However, once the polarizing filter is added, you can see a huge boost in overall color saturation. It’s a pretty dramatic difference without even post-processing the photo.

Circular polarizer versus ND grad filter

Landscape photo with no filter.

Circular polarizer versus ND grad filter

Landscape photo with a circular polarizing filter. Notice how overall the colors are intensified.

What is a neutral density filter?

Another effective filter for landscape photography is a neutral density (ND) filter, which reduces the overall exposure of an image. ND filters are uniformly dark in color and they come in different strengths depending on density.

The best use of ND filters is in situations where you wish to use a long exposure or wide aperture to capture an image, without risking overexposure. Some example scenarios when a ND filter would be effective include:

  • Producing a smooth, blurred movement of water in a waterfall, lake, or the sea.
  • Blurring moving subjects to convey movement or motion (such as panning).
  • Reducing diffraction by using a large aperture.
  • Shooting with a shallow depth of field in bright lighting.

What is a graduated neutral density filter?

ND filters also come in a graduated form, also known as a split ND filter. The top half of the filter appears dark, while the bottom half is clear. Similar to the circular polarizer, the graduated ND filter can also be spun around to produce varying degrees of saturation, so it’s important to be careful when using it to avoid unevenly saturating your image.

The best scenarios for a graduated ND filter to shine are when you wish to reduce light, or darken just part of your image. Think landscape photos where the earth is balanced, but the sky is blown out. This would be an ideal time to use a graduated ND filter to darken the sky.

Circular polarizer versus ND grad filter

The above landscape photo with a soft edge ND grad filter. Notice how the sky is darker and more saturated, while the water hasn’t changed.

There are two types of ND grad filters: hard edge, and soft edge. You’ll want to use a hard edge filter when the light and dark sections are very clearly separated, while a soft edge filter is best used when the light and dark sections are not distinctly separated.

Circular polarizer versus ND grad filter

Landscape photo with no filter.

Circular polarizer versus ND grad filter

Landscape photo with a circular polarizer.

Circular polarizer versus ND grad filter

Landscape photo with a graduated ND filter.

Over to you

Do you use polarizers or neutral density filters with frequency in your photography? Please share your thoughts and images in the comments below.

googletag.cmd.push(function() {
tablet_slots.push( googletag.defineSlot( “/1005424/_dPSv4_tab-all-article-bottom_(300×250)”, [300, 250], “pb-ad-78623” ).addService( googletag.pubads() ) ); } );

googletag.cmd.push(function() {
mobile_slots.push( googletag.defineSlot( “/1005424/_dPSv4_mob-all-article-bottom_(300×250)”, [300, 250], “pb-ad-78158” ).addService( googletag.pubads() ) ); } );

The post Circular Polarizers Versus Graduated Neutral Density Filters for Landscape Photography by Suzi Pratt appeared first on Digital Photography School.


Digital Photography School

 
Comments Off on Circular Polarizers Versus Graduated Neutral Density Filters for Landscape Photography

Posted in Photography


Tips for Abstract Macro Photography – Using Texture and Light

21 Aug

Macro photography opens up a whole new world to those who are willing to get up close. There is no shortage of subject matter to photograph, but in this article we’ll look at the abstract world of texture and light.

Rusted paintwork of a Dodge Campervan

Rusted paintwork of a Dodge Campervan

The beauty about these subjects is that they can be shot anywhere; in your backyard, on your street, or in any part of your city. Textures are everywhere. They are really easy to find, and working with the light properly will help you to highlight the grittiness and tactile effect of textures. Ideally, a macro lens would be perfect to use for this type of photography, but a good 50mm or 85mm can work too. A macro lens gives you the bonus of being able to focus really close, normal lenses may not be able to get as close as you want.

My view is that even if you don’t have a macro lens, give this a try anyway, a new tiny world of wonder awaits you!

What is Abstract Macro Photography?

Abstract photography, in general, is about representing a subject in a non-literal way. The focus of abstract photography is more about colour, shape, and texture, as opposed to the literal representation of the subject. Abstract macro photography, takes this to the next level by enabling you to get even closer to your subject, and therefore also able to be more abstract in a sense. In this article, we are concerned with texture and showing that in our images.

The same guidelines around composition apply, you can use the rule of thirds, curves, and lines, to draw the viewer into your image. The difference is that the subject may not be immediately recognizable, your centre of interest might be a colour, or the curve of a flower. So for abstract macro photography, you will need to think a little differently.

Cracked paint on a car bumper

Cracked paint on a car bumper

What will I need to do abstract macro photography?

A macro lens will work best. A 50mm or 85mm lens will work pretty well too, you may not be able to get as close to your subject though, so be aware of that (or you can try close-up filters). You will need a tripod too, or some sort of support for your camera, as shooting macro images handheld is really difficult and can be frustrating.

What can I photograph?

Textures are all around you. Think of the rusted lamppost at the corner of your street, the peeling paint on the wall of the shed, or even the cracked paint on the bumper of a car. They are everywhere.

You need to spend time looking at all the surfaces around you, then take some test shots to see if they work. The key thing to be aware of when shooting textures is how the light is affecting the scene. Macro photography is like a micro landscape image. It has a foreground, middle-ground and background. There are colours, shapes, and of course textures in the image.

When you look at the texture, take some time to study where the light is coming from, and how it is affecting the image. Try a few different angles to see what works best in the scene. Using side light (i.e. light some from the left or the right) will accentuate the texture in your image. Side light will give your image a three dimensional quality, so try and get some directional light on your scene if possible.

Reflections from a security gate

Reflections from a security gate

Find your texture, and use this as a workflow

  • Work on building your composition – is there a particular part of the texture you want to emphasize, try and get some side light if possible?
  • Use manual focus to bring even a small part of your image into sharp focus, this sharp area will be the natural focal point for your viewer.
  • As an abstract image, you don’t need a subject as such, but the texture and the colours will be the reason for the image, so make sure the subject matter is interesting.
  • Check the histogram to make sure that you are exposing your scene correctly.
  • Capture the shot.
  • Try shooting the same subject from different angles, and maybe even with a different centre of interest.
  • Take as many images as possible, from different angles, with different focal points.

The beauty about this type of photography is that you have an infinite number of subjects. It is really easy to get going once you start looking around you, at what there is to photograph.

The beauty of cracked window putty

The beauty of cracked window putty

Have you tried abstract macro photography before? If not give it a go and share some of your images in the comments below. See if we can guess what you photographed.

googletag.cmd.push(function() {
tablet_slots.push( googletag.defineSlot( “/1005424/_dPSv4_tab-all-article-bottom_(300×250)”, [300, 250], “pb-ad-78623” ).addService( googletag.pubads() ) ); } );

googletag.cmd.push(function() {
mobile_slots.push( googletag.defineSlot( “/1005424/_dPSv4_mob-all-article-bottom_(300×250)”, [300, 250], “pb-ad-78158” ).addService( googletag.pubads() ) ); } );

The post Tips for Abstract Macro Photography – Using Texture and Light by Barry J Brady appeared first on Digital Photography School.


Digital Photography School

 
Comments Off on Tips for Abstract Macro Photography – Using Texture and Light

Posted in Photography


Weekly Photography Challenge – Feet

20 Aug

Tootsies, feet, toes, the often forgotten and less photographed part of the anatomy. See some photos of feet here.

Greg Pye

By Greg Pye

Weekly Photography Challenge – Feet

This one isn’t hard – you don’t need any special gear, or an exotic location. Just go out and find some feet!

Think outside the box on this one too – look not only at your own feet and other humans but at dogs, cats, all pets, statues, toys, etc. How can you photograph feet to make an interesting and compelling image? Can you tell a story with feet?

Navy Blue Stripes

By Navy Blue Stripes

Graeme Paterson

By Graeme Paterson

Khánh Hmoong

By Khánh Hmoong

Rick Harris

By Rick Harris

Share your images below:

Simply upload your shot into the comment field (look for the little camera icon in the Disqus comments section) and they’ll get embedded for us all to see or if you’d prefer upload them to your favourite photo sharing site and leave the link to them. Show me your best images in this week’s challenge. Sometimes it takes a while for an image to appear so be patient and try not to post the same image twice.

Share in the dPS Facebook Group

You can also share your images on the dPS Facebook group as the challenge is posted there each week as well.

Micah Camara

By Micah Camara

Maia C

By Maia C

googletag.cmd.push(function() {
tablet_slots.push( googletag.defineSlot( “/1005424/_dPSv4_tab-all-article-bottom_(300×250)”, [300, 250], “pb-ad-78623” ).addService( googletag.pubads() ) ); } );

googletag.cmd.push(function() {
mobile_slots.push( googletag.defineSlot( “/1005424/_dPSv4_mob-all-article-bottom_(300×250)”, [300, 250], “pb-ad-78158” ).addService( googletag.pubads() ) ); } );

The post Weekly Photography Challenge – Feet by Darlene Hildebrandt appeared first on Digital Photography School.


Digital Photography School

 
Comments Off on Weekly Photography Challenge – Feet

Posted in Photography


The good, the bad and the ugly of aerial photography – part 2: aircraft

19 Aug
My favorite image from the Holuhraun volcanic eruption, Iceland. Not only did I shoot multiple versions, I also asked the pilot to fly as slowly as possible and to return to this angle repeatedly so I could make sure I have the composition just right. This was easily done with the helicopter.

In the previous article I talked about some of the advantages of aerial photography. Now we’ll talk about some logistics, starting with the aircraft. There are two main options here: a light airplane or a helicopter. Yes, you can shoot from a hot air balloon but that’s not really an option in most places, plus it’s far less maneuverable, so I’ll gently disregard it. Also, while drones are taking the world of aerial photography by storm, the considerations discussed in this series don’t really relate to them, and so I won’t be talking about them at all.

It will probably come as no surprise when I say that a helicopter is the better way to go, by far. It might cost a bit (or a lot) more, but the advantages it offers make for a very different, vastly superior experience. 

Perhaps the greatest advantage is that some helicopters allow the doors to be opened or even completely removed for the flight

A helicopter is a flexible craft: it can fly slower than a plane or even hover in place, which gives you much more time to shoot a desired composition. But that’s not all: perhaps the greatest advantage is that some helicopters allow the doors to be opened or even completely removed for the flight. Once the door is off, you have a huge field of view, and wide-angle shooting is possible. You need to be careful not to have the rotor in the shot, but that can generally be avoided when pointing the camera downward.

The huge field of view also means that you have the option to try the same shot more than once should the first try fail, and you can shoot different angles of the same subject even after you’ve moved ahead. That’s a critical advantage which can make the difference between getting a shot and losing it.

Huge icebergs finally released from Kangia Fjord after floating there for years. Can you spot the (fairly large) boat?

Disko Bay, Greenland.

The most common helicopter for aerial photography is the Robinson R44. It’s a small helicopter fit for a pilot plus three passengers, and you can take both doors off in a minute, which is crucially important for getting crisp images without reflections or aberrations (if the pilot refuses to take the door off don’t even bother). Its small size also makes it relatively cheap to fly and maintain (emphasis on relatively).

What’s considered cheap? Well, one of my R44 flights cost me $ 850 (around €760) an hour, the other €1500 (around $ 1670) an hour. It really depends on where you fly, and costs worldwide can vary even more than that in both directions, but primarily upward. In places where a small, cheap helicopter isn’t available, costs can rise quite ludicrously. For example, I’ve recently gotten a quote of $ 4200 an hour for a larger heli in a place whose name I won’t mention. That’s $ 70 a minute. Yes, my reaction was similar to yours.

In the image below you can see a wide-angle shot of the dunes of Sossusvlei, Namibia, taken from an R44 helicopter with the doors taken off. It’s quite striking to see these intricate dunes from this angle, and the helicopter allowed me to take a very wide shot and include the entire dune, which is a huge advantage.

Shooting from a light plane is different. You usually shoot from an open window, and that’s in the best case scenario: about a year ago I did a photography flight in Greenland in which I had the dubious pleasure of shooting through a 15cm hatch in the front window. This means that shooting-angle selection was extremely limited (forget about ultra-wide lenses), and that once you pass a good shooting angle, the shot is gone unless you circle back. This disadvantage is emphasized by the faster movement speed, which frankly gives you a feeling of anxiety to be ready and shoot before it’s all gone.

To sum it up, though cheaper than a helicopter, a light plane with a small hatch (as opposed to a large window) is very limited in shooting angles, supplies less opportunities to get the right shot, and as a result yields much less keepers when the flight is done. I’d seriously reconsider before ever doing it again.

A Cessna with a large window you can open is a very different story. Shooting is much more comfortable and angle choice much less limiting. If you lean back (careful not to push against the poor pilot! I know I did that a few times…), no wind interferes with your lens and stability is quite good. I shot from such a Cessna in the Lofoten Islands and the experience was wonderful. 

Kjerkfjord, surrounded by mountains struck by beautiful pink light. Shot from a Cessna during sunset on my Lofoten Islands workshop this January.

In the next article I’ll discuss technicalities and parameter selection for aerial photography.


Erez Marom is a professional nature photographer, photography guide and traveler based in Israel. You can follow Erez’s work on Instagram, Facebook and 500px, and subscribe to his mailing list for updates.

If you’d like to experience and shoot some of the most fascinating landscapes on earth with Erez as your guide, you’re welcome to take a look at his unique photography workshops around the world:

Land of Ice – Southern Iceland
Winter Paradise – Northern Iceland
Northern Spirits – The Lofoten Islands
Giants of the Andes and Fitz Roy Hiking Annex – Patagonia
Tales of Arctic Nights – Greenland

More in This Series:

The good, the bad and the ugly of aerial photography – Part 1: Why shoot aerials?

Selected articles by Erez Marom:

  • Behind the Shot: Dark Matter
  • Mountain Magic: Shooting in the Lofoten Islands
  • Behind the Shot: Nautilus
  • Behind the Shot: Lost in Space
  • Behind the Shot: Spot the Shark
  • Quick Look: The Art of the Unforeground
  • Whatever it Doesn’t Take
  • Winds of Change: Shooting changing landscapes
  • On the Importance of Naming Images
  • Parallelism in Landscape Photography

Articles: Digital Photography Review (dpreview.com)

 
Comments Off on The good, the bad and the ugly of aerial photography – part 2: aircraft

Posted in Uncategorized


How to Bump Your Photography up a Level by Using Film Style Limitations

19 Aug

Get 50% off Tom’s ebook Ang’s World – A Life in Photography eBook, now only until July 26 at Snapndeals.

One of the most important skills in photography is pre-visualization. The idea is that before you capture an image in the camera, you have a clear idea in your mind of what it’s going to look like. You preview the image before you shoot it. Colour or black-and-white in rendering? Rich in tones or pale and soft? Misty-blurry in feel or so tack-sharp you might cut your eyes on it? What – exactly – will your image look like?

One of the early objections to digital photography was that it wasn’t really photography because there was no negative; no sense of what kind of picture you’re making. In fact, with digital, there’s not much at all, apart from data in the form of a very, very long row of zeroes and ones. You know what kind of image you have only when you use that data to drive a screen (on camera or at computer) or a printer. And before you get there, you have to process the image. If you feel feel isolated from the process of creating the image, it’s no wonder.

01 DSC3714
The most basic in-camera processing setting is your exposure. For this nature shot in my back-garden (above), I over-exposed by two stops. This pales out the colours, fills the shadows nicely to get the effect I envisaged, all suffused with light.

If you feel a bit disjointed from your images or from your camera, one way back is to try some old-school photography. If you feel your photography is getting a bit jaded, you can re-discover its joys by committing to a treatment or filter effect at the time you take the photograph.

You simply think, feel and shoot as if you’re using film.

I love this way of working. There are two simple steps. You choose an in-camera processing or filter effect (which, of course, produces JPEG files), and you do not use the screen to review your images (it’s good practice anyway). So, let’s set to the Toy Camera option – this vignettes the image heavily (darkens the corners), under-exposes, and adds strong saturation. And off we go:

02 DSC43152013
This indoor scene on our dining table (above) is rich in a surreal way, because the strong colours in the centre and heavy vignetting forces the viewer’s attention to the centre. The very shallow depth of field – from using a f/2 aperture – also helps make the space tensioned.

One reason some photographers have returned to work with film, is that the process of envisioning how the image will look before clicking the shutter, creates a sense of connection with the subject. You feel more involved with the process, and that’s an important part of the fun of photography.

03 DSC6410 2014

This portrait is a rich-toned black-and-white: it takes a shocking amount of processing in-camera, but comes out with deep, sharp tones that is surprisingly flattering. It works well in mixed hard and soft lighting.

There’s another advantage to camera processing – if you work this way, you often don’t need to touch the image before being able to use it. When I photograph for my books, I produce thousands of images, and have to submit as many as 1,500 images to the art department. You won’t find me messing about with the images more than I need to, I have a book to write! So images that pop straight out of the can into the book are what I aim for, like this one.

04 DSC9708 2

This late evening scene in Auckland, New Zealand comes straight out of the camera as rendered by the Toy Camera effect. I did try out some adjustments, but quickly decided it was best left as shot.

04A DSC14092014

Garden furniture left in the rain came out glowing with the Toy Camera filter, which often brings out a mood that is slightly world-forsaken. I like using the filter with the lens wide open, to leave as much as possible softly blurred.

So the question is; do you know what your image will look like before you capture it? If commitment scares you, one approach is to at least think ahead to the post-processing that you’ll do. Instead of blundering around trying one effect or adjustment after another, you will go straight to the effects that you want. Saves a LOT of time.

Or you can do as I’m showing here, and bravely go for it. More jeopardy equals more fun! And that’s exactly what you’d have done with film. You load the camera with film – say slow black-and-white for fine grain, or fast colour for low-light work. 24 or 36 exposures, and you’re stuck with it until the last frame reels off, come rain or shine, action or still-life. Many photographers have found fun in photography again by embracing the risks of film-like limitations.

05 IMG 1367

I’ve used the Hipstamatic app on my iPhone since the beginning, as I enjoy the commitment to the image coming out according to the film and lens combination you pick. This is one of my favourite combinations – the Libatique lens – and the Dream Canvas film.

Just like learning to work with a fixed focal length, what looks like an imposition and inhibiting feature, can actually free you artistically. For example, knowing that I’ve chosen a filter that gives a particular soft focus but richly coloured look, means that everyday scenes become mysterious washes of colour and tone. Without that effect, I might not have thought of making this shot.

06 IMG 1446

This is a Hipstamatic shot using D-Type Plate film with the Jane lens, processed for increased saturation.

A mundane scene like the mess on a chopping board just looks ordinary in colour. But in black-and-white, with a bit of fake Tintype effects, and the image moves into another arena.

Committing to a treatment challenges you, and changes the way you look at things. Some photographers say they can see compositions only in black-and-white. If you set your camera to shoot black-and-white, you will find that you photograph different things from your usual subjects. You’ll probably shoot them in a different way too. If you’re feeling especially brave, you can set your camera to apply an art filter. I like using the Illustration filter, which pumps up colours and draws a line on sharp edges. It works neatly with nature.

07A__DSC2691A
A moderate wide-angle view of a nature reserve. (Looks pretty but actually it’s over-run with invasive foreign species.) In the soft light, I thought the image would come out flat and lacking in contrast. So I decided to add some filter fizz.

07B DSC02690 2014

With the illustration filter applied, all the important features have been brought out; the trees, the slope of the hill, the bright lilies, and lily leaves. This image came straight out of the camera, with no post-processing at all.

You don’t have to be so drastic though. One useful in-camera effect available in several models, is built-in HDR (High Dynamic Range). In fact, what the effect does should be called tone-mapping. It makes three or more rapid-fire shots of the subject, at different exposure values. Then, in camera, it combines them so that the image is predominantly filled with mid-tones. Now if you try this on a moving subject, you get weird double-fringed effects. More in-camera fun!

08 DSC27672014
Three separate exposures of trees waving in the wind, even when shot at a high rate of fire, will create blurred or fringed images. Then tone-mapping them – processing to bring out mid-tones – gives a half-photographic, half-graphic effect. (Post-processed to reduce brightness and increase saturation.)

All this works, because pre-visualization makes you see in a different way. What happen is that the camera actually reprograms the way you see. That makes a lot of sense, if you think about learning new skills. Let’s take martial arts, for example. Before you start classes, you just see people punching, kicking. Once you learn more about it, you start to get your eye in – you see when someone’s leaning too far forward, or that there’s no power in a strike. It’s exactly the same moves as before, but your now-tutored eyes see more; they see differently.

In photography, you may start to see relationships, not objects. You pick out shapes and aren’t distracted by textures. Or you may see small details which before you’d overlook. In short, committing to one look for your images can invigorate your seeing, which will inspire your photography to greater, new levels.

09 IMG 4425 2015
An extravagant flower display at a hotel reception looks charming when given a look of aged film, complete with old-world border given by Hipstamatic Libatique lens with Ina’s 1969 film options.

Get 50% off Tom’s ebook Ang’s World – A Life in Photography eBook, now only until July 26 at Snapndeals.

googletag.cmd.push(function() {
tablet_slots.push( googletag.defineSlot( “/1005424/_dPSv4_tab-all-article-bottom_(300×250)”, [300, 250], “pb-ad-78623” ).addService( googletag.pubads() ) ); } );

googletag.cmd.push(function() {
mobile_slots.push( googletag.defineSlot( “/1005424/_dPSv4_mob-all-article-bottom_(300×250)”, [300, 250], “pb-ad-78158” ).addService( googletag.pubads() ) ); } );

The post How to Bump Your Photography up a Level by Using Film Style Limitations by Tom Ang appeared first on Digital Photography School.


Digital Photography School

 
Comments Off on How to Bump Your Photography up a Level by Using Film Style Limitations

Posted in Photography


Photography: One Hobby to Rule them All

18 Aug

Fellow photographers, let’s reflect for a moment on our mutual passion for this amazing art form, and maybe even do a little bragging about it. Photography is an incredibly rewarding hobby; in fact, it’s so rewarding that I believe it to be the best hobby one could enjoy. Here are five reasons why.

IMG 1636 dps

1. Photography complements many other hobbies

If your other hobby involves any physical thing, well then, you’re able to take beautiful photos of it! Whether it’s gardening, cars, or cooking, being able to skillfully photograph the things you spend your free time doing, only enhances the pleasure you take in those activities.

IMG 6922 dps

This principle extends beyond the photographer too. My mom spends all of her free time in the summer taking care of her numerous gardens (about five different flower gardens, a vegetable garden, an herb garden, and two shade gardens). She loves to see photos of the many plants that she puts so much time and energy into cultivating (and of course I love taking them; the photo below is of a daffodil that was grown by my mom this spring).

IMG 5299 dps

2. Photographers get to beautifully capture their loved ones

Anybody with a camera tends to take a billion photos of their kids, especially while they’re so little and cute – it’s pretty much impossible not to. But only photographers are knowledgeable about window lighting, reflectors, bouncing a flash, or using fast glass to make the best photos in poor lighting situations. Especially for an active little one, it takes a photographer who knows how to take control of the camera settings to get a shot that’s not blurry.

IMG 8438 dps

Aside from the kids, folks are always grateful for the photographer in the family who takes photos during holiday gatherings and special occasions. Unless the photographer corrals everybody into a group shot, it usually doesn’t get taken. There is also the candid photos of genuine moments while families enjoy each other’s company. While selfies and food photos abound, a true photographer is more focused on the meaningful moments.

All of those everyday moments matter, especially when it comes to one’s immediate family. I’m 30 years old, but I still spend Sunday evenings over at my parent’s house for family dinner. None of my immediate family particularly likes getting photographed – but every now and then I sneak in some candids. The older I get, the more these kinds of photos are cherished.

26045993031 0e0648589a o dps

3. Photographers get to relive their magic of vacation all over again

All of the wonders that we spend our hard-earned money to see make the trip back home, packed up into a few tiny memory cards.

IMG 9719 dps

There’s no doubt that anybody with a smart phone is snapping away their entire vacation. But it takes some specialized gear to really capture the most amazing travel photographs. It also takes some post-processing knowledge to make those photos wall-worthy.

For example, wide angle lenses are crucial in capturing the majesty of a stunning landscape, or perhaps some ancient architecture. Just the right amount of HDR will really bring out a landscape, or an intense black and white conversion might be the perfect touch for an architectural shot. Photographers know how to work their digital toolkit to really make the most of those beautiful vacation memories.

9233878664 aef785d3a7 o dps

4. Photographers get to see the world from a different perspective

Photography often propels us forward into new territory, that we otherwise wouldn’t experience. If there’s any beauty to be captured, we’re willing to accept the uncomfortableness that might go along with it.

Getting up before dawn on a weekend isn’t most people’s idea of a great way to start the day, but capturing a sunrise photo makes it all worth it. Dirty hands and knees are often required for getting the perfect floral or insect shot.

IMG 9521 dps

Photography connects us with nature in ways that wouldn’t exist without our cameras. I truly believe that the heart of a photographer is just a little more wild, a little more adventurous.

6573220145 6bf98a9bf7 o dps

5. Photographers are a part of one big, awesome, online community

Whether it’s Flickr, 500px, your favorite online photography forum, or maybe even your local photography club -photographers support each other. For the most part, we are ready and willing to help, to share our process, and to share what the conditions, settings and equipment were for those really amazing shots.

IMG 5622 dps

When you go looking, there is an almost never-ending source of support and encouragement for your photography. It is one of the few creative realms where we’re able to teach one another, even if we’re separated by half the planet. And that, my fellow photographers, is quite the blessing!

Does anybody have any other perks that they love about being a photographer? I’d love to hear some more reasons why photography rocks in the comments below.

googletag.cmd.push(function() {
tablet_slots.push( googletag.defineSlot( “/1005424/_dPSv4_tab-all-article-bottom_(300×250)”, [300, 250], “pb-ad-78623” ).addService( googletag.pubads() ) ); } );

googletag.cmd.push(function() {
mobile_slots.push( googletag.defineSlot( “/1005424/_dPSv4_mob-all-article-bottom_(300×250)”, [300, 250], “pb-ad-78158” ).addService( googletag.pubads() ) ); } );

The post Photography: One Hobby to Rule them All by Matt Robinson appeared first on Digital Photography School.


Digital Photography School

 
Comments Off on Photography: One Hobby to Rule them All

Posted in Photography


8 Steps to Getting Your Photography Business Noticed

18 Aug

Photographers, photographers everywhere! It seems in this social media age, new digital photographers flood the industry every day. These “professionals” boast low prices and high quality. There’s nothing wrong with that, but how do you get your work to stand out from the pack? What makes your images different than Johnny Photographer who was given a DSLR for Christmas along Continue Reading

The post 8 Steps to Getting Your Photography Business Noticed appeared first on Photodoto.


Photodoto

 
Comments Off on 8 Steps to Getting Your Photography Business Noticed

Posted in Photography


Tips for Doing More Spectacular Sunset Photography

17 Aug

The first thing I was told to do when I wanted to learn how to photograph landscapes and cityscapes, was to always shoot during the sunset. I have always asked myself why, but the answer is actually pretty easy. You get amazing colors in the sky, dramatic clouds, and soft light.

Sunset tips 1

You can photograph the most beautiful place in the world and I can guarantee you, it will look much better during the sunset. The only problem with this mindset, is that you will never take another image in the middle of the day. If I find a really cool spot to photograph, but there won’t be any sunset anytime soon, my go to option is to create a desaturated long exposure. The second option is to come back another day.

In this article, I am going to give you some tips on how to shoot sunsets to get the best results possible. These tips can also be applied to photographing a sunrise, if you have the energy to wake up at 5am and go outside.

How to predict the best sunsets

Depending on where you live, the sunset will be different. You can’t really predict a nice sunset, but there are some signs that can help you decide wether you should go out and give it a try or not. Of course, I would recommend going out and photographing all the time, but if you’re a busy person and do not want to go back home frustrated, then you should consider these few tips.

There are some areas in the world where sunsets are not vivid, and you won’t see any colors in the sky. For example, I have lived in the United Arab Emirates for a year and during that period I have only witnessed around 10 beautiful sunsets (no joke). However, when I go to the south of France, there is a dramatic and vivid sunset everyday.

Sunset tips 2

One of the better sunsets in the United Arab Emirates. This is considered as an amazing sunset over there, but in reality it is just very average.

Sunset tips 3

An amazing sunset in the south of France: I was really surprised because I got the same sunset five days in a row. and it wasn’t even summer.

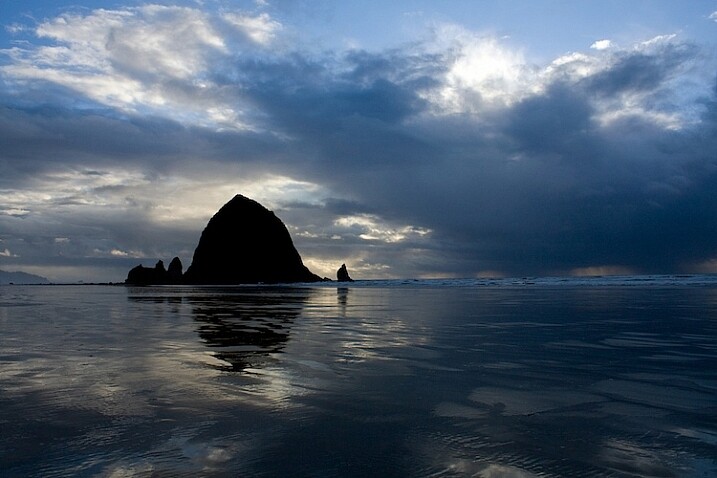
There is a simple reason explaining this – clouds make all the difference. I am talking about patchy white clouds with a blue sky. These clouds will catch some amazing colors and give you the best results possible when the sun sets.

Sunset tips 4

There were some patchy clouds in the sky, and during the sunset the colors turned out really nice in this image.

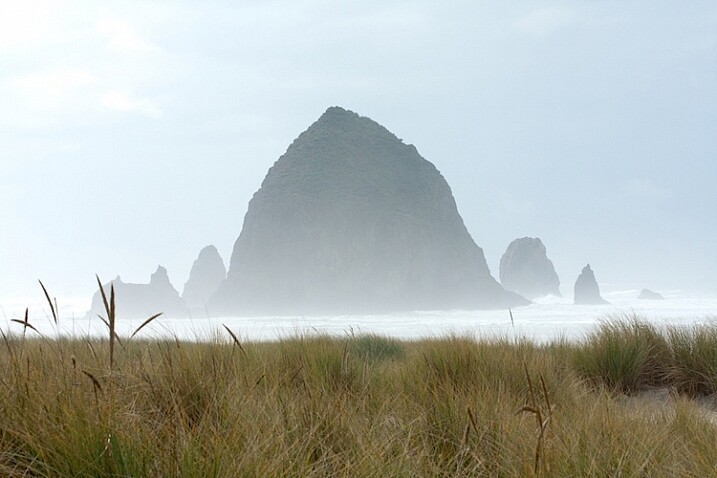
If there aren’t any clouds, then your sunset will be pretty boring. You will only have a nice gradient of color going from blue to orange.

Sunset tips 5

Example of a sunset without any clouds.

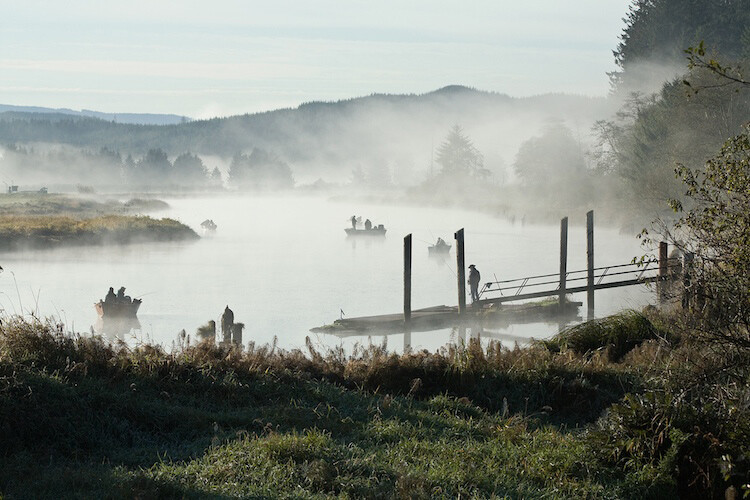
I usually don’t bother going out when there is an overcast day to shoot sunsets, because the results are quite disappointing. The clouds cover the sky and you can’t see it, so you will end up having no colors at all.

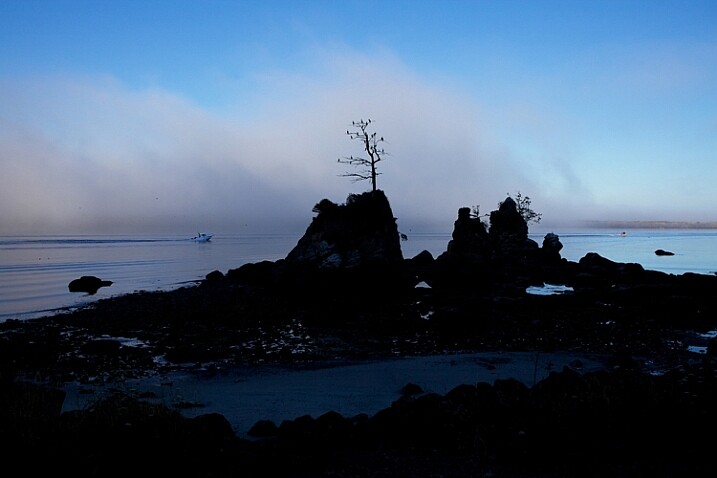
If there is some light rain during the evening, then you can be pretty sure you will get an amazing sunset. I really can’t explain it, but trust me, it works all the time.

Planning and patience

Planning is the most important thing, I would recommend going to the location around 30 minutes before the start of the sunset to compose your shot, especially if you don’t know the location.

With sunsets, the scene can change very very quickly. I highly recommend composing your shot, placing your camera on the tripod, and not moving until the sunset is totally finished.

Sometimes a nice color can appear on a cloud for only two minutes, and if you’re not ready then you won’t be able to photograph it. There is an app called Magic Hour which you can download on your mobile device (for iOS only) Based on your location, it will give you the time that magic hour begins, the time of the sunset, and the time it ends. It also does the same thing for the sunrise the next morning.

Note: you could also try the Photographer’s Ephemeris or PlanIt! apps.

Sunset tips 6

With this information, you have the time to look around, try different compositions, and decide which one works best. I will repeat – once you find your composition, place your tripod, and do not move it. It’s better to have one good photo of a sunset then five different average ones.

You will stay behind your tripod for 30 minutes, taking an image every time the sunset changes, with the clouds moving and new colors appearing. It is quite frustrating, but at the end you will have the best composition possible, with an image of the best clouds, and the best colors of the whole evening.

Sunset tips 7
I waited in the cold for one hour to photograph this sunset. At first it looked terrible, but it started developing very well. I ended up having some nice cotton candy looking clouds.

Lens and composition

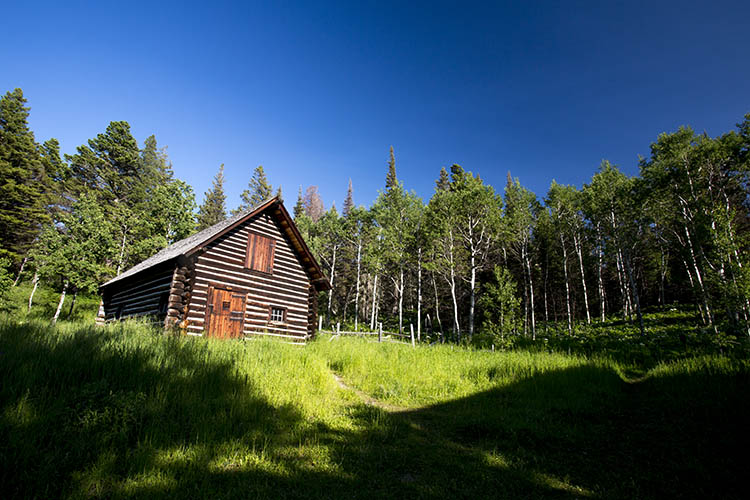
I would recommend using a wide angle lens to capture the whole scene, if you’re going to compose your image to include some foreground, middle ground and background, which I highly recommend. This enables the viewer to position himself in the image, and it adds a good sense of depth. Also, try to make the sky or the foreground at least a third of the image.

Sunset tips 8

The trees as the foreground, the Eiffel Tower as the middle ground, and the sky as the background, all give nice depth to this image.

If you cannot find that type of composition, then using a long lens can be a good alternative, while using the rule of thirds.

Sunset tips 9

I could not find a good composition for this shot, so I used a long lens to compress everything. and composed it using the rule of thirds.

Sunset tips 10

Composing my shot using the rule of thirds.

Settings and extra gear

A tripod is essential because you will want to shoot with an aperture between f/8 and f/13 for sharp images, and ISO 100 for the best image quality. This cuts down the light quite a lot, and you will end up having a slow shutter speed to compensate. To avoid any shaky images, use a tripod with a cable release or a two second timer.

I highly recommend exposing your images for the highlights (which means you are exposing for the sky). The rest of the image will be underexposed, but if you’re shooting in RAW you will be able to recover details in the shadows.

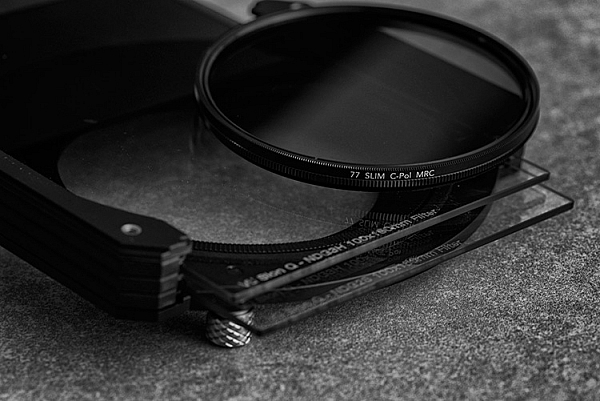
Another solution is to use a graduated neutral density filter that will cut down the light on your highlights in the sky, and keep your mid-tones and shadows well exposed.

Sunset tips 11

A graduated filter that you can stack.

I usually leave my white balance on auto, because with RAW files I can take more time to change it on Lightroom. If you’re shooting JPEG, the white balance that works the best with sunsets is Shade or Cloudy. It gives a nice warm magenta color to the image, and makes the vivid colors in the sky pop more.

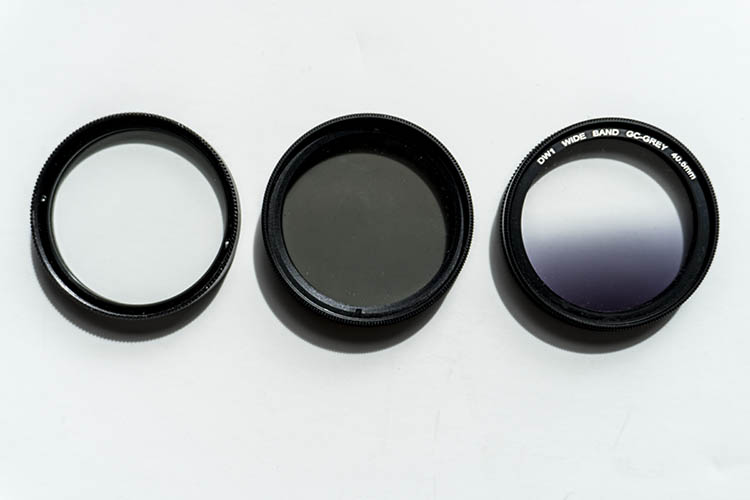
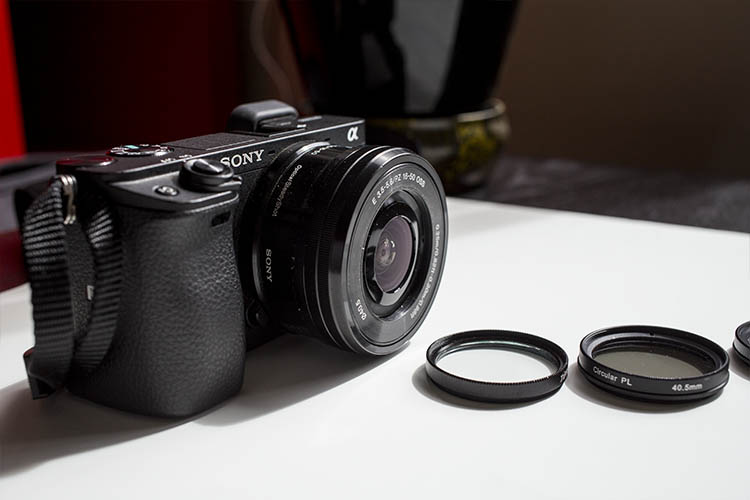
Polarizing filters are also a good alternative to recover details in the sky, and make the colors more saturated without any post-production.

Sunset tips 12

Using manual focus can be useful if it gets too dark and your lens has trouble focusing by itself.

Get creative

For sunsets, in my opinion the best thing to do is to get creative – either do HDR or digital blending.

In both cases, it’s better to take three different exposures to get the full dynamic range of the scene. Especially because there will be a lot of contrast between the brights and the darks, it’s difficult to get all the details. You can merge the exposures automatically with a software, or manually with luminosity masks.

Sunset tips 13

This sunset looks good, but because I did not shoot three different exposures you can see in the middle there are white pixels in the sky that I could not recover.

You can also get creative by doing long exposures and stretching the clouds. And of course you always have Photoshop and Lightroom to finish your art the way you like it.

Sunset tips 14

This is an example of a creative sunset: I shot 3 different exposures, a long exposure of the clouds, a long exposure of the car trails one hour later, and merged everything on Photoshop to get the best of both worlds.

Now it’s your turn. Do you have any other sunset photography tips to share? Please do so, and share your images as well, in the comments below.

googletag.cmd.push(function() {
tablet_slots.push( googletag.defineSlot( “/1005424/_dPSv4_tab-all-article-bottom_(300×250)”, [300, 250], “pb-ad-78623” ).addService( googletag.pubads() ) ); } );

googletag.cmd.push(function() {
mobile_slots.push( googletag.defineSlot( “/1005424/_dPSv4_mob-all-article-bottom_(300×250)”, [300, 250], “pb-ad-78158” ).addService( googletag.pubads() ) ); } );

The post Tips for Doing More Spectacular Sunset Photography by Yacine Bessekhouad appeared first on Digital Photography School.


Digital Photography School

 
Comments Off on Tips for Doing More Spectacular Sunset Photography

Posted in Photography


Tips for Creating a Personal Photography Project

16 Aug

One of the best ways to grow your photography is by working on a personal photography project. As a professional photographer, I am always working on personal projects. It’s a way to keep myself inspired, and to feel challenged to grow. It’s also a great way to keep my portfolio fresh, try out new ideas, and grow my vision as a photographer.

Shooting a place more than one time gives you the opportunity to capture the place in the perfect light. I had visited this part of the Oregon Coast more than a dozen times before the perfect scene appeared.

Shooting a place more than one time gives you the opportunity to capture the place in the perfect light. I had visited this part of the Oregon coast more than a dozen times before the perfect scene appeared.

In this article, I will share with you:

  1. What is a personal photography project?
  2. What’s the value of working on personal projects?
  3. What makes a good project?
  4. How to be successful
  5. Ideas for personal photography projects of your own

What is a personal photography project?

I define a personal photography project as choosing a subject to shoot over and over again over time. It can be as simple as shooting your kid’s sporting event every weekend, photographing an intriguing building near your home six times, or creating a series of portraits of your friends.

Personal-Projects-Oregon-Beach-CBB

I photographed about 60 miles along the northern Oregon coast over a period of six months. I created a route that I drove whenever I could. By shooting the same place over and over again, I was able to truly capture the personality of the places.

2 – What’s the value of personal projects?

Some photographers are reluctant to shoot the same subject over and over again, but by photographing it more than once, it gives you some great opportunities to grow as a photographer.

  1. It gives you the chance to get it right. Have you ever said, “I wish I would have done X better?” By going back and shooting something more than one time, you create the opportunity to analyze your mistakes, and go back and do it again. In this exercise, you shoot one day, analyze what you can do better, then tweak your shooting until you learn to nail it every time.
  2. It gives you some structure. When you have some free time, you don’t have to wonder what you are going to shoot. If you have committed to photographing the City Hall in your town six times, you can just go shoot it. On the other side of the coin, you can also put your shoots on your calendar weeks, or months, ahead of time.
A different mood of Cannon Beach, Oregon.

A different mood of Cannon Beach, Oregon.

A Project could look like this – Shoot City hall at:

  1. Sunrise
  2. Sunset,
  3. Morning light
  4. Afternoon light
  5. Golden hour
  6. Dusk
  7. With the moon
  8. On a sunny day
  9. On a cloudy day
  10. On a rainy day
  11. On a Snowy day
  12. During each of Spring, Winter, Fall, and Summer

Can you begin to see the many opportunities, and how to create different pictures of just one thing?

I was fascinated by this lone tree growing out of a huge rock near Garlibaldi, Oregon but I wanted to get it with a beautiful sky.

I was fascinated by this lone tree growing out of a huge rock near Garlibaldi, Oregon, but I wanted to get it with a beautiful sky.

It took many evenings of watching for the perfect sunset, but the photo was well worth it.

It took many evenings of watching for the perfect sunset, but the photo was well worth it.

Once you nail the technical part of a situation, you can challenge yourself to do something really different. This is the point the great photos come in!

The great photos don’t come when you are trying to figure out how to focus your camera, use your flash, or what is the right exposure or camera angle. Once you’ve got all that nailed, the real creativity begins! That’s when the great pictures happen. Here’s an example:

Posey-Personal-Projects

This was my first glamour shoot. I just practiced finding the perfect window light in my studio. And, as a journalistic photographer, I rarely do any retouching, but this subject offered the opportunity to pull out some new retouching tools, and also reminded me to pose the subject in such a way to hide skin imperfections.

I fell in love with the work of a glamour photographer, Sue Bryce. She does beautiful work and doesn’t use studio lighting, she uses window light in a very sophisticated way. I decided to emulate her work by studying her technique. I had never studied glamour photography, so not only would the lighting be a challenge, but the posing would be too. Here’s what I did:

  • I studied her technique, watched some YouTube videos, and took detailed notes.
  • I practiced posing myself in front of the mirror.
  • I did some tests with window light in my studio to find the best times of day to shoot, and to decide what kind of reflectors, props, and backdrops I needed.
  • I found a few make-up artists who wanted to build their portfolio, and offered to work with me for prints.
  • I scheduled several friends for shoots.
Suzanne-personal-projects

This was my second shoot. I practiced using a different kind of light, a little bit harder with more fill.

I also had the chance to work with posing and hands. It felt awkward to me, and I didn’t really get the subject to do what I wanted her to. It was time to go back to the mirror and practice with my own hands, then create language that would help my subject move into those poses.

allie-personal-projects

This shoot went much better. I was learning, developing skills, having fun, and building my confidence in this new world of glamour photography.

Tyler2-personal-projects

By my fourth subject, I had learned how to direct my subject into a pose, and had a great feel for window light.

Tyler-personal-projects

I had a few new pieces for my portfolio, not to mention a few happy friends with prints.

Let’s back up a few steps and review some of the ideas we’ve touched on so far.

3 – What makes a good photo project?

  1. Have an objective, a goal. Be clear on your outcome. It can be to master a new skill, to create a series of prints, or to make a calendar as a gift.
  2. Select a subject that you can return to over and over again.
  3. Choose something you are really interested in, and passionate about. For ideas, think about the activities you and your family are involved in. Would any of your hobbies make a good project? Are there places you love to visit or photograph?
  4. Find something to shoot within 10 or 20 minutes of your home.
  5. Commit to something that either happens on a regular basis at a scheduled time, or a place you can just show up and shoot anytime. For example, a ballet class that happens every week or a favorite park, botanical garden, or lake.
  6. Choose a subject with a variety of visual possibilities.
  7. Choose a subject with a learning goal, or end product in mind. You might want to learn more about light, or shooting in manual mode, or photographing people.
The Capital Building in Washington DC is stunning at night, and I wanted to capture the full moon rising behind it. This was the sixth night I made a trip to the monument. Persistence paid off.

The Capitol Building in Washington, DC is stunning at night, and I wanted to capture the full moon rising behind it. This was the sixth night I made a trip to the monument. Persistence paid off.

Several years ago, while living in Washington, DC, I chose to shoot the monuments with a full moon. Why was this a good project? Let’s look at the checklist above and compare

  1. I love documenting history, enjoy being out in the evenings taking pictures at night, and I always feel a sense of wonder seeing the Washington, DC monuments.
  2. I wanted to create a set of prints that I could share and offer to my corporate clients.
  3. Getting to the monuments was easy for me.
  4. I could write the full moon dates in my calendar months ahead of time and keep my schedule clear. (Although I did get strange looks when I told friends I couldn’t join them for dinner because it was a full moon!)
  5. There are lots of monuments to photograph within walking distance.

I loved having something on my calendar to shoot. It provided some structure, and gave me something to shoot for several months without having to come up with a new idea. And, now I have a beautiful collection of photograph for my portfolio.

This is the World War II Memorial in Washington DC with the Washington Monument in the background. Committing to shooting a personal project is fun, rewarding and builds your self-confidence.

This is the World War II Memorial in Washington, DC with the Washington Monument in the background. Committing to shoot a personal project is fun, rewarding, and builds your self-confidence.

4 – How to be successful

  1. Make a commitment and write out the whys of doing the project.
  2. Find an accountability partner, a coach, a class, or a photo group, to share your progress.
  3. Put the time commitments on the calendar. Treat this as a new ritual. Plan the time and treat it as sacred.

5 – Ideas for your own personal photography projects

Here are some ideas to get you started on your own personal project.

  • Find a photographer or a style you love and try to mimic that style. I fell in love with Georgia O’Keefe’s paintings and her use of color. Ultimately, studying her art led me to creating these photographs. 
  • Shoot the full moon every month for six months. I chose to shoot the monuments in Washington, DC with a full moon and created a beautiful series of art prints.
  • Photograph a local park 10 different times, at different times of day. This is a simpler version of my Oregon Coast project.
  • Shoot a local landmark at all times of the day. It could be a building, for example the City Hall, a mountain, or a river. This project will give you an opportunity to learn about the quality of light at different times of days, the right angles, and it’s simple! Buildings and mountains are always there for you.
  • Shoot a kid’s sporting event every weekend. This will help you refine your skills with stopping action and learning focus.
  • Make portraits of your relatives and create a beautiful coffee table as a Christmas gift for the family. A great way to take care of that holiday gift list, as well as learn more about photographing people and developing a style of your own.
  • Photograph pets. Pets can be a real challenge. It will be an opportunity to learn about capturing action as well as learning about light.

Shooting projects is an amazing way to grow your portfolio and your self-confidence. Do you have an idea for a project? Share it with me in the comment section below, I’d love to hear about it or see your images.

googletag.cmd.push(function() {
tablet_slots.push( googletag.defineSlot( “/1005424/_dPSv4_tab-all-article-bottom_(300×250)”, [300, 250], “pb-ad-78623” ).addService( googletag.pubads() ) ); } );

googletag.cmd.push(function() {
mobile_slots.push( googletag.defineSlot( “/1005424/_dPSv4_mob-all-article-bottom_(300×250)”, [300, 250], “pb-ad-78158” ).addService( googletag.pubads() ) ); } );

The post Tips for Creating a Personal Photography Project by Vickie Lewis appeared first on Digital Photography School.


Digital Photography School

 
Comments Off on Tips for Creating a Personal Photography Project

Posted in Photography