RSS
 

Posts Tagged ‘Photography’

Tips for Stress-Free Wedding Photography

08 Sep

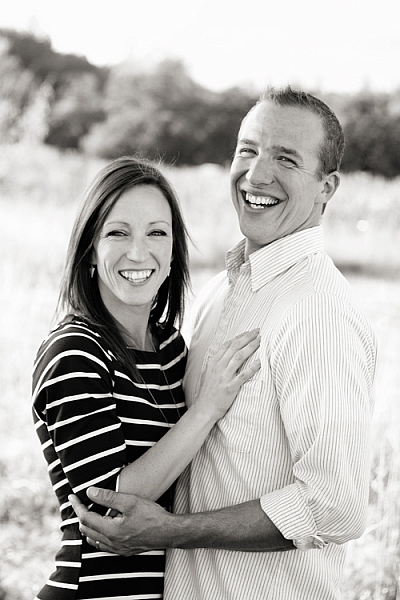
As wedding photographers, we love to think photography is the most important element of a bride and groom’s wedding day. Surely they want fabulous wedding photography, so certainly they will give us all the time in the world to create beautiful images.

But it doesn’t really work that way. Weddings are busy. Often you are scrambling to get all the images you need really quickly, leaving no time for the fun, romantic images you really want to create for the couple. Worse yet, someone springs a pose list on you that you weren’t expecting, or changes the location everyone is meeting for family portraits.

Bride groom romantic location photograpy

The easiest way to make sure you have enough time for all the photographs you want to create on the wedding day, is to know how much time you need and to be prepared.

Know how much time you really need

Depending on their style and process, every photographer needs a different amount of time to take photographs at a wedding. As well every wedding is different, with unique locations, bridal parties, and families.

If you are not certain how long it takes you to create the images you need, time yourself. When you know your own process, you will be better able to help the bride and groom accurately schedule enough time for all the photographs.

wedding-flower-bouquets-dresses

Can you travel to the beautiful park the couple wants to use for photographs between the ceremony and reception? Or did they forget to allow for the time it actually takes to drive there? Do you need 20 minutes to photograph the family, or is it really more like 45 minutes when you include the set up of lighting equipment?

Look for open pockets of time in their schedule during the day. You may not get all the photography time together in one block, but when you know how long you need for each session, you can schedule it to work within the couple’s timeline.

Tips for finding enough photography time on the wedding day

outdoor-location-ceremony-barn-wedding

Pre-Wedding planning consultation

Have a pre-wedding consultation. A final consultation one to two weeks before the wedding is a perfect time to go over details. Discussing the timeline with the bride and groom before the wedding will let you see where photography will best fit into the day. It will also help them see how much time you need to do your job well. This is close enough to the big day that they should know all the details, yet far enough out that they can tweak schedules, if need be.

Bride bridesmaids posed wedding

Ask about other wedding vendors. Find out how everyone from the florist to the caterer will also fit into the couple’s day. The follow questions may help you:

  • Ask when hair and make-up appointments are scheduled to be done and where.
  • Find out where the flowers are being delivered and at what time.
  • Ask how long the ceremony will last and how they plan to personalize it.
  • Know if the couple will do a receiving line, or somehow greet guests formally right after the ceremony.
  • Confirm what time they want to arrive at the reception.
  • What time will dinner be served,
  • When would the DJ or band like to start the dance.

Wedding idea list for photographers

Knowing when the other professionals need the attention of the bride and groom will help you know when it’s your turn.

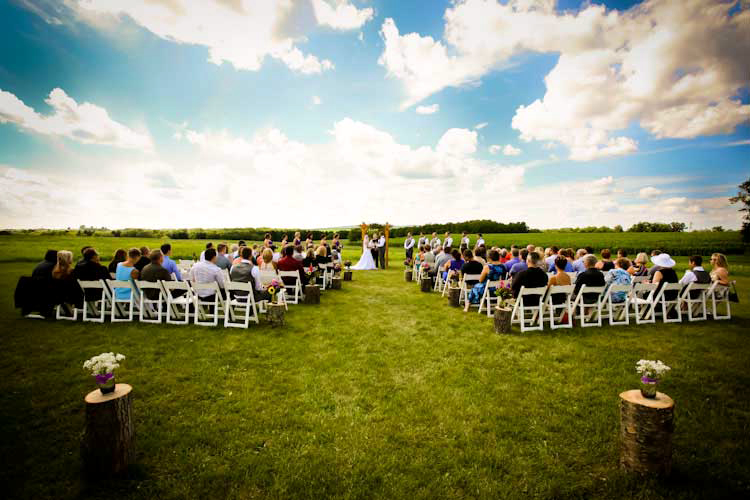
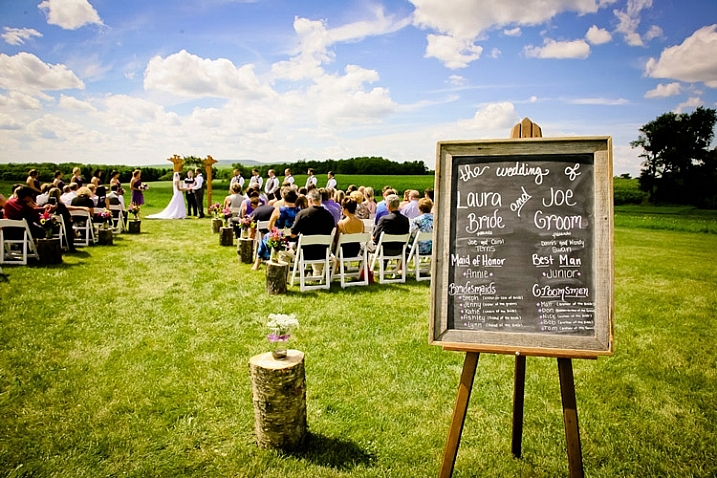
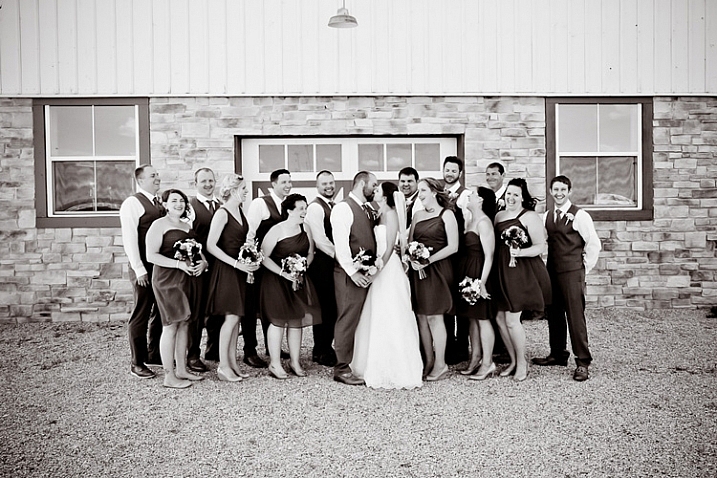
Plan for family portraits. Many photographers balk at the “dreaded pose list,” but capturing family photographs is an important part of wedding photography. To make the process of organizing family portraits easier, find out who’s in the their families, and what groupings are important to the couple. When you set the time for the wedding photographs, have the bride and groom inform everyone of the timeline, so they will be ready when it’s time to start.

Remember to add in travel time. Often the ceremony and reception are in different locations, and sometimes the couple likes to stop off at a third spot just for photographs. Make sure to add in the time that it will take to drive to these places into the schedule.

Wedding planning worksheets photogfaphers examples

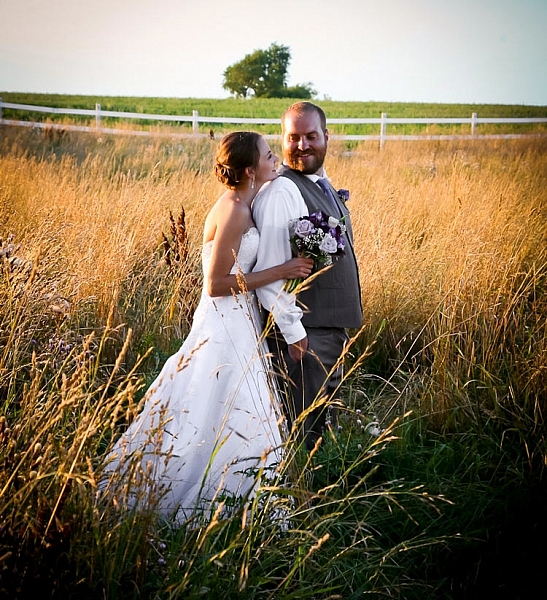
Know the sunset time. Whether you want to make sure you have enough light for evening portraits or for sunset images, knowing beforehand when sunset is that day, let’s you plan accordingly.

bride-groom-sunset-romantic-wedding-location

Before the wedding day

Pre-scout your locations. Go to the wedding venues a day or two beforehand, to look over the locations for possible photography backdrops. If you can’t scout before the wedding day, plan to arrive early at the venues to find the spots you will use for photography.

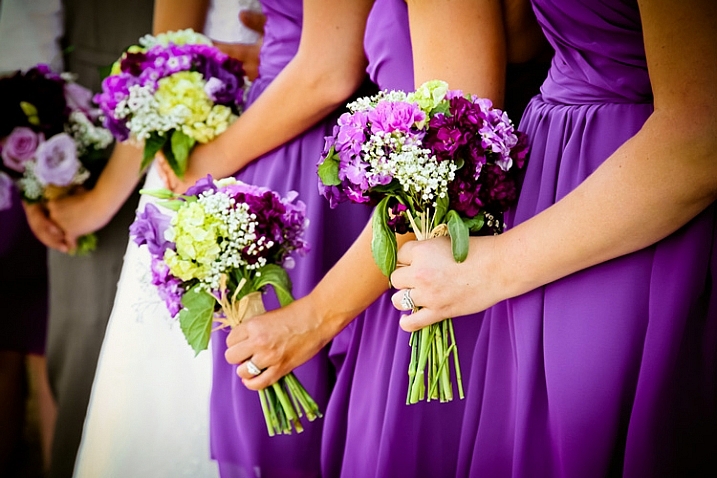
Have the bridal details lined up beforehand. Let the bride and groom know if you’ll want to photograph cufflinks, rings, shoes, jewelry and such details before they get dressed. Having these together and ready saves time.

outdoor-wedding-ceremony-vintage-sign-theme

Consider a “first look.” If your time between ceremony and reception is tight, it can be hard to get all the photographs done. Allowing a special moment for the bride and groom to see each other for the first time at the beginning of the day, can open the couple up to the idea of doing photographs before the ceremony.

On the wedding day

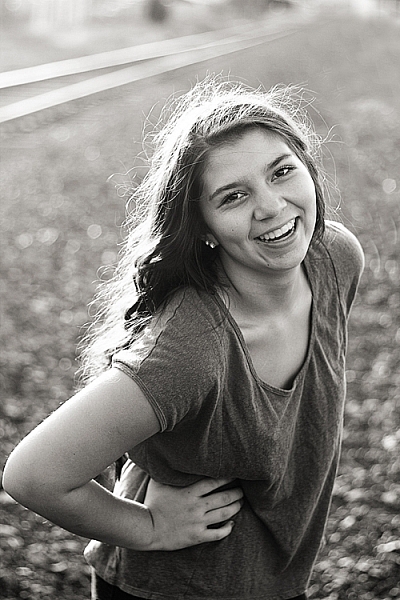
Know how to pose people. Brides and grooms are usually not experienced at posing themselves for photographs. If they aren’t sure how they look, it can take longer for them to get comfortable in front of the camera. When you already have a variety of flattering poses in mind, you are able to quickly move through the session.

Bride groom wedding location photography

Avoid backtracking. Whether you need to set up lighting equipment, gather family for portraits, or go to a cool location with the couple and the whole wedding party, do it only once. When you consolidate, you save time and hassle for everyone.

For example, it’s much easier to ask grandparents, or small nieces and nephews, to attend just one photography session on the wedding day. Pick a time when both the bride and groom will be ready for photographs, and plan to do all the different combinations you need to do at once. There’s no need to ask Grandma to arrive two hours before the ceremony for one photograph, if she needs to stick around after the ceremony for one more.

When the couple does a “first look,” before the ceremony, it can work well to take all the family portraits at that time a as well. Otherwise, immediately after the ceremony is a good time to do them, before people wander off to the reception and start mingling.

Wedding party posed garden

Work down from the biggest groups to the smallest groups. When you have large, extended family photographs to organize, get those done first. It allows people that only need to be present for one or two photographs to leave, letting you focus on the smaller groups with less chaos.

Summary

When you look at all the elements that go into the schedule on the wedding day, you can be prepared. When the bride and groom see how the photography fits into their schedule, they can make sure they have allowed enough time for you to do your job.

wedding-party-bride-groom-kissing

Do you have other tips to add? How do you carve out enough time for photographs on the wedding day?

googletag.cmd.push(function() {
tablet_slots.push( googletag.defineSlot( “/1005424/_dPSv4_tab-all-article-bottom_(300×250)”, [300, 250], “pb-ad-78623” ).addService( googletag.pubads() ) ); } );

googletag.cmd.push(function() {
mobile_slots.push( googletag.defineSlot( “/1005424/_dPSv4_mob-all-article-bottom_(300×250)”, [300, 250], “pb-ad-78158” ).addService( googletag.pubads() ) ); } );

The post Tips for Stress-Free Wedding Photography by Becky Appleby appeared first on Digital Photography School.


Digital Photography School

 
Comments Off on Tips for Stress-Free Wedding Photography

Posted in Photography


Tips for Starting a Photography Business the Right Way

07 Sep

Are you ready to make the switch from a hobbyist to full-time professional photographer? That,s great, congratulations on your decision. It’s a great profession to be in, one that gets your creative juices flowing every time you pick up a camera. But along with the desire to start your own photography business, there are a few necessary steps that you need to take to make sure you start off on the right note!

Memorable Jaunts Starting a business Article for Digital Photography School-20

Define who you are as a photographer and what is your business all about.

Get all the necessary legal paperwork in place

As per wikipedia, a professional is a member of a profession, or any person who earns their living from a specified professional activity.

The fact that you are charging money to clients in exchange for photos means you also need to document said money, and pay appropriate taxes. In most parts of the world, this means registering your business with the local governing body, reporting income accurately ,and paying appropriate taxes. Make sure you research what the legal requirements are where you live, and follow them.

You don’t want to get into trouble with the government at a later stage. Part of the registration process may require you to have a business name, as well as get a tax id. Many photographers pick their own name for their business, while others like me, choose a generic name to represent their brand. There is no right or wrong way, just pick one that works for you.

Memorable Jaunts DPS Article about starting a business

Maintain an online presence for your photography business

The important thing to maintaining an online presence is have a way to represent your body of work, i.e., your portfolio. Luckily, there are many free options for uploading your images to the Internet. Sites like WordPress and Blogger (previously called Blogspot) offer a way to create a blog. Flickr and 500px are other options to upload and host your images.

Getting a custom website, with a custom URL (in most cases your business name) takes it up a notch in terms of creating brand awareness (you can look at low cost options like Square Space). It is much easier to tell a client that your portfolio can be found at (for example) “www.memorablejaunts.com”, rather than saying “memorablejaunts.blogspot.com”. Depending on your business name this can be a mouthful and difficult to remember.

As you think about your online presence also consider social media. There are many options to choose from to be socially engaged with your clients, and more importantly, your potential clients. With so many social media platforms out there, it’s very easy to get overwhelmed. So my advice would be to pick two to three, and actively engage with your audience there. In the initial part of my career, I focused on Facebook, then added Twitter and Instagram to my social media strategy. As you create your own social media strategy, remember to be consistent across the board. Let your website and social media tools speak the same language, and showcase your style consistently.

Memorable Jaunts Urban Photography Article for Digital Photography School-20

Be social online AND offline

The internet has been a blessing in disguise for most small businesses. The world is no longer just limited to who we know, and our friends. It is very easy to find like-minded peers and colleagues all over the world. Reach out and form genuine connections. Don’t worry about what they can do for you. Instead focus on how you can help them.

Often times it is just being a positive voice – encourage them, congratulate them, and be genuinely happy for their success. Don’t be fake, being pretentious is a complete put-off. On that same note, make an effort to engage with local peers and colleagues. Take them out for lunch or just a cup of coffee – take the time to listen to their story and acknowledge their success. This is basic common courtesy, but you will be surprised at how many new and experienced photographers don’t seem to get this respect. It always pays to have a friend or a listening ear in the business!

Memorable Jaunts Starting a business Article for Digital Photography School-22

My Facebook Business Page speaks the same language as my website and Instagram business account – the look, the feel, as well as something as simple as a profile picture – they are consistent across all platforms.

Memorable Jaunts Starting a business Article for Digital Photography School-23

I have been more active on Instagram over the past six months and have met some really interesting people all over the world – it is such a perfect visual medium for photographers

Some sites that have communities of photographers (all various levels)

  • Meetup.com
  • Instagram – there are many photography related hashtags as well as geotags that you can search on to find other photographers, groups and peers.
  • Facebook – there are several public groups where photographers are welcome to join to ask questions, showcase their work, and get feedback
  • Local camera stores and community colleges – check your local camera store or community college to see if they have any groups that meet regularly. If not, don’t be afraid to start one.

Accurately track your income and expenses

I say this from experience! It is very painful, and time-consuming, to back-track and look through credit card receipts to tally expenses. The better and more sensible option is to spend one day every week to tally income and expenses. This will give you an idea on where you are financially at any given point of time.

Believe me, when you are just starting, expenses can add up very quickly. Before you know it, you can rack up a sizeable amount of debt that can be hard to get out of and handle.

Memorable Jaunts Starting a business Article for Digital Photography School-24

Keep it simple…I use a daily planner that has all items related to my business (to do tasks, as well as daily expenses). Once a week, I update a spreadsheet similar to this with all expenses, to keep a running tab of where I am financially.

Gear – need versus wants

This one is a hard one to control. It is human nature to want to have the best of everything, especially when you are starting something new. We have self-perpetuated this fantasy that having the best and latest/greatest, is essential to our success.

Gear, especially photographic gear, is very expensive and becomes obsolete very quickly. Really think through what you need to be successful in your job, and have a game plan on how to build up your gear. The first two years of my business I survived on a Canon 5D MarkII and Canon 24-70L 2.8 lens. My backup camera was an old Canon 10D whose battery life was less than two hours. But it was my backup, and I was really careful with my gear. If I needed another lens, I just rented it.

Once I started photographing weddings, for more than a year I rented the 70-200mmL 2.8 and a speedlight, before I saved up money to purchase them for myself. Also remember that there are other things that you will need to have a successful photography business like: a computer, editing software, and as well as business insurance. It is better to invest in those upfront (and they are needed to run a successful business) rather than just on camera gear!

Memorable Jaunts Starting a business Article for Digital Photography School-21

I shoot digital for client work and a mix of film and digital for personal work.

I hope all this did not scare you! Being a professional photographer is a hard thing to do, but it is incredibility satisfying. You can achieve a lot of success in this field if you are willing to put in the long hours and do what it takes to be successful.

Remember this is a business, one that you have willingly chosen to undertake. Give it your best, but also have fun. Don’t get too bogged down with all the mistakes you think you are making. They are not mistakes, they are learning opportunities, and they will make you a better photographer and better business owner in the long run.

googletag.cmd.push(function() {
tablet_slots.push( googletag.defineSlot( “/1005424/_dPSv4_tab-all-article-bottom_(300×250)”, [300, 250], “pb-ad-78623” ).addService( googletag.pubads() ) ); } );

googletag.cmd.push(function() {
mobile_slots.push( googletag.defineSlot( “/1005424/_dPSv4_mob-all-article-bottom_(300×250)”, [300, 250], “pb-ad-78158” ).addService( googletag.pubads() ) ); } );

The post Tips for Starting a Photography Business the Right Way by Karthika Gupta appeared first on Digital Photography School.


Digital Photography School

 
Comments Off on Tips for Starting a Photography Business the Right Way

Posted in Photography


Interview: Landscape photography master Charlie Waite

07 Sep
Grand Canyon Lighting by Grant Ordelheide. Winner of the ‘My USA’ category in the 2015 USA Landscape Photographer of the Year Award.

Founded in 2006, the annual UK Landscape Photographer of the Year Award has become one of the most prestigious photo contests in the world. 2016 marks the third year of a USA-specific competition, open to entrants from all over the world to showcase inspirational images taken in the United States.

As the deadline for the 2016 USA Landscape Photographer of the Year Award approaches, we spoke to its founder, renowned landscape photographer Charlie Waite about his life and career, and his hopes for the contest.


You’re one of the best-known names in landscape photography – how did you get started?

Well originally, I was an actor. I was rather a mediocre actor for 12 years, and I photographed a lot of actors for their publicity and so on. My wife was in television, and in the 1970s she was filming down in Devon. One day I was watching her filming and I wondered off into the Devon landscape with my camera and I just found myself responding to the landscape.

Back in London my wife and I went to look at a house we were thinking of buying and the guy who was selling it asked me what I did, and I said I was a landscape photographer, which was a complete untruth.

 Loch Indaal, Scotland. Photograph by Charlie Waite, used with permission.

It turns out he was in charge of the illustrated books department at a publisher and he said ‘can I look at your portfolio?’ so over the weekend I enlarged the pictures that I’d made, showed them to him and he commissioned me to do a book.

So I went from being an out of work actor to a photographer. And it just rolled on after that.

What inspired you to continue and make a career out of landscape photography?

I felt spiritually enriched. I knew that a deep engagement with the landscape was really good for me, and really elevated me as a person and calmed me. I found that landscape photography leveled me. Fully engaging with my surroundings. A lot of people think that landscape photography has nothing to do with emotions, it’s just craft, and skill, and finding the right light and everything else but it settles me and I’m very enriched by it. I’m more in love with photography now than I ever have been before.

 Amish country, Pennsylvania, USA. Photograph by Charlie Waite, used with permission.

What’s your favorite location?

In my heart I want to say the UK, and I think in joint second place would be the USA and France. I like to call France the most undiscovered country in Europe. It’s so quiet there.

 Autoire, France. Photograph by Charlie Waite, used with permission.

What lead you to create the Landscape Photographer of the Year programs?

I didn’t think there were many people out there who loved landscape photography as much as I did. I’ve always thought that if it elevated me it could elevate other people. I hate the word ‘evangelist’, but I felt sort of evangelical, and I wanted to say ‘come on let’s get together’. I love being in the company of other photographers, and I thought we could all get together and do a good thing, and bring landscape photography to a wider audience. And the competition really has done that.

It’s brilliant to go to the annual winners’ exhibitions, with 30 or 40,000 people visiting, and seeing the pleasure they get from the images. They’re moved by the eye and the craft of the photographer that made the images. I call a photograph a production. It’s not something you ’take’.

Dancing Trees, by Paul Leatherbury. Winner of the ‘Classic View’ category of the 2015 USA Landscape Photographer of the Year Award.

I love the US, I’ve traveled there a lot, so I thought it was a natural thing to start a US version of the competition, which we’ve been running in the UK since 2006. It’s been really fun bringing it all together. I wasn’t very good at school, I wasn’t a very good actor, and I wanted to do something that might mean something to people. And that’s what drives me on. There are some great photographers out there.

My dream – what I really want to happen, is – do you remember the series ‘Earth From Above? I cannot believe what a grand, far-reaching tour that exhibition had. And what I would love to do is to take the Landscape Photographer of the Year Award in the US and UK and take the exhibition around the world. And say ‘this is what America looks like, in the eyes of some of the word’s best landscape photographers’.

Hourglass, by Ted Gore. Overall winner of the 2015 USA Landscape Photographer of the Year Award.

Is there anyone who’s come through the Landscape Photographer of the Year Awards in previous years who’s gone on to make a career out of landscape photography?

I think they all have. It’s elevated the winners hugely. It’s an amazing label, to be Landscape Photographer of the Year.

What advice would you give to an aspiring landscape photographer?

Find your signature and specialize. Don’t be a jack of all trades. Find your way of seeing. And be memorable for your particular way of seeing. I was given that advice, and it’s a bumpy ride, like acting. It’s really not easy. It’s precarious and insecure, but there are many different ways of seeing, and many ways that are still to be found. Make your images have meaning. And practise.

Click here to submit entries to the 2016 USA Landscape Photographer of the Year Award


Charlie Waite is a renowned landscape photographer and founder of Landscape Photographer of the Year Award competitions in the UK and USA.

Articles: Digital Photography Review (dpreview.com)

 
Comments Off on Interview: Landscape photography master Charlie Waite

Posted in Uncategorized


Get Outside Your Photography Comfort Zone to Learn and Grow as a Photographer

06 Sep

As photographers, we usually start out photographing everything and anything. All subjects are game as we explore our new found passion. When we grow and get more serious about our craft, we often try to find our unique place in the industry. Our niche, our comfort zone, where we can specialize and make a name for ourselves.

This is a good thing! A photographer that has a unique niche is more memorable than a photographer that covers every subject. It’s better to be the dog portrait guy, or the black and white waterfall girl, than to be forgettable.

Convict Lake California by Anne McKinnell

One of my favourite things to photograph: water scenes at twilight.

But just because you’ve specialized in a particular area of photography doesn’t mean you can’t continue to explore your craft. There is much to be learned from photographing other things, and applying any lessons learned to your niche. In fact, there is much you can learn from photographing things that you specifically don’t like to shoot.

Get out of your photography comfort zone

So I challenge you to come up with a short list of things you don’t like to photograph, and then give them a try. Remember, you don’t have to be good at it. Don’t worry about trying to create a masterpiece. You’re not going to show these photos to anyone. But, by getting outside of your comfort zone and giving yourself the permission to play, you’re bound to learn something along the way.

Elephant in Tarangire National Park, Tanzania by Anne McKinnell

Applying lessons learned about shadow and light in portrait photography to wildlife photography.

Afraid of portraits? Photograph one

For example, when I did this exercise, the thing on the top of my list was portraits. I’ve always been somewhat terrified of doing portraits! Also on my list was sports, cars, and architecture.

It was serendipitous when a friend of mine asked me to photograph her newborn. As the terror swept through me, I remembered my list and realized I should take the opportunity. Of course I advised her to hire a real newborn photographer since I had no experience in this area. But I still tried, and I made some images that were pretty good. But more importantly, I learned some things that I could apply to the areas of photography I was more interested in, like landscapes and wildlife.

Working inside was new to me and since I didn’t own any lights, I worked with natural light from the window. As I positioned my subjects around the room, I noticed how the light fell on their faces, and learned to pay very close attention to the direction of the light. I also noticed how important it was not to have any distracting things in the background, which also applies to many other areas of photography.

Great White Egret by Anne McKinnell

Using rim lighting and non-distracting backgrounds (learned doing portraits) in wildlife photography.

Try sports photography

The second thing on my list of things I wasn’t interested in photographing was sports. So I headed up to the local university where there is always something happening on a weekend, and found a rugby game to photograph.

I learned something very important that day. You see, I don’t know a thing about rugby, and it quickly became obvious that I couldn’t capture a special moment, because I had no idea when it was going to happen. I had to sit and watch, and try to figure out how the game worked, and only then did I have a chance.

I didn’t make any good images that day, but I sure learned a lesson that I apply to wildlife photography all the time. I sit and watch, and learn the behaviour of the animals before I try to photograph them. That way I can anticipate what is going to happen, and come away with a photograph that captures a special moment in time.

Lion and cub at Ngorongoro Crater, Tanzania by Anne McKinnell

Anticipating the special moments in wildlife photography.

How about architecture photography?

Another thing on my list at the time I did this exercise was architecture, but after playing with it for awhile I discovered a new passion. Now I love photographing architecture. One thing I learned is that most architectural subjects are inherently symmetrical, and while the rule of thirds works, symmetrical compositions work really well too. Now I apply this principle to other subjects that are inherently symmetrical as well.

Yucca at White Sands National Monument, New Mexico by Anne McKinnell

Using a symmetrical composition in landscape photography.

Challenge yourself! Give yourself time to play! Remember that this is an exercise just for you, to help you explore your craft and grow as a photographer.

Exploring subjects is just one way to accelerate your photography learning curve. (It’s a great way of finding your niche too!) For more ways to speed up the learning curve, check out my eBook “8 Ways to Accelerate Your Photography.”

googletag.cmd.push(function() {
tablet_slots.push( googletag.defineSlot( “/1005424/_dPSv4_tab-all-article-bottom_(300×250)”, [300, 250], “pb-ad-78623” ).addService( googletag.pubads() ) ); } );

googletag.cmd.push(function() {
mobile_slots.push( googletag.defineSlot( “/1005424/_dPSv4_mob-all-article-bottom_(300×250)”, [300, 250], “pb-ad-78158” ).addService( googletag.pubads() ) ); } );

The post Get Outside Your Photography Comfort Zone to Learn and Grow as a Photographer by Anne McKinnell appeared first on Digital Photography School.


Digital Photography School

 
Comments Off on Get Outside Your Photography Comfort Zone to Learn and Grow as a Photographer

Posted in Photography


How Black and White Photography Taught Me to Capture Emotion

04 Sep

My first experience with photography was a black and white film photography class in high school. We were given one roll of film per week, and told to, “go capture something compelling.” Though learning photography on a fully manual, very low-tech camera, resulted in a bit of a learning curve when I switched over to digital (hello metering modes, back button focus, and exposure compensation!), one of the most important things that my first black and white photography class taught me was the importance of capturing emotion in photography.

capture-emotions-2

Ted Grant–an amazing Canadian photojournalist–has said, “When you photograph people in color, you photograph their clothes. But when you photograph people in black and white, you photograph their souls!” While I’ve certainly seen my fair share of color photos that beautifully capture emotion, I also relate to Grant’s words very much.

capture-emotions-4

Black and white strips the image down to the basics

In a sense, black and white photography strips away all the extras, and forces you to think about things like contrast and emotion, in a way that isn’t always be as crucial when you’re shooting in color. Whether intentional or not, it can be easy to use color and props as a sort of crutch in photography. I love a photo of a toddler licking a giant multi-colored lollipop just as much as the next person. But, the tendency with images like that can sometimes be for the color and the whimsy to carry the image, rather than the emotion.

Starting in black and white photography taught me that it’s not enough to have perfectly matched clothing, or a brightly colored chandelier hanging from a tree in the woods. It’s not enough to stand someone in front of a beautiful backdrop and tell them to smile. Compelling photographs do more than that. They give you a glimpse into what the person being photographed is feeling right at that moment.

capture-emotions-6

Black and white only challenge

If you’ve never had experience shooting exclusively in black and white, I highly suggest giving it a try. Most digital cameras have the capacity to shoot black and white right in camera (consult your manual). It’s a really great exercise to occasionally force yourself to do so. Grab a friend, and go shoot 50 or 100 frames in black and white.

I do recommend shooting black and white right in camera for this exercise, because it completely eliminates color from the equation. It’s a quick and easy way to see which images are successful in black and white, and which are not. It also helps train your brain to “think” in black and white. Once you’ve completed this quick exercise, take a look at your images. Are your black and white images compelling? If not, one of the reasons may be that the images are lacking emotion.

capture-emotions-1

Getting emotion into your images

As a photographer, there’s no exact science to capturing emotion in your photos. Some children will be naturally expressive, and some couples will be naturally affectionate. Other people may need a bit of help getting comfortable enough to express themselves in front of the camera. As always, building rapport with the people that you’re photographing, before and during the session, will go a long way in helping them relax and feel comfortable.

capture-emotions-8

Your subjects will mirror you

In my experience, the key to capturing emotion, is helping your subjects to actually feel the same emotion that you’re trying to capture during the session. One simple and effective tip is to remember that humans naturally mimic the emotions and attitudes of those around them. As the photographer, if you come into the session laughing and joking around, it’s much more likely that the people you’re photographing will start to laugh and joke around as well.

So, keep a book of silly knock knock jokes tucked into your camera bag, or come prepared to tell a funny story that happened to you recently. If you’re having a bad day, make the conscious decision to leave it behind for the duration of your session, and even fake it until you make it if you must. It really does make a difference!

Couples

capture-emotions-3

When photographing couples, asking them to tell you a story about how they met, got engaged, or the best part of their wedding, are all topics that can help cultivate real emotions during your session. Ask the question, then wait and watch carefully, with camera in hand, for interaction between the couple during the story.

Kids

For kids, try asking them about their favorite movie, TV show, or the best part of their week so far. If you don’t have children around the same age as the ones you’re photographing, it’s a good idea to ask the parents in advance about the sorts of books, songs, TV shows, movies, and/or sports their children enjoy so that you can prepare thoughtful questions that will allow them to talk about the things they love.

capture-emotion-9 capture-emotions-7

Get them laughing

As funny as it sounds, another method that’s really effective in making people laugh is to actually ask them to fake laugh. Ask them to be silly and to give you their biggest and deepest Santa Claus chuckle. It will feel weird and awkward, but the end result is usually that everyone around starts genuinely laughing, and that’s the moment you’re waiting for as the photographer.

During family sessions, getting mom or dad to play along and be over-the-top silly, almost always helps elicit laughs from the kids. It’s a good idea to tell the parents in advance that you’re going to ask them to be silly and ridiculous, but that if they just roll with it, the kids will smile and laugh in a natural way. They won’t if you just say, “look here and smile!”

capture-emotions-5

Summary

I no longer shoot exclusively in black and white, nor am I arguing that black and white photography is the only way to capture emotional images. Ones that capture real emotions will be compelling whether they are processed in color or in black and white. However, upon reflecting on my personal journey in photography, I can clearly see that beginning with black and white photography forced me to prioritize emotion in my images over color, props, and styling, in a way that has strengthened my photography overall.

Do you struggle with capturing genuine emotion in your images, or does it come easily for you? Do you have any other tips about capturing emotion to share? Please share in the comments below.

googletag.cmd.push(function() {
tablet_slots.push( googletag.defineSlot( “/1005424/_dPSv4_tab-all-article-bottom_(300×250)”, [300, 250], “pb-ad-78623” ).addService( googletag.pubads() ) ); } );

googletag.cmd.push(function() {
mobile_slots.push( googletag.defineSlot( “/1005424/_dPSv4_mob-all-article-bottom_(300×250)”, [300, 250], “pb-ad-78158” ).addService( googletag.pubads() ) ); } );

The post How Black and White Photography Taught Me to Capture Emotion by Meredith Clark appeared first on Digital Photography School.


Digital Photography School

 
Comments Off on How Black and White Photography Taught Me to Capture Emotion

Posted in Photography


Weekly Photography Challenge – Stripes

03 Sep

Finding unique photography subjects can be a challenge sometimes. Contrast draws attention, and stripes carry inherent contrast. Like this images of stripes.

Evelyn Berg

By Evelyn Berg

Weekly Photography Challenge – Stripes

Leading lines is a great element of composition to use to create dramatic images. Taking that to the extreme and you have stripes!

This week for the photography challenge you need to find or create some stripes to photograph. That might be painted striped on a road or crosswalk (be safe please), blinds or light coming through them, shadows or a fence, etc.

Use your thinking cap and add a little creativity and see what you can come up with for stripes.

Tanakawho

By tanakawho

Mike Steinhoff

By Mike Steinhoff

Tuncay

By Tuncay

Share your images below:

Simply upload your shot into the comment field (look for the little camera icon in the Disqus comments section) and they’ll get embedded for us all to see or if you’d prefer upload them to your favourite photo sharing site and leave the link to them. Show me your best images in this week’s challenge. Sometimes it takes a while for an image to appear so be patient and try not to post the same image twice.

Share in the dPS Facebook Group

You can also share your images on the dPS Facebook group as the challenge is posted there each week as well.

Evelyn Berg

By Evelyn Berg

Evelyn Berg

By Evelyn Berg

Maria Keays

By Maria Keays

VanessaC (EY)

By VanessaC (EY)

googletag.cmd.push(function() {
tablet_slots.push( googletag.defineSlot( “/1005424/_dPSv4_tab-all-article-bottom_(300×250)”, [300, 250], “pb-ad-78623” ).addService( googletag.pubads() ) ); } );

googletag.cmd.push(function() {
mobile_slots.push( googletag.defineSlot( “/1005424/_dPSv4_mob-all-article-bottom_(300×250)”, [300, 250], “pb-ad-78158” ).addService( googletag.pubads() ) ); } );

The post Weekly Photography Challenge – Stripes by Darlene Hildebrandt appeared first on Digital Photography School.


Digital Photography School

 
Comments Off on Weekly Photography Challenge – Stripes

Posted in Photography


5 Things Newbies Should Know About Getting Started in Photography

01 Sep

Getting started in photography can be quite scary. We all start by investing in a DSLR, and think we are going to take amazing images. In reality it is a bit more difficult, because if it was easy… well everybody would sell prints, quit their day job, and live off photography.

Just like any art, photography has to be learned, and practiced – a lot. It is a trial and error process, we all start at the bottom and build our way up.

5 tips photography 1

If your images do not look like you imagined them, then try a different approach. Just do something. Einstein said that the definition of insanity was doing the same thing over and over and expecting different results.

#1 – Gather information and knowledge

Photography is the best hobby you could have, but it is a lot of hard work. I personally don’t believe in talent. The first tip I can give you is to absorb as much information as possible. How do you do that ? Well you have so many free resources on the internet, the only need to take advantage of it. Since you are reading this, then you’re on the right track.

By resources, I mean articles online, magazines, and YouTube tutorials. You can learn so much in less than 30 minutes. One other tip I can also give is to check multiple resources for the same topic.

5 tips photography 2

Read photography magazines. They have amazing stories and tutorials.

For example you want to learn how take portraits – don’t read or watch only one tutorial. The more you research, the more you will learn, because sometimes one article won’t give you all the answers to your questions, but another article will.

You should also anticipate. What I mean by that, is to learn about it, before trying to do something.

For example, say you want to buy a new DSLR. You should learn how to use it before you actually buy it, read reviews and tutorials. If you are planning a trip to the sea, then learn seascape photography before travelling.

5 tips photography 3

Photography is spending hours and hours on research.

#2 – Try all kinds of photography

This brings me to my second tip: don’t focus on only one type of photography. Of course, if you like portrait photography then do that. What I’m trying to say, is that you should explore all the possibilities, before focusing on only one type of photography. Try to add variation by learning about macro photography, landscapes, portraits, wildlife, etc.

5 tips photography 4

Try super sports car photography. It’s so fun, just protect your ears.

You may be surprised by the results you get, and if you never try, you will never know if you actually like photographing birds or not. From my experience, the more you learn, the more you’ll be able to do things. It’s better knowing how to do five things than only one. Starting photography and only wanting to take portraits is not the right mindset. It’s just like food, if you don’t try new food, you will never know if you like it or not.

#3 – Photography is an investment

The third thing you should know is that photography is a big investment. You will need to buy lenses, camera bodies, tripods, and filters, which will end up being quite expensive. If you are not smart with your decisions, then your bank account can end up in tears.

It may seem confusing when I tell you to try different types of photography, but then warn you about buying too much gear. If you want to try macro photography, don’t buy a macro lens right away. Just buy extension tubes (or close-up filters) until you know if you are serious about macro. They cost a lot less, and increase your focusing distance dramatically.

5 tips photography 5

A very inexpensive $ 30 ND Filter.

For filters, you can buy $ 20 Neutral Density filters for your landscape photography. Of course they won’t have the same quality as the professional ones, but it’s a good place to start.

I started photography with a phone, then moved up to an entry level DSLR, and now I own a full frame camera. But, it took me four years to go from my phone to full frame, so don’t go out and buy the best DSLR ever, find something that will suit where are you starting first.

5 tips photography 6

Phone photography

Make smart decisions, a normal kit lens is enough to get started in landscape photography.

#4 – Post-processing is a good thing

The fourth tip is about post-processing. Most beginner photographers underestimate the power of post-processing. It can make or break an image, that’s why my first point is important. You have to learn and fail in order to succeed – once you learn how to master software like Lightroom and Photoshop, your photography will become more like a process, because you will automatically think about post-production.

5 tips photography 7 5 tips photography 8

For post-production, I also recommend learning about the same topic from different sources. There are a lot of different ways to do the same thing, you just have to find which way works the best for you. It doesn’t matter how you do it, the important thing is the end result.

For example, for dodging and burning an image I prefer using a curves layer with a mask, but that doesn’t mean I don’t know how to dodge and burn using grey layers.

Post-production can be quite scary because there are so many tools, but once you master a certain software, you will be able to work on your worst shots and get the best out of them.

I would say that post-production is almost indispensable. There are a lot of photographers who want natural photography, but that doesn’t exist. Your colours will get interpreted anyway, it’s up to you to decide if you want your camera to do it automatically, or if you want to take control over everything.

5 tips photography 9

Simple snapshot with my own interpretation of colors.

#5 – Good photographers create depth in their images

The last thing you should know is that photography is all about creating depth. There are many ways of creating depth; you can do it with light and contrast, colours, movement, a solid composition, and with depth of field.

You should aim to have at least one of these elements in your images. If you can mix all these elements in one image, then your result will be even better.

With light and contrast you can play around with shadows, and dodging a burning. The main purpose is to have uneven lighting on purpose – try to avoid flat lighting. Some area should be lighter than others, and some darker. You also want to know which lighting conditions will give you the best results. For example, if you like shooting landscapes then you will want to know that you get the best light during the magic hour (blue hour).


Composition is the most important thing, try to use a foreground, middle ground and a background. The rule of thirds is also really useful to frame your subject in a pleasing way.

5 tips photography 10

With colours, the main purpose is to have tones that go together. Always look at your colour palette and see what works best. This is quite difficult to do, but one tip I can give you, is that when the colours do not look good, convert your image to black and white.

For movement, try long exposures, they are a good way to create a surreal images.

The last thing is depth of field. This is very important if you’re taking portraits, the amount of background blur can completely change an image. If you want to learn about it here’s another article I wrote: How to Achieve Background Blur or Bokeh where I explain three easy ways to achieve a nice bokeh.

IMAGE 2

Summary

So if you’re just getting into photography, consider these five things as you begin your journey. Learn everything you can from multiple sources, try different kinds of photography to see what you like, don’t get caught in gear envy, don’t be afraid of post-processing and remember to add depth to make more interesting images.

Are you further along in photography? What other advice would you offer to new photographers? Please share in the comments below.

googletag.cmd.push(function() {
tablet_slots.push( googletag.defineSlot( “/1005424/_dPSv4_tab-all-article-bottom_(300×250)”, [300, 250], “pb-ad-78623” ).addService( googletag.pubads() ) ); } );

googletag.cmd.push(function() {
mobile_slots.push( googletag.defineSlot( “/1005424/_dPSv4_mob-all-article-bottom_(300×250)”, [300, 250], “pb-ad-78158” ).addService( googletag.pubads() ) ); } );

The post 5 Things Newbies Should Know About Getting Started in Photography by Yacine Bessekhouad appeared first on Digital Photography School.


Digital Photography School

 
Comments Off on 5 Things Newbies Should Know About Getting Started in Photography

Posted in Photography


Tips for Doing City Photography from Above

30 Aug

Many cities have places with great panoramic views of the city vistas from above. For example, in the U.S., New York has the top of the Empire State Building or Rockefeller Center. Similarly, Chicago has observation decks in both the Willis Tower (formerly the Sears Tower) and the Hancock Building. In Europe, there are great views of Paris from Montparnasse Tower. You can capture London from the top of St. Paul’s Cathedral, or now the observation deck of the Shard (the new tallest building in London), and the list goes on.

Madrid, Spain, from the Circulo des Bellas Artes

The Gran Via in Madrid, Spain, from the Circulo des Bellas Artes

But these shots present certain challenges. Often tripods are not allowed. Sometimes you have to shoot through glass. And when should you go? What settings should you use? In this article, we’ll work through these issues so you can get great shots from these city overlooks.

What? I Can’t Use My Tripod?

Sometimes you are allowed to use a tripod, and sometimes not. Each building has its own rules. To make things even more interesting, some buildings seem to have different rules depending on when you visit (or perhaps the mood of the security guards). So you will need to be prepared to shoot without a tripod.

If you go up the building in the middle of the day, that might not matter very much. There will be enough light to support a fast shutter speed, and you can get away with hand holding. But if you are shooting in dim light or at night, you will want to use a longer shutter speed. That will require some sort of stabilization.

Paris from the Eiffel Tower

Paris from the Eiffel Tower

In almost every case, you will find something available at the top of the building to support your camera. Sometimes you have to resort to using the the floor (which can work if you press your lens up against the window), but often there is some sort of shelf to use. Many buildings have plexiglass panels at the top, with small gaps between them, and you can hold your camera against the sides of the panels to steady it.

Shooting Through Glass

Oftentimes, you are photographing from an enclosed structure surrounded by glass. That means reflections are going to be a problem. I wish there was a magic bullet to solve this problem, but there isn’t. I do have a few tips to help you minimize the reflections though.

Chicago from the Willis Tower (formerly known as the Sears Tower)

Chicago from the Willis Tower (formerly known as the Sears Tower)

Before resorting to that, see if there is any way to shoot unobstructed. As mentioned above, some buildings have plexiglass panels on top. There are often carve-outs in the panels that you can shoot through, which you should definitely use. If not, check to see if you can shoot between the panels. That will avoid the whole issue with reflections.

If not, you are going to need to take steps to minimize reflections. Let’s start with one that should be obvious (but I always see people doing it). Do not use your camera’s flash. First of all, the flash is useless in this situation. Everything will be too far away for the flash to have any effect. More importantly, the flash will cause reflections and glare in the glass.

Next, hold your camera directly up against the glass. This will minimize reflections. In addition, make sure your point of focus is set far away from you and that your camera is not trying to focus on the reflections.

Panama City, Panama from the Intercontinental Hotel (shot through glass)

Panama City, Panama from the Intercontinental Hotel (shot through glass)


If you are on your own (like in a hotel room or somewhere you can set up), then make sure all the inside lights are off, and use the curtains to block any light coming from the room. Some photographers hold a black cloth against the window with a hole cut in the center to shoot through. If you have the opportunity and time to prepare, that is the best option.

Usually, you will find yourself in a public place where such steps are not possible. In that case, just use your body or hand to block any areas of glare or bright light.

After that, just take a few pictures and see if there are any reflections in the final result. Zoom in on your LCD to take a close look. If you find any reflections or glare, just adjust your position slightly to try to get it out and shoot again. You would also try a polarizing filter.

London from the top of St. Paul's Cathedral

London from the top of St. Paul’s Cathedral

What Camera Settings Should I Use?

Your exposure settings will depend on how much light is available at the time you are shooting. While I obviously cannot give you exact exposure settings, I can give you a few ideas to maximize your light and get the best exposure.

First and foremost, remember that you don’t need to use a small aperture for these shots because you do not need a deep depth of field. Your focus will be set at infinity. Nothing in your shot will be within 50 feet/15 meters of you. Too see this for yourself, take a look at the distance scale on the top of your lens (assuming it has one). It will show you that everything farther than about 30 feet/10 meters is set at infinity (in fact, the focus will be at infinity even sooner for wide angle lenses). There will not be a wide range of distances in your shot that require a deep depth of field. Therefore, if you find yourself in need of more light to create your exposure, widening the aperture is a good place to start.

Chicago from the Hancock Building

Chicago from the Hancock Building

Your other two exposure settings (shutter speed and ISO) will depend entirely on whether you can use a tripod. If you cannot use a tripod, raise the ISO until your shutter speed is fast enough to hand hold. Remember you can cheat a little bit and use a slower shutter speed than usual by propping your camera on something. But blur from movement during the exposure will ruin the picture. Remember that digital noise can be fixed in post-processing, but camera shake cannot. Raise the ISO as much as you need to get a supportable shutter speed.

If a tripod is allowed, things are much easier when it comes to exposure settings. You can use as slow a shutter speed as you want. That will also allow you to reduce the ISO, and use a smaller aperture as well. In fact, you may want to keep the the ISO low and the aperture small to force the camera to use a long shutter speed. That will capture traffic trails, create some movement in the clouds, and other effects.

New York, from Rockefeller Center (Top of the Rock)

New York, from Rockefeller Center (Top of the Rock)

Finally, consider bracketing your photos, especially if you are shooting at night. The scene before you will contain bright lights and dark portions. This will challenge your camera’s dynamic range. Even if you will never use any sort of blending or HDR, you might be pleasantly surprised by the overexposed or underexposed images.

Making a Composition from a Jumble of Buildings

When you are up high in a building overlooking the city, you will have a great view, but that doesn’t necessarily mean a great picture. The key to success is creating a composition out of what is before you, in other words to generally find a center of interest. That is, find something to key on that will anchor the picture. Sometimes it is obvious – like when you are staring at the Empire State Building or the Eiffel Tower – but other times it isn’t. You’ll just have to find something to center your picture on. It could be a building that stands out, perhaps a bridge, or even a leading line.

In doing so, don’t overlook the usual compositional rules. Start with the Rule of Thirds. Put your horizon line on either the top third or the bottom third. After that, you might consider placing an important, or prominent, feature on one of the vertical third lines.

Paris from the Montparnasse Tower

Paris from the Montparnasse Tower

Just these two concepts – ensuring you have a center of interest and following the Rule of Thirds – will go a long way to ensuring success. After that, you can find lines, shapes, and forms to work around. Experiment with different focal lengths and angles. Remember that nothing is moving so you can keep experimenting all you want.

When to Go

Deciding when to go capture you city view from above will have more to do with how the pictures turn out, than anything else you do. Avoid going in the middle of the day. Travel schedules don’t always allow that, but that is the worst time for these pictures.

If you are going to a public observation deck, when you can go will be limited by the opening hours of the building. They are generally not open early enough for sunrise, so that won’t be an option. Almost all locations are open for sunset and a few hours of darkness, so that is often an option.

London from the tower of Westminster Cathedral

London from the tower of Westminster Cathedral

The best time to go is just before sunset. You will have the best of all worlds with one ticket. You can capture the sunset and twilight. After that, just wait around for a little while for some night shots.

But in any case, go. It is an easy way to get great shots of whatever city you happen to be visiting. Get up high and capture the city from above.

googletag.cmd.push(function() {
tablet_slots.push( googletag.defineSlot( “/1005424/_dPSv4_tab-all-article-bottom_(300×250)”, [300, 250], “pb-ad-78623” ).addService( googletag.pubads() ) ); } );

googletag.cmd.push(function() {
mobile_slots.push( googletag.defineSlot( “/1005424/_dPSv4_mob-all-article-bottom_(300×250)”, [300, 250], “pb-ad-78158” ).addService( googletag.pubads() ) ); } );

The post Tips for Doing City Photography from Above by Jim Hamel appeared first on Digital Photography School.


Digital Photography School

 
Comments Off on Tips for Doing City Photography from Above

Posted in Photography


3 Tough Photography Client Questions and How to Answer Them

29 Aug

Ah yes, the priceless questions photographers get from their clients. If your work involves human subjects, you may occasionally feel that you’re locked in the eternal struggle of staying true to your vision, while still making your clients happy. Any of these photography client questions sound familiar:

  • Can we have all the RAW files?
  • Wouldn’t a jumping shot near this cliché tourist destination be awesome?
  • Can’t you just fix this in Photoshop?

DPS 3

While it may feel like you can only have either one or the other, I’m convinced you can have it both ways: happy, well-served clients, and a strong standard for how you shoot and share your own work. Here’s how we tackle the three tough client questions we get most often:

1 – Can you to deliver all the RAW files in the final package?

I KNOW, I KNOW, when you get this question your first instinct may be to delete their email and never respond again (or am I the only dramatic one?). But this one is an easy one to tease apart. The goal here is to get to the bottom of what the client really wants. So, before you launch into your response, ask them leading questions to find out real the root of the issue.

DPS 1

The first possibility is one of sheer numbers: Do they fear that they won’t get enough images? Are they hoping to go through them to make sure that you really did select the best ones for them? This is the time to gently explain your process to them. Explain ow you carefully cull, deliver only the best image, and spare them the misery of pawing through all the shots of their double chin or half-closed eyes.

Client education is key

Conversely, they might not even know what a RAW file actually is. Some clients think that RAW is a synonym for unedited, and want to try out their own iPhoto tricks on their images later. Now’s the time to lay down some education about the advanced programs that can open RAW files, including the fact that they require quite a bit of training to use them correctly. Normally that’s more information than the average client has ever gotten about photo editing, and they are able to reframe their question to express their needs more specifically.

DPS 5

This is also a good time to throw out the old “It’s industry standard to not provide RAW files, so that we photographers can provide you with the exact final product that is worthy of your time.” They wouldn’t walk into a chef’s kitchen and judge their work based on the raw meat in the fridge, the same holds true for their photographer.

Once you hear their concerns, and educate them through your process in a professional and kind way, most sane clients realize that asking for the RAW files just isn’t realistic.

2 – Wouldn’t this jumping shot in front of the Space Needle be awesome?

DPS 6

Okay, the late 90s jumping shots aren’t our bag either (if it is yours though, I hope the clients who ask for this are finding you!). However, we make it a firm policy to never say no to a client’s idea. Not only does it throw off the energy of the shoot, it makes the client feel that they are separated from the process of creating images; that their ideas aren’t as good as the professionals. In short, it makes them feel bad, and a subject who feels bad will never create the bomb images you want.

Always say yes client ideas

We always say yes if a client has an idea for an image that we aren’t particularly into. It lets them know they’re an integral part of the process, and encourages everyone to get creative with the shoot. Not only that, but sometimes we think a particular pose or scene isn’t going to look good, and it ends up being an awesome idea that we never would have come up with ourselves. That kind of discovery is golden. Never think that your style is so entrenched that you can’t hear new ideas, and always be ready to learn and experiment when you have clients who are in it with you.

DPS 7

All that being said, sometimes you do end up with shots that are just not you, not your look, and not something you necessarily want to represent you. Guess what? You get to choose what you share, how you blog, what your social media will show off, and how you want your portfolio to look. Deliver the client’s images with a smile, make the client happy, and share the ones you love on your own pages. There’s no rule that you have to share every image from a shoot. Select your favorites and move along.

3 – Can’t you just fix this in Photoshop?

I will be the first to admit that I’m abnormally flattered when people assume that I’m a Photoshop wizard, just because I’m the photographer. Thanks for the vote of confidence, guys.

DPS 4

However, the reality is that I am fairly abysmal at it. I would rather spend my time out shooting, than inside glued to my computer, making people look ten pounds thinner, or removing the billboard from behind the venue. Just no thank you.

So when the Photoshop question comes up, I try to manage of expectations ahead of time, as much as possible. When the parent at a wedding asks very seriously if you’ll make them look thinner, I respond with something like, “There’s absolutely no need for Photoshop on a perfect day like today. Everyone here loves you and wants to keep you just as you are. Also, no.”

If there’s an object that could easily be moved from a scene (garbage cans, a sign, trash) then I make a point to move them before shooting, so the client is aware that not everything is post-production magic.

Follow this general rule of thumb

DPS 2

Our general policy for retouching in Lightroom is that if something will not be there in two weeks (e.g. a bruise, zit, etc.) we’ll do a light erase, no problem. If there are larger things that the client requests be handled in Photshop, like the mother of the groom who insisted that I edit all the photos of her scowling in the background (you can’t make this stuff up) we let them know individually that we do have a per-image rate for Photoshopping. If they want to go ahead with it, fine by me, but it’s a friendly reminder to clients that Photoshop isn’t a magic button that photographers press behind the scenes to turn every Furbie into a Victoria’s Secret model.

Plan moving forward

The moral of the story is to be kind, ask questions, and get to the bottom of what your clients really want when they ask you these dreaded things.

Then let me know in the comments below. What questions do you dread? How do you respond to them? I’d love to hear how you tackle the tough ones.

googletag.cmd.push(function() {
tablet_slots.push( googletag.defineSlot( “/1005424/_dPSv4_tab-all-article-bottom_(300×250)”, [300, 250], “pb-ad-78623” ).addService( googletag.pubads() ) ); } );

googletag.cmd.push(function() {
mobile_slots.push( googletag.defineSlot( “/1005424/_dPSv4_mob-all-article-bottom_(300×250)”, [300, 250], “pb-ad-78158” ).addService( googletag.pubads() ) ); } );

The post 3 Tough Photography Client Questions and How to Answer Them by Laura Sullivan appeared first on Digital Photography School.


Digital Photography School

 
Comments Off on 3 Tough Photography Client Questions and How to Answer Them

Posted in Photography


6 Still Life Photography Mistakes and How to Avoid Them

28 Aug

As a beginner photographer, I still remember experimenting with random photo-shoots of colorful fruits, leave,s and flowers. Believe it or not, capturing the inanimate has always been one of our favorite pass time activities as photographers. But, not anymore! With so much demand for lively product shoots in magazines and websites, still life photography is a million dollar business today.

Capturing the still life is a very unique photographic experience. With your subject being inanimate, you get enough time to play with all the creative controls on your camera, and keep snapping until you end up with a shot to which you say – Woah! That is the perfect one.

Rikaguite 225579 compressed

Capturing still life photographs seems easy, but breathing life into those inanimate objects requires a great deal of creativity and obviously, a lot of practice. Should you mess up with the lighting and framing, it’s fairly easy to end up with an austere shot of that already dull bunch of keys. Here are the six most common mistakes that photographers make while doing still life photography.

Still Life Mistake #1 – Improper Lighting

Rule one, your subject needs to be well lit up. After-all, it is the central theme of your photo-shoot. Using natural light generally gives superb results.

In case you are shooting inside a room, you need to be a little creative with the way light falls on your subject. One of the most common mistakes is to photograph your subject under full blown artificial light sources like LEDs and fluorescent tube-lights. Why? Because such light sources add a color temperature to your subject that makes it look less natural. Moreover, they make your inanimate object look just what they are – lifeless and boring.

Rikaguite 846293 compressed

Solution

Place your subject near a natural light source, such as an open window. Get creative with the light falling on the subject. Does it look amazing when light falls on it from the side? Or does it look more attractive with light falling on it from behind? I personally find natural light from the side to look more attractive. The subtle shadows and visible details under the natural light, sparks interest in the otherwise dull object.

Rikaguite 552047 compressed 1

Another important thing to take care of is the intensity of the natural light falling on your subject. Avoid shooting it under direct sunlight. The bright sunlight may washout the otherwise delicate details and colors of your subject. As a remedy, in case you really need to shoot under broad sunlight, use a light modifier such as a soft-box (or translucent reflector) that will help produce an overcast effect, and will direct the light to softly diffuse over your subject.

Still Life Mistake #2 – A Distracting Background

Placing your subject on a backdrop full of distractions is another potential mistake in still life photographs. Your product being the central theme, deserves all the attention. Therefore, you need to ensure that the background is free from all such distractions. By this, I mean anything that shifts your attention from the main product to the backdrop behind it. For example: capturing a vase of flowers in a background of a home furniture shot.

Rikaguite 336911 compressed 1

Solution

Choose a wall that’s simple, and painted with a plain color. If your wall is not plain, use a piece of white chart paper to cover the wall, so that it doesn’t interfere with your main subject. One more tip, if you’re shooting your product over a table top, again make sure that the table is neatly covered with a white piece of cloth or paper. The main idea is to focus as much attention on your product as possible.

Still Life Mistake #3 – Not Using a Tripod

In case you need to shoot your subject with longer shutter speed, you need to make sure that you do not end up with a blurry shot. An example under this kind of setup can be a decorative indoor water fountain. You may want to use longer shutter speed to capturing the motion of the falling water. So in this case, it makes any sense to use a tripod because even a slight camera shake can result in a blurry shot.

With a tripod, you may also wish to use a wireless remote control for shutter release. This makes sure that not even the slightest of the shakes can blur your photo. Alternatively, in case you do not have a remote control shutter release, you can capture the shot by setting your camera on the 2-second timer mode.

Still Life Mistake #4 – Improper Framing

Rikaguite 534724 compressed 1

Framing your shot helps focus and arrest the attention of the viewers on your main subject. While framing the shot, determine whether the subject fills the frame in a way that draws the required attention. Utilize the rule of thirds, move around and experiment with different possible angles. You’ll definitely come up with that perfect shot.

Still Life Mistake #5 – Not Experimenting

Rikaguite 486072 compressed

Being fastidious really pays off when it comes to taking still life photographs for professional and commercial purpose. When you’ve finished setting everything up for the shoot, take a few good clicks and randomize the entire setup – shift your subject to a little different location, add something to the scene that complements the subject, use different angles and lights, try framing the shots all over again. You’ll end up with a unique piece of art each time.

Still Life Mistake #6 – Wrong Choice of Lens

Still life photography is all about creating depth, and bringing out the subject in a way that directly interacts with the viewer. How will you achieve this level of focus? By utilizing the shallow depth of field.

This works great with subjects with high levels of detail such as: flowers, leaves, and fruits. Under this kind of a setup, you will want to come closer to your subject, set the camera to AV mode (Aperture Priority), and keep the focal length as long as possible. A telephoto lens is your best bet for this kind of a setup, because the longer focal length compresses perspective, helping your subject stand out more.

Rikaguite 868377 compressed 2

This doesn’t mean that only telephoto lenses work for still life photography. If you wish to bring out, and focus on the delicate details of your subject, go ahead and shoot with a telephoto lens. On the flip side, if you wish to capture everything on your table top setup, you would be fine with a either a standard 50mm lens or a wide angle.

How do you capture the still life?

What has been your experience with still life photography? Do you have any other useful tip to share? We look forward to your thoughts and suggestions on this article.

googletag.cmd.push(function() {
tablet_slots.push( googletag.defineSlot( “/1005424/_dPSv4_tab-all-article-bottom_(300×250)”, [300, 250], “pb-ad-78623” ).addService( googletag.pubads() ) ); } );

googletag.cmd.push(function() {
mobile_slots.push( googletag.defineSlot( “/1005424/_dPSv4_mob-all-article-bottom_(300×250)”, [300, 250], “pb-ad-78158” ).addService( googletag.pubads() ) ); } );

The post 6 Still Life Photography Mistakes and How to Avoid Them by Rika Guite appeared first on Digital Photography School.


Digital Photography School

 
Comments Off on 6 Still Life Photography Mistakes and How to Avoid Them

Posted in Photography