RSS
 

Posts Tagged ‘Photography’

dPS 12 Days of Christmas: Save up to 85% on Some Great Photography Training and Tools

13 Dec

NewImage

In 24 hours our dPS 12 Days of Christmas celebration begins!

This is when you’ll score HUGE savings on our most popular products and MASSIVE discounts with some very special dPS partners so that you have the best resources to reach your photography goals for 2017.

It works just as you’d expect. Over 12 days, we’ll announce a brand new deal every 24 hours.

To get notified of each deal just add your email address below.

(function(d, s, id) {
var js, fjs = d.getElementsByTagName(s)[0];
if (d.getElementById(id)) return;
js = d.createElement(s); js.id = id;
js.src = “//forms.aweber.com/form/33/1265496433.js”;
fjs.parentNode.insertBefore(js, fjs);
}(document, “script”, “aweber-wjs-srgepzl3e”));

Each day you’ll receive an email from us with a special offer from us or a partner.

Many of our deals are offering 70% to 85% off the normal price.

We’ll also share the deals on our Facebook page, but the best way (so you don’t miss a thing), is to sign up for the emails above.

On signing up you’ll also get a special free downloadable gift from dPS – our mini-guide and checklist for photographing the holidays.

NewImage

Our annual 12 days of Christmas is the most anticipated event on the dPS calendar – and this year is going to be bigger than ever! It starts in less than 24 hours and is always lots of fun. We hope you’ll join us.

We can’t wait to unveil the first deal with you…just 24 hours to go!

Again – to get the deals via email just sign up below.

(function(d, s, id) {
var js, fjs = d.getElementsByTagName(s)[0];
if (d.getElementById(id)) return;
js = d.createElement(s); js.id = id;
js.src = “//forms.aweber.com/form/33/1265496433.js”;
fjs.parentNode.insertBefore(js, fjs);
}(document, “script”, “aweber-wjs-srgepzl3e”));

googletag.cmd.push(function() {
tablet_slots.push( googletag.defineSlot( “/1005424/_dPSv4_tab-all-article-bottom_(300×250)”, [300, 250], “pb-ad-78623” ).addService( googletag.pubads() ) ); } );

googletag.cmd.push(function() {
mobile_slots.push( googletag.defineSlot( “/1005424/_dPSv4_mob-all-article-bottom_(300×250)”, [300, 250], “pb-ad-78158” ).addService( googletag.pubads() ) ); } );

The post dPS 12 Days of Christmas: Save up to 85% on Some Great Photography Training and Tools by Darren Rowse appeared first on Digital Photography School.


Digital Photography School

 
Comments Off on dPS 12 Days of Christmas: Save up to 85% on Some Great Photography Training and Tools

Posted in Photography


How to Convert a Camera to Infrared for Black and White Landscape Photography

13 Dec

Get Andrew’s The Black and White Landscape eBook bundle at 30% off now over at Snapndeals, only until December 20th (AUS time).

Do you have an old digital camera that you don’t use much anymore? If you do, one way to make it useful again is to convert it to infrared for black and white landscape photography.

How to Convert a Camera to Infrared for Black and White Landscape Photography

Why would you want to do this? For me, the main reason is that it gives me a new way of working in black and white. Yes, infrared converted cameras can give you color images as well as black and white ones, but for me, the strange colors are more of a gimmick than a useful tool. With black and white, it’s different. In infrared photography, the tonality of the photo changes, giving you new and interesting ways to capture the landscape.

What is infrared photography?

The simple (non-technical) explanation is that infrared light is a kind of invisible light, formed of electro-magnetic waves that are undetectable to the human eye.

Human skin reflects a lot of infrared light, so does vegetation. These these things appear very bright in black and white infrared photos. Inanimate objects, such as roads, stones, and buildings, don’t reflect as much infrared light and can look remarkably similar to regular black and white photos when photographed in infrared.

How to Convert a Camera to Infrared for Black and White Landscape Photography

What is an infrared conversion?

Digital camera sensors are sensitive to ultraviolet (UV) light and infrared light as well as the visible wavelengths of light. Because of this, digital cameras have filters to block both ultraviolet and infrared light. The infrared filters on most cameras do let some infrared light through, but not enough to affect the image.

During an infrared conversion the technician removes the infrared filter so that the sensor can now see infrared light, and replaces it with a filter that blocks visible light, so the sensor can only see and record infrared. The process isn’t complex, and because of that isn’t particularly expensive. If you are technically minded you could even try it yourself. There are videos on YouTube that explain how. You just need the right tools and parts.

The usual caveats apply. If your camera is still under warranty that will be voided, and bear in mind that you can damage your camera if you don’t know how to do it properly. You should only attempt it if you know what you are doing!How to Convert a Camera to Infrared for Black and White Landscape Photography

The infrared conversion on my camera was done by Protech Photographic in the UK (they also handle orders from mainland Europe). LifePixel and Kolarivision are US based companies that also do infrared conversions. If you know of any other reliable companies, please let us know in the comments section below.

Types of infrared conversion

There are several types of infrared conversion. These are some of the most common.

Full spectrum conversion

The UV and infrared filters are removed. Your camera’s sensor can now see UV and infrared light as well as visible light. You control the effect by using filters (on the lens) to block different amounts of visible and/or infrared light. This may be interesting if you like to experiment, but the disadvantage is that you need to buy filters, adding to the cost. Filters also block light, so you need to use slower shutter speeds or higher ISOs to compensate.

infrared-camera-conversions-6

720nm conversion

The technician places a filterin front of the sensor that blocks all wavelengths under 720nm (nm = nano-meter and is a unit of measurement equivalent to 1/1,000,000,000 meter used for measuring wavelengths of light). In other words, it only lets infrared light through. It’s the type of conversion best suited for landscape photography, giving you a color image that’s easy to convert to black and white. This is probably the most common type of infrared conversion and the one you should go for unless you have a specific need for one of the other types.

830nm conversion

The sensor is fitted with a filter that blocks all wavelengths under 830nm. This gives a more intense type of infrared effect, with very little color. It’s ideal for dramatic black and white landscape photography.

Some companies offer different types of conversion in addition to these, so check their websites for details.

How to Convert a Camera to Infrared for Black and White Landscape Photography

Camera types and infrared conversions

When it comes to converting digital SLRs to infrared there is something you need to bear in mind. Infrared light focuses at a different point to regular light. Your camera is calibrated to focus visible light, which means that if you try to focus on something using a wide aperture (which gives less depth of field) then your focus may not be accurate. It is possible to calibrate a lens to focus accurately with infrared, so check with the company that is going to handle your infrared conversion for details.

But for landscape photography, where most photographers use wide-angle lenses and stop down the aperture for sharp focus, it is not so important. If your camera offers some sort of contrast detect autofocus in Live View (where the camera focuses by taking a reading from the sensor rather than using the camera’s phase detection autofocus system) then you will have accurate focusing in Live View (just not when using the viewfinder).

infrared-camera-conversions-5

Mirrorless advantage

Mirrorless cameras have an advantage over digital SLRs for infrared because they are able to focus from the camera’s sensor. That means that if you plan to hand-hold the camera and look through the viewfinder to take photos (rather than put the camera on tripod and use Live View) then a mirrorless camera is an excellent choice as you won’t get any focusing errors.

Another advantage of cameras with electronic viewfinders is that when you set the camera to its black and white mode the camera displays the scene in black and white in the viewfinder. This makes it easy to visualize how the photo will come out in black and white with the infrared effect applied.

infrared-camera-conversions-7

Lenses and infrared photography

Another consideration is that not all camera lenses are suitable for infrared photography. Older lenses in particular tend to show a hot spot at the center of the frame, especially at wide aperture settings. Before converting your camera you should check and see if there are any reported problems with the lenses you intend to use with it. Kolarivison have a comprehensive list of infrared compatible lenses.

Infrared filters

Another option, if you don’t want to convert a camera to infrared, is to buy an infrared filter that blocks out visible light and just lets infrared light reach the camera’s sensor. The Hoya R72 filter is a great option and not very expensive, especially if you have smaller lenses. It blocks wavelengths below 720nm, just like a 720nm infrared conversion.

Note: shop for the Hoya R72 Filter on Amazon.com or on B&H Photo’s site. 

infrared-camera-conversions-8

You may remember that digital cameras have a filter that blocks most infrared light. An infrared filter is opaque, so the result is that not much light reaches the sensor. In effect, an infrared filter is a strong neutral density filter as well as an infrared filter.

The strength varies according to the camera used, but don’t be surprised if you lose 16 stops of light. A tripod is essential. Luckily, this is not necessarily a bad thing for landscape photographers. If you are prepared to work within this limitation then an infrared filter could be for you.

infrared-camera-conversions-11

Test first

The infrared filter on some cameras is so strong that no light reaches the sensor at all. This makes using an infrared filter impossible. There’s a simple way to check to see if your camera’s sensor can detect infrared light. Do this test first before buying an infrared filter.

Set your camera to Live View and focus on the end of a television remote control while pushing down one of the buttons. If you can see a light (the infrared communication in action) then it is sensitive enough to infrared light to use with a filter. It’s probably easiest if you ask somebody to hold the remote control for you.

Black & white infrared landscape photograph

This photo (below) was taken with a Hoya 72 filter. It required a shutter speed of 180 seconds, even though the cliffs were lit by the light from the setting sun.

Black & white infrared landscape photograph

All the other photos in the article were taken with a Fujifilm X-Pro 1 converted to infrared.

Conclusion

That concludes our overview of converting cameras to infrared for black and white landscape photography. Have you tried this yourself? What camera did you have converted and how did it work out? Please let us know in the comments.

Get Andrew’s The Black & White Landscape eBook bundle at 30% off now over at Snapndeals, only until December 20th (AUS time).

googletag.cmd.push(function() {
tablet_slots.push( googletag.defineSlot( “/1005424/_dPSv4_tab-all-article-bottom_(300×250)”, [300, 250], “pb-ad-78623” ).addService( googletag.pubads() ) ); } );

googletag.cmd.push(function() {
mobile_slots.push( googletag.defineSlot( “/1005424/_dPSv4_mob-all-article-bottom_(300×250)”, [300, 250], “pb-ad-78158” ).addService( googletag.pubads() ) ); } );

The post How to Convert a Camera to Infrared for Black and White Landscape Photography by Andrew S. Gibson appeared first on Digital Photography School.


Digital Photography School

 
Comments Off on How to Convert a Camera to Infrared for Black and White Landscape Photography

Posted in Photography


Time’s running out to enter 2017 Sony World Photography Awards

11 Dec

2017 Sony World Photography Awards Last Call for Entries

Cash prizes and Sony gear are on the line as deadlines for entry to the Sony World Photography Awards are approaching. With a little less than a month left to enter, the competition has released some early contenders. Head to the competition website to learn more, and take a look at some of the early standouts here.

Panopticon #1 The prison San Vittore Milan. © Jelena Kostich, Serbia, Entry, Open competition, Architecture, 2017 Sony World Photography Awards

The project named after social theory Panopticon, originally developed by French philosopher Michel Foucault in his book Discipline and Punish. The ìPanopticonî refers to an experimental laboratory of power in which behaviour could be modified, and Foucault viewed the Panopticon as a symbol of the repressive, disciplinary society of surveillance. I made photographs of the prison San Vittore in Milan, Italy. To show the boundary that is standing between those ones outside the prison, and those once inside the prison. That those outside the prison can’t actually see what is going on behind the walls of the prison.

2017 Sony World Photography Awards Last Call for Entries

Untitled. © Adit Merkine, Israel, Entry, Open competition, Wildlife, 2017 Sony World Photography Awards

I was laying on the bank of Kerkini Lake, Macedonia, Greece on 27 January 2016. This lake is known as the most important wintering habitat of the Dalmatian pelican in Europe. At this time of the year the Dalmatian pelicans are in their breeding plumage. It was in the mid-morning. A group of five Dalmatian pelicans came closer and closer, probably looking for some fish from the fisherman on shore. They stopped for a short time in a lined row staring at my camera, like posing for a family shot. It was very exciting and I took the shot.

2017 Sony World Photography Awards Last Call for Entries

GOTHS. © Peter Dench, UK, Entry, Open competition, Portraits, 2017 Sony World Photography Awards

Two Goths share a portion of chips on Southend promenade, UK.

2017 Sony World Photography Awards Last Call for Entries

Malaysia Independence Spirit. © Mohamed Shaiful Azre Allias, Malaysia, Entry, Open competition, Motion, 2017 Sony World Photography Awards

Hundred of student hoisted flags during 59th Malaysia Independence Day celebration at Merdeka Square on 31 August 2016 in Kuala Lumpur, Malaysia. Malaysia celebrates its 59th National Day on August 31. I took this photo using a telephoto lens and wait for the show to begin.

2017 Sony World Photography Awards Last Call for Entries

Waiting a Next Turn. © Mankichi Shinshi, Japan, Entry, Open competition, Culture, 2017 Sony World Photography Awards

After I heard that it is “one of the most crowded places in the world,” I decided to visit the beach in Qingdao, China. But Qingdao in May was chilly and foggyóit was still off-season. I could sense that this place had at one point been full of exuberant people, and in the subsequent emptiness, I felt a sense of loss.

This photo is the scene of wedding photo sessions around the sea. Although It was very bad weather, maybe they had to do that because of the full reservations of the popular spot in China.

2017 Sony World Photography Awards Last Call for Entries

Al Ain City. © Andrzej Bochenski, Poland, Entry, Open competition, Architecture, 2017 Sony World Photography Awards

2017 Sony World Photography Awards Last Call for Entries

Lava, Etna. © Placido Faranda, Italy, Entry, Open competition, Nature, 2017 Sony World Photography Awards

Solidified lava river vs Forest – Volcano Etna, Sicily. Aerial view from a drone.

2017 Sony World Photography Awards Last Call for Entries

Feeding Frenzy. © Noel Guevara, The Philippines, Entry, Open competition, Wildlife, 2017 Sony World Photography Awards

Wolf Snappers feeding on plankton. German Channel, Ngemelis Island, Republic of Palau. Taken in miso soup visibility but one of my favorite shots from the trip. I took this while the three Mantas we were shooting were making their huge U-turn for another pass at the cloud of plankton. This was at around 3 meters and the energy was electric all around.

2017 Sony World Photography Awards Last Call for Entries

X-flies. © Peter Csakvari, Hungary, Entry, Open competition, Still Life, 2017 Sony World Photography Awards

Who killed the flies?

Articles: Digital Photography Review (dpreview.com)

 
Comments Off on Time’s running out to enter 2017 Sony World Photography Awards

Posted in Uncategorized


Tips from the Sports Photography Pros to Help You Get the Money Shots

07 Dec

The pros know that sports photography is a fast paced and intense profession. You have to be quick. Really quick! Catching the moment is one-third intuition, a third skill, and the rest is pure luck. Accept it now! Sometimes the most amazing shot you capture will just be pure luck.

sports photography action

Capture the emotion and the intensity of the players. These shots sell.

There are things you can do to increase the odds of success. If you’re like me and you want to earn part of your income from sports photography then there are some tips and tricks you need to learn. Sports photography is a lot more than just pointing the camera at an athlete and holding down the shutter button.

Camera grip is key

The sheer speed of sports photography requires a specialized grip. You have to be able to zoom in and out quickly as well as switch from landscape to portrait (horizontal to vertical) orientation. If you are strong enough to handhold your lens then this technique is for you.

sports photography black and white

For a magazine a shot in black and white can create a lot of drama.

Loosen up the tripod collar on the lens so it slides easily. Hold the lens by placing the base of the collar in the palm of your hand and grip the zoom ring with your fingers. As you rotate your camera from portrait to landscape your camera will automatically change focal lengths. It’s quick and convenient and it’s also pretty easy to maneuver. You can then adjust the orientation of your camera back to portrait or landscape by releasing your grip on the zoom ring. It takes practice to perfect this method but once you’ve got it the process becomes very quick.

The same basic premise can be used if you shoot with a monopod. Instead of using your hand as the base for monopod ring you’re going to handhold the zoom ring and turn from portrait to landscape in the same way.

sports photography

In this case, the image is about the struggle and expressions on the kid’s faces. The scene tells a story about struggle.

Money shots

I quickly learned that certain types of shot sell while other shots are nice but they don’t sell. The images that generally fall into one of the following three categories:

sports photography action hockey

At tournaments, these types of shots sell to parents.

1) The Celebration

Images of athletes celebrating are so popular because they show the height of emotion and sacrifice. The recent shot of the World Series winning Chicago Cubs is a fantastic example.

While this isn't an epic celebration parents love this type of shot.

While this isn’t an epic celebration parents love this type of shot.

2) The profile shot

In this instance, you capture an image of an athlete in action. The shot shows the shape of their body as they compete and there is little to distract from the perfection of their form.

sports photography girl running

The water droplets are my favorite part of this shot even though most people won’t notice them.

3) The unusual occurrence shot

These are the unique moments in sports that only happen once. You won’t catch these types of shots very often but when you do it’s a fantastic adrenaline rush.

sports photography expressions

In this case, the facial expression and position of the girl’s arms and the ball make for a unique shot.

I’m not saying that other shots won’t sell but the likely hood is far less. Sometimes the image falls into a category of its own. If you try to capture the majority of your images from these three categories then you are well on your way to earning an income from sports photography.

Don’t give up

Sports photography is an incredibly tough world to try and break into. You have to work so hard to get noticed. It’s also incredibly challenging and very physical. Be prepared for the ride of your life. You will have to push your camera and your body to their limits to keep up with these talented and very physical athletes.

So use every trick or tip you can find to rise above the rest and take those memorable shots. Leave any of your tips below and also share your favorite images.

Capturing goalies is a real challenge. Usually, there's a lot of traffic in front of them.

Capturing goalies is a real challenge. Usually, there’s a lot of traffic in front of them.

googletag.cmd.push(function() {
tablet_slots.push( googletag.defineSlot( “/1005424/_dPSv4_tab-all-article-bottom_(300×250)”, [300, 250], “pb-ad-78623” ).addService( googletag.pubads() ) ); } );

googletag.cmd.push(function() {
mobile_slots.push( googletag.defineSlot( “/1005424/_dPSv4_mob-all-article-bottom_(300×250)”, [300, 250], “pb-ad-78158” ).addService( googletag.pubads() ) ); } );

The post Tips from the Sports Photography Pros to Help You Get the Money Shots by Erin Fitzgibbon appeared first on Digital Photography School.


Digital Photography School

 
Comments Off on Tips from the Sports Photography Pros to Help You Get the Money Shots

Posted in Photography


How to do Lifestyle Newborn Photography

07 Dec

Very little is as precious to photograph as a newborn baby. Those tiny toes, the fluttering eyelashes, the way they grasp their parents’ fingers. These are the moments that parents want to record and keep forever. There are two schools of newborn photography – I think it is fair to say that they exist on one spectrum.

Lifestyle Newborn Photography

On one far end of the spectrum is what we’ll call traditional newborn photography. This is an incredibly popular style with so many beautiful applications. It is usually posed photographs on a natural background, oftentimes with props or staging, i.e., baby in a basket photography. It’s gorgeous and gives a client’s baby a chance to be a model for the day.

On the other end of the spectrum is newborn lifestyle photography. This is more like photojournalism in that it is designed to tell a story, to document the baby and his or her interactions with the family, pets, environment, etc. These tend to be shots that are more real and less staged, designed to capture the essence of having a newborn.

Lifestyle Newborn Photography

Since these exist on one spectrum, you can do a combination of elements from each. But in this article I’m going to focus on newborn lifestyle photography and its advantages.

What setup is required for lifestyle newborn photography?

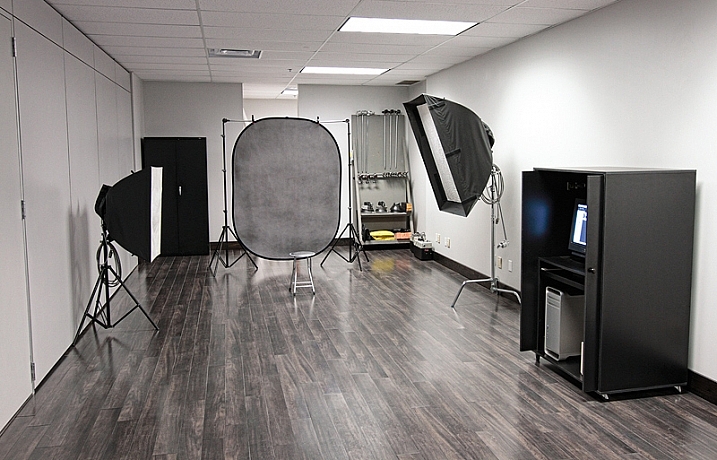
In order to set up a home studio for traditional newborn photography, you will likely need quite a bit of gear. At the bare minimum, you will need a beanbag or posing device, some backgrounds, lighting, and dedicated space. Most traditional newborn photographers also have an array of props, also – wraps, hats, tiaras, etc. This can cost thousands in setup costs alone, in addition to your other obvious expenses, like camera, lenses, gallery delivery system, etc.

With newborn lifestyle photography, the entire setup is much simpler. If you are entirely on the lifestyle end of the spectrum (which would take place entirely in a client’s house or destination), you would really just need your camera and maybe a flash. Natural light is highly recommended, however, as flash startles a baby and can look harsh in a home. A better solution for reflecting natural light where you want it to go would be to use a reflector.

Lifestyle Newborn Photography 9

Before the session

You’ve got a client! So, what’s next? Here are a few things to do prior to the appointment.

Communicate with the client

Call or email and find out what type of shoot they envision, how they want the end product to look. First of all, this will tell you if you have the appropriate gear or props, and if it is practical for you to procure them if you don’t. It will also tell you on what end of the traditional versus lifestyle spectrum they reside so that you can plan the shoot and what you might want to bring. You can research poses and photo ideas based off of this information for inspiration, too – Google Images can be your friend.

Lifestyle Newborn Photography

Setting the stage

I find it’s helpful to give the clients some recommendations for setting the atmosphere of their home for newborn photos. Babies like it warm (especially if you’re going to have them stripped down to minimal or no clothing), so I recommend either an overall temp of 78 to 82 degrees F (25.5 – 27.5C), or a space heater nearby. White noise is helpful if there are older siblings or other ambient noises around.

If they want lots of sleepy shots, keeping the baby up for two hours or so prior to the shoot will help ensure that you can get some shots of the little one napping. Sleepy shots and traditional newborn photographs tend to work best when the baby is 10 days old or younger, also, just because they’re still in that cuddly newborn stage. However, if they are okay with true lifestyle photos or if the baby is awake, you can fudge that 10-days rule and the amount of awake time some.

Awake Lifestyle Newborn Photography

Do your best boy scout impression

Be prepared! Some good things to take (or ask if they have ahead of time) are a step-stool or ladder for shots from above, a reflector or (less ideally) a flash, and a spare charged battery for your camera. You may also want to take a change of clothes for yourself, just because babies are prone to all kinds of emissions!

There are also extra optional things you can make that may fall more on the traditional end of the spectrum. A newborn beanbag can be great for getting those up-close posed shots. Here is a great article on how to create your own backdrop stand. You can also take blankets and other backdrops, wraps, props, etc., as much as you can fit in your vehicle.

At the session

Every photographer conducts their photo shoots differently, so you will have your own system and style that works. Here are just a few basic recommendations.

Go where they go

Lifestyle Newborn Photography

Newborn lifestyle photography is all about their life at the time the baby is a newborn (not to belabor the obvious). If the family is home from the hospital, take photos there. Get shots in the crib or bassinet (if they use one), in the master bed cuddled with mom, curled up on the couch, by the front door, etc. Outdoor shots (if seasonally appropriate) can also be fun keepsakes.

However, different babies’ realities might look different. For example, sometimes complications happen and a baby has to be in the NICU for an extended period of time. Those babies still deserve to be captured in their beauty and innocence during the newborn period, so move the shoot there. Capture the reality of what the NICU life is like for the family, as those will be memories that they will have for a lifetime.

Lifestyle Newborn Photography 4 5

Find the light

With on-location photography, you obviously want to capture picturesque and beautiful places of the home or place you are photographing. However, just as important as the composition of the photo is the lighting. Try to find areas that are particularly well-lit if you are using natural light. Have a parent hold the baby near a large window, especially if it’s indirect lighting. The time of day may greatly affect what works best in a given environment, too. If there is limited natural light and you don’t want to, or can’t use artificial lighting, you may need to shoot at a higher ISO, too. Just keep in mind that this can result in additional graininess in your photo.

Lifestyle Newborn Photography

The tiny details

One of the great thing about newborn lifestyle is that it’s like being a photojournalist, so you catch everything. The curl of a newborn’s eyelashes, the shedding skin on baby’s feet, the umbilical stump. These are things that are precious and fleeting, so you can capture them to remember. You also aren’t confined to just sleeping photos when you do newborn lifestyle photography, so you can get shots of the baby crying, or yawning. Use your imagination.

Capturing the intimacy of the moment through angles

Newborn lifestyle photography is very personal and intimate to the clients’ lives (unlike a studio, which is obviously a separate space). You then, in turn, can capture them having private moments. Cuddling on a bed, holding baby’s hand, feeding the baby – these are all special moments ripe for photo making. You can also use unique angles to preserve that privacy, but to give the appearance of peeking in on the moment. Catch some shots with their reflection in a mirror, through a cracked door, through the bars of a crib, etc. (see below left)

Lifestyle Newborn Photography 10

The human element

Babies need relationships. They thrive on interpersonal connections, so catch some shots of each parent (if relevant) individually with the baby, and together with the child. Incorporate siblings (if applicable) into group shots, or alone with the baby. Don’t bother posing them. Let them love on their new sibling, and just have your camera ready. Even involve pets if it is safe to do so and desired. (see above right)

Edit Patiently and Carefully

You likely took many photos, so take the time to be choosy about what images to edit. Slightly overexpose shots to get a creamier, softer look. Black and white conversions lend themselves very well to newborn lifestyle photography. I usually offer both a color and black and white version of every photo I present to the clients so that they can choose their own favorites. Make sure to keep your white balance consistent, but one of the wonderful things about a newborn is that you don’t really need to do much to make them look gorgeous.

Conclusion

Do you do lifestyle newborn photography? Please share any addition tips and tricks you have and also your images in the comments section below.

googletag.cmd.push(function() {
tablet_slots.push( googletag.defineSlot( “/1005424/_dPSv4_tab-all-article-bottom_(300×250)”, [300, 250], “pb-ad-78623” ).addService( googletag.pubads() ) ); } );

googletag.cmd.push(function() {
mobile_slots.push( googletag.defineSlot( “/1005424/_dPSv4_mob-all-article-bottom_(300×250)”, [300, 250], “pb-ad-78158” ).addService( googletag.pubads() ) ); } );

The post How to do Lifestyle Newborn Photography by Angie DeWaard appeared first on Digital Photography School.


Digital Photography School

 
Comments Off on How to do Lifestyle Newborn Photography

Posted in Photography


A shot in the dark: Casio launches 1.9MP camera for ultra low-light photography

06 Dec

Casio has announced an addition to the Exilim Outdoor Recorder line with a model that is designed to take stills and video in extremely dark conditions. The EX-FR110H uses a back-illuminated CMOS sensor with 1.9 million extra-large pixels that Casio claims are better at recording light when there isn’t much of it around.

Aimed at cavers, campers and those who enjoy a night safari the camera offers ISO 51200 and new noise suppression circuitry as well as a high speed EXilim engine HS ver.3.

Samples from Casio compare images taken with the FR110H with those taken on the company’s regular cameras

The camera features an f/2.8 lens with the angle of view of a 20mm on a full frame camera, while the 3in LCD screen has a special setting for working in very low light. The camera follows the detachable format of the FR series so that the body and the lens unit can be separated for remote capture with feature control maintained via Bluetooth. Casio says the camera is drop-, water-, freeze- and dust-proof, and that it can record Full HD video at 30fps and with 3 stops of stabilization.

Despite the camera’s low-light credentials, in the product information Casio helpfully points out that you can’t take pictures in the absence of light.

The Casio Exilim FR110H will be an Asia-only product, and will be released for sale on 9th December. For more information see this translation of the Casio product page.

Articles: Digital Photography Review (dpreview.com)

 
Comments Off on A shot in the dark: Casio launches 1.9MP camera for ultra low-light photography

Posted in Uncategorized


Weekly Photography Challenge – Minimalism

06 Dec

Viewing some images that are good examples for minimalism is the first step. Then it’s your turn.

Weekly Photography Challenge – Minimalism

This one should be fairly simple (pun intended). Find something and shoot it in the most minimalistic way possible. Put less into your image. Get closer and crop tight. Another way to think about it is to simplify. Like these:

Kim Seng

By Kim Seng

A_Peach

By A_Peach

Andy Smith

By Andy Smith

Put on a long lens, use a wide aperture, maybe even try a close-up or macro lens. Watch the edges of your image. Remove anything that doesn’t add to the photo. Keep it simple.

Share your images below:

Simply upload your shot into the comment field (look for the little camera icon in the Disqus comments section) and they’ll get embedded for us all to see or if you’d prefer, upload them to your favorite photo-sharing site and leave the link to them. Show me your best images in this week’s challenge. Sometimes it takes a while for an image to appear so be patient and try not to post the same image twice.

Share in the dPS Facebook Group

You can also share your images on the dPS Facebook group as the challenge is posted there each week as well.

Gafa Kassim

By gafa kassim

Daniel Sallai

By Daniel Sallai

Bertram Nudelbach

By Bertram Nudelbach

googletag.cmd.push(function() {
tablet_slots.push( googletag.defineSlot( “/1005424/_dPSv4_tab-all-article-bottom_(300×250)”, [300, 250], “pb-ad-78623” ).addService( googletag.pubads() ) ); } );

googletag.cmd.push(function() {
mobile_slots.push( googletag.defineSlot( “/1005424/_dPSv4_mob-all-article-bottom_(300×250)”, [300, 250], “pb-ad-78158” ).addService( googletag.pubads() ) ); } );

The post Weekly Photography Challenge – Minimalism by Darlene Hildebrandt appeared first on Digital Photography School.


Digital Photography School

 
Comments Off on Weekly Photography Challenge – Minimalism

Posted in Photography


Tips to Help You Find the Right Photography Studio Space to Rent

06 Dec

Are you looking to up your portrait, fashion, or product game but are running out of space in your home? Maybe you are on the cusp of having a steady stream of clients but small droughts here and there have you worried about signing a lease for more space. Or perhaps you are curious about what you could do with some professional equipment and a dedicated space? Renting photography studio space is often a perfect solution for any of these situations and more.

Ravenshoe Group

By Ravenshoe Group

Casual studio renting sounds ideal; no need to own extra gear, no monthly rent, no lighting/heating/insurance costs. But it can have some drawbacks if you’re not careful. Here are some tips to help you find the right photography studio space to rent.

What do you need in a photography studio?

Some studios have all the gear you would ever need; C-Stands, professional strobes and modifiers, and a gaggle of backdrops. Others will give you a heated space and an outlet, that’s all.

The right photo studio equipment can make magical images

Image by Erik Söderström/Flickr

Your first step before renting a space is to figure out just what you need. Having a list of items you require will help you in the next phase (searching for your studio) as you file through website after website.

For those totally new to studio shooting, I’d suggest finding a class to help you become familiar with handling the expensive gear in a studio space. I know I was intimidated the first time I was given an Alien Bee light and told to set it up.

If you are only showing up with a camera, you’ll need to make sure the studio has it all. But if you like your strobes (yes, you can use a typical camera flash, with or without modifiers, in a studio) maybe you only need a dry space with a variety of backdrops.

Resources for your search

Google Maps works as a starting point but shouldn’t be your only stop. I use search terms like “Photo Studio”, but you have to be careful how you use the word “studio” otherwise you’ll start getting all kids of apartment listings.

Getting setup for a photo studio shoot

Image by Heisenberg Media/Flickr

I’ve found Yelp to be useful for all the normal Yelpy reasons, but also because the photos help me get a sense of the space.

Facebook groups are another excellent place to find space but make sure you do a little research first. Chances are someone has already asked your question, so search the results in your area. These groups are often run by local photography clubs, so a search for the likes of “Nashville Photography Club” will point you in the right direction. I find that photography club members are usually quite helpful finding most any photo resource when I am visiting a new location as well. They can also be a good source if you are looking for a mentor or assistant to help in the studio.

Knowing what you’re getting

Read the studio’s website very carefully if when in doubt, ask. Keep your emails that describe what you’re getting and what’s not included. Know when you can show up and if they will let you tour the space before your reservation date.

Lots of space can be an advantage when renting photo studio space

Image by jm3/Flickr

This is just a business transaction; don’t be afraid to ask for what you need. If you want a fog machine, ask if one is included. Will a changing room be available? Will remote triggers for any flashes be included or should you bring your own? If you like a specific modifier for the lights, make sure they can provide it.

These all seem like simple things but they will trip you up if you make an assumption that turns out not to be true. If the space has plenty of daylight but no good draperies to cover the windows, you should know this before you show up with clients.

Be prepared

Know which gear is available when renting a photo studio

Image by a kindly stranger/Flickr

Assume nothing. While the list of items may be complete and you received guarantees in email, be prepared to have vital items with you or a backup plan in place. What if the backdrop color you want got damaged just before your session by another patron? What if you really need music for your shoot (such as playback for a music video) and their system breaks?

Have backups and backup plans. Carry extras of your own gear, as much is as practical, in case you are the cause of a breakage. Such as a lens cracks or your own wireless transmitter freaks out. You’ve spent time and money on the shoot; make sure it is not scrubbed because of something that can be backed up.

Depending on the level and importance of the shoot, you may want to rent backup gear if there isn’t a shop close to your rental studio. Studio space can range from $ 30-$ 150 per hour or more, and if you are bringing in hair and makeup professionals or maybe a model or two the costs add up. It’s worth the slight extra cost to make sure that money isn’t wasted because you ran out of batteries or gaffers tape or can’t find your 50mm lens.

Conclusion


Renting studio space to expand your skills and resources is a great option as your photography grows. Getting in with a local group, via Facebook or an internet search, is a great way to find space and people who might be good mentors. Make sure you know what you are getting yourself into and what is and is not, included with the rental.

Most of all, have fun shooting!

googletag.cmd.push(function() {
tablet_slots.push( googletag.defineSlot( “/1005424/_dPSv4_tab-all-article-bottom_(300×250)”, [300, 250], “pb-ad-78623” ).addService( googletag.pubads() ) ); } );

googletag.cmd.push(function() {
mobile_slots.push( googletag.defineSlot( “/1005424/_dPSv4_mob-all-article-bottom_(300×250)”, [300, 250], “pb-ad-78158” ).addService( googletag.pubads() ) ); } );

The post Tips to Help You Find the Right Photography Studio Space to Rent by Peter West Carey appeared first on Digital Photography School.


Digital Photography School

 
Comments Off on Tips to Help You Find the Right Photography Studio Space to Rent

Posted in Photography


Shooting in the Cold – Tips for Winter Photography

06 Dec

Just because it’s cold doesn’t mean you should stop doing any photography. Winter photography can be magical, here are some tips for shooting in the cold to help you.

The weather

It’s easy to go out and shoot when the weather is nice and the weather God’s smile down with big fair sky grins. Summer, Spring, and especially Autumn are popular times for photography because there’s no shortage of photo opportunities – comfortable photo opportunities at that.

Winter Photography 2

Seasons change, though, but that doesn’t mean that you have to be discouraged, or worse, stop shooting just because winter comes around and the weather outside turns cold.

Winter Photography 5

That’s not to say that making photographs in winter doesn’t come with its own set of problems – well, not really problems. Let’s just say that making photos in the colder months is more challenging than it is when at warmer times of the year.

Winter Photography 4

There are still quite a few reasons to venture out into the cold with your camera. Here are a few tips that will help you stay productive (and safe) during those frosty months between Fall and Spring.

Winter Photography 7

Protect yourself

All the know-how and skill in the world won’t do you much good if you’re too cold and miserable to actually make photographs. Always be aware that you and your well-being, above all else, is the most important thing to protect while shooting in frigid temperatures, doing winter photography.

Winter Photography 6

Keep a well updated on current and future weather conditions and dress accordingly. Wearing layers of clothing will help you adjust your body temperature based on your level of activity while shooting, to prevent sweating which can lead to hypothermia. Protect your face, hands, and feet.

Winter Cold Weather Protection

This includes wearing warm gloves that allow good finger movement so you don’t have to constantly remove them before using your camera. Also, a face wrap or scarf goes a long way to shield your face from the wind but also to protect your camera from freezing condensation of your breath. More on that oh so wonderful phenomena a little later.

Protect your batteries

Yes, we all know most of our cameras are electric and that means batteries. Batteries are essentially little chemical reactors that produce electricity. High or low temperatures affect batteries to varying degrees (temperature humor). Cold batteries discharge themselves faster than do warm ones. So basically, the cold temperatures faced when shooting winter photography can drain your batteries.

Winter Batteries

Take this into account and bring an extra battery or two when you venture out for some chilly winter shooting. If you can, carry your extra batteries in your pocket or closer to your body to keep them warmer and working more efficiently. There have been times when I was working in single digit temperatures when I put my battery in the camera only immediately before composing in order to maximize my shooting time.

Don’t breathe

Well, breathe of course, just not on your camera, or lens for that matter. Your breath contains a relatively high amount of moisture and heat. When the temperature outside drops, the very air you exhale can spell disaster for your winter photography. If you breathe directly onto your camera or lens condensation forms. Just like blowing your breath on a mirror. When it gets cold (below freezing), that condensation WILL FREEZE. This means that lens elements can glaze over with your own brand of self-made ice and viewfinders become unusable.

Winter Frozen Camera 2

To combat this frosting effect, remember to never carry your lenses close to your body and never blow your breath on them. For that matter don’t hold them in your hand for extended amounts of time because this too will warm them up which can lead to condensation. When composing your images, it’s a good idea to hold your breath.

Winter Frozen Camera 1

It only takes a few moments and will prevent a buildup of frost and ice on your camera.

Understand your tripod

I remember one late afternoon of shooting, a few winters back on a secluded stretch of a mountain stream. I was standing in the water with my tripod, making exposures until the light was gone and then packed everything up to drive back to the hotel. The temperatures were hovering somewhere in the lower twenties F (-4 to -6c). I carried my gear inside but left the folded tripod in the car.

The next morning found me beating on my now frozen tripod with a boot in order to break it free of the ice caused by leaving a wet tripod in a car overnight.

Winter Photography 1

I learned my lesson that day and there are a few things you can do to prevent my mistake from happening to you.

Winter Frozen Tripod

If your tripod gets wet, do what you can to remove as much water as possible. This will reduce the ice buildup. If you find yourself unable to store your tripod in a warmer place after shooting, leave the legs fully extended and be sure not to lock the legs. By leaving the legs unlocked you will have a much easier time making the tripod usable if it does freeze.

Leaving the legs fully extended may be cumbersome but it will keep water from being introduced further into legs. The key factor to remember when using your tripod in winter is that water and moisture are your enemies. Anything you can do to reduce the moisture will help ensure your tripod functions more easily when things get really cold.

Summary

Cold weather shooting and winter photography can be an extremely rewarding experience. Winter time transforms landscapes and locations into dream-like scenes different from any other time of year.

Winter Photography 3

Be sure you understand how to cope with the winter temperatures so you can protect yourself and your gear. Here’s a quick recap of the things you can do to make your sure your winter shooting is a great experience.

  1. Dress yourself according to the conditions. If you feel you’re not adequately prepared don’t risk it.
  2. Bring extra batteries and keep them warm. Carry your batteries close to you in order to extend their life.
  3. Don’t breathe on your gear. The condensation from your warm breath will freeze on your camera and lens. Hold your breath when composing.
  4. Be mindful of your tripod. If it gets wet the water may freeze making it difficult to use. Keep it as dry as possible.

Please share any other winter photography preparedness tips in the comments below. Of course, share your winter images as well!

googletag.cmd.push(function() {
tablet_slots.push( googletag.defineSlot( “/1005424/_dPSv4_tab-all-article-bottom_(300×250)”, [300, 250], “pb-ad-78623” ).addService( googletag.pubads() ) ); } );

googletag.cmd.push(function() {
mobile_slots.push( googletag.defineSlot( “/1005424/_dPSv4_mob-all-article-bottom_(300×250)”, [300, 250], “pb-ad-78158” ).addService( googletag.pubads() ) ); } );

The post Shooting in the Cold – Tips for Winter Photography by Adam Welch appeared first on Digital Photography School.


Digital Photography School

 
Comments Off on Shooting in the Cold – Tips for Winter Photography

Posted in Photography


Kodak Ektra ‘photography’ smartphone goes on sale

06 Dec

A few weeks ago, Kodak announced the Ektra, its new ‘photography first’ smartphone designed to appeal to mobile photographers. Designed to look like a camera as much as a phone, the Ektra includes a 21MP rear camera, a 13MP front camera (for the obligatory selfies you’re sure to take), and features such as an F2.0 maximum aperture, phase detect autofocus and optical image stabilization. Additionally, Google’s Snapseed editing software is integrated directly into the photo gallery app.

The Ektra is set to go on sale in Europe on December 9 at a cost of €499, but The Irish News is reporting that it has already gone on sale at a pop-up store in London’s Soho neighborhood for anyone who wants to get their hands on it a bit early.

What do you think about the Ektra? Is this a have-with-you-all-the-time camera that you would use? Tell us in the comments.

Articles: Digital Photography Review (dpreview.com)

 
Comments Off on Kodak Ektra ‘photography’ smartphone goes on sale

Posted in Uncategorized