Everywhere you go in the world today you will find someone, or many people, with their phones in the air capturing what they see. They all have a camera with them because they have their phones and can photograph everything they see. Phones have had cameras in them for quite a few years now, but slowly over the years they have improved and today many phones are amazing.
However, when you look around at phone photography there does seem to be an emphasis on iPhones and their cameras. While this article isn’t about which is better, it is important to remember that when it comes to phones Android has a much larger market share and therefore more people are using Android phones and their cameras.
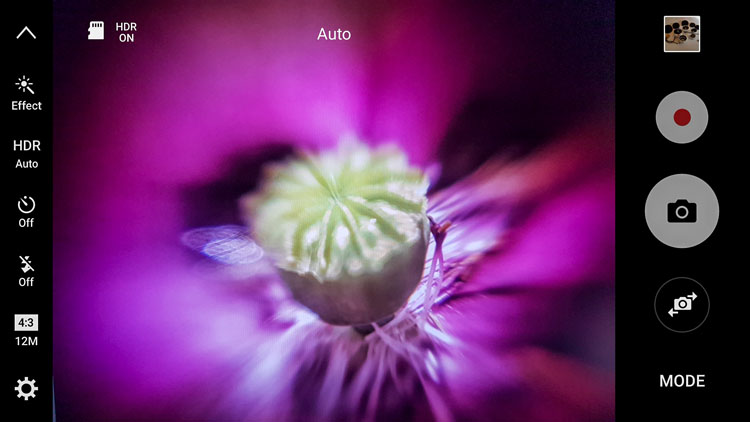
The camera user-interface for the Samsung Galaxy S7 Edge.
For this reason, this article is going to concentrate on Android photography, as there are many who seem to think that everything is made for the iPhone and if they don’t have one they are missing out. That really isn’t the case and since beginning research for this article so many things have come to light.
Phone
Not all phones are the same, nor are the cameras in them. If you are serious about using it for photography, then it would be good to do your research and get one that has a good camera.
While Samsung has had some bad press lately over the debacle with the release of the Note 7, it has to be remembered they are still good phones and the camera in the Galaxy S7 Edge is said to be the best still camera (inside a mobile phone) on the market. It is very clear and the photos have an amazing quality. This is the one I use.
Get one that matches your needs
The camera, as with most, has lots of different settings and modes so you can find one that will be suitable for the type of photography that you are shooting.
If your intention is to use your phone a lot for photography then be sure to select on that has what you need. Also, make sure that it is easy to get the photos from the phone to your computer. In today’s phone market, though, that is easier than ever.
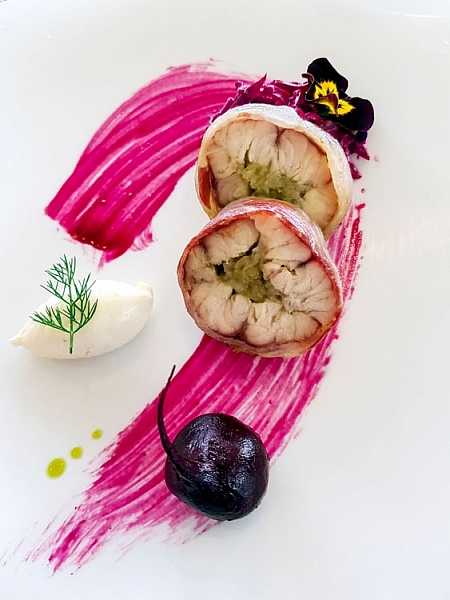
Some food photography with the Samsung Galaxy S7 camera.
Apps for photography
We live in a world of apps. There seem to be apps for everything. Whether they are good or not is another story.
If you go to the Google Play Store and search for cameras you will be given an overwhelming choice. You can get apps for image sharing, doing effects, making selfies, collages, and so on. The list seems endless. Just the popular results give you over 200 choices.
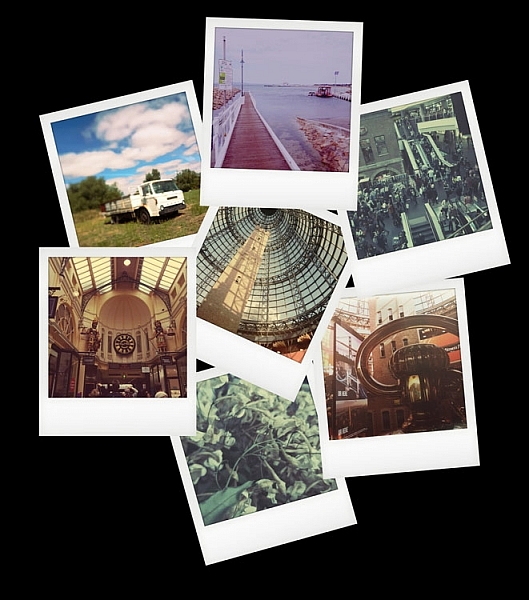
Photos taken with the Instant Camera App.
Most of them are free, so if you are unsure which ones to use you can install them, try them out, and if you don’t like one then just uninstall it. The reviews and number of stars can be a good indicator, especially for ones that you have to pay for. If you have to spend money, then you want to make sure it is a good purchase. Having said, though, many of them don’t cost a lot.
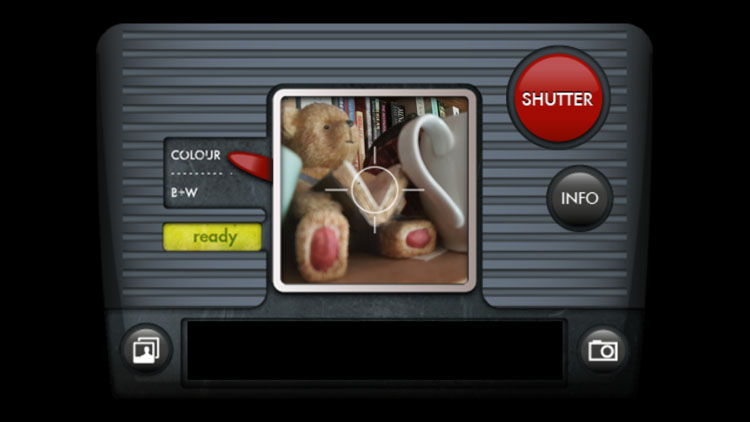
I purchased Instant, which imitates the type of image you would get with a Polaroid camera. After playing around with it for a bit I discovered that there are lots of filters in the app to create many different effects. It is set up for you to shake or blow the image for it to be revealed, like the original Polaroids. Even though you know you don’t need to do it, it almost seems irresistible to not shake or blow on it.
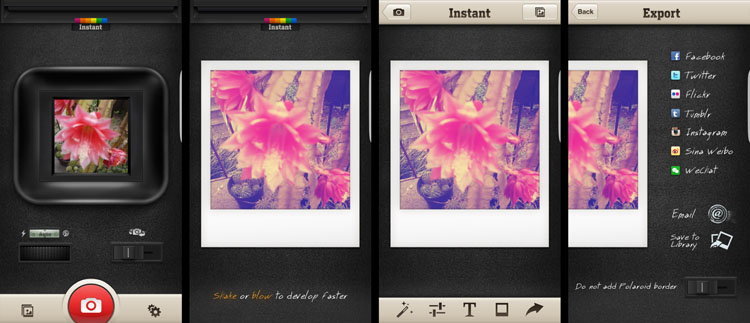
Taking photos with the Instant Camera App.
Retro camera app
Another one that you can try out is the Retro camera. It’s free and comes with several different cameras. If you press the camera icon in the app you can scroll through and find different ones. I quite like the Xoloroid one and the Fudgecan. This app does not seem to have the filters, but you can choose to either take colour or black and white images with it.
The Retro Camera app as it is taking an image.
They are great fun to play around with and I do suggest you try many apps. You might even fall in love with one.
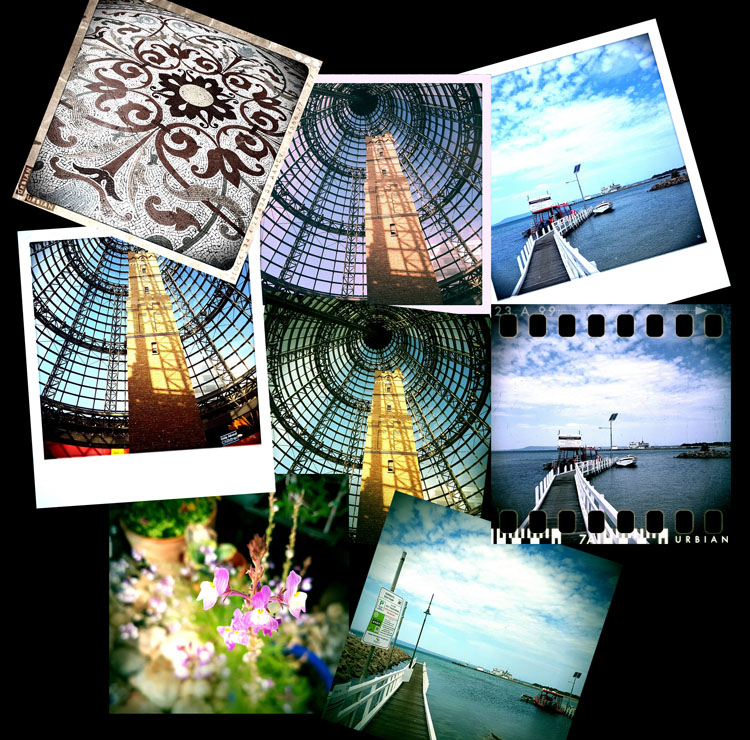
Using the cameras within the Retro Camera app you can get a variety of results with each of the different options.
Lenses to attach to your phone
Lenses for mobile phones have been around for a while, but there does seem to be the impression that they are only for iPhones. I thought the same thing too. But, there are many lenses available for you to attach to your Android phone.
Lensbaby has lenses for the iPhone. When asked why didn’t they do them for Android the answer was simple. They did, but people didn’t seem interested and they didn’t sell. Perhaps the reason they didn’t sell well, was because people didn’t know about them. Well, now you do.
It is unknown how many lenses there are for Android, but apparently, a lot of the ones for iPhones can also be used on Androids. They use a magnetic ring that sticks over the top of the camera on the back of your phone. Some rings are better than others, and some don’t work very well.
Lensbaby
There are three phone lenses from Lensbaby and they all do different things. Along with them is an app for your phone that helps you take photos.
- The Lensbaby LM-10 is a two-way lens, meaning you can turn it around and use the opposite end as well. The sweet spot is in the center for both ends, but one end will let you get closer than the other. It is a bit like reversing the lens on your camera.
- LM-20 has a bigger sweet center spot and lets you take more normal images.
- LM-30m this is very sharp in the middle and gives a crazy effect around it. Some say the photos are mind-bending, and can too strange. You do have to think about where you would use this lens. It isn’t suitable for everything.
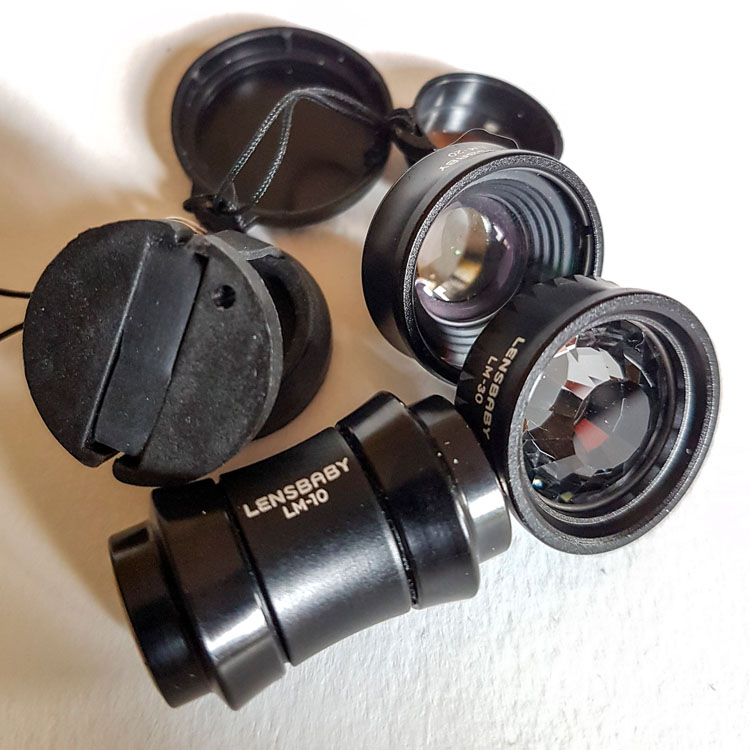
Lensbaby Lenses
The magnetic ring that sticks to the camera is great and doesn’t come off when you take the lenses off. However, it can be hard to focus using it and if you leave it on, the camera can move so it may need readjusting next time.
One thing that is quite good is that you can take it on and off a bit. I’ve done it up to four times and often leave it stuck to the back of the phone until I need it, and then move it over the camera when I’m ready to shoot.
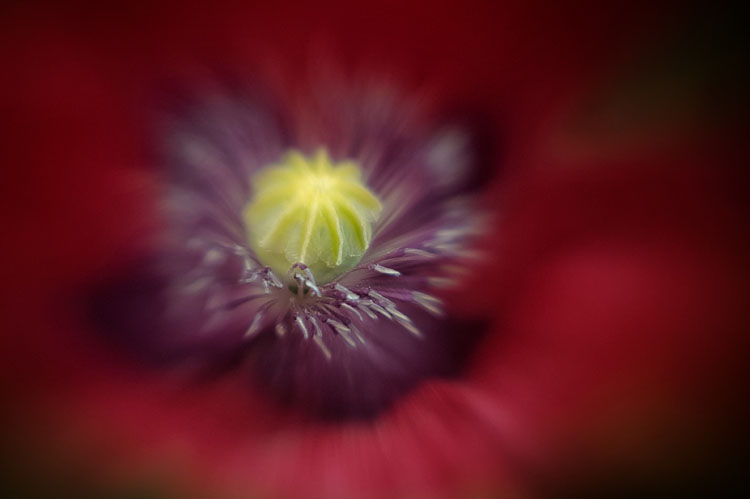
Macro photo taken using the Lensbaby LM-10
Lensbaby app
As previously stated, Lensbaby also has a free app that you can download that lets you have a lot more control over the images. You can move the sweet spot around, or lock it to one position. Be aware that the LM-10 does reverse the image when you are taking it, so you need the app so you can reverse the view so it appears right way around.
Overall the lenses are great and are small enough to carry around in your pocket or bag when you’re out. I use them a lot for macro photography.

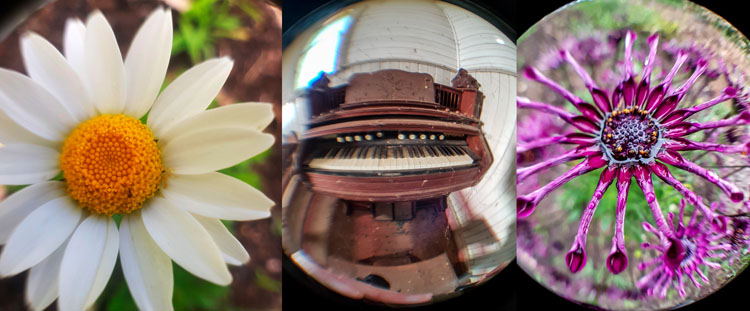
Three images, the first taken with the Lensbaby LM-20, the second two taken using the LM-30 lens.
Photojojo
Another company that has produced lenses is Photojojo. You can buy all five or just a couple of them. They have standard lenses, but they also have some special effects ones as well. They are the only company that I saw with a polarizer, which could be very handy for some situations.
Here is a list of what they have:
- Fisheye
- Superfisheye
- Polarizer
- Wide/macro
- Telephoto lens
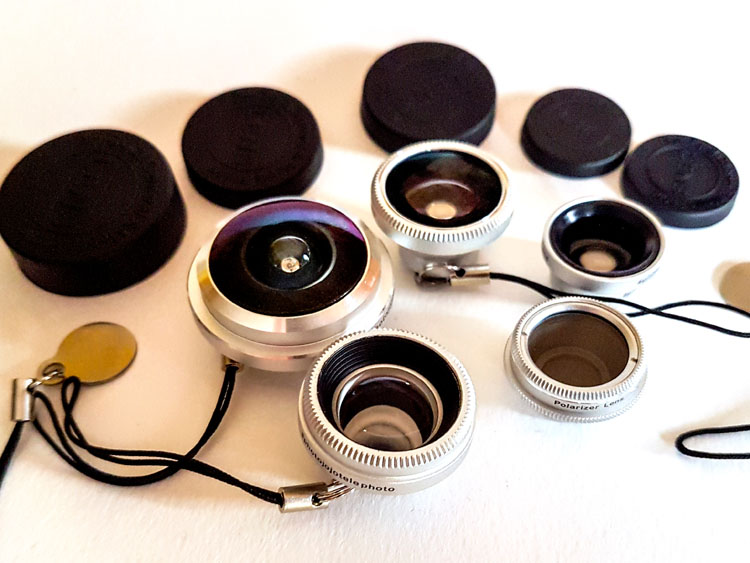
Photojojo lenses
They are all good but the super fisheye is probably the one I’ve played with the most. It is very wide and distorted. You will get your hand holding the camera in the shots you take with this lens. The other lenses are much what you would expect.
The Photojojo lenses come with the magnetic rings to attach to your camera, but they don’t stick very well and when you remove the lens, the ring often comes off as well. If the lens is a bit heavy, like the super fisheye, when you angle the phone down it will just come off, along with the ring.
Photos taken with the Photojojo lenses, the super fisheye.
I’ve been using the Lensbaby rings with the Photojojo lenses. Sometimes you have to move the lens or the ring around, but you can get them to work together if you are patient.
Photo editing apps
When you start taking photos with your phone the next progression is to start sharing them with the world on social media places like Facebook or Instagram. You could just post them straight up, use the filters that come with Instagram, or you can do some fine tuning of the images photo editor apps.
If you do a search for photo editors in the Play Store you will be given many choices. As it was for the cameras, you need to go through and see which ones you think will work for you and your purposes. We are going to look at two here.
Snapseed
Snapseed is a photo editor app that has been around for a while. It is free and fairly easy to use. While it does have some filters that you can just add to your image, it also has quite a few adjustments as well. Often, that is all you need to do, just do a few tweaks and the photo is ready to be saved.
As with any software that allows you to make changes to your images you always have to save it. On your phone, Snapseed will make a new gallery for your new saved edited images. You will end up with two of every image, the original and the edited version. When you are sharing, make sure to choose the one from the Snapseed gallery.
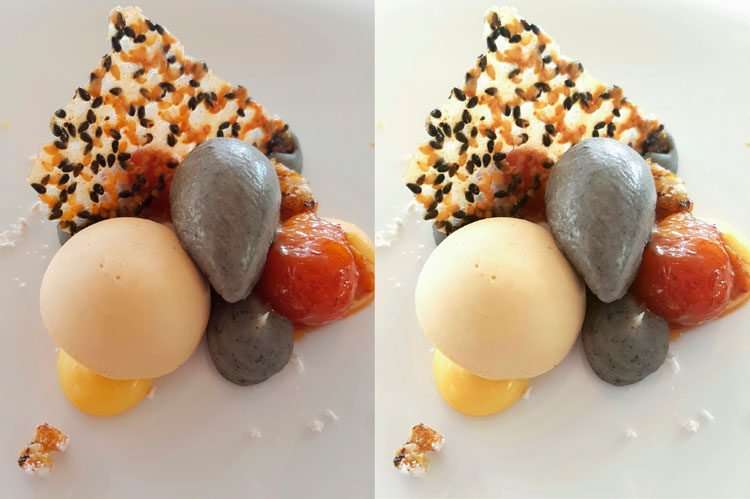
The photo on the left was taken with my phone and then processed in Snapseed on the right.
Lightroom Mobile
To get Lightroom Mobile for your phone you have to be a subscriber to Adobe for Photoshop CC and Lightroom CC. It comes as part of the package. Once you are a subscriber you can download the app and sign in.
Get a 20% discount on Photography Plan using this link for dPS readers only!
It doesn’t work like Lightroom CC on your computer, rather is very similar to other photo editing apps like Snapseed. It is easy to navigate around and figure out. Again, save everything you do and it will export it into a Lightroom gallery for you on your phone.
If you don’t subscribe, then don’t do it just to get this app. Snapseed is probably just as good, and if you don’t like it there are lots of other editing apps. Ask around and I am sure you will get a list for a lot of them. One thing that is great is the ability to install them, and if you don’t like, just uninstall.
Android photography round-up
Taking photos with your phone can very enjoyable and just because you have an Android that doesn’t mean you can’t take photos just as well as those with iPhones. Don’t let Apple users tell you your phone isn’t as good. Now you know that you can take good photos just as good, maybe even better.
In the end, it comes down to the person holding the camera (you) and how good you are. Have faith and share your photos. I would love to see them in the comments section below.
googletag.cmd.push(function() {
tablet_slots.push( googletag.defineSlot( “/1005424/_dPSv4_tab-all-article-bottom_(300×250)”, [300, 250], “pb-ad-78623” ).addService( googletag.pubads() ) ); } );
googletag.cmd.push(function() {
mobile_slots.push( googletag.defineSlot( “/1005424/_dPSv4_mob-all-article-bottom_(300×250)”, [300, 250], “pb-ad-78158” ).addService( googletag.pubads() ) ); } );
The post Tips and Resources for Doing Android Phone Photography by Leanne Cole appeared first on Digital Photography School.

Digital Photography School


You must be logged in to post a comment.