RSS
 

Posts Tagged ‘Photography’

How to Prepare a Photography Exhibit of Your Work

12 Jan

There is nothing like having your work displayed up on a wall for everyone to see. Even better, is seeing little round red stickers underneath to indicate that the work has been sold. For most artists, that is their driving force and anyone who makes images that are intended for walls and display. However, where and how to go about having a photography exhibition can be harder than you think. It can also be a very expensive exercise.

This article will help answer a lot of the questions that you may have when it comes to exhibiting your work.

photography exhibit tips

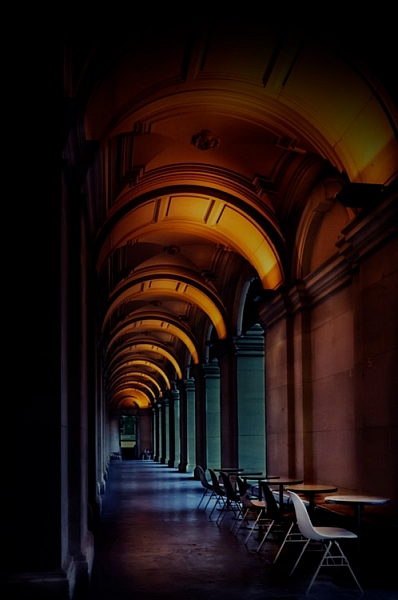
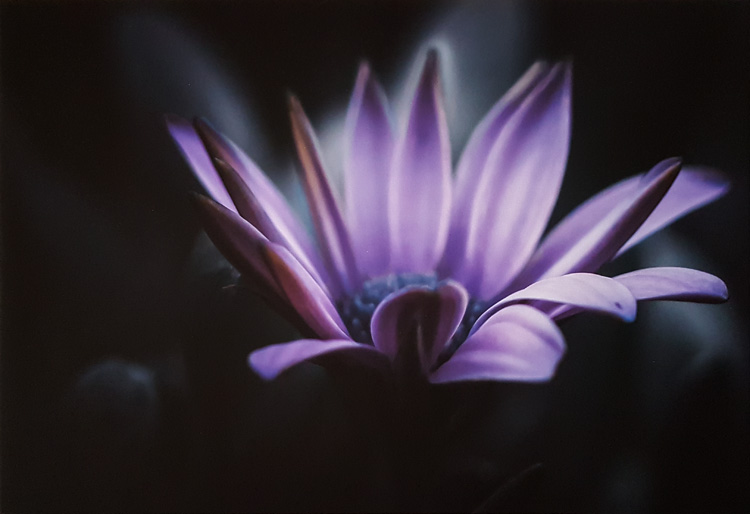
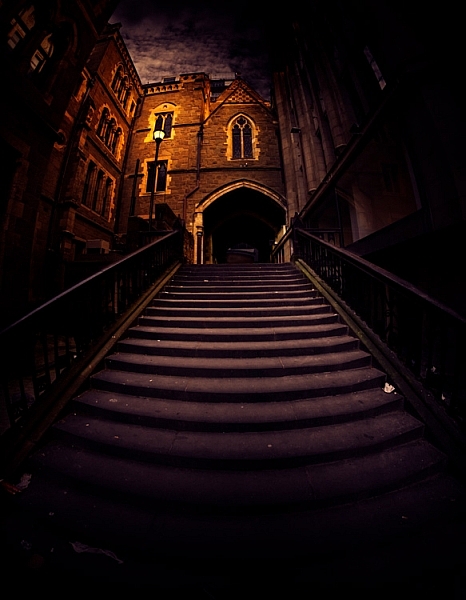
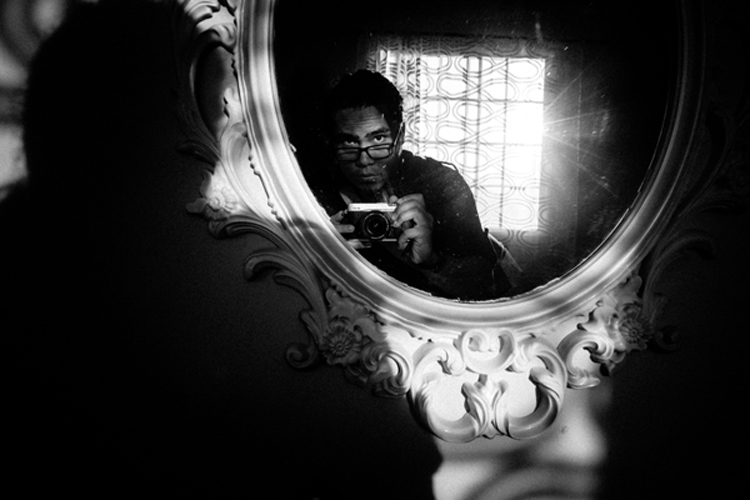
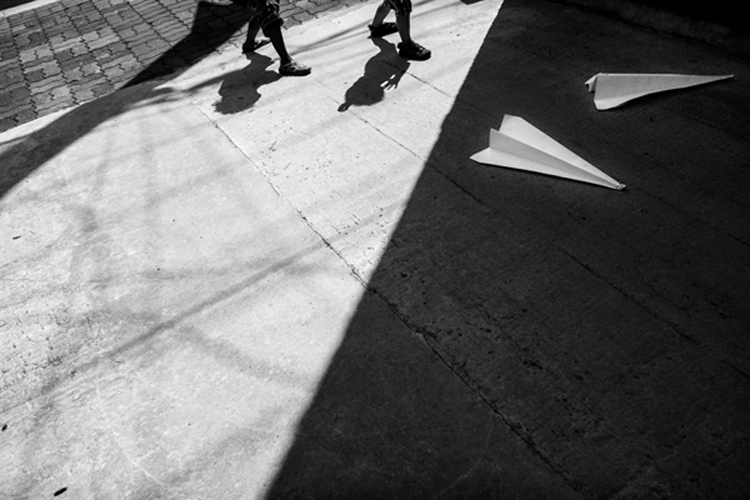
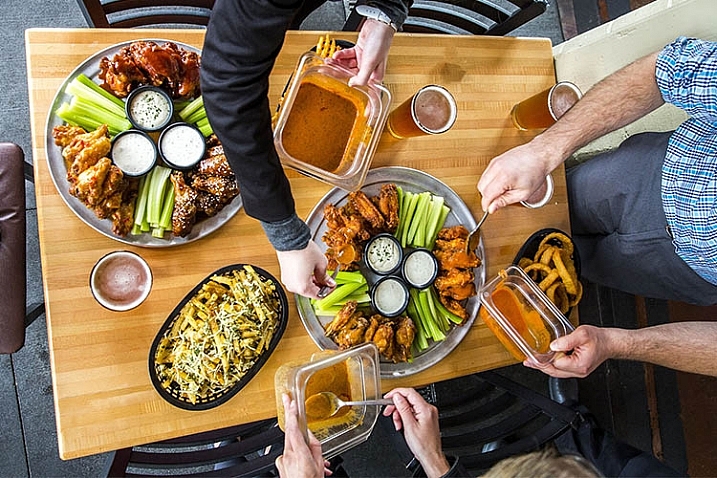
If I were to have an exhibition now this image would be in it.

Why do a photography exhibit?

Artists have been exhibiting their work for centuries, now is no different. The reasons for doing an exhibit can vary from artist to artist. Before the internet, it was one of the best ways to showcase your work to everyone. However, artists used them to make money. They would invite special clients or benefactors to the openings in the hope they would buy one or a few pieces.

Selling artwork is harder these days, so if your sole reason for exhibiting is to sell some, then you may be very disappointed. However, if your goal is to put your work up on a wall to show people what you are capable of, then it can be very rewarding. Having all your best work up for everyone to look at can feel like quite an achievement.

Another reason many artists exhibit is to be able to put the exhibitions down on their artists CV. The CV or Curriculum Vitae is a list of all their exhibitions, plus education and a few other things, similar to a resume. It is what galleries look at when seeing if they will have a show with an artist.

leannecole-exhibiting-your-artwork-31

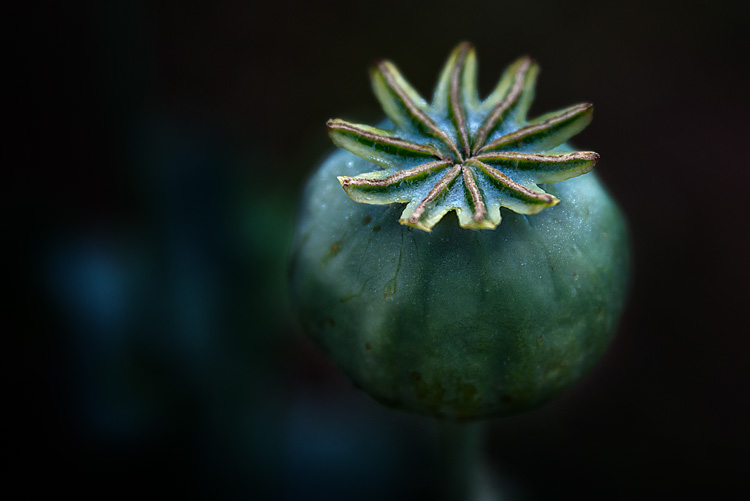
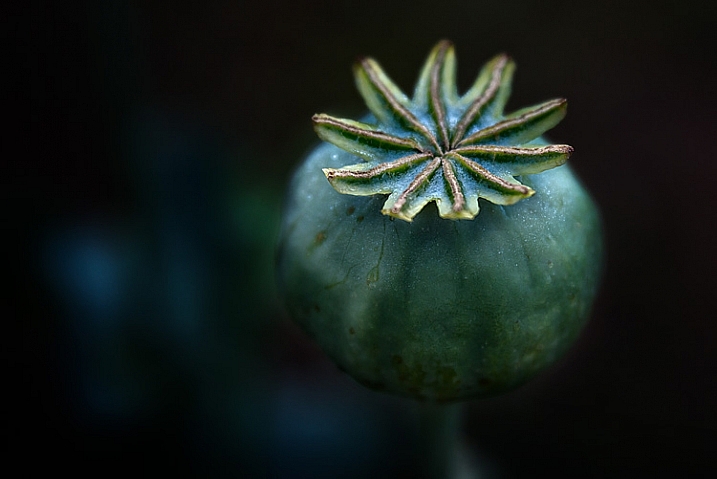
This image would be ideal if I decided to have an exhibition of just my macro work.

Costs and Budgeting

Exhibitions are not cheap and before you decide to have one there are many things you need to take into consideration. What sort of space will you exhibit in and how much will it cost? What other expenses will there be? How many images will you prepare for the exhibit and what will the reproduction outlays cost? Should you have a solo exhibition or start with group shows? These are all questions you need to think about.

Group or Solo

Solo shows are fantastic and ultimately what every artist wants, to have their own show. But they are also very expensive and you have no one to share the expenses with. Having said that, most artists build up to solo shows and often have had some success in group shows first.

For most photographers, group shows are a good way to get your feet wet and start building your artist’s CV. Find some friends who are also interested in exhibiting. Apply together to galleries to see if you can get an exhibition. Many galleries advertise for artists to participate in group shows they are holding, so look out for them and apply.

leannecole-exhibiting-your-artwork-39

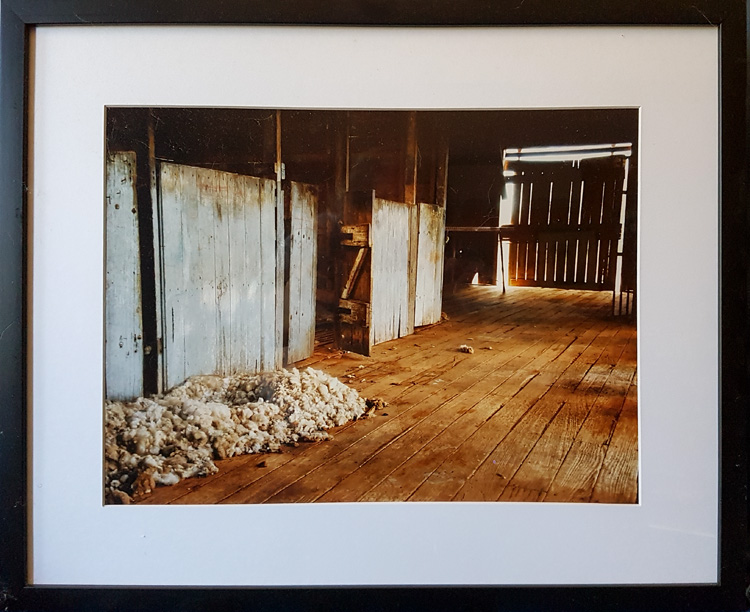
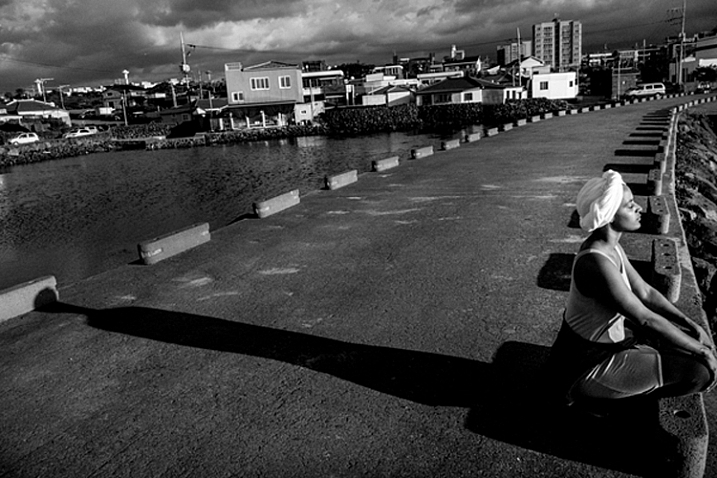
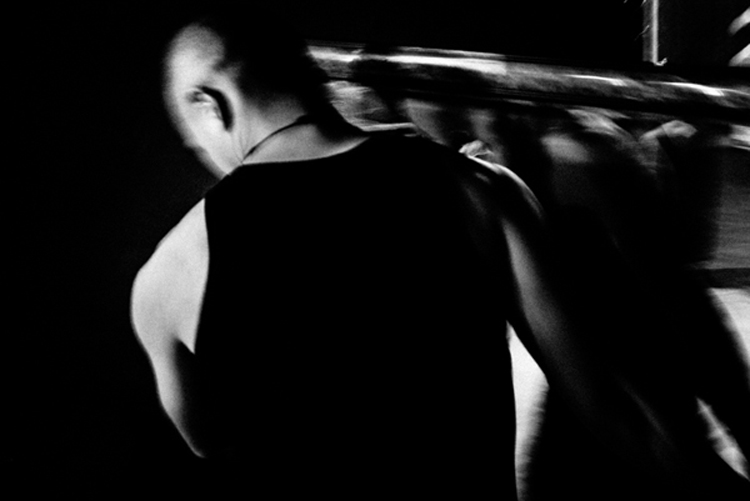
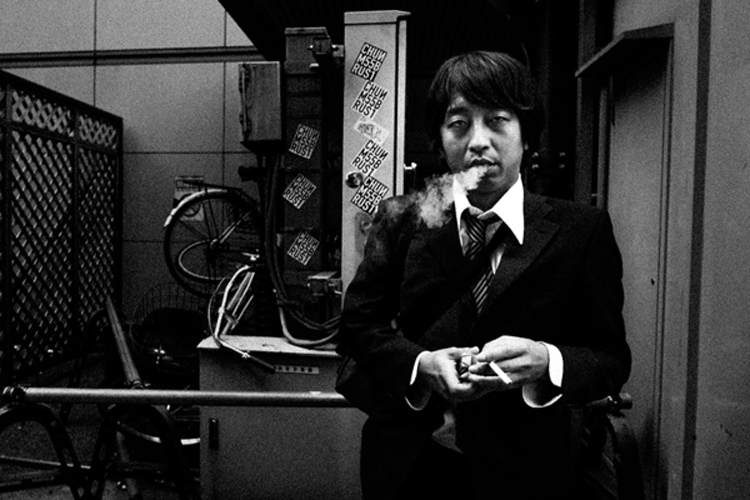
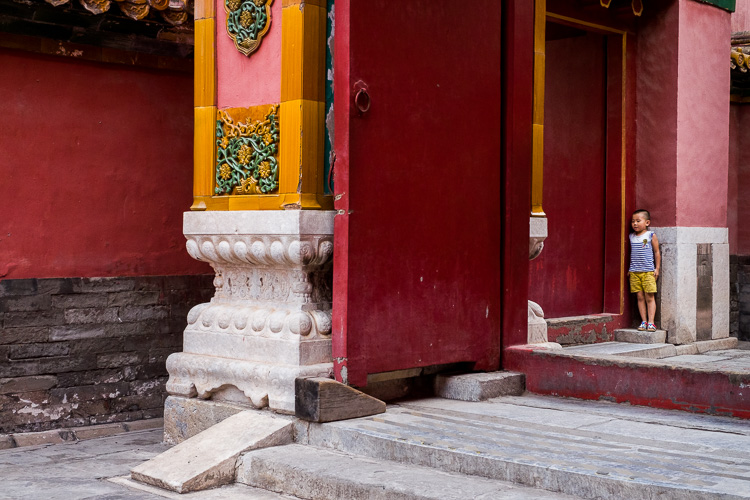
This framed image was in a group show for street photography.

Where to exhibit

This could be an endless list, but the most common places are galleries that specialize in the work that you want to show. However, there are other places, like cafes or restaurants, that like to have exhibitions which feature different artwork on their walls. There are benefits and disadvantages to each.

Cafes, Restaurants, and Foyers

These are often free for holding an exhibition. They don’t always have schedules so you could possibly have your work up for longer than you could in a gallery. These types of venues may not want a commission from the sale of work, though they may want you to handle all the sales, so you would need to leave contact information. They usually won’t take any responsibility for your art pieces, so be aware of that (loss or damage is not covered).

leannecole-exhibiting-your-artwork-35

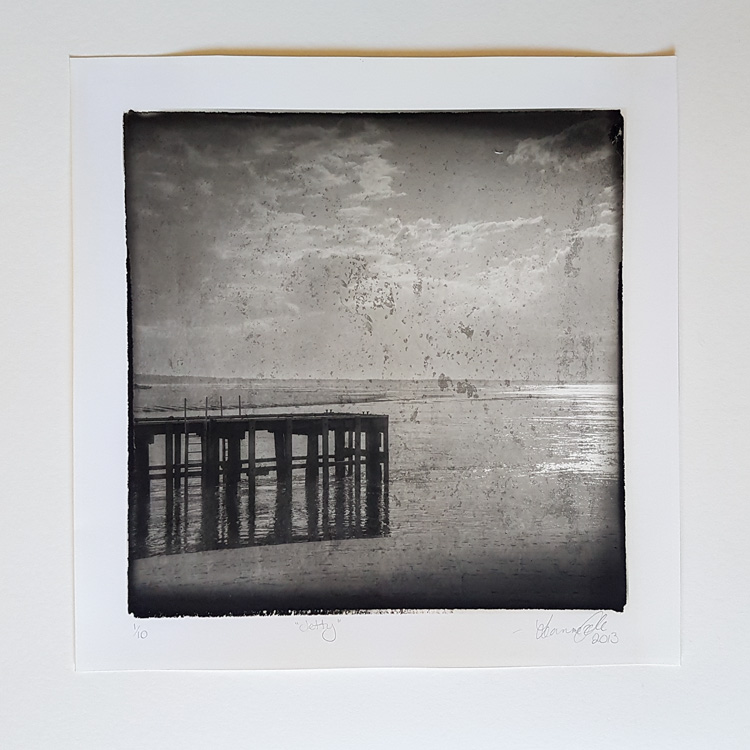
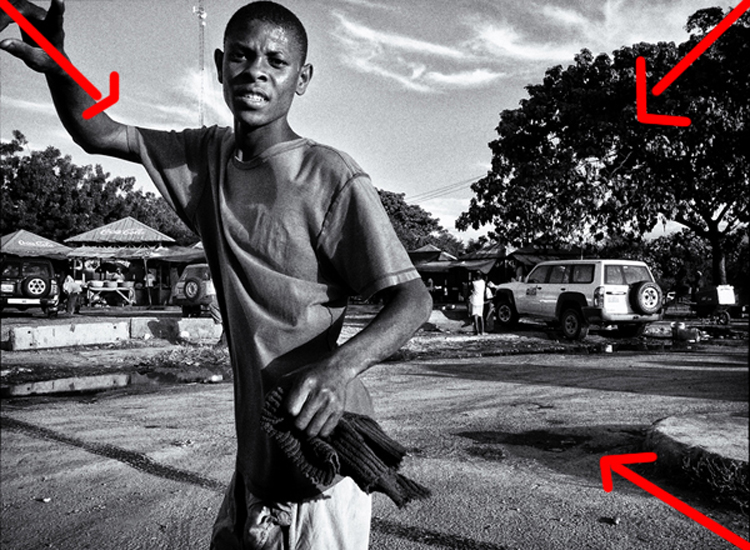
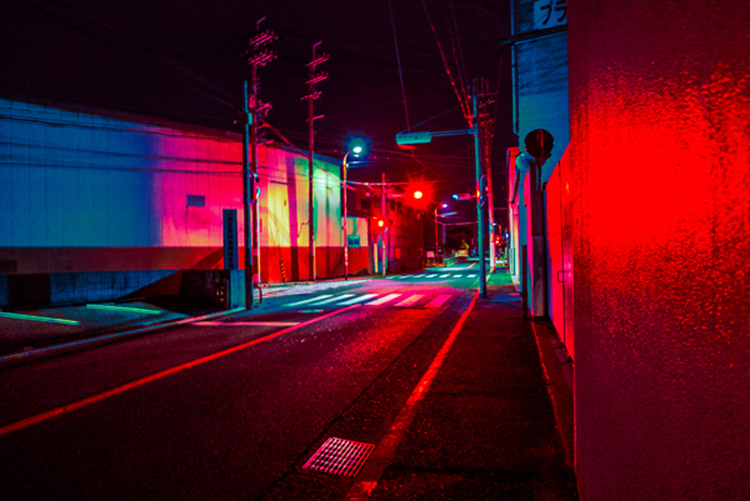
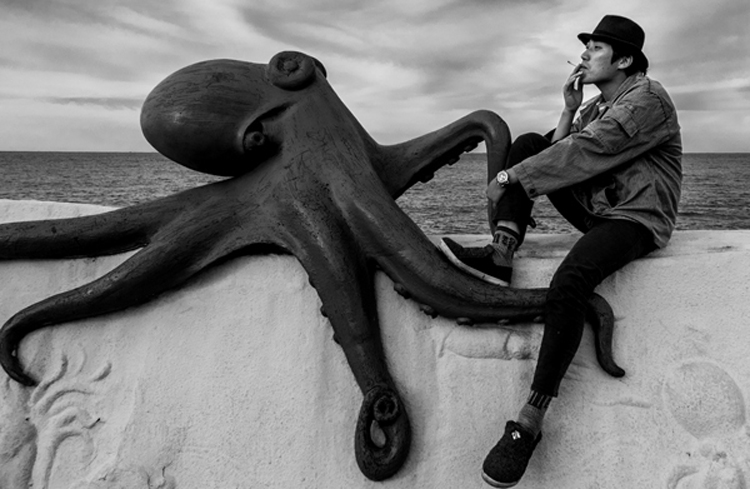
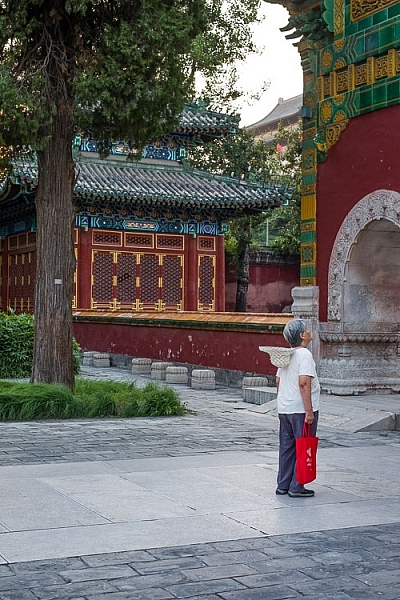
This is one of two images that were exhibited in a cafe down near the coast.

With a place like this, you won’t have access to a mailing list and will have to do all the advertising yourself. People can’t generally just wander in to look at the work. All the customers will see your images, but they are there for different reasons, such as to eat, and buying images isn’t one of them. While it isn’t impossible to sell a piece from a cafe exhibit, your audience isn’t there to necessarily buy what you are selling.

Your work will most likely need to be framed for hanging, and you will probably have to install it yourself at the exhibit space.

leannecole-exhibiting-your-artwork-34

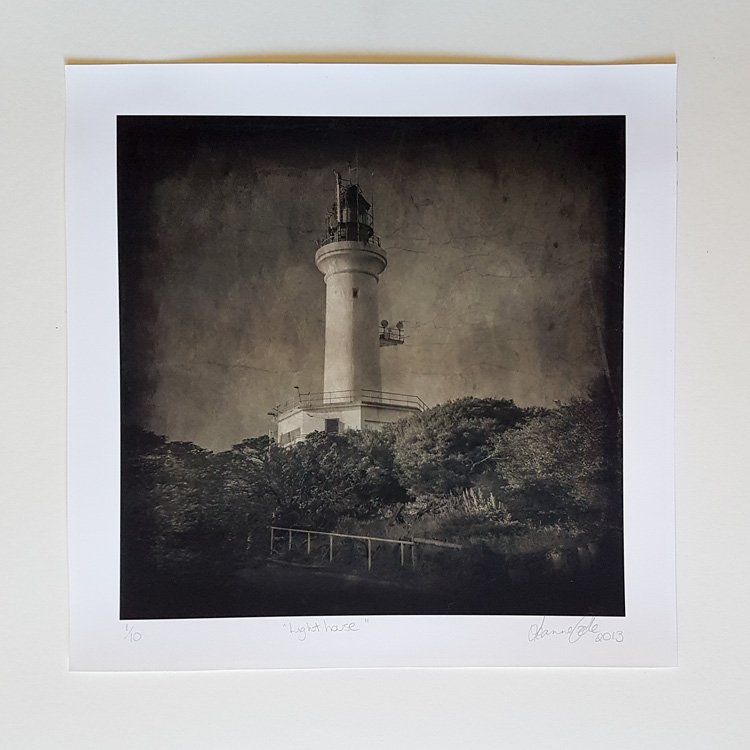
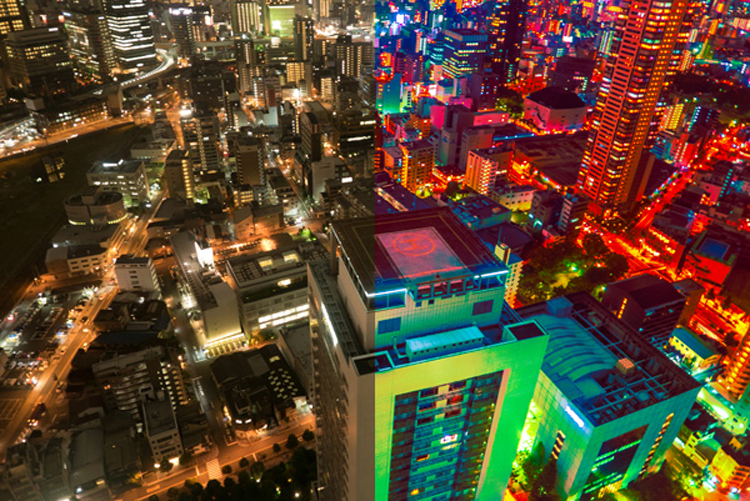
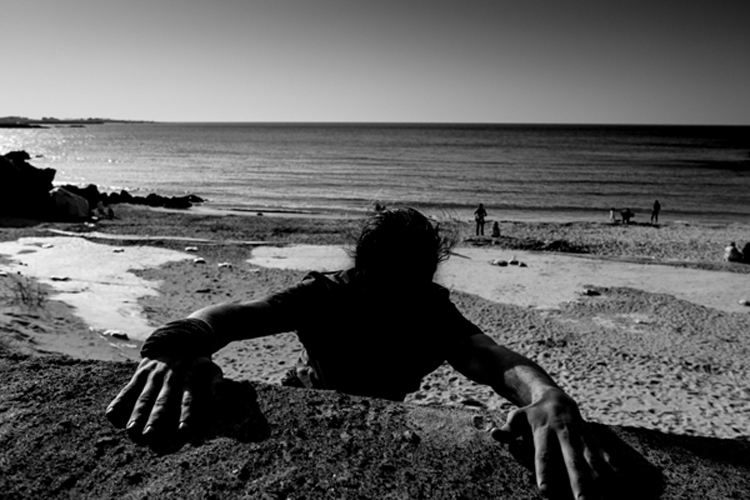
This is the other image that was exhibited in the cafe.

Galleries

There are many different types of galleries, and it is up to you to decide which one you think will work for you. They usually start with artist-run spaces, then come staffed galleries which are either non-commercial or commercial.

Artist-Run Spaces

Possibly the cheapest spaces to get are those which are artist-run. You pay less to use the space, but you are expected to do what they call, “sit the exhibition”. That means that when the gallery is open you have to be there to watch your work and manage any sales yourself.

Having to be there the entire time the gallery is open can be time-consuming. Many artists will get together for a group show, split the costs of renting the space, and draw up a roster to sit the exhibition. For artists starting out this can be a much better option. If you want to do this, but don’t know anyone to exhibit with perhaps you can contact the gallery as they may know some artists who are looking for someone to share.

You need to take on most of the expenses in this environment. The cost of the opening is covered and organized by you. You must pay for most of the advertising as well, though some galleries will have a mailing list for you to use.

leannecole-exhibiting-your-artwork-38

Still packed up from when it returned from an exhibition last year.

Staffed Galleries

Staffed galleries are the next level. They cost more, but you are relieved of the burden of having to sit the exhibition. There are two different sorts of galleries, the commercial and non-commercial kind, and they often have different directions.

Non-commercial galleries

These are often smaller galleries that will charge you for renting the space and for their service to sit the photography exhibit for you. They are often the most expensive galleries to hire. Non-commercial galleries will help advertise the opening, but they are generally not interested in helping to promote you and your work further beyond the exhibition and the relationship is short term.

They make their money from you hiring the space, and taking a commission from any work you sell, usually around 30%. It is a good way to start getting work on your CV or finding galleries that do a lot of group shows. See if you can put work into them.

Non-commercial galleries aren’t typically picky about who they choose, as long as the quality of work is good. They are not going to mind if one exhibition is all abstract paintings and the next one is more landscape photographs. It can be a lot easier to get a show with them than the commercial galleries.

leannecole-exhibiting-your-artwork-28

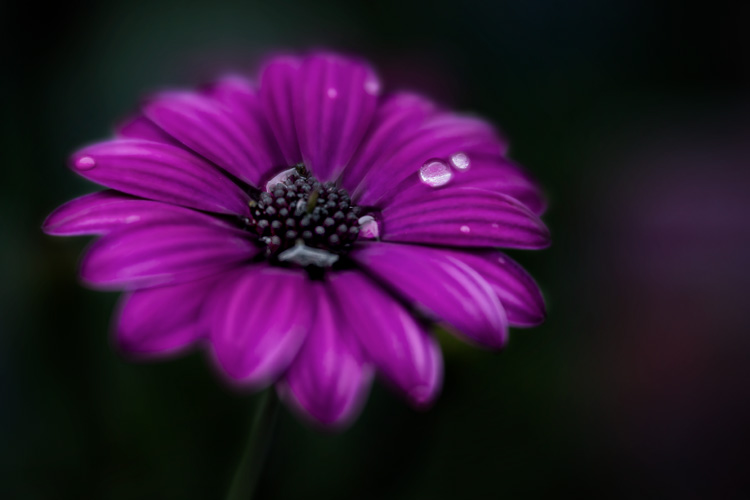
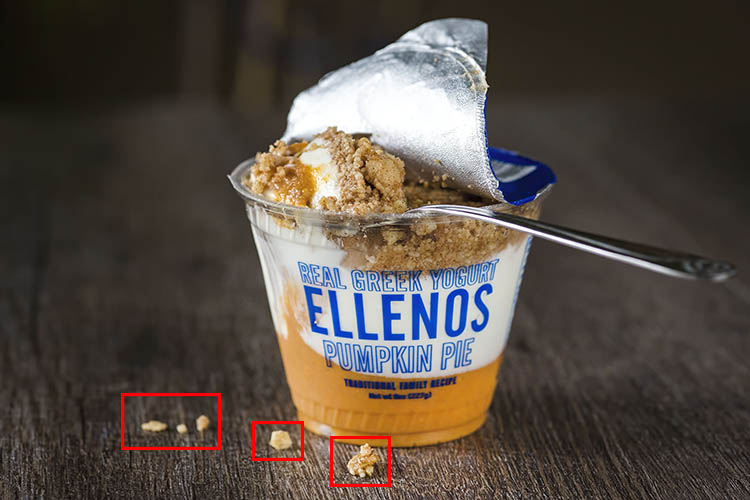
This image was also popular on social media so it would definitely be in the macro exhibition.

Commercial Galleries

These types of galleries are a lot harder to get exhibitions with as they have so many artists to choose from and usually have a particular type of artist in mind that they show. They are more interested in helping you establish yourself as one of their artists, in other words represent you. Commercial galleries will keep some of your work in a stockroom and advertise what you do. They try to get collectors to view what you have done so they can begin collecting and supporting you as well.

Commercial galleries usually have a niche market they represent. If you are a photographer and you send your work to a gallery that only deals with Indigenous art, then they are not going to be interested in your work.

When approaching these galleries you need to do your research and make sure you work fits in with the other artists they represent. At the same time, if they have another who does work that is almost the same as yours, then they are not going to be interested either.

The commercial galleries often cost a lot less for an exhibition, however they are harder to get shows in and they will take a higher commission. Here in Australia that rate is usually around 40%, compared to the 30% that other galleries take.

leannecole-exhibiting-your-artwork-30

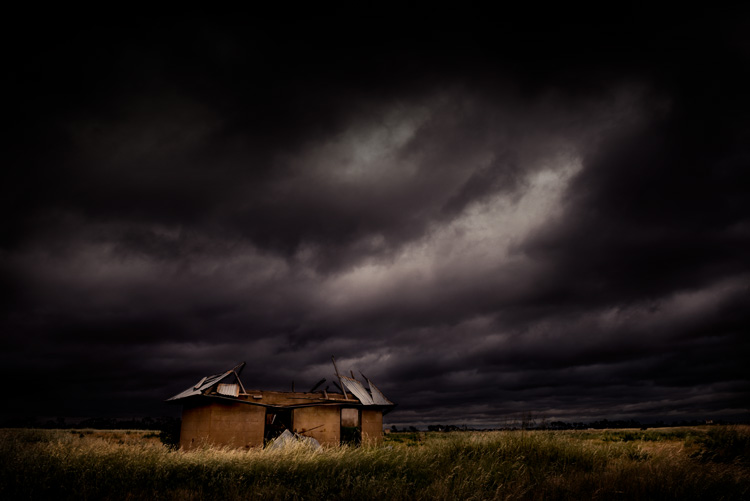
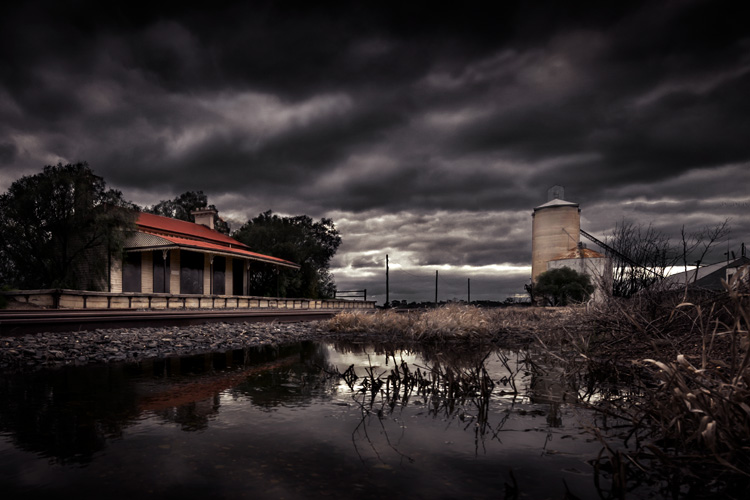
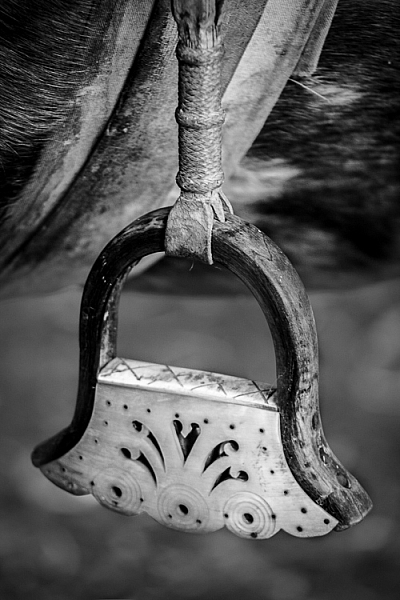
Another image that would be used if I were to have an exhibition now.

Submitting your work to galleries

All galleries tend to advertise when it is a good time to submit proposals. While you can send in inquiries at other times, it is best to look for submission dates, times when they are asking people to send in exhibition proposals.

Commissions and pricing your work

All galleries charge a commission and some cafes may as well. You need to consider how much the commission is when you are pricing your work. Make sure you find out how much the commission is when first inquiring about exhibiting in the space.

When it comes to pricing you should be realistic. If you are new to the art world, charging thousands of dollars for your work would be unrealistic. Only established artists can command prices like that. To get an idea look at the space that you will be exhibiting in and see how much previous artists have charged for similar work. If you are happy with the prices you could try charging the same, or similar.

As your reputation grows and more people start buying your work then you can look at charging more.

leannecole-exhibiting-your-artwork-36

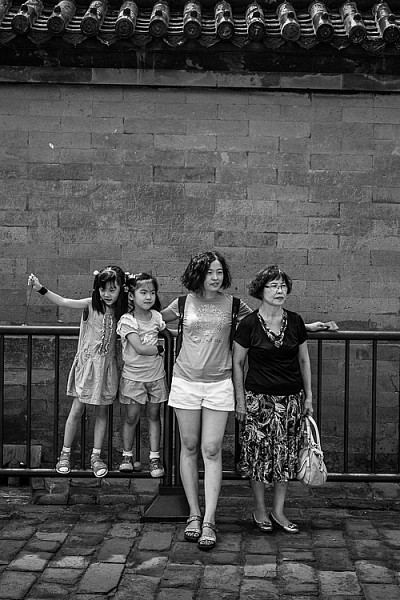
This is from an solo show I had in the foyer of a theater company.

Loss due to damage or theft

When you hire a space to show your work you also take on the responsibilities of it as well. The gallery or space is unlikey to cover any damage to your artwork or the theft of it. It is often in the contract or terms of conditions. Make sure you are aware of it, and if you are worried then insurance could be an option.

Insurance

As previously stated most places will not cover your work for damage or being stolen, so insurance is  something that you need to consider when putting your art up anywhere. Do you need to take out insurance on it? Most artists don’t worry about it, but that doesn’t mean you should do the same. Look into it and see how much it will cost and if it is worth it for you

If the work has cost you a lot of money to produce, then you may want to consider getting insurance. Talk to the gallery and see if they have had problems in the past, especially with theft. If the work is going into a high traffic zone, like a walkway, where it can be damaged or someone could walk off with it, then it is worth considering.

It should be done according to the place where you are showing. If it is a café then the staff may not have the time to watch the work at all, especially during busy periods. However, a gallery is going to be in a better position to watch if they have the staff. If you have to man the space yourself, can you watch everything?

To frame or not to frame

leannecole-exhibiting-your-artwork-37

Testing out a framer and had this macro printed on canvas.

Many places will answer the question of framing for you. tThey will either say the work has to be framed or it can be pinned to the wall.

If the work has to be framed then you must decide if that is something you can afford. Getting work custom framed can be very expensive. But what a lot of artists do is make all their work the same size (or use the same size frames and just alter the mat sizes according to the images), then go to somewhere like Ikea and buy cheaper frames. If you do the framing yourself then you can reuse the frames every time you want to do a show.

If you don’t have to frame and can pin the images on the wall, that doesn’t mean you can’t get the work framed. Again, your budget is going to determine that. However, if you choose to pin them on the wall you need to find out what is going to be the best way and if the purpose is to sell your work then pinholes in your photos might not be desirable to potential buyers (it also isn’t as professional looking or finished for the buyer, they can’t just take it home and hang it up).

What size and how many images to exhibit

leannecole-exhibiting-your-artwork-25

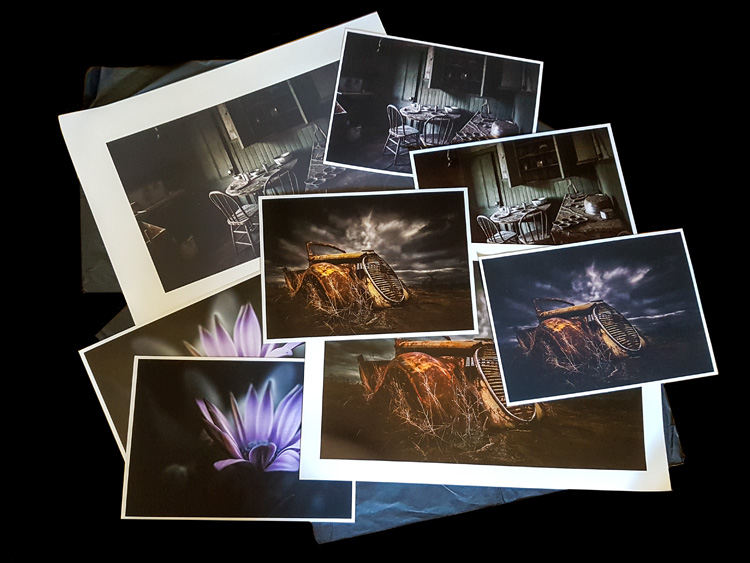
If I were to have an exhibition now this would be in it along with the others.

This decision comes down to price and space. How much money you have for the exhibition can only be determined by you. But how many pieces you can make, and the size you can get your work reproduced is going to be determined by your budget.

It is also important to know how much space you have available for the exhibit. If the space is only three meters (10 feet) of wall space, then putting up three images that are one meter (39 inches) across will make it crowded and not allow enough space in between each one. However, if you have 10 meters (33′) of space, and you put up four images that are only 50cm (20 inches) across, that will give you too much space between them.

Consider the space carefully. If you think your work looks great when it is enlarged, then perhaps having fewer large pieces is better. The larger they are the more they will cost.

The same goes for the number of images. You don’t want to completely fill the space you have, as giving each image room will allow them to be shown better. Just because you have paid for the space doesn’t mean you have to fill it up. Consider the size of the frames as well, if you choose to frame.

Editioning

leannecole-exhibiting-your-artwork-33

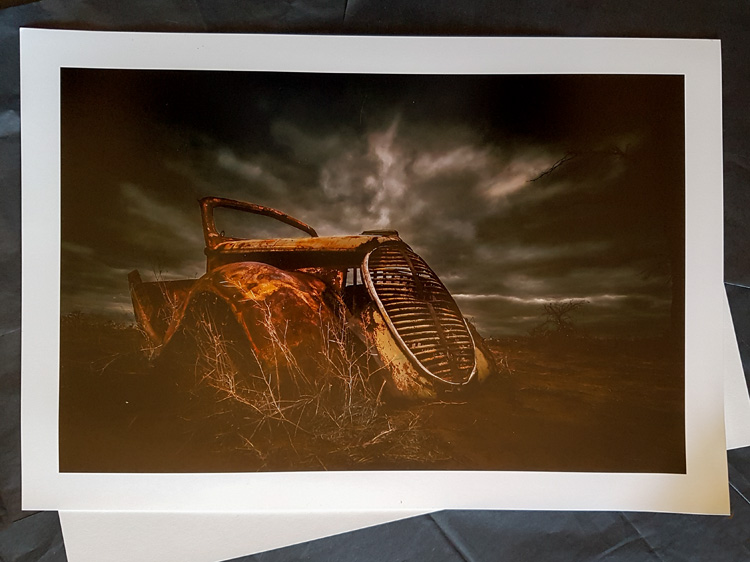
Trying out different papers to see which one will work best for this image.

Editioning is also referred to Limited Editions and is something to consider with photography. Printmakers have been doing it for centuries. It basically means that you are promising your clients or potential ones that only a certain number of those images (prints) will be available for sale.

Editions can be a good way to make your work more valuable. If you have an image and do an edition of 20, then you need to make sure that the buyer knows what number in the edition they are receiving, for example, 8/20. You need to keep records of it, so you know how many of the image you have sold. Once you have sold the 20 you can’t sell anymore. You made a promise to those that bought the first 20 that you would only sell 20 of them. Be sure of how many you think you might sell from the start, and be realistic.

Another thing you need to be careful about with editioning is to make sure they are all printed exactly the same. They all have to be consistent. If you put up a piece in a show and sell it a few times, people won’t be happy if the image they receive is not the same as the one they saw in the exhibition. You don’t have to get them all printed at the same time, but make sure you use the same printer for all of them and that the printer knows how to replicate them identically.

Medium for printing

What medium you choose for printing is again going to be determined by your budget, but also consider how your work will look the best. Do you want prints in frames? Perhaps canvas will work better for the type of image you are getting printed. Getting work printed on metal is becoming popular now as well, though it is also very expensive and perhaps might only suit some styles of photography.

Whatever you choose, you need to be careful that it shows off your work in the best way possible. Consider getting some images printed in different ways and then deciding which you like the best, and which one will fit into your budget.

leannecole-exhibiting-your-artwork-32

My new printer did lots of tests for me to see which would work the best on what medium.

Curating and choosing which images to exhibit

Choosing which images to put in the exhibit is the hardest part for most people How do you know what images will be the best to show? There is no real way to tell. If you are working with a gallery that has a curator you can likely get a lot of help from them using their experience with the gallery and what sells. If a curator isn’t available you might have to enlist the help of friends, find out what are their favorite pieces. Perhaps your social media sites will help you see which images were popular online.

When it comes to curating the show, there should be a cohesiveness to the work and to the final exhibition. Make sure all the work fits together and flows. Be clear on what your vision for it is. The better it looks on the walls, the more you could sell.

leannecole-exhibiting-your-artwork-29

If I were to have an exhibition now this is another image that would be in it.

Start planning your exhibition

Hopefully this has answered many of the questions you had and explained some of the ways that galleries work. There are many decisions that need to be made and before you start it is good to have a plan of what you want to do, why, and how you will pay for it.

Have you done a photography exhibit before? Please share your experience or post your questions in the comments below.

googletag.cmd.push(function() {
tablet_slots.push( googletag.defineSlot( “/1005424/_dPSv4_tab-all-article-bottom_(300×250)”, [300, 250], “pb-ad-78623” ).addService( googletag.pubads() ) ); } );

googletag.cmd.push(function() {
mobile_slots.push( googletag.defineSlot( “/1005424/_dPSv4_mob-all-article-bottom_(300×250)”, [300, 250], “pb-ad-78158” ).addService( googletag.pubads() ) ); } );

The post How to Prepare a Photography Exhibit of Your Work by Leanne Cole appeared first on Digital Photography School.


Digital Photography School

 
Comments Off on How to Prepare a Photography Exhibit of Your Work

Posted in Photography


10 More Photography Tips to Help Take Your Images to the Next Level

12 Jan

A while back I wrote an article that was quite popular: 10 photography tips to take your photography up a level. In this article, I bring you 10 extra tips from all aspects of photography. Enjoy!

10 More Photography Tips to Help Take Your Images to the Next Level

#1 – What’s more than meets the eye?

Let me ask you something, what would you do? You meet someone attractive, you are head over heels, and then you start actually talking to them. You then uncover the most superficial person you have ever met. That person is all looks and not much else. You would lose interest, right? Because looks by themselves are good enough to make you interested, but if there is nothing sustaining that interest, you’re gone. This is the same thing in Photography,

This is the same thing in photography. A beautiful composition is nice, but what is in your image that is designed to keep the viewer’s attention? What is it about your image that is more than meets the eye? Is it saying something deeper? Is it making a point? Showing a concept? Add meaning to your images to keep the viewer engaged.

#2 – Know your opportunity

I believe there are only four times when you control the image. The first is at the moment of exposure (when you shoot), the second is in post-processing, the third is in sequencing and editing, and the fourth is while printing. So, when shooting, have these things in mind in order to shoot with clarity.

Example, you shoot an image and it is overexposed (because of the camera’s limitation). But it doesn’t end there as you know that you have another opportunity in the post-processing phase to recover details. Or you shoot something with a nice texture but it doesn’t have the effect you want. It doesn’t end there, you know that you can print and blow it up real big to have the effect you seek. Or you shoot an image that can’t stand by itself. Once again it doesn’t end there, you know you have another similar image that can make a diptych.

The point is that making an image is only the first step. There’s a whole process that comes afterward when you can get the effect you desire. So it’s important to know that what you have in the camera is the starting point and not the end.

#3 – Pay attention to this detail (after your background)

10 More Photography Tips to Help Take Your Images to the Next Level

In the first 10 tips article, I suggested that you pay attention to the background first. Now I would like to add another thing to pay attention to before your subject – the corners. You see there is a strong dynamic with the corners, they draw you into the frame, towards the dead center and if you can align some lines there, it’s like surfing a big wave, it just draws your eye even more!

In the image above we have the guy’s hands, the shape of the tree and the shadow on the bottom right corner just pulling you into the image. So, pay attention to your background, watch your corners, and then look at your subject.

#4 – Dennis Rodman-ize it

10 More Photography Tips to Help Take Your Images to the Next Level

Let’s face it, it’s hard to get attention in this ever increasing attention deficit world. Dennis Rodman had been in the NBA for years, but he was receiving few endorsement contracts. He was a good player but didn’t shine enough. Then came the Rodman with the crazy hair and style, even as a kid I knew his name because he simply looked different.

That brings us to photography, you are probably doing something a certain way, so can you Dennis Rodman-ize it? Shoot in a different way that makes your work pop above and beyond what you normally do? For example, landscapes are usually shot with a wide angle, what if you shot landscape abstracts with a telephoto? Or used a special processing technique on your images that gave them a certain look?

#5 – Work on your name

You probably know the wine experiment, where they gave people wine to drink, one was expensive and the other was cheap. Everyone, of course, preferred the expensive wine over the cheap one, even if it was the same wine. Here’s the REAL KICKER, when they scanned the brains of the people who drank the wine, their brain actually made them believe they were drinking expensive wine, and it literally tasted better. Their perception altered their reality.

10 More Photography Tips to Help Take Your Images to the Next Level

With that in mind, work on your images but also on your name or brand. Try to get as much recognition as you can, it will alter people’s perception of your work. I remember a photographer who had decent work, and then that person got famous literally overnight. Let me tell you, even I, knowing all that I know about psychology, now see his work in a better light.

It’s crazy, and probably a bit sad, but that’s just the way it is. The story of Joshua Bell also illustrates this point well. This guy makes $ 1000 per minute playing on a million dollar violin, yet he got a meager $ 32 and a few cents when they had him play anonymously in a metro. Same guy, same skill – different context, different result.

#6 – Get luckier

Let’s not mince words here, luck plays a big role in photography. That Cartier-Bresson shot of the man jumping? That was 100% luck because he couldn’t even see what he was shooting through a hole.

Why is luck such a big deal? Because you DO have to be there at the right moment, and so does your subject, the light, etc. Truth be told, you need the skill and the eye to seize the moment, but if you are not there, the shot won’t be yours.

10 More Photography Tips to Help Take Your Images to the Next Level

So taking into account the luck factor, shoot more often. You’ll get luckier and luckier every time you do. By making more photo opportunities, you’ll be making more images. So if you used to go out once, go out twice, etc.

I mean, who do you think will have a better chance at getting a job? The one that applies for one job, or the one that applies for 10? Skill and creativity are multiplying forces, but it doesn’t matter how skillful you are if you are a couch potato. Sharpen your skills and get out there to get lucky.

#7 – Scramble everything

There was this cool experiment where they gave this guy upside down glasses, so everything was inverted. They wanted to pour him a drink, and he turned the cup upside down (because he believed it was upside down). Imagine the world upside down and how hard it would be to live like that. The kicker? After 10 days he adapted to the upside down vision, and could even ride a bike!

10 More Photography Tips to Help Take Your Images to the Next Level

Sometimes we just get used to how we shoot, we get complacent, that’s normal. So scramble things up. If you normally shoot color, try b/w, if you like portraits try street photography, if you are a film shooter, try digital, etc. It’s like the “Dennis Rodman-ize” tip, but this is more designed to shake you out of complacency rather than to bring attention to your work.

#8 – Revisit your images
10 More Photography Tips to Help Take Your Images to the Next Level

Two photographers can look at the same scene, and yet see two different things. The difference is their knowledge about photography. You probably have some hidden gems in your images that you’ll probably never uncover if you do not revisit your images. You made them, but when you revisit them you do so with new eyes, and you will see them differently.

You will be amazed at what you find. Images that you believed were boring and/or ruined will be seen in a new light. You may ask yourself, “How did I miss that?!? There are quite a few images that I have overlooked, that’s why I have a no-delete policy. Maybe I can’t see what my future self will see or what my future self will be into.

#9 – Let go of preconceptions

10 More Photography Tips to Help Take Your Images to the Next Level

I receive emails daily from photographers around the world. The one thing many seem to struggle with is that they don’t live in a big city. It is understandable, but just because you can’t find the images you have in your mind doesn’t mean they are not there. You just need to let go of your preconceived ideas and be more open to what is in front of you.

Some people tell me they wish they had more money to travel. Evidently, the image in their mind is of travel, but an image doesn’t need to be travel photography to be good, does it? It’s good to have a general idea of what you want, but also to be open to the possibilities.

Some people get hung up on relationship breakups, passing by great, if not better opportunities in front of them. Likewise, seeing what is possible right in front of us allows us to maximize our opportunities as photographers.

#10 – Remember it’s all plastic

10 More Photography Tips to Help Take Your Images to the Next Level

It’s a hard concept to grasp, especially as a beginner, but remember that photography is plastic. Exposure? Plastic. Colors? Plastic. White Balance? Plastic. Sharpness. Who said every image needed to be averagely exposed, with white balance set perfectly by grey card, and super sharp? The first thing I do as a photographer in Lightroom is to clip my blacks. I LOVE clipping my blacks. I never set my white balance with a grey card, I just look at the image and hear what it creatively calls for, then do that.

Photo of a bride and groom? Probably needs to be on the warmer side so that the viewer can get some emotional cues from that. Shot these plastic surgeons? I’ll put my white balance on the cool side to reinforce the surgical cleanliness. Whatever you are doing right now, remember all of it is plastic. Who said images needed to be in a square or rectangle? Who said portraits have to contain faces? Who said colors had to be realistic (see above)? Who said paper and canvas was the only printing options…..you get the gist!

Conclusion

There you have it, 10 more photography tips to help you in your photography journey. I hope you resonate with some of them. Be yourself, stay focused and keep on shooting.

10 More Photography Tips to Help Take Your Images to the Next Level

googletag.cmd.push(function() {
tablet_slots.push( googletag.defineSlot( “/1005424/_dPSv4_tab-all-article-bottom_(300×250)”, [300, 250], “pb-ad-78623” ).addService( googletag.pubads() ) ); } );

googletag.cmd.push(function() {
mobile_slots.push( googletag.defineSlot( “/1005424/_dPSv4_mob-all-article-bottom_(300×250)”, [300, 250], “pb-ad-78158” ).addService( googletag.pubads() ) ); } );

The post 10 More Photography Tips to Help Take Your Images to the Next Level by Olivier Duong appeared first on Digital Photography School.


Digital Photography School

 
Comments Off on 10 More Photography Tips to Help Take Your Images to the Next Level

Posted in Photography


Weekly Photography Challenge – New Beginning

11 Jan

As the first photography challenge of 2017, I thought it would be fitting if we go with a theme for new beginnings. Like these 19 images show – there are many ways to interpret that theme.

Francisca Ulloa

By Francisca Ulloa

Shellie

By Shellie

Weekly Photography Challenge – New Beginning

So, however you want to run with this idea is up to you. It could be about babies, kittens, or eggs. Or it could be around a new beginning you want for yourself this year. Maybe even a goal or resolution you want to achieve.

Share your images below:

Simply upload your shot into the comment field (look for the little camera icon in the Disqus comments section) and they’ll get embedded for us all to see or if you’d prefer, upload them to your favorite photo-sharing site and leave the link to them. Show me your best images in this week’s challenge. Sometimes it takes a while for an image to appear so be patient and try not to post the same image twice.

Micolo J

By Micolo J

Andy Reago

By Andy Reago & Chrissy McClarren

Craig Sunter

By Craig Sunter

Elycefeliz

By elycefeliz

Share in the dPS Facebook Group

You can also share your images on the dPS Facebook group as the challenge is posted there each week as well.

googletag.cmd.push(function() {
tablet_slots.push( googletag.defineSlot( “/1005424/_dPSv4_tab-all-article-bottom_(300×250)”, [300, 250], “pb-ad-78623” ).addService( googletag.pubads() ) ); } );

googletag.cmd.push(function() {
mobile_slots.push( googletag.defineSlot( “/1005424/_dPSv4_mob-all-article-bottom_(300×250)”, [300, 250], “pb-ad-78158” ).addService( googletag.pubads() ) ); } );

The post Weekly Photography Challenge – New Beginning by Darlene Hildebrandt appeared first on Digital Photography School.


Digital Photography School

 
Comments Off on Weekly Photography Challenge – New Beginning

Posted in Photography


Toy Photography Lets Hobbyists Work While They Play

11 Jan

Chris McVeigh didn’t reach paid photography through any of the usual routes. He didn’t study photography, didn’t work as an assistant and he didn’t even have photography as a goal. His background was in writing for technology magazines and providing illustrations and animation for online advertising. It was only when the economic downturn left him with less demand from his regular employers, and more free time for creative experimentation, that he turned towards picture-taking. His images have since become regular additions to Gizmodo, they’re sold on RedBubble and Society6, and Lucasfilms has even put one of his photos on the front page of StarWars.com.

His success has been helped by the fact that Chris skirted around the competition for landscape photographs and wedding shoots. He produces a nearly unique set of pictures that he calls “toy photography.” He creates sets out of Lego figures and uses them to illustrate scenes.

Chris’s interest in Lego started as suddenly as his interest in photography. Like most people, Chris had left playing with plastic bricks in his childhood. Some friends, though, bought him some Star Wars Lego sets for Christmas… which he then ignored for about a year before assembling them.

“When I did finally break open the boxes and put them together, it was like a spark ignited within me,” Chris recalls. “However, it would be another few years and a dozen Star Wars sets before I was really hooked again.”

At the same time, Chris was playing around on Flickr, creating a series of comical self-portraits as part of a daily photo challenge. That series built an audience, won plaudits and gave him the confidence to buy his first DSLR.

breakfast

Photography: Chris McVeigh

Each Set Takes Two to Three Weeks to Build

It wasn’t long before his growing interest in photography met the fun he was then having with Hasbro Star Wars figures. Lego, though, offered a more flexible platform, with parts that were interchangeable, allowing Chris to reuse pieces from any Lego theme from Batman to Harry Potter.

The props might be toys but creating the images isn’t child’s play. Chris usually has plenty of ideas but he starts designing using a Lego CAD app called Lego Digital Designer. That allows him to experiment with the build without spreading all the bricks in front of him. Once he’s happy with the design, he creates a test build in the real world then works to optimize the parts usage.

Some designs, he says, take as little as 24 hours but most require a development of two to three weeks before they’re ready to be photographed.

The shoot is a whole different challenge. Legos’s bricks are highly reflective, especially the darker colors, says Chris, so he has to be very careful about how he uses light and where he positions his panels. It’s no surprise that he typically builds and photographs new models just once a month at the moment, although he might produce a number of models concurrently and photograph them at the same time.

The result is a mixture of whimsy and smart photography. Scenes include a version of American Gothic, a reconstruction of Michael Jackson’s Thriller video (complete with dancing zombies) and a bowl of milk filled with floating stormtrooper heads. Reconstructions of early technology, including a Leica M9-P Hermes and a (sort of) working Polaroid Land Camera are popular too.

Chris’s intention when he began creating and photographing his models was little more than to enjoy some creative experimentation. But when he uploaded them to Flickr, the pictures continued to win attention, including from buyers.

“One of Gizmodo’s editors was a contact of mine on Flickr, and was impressed both with my capacity to design my own models and my ability to present those models with my photography,” Chris said. “So he contacted me through Flickr to see if I’d be interested in contributing to Gizmodo.”

From Lego to Kozik’s Mongers Menthols

The technology website has published dozens of Chris’s pictures using them to illustrate articles about water pressure as well as explanations of the difference between GSM and CDMA. The site made a point of linking to Chris’s Web pages and even mentioned that he was able for commissioned work.

His work for Lucasfilms also came about as a result of his presence on Yahoo’s photo sharing site. Bonnie Burton, formally of the Official Star Wars blog, contacted Chris on Flickr after seeing his Star Wars action figure/chipmunk photography on Digg.

Chris isn’t the only photographer who has managed to make money setting up toys and taking their picture. Ryan Roberts paints with a slightly different canvas, using collectible figures from Japan and China’s urban vinyl toy culture that was popular in the 1990s. They might include the Kozik’s Mongers Menthols series that contained a smoking pile of poop, Domo’s Acid Sweeties, or Pete Fowler’s Monsterism.

“These figures went way beyond my childhood toys with so much color and attitude,” says Ryan on his website. “They were already tiny works of art by giant artists from other genres such as painting, illustration, silk screening, and street art.”

Ryan’s broader choice of figures gives his scenes a greater freedom of expression even if the models themselves are less familiar than the Lego characters used by Chris McVeigh. He sells his prints from his websites, has a DVD of toy-based shorts and markets a calendar of his images that costs $ 45.

What both these photographers have in common is the combination of a passion for a hobby — in this case a particular kind of children’s toy — and a knowledge of photography. Bring those two together and add the kind of photography-loving networking that can still be found on sites like Flickr and while you might not find yourself traveling down the usual route taken by professional photographers, you could well find yourself winning commissions, landing sales making some money doing a photo-based activity you love.


Photopreneur – Make Money Selling Your Photos

 
Comments Off on Toy Photography Lets Hobbyists Work While They Play

Posted in Equipment


The Pros and Cons of Black and White Versus Color for Street and Travel Photography

10 Jan

The question of whether to shoot street and travel photos in black or white or color is an eternal one that isn’t going to go away. But one of the interesting things about digital photography is that it lets you decide whether to process a photo in black and white or color after the photo has been taken. Unlike film photography, there’s no need to commit to one or the other until you open the photo in Lightroom.

The Pros and Cons of Black & White Versus Color for Street and Travel PhotographyBut is that a mistake? I think it is because black and white photography and color photography are two different mediums. If you are working in color, then you need to pay attention to the colors in the scene and how to use them to create an interesting composition. But in black and white, you need to pay more attention to textures, contrasts, and shapes in order to create a strong composition.
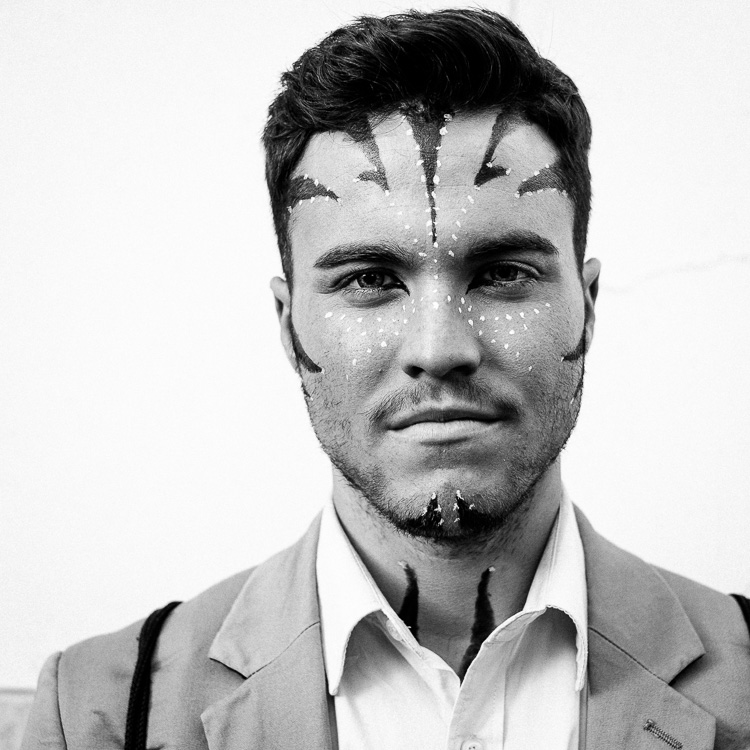
 

That’s on top of the task of capturing the expressive moments that the best street and travel photos reveal.

There’s a lot to think about, and as black and white and color photography require different mindsets, it’s a good idea to make the decision about which you are going to shoot before you press the shutter button.

Having said that, it is also helpful to think about the following factors when you are processing photos. It may be that you were working in color, but realize afterward that a particular image would work very well in black and white. The same considerations apply, except that you have more time to think about it.

3 Reasons for working in black and white

1. To capture character

Many street and travel photographers, street photographers especially, chose to work in black and white. If your aim is to make a candid portrait that captures something of the person’s character or soul, then black and white is an excellent choice. There is something timeless about black and white that helps reveal character.

That’s why I shot the following photo in black and white.

The Pros and Cons of Black & White Versus Color for Street and Travel Photography

2. To simplify the composition

Black and white is a form of simplification. Skilled street photographers learn to create images that are uncluttered and that contain as few distractions as possible. Color can be extremely distracting, and sometimes it’s easier to ignore color completely and work in black and white.

For example, let’s say you make a portrait of somebody on the street, but there is a red poster on a wall behind them. In a color photo, that’s likely to be very distracting. But convert it to black and white and the distraction goes away. The viewer’s attention goes back to the person, where it belongs.

If you are working in an area with lots of potentially distracting colors, working in black and white may be the way to go. For example, this scene in Bolivia was quite colorful, and I felt that black and white removed the distractions of those colors.

The Pros and Cons of Black & White Versus Color for Street and Travel Photography

3. To evoke atmosphere

Color photos can be tremendously evocative, but so can black and white ones. I think it’s because a black and white image leaves something for the imagination, or perhaps because we associate it with photos taken in the past. So, if you are working somewhere with lots of old buildings, then black and white photos can be a tremendously moody way of capturing the atmosphere of that place.

I chose black and white for this photo, taken in the Argentina, because the stirrup is handmade, and looks ancient, as if it were made many years ago.

The Pros and Cons of Black & White Versus Color for Street and Travel Photography

3 Reasons for working in color

Color is very powerful and used wisely it can elevate your images to another level. Yet, if it is not used thoughtfully, it can take away from the impact of your photos.

1. The colors of the location are part of its character

For example, last year I visited Beijing and noticed that red is a very common color in that city. It denotes power and wealth and has an important part in Chinese culture. I realized that it is possible to create a series of interesting photos with red as the dominant color.

For example, this photo (below), taken in the Forbidden City in Beijing, makes use of the striking contrast between the red walls and the yellow tiles (matched by the boy’s shorts).

The Pros and Cons of Black & White Versus Color for Street and Travel Photography

2. The light is beautiful

Color photos are at their strongest when the light is beautiful. This is usually during the golden hour close to sunset, or early morning just after sunrise. The light at these times is warm and golden, and tremendously evocative. This could be a good time to work in color.

I took this photo close to sunset. The light was soft and its warmth helped lift the scene.

The Pros and Cons of Black & White Versus Color for Street and Travel Photography

3. You are shooting at dusk

Dusk and early evening are good times to work in color as it gives you the opportunity to work with the natural color contrast between the orange light cast by tungsten light bulbs and the natural blue color of the ambient light.

This photo below was taken in the early evening. The hat and t-shirt of the man in the foreground are colored blue by the ambient light outside, while the rest of the scene is lit by artificial light. I retained the orange color in post-processing to keep the atmosphere.

Color vs black and white in street and travel photography

Commit

The process of deciding to shoot in black and white or color involves assessing the scene and the situation, and deciding which one to use, taking into account the reasons listed in this article and your personal preferences. The key is then to commit to the process. Work the subject and do your best to create the most powerful images possible.

If you’re working in color, think about the colors present in the scene and how you can use them effectively. Your mind will engage and start looking more deeply at the colors around you.

If you’re working in black and white, look for interesting textures, tonal contrast, and shapes. Again, once you commit your mind will start looking for compositions that work well in monochrome.

Your turn

What do you think? Do you prefer to make street and travel photos in black and white or color? Let us know in the comments.


If you enjoyed this article and would like to learn more about street and travel photography then please check out my ebook The Candid Portrait.

googletag.cmd.push(function() {
tablet_slots.push( googletag.defineSlot( “/1005424/_dPSv4_tab-all-article-bottom_(300×250)”, [300, 250], “pb-ad-78623” ).addService( googletag.pubads() ) ); } );

googletag.cmd.push(function() {
mobile_slots.push( googletag.defineSlot( “/1005424/_dPSv4_mob-all-article-bottom_(300×250)”, [300, 250], “pb-ad-78158” ).addService( googletag.pubads() ) ); } );

The post The Pros and Cons of Black and White Versus Color for Street and Travel Photography by Andrew S. Gibson appeared first on Digital Photography School.


Digital Photography School

 
Comments Off on The Pros and Cons of Black and White Versus Color for Street and Travel Photography

Posted in Photography


Some of the Best Beginner Photography Tips of 2016

04 Jan

Earlier this week we shared some other popular articles from 2016. Check those out here:

  • Top Gear Related Articles of 2016
  • 15 of the Most Popular Landscape Photography Articles of 2016
  • 18 of the Most Popular Portrait Articles on dPS in 2016

Now it’s time to take a look at some photography basics. These are some of the best beginner photography tips we ran on dPS in 2016. If you just got your camera recently, or even for Christmas, these will be a good place for you to dig in and get started.

some-of-the-best-beginner-photography-tips-of-2016

  • How To Find Your Lens’ Sweet Spot: A Beginner’s Guide to Sharper Images
  • How to Understand the Mysteries of ISO for Beginners
  • Beginner’s Guide to Water Droplet Photography
  • Histograms for Beginners
  • How to Photograph Sun Flares: 14 Tips for Beginners
  • A Beginner’s Guide to Doing Black and White Photography
  • 5 Tips for Getting Started with Wildlife Photography for Beginners
  • 13 Snow Photography Tips: A Beginner’s Guide
  • Beginner’s Guide to Doing DSLR Video Clips
  • An Exercise to Learn and Practice Shutter Speed at Home
  • 12 Common Newbie Photography Mistakes to Avoid
  • 10 Things Nobody Tells Photography Newbies
  • Common Photography Mistakes Newbies Make and How to Avoid Them
  • Camera Modes Explained for Newbies
  • How to Overcome 6 Common Newbie Photography Fears
  • How to Use Exposure Compensation to Take Control of Your Exposure
  • How to Use the Zone System to Learn about Metering and Exposure Compensation
  • Do These 5 Quick Exercises to Learn What Your New Camera Can Do
  • Your Next Purchases After You Get a New Camera


nutsbolts_1200x628px

You can also check out our ebook for beginners: Photo Nuts and Bolts.

OR our online course Photo Nuts and Bolts here.

day-05-nut and bolts

That’s a lot of reading for you. Tomorrow I’ll dig up some post-processing tips if you think you’re ready to tackle that subject.

googletag.cmd.push(function() {
tablet_slots.push( googletag.defineSlot( “/1005424/_dPSv4_tab-all-article-bottom_(300×250)”, [300, 250], “pb-ad-78623” ).addService( googletag.pubads() ) ); } );

googletag.cmd.push(function() {
mobile_slots.push( googletag.defineSlot( “/1005424/_dPSv4_mob-all-article-bottom_(300×250)”, [300, 250], “pb-ad-78158” ).addService( googletag.pubads() ) ); } );

The post Some of the Best Beginner Photography Tips of 2016 by Darlene Hildebrandt appeared first on Digital Photography School.


Digital Photography School

 
Comments Off on Some of the Best Beginner Photography Tips of 2016

Posted in Photography


Top Street and Travel Photography Tips of 2016

04 Jan

This week we have shared some other popular articles from 2016. Check those out here:

  • Top Gear Related Articles of 2016
  • 15 of the Most Popular Landscape Photography Articles of 2016
  • 18 of the Most Popular Portrait Articles on dPS in 2016
  • Some of the Best Beginner Photography Tips of 2016
  • Most-Read Post-Processing Articles of 2016

In this last annual round-up, I have gathered some of the top street, and travel photography articles of the year for you, and as a bonus some other miscellaneous topics as well. We will be back to our normal schedule of two articles per day tomorrow.

top-street-and-travel-photography-tips-of-2016

Street photography

  •  23 Quick Tips for Street Photography or Your Next Photo Walk
  • The Uncomfortable Truth About Street Photography
  • 13 Steps for Editing Street Photography in Lightroom from Start to Finish
  • An Introduction to Street Photography for New Photographers
  • How to Choose the Best Lens for Travel and Street Photography
  • 7 Common Mistakes That Newbie Street Photographers Make
  • How the Square Format Can Enhance Your Street Photography
  • 8 Advanced Street Photography Tips to Get You to the Next Level
  • Pros and Cons of a Telephoto Lens for Street Photography?
  • 9 Tips for Creating Great Street Portraitsultimate-street-photo-guide

Ultimate Guide to Street Photography – free PDF download

Remember you can also get the dPS The Ultimate Guide to Street Photography here. Download it as a free PDF to keep with you as a reference when you go out shooting.

Travel photography

  • 7 Travel Photography Mistakes to Avoid
  • Travel Photography Simplified: 4 Changes that Made me a Better Photographer
  • 7 Common Mistakes That Could be Ruining Your Travel Photos
  • How to Use a Travel Photography Shot List to Come Home with Better Photos
  • My Favourite Travel Lens; The Tamron 28-300mm
  • 10 Tips To Help You Capture Sellable Travel Stock Photos
  • Travel People Photography – Tips and Pitfalls
  • 10 Tips For Food Photography When Travelling
  • 6 Tips for How to be a Culturally Sensitive Travel Photographer
  • 7 Reasons Why a Tripod is a Travel Photographer’s Best Friend
  • How to Travel Safely with Your Camera Gear
  • 5 Lessons Learned While Using a Kit Lens for Travel Photography
snapntravel-1-1.jpg

Also available is our SnapnTravel ebook. Get it here.

Other topics

  • Behind the Scenes of Marvellous Macro Insect Imagery
  • Quick Overview of How to do Macro Photography
  • Macro Photography on a Budget: An introduction to Close-up Filters
  • How to Get Stunning Macro Photos with Your Mobile Phone
  • Tips for Abstract Macro Photography; Using Texture and Light
  • 5 Must-Have Lenses for Wedding Photographers and Why
  • 4 Easy and Unique Ways to Light and Photograph Wedding Rings
  • Wedding Photography; Just How Specialized is it?
  • 10 Fundamental Tips for Newbies in the Wedding Photography Business
  • 10 Tips for Photographing Great Headshots
  • How to Edit Corporate Headshots in Lightroom
  • The Secret to Finding the Hero Angle in Food Photography
  • 5 Tips for More Professional-Looking Food Photography
  • 8 Tips for Food Photography Newbies
  • How to Take Cool Food Photos in Your Refrigerator
  • 10 Ideas to Instantly Improve Your Photography Composition
  • 6 Advanced Composition Techniques to Improve Your Photos
  • 4 Steps to Creating Images With More Meaningful Composition

leannecole-exhibiting-your-artwork-31

googletag.cmd.push(function() {
tablet_slots.push( googletag.defineSlot( “/1005424/_dPSv4_tab-all-article-bottom_(300×250)”, [300, 250], “pb-ad-78623” ).addService( googletag.pubads() ) ); } );

googletag.cmd.push(function() {
mobile_slots.push( googletag.defineSlot( “/1005424/_dPSv4_mob-all-article-bottom_(300×250)”, [300, 250], “pb-ad-78158” ).addService( googletag.pubads() ) ); } );

The post Top Street and Travel Photography Tips of 2016 by Darlene Hildebrandt appeared first on Digital Photography School.


Digital Photography School

 
Comments Off on Top Street and Travel Photography Tips of 2016

Posted in Photography


Household Items to Bring to Your Next Food Photography Shoot

03 Jan

One of the most common assumptions about food photography is that hardcore food styling techniques must be involved to make dishes more visually appealing. In fact, there are professional food stylists who will employ all sorts of techniques to transform a dish into an inedible, yet highly photo-worthy subject. However, food styling techniques can also be very simple and accessible. Below is a list of common household items that can also help you out on your next food photography shoot.

Tweezers Food Styling Tips for Photography

For Keeping Food Clean

Tweezers

It’s pretty much inevitable that a plate of food will have quite a few moving parts that can easily fall out of place. While the Spot Healing Brush in Photoshop can make crumbs or blemishes disappear in post-production, it’s best to remove those bits and pieces from the dish before your shot is taken. This is where a pair of tweezers comes in. Use them to rearrange food on a plate or reach down into a deep glass or bowl to make adjustments.

Tweezers Food Styling Tips for Photography

These crumbs could have been easily removed with tweezers, or removed in post production.

Cotton balls

Besides being used to soak up pools of excessive liquid that might gather on a dish, cotton balls are also great for propping up food. Stuff one or two behind a piece of food to give it some leverage and height. Since they’re small and absorbent, the cotton balls can easily hide and blend into a dish so it’s not obvious they’re being used.

Q-tips

Serving a similar purpose to tweezers and cotton balls, Q-tips (cotton swabs) are important for small touch ups. Use them dry or dipped into some rubbing alcohol to remove small blemishes from a dish and you’ll save yourself some valuable time in post-production. Which leads me to my next point…

Rubbing alcohol

Throughout a food photography shoot, your props and gear are bound to come into contact with some morsels of food. Bring a small bottle of rubbing alcohol to keep your gear clean, and even consider keeping some hand sanitizer nearby to clean your hands after rearranging plates of food.

Highly absorbent paper towels

If it’s not already obvious, all of the food styling tools listed thus far have to do with cleaning and touching up dishes before they’re photographed. This tool is the last of the cleaning sort and is useful not only for wiping dirty hands after styling, but also for absorbing liquid from juicy meats, iced drinks, or other plates of food that are a touch too wet.

For Keeping Food Fresh

Food Styling Tips for Photography

Using a spray bottle filled with water was essential for keeping the shine on these saucy chicken wings.

One of the biggest challenges for food photographers is to shoot dishes while they still look appetizing and edible. These tools will help restore shine and luster to dishes to imply freshness.

Nonstick cooking spray

Restore a bit of shininess to a dish and help it reflect light better by adding a bit of nonstick cooking spray. Be very careful, however, as a spray that is too strong might dishevel parts of your dish.

Spray bottle filled with water

This serves the same purpose as the nonstick cooking spray, but in a slightly more controllable manner as you can often shift the nozzle of a spray bottle to emit a smaller or larger stream of water.

Eye-dropper

When you need ultimate control over liquid application, it’s best to use an eye-dropper instead of a spray bottle or nonstick cooking spray.

For Applying Creative Touches

After using the above tools to perfect the details of your photo subject, it’s time to focus on two other factors that can take your photo to the next level; light control, and selecting a creative background.

Tin foil (or a large metal baking sheet)

Depending on your preferred camera tools, you may already have a reflector in your food photography kit. If you don’t have a reflector, you can use a sheet of tin foil or a metal baking sheet. If you use tin foil, you have the added bonus of being able to use smaller pieces and mold them.

Food Styling Tips for Photography

On the left: shot without a reflector; on the right: shot with a reflector to the right of the food.

Baking parchment paper

In photography, baking parchment paper can serve a couple of purposes.

First, it can be used as a cheap alternative to a diffuser (light modifier) to soften the light aimed at your subject. Simply tape a sheet of parchment paper to a window where sunlight is shining through. The resulting light will soften considerably, reducing the shadows and glare on your food subject.

Another way to utilize parchment paper is as a photography background or surface. Try plain parchment paper for a white surface, or the brown version for a different color option.

Food Styling Tips for Photography

Parchment paper can add a different texture and color to your photo subject.

Gift wrap

Since we’re on the subject of photography surfaces, gift wrap is another affordable option for shooting food against creative backdrops. Cutting boards, tabletops, and placemats are also popular options, but they can be pricey and take up lots of room to store. Gift wrap, on the other hand, is plentiful with a variety of colors and textures to choose from.

Tweezers Food Styling Tips for Photography

The same dish shot with different backgrounds. White gift wrap paper was used on the left and a wooden table surface on the right.

Over to You

Do you have any simple food styling tips or tricks to share? Let me know in the comments below!

googletag.cmd.push(function() {
tablet_slots.push( googletag.defineSlot( “/1005424/_dPSv4_tab-all-article-bottom_(300×250)”, [300, 250], “pb-ad-78623” ).addService( googletag.pubads() ) ); } );

googletag.cmd.push(function() {
mobile_slots.push( googletag.defineSlot( “/1005424/_dPSv4_mob-all-article-bottom_(300×250)”, [300, 250], “pb-ad-78158” ).addService( googletag.pubads() ) ); } );

The post Household Items to Bring to Your Next Food Photography Shoot by Suzi Pratt appeared first on Digital Photography School.


Digital Photography School

 
Comments Off on Household Items to Bring to Your Next Food Photography Shoot

Posted in Photography


10 things I wish I knew when starting my photography business

30 Dec

The moment I bought my first DSLR I knew that photography was my true passion. I didn’t consider myself a professional back then, but I was sure I wanted to become one. Well, the road  turned out a lot longer than I expected. I have learned there’s much more than meets the eye when it comes to the photographer profession. Continue Reading

The post 10 things I wish I knew when starting my photography business appeared first on Photodoto.


Photodoto

 
Comments Off on 10 things I wish I knew when starting my photography business

Posted in Photography


Weekly Photography Challenge – Festive

29 Dec

Holiday time in many parts of the world is a time for festivities. I shared a few festive images earlier, have a look.

Kenny Miller

By Kenny Miller

Weekly Photography Challenge – Festive

What does festive look like for you? In your city? In your culture? Photograph that and share it with us this week for this challenge. Think about:

  • Decorations and lights
  • Food or special meals
  • Parties or events
  • Parades or fireworks
  • Family and friends
MattysFlicks

By MattysFlicks

Jamie McCaffrey

By Jamie McCaffrey

The Explorographer™

By The Explorographer™

Share your images below:

Simply upload your shot into the comment field (look for the little camera icon in the Disqus comments section) and they’ll get embedded for us all to see or if you’d prefer, upload them to your favorite photo-sharing site and leave the link to them. Show me your best images in this week’s challenge. Sometimes it takes a while for an image to appear so be patient and try not to post the same image twice.

Share in the dPS Facebook Group

You can also share your images on the dPS Facebook group as the challenge is posted there each week as well.

googletag.cmd.push(function() {
tablet_slots.push( googletag.defineSlot( “/1005424/_dPSv4_tab-all-article-bottom_(300×250)”, [300, 250], “pb-ad-78623” ).addService( googletag.pubads() ) ); } );

googletag.cmd.push(function() {
mobile_slots.push( googletag.defineSlot( “/1005424/_dPSv4_mob-all-article-bottom_(300×250)”, [300, 250], “pb-ad-78158” ).addService( googletag.pubads() ) ); } );

The post Weekly Photography Challenge – Festive by Darlene Hildebrandt appeared first on Digital Photography School.


Digital Photography School

 
Comments Off on Weekly Photography Challenge – Festive

Posted in Photography