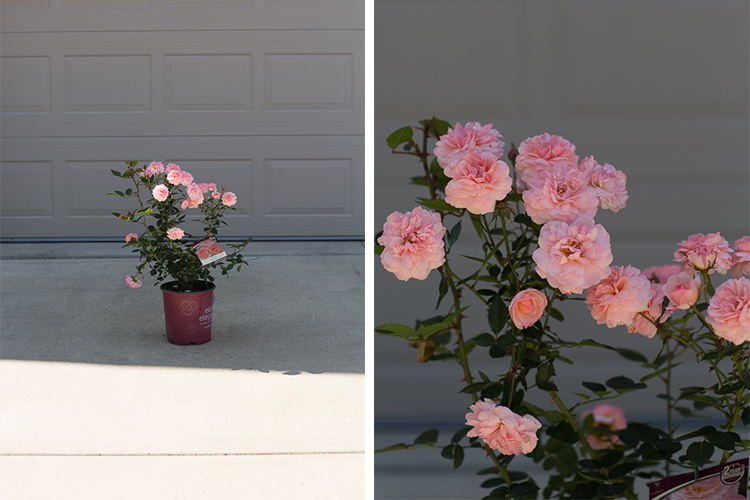
Have you noticed how many photographers are fascinated with the natural world? Even if we specialise in another genre, few of us can resist a gorgeous flower, or a branch of autumn leaves.
One of the best things about photographing nature is that it is so accessible. You needn’t travel far to find it, because it’s all around you. You may take it for granted because you see it every day, but your own backyard is treasure trove. Every hour of every day and every season, bring something new.

Summer lavender: ISO 100, f/3.5, 1/200th
Backyard needn’t be taken literally here. If you don’t have a backyard, you’ll find plenty of nature to photograph just by wandering the streets or public parks and gardens.
Tech details: All of the photographs in this article were shot on my Canon 5D Mark III. Unless otherwise stated, I have used my Canon macro 100mm f/2.8 lens. I have included details of ISO, aperture and shutter speed settings.
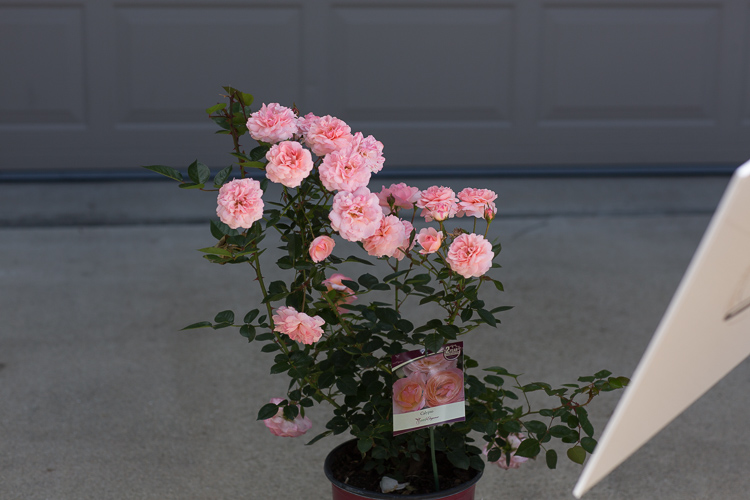
#1 – Flowers and leaves
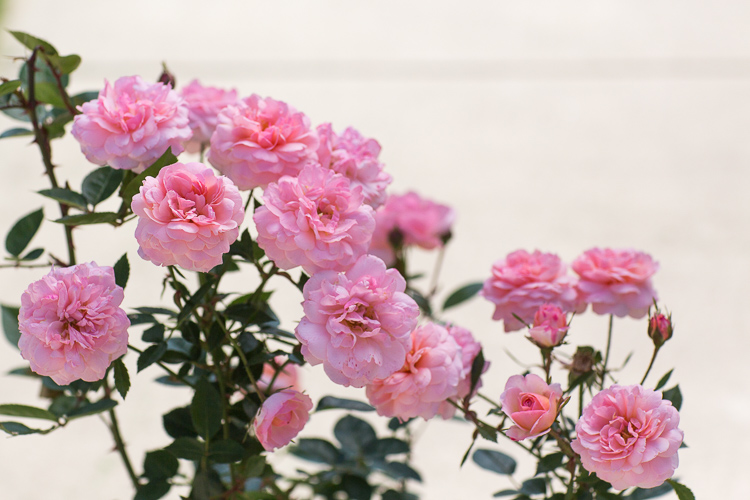
Flowers and leaves are often the first things that come to mind when we look for subjects in our own backyards. They offer an endless variety of colours, shapes and textures for you to photograph. You could create a collection based on a single colour scheme, or try to find as many different leaf or flower shapes as possible.

Cymbidium orchid: ISO 640, f/4, 1/100th
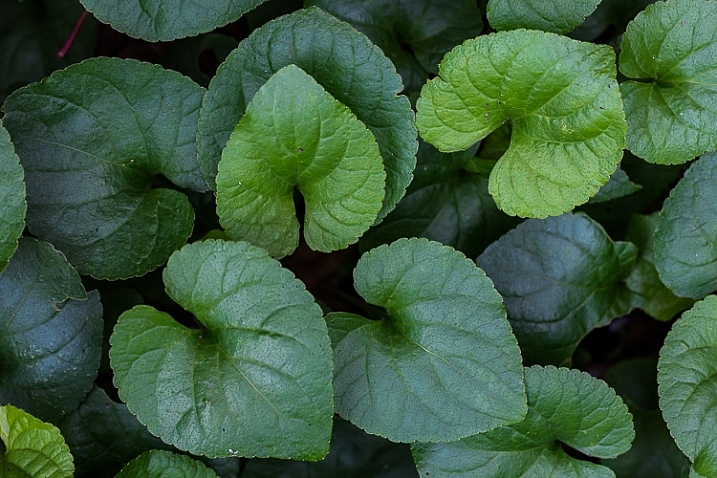
Violet leaves: ISO 800, f/8, 1/30th
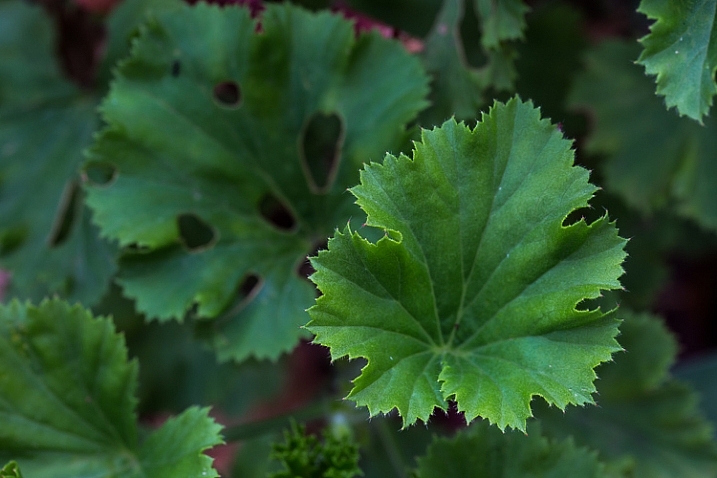
Geranium leaves: ISO 320, f/8, 1/40th
Experiment with different lighting and conditions. I love backlighting for leaves and flowers, as it creates a luminous, almost three-dimensional effect, and you can see details such as veins. Some shapes look better with strong, directional light, and I love how colours are enhanced in the wet.
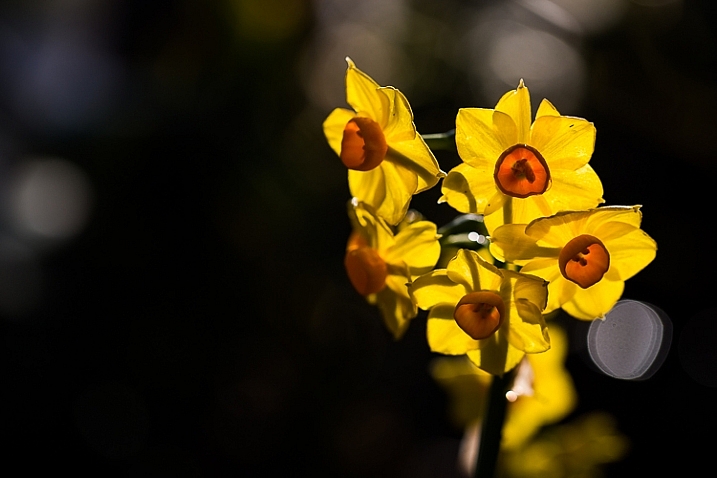
Erlicheer daffodils BACKLIT: ISO 100, f/4, 1/640th
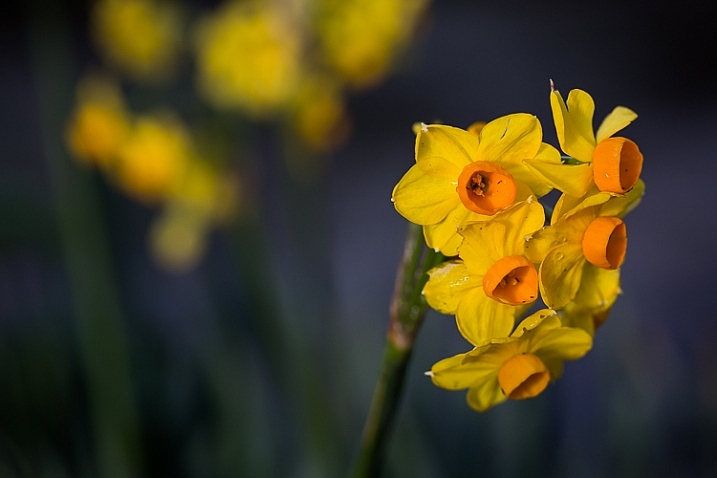
The same flower shot with the sun on my back: ISO 100, f/4, 1/800th
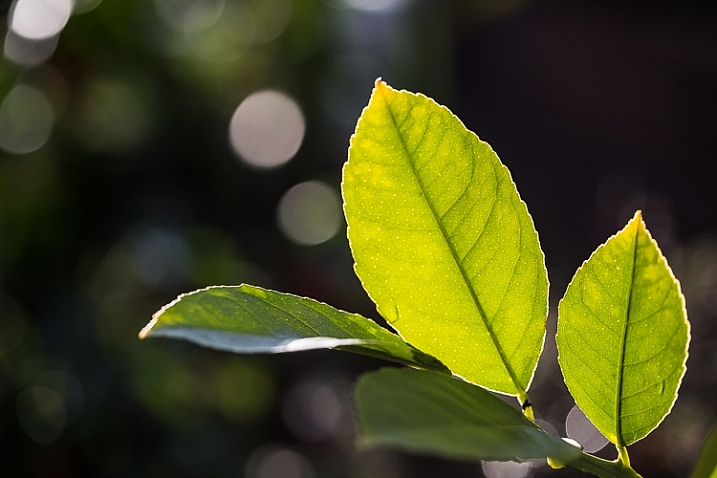
Backlighting a leaf reveals details you wouldn’t see if you lit it directly : ISO 100 f/4, 1/250th
Flowers are seasonal, and in temperate zones, spring and summer offer the widest variety. There are still flowers to be found in winter, although you may need to look harder. Don’t forget that weeds, such as dandelions ,are also beautiful! Autumn (fall) provides the greatest colour spectrum in leaves.
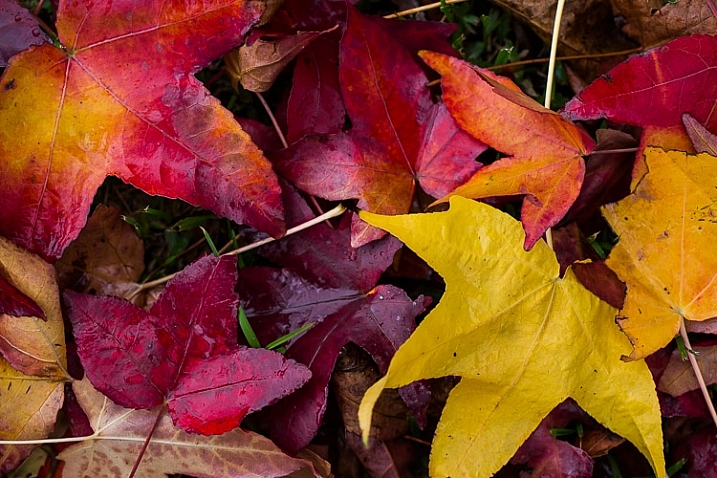
Liquidamber leaves photographed en masse: ISO 640, f/4, 1/80th
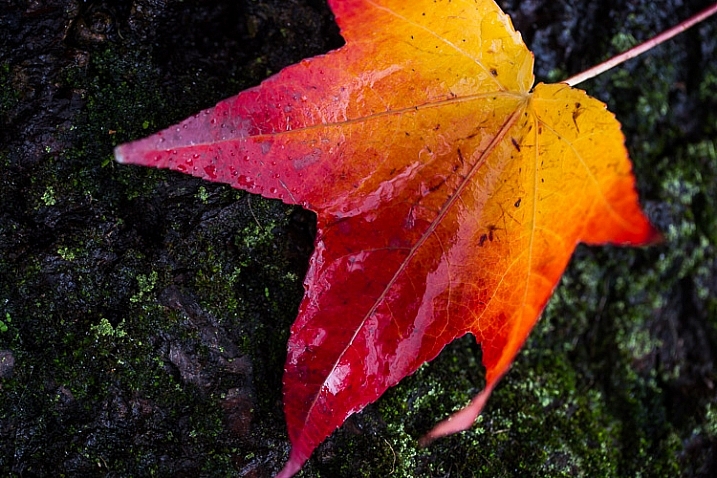
A single leaf isolated against a dark background: ISO 640, f/4, 1/30sec
#2 – Fruit, berries and seed pods
When the summer flowers disappear, fruits and berries are nature’s way of providing for birds and animals throughout the colder months. Many berries and seed pods ripen towards the end of autumn, bringing colour to the winter garden. Citrus trees bear fruit in winter, and persimmon trees lose their leaves to reveal branches of shiny orange fruits. Think also of acorns, pine cones, and nuts.
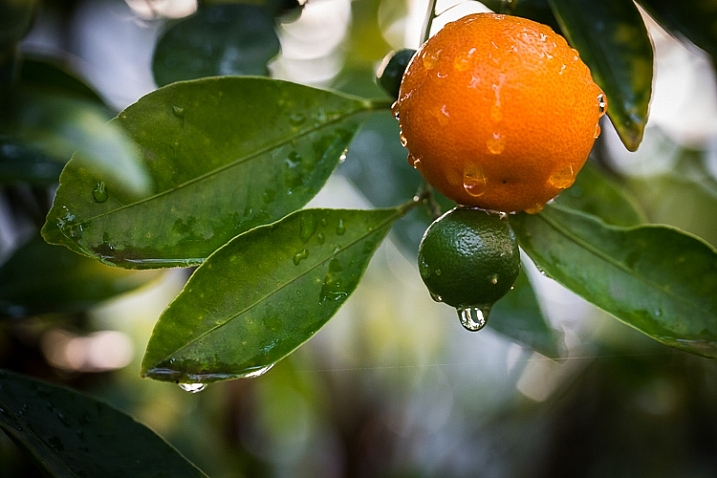
Kumquat: ISO 2500, f/4.5, 1/50 sec
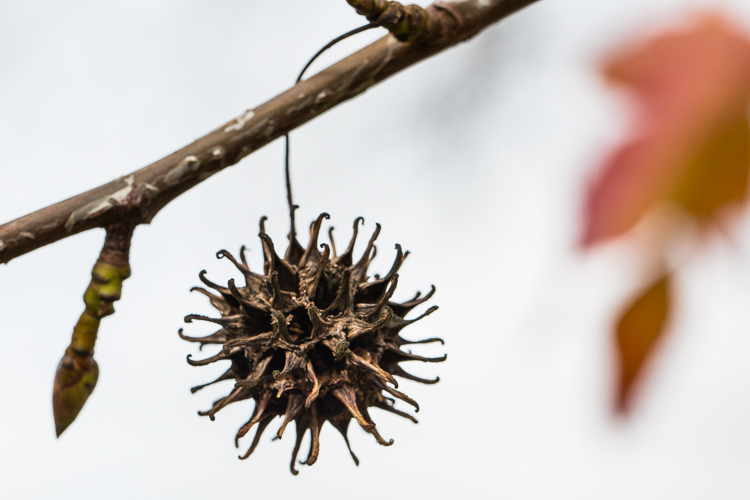
ISO 800, f/8.0, 1/500th.
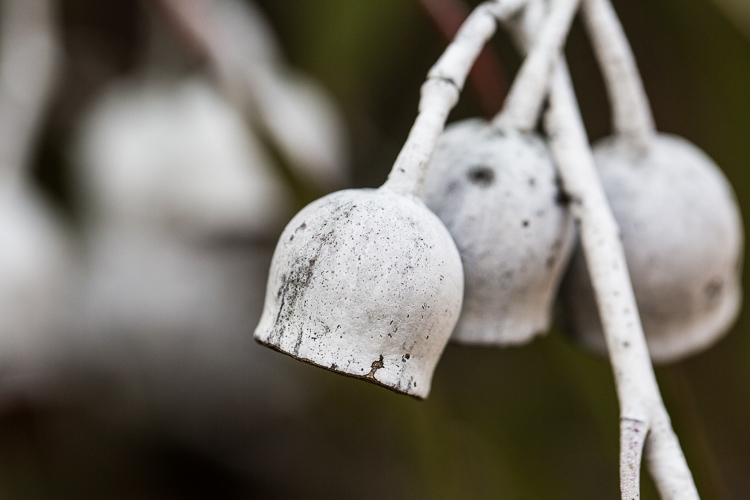
ISO 500, f/5.0, 1/1250th.
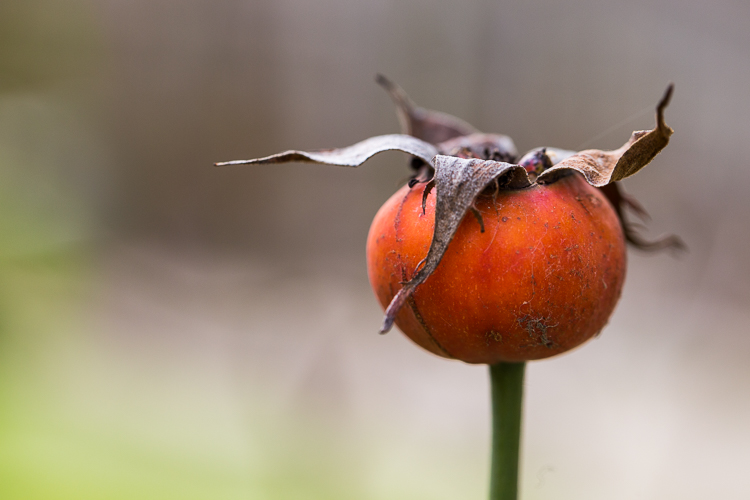
Orange rosehip: ISO 500, f/5.0, 1/160th
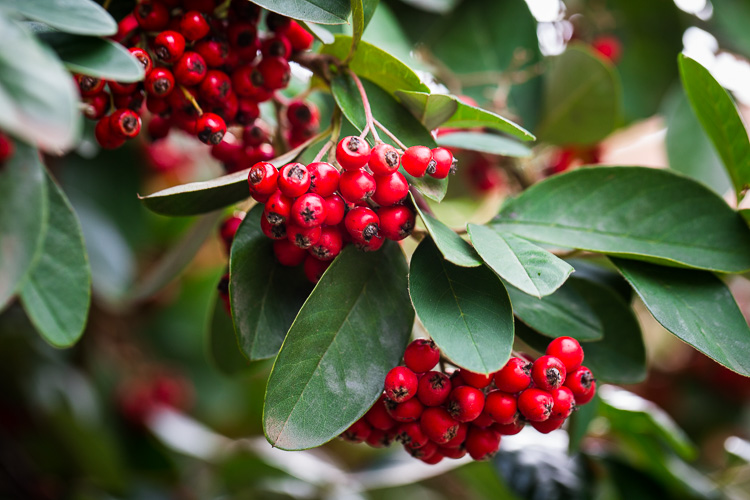
Bunches of red berries: ISO 500, f/5.0, 1/100th.
#3 – After the rain
Raindrops are fascinating through the lens. Try photographing them from various angles, and in different lighting. When photographing a single droplet, or a string of them, isolate them by keeping the background uncluttered. You can do this by creating distance between the droplets and the background, and using a wide aperture to ensure it is blurred. Notice also how water sits in nice round droplets on some types of leaves, but on others it disperses.
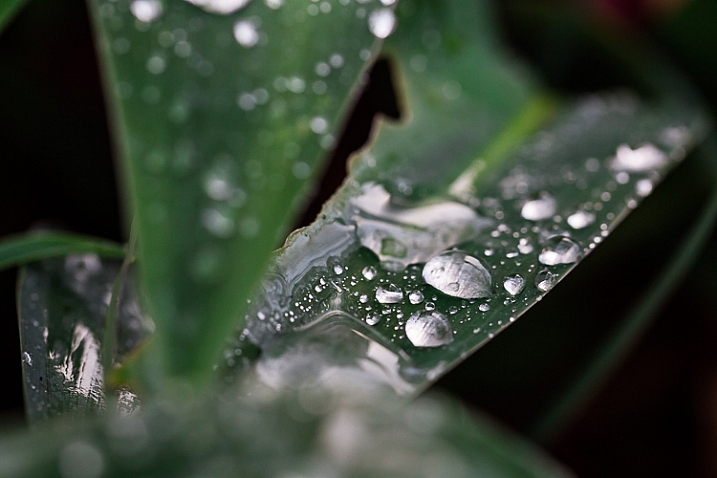
Arthrododium leaves after rain: ISO 800, f/4.5, 1/80 sec
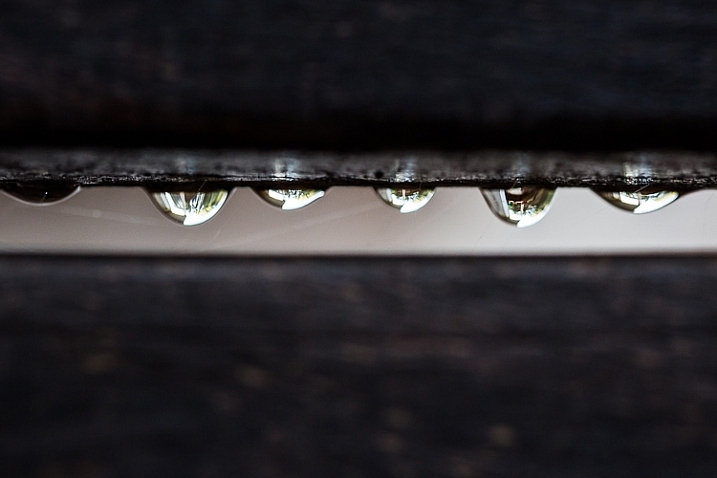
Raindrops hang from the slats on the back of a garden chair: ISO 1000, f/4, 1/125 sec
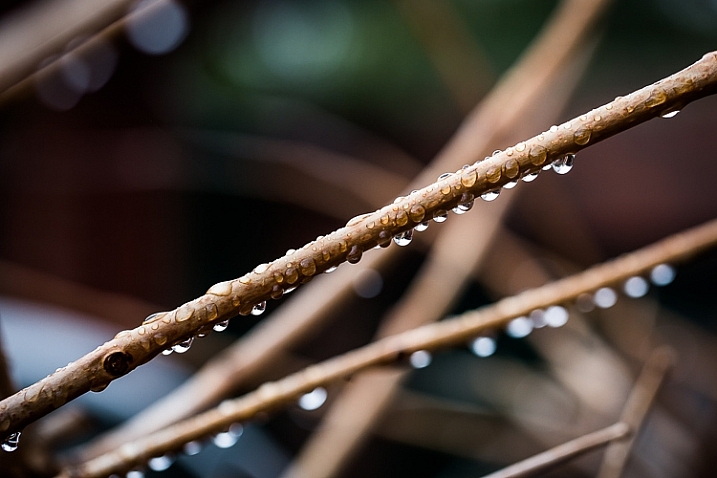
ISO 640, f/4, 1/125 sec
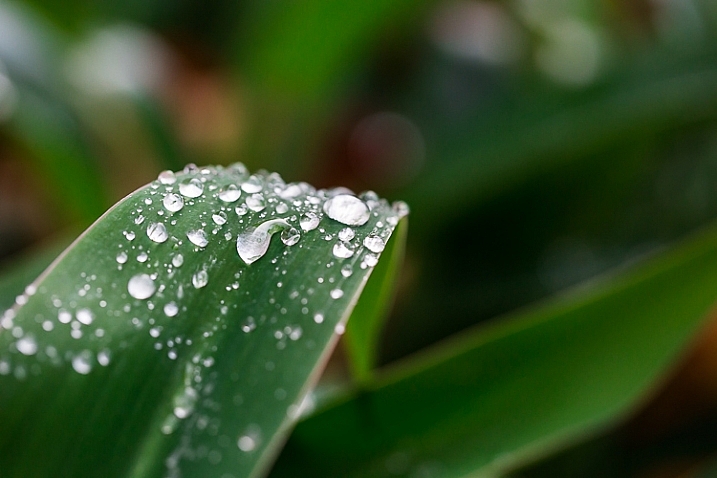
ISO 1000, f/4, 1/125 sec
#4 – Mushrooms, toadstools and fungi
These are abundant in autumn and winter, but some species pop up throughout the year after rain. Look in damp, mossy places, on the sides of trees and log piles for them.
My personal favourites are the red toadstools with white speckles. They are evocative of fairy tales and magic, and their colours are a nature photographer’s dream!
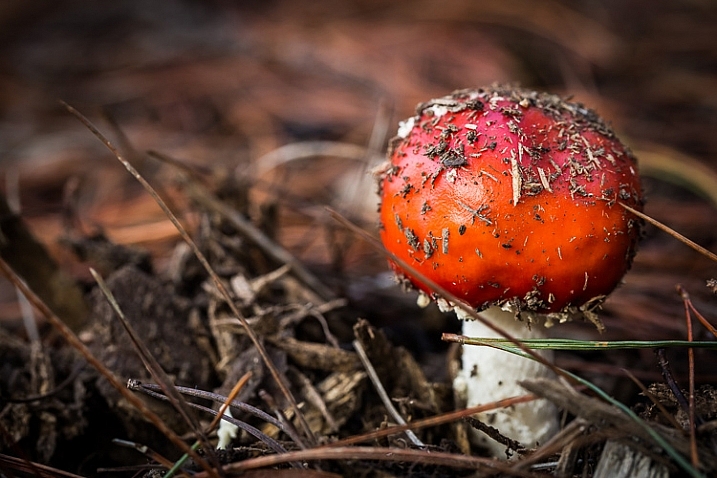
Toadstool: ISO 1000, f/6.3, 1/250 sec
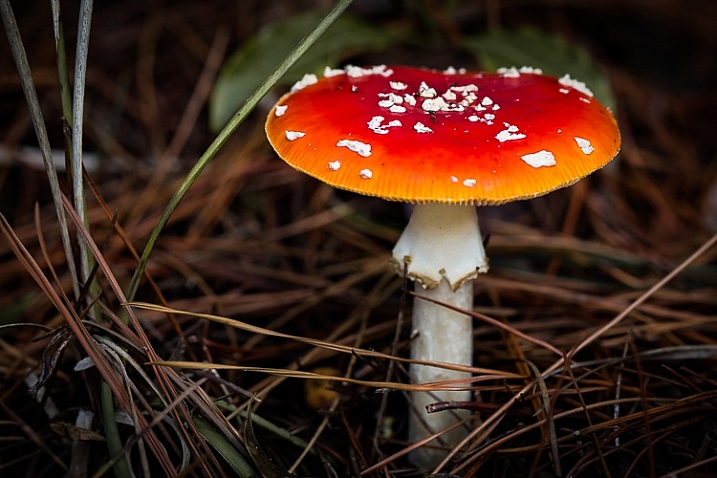
ISO 1000, f/6.3, 1/160 sec
Don’t ignore the tiny, dull-coloured mushrooms and fungi. The ones in the photo below were growing in a crevice in the side of my herb garden. You can see by the scale of the woodgrain how tiny they were. From above, they were nondescript, but when I lay on the ground beneath them and shot into the backlight, they became translucent and I could see their delicate structure.
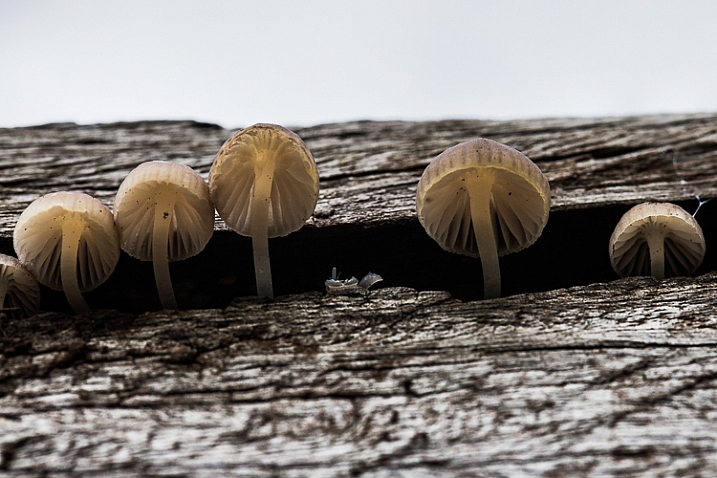
These tiny mushrooms were no bigger than the fingernail on my pinky finger! ISO 800, f/8, 1/160 sec
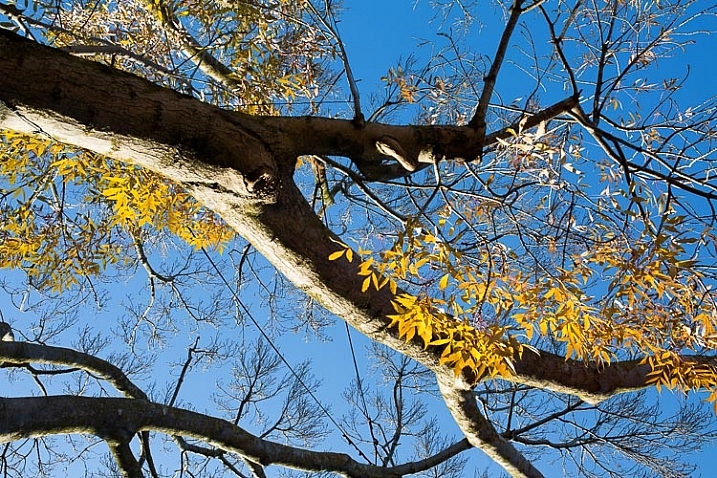
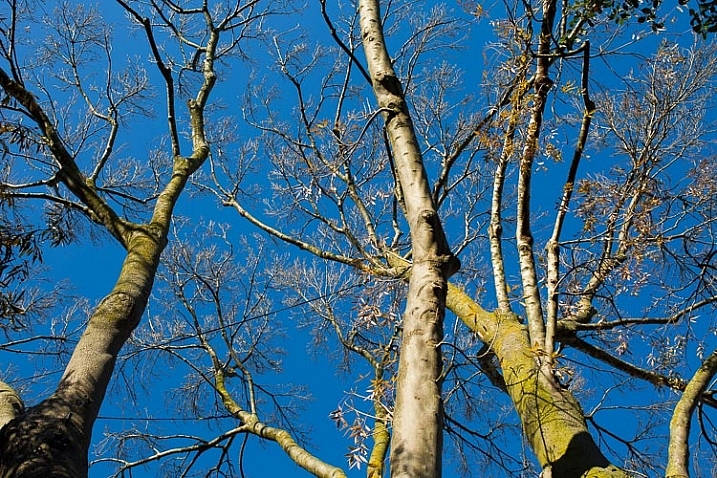
#5 – Look up . . . look down
We have a ginormous tree in our backyard. It was probably planted when our house was first built in the 1920s, and its canopy is as big as the footprint of the house. One of my favourite things to do in the warmer months is to put a picnic rug on the lawn, and lie on my back gazing up into its branches. It is free therapy!
Watching the leaves change from bright spring green through to darker green in summer, the first blush of colour in autumn, through to rich claret just before they drop, never ceases to delight me. I have photographed it time and time again through the seasons. Even lying on the ground with my 35mm lens, I can only capture a small portion of the canopy.
Sigma 35mm Art lens, ISO 160 f/11, 1/60 sec
Sigma Art lens 35mm, ISO 160, f/11, 1/100 sec
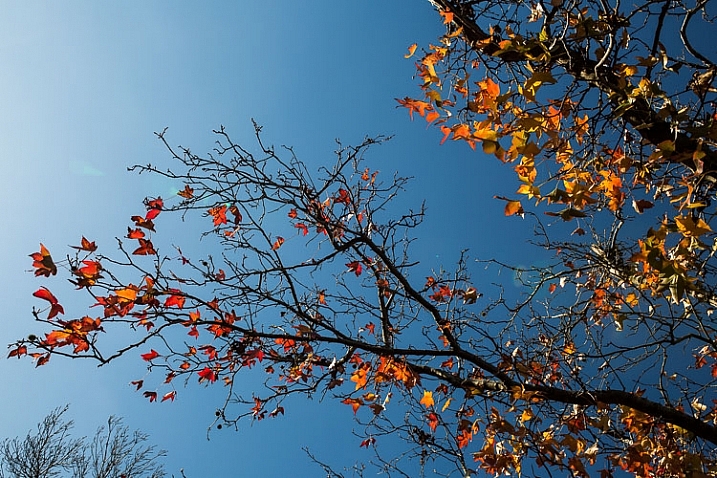
If you are lucky enough to have trees in your garden, try standing or lying directly underneath them and shooting up into the branches. Notice how the light changes from early morning, throughout the day into late afternoon and evening. Branches, whether they are naked or covered with leaves, contrast beautifully against a blue sky. They are equally stunning at sunrise and sunset, and on a moonlit night.
Sigma Art lens 35mm: ISO 200, f/11, 1/200
If you haven’t any trees, look for interesting cloud formations to photograph. You can create a collection of skies to use as Photoshop overlays, to add interest to other outdoor photos such as portraits. Look for vertical cloud formations, fat white fluffy ones, and those lovely soft colours around the edge of the clouds at dusk and dawn.
Down on the ground are a million microcosms in the moss, the lawn, between the paving stones, and the fallen bark and leaves. You won’t see them until you get down to ground level, so lie flat on your tummy and peer into another world.
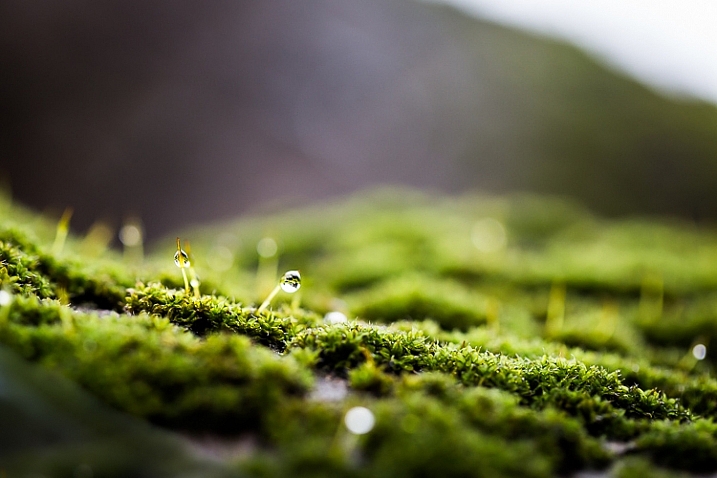
Macro world: the moss on a tree trunk. ISO 640, f/4, 1/40 sec
#6 – Black and white beauty
We tend to think of colour photography when we think of nature, but don’t dismiss the idea of black and white. Nature provides sculptural shapes and contrasting textures that make great black and white subjects. If you have succulents or cacti in your garden, they are often more interesting in black and white than they are in colour (except on those rare occasions when they flower). Ditto with white flowers against a dark background. Smooth pebbles, rough bark, snail shells, acorns and pine cones all look fabulous in black and white. Try strong, directional lighting, and a high contrast edit.
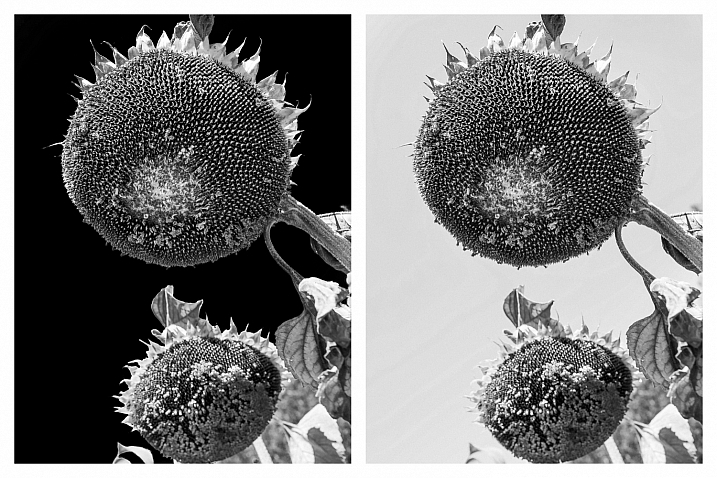
When I converted this file to B&W in Lightroom, I played with the sliders in the HSL panel. The photo on the left has the blue slider pulled all the way down to -100 to darken the blue sky. On the right, the blue slider is set to zero.
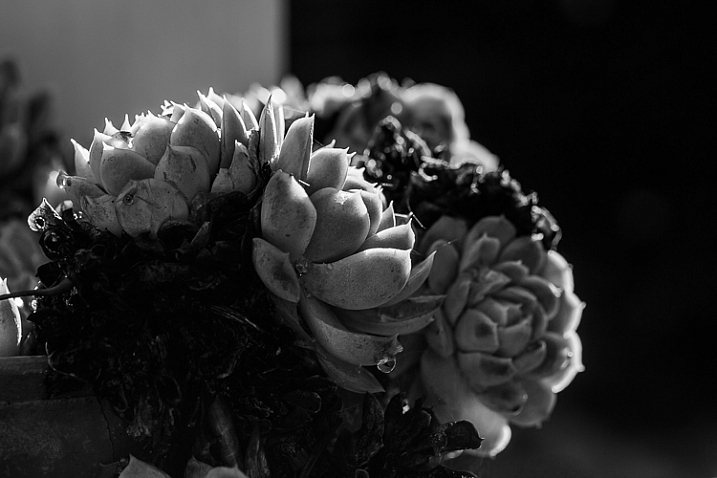
ISO 100, f/8, 1/100th. Converted to B&W in Lightroom.
#7 – Experiment with sun flare and haze
Your backyard is one of the best places to experiment with effects and new techniques. Firstly, you become familiar with how things look at various times of the day, and throughout the seasons. Secondly, you don’t need to travel far, so you can respond to anything on a whim. If you spot something amazing while you’re sipping on your morning coffee, you needn’t even get out of your pyjamas to capture it!
The subjects in the two photographs below are both visible from my desk. Every morning last summer, I noticed how this shaft of hazy sunlight would hit the planting of succulents on the pedestal, so I knew exactly what time to capture it at its best. Also sitting at my desk, I saw how the sun caught this spray of orchids just after the rain, and I rushed outside with my camera.
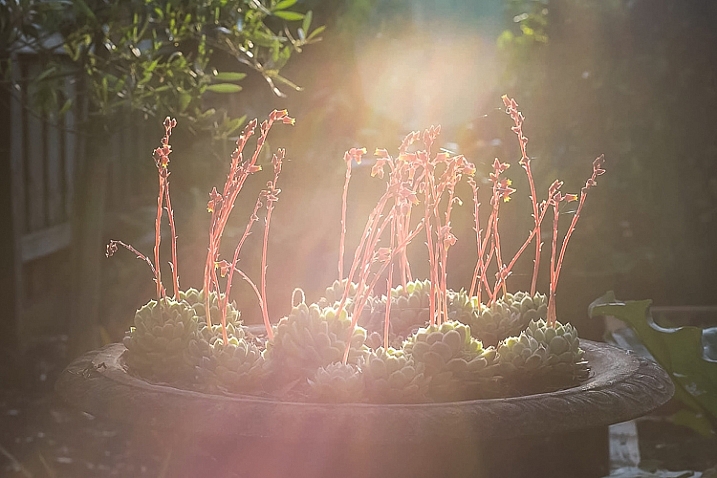
Canon 85mm lens, ISO 100, f/4, 1/800th.
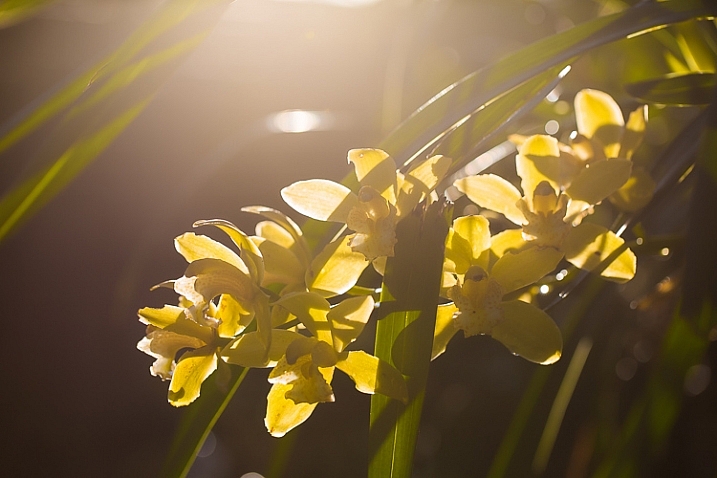
Shot with sun flare and no lens hood: ISO 100, f/4, 1/1000 sec
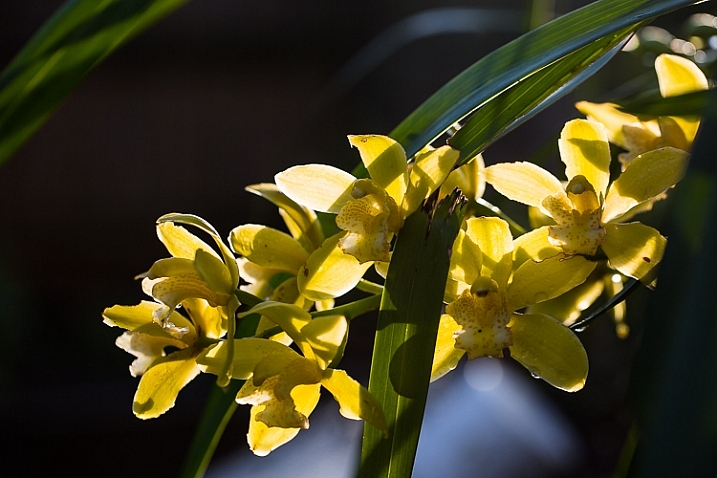
For comparison, this is the same scene shot with a lens hood to cut flare: ISO 100, f/4, 1/320sec
#8 – Snails, bugs and spiders
For nine months of the year, there are a million creepy-crawlies in my backyard. Butterflies, cicadas, crickets, praying mantis, caterpillars, moths, bees, wasps and spiders (I could happily do without the latter two). At the time of writing this article, it is winter in Melbourne, so most bugs are hiding or dormant.
#9 – Birds and other wildlife
I’m going to preface this paragraph with honesty. Confession #1: photographing wildlife of any kind requires more patience and a longer telephoto lens than I possess. Confession #2: I have the greatest admiration for those who do it. I have a Pinterest board just for animal photos (you’ll notice a clear bias towards squirrels) and on 500px I follow a number of photographers, one of whom only photographs squirrels!
Editor’s note: our own Will Nichols specializes in photographing squirrels.
The kinds of animals and birds you’re likely to find in your backyard obviously depends on which part of the world you live in, and how built-up your neighbourhood is. You will know which kinds of critters visit your backyard, and what their habits are. With that in mind, find a spot where you won’t be too conspicuous, and be prepared to wait. If you’re using a long lens, you might consider using a tripod or monopod to avoid camera shake. Have your ISO and aperture all set to go, with a fast shutter speed to freeze motion. If you have been watching the animal or bird’s behaviour over several days or weeks, it may be possible to focus roughly on the area you expect them to appear – for example, the birdbath.
Also read: Guide to Attracting Critters to Your Garden for Backyard Wildlife Photography
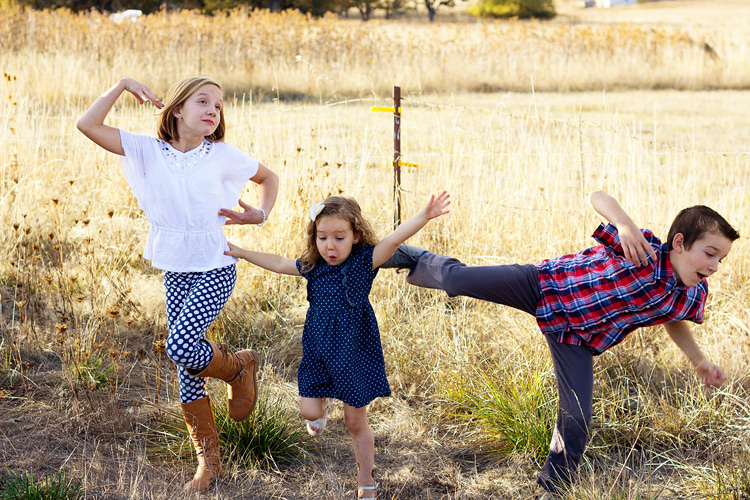
#10 – Portraits in nature
Nature provides us with the perfect canvas for portraiture. Look for a bank of flowers, a bed of autumn leaves, or just a green hedge – the colours in nature never seem to clash.
When photographing children and pets in particular, I almost always prefer an outdoor location over a studio. My eldest daughter usually runs a mile when she sees the camera, but the chance to roll around with the dog in these glorious leaves was clearly too much for her to resist.
I love how the soft hues flatter her skin tone. If you are shooting outdoors with lots of colours, such as flowers or autumn leaves, take care with your subject’s outfit. These portraits might been too busy if my daughter had been wearing a patterned outfit.
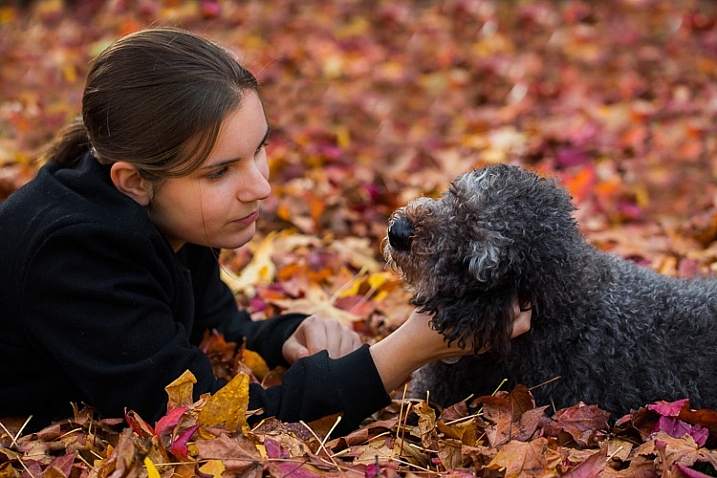
Not even teenage daughters can resist these leaves! ISO 320, f/4, 1/400 sec
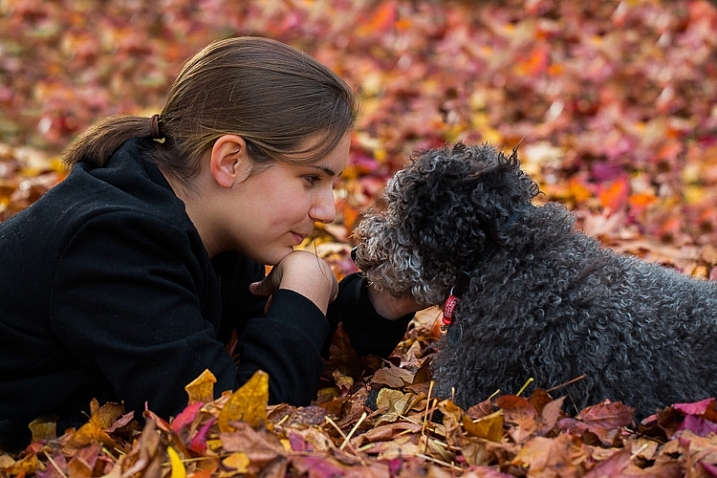
ISO 320, f/4, 1/320 sec
Let’s hear from you!
So there you have it – plenty of inspiration to get outdoors and photograph nature in your own backyard. It’s time to stop reading and get out there with your camera. Please share your backyard nature photographs in the comments below … especially if they involve squirrels!
This week we are doing a series of articles to help you do better nature photography. See previous articles here:
- 3 Habits Every Outdoor Photographer Should Develop to Avoid Missing Shots
- 5 Tips for Better Nature Photography
- 27 Serene Images of the Natural World
- Weekly Photography Challenge – Nature
googletag.cmd.push(function() {
tablet_slots.push( googletag.defineSlot( “/1005424/_dPSv4_tab-all-article-bottom_(300×250)”, [300, 250], “pb-ad-78623” ).addService( googletag.pubads() ) ); } );
googletag.cmd.push(function() {
mobile_slots.push( googletag.defineSlot( “/1005424/_dPSv4_mob-all-article-bottom_(300×250)”, [300, 250], “pb-ad-78158” ).addService( googletag.pubads() ) ); } );
The post 10 Ideas for Photographing Nature in your Backyard by Karen Quist appeared first on Digital Photography School.

Digital Photography School


You must be logged in to post a comment.