RSS
 

Posts Tagged ‘Photographer’

Photographer hits #1 on Reddit with Mt Fuji picture, and quickly regrets it

27 Jul

British photographer Kris Boorman summited Mount Fuji in 2012 and took a photograph from the top, showing the shadow cast by the giant mountain at sunrise. The image has since been used as a background for the Bing search engine and last year won a competition held by Gettty Images. A couple of days ago he posted the photo at low resolution on Reddit, and within a few hours it had garnered more than 6000 upvotes. Although this might sound like good news, Boorman quickly came to regret posting the picture. Click through to learn why. 

Articles: Digital Photography Review (dpreview.com)

 
Comments Off on Photographer hits #1 on Reddit with Mt Fuji picture, and quickly regrets it

Posted in Uncategorized


14 July, 2014 – Portrait of an Emerging Photographer

15 Jul

I (Kevin) have thousands of friends on Facebook.  I know a few hundred.  These friends are mostly fellow photographers who share their passion and recent images.  I have always enjoyed sharing my images and getting feedback.  A few years ago I took notice of a certain photographer Valerie Millett on Facebook.  She seems a natural when it came to landscape photography and over the years I watched her images mature and take a beautiful form using color, light and excellent composition.  I asked Valerie to tell us her story and we share that today. Portrait Of An Emerging Photographer.  It’s wonderful to see in our adventures and workshops how many women are enjoying and making incredible landscape images.  We have previously published Eleanor Brown’s work and Jackie Ranken’s.


The Luminous Landscape – What’s New

 
Comments Off on 14 July, 2014 – Portrait of an Emerging Photographer

Posted in News


Behind the Scenes with USAF Thunderbirds Official Photographer

10 Jul

Sergeant Larry Reid Jr. is an official photographer for the US Air Force’s Thunderbirds display team, covering everything from mechanics working on the team’s F16 fighter jets to air-to-air shots at high G-loads. A new video produced by Jaron Schneider takes a detailed look at Reid’s job, which has everyone here at DPReview insanely jealous (albeit a little queasy). Click through for a look – and hold on to your hat!

Articles: Digital Photography Review (dpreview.com)

 
Comments Off on Behind the Scenes with USAF Thunderbirds Official Photographer

Posted in Uncategorized


Zenfolio launches Photographer Central, an online photographer directory

29 Jun

Photographer Central, a new service from portfolio-hosting site Zenfolio, aims to help professional photographers and clients find each other. Available only in the US, the online directory allows photographers to list their business for a yearly fee. Potential clients can browse photographers in a Yelp-like fashion, with the ability to sort results by price, location and style. Learn more

related news: Digital Photography Review (dpreview.com)

 
Comments Off on Zenfolio launches Photographer Central, an online photographer directory

Posted in Uncategorized


Zenfolio launches Photographer Central, an online photographer directory

25 Jun

pc-logo-color.jpg

Photographer Central, a new service from portfolio-hosting site Zenfolio, aims to help professional photographers and clients find each other. Available only in the US, the online directory allows photographers to list their business for a yearly fee. Potential clients can browse photographers in a Yelp-like fashion, with the ability to sort results by price, location and style. Learn more

News: Digital Photography Review (dpreview.com)

 
Comments Off on Zenfolio launches Photographer Central, an online photographer directory

Posted in Uncategorized


Three Exercises to Limit Yourself and Grow as a Photographer

25 Jun

Today’s digital cameras are marvels of modern technology, allowing even the most inexperienced photographer access to state-of-the-art imaging systems that were the domain of supercomputers, and research institutions only a few decades ago. With prices plunging continually lower, and more devices equipped with cameras than ever before, photography has reached the point of ubiquity: cameras are everywhere, and anyone who wants to take photos can do so. But sometimes, the best thing you can do to grow as a photographer is to take the opposite approach and set some strict limits for yourself. By operating within the bounds of some simple constraints, you will often find yourself exploring new photographic possibilities that you had never realized were there before.

Duck pond

1. Limit the number of shots you take

Memory cards are extraordinarily cheap. It’s tempting to buy the biggest card you can afford in order to ensure you can fill it with thousands of pictures and not worry about running out of space. But not too long ago, photographers were limited to just a handful of pictures at a time. Each roll of film (i.e. memory card) could hold 36 shots at most, and they were crazy expensive by today’s standards. Imagine paying four dollars for a memory card that could only hold a couple dozen photos and only be used once! Nevertheless, for decades our photographic forefathers were able to churn out amazing images by working within these limits, and so can you.

Cicaida tree

The next time you go out to shoot, limit yourself to only a handful of pictures–set the number beforehand, and stick to it. In doing so, you will have to be much more purposeful about what you photograph. Rather than take the “spray and pray” approach where you shoot hundreds of photos now and find the good ones later, take a more measured and intentional approach by really studying your subjects and finding the best shots through careful planning. You might be frustrated at first, but will soon find that you develop a much more intimate relationship with your subjects, the lighting, the composition, and other elements of photography. Limiting yourself to only a few pictures will help you make each shot count, and help you shoot for quality instead of quantity.

Night lights

2. Limit your focal length

Zoom lenses are a wonderful thing, and are a great way to help you get closer to the action or take in a wide angle of view on a given scene. But zoom lenses on consumer cameras are a fairly recent invention, and not long ago every camera shipped with a simple prime lens, meaning it could not zoom at all. Imagine not being able to zoom in and out! You would have to physically move yourself to get closer to the action–not at all what people expect nowadays. But by limiting your focal length you can, ironically, find yourself stretching your photographic muscles in ways you never thought possible.

Flower bug

When you allow yourself only one focal length, it forces you to look at the world with a different perspective and see new opportunities for pictures. Let’s say you are out with your kids at the park, but instead of standing on the side and zooming in, try locking your lens at one focal length such as 24mm or 35mm and physically walking around to get closer. You will soon discover new perspectives that you overlooked, because you were relying on the zooming capability of your lens. Or if you normally like to take photos of nature or architecture at a wider settings like 18mm, try setting your focal length to something like 55mm and see what happens.

True, the pictures you take will look nothing like what you are used to, but you will see the world from a new perspective and find all sorts of different photographic opportunities you never realized were there. If the temptation to start zooming in or out strikes, don’t give in. Move yourself around and look for ways to work within the limit you have set, and you will be surprised at what you can accomplish.

Toy top

Of course the best way to limit your focal length is to buy a prime lens, which I highly recommend. Not only will you learn to maximize the possibilities afforded by a single focal length, but you will get other benefits like a much larger aperture which means better photos in low light, and nice blurry backgrounds too.

3. Limit your subject

We’ve all heard people tell us to take time to stop and smell the roses, but what about taking time to photograph them? Or, specifically, one single rose. That’s the idea here: rather than taking pictures of many roses, trees, buildings, sculptures, or people – focus on just one subject and look for new and interesting ways to capture it on digital film. Study it from every possible angle, and find ways of positioning it (or yourself) that might not seem so obvious. Try returning at different times of day, or seasons of the year, and see how it changes. You might end up with dozens or even hundreds of pictures that are boring, uninteresting, or just not all that good. But you will also likely end up with some gems that are far beyond what you thought you could accomplish before.

Tree perspective

Limiting yourself, in a world with limitless photographic opportunities, might seem counter productive at first. But if you give it a try, you will find that putting some constraints on your photography will help stretch yourself in new ways and find interesting picture opportunities that you might have overlooked hundreds of times before.

The post Three Exercises to Limit Yourself and Grow as a Photographer by Simon Ringsmuth appeared first on Digital Photography School.


Digital Photography School

 
Comments Off on Three Exercises to Limit Yourself and Grow as a Photographer

Posted in Photography


Getting Your Foot in the Door as a Freelance Assignment Photographer

23 Jun

Hurricane Sandy

One of the biggest changes photography has seen over the last 10 years is in photojournalism and documentary photography. Some will see this change as good while others will see this change as bad. The improvements made to consumer DSLR cameras, lenses and editing software have opened the doors for many photography hobbyists to engage in documentary photography.

Gone are the days when having a good camera and access to a darkroom separated the professional photographer from the amateur photographer. The playing field has been levelled and it is open season for anyone to take part. Within this new landscape there is an abundance of opportunities for you to possibly earn a little extra cash by taking photos for your local paper, magazines or online news outlets.

The assignments will always vary. You may be asked to cover a government meeting or the opening of a new business. You may be taking pictures for a human interest story about a unique person in your town. You could be asked to cover a local high school football game or be asked to rush to the scene of an accident. You may find yourself taking pictures of a festival or a gala dinner featuring some movers and shakers.

Police Car

Below is a list of tips that will help you be a better assignment or documentary photographer, and possibly get your foot in the door to get some jobs.

PRACTICE. KNOW YOUR GEAR.

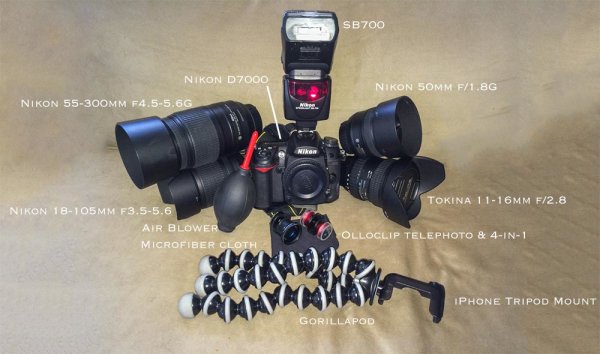
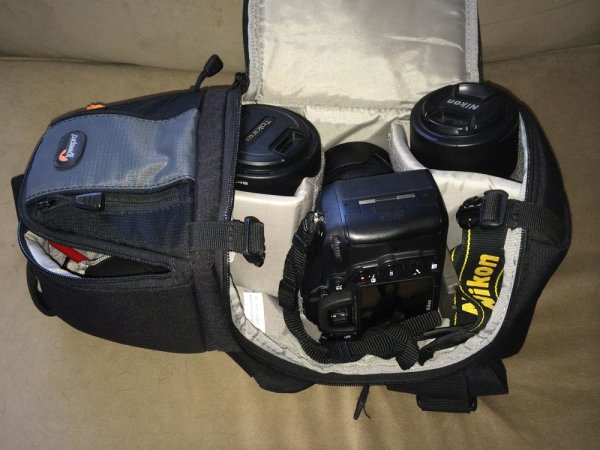
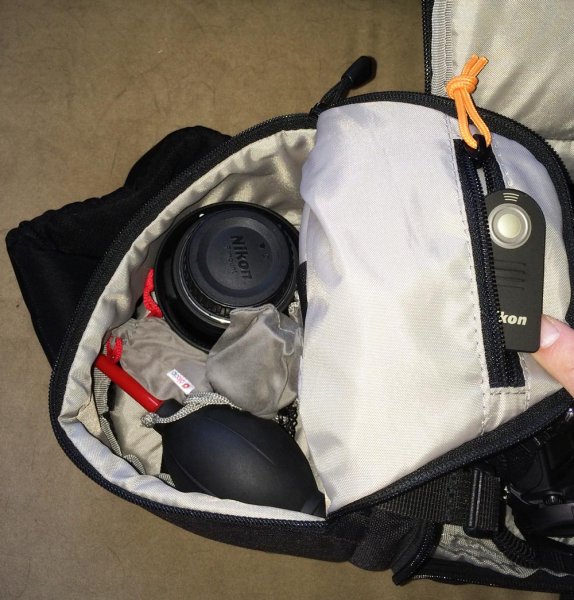
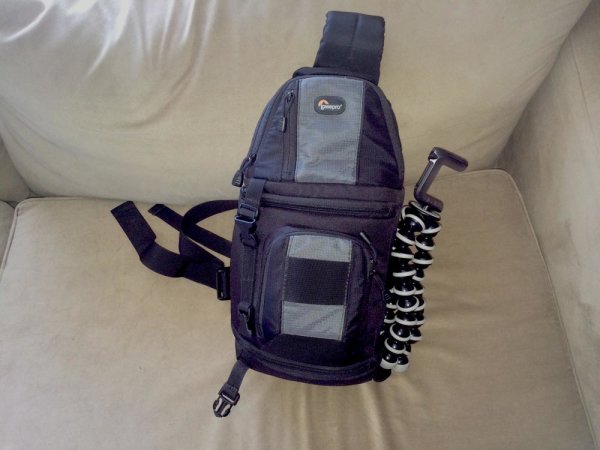
In many regards, photography starts with the gear. It is important to know the limitations of your equipment. It is equally important to know the areas in which your equipment performs well. No matter what camera and lens you are working with, your equipment will have limitations. Don’t spend time wishing for, or wanting a different lens or camera. Use what you have to the best of its ability. A better lens in some warehouse, is not going to help you now.

ASK QUESTIONS OF YOUR ASSIGNMENT EDITOR

As an assignment photographer you should be prepped before you go out by the editor of the publication, or the writer of the story. If you have any questions, ask them! I have never had an assignment editor react poorly to me asking questions about a piece they are asking me to cover.

Ignorance can be overcome by asking questions. Overcoming stupid is more challenging. Don’t be stupid. If you are not clear about what is expected of you, ask questions until you and your editor are on the same page.

WHO? WHAT? WHEN? WHERE? WHY? HOW?

Speaking of questions, do your pictures answer the ones above? Try to take pictures that answer as many of these questions as possible. While it will be very challenging to capture one picture that addresses all of them, shoot with the idea that your pictures are answering as many as possible.

Blueberry Season

DO YOUR OWN RESEARCH

After you have asked the necessary questions of your assignment editor, do your own research on the subject. This will help you develop ideas, understand how events may unfold, or which images will be more important than others. Don’t expect your editor to tell you exactly what picture to get. They are hiring you, in part, because of your vision. Conducting a little research before you go out will help you find your vision.

COME WITH AN IDEA IN MIND

After researching your subject, think of shots that you want to capture and work toward those pictures when you are in the field. But don’t knock yourself too much if you don’t get “the” picture you wanted. Documentary photographers have little (or no) control over what happens. Come with an idea that will keep your mind centred, but be prepared to adjust your ideas accordingly as the events unfold before you.

Civil War

START BY PLAYING

Once you arrive, begin by playing with your exposure settings and shooting styles. This will ensure that you, and your camera, are properly set up when the moment arrives. In the same way athletes warm up before a race or a game you need to begin by getting your mind and your gear in proper condition before the event begins.

BE INVISIBLE

Remember, you are there to document what others are doing. The story is not about you. Do what you can to stay out of the way to allow events to unfold naturally. If you are too intrusive your subjects will not relax and you will not be documenting natural events. Stay out of the way and let events unfold in front of you.

TIGHT. MEDIUM. WIDE.

Take wide, medium and tight shots of what you are covering. As an example, if you are covering a town hall meeting be sure to get a wide shot that shows all of the filled, or empty chairs, in the room. A medium shot may be a waist-up shot of someone at the podium. A tight shot would be a head shot of someone expressing emotion as they discuss the subject of the meeting or as they listen to the presenters speak.

Westville Meeting

FOCUS

Proper focus is critical in all photography. It is essential in documentary photography and photojournalism. Your focal point tells the viewer what they should be looking at. If you are still taking pictures at that town hall meeting you can have two very different pictures of someone at the podium if one picture is focused on the speaker and another picture is focused on all of the microphones that the presenter is speaking into. One picture shows who was talking and the other picture shows how many people (news outlets) were there to cover the event. Each picture has its own meaning and that is derived from the focal point.

ANTICIPATE

I make a lot of sports analogies when talking about documentary photography because, in many regards, photojournalism and documentary photography is a sport. Just as a quarterback has to read the defence as he stands behind the centre, a documentary photographer has to have his eyes and attention in several places at once. By keeping a constant vigil on your surroundings you will see a picture developing in the same way a quarterback sees a play developing. The great ones always seem to be a few seconds ahead of the action.

Semana Santa

BE PROFESSIONAL

A professional attitude will help to guarantee two things. One, it will help to ensure that those around you understand that you have a job to do and they will permit you to do your job as long as you maintain a professional demeanour. The other thing a professional attitude will bring to you is another assignment. If word gets back to your editor that you were forcing people to behave in a certain way or that you interfered with the event to get a shot, you may not get another chance to work for that editor again because you have embarrassed them (and yourself) in your attempts to get a great picture.

BACK UP YOUR WORK

Once you get back home or to the office, back up your pictures. It doesn’t matter if you put them on a second hard drive, upload them to the cloud or put them on a disk. Make sure that you have copies of your pictures in more than one place in the event that the originals become damaged, destroyed or lost.

Farm to Fork

CAPTION YOUR PHOTOS

Your job as an assignment photographer doesn’t end when you back up your pictures. More times than not you will be asked to caption your photos. Your assignment editor will have no idea of the names of the people in your pictures. It will be up to you to write a brief description for each picture you are turning in. An easy way to do this is to answer the questions, who, what, when, where and why when making captions. “How” may not always be relevant.

DON’T OVER EDIT YOUR PICTURES

If you are asked to turn in edited pictures, don’t over-edit your work. Photojournalism and documentary photography are about the real world. In a strict sense you should only adjust the contrast of your picture. Some news outlets shun adding too much color and all news outlets shun the removal or addition of elements into a picture.

Habitat Vans

BE EASY TO WORK WITH

Being easy to work with is incredibly important in today’s freelance assignment photography landscape. It is becoming easier and easier to take quality pictures with less than professional equipment. Photographers are becoming very replaceable as there are more and more people with photo skills itching to get a little credit and maybe even a little money. Make sure you have an easy payment process. Make sure it is easy to get in touch with you, and that you respond quickly to emails and phone calls. Make sure you are open to your editor’s suggestions and that you are willing to go the extra mile to make them happy. Make it a no-brainer for them to rehire you because there are more photographers behind you just waiting for their chance.

This is a great time to get your foot in the door as a freelance assignment photographer. It’s not easy work and it’s not always sexy. But with hard work, a good eye, a professional attitude and determination you can find yourself on a short list of photographers that assignment editors want to use again and again.

The post Getting Your Foot in the Door as a Freelance Assignment Photographer by Scott Umstattd appeared first on Digital Photography School.


Digital Photography School

 
Comments Off on Getting Your Foot in the Door as a Freelance Assignment Photographer

Posted in Photography


Atkins Ciwem Environmental Photographer of the Year 2014 shortlist

21 Jun

tuyet_trinh_do.jpg

From over 10,000 entries, the shortlist selection has been revealed for the 2014 Atkins Ciwem environmental photographer of the year competition. In its seventh year, the competition sponsored by the Chartered Institution of Water and Environmental Management (Ciwem) encourages entrants from around the globe to showcase work that ‘will inspire people around the world to start taking care of our environment’. See gallery

News: Digital Photography Review (dpreview.com)

 
Comments Off on Atkins Ciwem Environmental Photographer of the Year 2014 shortlist

Posted in Uncategorized


A Look Inside the Bag of a Hobby Photographer on a Budget

19 May

We often get to see inside the bags of professional photographers. You know, the bag that we dream of having ourselves, filled with three full-frame bodies and six or more lenses with plenty of accessories to fill out every pocket the bag has to offer. Well, I’m not a pro – and today’s ‘inside the bag’ post might not be something to drool over, but it should give you an idea of what you can do on a reasonable budget if you’re planning to do some serious photography on the weekends.

Inside the bag of a hobby photographer on a budget

hobby photographer gear

As you can see from the photo, I have a fairly well rounded collection of lenses that let me capture anything from ultra-wide to super close. I wouldn’t consider anything inside this bag “pro-level”, but the collection is very capable and allows for a wide range of subjects.

My camera body for the last three years has been the trusty Nikon D7000. I highly recommend this camera, or its bigger brother the D7100, to anyone who’s interested in getting into photography seriously. While it’s not an FX (full-frame) body it does have a lot of pro-like features, is very capable in low light situations and being marketed at the enthusiastic hobbyist it’s fairly affordable as well.

As far as lenses go I use the Tokina 11-16mm f/2.8 most frequently, followed closely by the Nikon 55-300mm f/4.5-5.6G. It really depends on the mood that I’m in but I tend to spend most of my time at the extremes of my focal length range. On occasion the Nikon 50mm f/1.8G and the  Nikon 18-105 3.5-5.6G, which came with the D7000, will be used for specific shots. The Nikon SB700 speedlight featured in the photograph above is rarely used and is probably my greatest regret in terms of purchases (not that it’s a bad flash, just that I don’t use it nearly as much as it deserves).

On top of the DSLR stuff I do carry two Olloclip adapters (the telephoto + circular polarizer and the 4-in-1 kit) for my iPhone along with a Gorillapod with an iPhone mount attached to it. Sometimes I just enjoy the simplicity and creativity that the iPhone allows.

Other little things not pictured above include a wireless remote shutter release, 77mm circular polarizing filter, and a 77mm Hoya ND filter.

To support the main camera I use the Manfrotto 190XPROB aluminum tripod with the basic Manfrotto ball head. It does the job I need it to do, and has served me well for three years, but I do want to upgrade to a carbon fiber tripod in the future for the added strength.

What bag holds it all and how’s it packed?

I manage to fit all of this into a Lowpro Slingshot 102 AW which when fully packed it’s bursting at the seams. The bag itself is designed to fit a camera body with a small lens attached, two smaller lenses on either side, and has a couple other storage compartments for extras like filters, charging cables and cleaning supplies.

I almost never pack my flash as it’s not typically something I use, but if I do pack it, the 18-105mm is usually the lens that gets left at home. Here’s a couple photographs to show you the bag fully packed.

hobbyistphotobag1

Main storage compartment from left to right: Tokina 11-16mm, Nikon D7000+18-105mm, 55-300mm.

hobbyistphoto3

Secondary compartment – 50mm, Olloclips, cleaning supplies and remote trigger.

hobbyistphoto2

All closed up and ready for a shoot with Gorillapod attached to the side.

The filters and other little things that I may need can fit in the front compartment and if I want to bring the Gorillapod along I can attach it to the side of the bag using the built in tripod holder (which doesn’t really work well for anything larger than a Gorillapod anyway.

What do I use this kit for?

Whether it’s waterfalls, seascapes or the night sky; the D7000 plus the Tokina, supported by the Manfrotto, works like a charm. While I primarily shoot landscapes, the 55-300mm lens comes in handy when I want to capture a shot of some wildlife or simply looking for a change in perspective. I’ve also done some cityscape photography, a few portraits and one wedding (read: The Story of Photographing my First Wedding also Likely my Last to find out why I won’t do that again.)

hobbyist-photo5

Hobbyistphoto4

All in all I think it’s a pretty well rounded kit for someone who spends his weekends hiking through forests taking photos. Obviously there’s a lot more that I could add to the collection, and I plan to do just that when I have more money to invest into it. Currently on my ‘next to buy’ list is a macro lens and then it might be time to upgrade the body.

So that’s my bag – what do you think about it and feel free to share your own in the comments below.

The post A Look Inside the Bag of a Hobby Photographer on a Budget by John Davenport appeared first on Digital Photography School.


Digital Photography School

 
Comments Off on A Look Inside the Bag of a Hobby Photographer on a Budget

Posted in Photography


Photographer takes Panasonic GH4 on test shoot around Seattle

13 May

GH4_H_FS14140_slant.png

The headline feature of the Panasonic GH4 is that it’s a Micro Four Thirds camera that can shoot 4K video for under $ 2000, capturing either Quad HD (3840 x 2160) at up to 29.97p or ‘Cinema 4K’ (4096 x 2160) at up to 24p. Seattle-based photographer Erik Hecht recently took the new Panasonic GH4 for a spin to test the dynamic range and to see how well it takes color correction. See video

News: Digital Photography Review (dpreview.com)

 
Comments Off on Photographer takes Panasonic GH4 on test shoot around Seattle

Posted in Uncategorized