RSS
 

Posts Tagged ‘Photographer’

How to Grow As a Photographer in 2016

22 Jan

Ok, so if you’re like everyone else in the free world, you made some great resolutions this New Year. The three big ones are lose that extra weight, stop drinking so much, and become a better… person, dad, wife, or, if you’re reading this column, photographer. Well, you and I both see that cookie in our hands, and Bunco and Continue Reading

The post How to Grow As a Photographer in 2016 appeared first on Photodoto.


Photodoto

 
Comments Off on How to Grow As a Photographer in 2016

Posted in Photography


Phase One photographer Tim Kemple puts XF 100MP back to use in new video

14 Jan

Phase One has published a new video featuring the XF 100MP back in use. Phase One photographer Tim Kemple put the new Sony co-developed 100MP CMOS sensor through its paces outside of the studio, soaring to great heights above a waterfall and on dusty trails in the desert of Moab, Utah.

The Phase One XF 100MP camera system offers 16-bit color output and a claimed 15 stops of dynamic range, presumably at the base (native) ISO setting of 50. In a handful of samples published alongside the video, Kemple pushes the camera to ISO 3200 for some action shots. And as a heads up, if the thought of $ 49,000 worth of gear dangling above a waterfall makes you queasy, the video above probably isn’t for you.

Articles: Digital Photography Review (dpreview.com)

 
Comments Off on Phase One photographer Tim Kemple puts XF 100MP back to use in new video

Posted in Uncategorized


How to be a Better Photographer: Camera User Manual University

11 Jan

dPSmanual

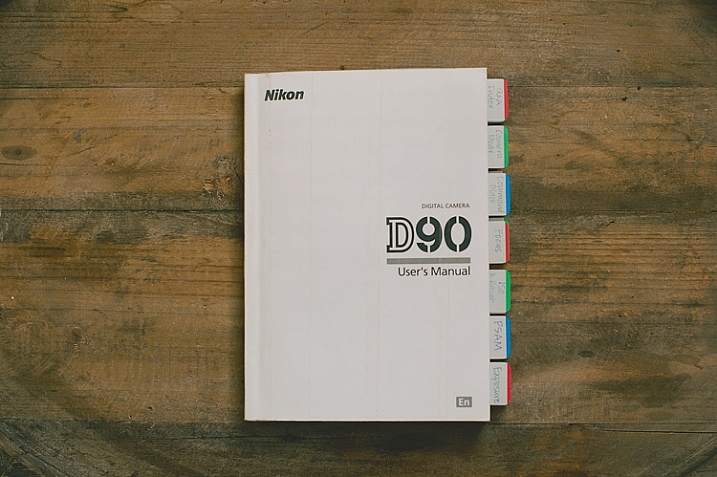
Let me guess; you got a brand new camera, you don’t know how to use it, and you have no idea where to start – about right? Let me introduce you to one of the best ways to get to know your camera inside and out, backward and forward. It’s included with your camera, so there is no extra cost! It’s at your fingertips 24 hours a day. It’s patient, and never gets frustrated if you ask it the same questions over and over again. Welcome to:

Camera User Manual University!

dPScamera

For many of us, getting a brand new camera is beyond exciting. We start trying to use it right away, throwing the manual back in the box, forgotten forever. The problem is, we soon run into frustrations and questions, and end up just putting the camera aside, or searching and asking for the answers one at a time, learning slowly and with difficulty. Or maybe we have even had our camera for ages, and just barely discovered something amazing that it can do.

If I can convince you to actually USE that camera manual, you will start out with much more knowledge than the average camera owner, and you will discover lots of cool stuff that your camera can do, that your seasoned photographer friends may not even know!

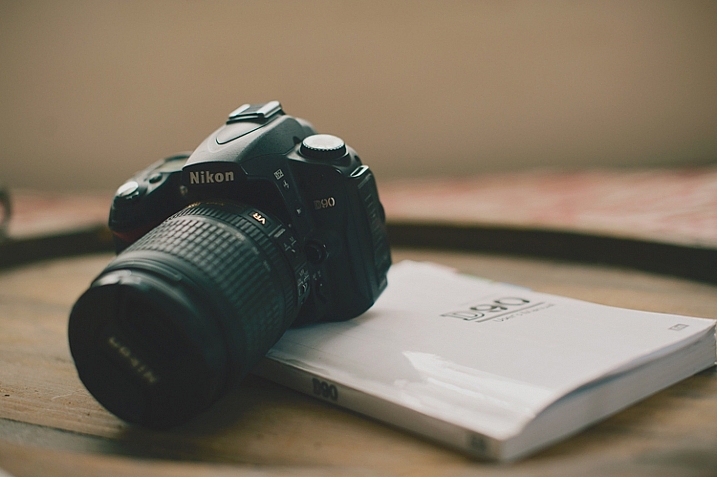
I am going to share my first camera manual and how I made it useful for me. These tips might help you transform your boring manual, into something that can actually help you become a better photographer.

Protect Your Manual

dPSprotect

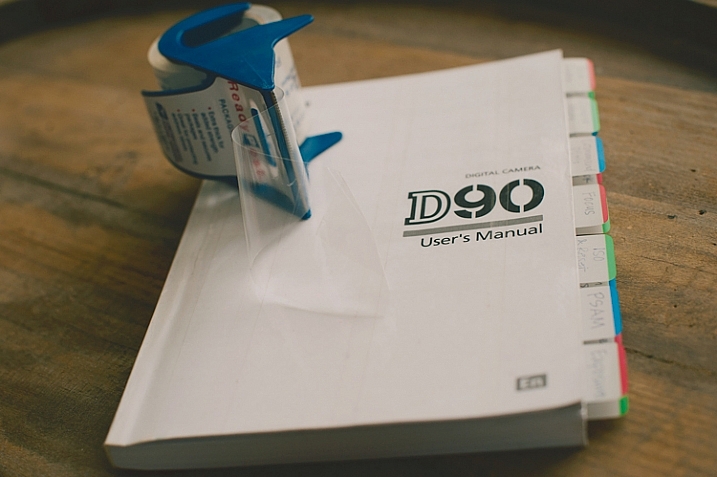
The covers on camera manuals are usually very flimsy, and easily torn or bent. The first thing to do is laminate your cover, so it’s more durable and stays nicer. I did this by simply covering the front and back covers with packaging tape. I made the pieces of tape slightly bigger than the book, and folded them under so the edges were protected also. Take your time with this, and make sure you use a clean surface to avoid bubbles and dirt stuck underneath the tape.
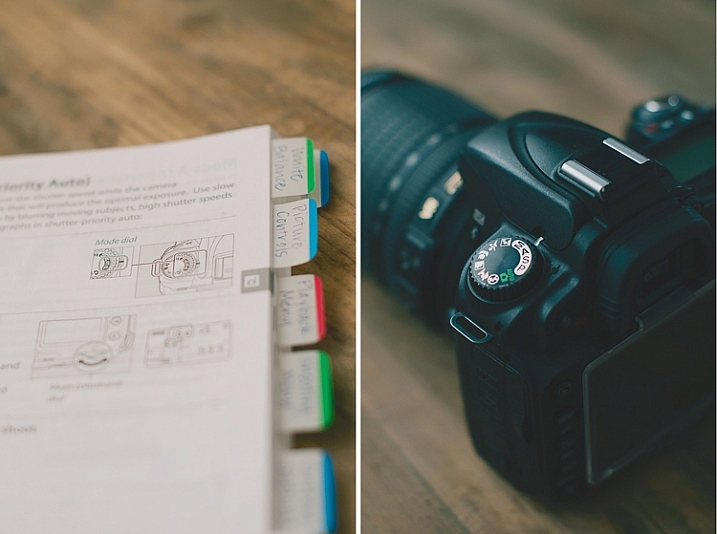
Add Divider Tabs

dPStabs

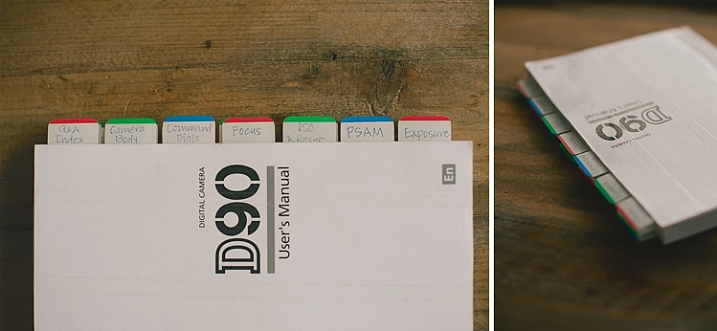
I went through the book and labeled and divided each section, so I could find them at a glance. Not only does this make finding things easier later on, but labelling the tabs and sticking them in each section, gets you familiar with the manual even before you start digging in deeper. You will know what your manual has to offer, and what kind of things you are going to be learning very soon.

I used removable tabs that I bought from an office supply store. They have a slight plastic feel to them, and are very sturdy. I like using removable ones, because you can move them later if you don’t need one of the labels in there.

Start at the Beginning

dPSpages

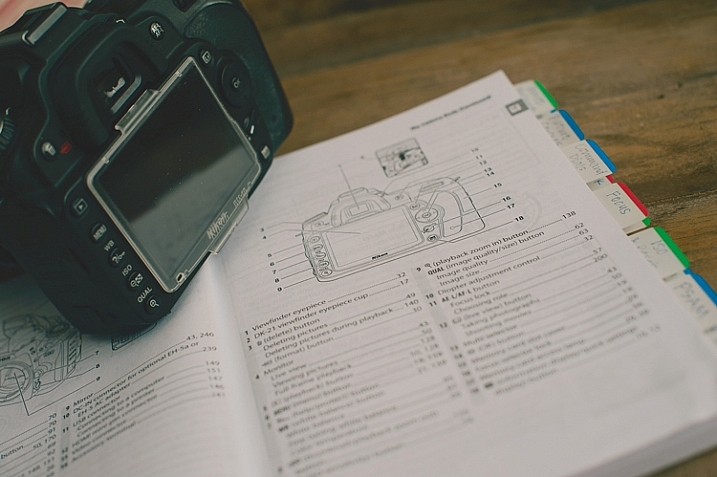
With your camera in your hands, go through the manual from the very beginning. Look at the diagrams, and find each item on your camera body. Even if you don’t understand what something is yet, find it on your camera. Later, as you read more detail, everything will start to come together. Read every page, even if it doesn’t make sense at first. Getting a nice camera is a big investment, so wouldn’t you want to know what it can do?

Camera manuals usually have very basic instructions near the beginning of the manual to get you shooting, almost right out of the box. Feel free to read that part, and begin using your camera right away, but don’t stop there! As you work your way through the manual, you will discover the reason you wanted a DSLR in the first place.

Try Everything

dPSdial

As you read and find each dial, button, and menu item on your own camera, give everything a try. If the manual is talking about different shooting modes, dial your camera in to each one, follow the instructions, and try a few test shots. Reading about things is good, but reading and then getting hands-on experience is infinitely better. You will understand what the manual is talking about with more clarity if you try things out for yourself.

Keep in mind that not everything will make sense the first time through, that’s okay. After you’ve practiced awhile, try going back through the manual page by page again. You’ll find that much of what confused you initially, has now become clear.

Once you’ve tried something, you may realize that it isn’t a feature that you will ever use. If that’s the case, just move on, and know that you at least tried it. You may end up wanting to use that feature in the future, and now you know that it exists.

Underline the Key Words

dPSmark

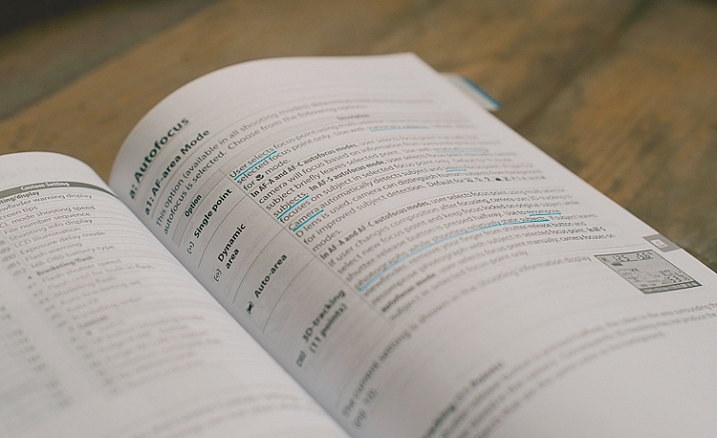
As you are reading through and learning, have a pen handy. Underline (or highlight if that’s your thing) key words that will help you focus on what is most important. Sometimes manuals can be wordy, and hard to understand. If you can zone in on the most important words, it will become more clear. Later, when you are trying to find something, those underlined words will pop out and make it easier to find.

Take notes in the margins if you try something, love it, and know that you will want to remember that in the future. Add an extra tab or sticky note there, or put a star next to it. It’s hard to remember everything you read after one read-through, but if you can quickly go back to your starred items and practice those often, you’ll be well on your way to mastering your camera.

dPSmanual

All of this might seem a little obsessive, and maybe it is for some. However, I have taught many photography classes, and had many one-on-one mentoring sessions with new photographers, and almost every question they ask me about their camera can be found in the manual. Some people learn better from a live teacher, but the great thing about the manual is that you can refer back to it as many times as you need to, and you don’t have to pay anything extra to learn.

Have you attended Camera Manual University? Do you have any tips for making your camera user manual easier to use? I’d love to hear them in the comments.

googletag.cmd.push(function() {
tablet_slots.push( googletag.defineSlot( “/1005424/_dPSv4_tab-all-article-bottom_(300×250)”, [300, 250], “pb-ad-78623” ).addService( googletag.pubads() ) ); } );

googletag.cmd.push(function() {
mobile_slots.push( googletag.defineSlot( “/1005424/_dPSv4_mob-all-article-bottom_(300×250)”, [300, 250], “pb-ad-78158” ).addService( googletag.pubads() ) ); } );

The post How to be a Better Photographer: Camera User Manual University by Melinda Smith appeared first on Digital Photography School.


Digital Photography School

 
Comments Off on How to be a Better Photographer: Camera User Manual University

Posted in Photography


How 10 Minutes a Day with Your Camera Will Help Make You a Better Photographer

08 Jan

How to make sure that the camera is your tool, so taking photos can be your passion.

9990207

Spend 10 minutes with your camera every day

Have you ever found yourself standing in front of an awesome moment trying to decide which camera setting to choose?
Try the following tips for just 10 minutes a day with your camera, and soon enough you will forget it’s even there. The camera will become a natural extension of your eye and hand, and will not be an issue when you see a photo you want to take.

This self-tutoring plan is based on natural human curiosity, and on the fact that muscle memory can do a better job than brain memory in performing manual tasks, such as setting the desired shutter speed. Once you have created a link between your vision, and the finger that turns a dial, or presses a button on your camera, it will stay in that finger’s muscle memory for good. Then, next time you think about that function, it will happen magically by itself.
Here are some examples for 10 minute exercises to do with your camera. Take them as inspiration for making some of your own.

9720526

Explore your camera like a toddler

A toddler is crawling and exploring, seeing new bits and pieces of the world, then stands up and making a new step every day, walking while seeing things from a higher vantage point. You can do the same with your camera if you allow yourself to touch and turn dials, push buttons, or change menu settings without a specific goal. Do that on a daily basis, not in a moment before you need to capture an exciting event. Practice this until you feel safe to take a wrong turn on your camera’s menu, and remember there is always a way back in, by using “Reset Menu”.

DSF9376

One Day, One Button

The secret for fast learning is in keeping it simple. The human brain is really good at learning and performing one process at a time. So if you choose one variable, and focus your attention on it for the whole 10 minutes, it will burn into your brain and stay there.

The place to start is the shutter release button. For 10 minutes, work on different ways to half press it, then fully depress it, and then retrieve your finger tip back to half press. This is better done in front of a mirror, so you can look at your index finger while it’s working. Start at a fast shutter speed and adjust it slower after each shot. When your photos become blurry, try again until the movement of your finger tip is unnoticeable. You’ll start to see that you can shoot hand-held using slower shutter speeds with every minute of practice do you. This will help you discover your lower limit for shooting hand-held.

20100413OT0864 copy

Repeat

Even an experienced professional musician plays repeating scales for few hours a day, before the real work begins. If you repeat your camera’s operation in a simple, yet systematic way, you will feel the difference from day one. Unlike the musician, it will only take you 10 minutes a day to create a change.

For example try standing on a busy street corner following passing cars with your camera (panning), taking some shots with a slow shutter speed. Try to blur the surroundings and keep the car as sharp as possible. For 10 minutes do just that, and explore different ways to hold and move your camera along with the passing car. Shoot at different shutter speeds every time, building your eye-arm-finger connection to work together for the simple task over and over again. Do only that, and nothing else on those 10 minutes.

DSC 5930

Belz Mazzos20120328002

Take your camera everywhere with you

Your body language tell everyone around you about your feelings. The moment you feel uncomfortable, others around you can tell, and then they will feel the same.

SofiaOT4115

The way you are perceived by others, reflects your confidence with your camera. Try taking the camera on your shoulder while going to the supermarket or post office for errands. After about 10 minutes of being out doing daily chores with your camera, you will forget it’s even there, and will project that to others around you. Then you can start taking photos everywhere.

Summary

If you let yourself play with your camera for just 10 minutes a day, you’ll feel different and see the results right from day one. Remember that you learn your camera in order to forget it’s there, so you can focus on your photos.

Do you have any other ideas or tips for using your 10 minutes a day? Please put them in the comments section below.

googletag.cmd.push(function() {
tablet_slots.push( googletag.defineSlot( “/1005424/_dPSv4_tab-all-article-bottom_(300×250)”, [300, 250], “pb-ad-78623” ).addService( googletag.pubads() ) ); } );

googletag.cmd.push(function() {
mobile_slots.push( googletag.defineSlot( “/1005424/_dPSv4_mob-all-article-bottom_(300×250)”, [300, 250], “pb-ad-78158” ).addService( googletag.pubads() ) ); } );

The post How 10 Minutes a Day with Your Camera Will Help Make You a Better Photographer by Ouria Tadmor appeared first on Digital Photography School.


Digital Photography School

 
Comments Off on How 10 Minutes a Day with Your Camera Will Help Make You a Better Photographer

Posted in Photography


Remodeling a Room? Think Like a Photographer

22 Dec

Long-time readers of this site are already familiar with my family, having watched my kids grow up in photos. Seen above, on the left, is my daughter Emily. You guys met her when she was eight.

She’s seventeen now, and headed off to college next year. Which meant this is the last time we’ll put up a Christmas tree while we are all living here together.

I have always tried take lots of photos around the holiday season. And even more so, now that the kids will be graduating soon. And as we have successively remodeled many of the rooms in our house, I have made it a point to pay special attention to the lighting.

Why? Because you can get a lot of bang for your buck when it comes how a room looks just by thinking like a photographer during the remodel. And another bonus is that your quick available light grab shots will look much better, too. Even if you are just using your iPhone to shoot it.

Take the living room, for instance. Before remodel, it was lit mainly by a small, four-bulb fixture attached to a ceiling fan. You can probably imagine just how flattering this wasn’t. And it was something that bugged me enough to lobby to get rid of the fan just so we could have more of a choice about our lighting.

In the end, I got the okay. And I have long been happy that we did it. Here’s a quick run-through on the decision process for this room, in the hopes that it’ll inspire you to think about how you can use your lighting skills to improve the quality of any room you might choose to remodel in the future.
__________

Here’s a photo of the living room as it exists now. Mind you, this is purposely shot available light, as that is kinda the point. The lighting in the room is not designed to exist in an overall interior shot. (In fact, that’s kind of impossible if the lights are part of the subject matter.)

But here it is, exposed for the room rather than for the light sources, to give you a sense of how the lights are distributed.

First and most important is the drum lamp hanging from the center of the ceiling. Remember the four-banger bare-lamp light I mentioned earlier? That’s long gone, and replaced by what is essentially a soft box pointing straight down. It’s three feet across; a legit beauty light.

And the arrangement of the room around the light means that anyone sitting in the room is sitting under a quality light source, and at a good angle. The only harsh place to be around this light would be directly under it. And you can’t go there. Because guess where we put the coffee table.

So if you are sitting on the sofa or the love seat or the chair, you look good. When you’re in the room the effect is not unlike sitting in a lounge in a nice hotel, where they have taken the time to design the light for the effect that they want.

And standing or sitting, pretty much anywhere in the room, a snapshot of you is gonna be reasonably flattering at the very least. And that’s true whether it was shot on a purpose-built camera or a smartphone. To wit, the example at top of the page.

Over at camera right are two wall lamps, which serve to fill the shadows of the overhead “key” light—or to become pretty nice rim lights for someone sitting on the couch. No major surgery here, as the lamps came with conduit assemblies to run the cords right down the wall. They’re just plugged in behind the couch.

At back are two “can” lights in the ceiling, washing down on the fireplace. They just keep it from going super dark back there. (And of all of the lights, they are the only ones that are built-in, and pre-dated the remodel.)

Two other items of note. One, the lights are all on dimmers. This gives us tons of control of both the absolute level of light and the lighting ratios between the different planes. You really can accomplish a lot of looks with a few different planned-out light sources and some dimmers.

And two, all of the lights are LEDs. Which means that this entire room—seven bulbs—totals only about 36 watts of energy consumption. And that is if they are on full-blast, which they almost never are. I just nuked them up to buy myself some exposure here. We normally keep them pretty subtle and balanced. But that also would look bad in a photo because a light cannot easily serve as both subject matter and light source.

But dialed down, I would guess we are typically lighting the room with around ten watts of power, total. It’s just well-distributed.
__________

Remodel Like a Photographer

When choosing lights for a room remodel, here are some things to think about.

• If you can spring for a big, soft main source, splurge. You won’t regret it. This could mean a drum lamp (we had ours made here) or a light that bounces off the ceiling. In our case, the main light does both. Unseen (from almost exactly my camera position) is a smaller version that hangs down over our dining table. The two light their assigned spaces beautifully and tie the double room together visually.

• Think of task lights as doing double-duty. First, they accent a room. Second, they fill the main light. Oh, wait, make that three—they can also create mood by dimming them down and using them without the main.

• LED bulbs are getting better and better—they have passed CFL lights—and will save you tons of money over their lifespan. Good quality ones are as low as $ 5 at Home Depot (these are Philips, FYI.) The room shot above is a poor representation of the light color/quality. That’s because the lights are serving as both light source and subject. If I chose one or the other (as in the top photo) they would look good. And to the eye they look great.

• Dimmers on each circuit and dimmable LED bulbs will give you lots of options to shape the room. Just make sure to use modern “triac” style dimmers (most all sold today are this type). Those work best with LED lights and also don’t just waste energy through resistors when you dim down.

• In the overall cost scheme of remodeling a room, decent lighting design (and the forethought of a photographer’s approach to lighting) is about the best value you can get for your dollar. I’ve done this with every single room we have remodeled, and have been really pleased with the results.
__________

While we’re here, from our family to yours, Merry Christmas.

Oh, and check back in next week if you get a chance. We are going to unwrap a project we’ve been hard at work on for three years.


Strobist

 
Comments Off on Remodeling a Room? Think Like a Photographer

Posted in Photography


Behind the camera: Beauty photographer Lindsay Adler

05 Dec

Lindsay Adler started her career as a portrait photographer very early. As a teenager, she took her classmates’ senior portraits, and later found that shooting portraits through each summer during college would help offset the costs of the school year. She’s now an author, educator and a leading fashion and studio photographer based in New York. We sat down with her recently to find out more about her early career, success and her evolving views on her own so-called ‘failures.’

Articles: Digital Photography Review (dpreview.com)

 
Comments Off on Behind the camera: Beauty photographer Lindsay Adler

Posted in Uncategorized


Behind the camera: Cristina Mittermeier, conservation photographer

01 Dec

In this video we take a look at the work of Cristina Mittermeier, a conservation photographer who has dedicated her working life to documenting our changing environment and the roles of human communities around the world in protecting it. Founder of the International League of Conservation Photographers, Cristina delivered the keynote talk at our recent PIX 2015 show in Seattle. Check out our video to learn more about her work.  

A look at the work of Cristina Mittermeier, conservation photographer 


This is sponsored content, produced with the support of Sony. What does this mean?

Articles: Digital Photography Review (dpreview.com)

 
Comments Off on Behind the camera: Cristina Mittermeier, conservation photographer

Posted in Uncategorized


PPE 2015: Interview with portrait photographer Victoria Will

28 Nov

Trained as a photojournalist, Victoria Will found herself gravitating toward portraiture as she honed her skills at the New York Post. She’s now known for her celebrity portraits, including a series of tintype portraits created at the Sundance Film Festival. We sat down with her at PPE 2015 to learn more about what led her to where she is now and how she connects with her subjects. Read more

Articles: Digital Photography Review (dpreview.com)

 
Comments Off on PPE 2015: Interview with portrait photographer Victoria Will

Posted in Uncategorized


8 Things to Do in Autumn When You’re a Photographer

23 Oct

8 Things to Do in Autumn When You’re a Photographer   Autumn is a great time for relaxing at home under warm blanket, with hot tea and a nice book to read or a movie to watch. But not for a photographer. If you still consider autumn not the best time for outdoor shooting… well, any kind of shooting and Continue Reading

The post 8 Things to Do in Autumn When You’re a Photographer appeared first on Photodoto.


Photodoto

 
Comments Off on 8 Things to Do in Autumn When You’re a Photographer

Posted in Photography


£10,000 Landscape Photographer of the Year 2015 prize winner announced

20 Oct

A picture of the Dorset coastline on a snowy day has won a UK photographer the £10,000 top prize in the ‘Take A View’ competition. Andy Farrer, a professional photographer from Dorset, England, has become the ninth Landscape Photographer of the Year with his image of ‘Bat’s Head In The Snow’. Read more

Articles: Digital Photography Review (dpreview.com)

 
Comments Off on £10,000 Landscape Photographer of the Year 2015 prize winner announced

Posted in Uncategorized