RSS
 

Posts Tagged ‘Photographer’

9 Things You Need to Know to Become a Nature Photographer

29 Mar

Nature photography is a very popular field to be involved in. That’s no surprise though, as it gets you outdoors and seeing our planet in a way that others may miss. When I first started as a nature photographer, I began to see things differently. It sounds cliché, but I paid more attention to my surroundings and saw things from different angles.

Will Nicholls 3This tutorial will look at some of the most important things to keep in mind if you are looking to become a nature photographer.

#1 You’ve got to love it

Luckily this isn’t a very hard thing to adhere to, but you must love nature to excel at capturing it on camera. Nature photographers spend a lot of time outdoors. If you’re a landscape photographer, you’ll spend lots of your time hiking through scenic areas for just a few clicks of the shutter. Wildlife photographers often spend hours and hours sitting in one place, waiting for an animal to appear. Without the passion and drive behind you, this can be mind-numbing.

So it’s not for everyone, but if you’re reading this article, then chances are you have that interest programmed within you already!

#2 Be different

While it’s great that nature photography is so popular, this brings with it one big challenge – everybody is doing it. This means you need to figure out how you can be different (assuming you want your photos to be noticed).

This could be anything from focusing, and specializing on a single family or species of animal, to developing an artistic quirk and style in your photography. Personally, I spend a lot of my time photographing red squirrels – thousands of hours actually, to give you some idea. All this time has allowed me to learn about the animal, and capture behaviour that others have not managed.

Will Nicholls 5

#3 Take risks

By taking risks I mean with your time, not necessarily something dangerous to your wellbeing. As the saying, “Nothing ventured, nothing gained.” suggests, if you don’t take risks then you are unlikely to capture those truly mesmerizing images.

Recently in the North of England, there was a display of the aurora borealis. Typically, it is hard to predict this phenomenon, and the available forecasts only look an hour ahead. It can finish as quickly as it starts, so planning for such an event is not really possible. I decided that I wanted to capture the Northern Lights with a particular castle in the foreground, but it was over two hours away. Nevertheless, at 2 a.m. I dropped everything, and raced off to the coast. When I arrived the display was weakening, but I waited a further two hours and the lights erupted in front of me. I got home at 8 a.m., but it was well worth it.

I’m particularly pleased with this result as photographing the Aurora Borealis can be especially challenging because we are positioned only just north enough to see them.

Will Nicholls 8

#4 Be respectful of nature

Unfortunately, this is one thing that is not adhered to by everyone who calls themselves a nature photographer. Having an ethical approach to your photography, especially when it involves animals, is of the upmost importance. Those who don’t are shamed within the industry, and immediately lose the respect of the majority of photographers who really care about their subjects.

No photo should come before the welfare of an animal or place. It’s just that simple, and remembering this rule will help to improve your photos in the long run. The best photographers don’t cut corners, and you’ll find they have a great affinity with the environment.

Will Nicholls 4

#5 Think about what you’re photographing

It’s easy to press the shutter when you finally find what you’re looking for, whether that be an animal or a scene, but clicking the shutter without thought will often result in unimpressive photos. Think about what you’re trying to convey to the viewer. You want the person looking at the picture to feel like they are in your shoes, looking at the scene themselves.

For landscape photography, this often comes with effective composition, thinking about both your foreground and background to properly document a scene, and avoiding a flat appearance.

With wildlife photography, this comes from capturing the character and behaviour of an animal. Impactful photos can be achieved by establishing eye contact between the viewer and the subject.

Will Nicholls 7

#6 Introduce scale

Sometimes we are just bowled over by the scale of something in nature. Documenting this with a camera can be tricky as you’re recording a three dimensional scene with a two dimensional medium. Think about using objects to show scale in your photos.

For this photo of the Northern Lights, I photographed it above a tree. This tree is particularly famous, resting in a gap on Hadrian’s Wall in England – and it’s actually rather large itself! This helps to convey the expanse of the sky and display above.

nature photography


#7 Try a different lens

This is another way of experimenting with your photos, and it works for both landscape and wildlife photography. If you usually shoot with a wide-angle lens, then put it down and pick up a telephoto. If you use a telephoto, then try something shorter. This forces you to play with perspective, and capture something new.

Photographing wildlife with a wide-angle lens is great fun, and can result in some fun shots that incorporate the surroundings into the image.

Will Nicholls 2

#8 Plan your shoots

Just because nature is relatively unpredictable, that doesn’t mean you shouldn’t plan your shoots. Have an idea of a photo you want to capture, and keep at it. Maintaining a long-term study of an area, or animal, will allow you to capture something extra special. It may be that particular shot you’ve been chasing, or something completely different.

#9 Don’t give up

If it was easy then everyone would do it. Nature photography requires a huge amount of time, but it should also be something that you can relax and enjoy – it definitely shouldn’t be a burden on you.

Will Nicholls 6

Results don’t come instantly, and like anything, it takes practice to achieve great images. Since you can’t direct nature and tell it what to do, taking good photos can be a longer process than in the other disciplines, but the challenge is what keeps it interesting.

Please share any other things you’ve noticed about being a nature photographer, and your nature images in the comments below.

amzn_assoc_placement = “adunit0”;
amzn_assoc_enable_interest_ads = “true”;
amzn_assoc_tracking_id = “dpsgeneral-20”;
amzn_assoc_ad_mode = “auto”;
amzn_assoc_ad_type = “smart”;
amzn_assoc_marketplace = “amazon”;
amzn_assoc_region = “US”;
amzn_assoc_linkid = “6710d26f550e9793f41475ee806fee9e”;
amzn_assoc_emphasize_categories = “13900861”;
amzn_assoc_fallback_mode = {“type”:”search”,”value”:”digital cameras”};
amzn_assoc_default_category = “Photo”;

googletag.cmd.push(function() {
tablet_slots.push( googletag.defineSlot( “/1005424/_dPSv4_tab-all-article-bottom_(300×250)”, [300, 250], “pb-ad-78623” ).addService( googletag.pubads() ) ); } );

googletag.cmd.push(function() {
mobile_slots.push( googletag.defineSlot( “/1005424/_dPSv4_mob-all-article-bottom_(300×250)”, [300, 250], “pb-ad-78158” ).addService( googletag.pubads() ) ); } );

The post 9 Things You Need to Know to Become a Nature Photographer by Will Nicholls appeared first on Digital Photography School.


Digital Photography School

 
Comments Off on 9 Things You Need to Know to Become a Nature Photographer

Posted in Photography


11 Stages That Every Photographer Goes Through

25 Mar

Get 25% OFF James’ ebooks: Essentials of Street Photography & Street Photography Conversations eBook Bundle now for a limited time only at Snapndeals.

How the $  *#$   do I use this thing!!?!

How the $ *#$ do I use this thing!!?!

While I hope you take this article as tongue and cheek, and realize that a decent amount of this is talking to my early self – the reality is that there is a pretty consistent learning curve that many photographers go through.

While hopefully your learning curve will not be this extreme, I think that understanding it will help you to have as much fun as possible progressing through the photography learning process.

Here is my belief about the typical progression, or the 11 stages a photographer goes through:

1. Auto mode and how the $ @&# do I use this thing!?

The camera sits like a brick for a couple months, except for when you switch it to auto mode to photograph your cat, or patio furniture in the snow. You take 12 self portraits with a hat on one day, staring at yourself in the bathroom. 12 years later, you still use this self portrait.

The reality is that you have heard about 5000 photography terms that you think you need to know, and it’s overwhelming. You just don’t know where to start. While there are only five or six things that you really need to learn at this point to get started, nobody tells you that. We will cover these things in a bit.

2. GEARRRRRR

The sharpest cat eye you've ever seen in a photograph.

Do you SEE how sharp those nose hairs are??!

When you think about your camera, your heart starts racing, your blood pressure rises, your hands get clammy, and you start sweating. Your camera system begins to morph into this awesomeness of sheer technology and power, that it was always destined to become.

Four lenses, five filters, a tripod that you tell everyone about that doesn’t actually work that well, a remote shutter release, a new camera strap, a flash unit, Lightroom, Photoshop, Silver Efex, a new monitor, a hard drive, a Wacom tablet, an ugly camera backpack where your gear can survive under water for 10 minutes, a light painting kit, 5,000 forum views, an HDR tutorial, and photo collages, oh my!

Occasionally, you just take your camera out to stare at it for awhile before your wife catches you, then you get on the internet to read fondly about its dynamic range, yet you have only taken your camera out into the world a couple of times.

Bonus points if you gave your wife a black eye due to your tripod hanging off your huge ugly backpack, on the way to catch a flight to an extended family vacation.

3. OMG, everything looks so awesome!

Bikes!

Bikes!

Macro, landscape, street photography, portraits, travel, wildlife, architecture, live music, sports, fashion, medical imagery and dental photography – it’s all so awesome!

Turn the saturation up to 20 baby! The world is my oyster. Colors, sunsets, old houses, doors, cobblestone, flowers, pots, bikes – definitely bikes!

4. Shutter speed, aperture, ISO, exposure compensation, white balance, and focal lengths

Shoot, I haven’t actually opened the camera manual yet. This is also known as the real step one. There are only six things that a photographer needs to learn at the very beginning (besides light, which we will cover later).

  1. Shutter speed
  2. Aperture
  3. ISO
  4. Exposure compensation
  5. White balance
  6. Focal length

You now engulf yourself in every type of training possible, and read, read, read. Keep in mind that the best photographers never stop doing this. You realize that different established photographers tell you completely different ideas about what to do, and it’s confusing. That’s actually a good thing. There are many different ways to get to the same endpoint with a camera.

5. I’m the best photographer ever

shoulders

“My knowledge of photography is unparalleled. Everyone else sucks. My neck muscles are huge because of the sheer weight of my awesomeness (and my camera bag with unnecessary equipment). I am ART. Everything is ART.”

This is a trap that can happen to some photographers. Needless to say, a small contingent get stuck on this step for longer than they should, but everyone else usually passes on to the next step a year or two later, which is…

6. OMG, everything sucks and I suck

Anarchist Barney

“I hate it all. I’m the worst photographer in the world. I’ve tried everything and I can’t take a good image. I can’t look at another flower ever again. I hate sunsets. I hate bunnies. I hate children. I hate cookies. I am a sad, depressed photographer.”

This is the point when you get past the basics, and realizes how difficult photography really can be. It goes way beyond settings. Creating interesting photography is difficult.

7. Starting to see the light

Light!

Light!

Eureka! Photography is just painting with light. Did you know, it’s all about the light? Warm light, cool light, colored light, harsh and shadowy light, indoor and artificial light.

This step is so important, and learning about light sounds simple, but it actually takes most people a long time to start to see light well. It’s shocking how long it can take sometimes, because photographers tend to focus on so many other things, and particularly equipment at first. When learning to use your camera, light is the number one factor that goes into the equation. It should be the first thing that you learn before you even think about how to set up your cameras.

8. Traveling light

“Screw all that equipment. You know, photographers are too obsessed with equipment. One camera, one prime lens, a small (beautiful) bag, and a notebook that I’m never going to write in – that’s all I need. Life is beautiful. I can feel life and the wind in my hair.”

An optional black and white period often takes place here, and the gear fetish morphs into a camera bag fetish, but in reality this is an important step. For most types of photography, you just did not need all that equipment. Simple can be a lot better, more often than not.

9. Studying other photographers

11-study

“Wow, there were a lot of wonderful photographers throughout history, in all types of subject matter and all around the world. There are a lot of great photographers shooting now and doing it much better than I am!”

You spend time in bookstores and on the internet researching. You start building your photo book collection. This is usually a big turning point for photographers in their education. This can be both inspiring and humbling.

10. Focus, consistency, and subject matter

By this point, you have photographed enough where you really have put in the hours, and are starting to improve significantly. While it’s so important to put in the hours to study photography and photographers, nothing beats time spent photographing.

You become more intuitive with the camera, to the point where you start forgetting it’s there. Your subject matter, and the look of your photos, begin to become more consistent. You start to find specific content, and places that you like photographing the most.

You start creating a portfolio with images that all fit together. It’s no longer as much about the individual photograph, but about collections and sequences of photographs. You start to realize that you can create a narrative this way, that goes beyond what the individual image can often achieve.

11. Zen and a subtle feeling of inadequacy

5th Avenue, New York

While the other steps might take five to 10 years to progress through, this one can stick around for the rest of your photography life. There are so many incredible photographers out there doing powerful work, it can be intimidating. It feels like there is always someone out there who knows more about a subject than you. Each day you come across another fantastic body of work, from someone you have never heard of.

But you have your own interests and unique point of view, and realizing this is what sets you apart. It’s not just about your knowledge of photography, but about the subject matter and perspective.

This is where you can gain true satisfaction from photography, and for just being a small part of all of this. There is a worldwide community of people interested in the same things as you are, but all doing it in slightly different ways. It is powerful and inspiring.

Bonus stage 12 – going to Cuba

This is the final step of any photographer’s life progress. Cuba is so hot right now. I’m not going to lie, I really do want to go to Cuba very badly, although I heard it was so much better two years ago.

Can you relate to these stages of your photography journey? What stage do you most identify with right now? Have you been through others? Please share in the comments below.

Get 25% OFF James’ ebooks: Essentials of Street Photography & Street Photography Conversations eBook Bundle now for a limited time only at Snapndeals.

googletag.cmd.push(function() {
tablet_slots.push( googletag.defineSlot( “/1005424/_dPSv4_tab-all-article-bottom_(300×250)”, [300, 250], “pb-ad-78623” ).addService( googletag.pubads() ) ); } );

googletag.cmd.push(function() {
mobile_slots.push( googletag.defineSlot( “/1005424/_dPSv4_mob-all-article-bottom_(300×250)”, [300, 250], “pb-ad-78158” ).addService( googletag.pubads() ) ); } );

The post 11 Stages That Every Photographer Goes Through by James Maher appeared first on Digital Photography School.


Digital Photography School

 
Comments Off on 11 Stages That Every Photographer Goes Through

Posted in Photography


Photographic Education, Specialties, and Business: Interview with Photographer Melanie Weij

18 Mar

In one of our recent newsletters, I asked our subscribers to share their stories with me. The newsletter celebrated the beginning of spring and was dedicated to inspiration and aspiration in the contemporary photographic world. I always encourage readers to hit the reply button and get involved in the conversation. And often, you do (high five!). So did our subscriber, Continue Reading

The post Photographic Education, Specialties, and Business: Interview with Photographer Melanie Weij appeared first on Photodoto.


Photodoto

 
Comments Off on Photographic Education, Specialties, and Business: Interview with Photographer Melanie Weij

Posted in Photography


How to Prepare for a Portrait Session: A Few Things Your Photographer Wishes You Knew

10 Mar

Portrait photography is all about the face and can be really intimate and feel a little obtrusive for subjects that aren’t used to being photographed. But the end result can be beautiful and produce a photo that really captures the person. For the photographer there are a few aspects of different types of portrait photography that they wish their subjects Continue Reading

The post How to Prepare for a Portrait Session: A Few Things Your Photographer Wishes You Knew appeared first on Photodoto.


Photodoto

 
Comments Off on How to Prepare for a Portrait Session: A Few Things Your Photographer Wishes You Knew

Posted in Photography


A Journey From Novice to Natural Light Portrait Photographer

01 Mar

I’m here to share my photography journey that started few years ago as a novice, to where I stand today. As am amateur or hobby photographer, you may relate.

The journey from novice to advanced photographer

About two years ago, I bought an entry level DSLR, to use it as an expensive point and shoot camera. The camera decided the fate of most of my pictures. On innumerable occasions, the pictures were blurry, under or overexposed, and were of poor quality.

The urge to work on my photography skills blossomed, when I was blessed with a little girl. An utmost desire to take only the best pictures of my angel, had taken roots in me. As you may also do, I started searching the internet fervently, for ways to capture the best shots.

Dps fb ca viks photogrphy

This is the kind of natural light photography I do now, but that’s not where I started. Read on to find out how I got here, and you can too.

I realized, other than going through basic photography tutorials on YouTube, the thing that helped me the most was Flickr’s discussion groups. It has large community of knowledgeable professionals, and semi-professionals, who love to take a look at your picture and provide valuable feedback. Positive suggestions and encouragement I received on the forums, helped me to experiment further, and escape out of automatic mode. If you are in the same mode as I was two years ago, I strongly recommend getting feedback for your photos, through the online forums.

Moving out of auto mode and kit lens limitations

The very first step towards improvement for me, was shifting to Aperture Priority (Av/A) mode. Initially, pictures were blurry even in Av mode, but I could see that inside my home, my kit lens at f/4.5, ISO 6400, was still unable to shoot faster than 1/30th of a second. Such a slow shutter speed caused the motion blur. Shooting outdoors normally helped me to avoid blurry pictures, but I was not sure why my images didn’t have a blurry background like I saw online. Eventually, I understood the limitations of my kit lens, in not being able to shoot at a larger f-stop, to achieve shallower depth of field.

500px Photo ID: 53404702 -

This image is very noisy, focus is on her dress rather eyes/face, the out of focus raised hand actually distracts the viewer a lot.

One thing I would realize after many months of shooting, is that the exposure triangle (aperture, shutter speed and ISO) is easy to comprehend theoretically, but really hard to apply in the field. I went out for a shoot almost every day, and started experimenting with aperture and shutter speed to get a more desired shot. On returning home, I always got an impression I should have used a different aperture or shutter speed for a better shot. The ability to learn through your mistakes is a major milestone in your journey.

Branching out

Once you are bit confident in your understanding of the basics, you start enjoying it – which is what I experienced. I started devoting time to reading topics such as composition, photography tips, and subscribed to sites like Digital Photography School. Another thing that helped me a lot, was connecting to local events and activity pages via Facebook. I started showing up at many local events and offering free photography to the organizers.

The experience of shooting events was quite chaotic and challenging, especially when there were far more people posing in front of the camera, and many arbitrary things happening – kids running around, or folks dancing to tunes of the festivities. Every such shoot gave me lot more insight into concepts of understanding concepts like plane of focus, controlling focus points, exposure compensation, tips to hand hold the camera firmly, etc.

One of my early event photos. The face and overall image is poorly lit and the face looks orange. Overall image is noisy and the eyes are not in focus. The person behind her is very distracting.

One of my early event photos. The face and overall image is poorly lit, and the face looks orange. Overall, the image is noisy, and the eyes are not in focus. The person behind her is very distracting.

Upgrading gear

It’s very easy to get overwhelmed when reading about, or watching, the type of gear that pros are using in the field. My advice would be to start with minimum possible gear, and upgrade only when you clearly understand the limitations of your existing gear. Be it body, lens, tripod, or anything. After understanding that I couldn’t shoot with very low noise in ambient light during evenings, or achieve huge shallow DOF with my canon T3i and a kit lens, I moved up to a 6D after few months, and bought a prime lens. Though I love to shoot 100% natural light, I added a flash to my gearbox as well, to use as a fill light in some situations.

Here are few things I learned so far, that you can also apply in your photography. Then I will move on to what kind of work I produce these days, and some explanation about how the results are achieved.

Understand the basics:

Read a lot about aperture, shutter speed, ISO, and other beginner tutorials. Apply them as much as you can. These concepts are simple but take a lot of hands-on practice to start making some sense.

Very noisy, Focus is on the shoulder, a very bright area in the background is a huge distraction, very messy environment.

Very noisy, Focus is on the shoulder, a very bright area in the background is a huge distraction, very messy environment.

Participate:

Do share your everyday shots and learning, to online discussion groups and forums, without worrying about the quality of your work. Google knows a lot. Give it a try by typing the question the way you would ask someone in person. Once you get some clue, make sure to try it out, to experiment and confirm your understanding. As I said earlier, do volunteer photography for local charity or non profit, etc., as that is a sure way to learn, and it is much more fun.

Avoid GAS (Gear Acquisition Syndrome):

Avoid the mindset that you cannot do good photography without expensive gear. In the beginning, your cheapest camera is enough to get you started. Photography is not 100% driven by expensive gear. There are way many areas to catch up like composition, understanding of light, angle of shooting, etc. Learn the basics and how to use the gear you have first.

Shoot, shoot and shoot:

There is no shortcut to get good at photography. You have to keep shooting to learn, and learn more to confirm your understanding and get better.

Understand Light:

Taken in the middle of the day when sun was overhead with caring about harsh shadows. From composition point of view the image has a very busy background and viewer will be completely distracted at other elements of the image.

Taken in the middle of the day, without caring about harsh shadows when sun was overhead. From a composition point of view, the image has a very busy background and viewer will be completely distracted by other elements of the image.

It doesn’t matter what genre of photography you shoot; you need a firm understanding of light. This is a key ingredient for a good picture. So, read about the direction and quality of light, and how it affects the shape, size, shadows, and contour of objects it falls upon.

Master your camera:

This tip is especially important if you aim to shoot events, happening at fast pace like kids photography, birds, action, sports, etc. You will really miss opportunities if you are unable to change settings quickly on the fly, without looking at the controls.

Go Manual:

This needs to be your ultimate destination in terms of shooting modes. It’s true that 80% or more time you may be happy with Av mode, but ideally you should have no hesitation in switching to the manual mode in a blink.

Depth of Field:

Technically, in simple terms, aperture controls the depth of field. However, this is the area that took me the longest time to get a good grip on. It’s very hard to stop the desire to shoot at f/1.2, if you own a lens capable of that. However, lenses are not the sharpest at so small f-numbers, plus the depth of field is so thin, that it could be unusable if you are not at the right distance from the subject.

Though there is a nice catch light but looking at the distance it has been shot the f stop should have been chosen higher. The face is not completely in focus and the image does not appeal the viewer. The subject should have been moved a bit to get rid of uneven shadows.

Though there is a nice catch light, but looking closer, it has been shot with an f-stop that should have been higher. The face is not completely in focus, and the image does not appeal the viewer. The subject should have been moved a bit, to get rid of uneven shadows on his face.

Positioning the Subject:

Another key point I have seen even very mature photographers lacking, is realizing the importance of where you should ask the subject to stand. Key mistakes are: placing subject in front of a very busy background, having undesired points of interest in the frame, a brighter large light source behind the subject, etc.

I hope you find the above tips useful. In the final part, I would like to show some images, and a bit about my thoughts on post-processing. All the below images have been published in one or the other magazine.

Dps fb ca viks photogrphy 5

85mm, f/1.6, 1/1600, ISO 800

Location: Milwaukee, WI. This was taken at golden hour, with the sun facing the subject. The trees with some fall colors, are very far behind her.

Dps fb ca viks photogrphy 3

85mm, f/3.2, 1/400, ISO 400

Location: Redwood Shores, CA. This was taken at golden hour with sun facing her. The intensity of the light was low, as only partial light was passing through the tree. It was shot from above at about a 45-degree angle.

Dps fb ca viks photogrphy

70mm, f/2.8, 1/320, ISO 800

Location: Los Angeles, CA. This was taken in the middle of the day, in an apartment, where model was facing window light.

Dps fb ca viks photogrphy 6

135mm, f/2.8, 1/400, ISO 400

Location: Palace of fine arts, CA. Taken in the middle of the day, where plenty of ambient light was available. Behind the subject is a little darker area, due to trees and pillars. I positioned her at a spot where light was just right to avoid on her face which were too dark.

Dps fb ca viks photogrphy 484

85mm, f/1.8, 1/6400, ISO 100

Location: Fremont, CA. Again taken during golden hour, with a bit of shade from the door structure.

Dps fb ca viks photogrphy 4

85mm, f/2.8, 1/2000, ISO 800

Location: San Jose, CA. Taken in the middle of the day, using the shade from the ceiling above the model, and avoiding sunlight falling directly her.

Importance of Post-Production:

As a beginner you will surely hear or read a lot something similar to these statements, “I love straight out of camera pictures” or “I hate editing pictures”. However, I have found that you can delay getting into the post-processing of images, but cannot avoid it.

The extent you go to post-processing an image, is totally a different debate. Some do it to enhance the existing elements of an image, and others do it to make it into a totally different image. I am in the first category, and spend time doing things that improves the overall image appeal.

For beginners, I would advise that you stay away from it until you are comfortable with your gear and the basic concepts of photography. Always aim to get the image right in the camera.

The first step for post-processing, you can start with Adobe Lightroom, which is a great piece of software to enhance your images. Spend time in achieving mastery with Lightroom, and, once you understand its limitations, then start exploring Adobe Photoshop on a need only basis. In my typical workflow, all the images go through Lightroom, then for some final touches in Photoshop.

Your journey

So where are you in your photography journey? Did you just pick up a camera and can relate to my early experiences? Have you been practicing for a while? What is your experience, please share in the comments below.

Author Bio

Vik (Vivek) Kumar is a photographer and a software engineer. Hi started his photography a couple of years ago as an amateur landscape photographer. The hobby became serious portrait photography fun. His images are used by reputed hotel brands like Hyatt. He has been published numerous times in various fashion magazines like ICON, PUMP, Surreal Beauty Magazine, etc. See more of his work on his website or on his Instagram profile. His landscape photography work can be explored on 500px.

googletag.cmd.push(function() {
tablet_slots.push( googletag.defineSlot( “/1005424/_dPSv4_tab-all-article-bottom_(300×250)”, [300, 250], “pb-ad-78623” ).addService( googletag.pubads() ) ); } );

googletag.cmd.push(function() {
mobile_slots.push( googletag.defineSlot( “/1005424/_dPSv4_mob-all-article-bottom_(300×250)”, [300, 250], “pb-ad-78158” ).addService( googletag.pubads() ) ); } );

The post A Journey From Novice to Natural Light Portrait Photographer by Vik Kumar appeared first on Digital Photography School.


Digital Photography School

 
Comments Off on A Journey From Novice to Natural Light Portrait Photographer

Posted in Photography


Wonder of nature: Eight winning photos from the 9th International Garden Photographer of the Year competition

22 Feb

$ (document).ready(function() { SampleGalleryV2({“containerId”:”embeddedSampleGallery_0735964398″,”galleryId”:”0735964398″,”isEmbeddedWidget”:true,”standalone”:false,”selectedImageIndex”:0,”startInCommentsView”:false,”isMobile”:false}) });

A photographer from the UK has collected £7500 along with the title International Garden Photographer of the Year as the results of the ninth competition have been announced. Richard Bloom took the first prize with a picture of a field of lupins he came across while in the South Island of New Zealand in the summer of 2015. Bloom commented ‘The landscape was already amazing, scattered with drifts of naturalised lupins, which gave it an almost psychedelic, wonderland feel.’

The competition has eight main categories along with additional prizes for portfolios, projects and photographers under the age of 16. The competition culminates in an exhibition at the Royal Botanic Gardens, in Kew, London, and a book is produced of the winning entries and those commended. On request judges also offer feedback on entries once the winners are announced.

The 2016 competition is already open for entries, and is open to photographers around the globe, with a deadline of October 31st. Entry costs from £10 for adults.

To see more of the winning entries visit the International Garden Photographer of the Year website.

Articles: Digital Photography Review (dpreview.com)

 
Comments Off on Wonder of nature: Eight winning photos from the 9th International Garden Photographer of the Year competition

Posted in Uncategorized


Travel Photography Simplified: 4 Changes that Made me a Better Photographer

19 Feb

Get Viktor’s Lightroom Rapid Editing System for Travel Photography Course 50% off now at SnapnDeals for a limited time only – February 9th-23rd, 2016.

When I look back and analyze how my photography has changed over time, I see that the last couple of years were the most eventful in regards to the evolution of my photography. I see that rapid advances in technology, in combination with my attempts to simplify various aspects of my photography, gradually changed my entire workflow.

Images Travel Photography Simplified 01

If I had to identify the key moments that triggered the rest of the changes, my switch from DSLR to a mirrorless system would be at the very top of the list.

1. Mirrorless Setup

Depending on the type of photography, the switch to a mirrorless system affects photographers differently. As a travel photographer, the effect of the change was huge for me, and even though the learning curve was steep, it was liberating from the very beginning.

The compactness of mirrorless systems was the most obvious factor for the switch. Here is the breakdown of my camera, plus lenses setup:

  • Sony A6000 (344g, 12oz)
  • Sony 10-18mm (220g, 8oz)
  • Sony 16-70mm (308g, 11oz)
  • Total: 874g (31oz)

It’s hard to believe that a high-quality, wide angle zoom lens (10-18mm) can weigh only 220g (8oz). The full set, including the camera and two lenses that cover 90-95% of my needs, weighs less than 900g (32oz). I call it freedom.

Images Travel Photography Simplified 02

From a practical standpoint, it actually means that I can pack the entire setup into a carry-on when traveling by plane. It also means that I do not have to think about what equipment to bring when packing for a demanding hike. Instead, I bring everything with me.

The other two factors of my switch that impacted my photography were the amazing dynamic range of the Sony sensor and its EVF (Electronic Viewfinder). The extended dynamic range of the sensor allows me to reduce the number of brackets I have to take, to cover the entire dynamic range of the scene. Also, it saves me time editing, since I do not have to use HDR, and Image Blending techniques, as often as before.

The Electronic Viewfinder also allows me to more accurately assess the scene before taking the shot and, as a result, reduces the number of unsuccessful shots.

Images Travel Photography Simplified 03

2. Changing Travel Routine

I did not expect that one small change to my travel routine would impact my photography so much. So what was the change? I simply stopped editing photos while traveling. Instead, I began concentrating all my efforts on finding interesting locations and capturing them – nothing else. This new focus makes my trips more enjoyable, reduces stress, and improves my photography in general.

Before, I always loaded all of the new photos at the end of the day to Lightroom using my laptop. While checking the day’s results, I would often start culling and editing.

Now, when I want to check if a shot is successful, I can do it while shooting, simply by wirelessly connecting my camera with my tablet. And, if it is absolutely necessary to post a couple of new photos to social media, I can edit them in seconds using Snapseed on my tablet, then easily post them online.

Images Travel Photography Simplified 04

3. Simplified Backup System

Keeping photos safe while traveling is a big issue for any photographer. Up until recently, there was no reliable enough solution for a photographer, like myself, to go on an extended photography trip without bringing a laptop. For years, a laptop was the center of my backup strategy while traveling, which only added unnecessary bulk to my setup.

Finally, I think this is starting to change. For the last few months I’ve been testing a laptop-less travel approach, and I am confident that a new setup this year will completely replace my outdated backup system.

This new workflow is possible because of a device that was recently released: WD My Passport Wireless. The device has a variety of interesting features, but the most important one, from a photography standpoint, is the SD Memory Card Reader. When you insert a memory card into the reader, it automatically backs up all the contents of the card to the drive. Plus, it supports incremental backups, which means that it backs up only new files rather than those previously transferred.

Images Travel Photography Simplified 05

Photo courtesy Western Digital

This device makes it possible to travel without a computer. Also, it minimizes the risk of losing images due to memory card failure. Now, I incrementally backup my new images multiple times throughout the day, and by the end of the day back at the hotel, I already have all of my new images on two devices.

Another feature of the WD My Drive Wireless that excites me as a photographer, is its ability to connect to the drive with a mobile app and grab any photos (JPEGs only) for editing.

Images Travel Photography Simplified 06

4. Rapid Editing

Lightroom is my primary photography editing tool. At some point, I realized that 80% of my editing steps were identical for every photo. This meant that only 20% of my efforts were spent on what really mattered: making every photo unique. I also recognized that if I could automate the 80%, then I could drastically reduce the time I spend in front of the computer.

The obvious choice for editing automation was Lightroom’s preset functionality. The presets allow users to record their editing steps in Lightroom for later use.

The main obstacle in developing and implementing a new system was Lightroom’s presets limitations. You have probably already noticed that it is rare when you apply one of the presets to a photo that are happy with the final results. You still have to dive deeper into the Lightroom editing tools to compensate for the level of exposure, lighting conditions, shadows, and the dynamic range of the scene.

I solved this problem by introducing a two-level editing system which I call Lightroom Rapid Editing. I separated my Lightroom presets into two categories:

Style Presets: The presets that establish the artistic style and reflect our creative vision. For example, a dreamy, warm look or an aggressive and contrasted style, soft black & white or a vibrant cross processed treatment.

Images Travel Photography Simplified 07

Adjustment Presets: The presets that do affect the style of the photograph but help us to fine-tune the following parameters: exposure, shadow recovery, contrast, clarity, vignetting. I called the collection of the adjustment presets the TOOLKIT.

Images Travel Photography Simplified 08

This is how my workflow looked after I implemented the two level preset system:

First, I applied one of the Style Presets. Then, I used the Adjustment Presets from the TOOLKIT to fine tune the image. Simple, effective, and automated. The Lightroom Rapid Editing System reduced my editing time by more than half and made my photography more consistent.

Here is a quick demonstration:

For the demonstration, I selected a photo of Niagara Falls (American and Bridal Veil Falls). The scene was somewhat challenging as the water of the falls, was much brighter than the rest of the scene. I intentionally set exposure for the brightest areas, making sure I preserved enough details in the water. It resulted in an underexposed capture, making it more challenging to edit.

Images Travel Photography Simplified 09

First, I applied one of my favorite presets from the Landscape Collection – Natural. Second, I used the following TOOLKIT adjustments (Adjustment Presets):

  • 01 Exposure +
  • 08 Open Shadows ++
  • 17 Clarity ++
  • 31 Vignetting +

Here is the result. It took me five clicks, and no more than two minutes to complete the editing. To record my editing steps for future reference and easy sharing, I used Lightroom Rapid Editing Formula: Natural (02, 08, 17, 31).

Images Travel Photography Simplified 10

Read a more detailed explanation of my travel photography workflow here: Photo Editing Workflow for Travel Photography

Conclusion

I believe that simplification is the key factor in mastering any complex process. If you reject unnecessary complexity by drastically simplifying it, you can invest more time and effort into what really matters. The changes I listed above did not happen overnight but they were always driven by the desire to simplify my photography.

How have you simplified your photography? Share with us in the comments below.


If you found this helpful, get Viktor’s Lightroom Rapid Editing System for Travel Photography Course 50% off now at SnapnDeals for a limited time only – February 9th-23rd, 2016.

googletag.cmd.push(function() {
tablet_slots.push( googletag.defineSlot( “/1005424/_dPSv4_tab-all-article-bottom_(300×250)”, [300, 250], “pb-ad-78623” ).addService( googletag.pubads() ) ); } );

googletag.cmd.push(function() {
mobile_slots.push( googletag.defineSlot( “/1005424/_dPSv4_mob-all-article-bottom_(300×250)”, [300, 250], “pb-ad-78158” ).addService( googletag.pubads() ) ); } );

The post Travel Photography Simplified: 4 Changes that Made me a Better Photographer by Viktor Elizarov appeared first on Digital Photography School.


Digital Photography School

 
Comments Off on Travel Photography Simplified: 4 Changes that Made me a Better Photographer

Posted in Photography


A conversation with portrait photographer Brian Smith

13 Feb
When Brian Smith was just a High School student with a budding interest in making photographs, he learned that photography could earn you some significant perks – and at that age, that meant a pass to leave campus. These days he’s well known for his portraiture, including a portfolio of A-list celebrities. He sat down with DPReview Editor Barney Britton at PIX 2015 to discuss his background, career and his secret to putting all of his portrait subjects at ease in front of the camera.

Articles: Digital Photography Review (dpreview.com)

 
Comments Off on A conversation with portrait photographer Brian Smith

Posted in Uncategorized


Tokyo Drifter: Editorial and commercial photographer Alfie Goodrich on working in Japan

07 Feb

Tokyo Drifter: Editorial and commercial photographer Alfie Goodrich on working in Japan

Azusa by Alfie Goodrich

First published in 1991 at the age of 23, portrait photographer Alfie Goodrich has been shooting primarily in Japan since 2007. His eye as a photographer as well as a fluency in both English and Japanese has brought him a diverse portfolio of commercial and editorial clients, including Ferrari, Lamborghini, United Airlines, Condé Nast, Air Asia and so many more.

Goodrich counts on more than just his bilingualism to bring him clients, however. He’s a master of SEO, as well, with a daily blog that pulls in between 40,000 to 80,000 unique visitors a month, a self-produced online magazine and a Google+ page that sports more than a million followers. When he’s not shooting, he also leads workshops and tours for photographers looking to work in Japan, and has even published his own Google guide to photogenic locations throughout urban Tokyo and Japan.

Find out more about Goodrich by clicking through the slideshow and accompanying Q+A. For more imagery, visit his website, www.alfiegoodrich.com and subscribe to his magazine ‘Stekki’. You can also follow him on his blog, Google+, Facebook, Instagram, 500px, and Flickr.

Tokyo Drifter: Alfie Goodrich on working in Japan

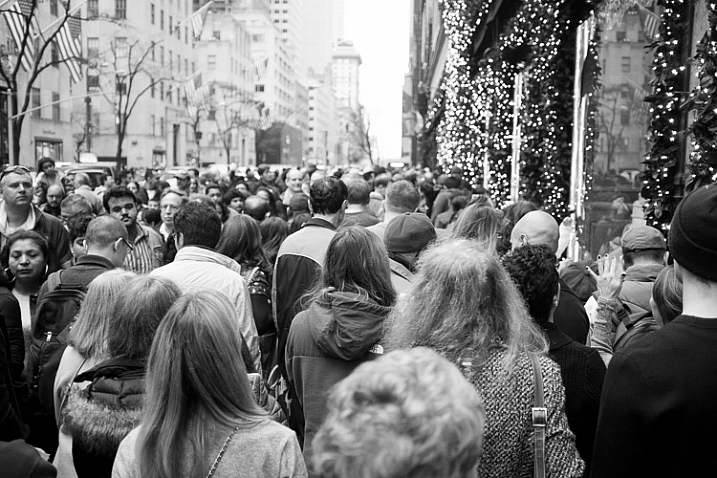
Kamakura by Alfie Goodrich

You began your career as a music portraitist and photojournalist in the UK. What was behind the transition to travel reportage and editorial work?

Actually, pretty much all of my professional photography work in the UK was done within the realm of the music business – which I was involved in from 1992 to 2002. Whilst I was PR Director for Nimbus Records, I shot a lot of stuff for CD covers, at recording sessions and events I was organising. Later, whilst general manager for Black Box Music in London, I did more of the same. Once I left music and started my own business, I started to mix up the subject matter a little more, providing a one-stop shop for people needing PR, websites, hosting and photography to promote and market their own companies. As my career changed, so did the subject of my photography.

Tokyo Drifter: Alfie Goodrich on working in Japan

Akari by Alfie Goodrich

When did you decide to make the move from England to Japan, and why did you decide to stay there?

My wife is Japanese. We met in the UK and lived together there for seven years, having two of our three children during that time. We’d been thinking of moving to Japan for some time. I lost both my parents within six months of each other, in 2005 and 2006. After that, we needed a change of scene. My parents had been very active in the local community, as had I. They were good times but, yes, a change was required.

I had some friends in business, some of whom were doing very well from diverse, international businesses built up over decades. People like that generally have a good sense for what’s in the wind. One of them, who had some experience of business in Asia, warned me that he felt Europe had some hard times ahead and that my thinking about a move to Japan was a good idea.

Tokyo Drifter: Alfie Goodrich on working in Japan

Fuji by Alfie Goodrich

(cont.) We left the UK in October 2007 when the yen was 210 to the Pound. Under a year later, Lehman happened and the Yen-Pound rate dropped to 105 at one point. My friend was right. Asia and Japan have weathered the financial crisis a little easier than friends of mine have back in the UK. For me to work in the way I do in Japan but do that back in the UK, we’d be looking at living and raising a family in London. Tokyo is very different. It’s safe, safe for the kids and safe for me to do my job – often dripping in camera equipment – without ever needing to look over my shoulder.

That’s one reason we’ve stayed here. Anther is that here I am different. I’m not a local. I have a different eye for Japan than a local photographer does; different working methods. I’ve made that work in my favour.

Tokyo Drifter: Alfie Goodrich on working in Japan

Johan – Akiko by Alfie Goodrich

Have you found any significant differences working in Japan as compared to working in the UK – not just culturally, but on the business side of things?

There are many differences between the UK and Japan and whilst nowhere is perfect, Japan and Tokyo tick a lot more boxes for us right now than London or the UK did. Little amusing things happen all the time, like asking if I could move a chair out of the background of a shot and having the company’s PR team all look at each other as though that was something that needed a board-level decision. My response at those times is just to make light of the situation, move the chair myself and then say ‘well, perfect… now you can blame the foreigner’.

There is a very hierarchical decision making process at work in Japan. Responsibility is a collective thing, not really down to individuals. That’s good in some ways but it can prolong decision making and during a shoot, things are often fluid and decisions need making quickly. Once you’ve built people’s trust with you then it’s different; they’ll give you more of a free reign over things.

One of the good things I would say here is that once you make business relationships, they tend to last. In the UK I would often come across the situation of having clients disappear to someone else based on cost: if Photographer X down the road was delivering Product A for £1 less an hour, then they’d move. That doesn’t happen in Japan. Trust and relationships take longer to build, which can be frustrating at first, but once you’ve made that relationship it isn’t really ever going to go south over trifling amounts of money.

Tokyo Drifter: Alfie Goodrich on working in Japan

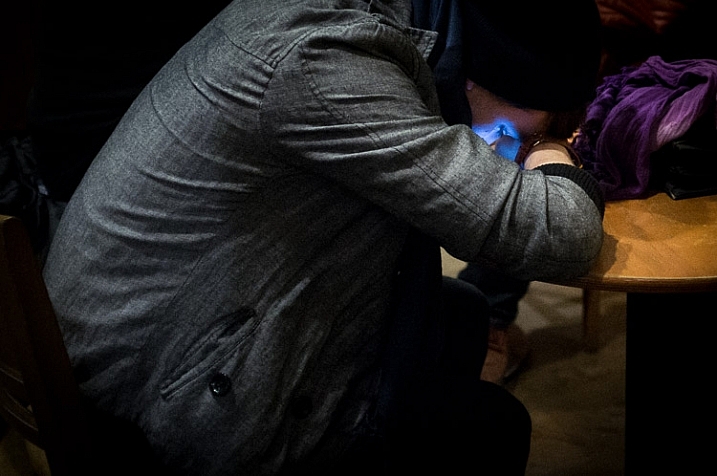
Kawasaki Daishi by Alfie Goodrich

You mention in an interview that budgets have shrunk so companies are looking for local photographers to carry out campaigns rather than flying out a production. What measures have you taken to ensure that you’re the ‘go-to’ photographer that they will think of in Tokyo and these other cities?

In terms of how I compare, from a client’s perspective to, say, a Japanese photographer then I think the main difference is my eyes. I see things from a foreigner’s perspective. Japan is still new and fascinating for me, after almost a decade of living here. I work differently to the locals. That can sometimes be a curse but usually it’s a benefit; where it might take a Japanese photographer a team of seven people to do even a small fashion shoot, it takes me three. Working quicker, more efficiently is something I would say that is an advantage.

I spent a lot of time getting my web presence sorted out and integrating it with SNS sites. So I have a good footprint on the web and on the search-engines. The photography teaching I do also helps a lot, making my network of contacts here and abroad more diverse and giving me a something different to blog about and publish online, which isn’t just about my own work but about encouraging and championing others.

Tokyo Drifter: Alfie Goodrich on working in Japan

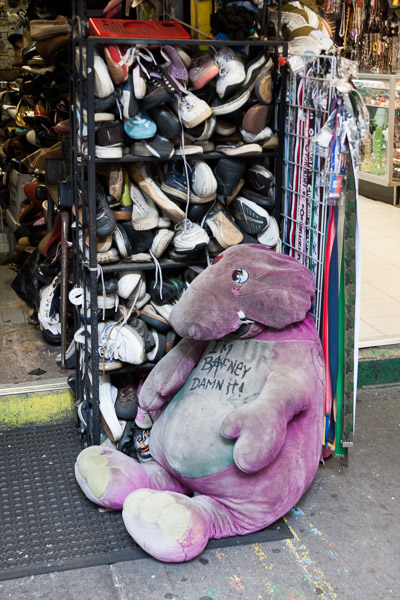
Asakusa by Alfie Goodrich

Besides speaking English and Japanese, what is it about your expatriate status that has given you a leg up over other photographers in Japan?

I am of course well-mannered and have respect for the local customs and culture, but being a foreigner means that it’s possible to skirt many of the conventions that hold local people back from being true to themselves 100%. I think for me it’s also about having come here at the right age. An old boss of mine once said that ‘when you get to 30, people take you more seriously. By the time you reach 40, you don’t give a shit whether they do or not!’.

I was 38 when I came here, with a wife and two children and on the back of just losing both my parents. Since then, we’ve had another child, I hit 40 and, to be very honest, I just have no time for bullshit anymore. Or for games. I’m also pretty happy with who I am. Still not perfect, obviously, but happy with the imperfections. There really is only ONE me.

Japanese people, because of the nature of their society, really don’t tend to get much chance to be totally themselves except when they are by themselves. They have one face for themselves, one for inside the house and one for outside the house… for work. Being myself and being happy with that person has been a large part of doing well here. You obviously have to have the skills to do the job, that goes without saying.

Tokyo Drifter: Alfie Goodrich on working in Japan

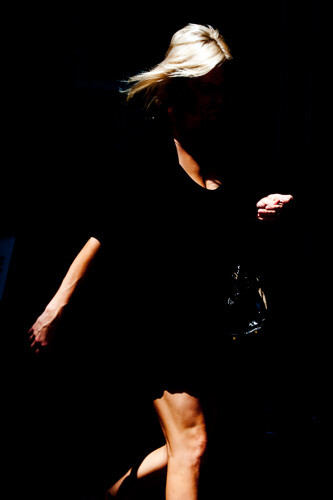
Baja by Alfie Goodrich

Since the beginning of the year, you’ve been an Ambassador for Hasselblad in Japan. How did that come about and what does that entail?

The boss of Hasselblad Japan is a Brit. Once we met, that certainly helped: shared heritage, same daft sense of humour, same propensity to swear every other word. I think he’d heard my name crop up quite a few times around the time that Hasselblad opened their shop and gallery here in Tokyo. The same had happened to me with his name. The foreign photographer community here is fairly compact and we were bound to meet each other eventually.

We had a meeting, talked about some of the things I was doing with photo education and which I was keen to explore with a camera company, especially one as legendary as Hasselblad. The boss and I got on well, we spent a bit more time hanging around with each other, I knew they had an ambassador programme and eventually we ended up talking about it and I was offered a post. It’s been a lot of fun.

Tokyo Drifter: Alfie Goodrich on working in Japan

Alfie Goodrich and his travel pack

What do you shoot with?

  • Hasselblad H5D-50c
  • Hasselblad H4D-40 as backup
  • Nikon D800E
  • Fujifilm X100 [borrowed from a friend]
  • Countless lenses

Tokyo Drifter: Alfie Goodrich on working in Japan

Iambo-ishii by Alfie Goodrich

What is it about the Hasselblad system that first appealed to you as a commercial portraitist?

First of all, the people at Hasselblad are human, friendly, passionate and down to earth. Yes, it’s business and of course it has to make money and be viable. But it’s about more than that. It’s about giving people an experience, sharing that feeling of joy and excitement that comes from having a truly awesome piece of machinery in your hands to take photos with… but at the same time, making sure it’s not all about gear. It’s about the image, the photo, the moment. The gear is crucial but it’s not everything.

As a perfectionist, I love being around people that are the same and Hasselbad are truly perfectionists. People often ask why the cameras are so expensive… well, part of the reason is that they are perfectionists. Craftsmen, perfectionists. And really, nowadays, buying a digital Hasselblad well of course they are not cheap but having one is the closest you will get to a ‘camera for life’. In the digital, throwaway, planned obsolescence society we live in now that’s a hard thing to say. But it’s true. So now imagine that camera for life and having unlimited free film, forever… and it doesn’t seem quite so expensive anymore.

Tokyo Drifter: Alfie Goodrich on working in Japan

Meijimura by Alfie Goodrich

(cont.) For me, why does Hasselblad appeal to me? The colour rendition is amazing, very film-like. Skin tones are perfect straight out of the camera. The True Focus system [which uses a gyro in the camera to re-focus after you have re-framed] helps me shoot at the large apertures I like and still nail the focus every single time.

The range of lenses is great and as ambassador I get to use what I like, as long as they have one available at the time. So, after really only using the 80mm and the 28mm a lot from the HC range before this year, I’ve been playing a lot with the amazing 300mm F4.5, the 210mm and the 120mm macro. I’ve also had a lot of fun with the CFV-50c digital back for the old film Hasselblads which is, for me, the fantasy come true of having all the wonderful usability of the older cameras but the convenience of the digital back.

The Hassie flash syncs up to 1/800th sec. That and the range of lenses they have, which often stop down to F32 and F45, give you a lot of flexibility to kill the sun when you are shooting with flash outdoors. The Nikon only syncs to 1/250th.

Tokyo Drifter: Alfie Goodrich on working in Japan

Ruri by Alfie Goodrich

As a Hasselblad Ambassador, you have ‘kid in a candy store’ access to their lenses. What have been a few of your favorite lenses so far?

Like I said before, the 300mm is astonishing: super sharp wide open at F4.5 and still super sharp when you stop it down to F45. It’s not light but it’s perfectly balanced. A joy to use and I use it hand-held a lot.

The 120mm macro is so sharp you could cut yourself on it. Lovely handling too. The first one I spent time with was the 100mm F2.2. I used to have the old Zeiss manual-focus 110mm F2 which was a beautiful lens. But it was seductive at F2, drawing you in what the lovely bokeh, only to leave you on the rocks of despair when you realised half the shots were out of focus.

With Hasselblad’s True Focus, you can shoot the 100mm all the way open at 2.2 and be sure to nail the focus every time. The 24mm is something also try to get my hands on when I can. Pretty much the widest lens for digital medium format and stunning on the right circumstances of subject matter. The TS1.5 tilt-shift converter has been fun too. I could go on… I mean, it’s a nice candy store.

Tokyo Drifter: Alfie Goodrich on working in Japan

Shinyong Kimono by Alfie Goodrich

You also shoot with the Nikon D800, D700 and D3X. When do you find yourself employing that system instead of Hasselblad? How do the two systems compare?

When I need lighter more compact cameras I use the Nikons. I don’t mind weight but if I need to hand-hold a shot at 1/4 sec then that’s more likely to be doable with the Nikon. I also have a lot of old Nikon glass which I like using a lot on the new cameras. So, sometimes it’s just because I have a lot of lenses at my fingertips that I use the Nikons. For shooting at a higher frame-rate, the Nikons win every time. Hasselblad is not built for that.

You have to play a camera, any tool, at its strengths. That goes for weatherproofing too. My D700 now has about 650,000 pushes on the shutter and has been through five typhoon seasons with me… and it’s been in the sea. The camera is practically bullet-proof. Best thing Nikon made since the F4, IMHO.

Tokyo Drifter: Alfie Goodrich on working in Japan

Keihincanal by Alfie Goodrich

(cont.) The Hassie I shoot the most is a CCD sensor camera, the H4D-40. It’s not a high ISO camera and I rarely shoot it above 400 ISO, although it’s still doing OK at 1600. The colour on the CCD chip vs the CMOS in the Nikons is huge. The dynamic range too. If I need large dynamic range, if the colour is super important and required to be nailed in the camera then I use the Hassie. I hardly do any post- production on the Hasselblad shots. If I am in the studio, it’s Hassie all the way.

Tokyo Drifter: Alfie Goodrich on working in Japan

Shinyong by Alfie Goodrich

With more than a million followers of Google+, do you have any tips for managing a presence on the site? Why has it become your social media site of choice?

I’m sort of getting back to Flickr too lately after a long break. Yeah, Google+… well I had a friend invite me to it very early, almost from day one of the site being open. The big thing for me was to investigate how well it integrated with other Google products, particularly whether it had any bearing on SEO and how far up Google you came. There are lots of articles out there on the net about G+ having no discernible effect on SEO. I’m not a techie but I can tell you that it has helped me get found.

One of the first reasons I was also attracted to G+ was that, via a plugin I have called Google+ Blog which was developed by photographer and coder Daniel Treadwell. It’s allowed me to post on Google Plus via by iPhone and have the posts pulled out and cross-published on my WordPress sites by the plugin. That solved two issues for me: first was that there was really no decent app on the iPhone for blogging on a WordPress site.

Tokyo Drifter: Alfie Goodrich on working in Japan

Rebel Rebel by Alfie Goodrich

(cont.) Secondly, the cross-posting gave me three bites of the SEO cherry with a post that shared the exact same title as the one on G+. And Daniel’s plugin preserves a link back to GPlus in the footer of each post. All these things have conspired to create a situation where, if I get clever about what I call my posts on G+, searches on Google’s main search engine containing the same words can mean me getting listed on page one of Google within 40 minutes of making the post. That’s powerful marketing for a small business or freelancer.

I’ve made some good friends there and you always have to give something to get anything back in life. So, putting out rich posts that have a backstory about how I shot the pic and why; these posts have always got good attention and allowed me to cultivate a nice audience.

Tokyo Drifter: Alfie Goodrich on working in Japan

Yokohama Rain by Alfie Goodrich

You’re also quite active on several other social media fronts. Which do you recommend photographers invest their time in the most?

Facebook is, for me, really just about keeping in touch with friends, making some new friends and having a personal place to chat informally. I don’t really use it for work. It’s my garden fence over which to gossip. The main thing I hate about FB for photography is that the JPEG compression is awful. It makes photos you post there look bad, so why would I use it so much for that? Google+ is all about photography. Flickr started in 2006 for me and now they have sorted out the look and the usability of the site, I am getting back to using it more. Tumblr I use as a scrapbook, moodboard and ideas archive. Twitter I am starting to use more but really just getting my head around it even now.

I think the biggest thing for photographers to get sorted is their own website. Get a decent platform for it which for me is WordPress. Then make it look nice but don’t over spec it. It’s all about your work, not fancy animations, complicated navigation or anything too clever. People want to see images and to get to see a decent cross-section of your work as quickly as possible, in a mobile and web-friendly way.

SNS should then relate back to your website. I post links on FB and link to my work on my sites. That generates traffic and sows links out there on the web and the amount of links a search engine sees to your site helps it bump you up the table for page ranking. As for what to post on SNS, give people something. It should not all be ‘me, me me’ and really not, on FB for instance, be about ‘come and like my page’. You have to find a unique voice for yourself.

Today is different. We have to be photographers and agent, promoter and marketer. That’s hard to do for long without occasionally disappearing up your own backside. Find a way to promote yourself that also educates or enriches the people seeing your posts. That’s really where the photography teaching has helped me; I like passing things on, helping people enjoy their photography more. A lot of what I post on SNS is slanted that way.

Tokyo Drifter: Alfie Goodrich on working in Japan

Yumi by Alfie Goodrich

How does your Japanorama website tie into the rest of your endeavors? 

Japanorama was the first domain I had outside of one in my own name. I bought it way back, at first just because I liked the name and it was a domain I used to point to my pics of Japan. When we moved here, I changed the site to be something the reflected more of everything I do: the teaching, the work, stuff not shot by me but done by people I teach etc. It’s also the umbrella name under which I do business in Japan.

Tokyo Drifter: Alfie Goodrich on working in Japan

Mari by Alfie Goodrich

Would you speak a bit about your self-published magazine Stekki and what the process of putting together a magazine is like?

Stekki came about purely as a way to help students and workshop attendees get the experience of seeing their work in a magazine form. On workshops we’d shoot to a brief of making features to fill pages. People would need to think about a cover, double-page spreads, remembering to shoot vertical and horizontal. I get to see my work in magazines. That’s nice for me. I wanted to share that experience and make a magazine for people.

Plus, the discipline of shooting for the page, pre-visualising for the page, seeing someone edit your shots down and then fit them on to a page… this is good for people who are learning about photography. I’m shortly about to start designing and producing all the content for a real magazine here in Tokyo. That will help me move Stekki one step closer to being in print, which I think we can realistically see happening in 2016.

Tokyo Drifter: Alfie Goodrich on working in Japan

Momo Shoko Yoyogi by Alfie Goodrich

As well as shooting, you teach photography in Tokyo. What are a few of the things that photographers can expect to learn in your workshops and photowalks? Are there any less known locations that you can recommend for photographers who are making a visit to Japan?

I help people see. I help them pre-visualise, become visual literate as much as anything we do technically or physically with the camera. We’ll always work to some kind of brief or project and since the Stekki magazine idea came along, very often we’ll work together on shooting pages for that. I do one-to-one lessons, courses and workshops and at any one time there’ll be something going on across a few genres of photography, from fashion to landscape, travel to documentary or street. I tend to get off the beaten track a lot and actually earlier this year made a Google Map with more than 100 places and walks on it, each with a photo. You can find that here: http://japanorama.co.uk/2015/04/30/a-photographers-map-of-tokyo-japan/

Tokyo Drifter: Alfie Goodrich on working in Japan

Mone Ohashi Tripych by Alfie Goodrich

You do a lot of location portraiture, what’s your chosen lighting system for working in these urban areas?

I’ve used lots of things and still do have a real mix of stuff. Recently I tried out the Profoto B2 kit for a few months and may well end up getting one. I like their B1 lights a lot as well. No cables. Huge benefit when working outdoors. I have an Einstein or two and the Paul Buff ring flash, which is fun. I still use a lot of small speed lights and radio triggers as well. I like the flexibility of clamping them onto a fence, railing or somewhere it would be hard to use stands or large lights.

Tokyo Drifter: Alfie Goodrich on working in Japan

Meijijingu by Alfie Goodrich

Does Japan have similar permitting issues as the US or the UK when it comes to commercial photography?

Japan is pretty good for photography. The main thing is about tripod and stand usage. There are plenty of areas in the cities where you can get away with light on a stand though. But the speed lights come in useful a lot for ‘gun and run’ type shoots.

The police never really bother me. It’s more the private security guards or guards that work for a building. If they think you are on their land, which at times can be hard to figure out, then they can be very persistent and annoying. Temples and shrines anywhere in Japan are pretty much either, ‘yes we are cool with you but it’s on a permission only basis’ or, ‘no, you can’t shoot commercially here’. They are usually pretty approachable and the ones that will let you shoot will usually turn around a request for permission in two weeks or less. Some even use email now! But be prepared in Japan for the surprise of how popular the fax machine still is.

Playing the ‘stupid foreigner’ card obviously is something I will do occasionally. I’m well mannered and polite but if I want a shot than I will try, within reason, plenty of things to try and get it. If pretending not to understand the rules is one, I’ll do it.

Tokyo Drifter: Alfie Goodrich on working in Japan

Mari by Alfie Goodrich

What was the experience of shooting Prince William, Duke of Cambridge like?

The experience of a lifetime. I mean, whatever you think about the royal family, being on an assignment with any super-VVIP level people is amazingly interesting: the organisation, the pace, the things you get to see and experience.? I spent four days with the Duke, as the British Embassy in Tokyo’s official photographer of his visit. I travelled in the convoy, went to all of the engagements in Tokyo and up in Tohoku. In four days I photographed the Duke, the Prime Minister, the Emperor and Empress, a Crown Prince and assorted other dignitaries. Not just from the press-pack perspective but as an embedded photographer. That opportunity doesn’t come around very often.

The Tohoku and Fukushima parts of the trip were especially poignant for me. My wife is from Fukushima and the majority of her family still live there. So when I got a chance, at the end of the trip, to speak with the Duke, I thanked him for taking the time to visit Fukushima. Lots of people had come out to see him. It meant a lot to them that someone like him would visit there home. Oh, and my two sons still hate me for the fact that – with the Duke – I managed to get inside the driver’s compartment of the bullet-train. You can only really do that if you have a Prince to get you in the door.

Articles: Digital Photography Review (dpreview.com)

 
Comments Off on Tokyo Drifter: Editorial and commercial photographer Alfie Goodrich on working in Japan

Posted in Uncategorized


Why Taking Pictures of Your Pets Will Help Make You a Better Photographer

27 Jan

If you have a pet, it may stand to reason that you already point your camera at it a fair amount. Why not? Pets, whether they are cats, dogs, or even chinchillas, tend to be photogenic. Beyond that, as a photographer, your pet is a subject you already share a strong emotional bond with, so it’s only natural to take a few snapshots along the way.

pet-photography-to-improve-camera-skills-9914

As a photographic genre, pet photography can go well beyond that of the simple snapshot. If you start to dissect the various disciplines it requires, you may notice that it involves a broader spectrum of skill sets than many other kinds of photography. From lighting, to camera control, to managing a difficult subject, photographing your pets can help you learn, and reinforce a great deal of camera craft that can be transferred across many other genres.

The important factor here is that your subject, your pet, is generally far more accessible to practice with than other subjects, such as people.

Even if you think pet photography isn’t something you’re ultimately interested in, this article is intended to demonstrate the skills and disciplines you can hone on pets, and then transfer effortlessly to other genres.

Camera craft

pet-photography-to-improve-camera-skills-8431

If you’re new to photography, this is the most important point. Things like aperture, shutter speed, and ISO all need relentless practice and reinforcement when you’re learning your way around the camera. Sure, you could just use an apple on a table, but having a moving subject will force you to act quicker, and make decisions on the fly. This kind of mastery over your camera will allow you to react faster to any changes in your subject, and will allow you to catch many images you may otherwise have missed while fiddling with the dials.

Camera on hand

One of the most given pieces of advice to photographers is to always have your camera with you. It’s good advice, but it’s not easy to implement. By dedicating yourself to photographing your pets, you’ll already be taking a step in the right direction. This is especially true if you have a dog that you walk regularly. Just make sure the camera goes with you on your walks, and you’ll be ready for any opportunity that presents itself, including ones that don’t involve your pet.

As a bonus, dog walking is an excellent excuse to be out during golden hour every day.

Patience

pet-photography-to-improve-camera-skills-9944

Photographing pets is hard. This difficulty has nothing at all to do with any technical skills with the camera. Animals tend to be impatient, disinterested, distractible, and sometimes skittish. With the exception of reasonably well-trained dogs, you will probably have a hard time getting most other animals to do what you need. Just imagine trying to give an iguana commands.

The key here is patience. Often you will have to wait frustratingly long periods of time before a shot presents itself. By understanding this, you can focus your energy on the shot when it does appear, rather than the time leading up to it. It is also usually better to wait for something natural to happen, than to force something artificial.

This kind of patience can take a while to develop, but it is a high value skill that transfers well across the photographic disciplines. Your wildlife photography, portraits (especially child portraits), street photography, and sports photography would all benefit from this trait.

Unpredictability

pet-photography-to-improve-camera-skills-0113

Animals are unpredictable. This is great news if you’re trying to hone your skills. Leveraging that unpredictability as a learning tool will allow you to react to different situations much faster. This could be as simple as pumping up the ISO without thinking about it, or even swapping lenses in seconds without a thought.

The best part is that it’s this unpredictability that often leads to the most interesting photos, or at least the funniest.

Lighting

Whether it’s natural or artificial, lighting is probably the most complex and multifaceted of the photographic skill sets. While not difficult, there is a lot to it, and it takes a significant amount of time to learn, and then master.

With a pet, you have constant access to a test subject for any new lighting technique you want to try. If something isn’t right, you can take your time and alter things as you need, without having to worry about taking up someone else’s time.

pet-photography-to-improve-camera-skills-0795

Individual lighting techniques tend to work as well with animals as they do with people. Once you have a setup the way you want it, often all you will need to do to switch to a human subject, is raise the lights up. If you’re using natural light, you wouldn’t even need to do that.

In the end

There is a lot of contention out there about whether or not photographers should share photos of their pets. That’s up to you, nobody else. Share them or not, as long as you’re putting the hours in and getting the experience, that’s all that matters.

Hopefully you can see how dedicating time to photographing your pets can help you to improve a broad set of skills simultaneously. By removing accessibility issues and keeping costs minimal (a bag of treats is a cost, right?) you can ramp up the time you spend practicing, and reach the top of the learning curve in no time.

If nothing else, can spending some extra time with your pet be a bad thing?

googletag.cmd.push(function() {
tablet_slots.push( googletag.defineSlot( “/1005424/_dPSv4_tab-all-article-bottom_(300×250)”, [300, 250], “pb-ad-78623” ).addService( googletag.pubads() ) ); } );

googletag.cmd.push(function() {
mobile_slots.push( googletag.defineSlot( “/1005424/_dPSv4_mob-all-article-bottom_(300×250)”, [300, 250], “pb-ad-78158” ).addService( googletag.pubads() ) ); } );

The post Why Taking Pictures of Your Pets Will Help Make You a Better Photographer by John McIntire appeared first on Digital Photography School.


Digital Photography School

 
Comments Off on Why Taking Pictures of Your Pets Will Help Make You a Better Photographer

Posted in Photography