RSS
 

Posts Tagged ‘Photograph’

The power of a photograph: Lynette Johnson and Soulumination

17 Jan

In 2005, wedding and portrait photographer Lynette Johnson founded an organization that would have a profound impact on over 1,400 families. Celebrating its 10th year, Soulumination is a non-profit that provides free professional photography sessions for individuals and families facing truly devastating circumstances – the loss of a child (or a parent with young children) to terminal illness. Now with almost 50 volunteer photographers, Soulumination provides a loving remembrance to comfort families and loved ones through extremely difficult times. 

In her PIX 2015 talk, Johnson discusses her work founding and growing Soulumination. She’s also joined by ‘Soul Mom’ Debbie, who brings a heartfelt perspective on just how important it is to have photographs that celebrate the life of a loved one. Lynette and Debbie give a moving talk, one that really illuminates how priceless a photograph can be.

Watch the talk and visit Soulumination’s website to learn more about their mission. The organization is currently running a ten-week campaign celebrating its ten years, hoping to raise $ 100,000 to continue helping families.

Articles: Digital Photography Review (dpreview.com)

 
Comments Off on The power of a photograph: Lynette Johnson and Soulumination

Posted in Uncategorized


Photograph Close to Home to Improve Your Photography

05 Jan

Think about the most interesting place that you could possibly go to take an incredible photograph. What comes to mind?

Maybe it’s Machu Picchu, New Zealand, Yosemite, a safari in Africa, a city like New York or Paris, or wherever is featured in the latest National Geographic Magazine. These locations are very special occasions for travel and photography. However, they are usually once in a lifetime trips, and once you are there, you often have a very limited amount of time for photographing, along with everything else planned.

Deer, Backyard, New Jersey by Neil Persh

All images in this article courtesy of my student, Neil Persh. Here is his backyard.

So what if I told you that the most interesting place you could photograph is much easier to get to? It’s in your own neighborhood, and its surrounding locations.

I am told fairly frequently by photographers and students that they cannot, or do not feel like, photographing where they live. “It’s too boring” they say, or “There’s nothing interesting to photograph. I only do my photography when I travel.”

This is great of course, as passion for travel and photography go hand in hand, and it’s often when people do their best work. But, thinking that way can also make you miss the whole point of photography.

Shop Window, Rutgers, New Jersey by Neil Persh

Shop Window, Rutgers, New Jersey by Neil Persh.

When students mention this to me, I get them to do a specific exercise, I suggest that you try it as well. Spend a few weeks photographing areas within close proximity to your house. Leave your home and go for a long walk in any random direction. Take it even further by thinking about the most uninteresting area that you can imagine photographing, and go there. Maybe it’s a mall parking lot, an empty street corner, or behind a convenience store. Stay there, and figure out how to take an interesting photograph.

Many people tend to take their own location for granted. Your surroundings may seem routine and banal to you, but they’re not. If you were to take someone from a different part of the world, or from a different time period, and park them right where you are – they would probably find things very weird and fascinating. They would probably photograph so many things that you may currently be overlooking.

Step outside, and try to see these areas in that way. What makes this area interesting? How are these scenes going to look as the world changes? How can you make these everyday things beautiful and interesting? Figure out why you might find an area uninspiring, and then photograph that. That is an fascinating idea in itself.

Road, New Jersey by Neil Persh

Road, New Jersey by Neil Persh.

The most experienced photographers have learned how to take unique and interesting photographs anywhere. They usually do not take anything for granted. I think this is a skill that you can practice and learn, and it goes to the heart of what being a good photographer is all about. On a practical note, these areas are right outside your door, so you don’t have to pack up all your equipment and plan a lengthy trip. You can walk outside three times a week for 30 minutes with your camera, altering the times of day and the route. If you are a once or twice a month photographer, this will have you practicing much more often. This alone will make you a much better photographer, over the longterm.

Photography is an exciting past-time. I first got into it for the simple fact that I liked to walk and daydream. As you improve and learn more about photography, as you eye better gear, as you think about creating grander images, and as you look at the work of well-traveled photographers on a daily basis, it can pull you away from this simple idea. One of most powerful aspects of photography is that it is a reason in itself to go and take an enjoyable walk. It is a reason to relax and daydream; it is an excuse to wander. It is also a great ice-breaker for meeting other people.

Subdivision, New Jersey by Neil Persh

Subdivision, New Jersey by Neil Persh.

Take a look at the work of William Eggleston, Lee Friedlander, or Alec Soth. Look at some of the areas where they photographed. The places probably did not feel that special, or inspiring, to the photographers on the surface. But these photographers were able to see past it, and show in their images how the areas were unique.

Any time that doubt creeps in, and you think that it is impossible to take a good photograph somewhere, I want you to stop yourself and slowly look around. Figure out how to take the best possible image that you can right there, and then go explore another block. Something new will be around the corner.

New Jersey by Neil Persh

New Jersey by Neil Persh.

The work of one of my students, Neil Persh is shown throughout this article. Neil frequently takes day trips into New York City, along with traveling to many interesting places to capture wonderful images. His work in these areas has gotten very good, and he clearly has an enthusiasm and passion for photography that is contagious. However, when he had to go photograph his neighborhood for an assignment, he struggled with the idea for a while. Then, when he finally commit to it, he began to get over his trepidation, and started to photograph his area more frequently. I was blown away by the images. The work shown here was taken over months, not years, and I find them to be much different from what you normally see.

You can do the same. Go for a walk this week!

Ham Radio Operator's House, New Jersey by Neil Persh

Ham Radio Operator’s House, New Jersey by Neil Persh.

googletag.cmd.push(function() {
tablet_slots.push( googletag.defineSlot( “/1005424/_dPSv4_tab-all-article-bottom_(300×250)”, [300, 250], “pb-ad-78623” ).addService( googletag.pubads() ) ); } );

googletag.cmd.push(function() {
mobile_slots.push( googletag.defineSlot( “/1005424/_dPSv4_mob-all-article-bottom_(300×250)”, [300, 250], “pb-ad-78158” ).addService( googletag.pubads() ) ); } );

The post Photograph Close to Home to Improve Your Photography by James Maher appeared first on Digital Photography School.


Digital Photography School

 
Comments Off on Photograph Close to Home to Improve Your Photography

Posted in Photography


How to Photograph the Holidays: Download your Free Guide Today

17 Nov

With the end of 2015 and the holiday period approaching, we know that many dPS readers find themselves with cameras in hand more than any other time of year.

The holidays come with so many wonderful photographic opportunities – and we don’t want you to miss a single one!

So we have a special gift for dPS newsletter subscribers…

A free dPS mini-guide – How to Photograph the Holidays!

Cover w flyouts

This 15-page downloadable PDF guide is filled with 12 practical tips and a fantastic printable checklist. It’s all about helping you discover how to capture the magic of the holidays and create memorable images that you’ll cherish for years to come.

A special thanks to our friends Lauren and Rob at Photography Concentrate for creating this download.

It’s completely free for all our subscribers as a thank you for being a valued part of our community.

To receive it, you can subscribe to our newsletter here. You’ll receive an email shortly after asking you to confirm your subscription, and on doing that, you’ll be taken to a page where you can download the guide and printable checklist.

We hope you find this little gift as useful as we do and that it helps you capture the joy and fun of the holidays.

googletag.cmd.push(function() {
tablet_slots.push( googletag.defineSlot( “/1005424/_dPSv4_tab-all-article-bottom_(300×250)”, [300, 250], “pb-ad-78623” ).addService( googletag.pubads() ) ); } );

googletag.cmd.push(function() {
mobile_slots.push( googletag.defineSlot( “/1005424/_dPSv4_mob-all-article-bottom_(300×250)”, [300, 250], “pb-ad-78158” ).addService( googletag.pubads() ) ); } );

The post How to Photograph the Holidays: Download your Free Guide Today by Darren Rowse appeared first on Digital Photography School.


Digital Photography School

 
Comments Off on How to Photograph the Holidays: Download your Free Guide Today

Posted in Photography


Photograph Summer Fun From Festivals to Farmers Markets

23 Jul

Street fairs and block parties and farmer’s markets, oh my!

Summer’s the time for outdoor fun. But so much activity can be overwhelming. How do you make sure you capture it all?

You use this list we made just for you! It has all the photo actions you’re gonna wanna take during your next outdoor summer extravaganza.

Now slap on some sunscreen and let’s go!

Photograph Outdoor Summer Memories

(…)
Read the rest of Photograph Summer Fun From
Festivals to Farmers Markets (437 words)


© Taylor for Photojojo, 2015. |
Permalink |
No comment |
Add to
Festivals to Farmers Markets”>del.icio.us

Post tags:


Photojojo

 
Comments Off on Photograph Summer Fun From Festivals to Farmers Markets

Posted in Equipment


How To Create Two of the Same Person in One Photograph Using Photoshop

12 Jul

This is a fun twist on portraiture that can often tell a bit more of a story about your subject, by allowing them to reveal two or more sides to their personality. It’s an old photography trick used in the days of the darkroom, and now with modern technology can be done in minutes with a few simple steps in Photoshop.

First you are going to need two or more photographs of your subject, so find yourself a victim to experiment on, or try a self portrait. The main trick to this technique is to get things set up well in the shooting stage so everything goes smoothly when you go to edit.

Getting Set Up to Shoot

You’ll need to put your camera on a tripod. Your tripod position, lighting setup, your camera and its settings, all need to remain the same throughout the shooting session. Once you’re set up don’t move or twiddle anything, otherwise things can get a bit wobbly when you go to blend your final images.

It is possible to do this with natural light, but you’ll have to work fast before the light changes too much. If you don’t have studio lighting you can try light painting or some of the other DIY lighting tips from my article Creating Effective Studio Lighting with Household Items

Start with a simple set such as two chairs. To make it a bit more interesting, add something like a small table in between with a prop or two; your subject could be sharing a cup of tea or a glass of wine with themselves.

portrait-photography-trick02

Positioning your subject

Once you have set your stage and are happy with how it looks through the viewfinder, bring in your subject to test out the lighting on them for both positions. Then you are ready to roll.

Think about how the different versions of your subject will interact with each other. Will they be in conversation, raising a glass congratulating themselves on a portrait sitting job well done perhaps? In such a case it’s important to get their line of site correct to achieve the illusion of the subject looking at themselves.

portrait-photography-trick03

It is a good idea, when first attempting this, to ensure there is no overlap of the two versions of your subject, such as a stray foot, to save you any extra fiddling about in the editing stage. You can help to keep both versions separate by placing a small marker, such as a tiny bit of tape on the floor in the middle of your setup, so your subject knows where that invisible overlap line is located.

For the shot below I had the female version lean on a rolled up towel to imitate the knee of the male version of herself. This gave a natural lean to her pose and helped create the illusion that she is actually leaning on the male version’s lap.

portrait-photography-trick04

Take as many shots as you and your portrait subject have the time and patience for. The more versions you have, the better chance of finding a perfect match in the editing stage. Try different facial expressions and poses for each version of your subject.

Easy editing

We are going to be working with layers here, but if that’s new to you don’t panic! It really is easier than you might think. Just follow the few steps below and you’ll be pulling a photographic rabbit out of a Photoshop hat in no time.

  • Open your favorite image of each version of your subject in Photoshop.
  • Make sure both images are the same size.
  • Using the Move Tool, click on the thumbnail of the first image in its Layers Palette, drag over the top of the second image and let go.
  • You now have both images on top of each other in the same file, seen as Background and Layer 1 in the Layers Palette (shown below).

portrait-photography-trick05

  • You’ll need to see both versions, so go to the Layers Palette and select the Layer 1 thumbnail.
  • Using the Opacity slider just above it, slide it around until you can see both images, about 50% usually works the best.

If you haven’t moved anything about during shooting the images should line up perfectly. In which case, you’ve done the hardest part already, it’s smooth sailing from here.

If your setup got bumped, you can probably still line things up well enough to work. Just use the Move Tool to slide around top image and try and get the best alignment. It helps to zoom in to check accuracy (you can also use Auto-Align Layers” in the edit menu but it may be fooled by the subject – but give it a try).

portrait-photography-trick06

Now the fun part

  • Select Layer 1 in the Layers Palette.
  • At the bottom of the Palette is a little square with a circle in it, commonly known as the Add Layer Mask button, or as I like to call it, the Where the Magic Happens button.
  • Click on it and a Layer Mask white box will appear next to the image thumbnail.

It’s not sounding very magic so far, but hang in there.

  • The Background and Foreground Colour squares at the bottom of your Tools Pallette will need to be black on the top (foreground color).
  • Select a brush, set to zero hardness and get ready to make magic happen.
  • Set both Layer and Brush Opacity sliders to 100%.
  • Make sure that white Layer Mask thumbnail is still selected.
  • Start brushing and watch as the second version of your model magically appears, tada!

portrait-photography-trick07

Don’t worry if you go too far, and erase something more than you intended, if you do, you can just switch those little black and white boxes in the Tools Pallette with the tiny arrows (or press X on your keyboard) so white is on top, then brush back in to reverse the mistake (black conceals, white reveals).

That’s it! All the tricky stuff done and dusted.

Now you simply flatten the image. File> Flatten Image, and all that is left is to edit as you would any other photograph. For this image it was a crop here, a filter and color adjustment there, and erasing the umbrella light reflection in the window.

portrait-photography-trick08

This technique is something you can really play with, from building sets and getting creative with props, or simply using it to get more of a story from your portrait subject. Either way, it is great fun to try. If you do, please share your results in the comments. Happy experimenting.

googletag.cmd.push(function() {
tablet_slots.push( googletag.defineSlot( “/1005424/_dPSv4_tab-all-article-bottom_(300×250)”, [300, 250], “pb-ad-78623” ).addService( googletag.pubads() ) ); } );

googletag.cmd.push(function() {
mobile_slots.push( googletag.defineSlot( “/1005424/_dPSv4_mob-all-article-bottom_(300×250)”, [300, 250], “pb-ad-78158” ).addService( googletag.pubads() ) ); } );

The post How To Create Two of the Same Person in One Photograph Using Photoshop by Lea Hawkins appeared first on Digital Photography School.


Digital Photography School

 
Comments Off on How To Create Two of the Same Person in One Photograph Using Photoshop

Posted in Photography


How to Photograph Fireworks: Happy 4th of July

30 Jun

The hot dogs have all been eaten and the blazing hot sun is finally setting. Time to grab your blanket and head out to your community 4th of July fireworks display. This year instead of coming back with just fond memories, grab your camera and follow these simple tips to photograph fireworks as well. Use Tripod If you’re using a Continue Reading

The post How to Photograph Fireworks: Happy 4th of July appeared first on Photodoto.


Photodoto

 
Comments Off on How to Photograph Fireworks: Happy 4th of July

Posted in Photography


The Ultimate Guide on How To Photograph Special Events

25 Mar

Weddings, birthday parties, anniversary dinners, christenings, product launches, retirement parties – these are special occasions and people always want professionally taken photographs to remember them by. This means that if you can perfect your technique and build a good portfolio of event images, you will always be in demand! The Do’s and Don’ts of Special Event Photography The important thing Continue Reading

The post The Ultimate Guide on How To Photograph Special Events appeared first on Photodoto.


Photodoto

 
Comments Off on The Ultimate Guide on How To Photograph Special Events

Posted in Photography


How to Photograph Babies from a Week Old to Sitting up

24 Mar

There is a huge trend among baby photographers to do all of those awesome shots of babies all curled up and almost “in the womb” looking. I LOVE those shots, but they have very definite parameters, meaning that you have to catch the baby while she is still curly; so 3 to 7, or sometimes, at the very oldest, 12 Continue Reading

The post How to Photograph Babies from a Week Old to Sitting up appeared first on Photodoto.


Photodoto

 
Comments Off on How to Photograph Babies from a Week Old to Sitting up

Posted in Photography


How to Organize and Photograph Events Like a Pro

19 Mar

The Main Event: How to organize and shoot events like a pro.

EVENTS MAIN

The Footy Show and image courtesy of Nine Network Australia © Gina Milicia 2015

If you own a camera and are known in your circle of friends as an enthusiast or a pro, there’s a really good chance you’ve been asked to photograph an event.

An event is basically any time a group of three or more people gather together to celebrate a milestone. This could be your best friend’s wedding, Uncle Dave’s 50th birthday, your next-door neighbor’s bar mitzvah, your cousin Maria’s engagement, a product or corporate event, or an awards ceremony. They’re all defined as events.

Event Montage

© Gina Milicia 2015

I’ve been shooting events for the last 25 years. In that time, I’ve been the official event photographer for the Australian Grand Prix, the Melbourne Cup, the Dalai Lama, Bvlgari, WWE Wrestling, the Logies (Australia’s Emmys), press conferences with rock stars, product launches for big brands, Uncle Dave’s 50th (great party!) and my cousin’s engagement.

The protocol I use to photograph events is the same for Uncle Dave’s 50th as it is for an A-list function. I’m going to share all the pre-event and event protocols, tips and techniques I’ve developed over the last 25 years – so you can photograph events like a pro too.

The “no more tears” gear check list

Rechargeable Batteries

© Gina Milicia 2015

Always ensure you have fresh batteries for your event. If you are shooting a lot of events and working with flash on-camera you may want to consider investing in rechargeable AA and AAA batteries for your flashes and other devices. They are a bit of an investment at the start, but eventually pay for themselves and are far more environmentally friendly.

“To be prepared is half the victory.” – Miguel de Cervantes

I always organize my gear the day before I shoot a big event. This is an extensive list based on all the items I’ve managed to forget over the years – and yes, there have sometimes been tears and yes, they did cause me stress.

  • Test all flashes, sync cables and radio slaves. (I once broke someone’s wedding! If you haven’t heard this story, you can relive my heartbreak here.)
  • Pack fresh batteries and spares.
  • Charge all camera batteries.
Melb Cup

© Gina Milicia 2015

In one of my early Melbourne Cup shoots, I was sent to the finish line to cover the presentation of the Melbourne Cup for its sponsor, Emirates. It had been a long day and I was still a bit green to this event caper. I completely overestimated my flash and camera’s battery lives and had to endure a stressful 30 minutes waiting to photograph “the money shot” with my camera blinking, “I’m about to die! Now feed me!”

My spare battery and charger were safely tucked away in my camera bag about 20-minute walk away. (Doh!) I managed to squeeze out five frames by turning the camera on and off. I got the shot, but it wasn’t fun.

  • Clean your lenses. Always check for dust, mould, scratches and smears. There’s nothing worse than having to retouch 300 shots because of gunk in the corner of the frame, or worse still, a large gooby that completely ruins a shot.
  • Fully charge your laptop, phone, and booster for remote locations.
  • Ensure you have all your cables, accessories and chargers for laptops, etc.
  • Pack two card readers and spare cables.
  • Carry extra memory cards and spare cards.
Cables

© Gina Milicia 2015

I once shot a wedding at a very remote Australian location. It was at the end of a long, hard week and I realized when I arrived that I had forgotten the USB cable for my card reader. I knew it was going to be a big wedding — the magazine wanted full coverage, from start to finish — and I only had enough memory cards to cover about half of it.

I sent my assistant out to the tiny country town’s shopping district in search of a cable or a card reader while I continued the pre-wedding shots. She rang every camera store within 20km (12.5 miles), but no luck. I ended up having to shoot with the limited number of memory cards I had, and treat it as if I was shooting with film.

I got there in the end, but that little oversight could’ve been very costly. Now I carry two memory card readers and put spare cables in my glove box camera bag, handbag and laptop bag.

Events 003

Nutella comes in a handy travel size. © Gina Milicia 2015

  • Put together a survival kit (water, tissues, deodorant, mints, snacks, protein bars, nuts, umbrella, blankets, spare warm clothes, and comfy shoes for the drive home). Events can go on for hours and often run over meal times. There’s nothing worse than being cold, tired, hungry or stinky at an event. Always pack an emergency kit to keep you going between meals and showers.
  • Read the run sheet, look up all shoot locations and work out the best travel routes. I always work out the best way to get to my gig the night before. Events can be stressful enough without having to worry about getting lost on the way.
  • Wash your car and fill the tank. Again, it’s all about minimizing stress. Events are usually dressy affairs, so it’s nice to turn up in a clean car. It feels better, too.
  • Pre-pack and recheck all lighting, tripods, stands, and accessories.
  • Ensure your gear is portable, lightweight and quickly and easily accessible. Here’s my personal event location kit: Roller bag, laptop, monopod or tripod, two camera bodies, 24mm-105mm f/4 lens, 70mm-200mm f/2.8 lens, 85mm lens, two speedlights, rechargeable AA batteries.
  • Have a safe spot to store the memory cards you use at the event. Mark them clearly so you don’t accidentally overwrite them.
  • Bring a hard drive for backup. If you have time and a safe place to do it, download your memory cards onto your computer and back them up at the same time. I have an in/out system that I use. Check out: Photography Workflow Tips – From Memory Card to Computer and Beyond for more info.
  • Keep drunken guests away from your table. Food and drinks don’t mix with and laptops. One spilled drink and it’s all over.
  • Don’t forget a pen and notebook to jot down important information.

Dress code

Your next clients may be among the guests at the event you’re shooting. You only have one chance to make a good impression, so make sure it’s a good one.

Events 4

© Gina Milicia 2015

I’d love to wear my favorite torn jeans and boots to every shoot I do, but I know that wouldn’t make a very good impression. I don’t want to embarrass clients by turning up in inappropriate attire, so I always check the dress code first.

I believe a good photographer should blend in with the guests. Don’t get me wrong, I’m not suggesting you turn up dressed like Paris Hilton. Rock out your own style, but maybe tone down the diamond tiara, nine-inch gold-plated heels and leopard skin jumpsuit.

Here are a few suggestions you may want to take on board:

  • Buy a great pair of really comfortable dress shoes. There’s nothing worse than wearing uncomfortable shoes on a long shoot.
  • The best color to blend in at an event is black.
  • Always carry a lint roller, safety pins, shoe polish and a sewing kit in your bag for those just in case moments. I once tore my pants just before an event.

Etiquette

Events 5

© Gina Milicia 2015

  • Never be seen eating or drinking at the event.
  • Food and drink should always be consumed away from guests (eat before you go).
  • Ask for the best place to store your gear (I often call the venue in advance to ask to have a space set up for me).
  • Don’t annoy guests and corner them and bang on with boring stories.
  • Only give out your card if somebody specifically asks for it.
  • Keep notes on a pad or your Smartphone so you can remember the names of key people.
  • Always ask guests if they mind you taking their photo. If people are deep in conversation, try and wait for a break before cutting in. This is tricky, especially for new photographers. Try, “Hello. Sorry for interrupting. Do you mind if I take a photo?” Tone is really important. Never be pushy and always have a huge smile on your face. Compliment guests on their hat, bag, shoes, or eyes, but do it sincerely.
  • If you’re working with other photographers, try and help them set up shots and work together. This is a small industry; chances are you will work together again and it’s always great to develop friendships with other photographers. This can be a lonely industry sometimes.
  • Never stand around looking bored. If you’ve run out of guests, shoot the food, band or signage.
  • Email shots of the band, flowers and food to the suppliers. This is a great way to value add for your client, a nice thing to do for the suppliers, and a great way to meet potential new clients.

Day of the event

Try and arrive 30 minutes, to an hour before the event. This will give you plenty of time to unpack your gear and compose yourself before the event starts. There’s nothing worse than arriving late and having to set up under pressure.

Do a quick reconnaissance of the location, take note of the lighting and try to pre-plan good locations for group shots and portraits. Set up your gear. Test and retest everything to make sure it’s working. Check that your memory cards are in your camera, the ISO is set to the correct setting, and your flashes are firing properly.

Read the shot list and check and double check you’re getting all your key shots. Continually refer back to this on the day. Cover every detail possible on the day: signage, food, gift bags, drinks, flowers, and table settings. This is a great opportunity to introduce your skills to other businesses, so make sure you forward these images to caterers, florists and designers.

Try and keep group shots to a maximum of five people. I often shoot people in groups of two, three and five. Take three to five frames when shooting groups of people because someone will always blink or pull a funny face. Tell the group you’ll take a few shots so they don’t look, or walk away, after the first frame. Keep talking while you’re photographing the group so you command their attention. Otherwise they’ll look the wrong way, start talking or eating, and ruin your shot.

Events 8

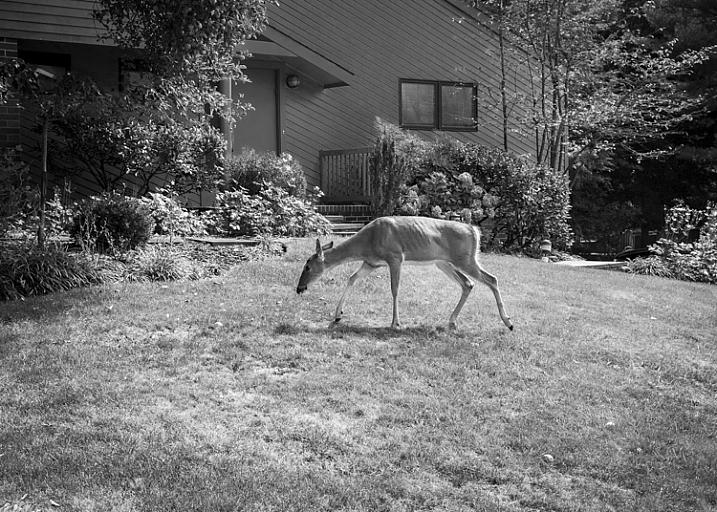
Using a long lens makes it really easy to capture candid images at events. © Gina Milicia 2015

People shots

Don’t be afraid to tidy people up (fix their jackets, ask them to stand in a more flattering way). Not every shot needs to be posed. Try and get a mix of candid images of people talking, laughing and enjoying the day. I find these shots are best done using a long lens when people don’t know you’re taking them. It’s very difficult to look discreet when you’re five inches away using a 28mm lens.

Try and shoot speeches with a long lens, no flash. This means you can be in a discreet position and take several shots of the speaker without annoying them with your flashes. I like to wait until the speaker looks up from their notes or smiles to acknowledge applause.

Avoid taking shots of people eating. I’ve yet to see someone who looks glamorous with a mouth full of food.

After the event

Events 6

© Gina Milicia 2015

  • Carefully back up ALL your files (Then back them up again when you get back to your office/base).
  • Do a final double check for random gear you might have left behind (I’ve lost two monopods).
  • Rehydrate and eat something before you process your files.
  • Send off any extra shots to caterers, florists or guests who may have approached you during the event.

Do you have any pre-event rituals that you use to help your day run smoothly? Is there anything I may have missed? I’d love to hear your suggestions.

googletag.cmd.push(function() {
tablet_slots.push( googletag.defineSlot( “/1005424/_dPSv4_tab-all-article-bottom_(300×250)”, [300, 250], “pb-ad-78623” ).addService( googletag.pubads() ) ); googletag.pubads().enableSingleRequest();
googletag.pubads().disableInitialLoad();
googletag.pubads().collapseEmptyDivs( true );
googletag.enableServices();
} );

googletag.cmd.push( function() { googletag.display( ‘pb-ad-78623’ ); } );

googletag.cmd.push(function() {
mobile_slots.push( googletag.defineSlot( “/1005424/_dPSv4_mob-all-article-bottom_(300×250)”, [300, 250], “pb-ad-78158” ).addService( googletag.pubads() ) ); googletag.pubads().enableSingleRequest();
googletag.pubads().disableInitialLoad();
googletag.pubads().collapseEmptyDivs( true );
googletag.enableServices();
} );

googletag.cmd.push( function() { googletag.display( ‘pb-ad-78158’ ); } );

The post How to Organize and Photograph Events Like a Pro by Gina Milicia appeared first on Digital Photography School.


Digital Photography School

 
Comments Off on How to Organize and Photograph Events Like a Pro

Posted in Photography


Tips for Retouching a Night Photograph using Lightroom

21 Dec

I will show you an experience I had of shooting in the middle of the night after sunset without a tripod. Many monuments don’t allow you to shoot with a tripod but you still want to take a photo. The nicer light in my opinion is usually after sunset or before sunrise, so I will show you how to take and process a photo without a tripod at night.

dPS-Before-after

If you have a nice high vantage point to take a beautiful photo but cannot put down your tripod you will see that there
is something we can do about it. The trick is you must put your camera on a timer, (use the built-in 2-second timer) meaning when you press the shutter it counts to two and then takes a photo. This way when you take the photo you are not pressing the button so there is less vibration.

Next go into manual mode and put it on 1/20th of a second. Usually it will be blurry, but if you put your arms on your stomach and stop breathing you should get a sharp photo. Then open the lens as much as you can. As you can see the photo is very sharp and I was only at 320 ISO.

As usual I am always shooting to get the highlights, so what you do is you put your camera at 1/20th of a second, 2 second on timer, approximately f/2.8 aperture (or open as wide as you can), then start going up on the ISO. You take several photos until you see that you have something you like.

Now let’s see how we are going to retouch this photo. First we are going to open up the shadows; you see how we can see the entire city?

Screen shot 1
Now on the white balance. When you are taking a photo of a sunset in a city there is one white balance that I advise you to use, but it is very difficult to get the right white balance right away. What I usually do is go to the shade preset, and add a bit of magenta, that is something I like.

Then bring down the highlights, and lastly do the white and black points.

Look how incredible this photo is, I took it without a tripod at night, now the only problem is that I don’t have a long exposure so the cars are very sharp, I don’t have the lighting streak behind the cars that I would have liked but it’s still pretty good.

Ok, now let’s crop the photo a bit to get it to look more dynamic.

Screen shot 2

Next, let’s take a brush, select a warm temperature and add some clarity to it and we will now start painting the photo in specific areas where we want to add color.

Screen shot 3

We will now create a graduate filter to accentuate the sunset.

Screen shot 4
Create a new graduate filter to add some highlights to parts of the buildings to make them come out a little bit more.

We will now add a gradient filter on the top of the photo to create more of a blue sky.

Screen shot 5

We will remove some clarity on the overall photo. Last but not least let’s add some sharpness, there is almost no noise as I am using this amazing Sony camera, so we will only remove a bit of noise.

We can now see the end result of this photo that was taken at night without a tripod. I find it quite incredible!

Before

After

For a full walk-through of how this is done check out this video:

If you enjoyed this tutorial you can find more of Serge’s tips and courses here.

PhotoSerge

googletag.cmd.push(function() {
tablet_slots.push( googletag.defineSlot( “/1005424/_dPSv4_tab-all-article-bottom_(300×250)”, [300, 250], “pb-ad-78623” ).addService( googletag.pubads() ) ); } );

googletag.cmd.push(function() {
mobile_slots.push( googletag.defineSlot( “/1005424/_dPSv4_mob-all-article-bottom_(300×250)”, [300, 250], “pb-ad-78158” ).addService( googletag.pubads() ) ); } );

The post Tips for Retouching a Night Photograph using Lightroom by Serge Ramelli appeared first on Digital Photography School.


Digital Photography School

 
Comments Off on Tips for Retouching a Night Photograph using Lightroom

Posted in Photography