RSS
 

Posts Tagged ‘Photo’

Unconventional COVR Photo case launches for iPhone SE

05 May

$ (document).ready(function() { SampleGalleryV2({“containerId”:”embeddedSampleGallery_3828535285″,”galleryId”:”3828535285″,”isEmbeddedWidget”:true,”standalone”:false,”selectedImageIndex”:0,”startInCommentsView”:false,”isMobile”:false}) });

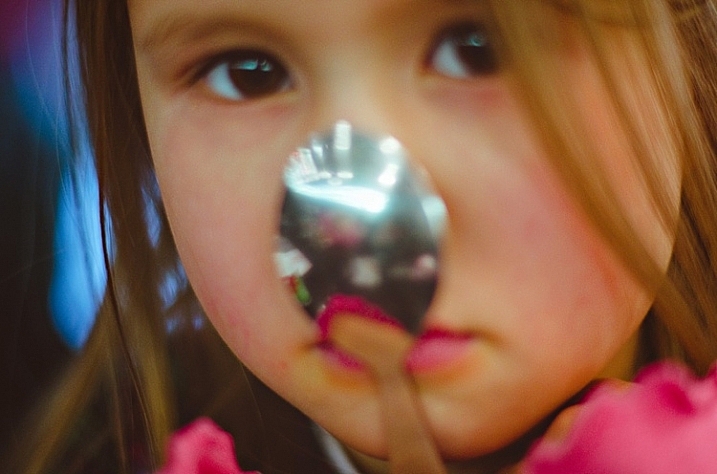
The COVR Photo iPhone case promotes shooting from an unconventional angle. Rather than holding your phone with the screen facing toward you, a prism in the case redirects the camera’s angle of view so the user can hold the phone as they would a remote control. Previously available for the iPhone 5/5S and 6/6S, it’s been released for the iPhone SE.

The app that is used with the device has also been improved to allow control of contrast, brightness and manual focusing, as well as a square shooting option and a burst mode.

The guiding principle behind the device’s design is that it allows more comfortable one-handed operation of the iPhone. Because the user points the ‘wrong’ part of the phone towards the subject, it isn’t obvious that a picture is being taken. The inventor, photo journalist Thomas Hurst, says that the design lets parents take more natural pictures of their children. He claims it is also useful for street photography and photo documentary work.

The device consists of a rigid case that snaps around the iPhone and a sliding prism with a lens unit that can be pushed over the phone’s camera unit or pulled back for ‘normal’ shooting. An app converts the image so that it doesn’t appear upside down on the screen.

The COVR Photo lens case for the iPhone SE costs $ 59.95 and comes in black, white, blue and purple. The case is also available for the iPhone 5/5S and 6/6S.

For more information visit the COVR Photo website.


Press release:

COVR Photo Releases App and New Case for iPhone SE

COVR the world with the only case that allows for one-handed iPhonography

As the only iPhone case with a built-in lens and custom app, COVR Photo is pleased to announce its case for the new iPhone SE. COVR Photo is the only case that allows users to take photos and videos while holding the phone one-handed and from a horizontal angle, like holding a TV remote.

“As a professional photographer for 20-years, I know how difficult it can be to capture a timeless moment,” said COVR Photo Founder, Thomas Hurst. “COVR came from a desire to help my wife easily capture the natural moments of our four children with the camera she always had with her – her smartphone.”

He adds, “COVR is the first smartphone case with a sliding lens built directly into it – so it’s always with you, at your fingertips, ready to help all of us capture the spontaneity of life with of our family, friends, and loved ones.”

Accompanying the new iPhone SE case, COVR Photo has just launched an updated app. In addition to adding manual contrast and brightness adjustment, the new app also features a “burst” mode, improved social media sharing, square camera mode and manual focus abilities.

The iPhone SE COVR case is available online now in black for $ 29.95 and $ 24.95 for white, blue and purple. Along with the case for the new iPhone SE, COVR Photo also offers cases for the iPhone 5/5S and iPhone 6/6S.

Parents, grandparents, professionals, photo-enthusiasts and travelers around the world use COVR to take photos and videos from a unique angle to capture once-in-lifetime moments using just one hand.

The case features include:

  • Patented sliding feature– Allows users to shoot using the COVR case similar to a remote control, or slide the COVR lens back and take pictures or videos with the regular iPhone camera lens.
  • Built-in Lens– COVR Photo is the only iPhone case with a built-in lens.
  • Protective case– Shock absorbent rubber core and a hard outer shell provides durability and protection without the bulk and weight.
  • Mobile app– The free COVR Photo app complements the COVR case by redirecting pictures through the COVR Photo lens as well as allows users to adjust focus, exposure and formatting.

Based out of Renton, Wash., COVR Photo was founded in 2014 by award-winning photojournalist Thomas Hurst. Designed with a high-quality prism, COVR Photo sits at just under a half inch tall, fitting comfortably in most pockets.

About COVR Photo: Created by photographer, Thomas Hurst, COVR Photo produces revolutionary products to equip and inspire people to document the world around them through photographs and videos. To learn more, visit covrphoto.com.

Articles: Digital Photography Review (dpreview.com)

 
Comments Off on Unconventional COVR Photo case launches for iPhone SE

Posted in Uncategorized


ON1 Photo RAW, a new non-destructive Raw processor, launches this fall

29 Apr

ON1, an Oregon-based photography software developer, has announced a combination non-destructive photo editor and Raw processor: ON1 Photo RAW. The application has been built from the ground up to work with modern computers and high-resolution camera systems. The software can open 50MP images ‘in a fraction of a second on a standard PC or Mac’ according to its maker and performs edits without lag.

ON1 has been developing Photo RAW for the past several years, doing so around its ON1 Browse photo browser to eliminate the need for cataloging and importing photos. Along with lag-free processing, it offers features like tagging, rating, adjustments and photo effects. The photo editor includes integrated masking tools, layers, and brushes; effects and adjustments are applied in a non-destructive manner, says ON1. 

Several usage options are available with ON1 — it can be used as a plugin for Adobe Photoshop and Lightroom, Corel, as a host app for Google Nik Collection, and as an extension for Apple Photos. ON1 says Photo RAW will support PSD, PSB, PND, DNG, TIF, and JPEG file formats.

ON1 Photo RAW is available to pre-order now for ON1 Plus Pro Members; a membership costs $ 149.99/year, and provides a perpetual license for ON1 applications. Members will receive ON1 Photo RAW first when it launches this fall. A non-membership ON1 Photo RAW purchase option will also be available.

Source: ON1


Press release:

Announcing the First New RAW Processor in Years, ON1 Photo RAW

The Future of RAW Photo Editing – Coming this fall – Includes support for over 800 cameras

Portland, OR – April 26, 2016 – ON1, Inc. today announced ON1 Photo RAW, the first all-new RAW processor and non-destructive photo editor to be released in more than a decade. With modern code optimized for today’s super-megapixel cameras and high-performance computer graphics systems, Photo RAW will be the world’s fastest, most flexible, and easiest-to-use RAW processor and photo editor on the market when it is released this fall.

The current class of RAW-based photo editors all have their heritage from the early days of digital photography, when most digital cameras had less than 10 megapixels, and computer processing power was a fraction of that found in modern PCs. When used with today’s popular 42- and 50-megapixel cameras, existing programs can often take seconds to render small portions of a RAW image and perform adjustments. Several years in the making, Photo RAW, with its modern RAW processing engine, is tuned for today’s sensors and graphics chips. It will open 50-megapixel images in a fraction of a second on a standard PC or Mac, and perform edits in real-time, without slider lag or frustrating waits for redraw.

Developed over the last several years, ON1 Photo RAW is built around ON1 Browse, the company’s lightning-fast photo browser, and will not require photographers to import and catalog their photos; an often painful and time-consuming process required before editing can begin. ON1 Browse is an integral part of Photo RAW, offering quick and easy ways to tag, rate, make color and tone adjustments, or add effects to their photos. Without catalogs, professionals will be able to make adjustments to photos and fellow colleagues can access and edit where they left off. This combination of a fast photo browser with instantaneous RAW processing will deliver a fluid, streamlined workflow to process any amount of photos all at once. Select one or 101 photos, make a few develop adjustments and all of the photos update automatically in real time.

ON1 Photo RAW’s instruction-based, non-destructive workflow will also surpass today’s RAW processors in other key ways. In addition to customary re-editable adjustments such as exposure, contrast, color, shadows and highlights, Photo RAW will also offer non-destructive effects and portrait retouching, something not present in any photo editor on the market. The complex filters found in ON1 Effects and ON1 Portrait—including Lens Blur, Skin Retouching, Dynamic Contrast, HDR Look and many more—are all available in Photo RAW’s non-destructive workflow. The controls found throughout ON1 Photo RAW will also respond in real-time by leveraging modern video cards, using the latest versions of OpenGL and OpenCL.

ON1 Photo RAW will include built-in layers, brushes, and advanced masking tools, making it a full RAW processor and complete photo editor in a single app. And, unlike any other photo app, Photo RAW will work the way you want, and where you want. For photographers with established workflows, Photo RAW will work seamlessly as a plug-in for Adobe Lightroom®, Photoshop®, and Corel®; a standalone host app for Google® Nik Collection and other photo editors; or as an extension to Apple® Photos. Common file formats—including JPEG, TIF, PSD, PSB, PND, and DNG—will be supported and will benefit from the speed and performance of the app.

Price and Availability

ON1 Photo RAW will be available this fall. You can pre-order ON1 Photo RAW today by becoming an ON1 Plus Pro Member at $ 149.99/yr. Plus Pro members receive a perpetual license for all ON1 apps (not a subscription) and will be the first to receive the app once it becomes available. If you want to purchase ON1 Photo RAW without becoming an ON1 Plus Pro Member, you can submit your email address on the ON1 Photo RAW web page to get the latest news, videos, beta, and pre-order announcements.

Owners of previous versions of ON1 Photo will have the option to upgrade to ON1 Photo RAW. The upgrade price will be determined at a later date. There will be special pricing for Photo 10 purchasers. Customers will be notified over the course of the next several months providing their upgrade information.

Articles: Digital Photography Review (dpreview.com)

 
Comments Off on ON1 Photo RAW, a new non-destructive Raw processor, launches this fall

Posted in Uncategorized


5 Steps to Creating a Printed Photo Collection as Wall Art

28 Apr

In this digital age, where we wander about with thousands of digital images held captive in our smart phones, there is something special about printed photographs. They represent something tangible and reverent – something that was worth transforming into an enduring piece of artwork, to remind us of what is important in our lives.

One of the most rewarding aspects of my job is seeing the photographs I create for my clients hanging on their walls. To me, it is the icing on the cake, the cherry on top, the grand finale that tells me I have fulfilled my promise to the people who put their trust in me as a professional.

collection-dps-01

This image set by Darlene Hildebrandt

Like many portrait photographers, I began my career selling digital files on a USB stick. I found it disheartening and unfulfilling. Wall art collections were a revelation to me. As a photographer, they gave me a structure and framework to shoot within. My session times became shorter, because I was shooting with purpose. I now had something meaningful and lasting to offer my clients; collections that tell their story in all its detail, and represent something deep that they have revealed to me.

Photo collections can be about anything. In my case, they are invariably portraits, but if your thing is landscapes, travel, macro, nature etc., you can create collections that add life and personality to you home or office, and serve as visual reminders of what is important to you.

Step #1: Consider the space you want to fill

Think about the photographs you are capturing. What is the subject matter? What do these photos mean to you? Do you want to remember a favourite holiday destination, or how confident your son looks when he plays the violin? Do you want to capture the beauty of a rare flower you grew, or your young adult daughter who is about to leave home for college?

With this in mind, think about where in your home or office you would like to see these photographs every day. Consider how appropriate the subject matter is for where you want to display it, and take into account the style of the decor and other furnishings in the room. Often photographs are displayed above a piece of furniture – above your bed or the sofa, at the end of a breakfast nook, on the wall of a study, or cascading down a flight of stairs.

image showing photo collections

A collection to fit a long, narrow space.

Once you have decided where you want to display your photos, you should have a clear idea of what the layout should look like. Big spaces demand big photos, narrow spaces require long and thin, and a stairwell may need a staggered combination of large and small photos.

image showing photo collections

A different configuration using images from the same session. This would suit a larger space.

Step #2: Decide the layout before you pick up the camera

Think carefully about the configuration of your collection before you start photographing. For example, if you have a wide space to fill and you envisage a panoramic with two or three smaller prints underneath, your main photo will need lots of space to crop it into a panoramic shape, without compromising the composition or the quality of the image. You will be hard pressed to get a panoramic crop if you’re shooting in a vertical (portrait) orientation. When I’m shooting for a collection, I allow more space around my subjects than usual. This gives me some versatility when it comes to cropping.

Likewise with the smaller prints. Think about how you would like each photo to be oriented, and ensure you shoot from an angle that will enable this. I like to orient my detail shots inward, toward the main photo.

Image showing photo collections

It helps if you know how you are going to display each photo before you capture it.

Image showing photo collections

This shows how the collection would appear on a wall.

Step #3: Keep the lighting consistent

A collection looks most cohesive when the lighting is consistent throughout. If three out of four photos in the collection are high key images with lots of white, a dark photo, or one with lots of colour, will look out of place. So, if you photographed your dog on the beach at sunset, that photo you took of him earlier in the bright midday sun will look mismatched, regardless of how adorable his expression is.

In the photo collections below, the silhouetted sunset image stands out as a mismatch. In the second version, it is replaced with an image that better matches the lighting.

Image showing photo collections

The silhouetted sunset shot in the middle looks out of place.

Image showing photo collections

In this collection, the images are unified by similar lighting.

Step #4: Stick to one subject per collection

Avoid the temptation to create a hodge podge by cramming every member of a family, or every flower in the garden, into one collection. Allow your subject to shine by devoting a whole collection to him, her (or it, in the case of an inanimate object). As a portrait photographer, my collections usually consist of one full body photo, and several detail shots which help tell a story.

The photo collection below, taken at a water temple in Bali, depicts a sacred ritual. I took so many other photos I loved at the water temple, but to put them all together would detract from the story. I will save the other photos for a different collection.

image showing photo collections

Although it is tempting to cram every photo you love into a collection, the result is much more pleasing when you stick to one subject.

image showing photo collections

My main photograph in this collection is full of colour and a variety of shapes. To complete the collection, I have chosen closer-up detail shots of just two of the many lanterns.

Step #5: Collage or collection?

A photo collection can be made up of separate pieces displayed together, or you can create a collage to print as a single piece. Your decision will be influenced by the space you want to fill, the material you want to print on, and your budget.

A collection of separate pieces tends to look more luxurious than a collage. With some configurations such as stairs, it may be your only option. Another benefit of printing each piece separately is that you can change the layout later if you want to. Also, if one piece is not working quite the way you imagined, you can swap it out for a new one.

The photos below, taken at dawn on a beach in Vietnam, will be printed as separate pieces and hung together as shown.

image showing photo collections

Displayed together, the four photos tell a story.

On the flip side, printing multiple pieces can be expensive, and it can be tricky to hang a multi-piece collection with the accuracy it deserves. Some configurations, such as the black and whites below, can look itsy-bitsy when printed separately, and look better printed as a single piece.

You can create hi-res collages like this in Photoshop, Lightroom, or the professional version of Proselect. Alternatively, you can buy ready-to-hang frames with cut-out mats designed for collections, or you can ask a framer to create a customized mat for your frame.

This collage was designed to be hung above a dining table, so the long narrow shape worked well. Background and borders are white to match the colour scheme of my clients’ home, and it is printed on metal to suit their contemporary decor.

image showing photo collections

This was designed to be printed as a single piece.

Collections and collages are a fun and interesting way to display your favourite images. With a little care and thought, they can make breathtaking displays that will last for a great many years. I hope this article inspires you to go and rescue those beautiful images of yours that are trapped in the digital world, and bring them to life!

Share in the comments section below your favourite photo collections or collages, or any hints or tips you have learned along the way.

googletag.cmd.push(function() {
tablet_slots.push( googletag.defineSlot( “/1005424/_dPSv4_tab-all-article-bottom_(300×250)”, [300, 250], “pb-ad-78623” ).addService( googletag.pubads() ) ); } );

googletag.cmd.push(function() {
mobile_slots.push( googletag.defineSlot( “/1005424/_dPSv4_mob-all-article-bottom_(300×250)”, [300, 250], “pb-ad-78158” ).addService( googletag.pubads() ) ); } );

The post 5 Steps to Creating a Printed Photo Collection as Wall Art by Karen Quist appeared first on Digital Photography School.


Digital Photography School

 
Comments Off on 5 Steps to Creating a Printed Photo Collection as Wall Art

Posted in Photography


Announcing the All Things Photo Podcast

28 Apr

I’m happy to announce that I’ve launched a new podcast titled All Things Photo with Eric Cheng. Between the two of us we have decades of professional photography experience and a unique perspective as industry insiders, Eric with DJI & Lytro and myself with BorrowLenses. Unlike other podcasts this series will also include video vignettes above and beyond our recorded discussions. I welcome you to subscribe on iTunes (listing soon to be available) and subscribe to the All Things Photo YouTube channel. There is a lot still to be done getting the podcast off the ground (including decorating my office), but content begins flowing today.

All Things Photo #1: Lightroom 6.2 Troubles + Light L16 Camera Impressions
Hyped concerns and expectations…

  1. Lightroom releases a buggy update that revamps the beloved Import screen and sparks widespread ire amongst photographers.
    Warranted or overblown?
  2. Light announces the L16 camera promising in camera processing, wifi capabilities, depth of field control and a wide range of optical focal lengths (35-150mm). What we saw at the Light L16 camera launch party in San Francisco.

Additional Content
Essential Resources to Back Out of a Lightroom Upgrade – JMG-Galleries.com

Lightroom 6.2 Release Update and Apology – Adobe Lightroom Journal

Previous import experience to be returned – Adobe Lightroom Journal

Adobe Lightroom Import Screens Before and After – Petapixel

Light.co L16 Camera web site – Light.co

Light L16 Camera promotional video – Vimeo

The Light Story (video) – Vimeo

Robert Scoble Interview of Light CEO Dave Grannan (video) – Facebook

Read more at http://allthingsphoto.libsyn.com/allthingsphoto-1-lightroom-62-troubles-light-l16-camera-impressions#3bUZtXh236Oc2k2E.99
If you’re interested in joining our podcast mailing list visit All Things Photo, our site will be up shortly (much quicker than displayed)

The post Announcing the All Things Photo Podcast appeared first on JMG-Galleries – Landscape, Nature & Travel Photography.


JMG-Galleries – Landscape, Nature & Travel Photography

 
Comments Off on Announcing the All Things Photo Podcast

Posted in Equipment


7 Ways Custom Photo Backdrops Can Promote Your Business

13 Apr

How could you photograph a love story in Paris having less than $ 50 at your disposal? Or make local moms stand in line at your photo studio without running an expensive marketing campaign? That’s totally possible if you pay attention to one single element of your studio setup – background. Read on to find out how other photographers are successfully Continue Reading

The post 7 Ways Custom Photo Backdrops Can Promote Your Business appeared first on Photodoto.


Photodoto

 
Comments Off on 7 Ways Custom Photo Backdrops Can Promote Your Business

Posted in Photography


4 Steps for How to Make a Creative Photo Diary

11 Apr

If you are a visual learner like me, seeing images and written words reinforces your memory, and enhances your learning. Concepts, ideas, and experiences associated with images, colors, and action, stay longer in our memory, help us savour the moment, and relive the events more clearly.

Spring is in sight, the days are getting longer and lighter, let’s go out and make the most of the season and make some new memories. Here’s a fun personal photography project for you: write a creative diary in pictures!

component-creative-photo-diary_0000

A diary or a journal is a record of your day to day life and experiences. Entries report both mundane and unusual goings-on, your emotions, thoughts and feelings, your actions and reactions, including opinions that may even be outside your immediate experience. Diaries and journals tend to be written in a chronological sequence.

Let’s apply this definition to a photo diary and see how well you can record a point in your life using pictures alone. The challenge is whether you can piece together a coherent and complete story, just by looking at the pictures alone.

Here are four basic components of  a creative photo diary. When making yours, feel free to be as exhaustive as you like. In this example, I will show photos under each component and hope that you will try and piece together the entire story. That way we can gauge just how strongly and effectively the photos alone were able to recount the narrative.

component-creative-photo-diary_0000

#1 Set the context – lay out the plan

Think of this like a prologue or an introduction in a book. Include photos of the locality and vary the angles; wide scenes, close ups, details, panoramas. Don’t forget to take photos of preparation, getting ready for the trip, or some action en-route to the destination.

Set the mood. If it’s a gloomy and rainy day, take pictures of the rain or the storm clouds. If it’s a sunny day, snap photos of the sun, flare, and silhouettes included. Keep your eyes peeled and look around you. What do you see on the way to your destination? Any interesting sights? Anything out of the ordinary? Anything special or alluring? Anything new that you have never seen before? Or perhaps it has always been there but you just never bothered to look close enough until now.

component-creative-photo-diary_0000

component-creative-photo-diary_0000

component-creative-photo-diary_0000

component-creative-photo-diary_0000

component-creative-photo-diary_0000

#2 Have an opening chapter – a beginning

You have reached your destination and thus the narrative begins its ascent. So far you have only given glimpses of your main character, clues to the destination, snippets to the story. Now you are ready to introduce your characters and show more of their personalities. Make them shine and take center stage.

Vary your images by employing different angles; close up, far and wide, bird’s eye view, worm’s eye view. How about an inquisitive and questioning view? Be creative about it and think outside the box. There are many ways of presenting a person’s character like emphasizing color, favourite objects, unique accessories, action, identifying marks, etc., other than the ubiquitous frontal portrait. The obvious isn’t always the most interesting.

component-creative-photo-diary_0000

component-creative-photo-diary_0011

What happened when you reached your destination? Did the plans change? Were there distractions or unforeseen events that led you to switch gears, or take a different route? Or did you head straight on to what you wanted to do? Were there any curious twists to the plan, or some surprises – nice ones or otherwise?

component-creative-photo-diary_0000

component-creative-photo-diary_0008

component-creative-photo-diary_0000

component-creative-photo-diary_0000

#3 Inject some action or drama

It may be that nothing happens that is spectacular or which causes emotional upheaval. That doesn’t mean you can’t create something dramatic or notable. You can focus on particular emotions, or something pretty mundane, and make a choice to celebrate life’s simple pleasures. If on the other hand there was plenty of action, choose a few main actions shots of defining moments from the day, especially those that elicited the most impressive reaction, or the quietest but most precious twinkle of an eye.

component-creative-photo-diary_0000

component-creative-photo-diary_0014

component-creative-photo-diary_0014

component-creative-photo-diary_0014

component-creative-photo-diary_0014

Adopt a photojournalistic stance, and record what happens without thinking too much about meaning or composition. Photograph what catches your eye, or that which you get drawn to instinctively. Trust your eyes to lead you to interesting contrasts and juxtapositions – light and shade, silence and noise, darkness and light. Aim to capture and savour every highlight. Don’t rush, but linger and indulge in the moment. The more you focus on something, no matter how small, the bigger its effects on you will be. Find an experience in the simplest of things; you are writing a story. Writers emphasize, exaggerate, infer, and aim for a climax. Don’t be afraid to do the same with your pictures. Be pro-active and creative.

component-creative-photo-diary_0012

component-creative-photo-diary_0000

component-creative-photo-diary_0000

component-creative-photo-diary_0000

#4 Start the closing chapter

In a book, this part is usually referred to as falling action. It comes after all the excitement and drama happen. It’s like a letting out a big sigh and things start to gather at a much slower pace. Prepare your audience for the conclusion, and end of the story. Unlike the conclusion in a book where the plot is usually unravelled, this part could plainly be writing the last paragraph to the entry of your diary for the day. It could be as simple as taking your shoes off after a long and tiring walk, drinking a well deserved cup of tea after a day full of challenges, or the sun slowly setting or the moon rising.

Remember the purpose of a diary is to record, preferably in detail, what transpired during your day; the running of events, emotions, actions, thoughts, ideas, changes, differences, transformations. So many elements to capture in a few photos. But perhaps in and amongst all the snapshots from the day, there could be one photo that somehow encapsulates how you may be feeling at the end. Use that photo to close your diary entry, and end your story.

component-creative-photo-diary_0000

component-creative-photo-diary_0000

component-creative-photo-diary_0000

component-creative-photo-diary_0000

Have you attempted a creative photo diary in the past? If not, I hope you try it one of these days and enjoy the experience. What do you think is the story in this example above? Please share your thoughts in the comments below.

googletag.cmd.push(function() {
tablet_slots.push( googletag.defineSlot( “/1005424/_dPSv4_tab-all-article-bottom_(300×250)”, [300, 250], “pb-ad-78623” ).addService( googletag.pubads() ) ); } );

googletag.cmd.push(function() {
mobile_slots.push( googletag.defineSlot( “/1005424/_dPSv4_mob-all-article-bottom_(300×250)”, [300, 250], “pb-ad-78158” ).addService( googletag.pubads() ) ); } );

The post 4 Steps for How to Make a Creative Photo Diary by Lily Sawyer appeared first on Digital Photography School.


Digital Photography School

 
Comments Off on 4 Steps for How to Make a Creative Photo Diary

Posted in Photography


Think Tank Photo launches largest rolling case for lighting

05 Apr

$ (document).ready(function() { SampleGalleryV2({“containerId”:”embeddedSampleGallery_0536172367″,”galleryId”:”0536172367″,”isEmbeddedWidget”:true,”standalone”:false,”selectedImageIndex”:0,”startInCommentsView”:false,”isMobile”:false}) });

Bag manufacturer Think Tank Photo has introduced a rolling case for lighting kit that it claims is the largest on the market. The Production Manager 50 is designed to hold a pair of studio-style heads with power packs, battery packs, dishes, umbrellas and even lighting stands. The case has internal dimensions of 38 x 125 x 25.4cm / 15.5 x 49.2 x 10in and comes with a collection of adjustable dividers so users can customize the layout of the interior. Zip-up pockets on the inside of the lid are designed to keep cables tidy, and straps on the exterior can be used to attach tripods and larger lighting stands.

The bag is made with ballistic nylon coated with a water-repellent agent that covers a rigid shell, and the shock-absorbing wheels are user replaceable should they get damaged. Think Tank Photo says that the idea of this big case is to make it easier for photographers to transport large amounts of kit in one load, and claims the Production Manager 50 can carry what it would normally require two assistants to manage.

The Think Tank Photo Production Manager 50 costs $ 599.75/£515. For more information see the Think Tank Photo website.


Press release:

Photographers Can Fit Lighting Equipment and Large Light Modifiers in One Rolling Bag with Think Tank Photo’s New Production Manager 50

Santa Rosa, Calif. – Think Tank Photo has released the largest rolling photography equipment case on the market, the Production Manager 50.  Designed to hold an immense amount of gear, including lighting equipment and large light modifiers, one photographer will now be able to transport what it used to take up to at least two assistants.  It is easy to move, carry, work out of, and stack among other gear.

This large rolling bag features stabilizing, wide-set, shock-absorbing wheels that roll smoothly and hold up under the toughest conditions, the ability to lock the main compartment and secure the bag with the included lock and cable, and a fully customizable interior with dividers to protect small and large lighting equipment including c-stands and large modifiers.

“Pro photographers usually travel by car or van to where they are going to shoot,” said Doug Murdoch, Think Tank’s CEO and Lead Designer. “Once a shoot is completed the set needs to be torn down and moved to the next location. Often times, there can be a time crunch where all the gear has to be loaded quickly. Carrying these bags up and down stairs and over rough terrain can be very cumbersome and often takes two people.  The Production Manager 50 makes this time-sensitive, cumbersome process easier and quicker.”

KEY ADDITIONAL FEATURES
* Large front zippered pocket for reflectors, umbrellas, extension cords, cables, etc.
* Attachments for lightstands or tripods on both sides (straps included)
* Rigid shell and stiffened dividers ensures gear protection
* Robust handles on four sides for easy loading and unloading by two people
* Heavy-duty aluminum side-frame protects axle from impact
* ID plate can be registered on the Think Tank site that may allow lost or stolen bag to be returned
* YKK RC Fuse zippers, 1680D ballistic nylon, and super-stick velex (interior) contribute to one of the most robust products on the market.
* Large interior mesh pockets for organizing pocket wizards, gels, cords, tape, batteries, and other accessories
* Ergonomic top handle for rolling or carrying by two people.
* Velex wrapped dividers for extra durability and longevity.
* Adjustable lid straps keep bag open and accessible
* Rear skid rails and custom wheel housings allow for loading and unloading from a vehicle with ease
* Business card holder for easy identification on top panel
* User replaceable wheels & hardware
* Seam-sealed rain cover included

MATERIALS
External: All fabric exterior treated with DWR while fabric underside is coated with PU for superior water resistance, 1680D ballistic nylon, YKK® RC Fuse (abrasion resistant) zippers, custom designed extra tall skid plates, replaceable custom-designed wheels, antique nickel plated metal hardware, nylon webbing, 3-ply bonded nylon thread

Internal: 210D silver-toned nylon, PU backed velex liner & dividers, 2x PU coated nylon 210T seam-sealed taffeta rain cover, closed cell foam & PE board stiffened dividers, belly-o mesh pockets, 3-ply bonded nylon thread

PRODUCT DIMENSIONS & WEIGHT 

Exterior Dimensions: 17.3” W x 53.1” H x 12.6” D (44 x 135 x 32 cm)
Interior Dimensions: 15.6” W x 49.2” H x 10” D (39.5 x 125 x 25 cm)
Weight:  20.7 – 29.8 lbs (9.4 – 13.5 kg)

Articles: Digital Photography Review (dpreview.com)

 
Comments Off on Think Tank Photo launches largest rolling case for lighting

Posted in Uncategorized


Ilford Photo announces ordering program for unusual sizes of sheet film

01 Apr

UK film manufacturer Harman Technologies has announced that orders are being taken for unusual sheet and roll film sizes in its annual program for supplying low volume and custom-sized Ilford Photo materials for vintage and large format camera owners. Rather than making odd sizes on the chance that they will sell, the company uses it Ultra Large Format (ULF) program to collect orders from the public and institutions through specified retailers and sets aside time especially to produce film to fit old cameras.

The company offers these odd sizes in Ilford FP4 Plus, HP5 Plus and Delta 100 Professional black and white emulsions. Sheet materials as large as 20 x 24in. and as small as 2.25 x 3.25in. are on offer, as well as roll film in 46mm (127 film) and 70mm widths. Sheet sized film is also available in rolls for users to cut themselves, and can be ordered in widths of up to 20in (x 50ft). Some sizes have no minimum order volumes and can be ordered as a single box.

For information on which films and sizes are available, and through which retailers, see the Ilford Ultra Large Format information sheet (pdf). Orders must be placed by Friday 27th May 2016.


Press release:

ILFORD PHOTO ULF, CUSTOM & SPECIALIST FILM MANUFACTURE 2016

Buoyed by the fantastic response from the film photography community around the world, HARMAN technology Limited are delighted to be offering film photographers the opportunity to place orders for a range of specialist film products for the 11th consecutive year.

With the continued revival in film photography, it is vital to have film available for photographers using ultra large format alongside previously popular film formats for antique and collectable cameras.

By consolidating orders HARMAN technology can supply products that would not normally be viable to manufacture.

“This program enables us to further support the world of film photography that uses and values our conventional products” said Giles Branthwaite, Director of Sales and Marketing at Harman technology. “Through running the ULF program each year, we are able to satisfy the strong demand for specialist film formats. Whilst manufacture is not easy, we have been rewarded by increased demand year on year ensuring we will continue to address and care for this market.”

Films available for this year are ILFORD FP4 PLUS, HP5 PLUS, and DELTA 100 PROFESSIONAL. Not all films are available in all formats.

For a full list of the 2016 items and participating dealers visit:
http://www.ilfordphoto.com/ulf

The options available reflect what has been asked for over the past 10 years. HARMAN is happy to consider any other size suggestions but do not guarantee to make them available.
For sheet sizes an order for just one single box can be made, but for roll sizes this is not possible due to potentially excessive waste. Please see the minimums and multiples required next to the appropriate roll size.

Note:
Orders must be placed with the listed ULF reseller partners no later than Friday 27th May.

The UK factory will start to ship orders to Distributors during August and end users should check with the local ULF reseller for expected arrival dates.

Articles: Digital Photography Review (dpreview.com)

 
Comments Off on Ilford Photo announces ordering program for unusual sizes of sheet film

Posted in Uncategorized


Photo Pranks To Trick Your Pals

29 Mar

It’s April Fools’ Day!*

*APRIL FOOLS. It’s really not till Friday.

You still have time to plan the perfect photo prank.

So, we’ve rounded up our favorite ways to trick our buddies. Oh, and there’s a spider on your shoulder.

(…)
Read the rest of Photo Pranks To Trick Your Pals (0 words)


© laurel for Photojojo, 2016. |
Permalink |
No comment |
Add to
del.icio.us

Post tags:


Photojojo

 
Comments Off on Photo Pranks To Trick Your Pals

Posted in Equipment


20 Cutest Newborn Baby Photo Props for Spring Session

25 Mar

The right photo props can upgrade your newborn baby shots from “just cute baby photos” to some truly moving images that even a Grumpy-cat-type of person would not resist. Every photo shoot is a whole new experience of capturing a baby’s and parents’ personalities. There are endless ways to make your photo session unique and beautiful using various photo props. Continue Reading

The post 20 Cutest Newborn Baby Photo Props for Spring Session appeared first on Photodoto.


Photodoto

 
Comments Off on 20 Cutest Newborn Baby Photo Props for Spring Session

Posted in Photography