RSS
 

Posts Tagged ‘Next’

Your Next Purchases After You Get a New Camera

07 Jan

Buying camera gear can be a daunting task, especially if you’re just starting out with photography basics. If you recently got your hands on a new camera, chances are you’ll need a few extra accessories before you’re ready to start shooting like a pro. So, before you start snapping away, go through this checklist and make sure you consider adding a few extra accessories to your photography kit, before taking it out for a spin. As a heads up, this article is written assuming you have a new digital (not film) camera.

new camera accessories

The two cameras on the right are interchangeable lens cameras; the two on the right are not.

1. Extra Lenses

The very first thing you’ll want to do is take a close look at your camera and determine whether or not it is an interchangeable lens camera. If your camera can change lenses, it is considered one, and you will definitely want to think about adding a lens or two to your kit. However, if your camera’s lens cannot be removed, skip this section and move on.

When evaluating which camera lenses to get first, it’s generally not a bad idea to start out with the kit lens that is usually sold with a new interchangeable lens camera (SLR or Mirrorless). These kit lenses are considered starters, and they are inexpensively priced and versatile. Most kit lenses are zooms, meaning you can take a close-up, or wide-angle shot, by simply twisting the zoom ring on the lens.

new camera accessories

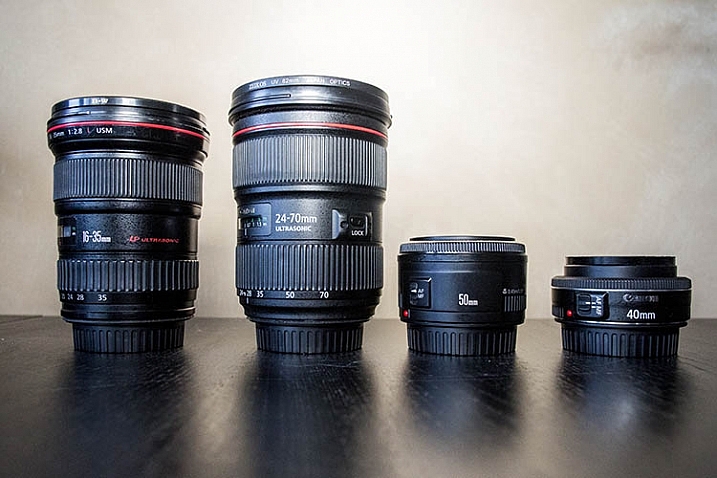
The two lenses on the left are zooms; the two lenses on the right are primes.

Another lens alternative, that most beginning photographers don’t usually know about off the bat, are prime lenses. They only have one focal length, meaning you have to physically move yourself to zoom in, or out, of a photo. The benefits of shooting with prime lenses are numerous including:

  • Quality: Most primes are slightly higher quality, and have crisper images than those taken with zoom lenses.
  • Size: Prime lenses are smaller, more compact, and weigh less than zooms.
  • Price: Prime lenses are usually pretty reasonably priced, compared to zooms of the same quality (maximum aperture).

If you’re considering purchasing a prime lens to accompany your kit lens, start out with a 35mm or 50mm lens. In terms of composition, 35mm (on an APS-C or cropped sensor) is the closest focal composition of the human eye, meaning it will allow you to capture more or less the same amount of a scene that your eye sees. The only downside to 35mm lenses is that they tend to be a bit bulky and expensive, which is why the 50mm is often a preferred alternative at a fraction of the size and price.

As a beginner shopping for prime lenses, ignore the different f-stops (i.e. f/1.4, f/1.8, f/2) specified for each lens and simply purchase the cheapest prime lens that fits your budget. Lenses hold their values well over time, so you can always sell it later when you’re ready to upgrade.

2. Memory Cards

Before you can shoot anything with your new camera, you need memory cards to store all of your photos on your camera. There are a number of different memory cards available, with the most common being the SD (Secure Digital card) and the CF card (Compact Flash card). Be sure to check your camera’s manual, and make sure you buy the right type of memory card. As a beginner, start out with 16GB or 32GB memory cards, and have at least two on you just in case. Also, keep an eye out for sales on memory cards, and stock up when prices are low. You can never have too many!

new camera accessories

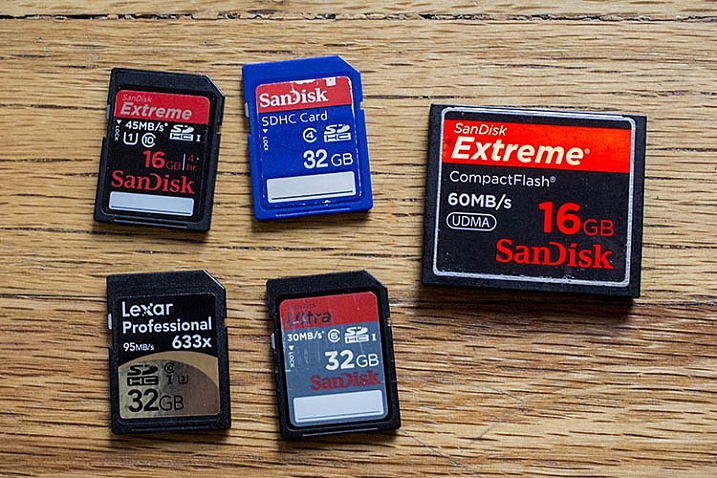
SD memory cards are on the left. The large card on the right is a CF (compact flash) card.

3. Memory Card Case and Reader

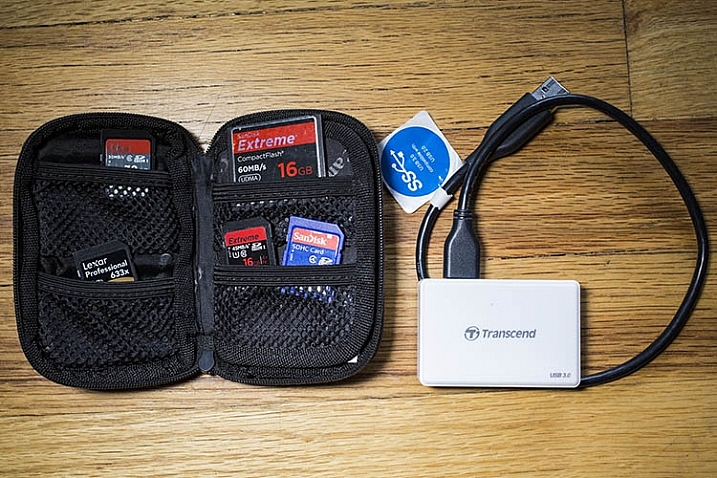
After you purchase memory cards, consider also adding a case or wallet, dedicated to storing and organizing your extra memory cards, as well as a card reader to transfer images from your camera to your computer. Many laptops have built-in memory card readers, but these will generally only accept SD cards. Also, I’ve destroyed many of a memory card by incorrectly inserting SD cards into my laptop, so I always use a card reader. They’re inexpensive, compact, and can even transfer over several memory cards at a time.

new camera accessories

new camera accessories

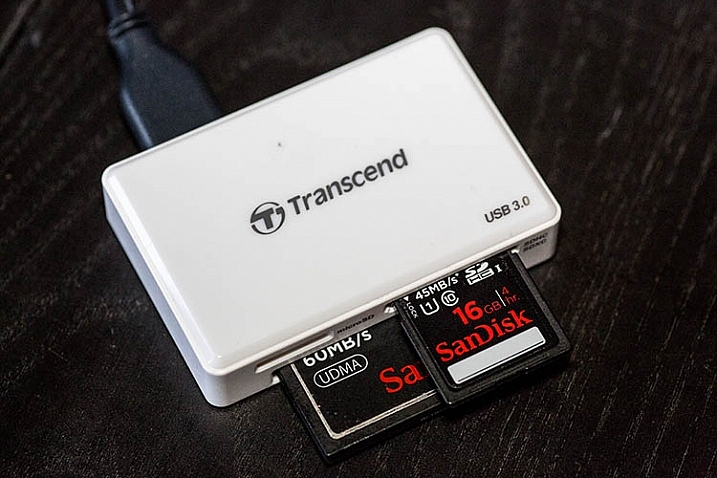
A memory card reader in action.

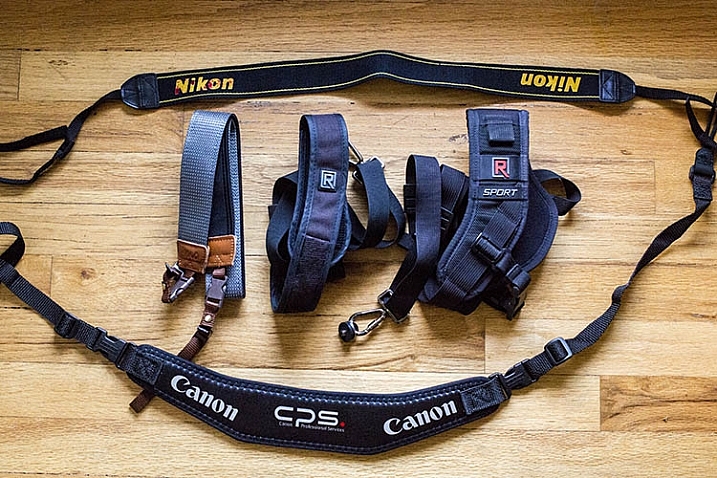
4. Ergonomic Camera Strap

While every brand new camera will come with its own default camera strap, there is also a variety of others available that can help you carry your camera in a flexible, stylish manner. One of the most popular alternative straps is the camera sling, which rests comfortably on your shoulder and keeps your camera hanging closer to your hip, rather than dangling around your neck in front of your chest. There are also rugged, sturdy camera wrist straps if you prefer keeping your camera at arm’s length.

new camera accessories

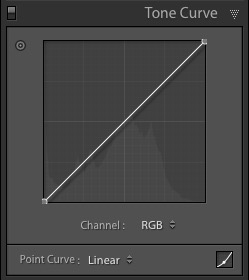
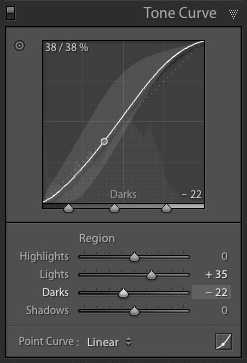
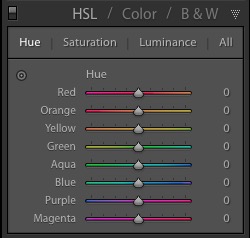
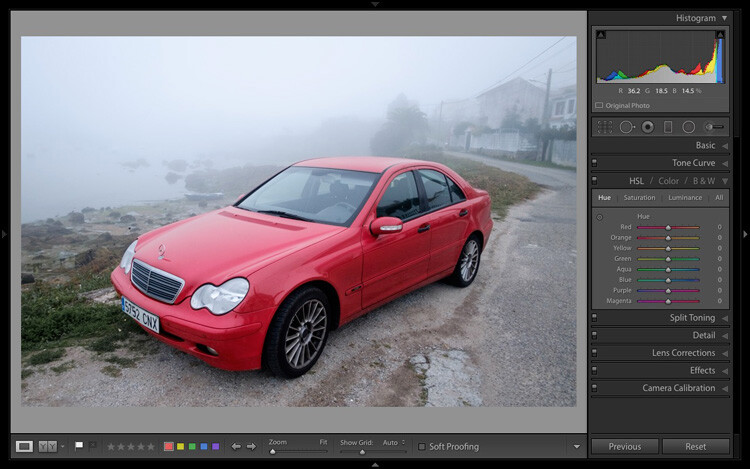
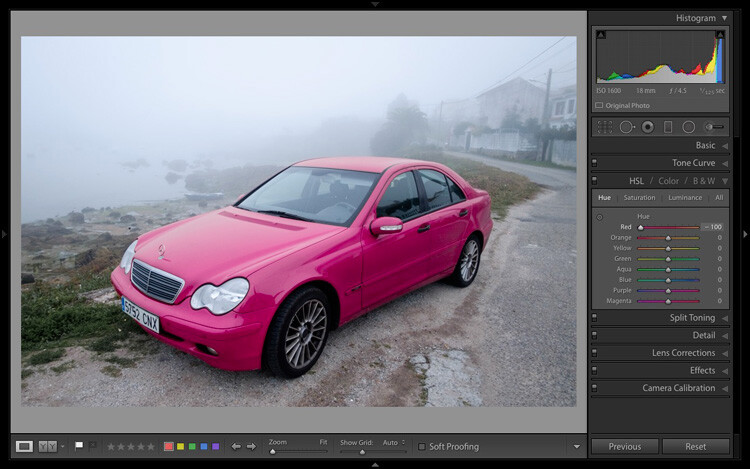
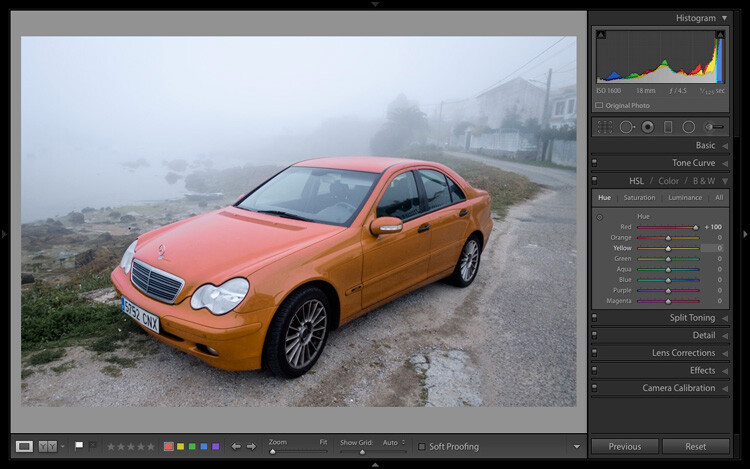
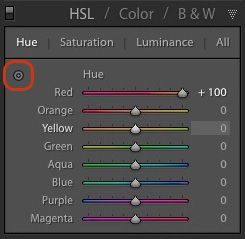
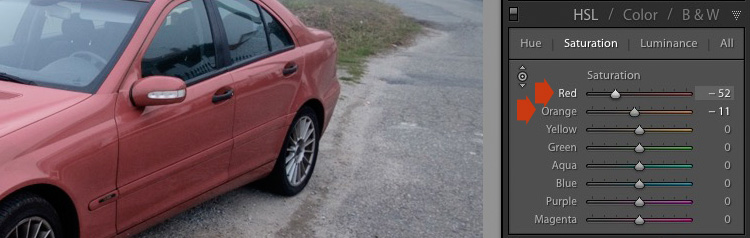
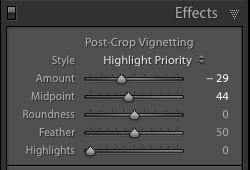
5. Adobe Creative Cloud Lightroom subscription

Just like all of the items previously mentioned in this article, there’s certainly no shortage of photo editing software choices. But if you’re just starting out, you may as well start with the industry standard for photo editing: Adobe Lightroom.

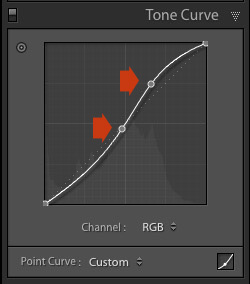
Considerably more user-friendly than Photoshop, Lightroom doesn’t let you do a ton of photo manipulations like putting your dog’s head on your cat’s body, but it does give you a plethora of tools to process your images. While Lightroom used to cost an arm and a leg, the new Creative Cloud subscription gives you unlimited access to the latest and greatest version, for a low monthly fee. Lightroom is used by pros and hobbyists alike, so if you plan to get serious about photography, take the time to learn how to edit photos in Lightroom.

Over to you

There are certainly plenty more recommended accessories for beginning photographers. You can see a list of the favorite photography gadgets of our dPS writers here.

Would you add any others to the list? Let me know in the comments below.

googletag.cmd.push(function() {
tablet_slots.push( googletag.defineSlot( “/1005424/_dPSv4_tab-all-article-bottom_(300×250)”, [300, 250], “pb-ad-78623” ).addService( googletag.pubads() ) ); } );

googletag.cmd.push(function() {
mobile_slots.push( googletag.defineSlot( “/1005424/_dPSv4_mob-all-article-bottom_(300×250)”, [300, 250], “pb-ad-78158” ).addService( googletag.pubads() ) ); } );

The post Your Next Purchases After You Get a New Camera by Suzi Pratt appeared first on Digital Photography School.


Digital Photography School

 
Comments Off on Your Next Purchases After You Get a New Camera

Posted in Photography


Take your Composition & Lighting Skills to the Next Level with this 70% Off Deal

18 Dec

It’s time for day 6 of our 12 Deals of Christmas and this one is from our good friends at Photography Concentrate who have two fantastic eBooks for you to choose from (and a great offer when you pick them both up).

Concentrate ebooks

Incredibly Important Composition Skills

Are you ready to unlock your superpowers in composition and gain real skills that you’ll use in every single shot you take?

Save 60% on this ebook and video guide from Photography Concentrate (and get a bonus Printable Field Guide and 7 bonus teaching videos)!

Fantastic Fundamental Light Skills

When you understand why light looks and behaves the way it does, you’ll know how to control and change it to suit your creative vision – and take better photos.

Save 60% today on this comprehensive guide (and get a bonus Printable Field Guide)!

Bundle Them Together

Grab both Incredibly Important Composition Skills and Fantastic Fundamental Light Skills in this amazing combo deal (with all the bonuses mentioned above).

A HUGE 70% OFF for 24 hours only!

googletag.cmd.push(function() {
tablet_slots.push( googletag.defineSlot( “/1005424/_dPSv4_tab-all-article-bottom_(300×250)”, [300, 250], “pb-ad-78623” ).addService( googletag.pubads() ) ); } );

googletag.cmd.push(function() {
mobile_slots.push( googletag.defineSlot( “/1005424/_dPSv4_mob-all-article-bottom_(300×250)”, [300, 250], “pb-ad-78158” ).addService( googletag.pubads() ) ); } );

The post Take your Composition & Lighting Skills to the Next Level with this 70% Off Deal by Darren Rowse appeared first on Digital Photography School.


Digital Photography School

 
Comments Off on Take your Composition & Lighting Skills to the Next Level with this 70% Off Deal

Posted in Photography


US National Park Service looking for the next Ansel Adams

10 Dec
Photo by Jeff Keller

If your dream job hasn’t come along so far and you fancy yourself as a bit of an Ansel Adams, you could do worse than to pay a visit to the US Government’s employment website. The National Parks Service is looking for a full-time photographer to record the glory of the country’s natural treasures, much as Ansel Adams did on contract to the Department of the Interior in the 1940s. The only hitch is that applicants will be expected to use equipment similar to that used by Adams himself, as the job involves shooting with large format film cameras as well as the latest digital kit. 

You’ll need to be a US citizen, have a driving license and be subjected to a background check, but for your efforts you could earn up to $ 100,000 a year for doing what you love. The job isn’t all wandering around with a big camera and a box of film holders though, as you’ll be expected to make large scale prints, mount exhibitions and help review submissions for the service’s photographic collection. According to the advert, you’ll have to put up with ‘moderate discomfort’ out on location and ‘exposure to weather conditions’.

Keen enthusiasts though will already be familiar and well-experienced in ‘physical exertion such as long periods of standing; walking over rough or rocky surfaces; recurring bending, crouching, or stretching; and recurring lifting of moderately heavy equipment and materials.’

The job advert also specifically asks for the following: 

  • Knowledge of the principles and techniques of large format, black and white photography.
  • Knowledge of published standards and guidelines for architectural, engineering and landscape documentation.
  • Knowledge of film and digital photographic processes and techniques.

Those demands shouldn’t be too much of an issue for most photographers already working with large format equipment in the field. To apply for the job you’ll need to get moving as applications have to be in by 15th December. Santa might be coming early to someone. 

Articles: Digital Photography Review (dpreview.com)

 
Comments Off on US National Park Service looking for the next Ansel Adams

Posted in Uncategorized


Next Steps to Getting Started in the Lightroom Develop Module

21 Oct

Lightroom Develop module

A previous article showed you how to get started in Lightroom’s Develop module by using the Camera Calibration, Lens Corrections and the Basic panels.

In this article you’ll learn how to use the remaining right-hand panels in the Lightroom Develop module:

  • Tone Curve panel
  • HSL / Color / B&W panel
  • Split Toning panel
  • Detail panel
  • Effects panel

This guide is aimed at photographers who are new to Lightroom, so it doesn’t cover every aspect – just the important things you need to know if you’re just getting started with it.

It is quite possible that you won’t have to touch any of the panels listed above when processing a photo. Many photos can be developed in Lightroom just by using the Camera Calibration, Lens Correction and Basic panels, plus local adjustments. But the panels mentioned above will help you be more creative with your processing, especially when it comes to working with colour and tone.

The Tone Curve panel

One purpose of the Tone Curve panel is to give you another way of applying the same tonal adjustments that you can make with the Basic panel sliders. If you’re accustomed to using curves in Photoshop, the Tone Curve panel gives you the option of doing the same in Lightroom in addition to, or instead of, using the Basic panel sliders.

This is what you will see when you open the Tone Curve panel for the first time.

Lightroom Develop module

This is the RGB curve. Adjusting this curve affects the brightness values, but not the colours, of the photo.

You can move the curve upwards (as shown below) to make the image lighter. To do so, left-click once on the midpoint of the curve to add an adjustment point. Then click and drag the adjustment point to move it up, and change the shape of the curve.

Lightroom Develop module

You can also move it downwards to make the image darker.

Lightroom Develop module

You can create an S-curve like this to increase contrast (add a second adjustment point first).

Lightroom Develop module

You can create the matte look with a curve like this. Add an adjustment point near the bottom of the curve then lift the left-side up. This makes the darkest tones in the photo dark grey rather than black, imitating the look of a print made on matte paper.

Lightroom Develop module

Notice the lower left point is not touching the bottom, this creates a matte look.

You can return to the original straight tone curve at any time by going to the Point Curve menu and selecting Linear.

Colour curves

Underneath the Tone Curve is a menu that lets you select the Red, Green, or Blue tone curves individually. These curves affect each of the color channels in the photo respectively. The blue curve is shown below.

Lightroom Develop module

More options

If you click the icon in the bottom right-hand corner of the Tone Curve panel (circled above) the panel opens up to reveal four sliders, called Highlights, Lights, Darks and Shadows (see below).

Lightroom Develop module

These sliders give you another way to make adjustments to the tone curve. When you move one of the sliders, the corresponding region of the tone curve is highlighted, so you can see which tones are affected.

The illustration below shows what happens when you move the Highlights slider. The top right of the tone curve is marked in grey. This part of the curve changes when you move the Highlights slider.

Lightroom Develop module

You can click and drag on a single adjustment point (but not multiple points) to change the shape of the curve. The sliders change value as you adjust the curve. The diagram below shows the effect a simple S-curve has on the sliders.

Lightroom Develop module

Double click on any slider heading to reset that slider to zero. That covers the basics of curves. You can learn more advanced techniques by reading our article Lightroom’s Tone Curve Explained.

HSL / Color / B&W

The HSL / Color / B&W panel is for adjusting colour values. It is also for converting photos to black and white. This is beyond the scope of this article, but you can learn more by reading my article How to Convert Photos to Black and White in Lightroom.

The HSL / Color / B&W panel is divided into three tabs. The HSL and Color tabs are the ones you need for making adjustments to colour. They contain the same sliders, just arranged in a different order. The screen shots below are taken from the HSL panel.

The Saturation and Vibrance sliders in the Basic panel affect all the colours in the photo. The HSL and Color tabs allow you to target individual hues without affecting others. You can target a specific colour and change the following:

  • Hue
  • Saturation
  • Luminance

Adjusting Hue replaces the selected colour with an adjacent colour on the colour wheel. For example, you can target red tones and make them more magenta (pink tone) or orange. Or you could target blue tones and make them aqua or purple.

You don’t need a colour wheel to see how colours are affected by the Hue sliders. You can just look at the eight Hue sliders. For example, the Red slider (top in the diagram below) is coloured magenta to the left and orange to the right. Moving the slider in those directions changes red colours in the photo to either magenta or orange.

Lightroom Develop module

The easiest way to see how this works is to try it. The examples below show the effect that moving the Red slider to -100 and +100 (the strongest available settings) have on the image.

Lightroom Develop module

No adjustment.

Lightroom Develop module

Red -100.

Lightroom Develop module

Red +100

The Saturation and Luminance sliders work in a similar way. Saturation adjusts the saturation (intensity) of specific colours, and Luminance adjusts the brightness.

Targeted Adjustment Tool

The Targeted Adjustment Tool gives you an even more precise way of adjusting colour values. To use it, click on the Targeted Adjustment Tool icon in the HSL / Color / B&W panel (circled below).

Lightroom Develop module

Then move the cursor over the colour (area) in the photo you want to adjust. Click and hold the left mouse button, while you drag the mouse downwards to reduce the Saturation or Luminance of the colours underneath the cursor, or adjust the hue.

Move the mouse upwards to increase the saturation or luminance, or adjust the hue in the opposite direction. Lightroom analyzes the colours underneath the cursor and moves the sliders in the HSL / Color / B&W panel accordingly. All similar colors in the image will be affected.

For example, in the following photo I activated the Targeted Adjustment Tool, then clicked on the car’s paintwork and dragged the mouse downwards to reduce the Saturation. Lightroom adjusted both the Red and Orange sliders, showing that the red paintwork is comprised of those two colours. This is more accurate result than only moving the Red slider.

Lightroom Develop module

The Targeted Adjustment Tool is a useful tool that appears in other Develop module panels.

Read my article Mastering Color in Lightroom using the HSL tab to learn more about the HSL / Color / B&W panel.

The Split Toning panel

The Split Toning panel is for toning photos. While this is a technique traditionally associated with black and white photography, you can also use it with colour. If you’re a beginner, split toning is a little advanced for you at this stage, so I’ll direct those of you who are interested to articles that cover it in detail.

How to Split Tone Black and White Photos in Lightroom shows you how it’s done with black and white photography.

How to Create a Vintage Look using Lightroom shows you how to split tone colour photos (it also covers tone curves and Lightroom Develop Presets)

The Detail panel

The Detail panel is for adjusting the default image sharpness and noise reduction settings. For beginners it is simplest not to touch these. You won’t need to do so until you are a more advanced user.

Those of your curious to learn more can read our articles Learn How to Use the Sharpening Tools in Lightroom and How to Do Noise Reduction in Lightroom.

The Effects module

Use the Effects module to apply a creative vignette, add grain or (new in Lightroom CC only) add or remove atmospheric haze.

Vignetting lets you darken (or lighten) the edges of your photo, gently guiding the viewer’s eye towards the centre. Many images, especially portraits, can be improved by adding a subtle dark vignette. Here’s an example:

Lightroom Develop module

You may have to look closely to see it as the effect is subtle, but the portrait on the right has a vignette. It is most obvious in the bottom right corner.

These are the settings used to create this vignette:

Lightroom Develop module

  • Move the Amount slider left to darken the edges of the image, or to the right to lighten them.
  • Move the Midpoint slider left to make the area covered by the vignette larger, or right to make it smaller.
  • Move the Roundness slider left to make the vignette squarer, or right to make it more circular.
  • Move the Feather slider left to make the edge of the vignette harder (a more defined end and beginning of it), or right to make the edge softer (graduates slower from dark to light).
  • Move the Highlights slider right to preserve any highlights present in the area covered by the vignette.

Tip: The easiest way to see what these sliders do is to set Amount to -100. Then move the other sliders to see what effect they have.

Use the Grain sliders to add grain to your photos. This is only useful if you would like to emulate the look of photos taken with film. Move the Amount slider right to add grain (there is no grain at the zero setting) and then use the Size and Roughness sliders to adjust the size and appearance of the grain. This before and after image shows the effect of increasing Grain to 100, the maximum setting:

Lightroom Develop module

Dehaze is a new slider that is only available in Lightroom CC. Use it to reduce atmospheric haze caused by flare, mist, or pollution. You can also use it to increase haze – a good example of this is with photos taken in foggy conditions.

Lightroom Develop module

Photo taken in foggy conditions. Dehaze set to zero (the default).

Lightroom Develop module

Dehaze set to -10 to increase effect of fog.

Lightroom Develop module

Dehaze set to +30 to decrease effect of fog.

I’ll show you how to build on the work done in the right-hand panels by making local adjustments in my next article. In the meantime, if you have any questions about the techniques in this article, please let me know in the comments.


The Mastering Lightroom CollectionMastering Lightroom ebooks

My Mastering Lightroom ebooks will help you get the most out of Lightroom. They cover every aspect of the software from the Library module through to creating beautiful images in the Develop module. Click the link to learn more or buy.

googletag.cmd.push(function() {
tablet_slots.push( googletag.defineSlot( “/1005424/_dPSv4_tab-all-article-bottom_(300×250)”, [300, 250], “pb-ad-78623” ).addService( googletag.pubads() ) ); } );

googletag.cmd.push(function() {
mobile_slots.push( googletag.defineSlot( “/1005424/_dPSv4_mob-all-article-bottom_(300×250)”, [300, 250], “pb-ad-78158” ).addService( googletag.pubads() ) ); } );

The post Next Steps to Getting Started in the Lightroom Develop Module by Andrew S. Gibson appeared first on Digital Photography School.


Digital Photography School

 
Comments Off on Next Steps to Getting Started in the Lightroom Develop Module

Posted in Photography


Save the dates: PhotoPlus Expo next week in New York

16 Oct

Next week sees the return of PhotoPlus Expo, the largest photography and imaging show in the United States. Held October 21-24 in the Javitz Center in New York City, PPE 2015 will play host to more than 100 educational seminars, Photo Walks and Master Classes, and over 250 exhibitors displaying thousands of products. As usual, DPReview will be at the event, reporting from the show floor. Read more

Articles: Digital Photography Review (dpreview.com)

 
Comments Off on Save the dates: PhotoPlus Expo next week in New York

Posted in Uncategorized


Next Level Techniques for Advanced Beginners

28 Sep

You’ve been bitten by the photography bug – it’s not an actual insect, but you know what I mean.

Andreas.

By Andreas.

After the salesman pried that hard-earned money from your hands, you brought home that tantalizing-looking DSLR and your friends looked at it like it was a dangerous alien device, inquiring what all of those buttons, dials, and switches actually do.

At the time you didn’t really even know what they did, but you did know that once you figured it out, some cryptic combination of clicking knobs, pushing buttons and twisting rings on that lens, you were going to produce some knock-out photos.

Since then, you have spent eons of your life that you will never get back reading and researching on Digital Photography School, and highlighting juicy passages in your camera’s user manual (that last part might not be true). And guess what? It’s paid off!

Now you know how aperture affects depth of field, how to use shutter speed to freeze or blur movement and that once mysterious acronym, ISO, finally means something to you. Looking back you now understand what it is like to be a beginner, and that realization alone has raised you to a new level.

JD Hancock

By JD Hancock

What now? You are getting some shots you are proud of, have a pretty firm grasp of the fundamentals and are ready to take it to the next level. You are ready to learn some new techniques, emerge from survival mode and get out there and photograph with intention.

Let’s take a look at some techniques that just might get you over that hump and give you the skills, knowledge and power to capture great photos consistently.

Understanding and Using Aperture and Shutter Priority Modes

These are features that the vast majority of DSLRs have, and even many point-and-shoot cameras on the market as well. Some purists may balk at the thought of using one of these “automatic” settings, but pro shooters have long ago learned the versatility and usefulness of these controls.

Aperture priority settings

Aperture priority gives you full control of aperture while your camera takes care of the rest.

Although the various options for these settings may vary between manufacturers and camera models, the basic premise remains the same.

As the name suggests, these settings are pseudo-automatic. However, unlike the Program (P) setting, which does allow a minute amount of influence from the shooter, Aperture and Shutter Priority modes let you set certain parameters that change automatically to compensate for other adjustments that you remain in control of.

For instance, if your camera is set to Aperture Priority you retain the ability to adjust the Aperture to alter the depth of field as you see fit, and in conjunction with ISO, the camera will automatically choose the corresponding shutter speed for correct exposure. Many cameras give you the option to control ISO manually or let the camera adjust it for you.

The Shutter Priority setting does what you would expect, allowing you to control the shutter speed while the camera does the heavy lifting of setting the appropriate aperture.

Thomas Hawk

By Thomas Hawk

Some cameras offer the option to set limits on the extent of certain settings. For example, if you are shooting in aperture priority, you can set the camera so the shutter speed won’t drop below a predetermined speed or the ISO won’t exceed a maximum level.

My camera is set to Aperture Priority more often than not – this is personal preference. I know my camera like the back of my hand, and can anticipate how all the settings correspond to one another, so I feel comfortable using this setting under most conditions. It is certainly important to be comfortable using your camera in Manual Mode, however, you are likely to find that once you become accustomed to Aperture or Shutter Priority modes, you will have enough control without having to spin dials as much. Priority modes also help prevent accidental changes which can result in improper exposure.

Exposure Metering, Exposure Lock, and Exposure Compensation

A*J*P

Vintage exposure meter – By A*J*P

While we’re on the subject let’s look at some other ways that you can work with your camera to get proper exposures in all sorts of conditions.

DSLRs give you a few different options as to how they meter and determine exposure for a given scene. The most common are spot, center-weighted and evaluative or matrix metering. Take a look at this handy cheat sheet that should help you wrap your mind around the concept.

Fancy technicalities aside, what are the practical applications of these different settings?

Spot metering

Since spot metering bases exposure on the reading from a very small area of the image, it is a great choice if the subject of your composition is small and significantly lighter or darker than the rest of the image, so you can hone in on the correct exposure. This metering mode can be useful for small backlit subjects, as the light source shining directly at the camera will most often result in an underexposed subject. Keep in mind that regardless of the type of focus points you are using, spot metering will read only about a 4mm radius (depending on the camera) from the very center of the focus point.

Center-weighted metering

Center-weighted metering takes the whole frame into consideration, but puts more value towards the center of the focus points (somewhere in the 12mm range). This setting works great when your subject takes up a larger part of the frame, or the lighting is more even. Consider a close-up portrait where spot metering might be too specific if it reads a shadowed or highlighted area, but center-weighted would give you more of an average.

Evaluative or Matrix metering

The last of three main metering types, evaluative (Canon) or matrix (Nikon) metering, determines exposure in a more complex way by taking into account composition, tones, color and some cameras can even factor in the distance objects are from the camera to estimate what the main subject is. This system of metering works great for landscapes and wide angle shots.

Many cameras are equipped with a dedicated exposure lock button or have customizable settings in order to delegate one. This is used when you want to take an exposure reading and hold it. If your subject fills a large part of the frame, the camera may do a good job at setting exposure. If the subject takes up only a small part of the frame, you can move in close to get an exposure reading, lock exposure and recompose the image.

Exposure/focus lock button

Once you familiarize yourself with the exposure/focus lock button, you will be surprised how often you use it.

Exposure compensation

Exposure compensation allows you to over or underexpose the image manually. This is most useful while using automatic or semi-automatic settings like Aperture or Shutter Priority. In the example of a backlit portrait, many photographers prefer to overexpose the camera’s suggested exposure, knowing that the reading will be wrong because of the lighting. You could certainly change your exposure metering to try and secure a more accurate reading, but with experience you can easily predict how the camera’s exposure meter will react ,and use exposure lock or exposure compensation as a more direct, and one-off, route to proper exposure.

Just keep in mind that the most challenging conditions for your camera’s exposure meter are high contrast situations, and with enough experience you will learn to “see” like your camera and easily be able to anticipate necessary compensations.

Selecting Different Focus Settings

To start with, there are two main categories of autofocus settings: Single and Continuous.

Single (One Shot on Canon) is intended for stationary subjects. When the camera finds focus in single servo mode, it holds that focus point until the shutter is released or the autofocus is released and re-activated.

However, single servo focusing can be very useful for action in certain applications. For example, one technique when shooting a moving, yet predictable subject, is to compose the image and lock focus on the spot where you know your subject will be, and wait for it to enter the frame (think panning).

In continuous focus mode, your camera will continually refocus while the autofocus is engaged. This is the setting to use if your subject, or you and your camera, are on the move. In continuous mode, many cameras allow you to choose how many focus points are live. Say you are shooting a sporting event and there are a lot of players, you may want to use fewer focus points in order to single out your subject.

Continuous servo autofocus

Continuous servo focusing is best used to maintain focus on moving subjects – especially if they are moving towards or away from you.

It’s also worth mentioning that just in case you haven’t figured it out already, you can move the focus points around the frame in the viewfinder with the multi-selector. This is key while trying to maintain a certain composition with a moving subject. Consider some basic compositional conventions such as the rule of thirds when setting your focus points for a shot.

Confirm Focus by Previewing Images at 100%, In-camera

As a digital photographer you are extremely fortunate to have access to a feature like this –film shooters didn’t/don’t have this luxury.

The concept is simple: if you are unsure whether you nailed a sharp image, due to camera shake or shallow depth of field, zoom in to 100% and do a little pixel peeping for confirmation. Make a habit of doing this instead of ending up in front of your computer in disappointment at a great shot that’s not sharp.

Zoomed to 100% in camera

Zooming to 100% is a quick way to confirm you have a sharp image.

Some cameras (check your user’s manual to see if your camera supports this feature) allow you to customize a button which zooms directly to 100% for this purpose.

Many cameras have a setting (sometimes called shutter release priority) which won’t allow a picture to be taken unless it recognizes that your focus point is actually in focus. Personally, I loathe this setting. I think it is better to take your chances and at least try to get the shot. Although the focus may not be spot on, you still may get a usable image.

Conclusion

These are just a few of the major technical considerations to keep in mind as you bravely forge ahead in your photographic pursuits.

Every situation requires its own approach, and the more tricks you have up your sleeve, the more prepared you will be to nail the best shots. Keep your nose to the grindstone and embrace the challenge!

Do you have any other tips for the advanced beginner? Please share in the comments below.

googletag.cmd.push(function() {
tablet_slots.push( googletag.defineSlot( “/1005424/_dPSv4_tab-all-article-bottom_(300×250)”, [300, 250], “pb-ad-78623” ).addService( googletag.pubads() ) ); } );

googletag.cmd.push(function() {
mobile_slots.push( googletag.defineSlot( “/1005424/_dPSv4_mob-all-article-bottom_(300×250)”, [300, 250], “pb-ad-78158” ).addService( googletag.pubads() ) ); } );

The post Next Level Techniques for Advanced Beginners by Jeremie Schatz appeared first on Digital Photography School.


Digital Photography School

 
Comments Off on Next Level Techniques for Advanced Beginners

Posted in Photography


Take Your Snapchat Game to the Next Level

06 Aug

Snapchat! That app that has everyone saying either, ‘duh!’ or ‘huh?’

For the huh?-ers, Snapchat’s a photo/video messaging app where you can view a Snap for 10 seconds before poof! It’s gone.

For the duh!-ers: you know Snaps can be outstanding photographic art, right? Right!

So read on to learn tricks for creative “snapsterpieces” that are guaranteed to have all of your friends talking.

(…)
Read the rest of Take Your Snapchat
Game to the Next Level (392 words)


© Taylor for Photojojo, 2015. |
Permalink |
No comment |
Add to
Game to the Next Level”>del.icio.us

Post tags:


Photojojo

 
Comments Off on Take Your Snapchat Game to the Next Level

Posted in Equipment


GoPro mount becomes standard accessory for next year’s Toyota Tacoma, as GoPro plans user-generated-content licensing deals

23 Jul

Toyota has revealed that the 2016 version of its adventure truck will come pre-fitted with a windshield mount for a GoPro camera. Those interested in filming their muddy, dusty and rocky scrambles will be able to fit a camera to point forwards or backwards to capture either the ‘flight’ or passengers reactions. Read more

Articles: Digital Photography Review (dpreview.com)

 
Comments Off on GoPro mount becomes standard accessory for next year’s Toyota Tacoma, as GoPro plans user-generated-content licensing deals

Posted in Uncategorized


Nikon to offer free newlywed portraits at New York’s City Hall next week

28 May

Nikon will be offering newlywed portraits for free to couples who marry at the New York City Hall on June 4th and June 5th. Couples married at City Hall will be treated to a free portrait session with pro photographer and Nikon Ambassador Joe McNally, working out of a 20-foot ‘Wedding Truck’ studio. Read more

Articles: Digital Photography Review (dpreview.com)

 
Comments Off on Nikon to offer free newlywed portraits at New York’s City Hall next week

Posted in Uncategorized


3 Simple Ways to Take Better Photos on Your Next Trip

04 Feb

I love to travel. To me, nothing compares to living on the road and waking up to new places every day. All the different photographs I’ve made during my journeys are the most rewarding part of it all.

Making photos while traveling or on vacation has a special quality because you’re seeing your subjects often for the first time. Travel also presents unique challenges, though – unfamiliar landscape, climate, and culture can easily throw you off. However, it is those very things that can also make beautiful, one-of-a-kind photographs!

Bay of Fundy, New Brunswick

Bay of Fundy, New Brunswick

When travelling to new places, you want to create photos that express the way you feel about the place. You also want to make unique images that are unlike anyone else’s. The sense of wonder you feel when seeing beautiful places for the first time can easily translate into the images that you make with these three simple tips to help you take better photos.

1. Plan, plan, plan

Once you decide where you’re going, read up on the area and educate yourself about the place and what kind of conditions you can expect. What will the weather be like? Are there any special events taking place? Will the flowers be blooming? If you’re traveling internationally, is there a language barrier? If so, try to learn a few key words and carry a phrase book with you. No matter where in the world you go, locals are always more helpful when you make an effort to speak to them in their own language – even if it’s just a few words.

Find out what else is around that you might be able to see during your visit. If you’re photographing nature, you can find great locations by studying maps. Photography websites and forums are full of advice and examples of interesting places to shoot. Learning about the location’s history and culture will also help direct you to unique and interesting subjects.

Sanibel Island, Florida

Sanibel Island, Florida

Find out as much as you can about the places and subjects you’ll be photographing, so you can prepare for them. For instance, if you’re going to be shooting in the desert, near the ocean, or in very cold, wet, or humid environments, you’ll know to bring protective gear to shield your camera from damage caused by moisture, salt, and sand. If you expect temperatures lower than -10c or higher than 40c, extra batteries will be needed as they drain quickly at extreme temperatures. You might consider renting a particular type of lens that is perfect for your subject like a super-telephoto or a tilt-shift. You’ll also need to know what sort of clothes to wear for the weather.

Big Bend National Park, Texas

Big Bend National Park, Texas

2. Don’t let your gear drag you down

No matter where you’re headed, there are some things you’ll need no matter what. When packing your gear, make a checklist to ensure you don’t forget anything important. It should include:

  1. Your main camera
  2. A backup camera
  3. A normal focal length lens (around ~50mm)
  4. A long focal length lens (~100mm or more)
  5. A wide-angle lens (~35mm or less)
  6. Your favourite, most-used lens
  7. A polarizing filter
  8. A battery charger
  9. Spare batteries and memory cards, and a place to backup images (computer, external drive, the cloud)
  10. A lens cloth and/or air blower to keep your equipment clean
  11. A comfortable camera bag – preferably one that doesn’t stand out as a camera bag to avoid making yourself a target for thieves.
  12. A good, sturdy, but lightweight tripod. Many manufacturers such as Manfrotto, Giottos, and Benro (among others) make special travel tripods that are made of strong, light carbon fibre and fold up into a small carrying case.
Strathcona Provincial Park, British Columbia

Strathcona Provincial Park, British Columbia

Be selective with your packing. Don’t bring things you probably won’t use because camera bags can get very heavy, very fast. Use lightweight luggage and never check your camera bag, since checked luggage can be mishandled or lost. If you are flying, check the size and weight restrictions of carry-on luggage so you don’t get an unwelcome surprise at the airport. If you leave your home country, purchase travel insurance that will cover your precious equipment from loss, damage, or theft while abroad.

3. Seek the unique

When traveling, try to avoid the mass-marketed tours and biggest attractions. Not only are they full of people that get in the way of your shot, but they’re also full of people getting almost the exact same photos that you are. Instead, search for places that are beautiful but overlooked. You may be able to find this information online, but the best way is to be open and talk directly to the people who live there – start with your hotel staff, be friendly, and ask locals where the most beautiful places are that most people don’t see.

Goblin Valley State Park, Utah

Goblin Valley State Park, Utah

This can even start when booking your accommodations – instead of staying in a generic chain hotel, look for places with more character such as cabins, villas, or bed and breakfasts. Or, if you’re like me, you can find an RV site right in the midst of the beauty to call home base. This way, the place you spend the most time can present its own photographic opportunities.

Remember to give yourself time to experience the place before you start photographing. Give yourself a chance to find out what is special about the place first, and then try to convey that in your images. If you are photographing something common like a famous monument or national park, try to find a new perspective.

Joshua Tree National Park, California

Joshua Tree National Park, California

It’s easy to become overwhelmed by the exotic nature of new places. But always remember that good light is a photographer’s best friend. A new place may look fascinating to you in the middle of the day, but it will look magical during good light.

googletag.cmd.push(function() {
tablet_slots.push( googletag.defineSlot( “/1005424/_dPSv4_tab-all-article-bottom_(300×250)”, [300, 250], “pb-ad-78623” ).addService( googletag.pubads() ) ); } );

googletag.cmd.push(function() {
mobile_slots.push( googletag.defineSlot( “/1005424/_dPSv4_mob-all-article-bottom_(300×250)”, [300, 250], “pb-ad-78158” ).addService( googletag.pubads() ) ); } );

The post 3 Simple Ways to Take Better Photos on Your Next Trip by Anne McKinnell appeared first on Digital Photography School.


Digital Photography School

 
Comments Off on 3 Simple Ways to Take Better Photos on Your Next Trip

Posted in Photography