RSS
 

Posts Tagged ‘Next’

Adobe details OS support for next version of Lightroom

23 Jan

In a new blog post, Adobe has said Lightroom 6 will require a 64-bit operating system, meaning it will only run in 64-bit versions of Windows 7, or OS X 10.8 or newer. The announcement suggests Lightroom 6 will continue as a stand-alone application, rather than being swallowed into the company’s subscription-only Creative Cloud program. Read more

Articles: Digital Photography Review (dpreview.com)

 
Comments Off on Adobe details OS support for next version of Lightroom

Posted in Uncategorized


First Hasselblad in space goes to auction next month

30 Oct

The first Zeiss lens and Hasselblad 500C camera to visit space will be going up for auction on November 13 via RR Auction in Boston. The unit is a piece of history, having joined Wally Schirra during the Mercury-Atlas 8 mission and, later on, Gordon Cooper during the Mercury-Atlas 9 mission. Read more

Articles: Digital Photography Review (dpreview.com)

 
Comments Off on First Hasselblad in space goes to auction next month

Posted in Uncategorized


Elevate Your Landscape Photography Skills To The Next Level With These Easy Tips

25 Oct

My experience has taught me that landscape photography is great for everyone who’s just starting out with photography because landscapes give you the chance to improve your photography skills without annoying a model or someone else. This is how I started with photography after all. Ladscapes are also great for learning the basics of photography, since you have all the Continue Reading

The post Elevate Your Landscape Photography Skills To The Next Level With These Easy Tips appeared first on Photodoto.


Photodoto

 
Comments Off on Elevate Your Landscape Photography Skills To The Next Level With These Easy Tips

Posted in Photography


4 Killer Tips To Nail Your Next Portrait Shoot

10 Oct

If you’re a portrait photographer perhaps you’ve found yourself in the position of carrying bulky, heavy gear around. That’s unnecessary though. With these 4 easy tips you’ll be able to get the best results at your next portrait session without the hassle and the back pain afterwards. These tips also help you save a fair amount of money that you Continue Reading

The post 4 Killer Tips To Nail Your Next Portrait Shoot appeared first on Photodoto.


Photodoto

 
Comments Off on 4 Killer Tips To Nail Your Next Portrait Shoot

Posted in Photography


Ready to Upgrade Your Kit Lens? Tips for Which Lens to Invest in Next

01 Oct

Most cameras come with a kit lens that generally works well as a decent all-around workhorse. A common focal range for these lenses is 18-55mm, which means they are capable of wide-angle shots as well as medium-telephoto pictures, and everything in between. The tradeoff for this zoom range, however, is a limited maximum aperture range of roughly f/3.5 when zoomed out (18mm), and f/5.6 when zoomed in to 55mm.

Of course some kit lenses cover a longer focal range and have different maximum apertures, but overall most kit lenses are designed for the types of all-around shooting conditions in which you may often find yourself. While this is not necessarily a bad thing, it does mean that the kit lens is more of a jack of all trades while being the master of none, and after a while you might start wondering what other options are available to you and how they will affect your photography. This all begs the question: which lens should you buy when you want to upgrade from the one that came with your camera?

Child bear

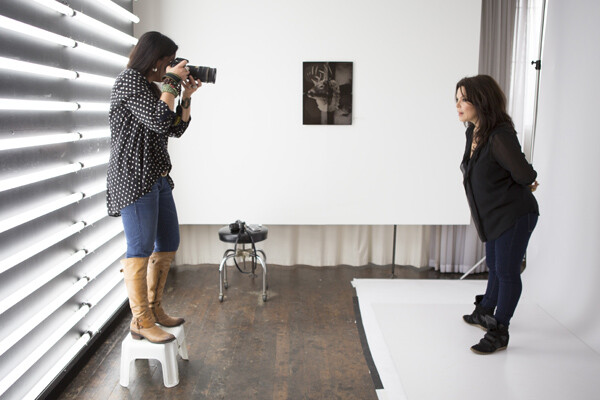
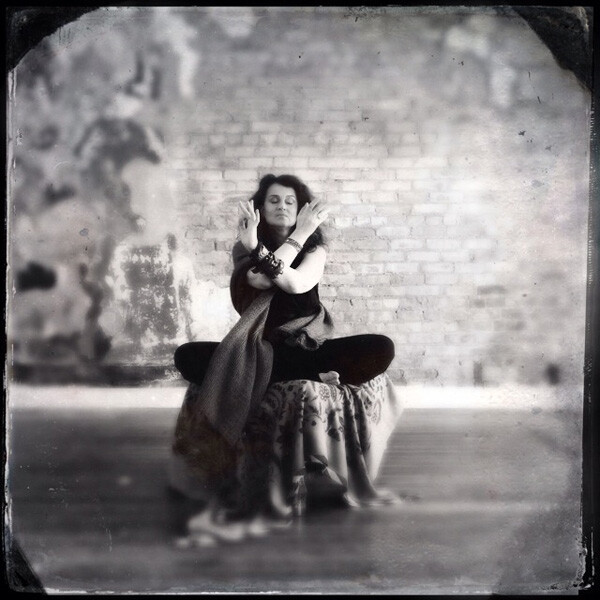
A 35mm or 50mm lens can work well for shooting portraits

Lenses are like apps

Think of lenses like different apps for your camera, and just as apps on your smartphone or tablet have specific functions, each lens is designed to meet a specific set of photographic needs. Next, think of the kit lens as a basic set of apps you might find on a device. It does many things well, but doesn’t really unlock the true potential of your camera. For some people, that’s fine: they don’t feel the need to install new apps (i.e. buy new lenses) and instead only use the ones that come with their device.

But when you start exploring the myriad of apps available for phones and tablets you might wonder how you ever lived with your device’s basic apps at all! The same holds true for lenses, but there is one key area where the analogy breaks down – price. When you start looking around for lenses, you might find that your vision quickly outstrips your budget! The choice, then, is this – which lens should you buy after exhausting the possibilities of the kit lens that came with your camera?

Montana

Wide-angle lenses are great for capturing photos of natural landscapes and other outdoor scenery.

Know what you need for the photography you do

The answer, unfortunately, is not as black and white as it might seem. While there are hundreds of options available, what you buy ultimately comes down to your unique needs and style as a photographer. After using your kit lens for a while, you will hopefully have an idea of what type of photography you enjoy most: landscapes, architecture, portraits, nighttime long exposures, pets, sports, weddings, etc. Or maybe you do a combination of everything! Before spending hundreds of dollars on another lens it’s important to know what will suit your needs – much in the same way that purchasing a vehicle is a matter of finding one that works for you, as opposed to simply buying the same car that all your friends have.

Grapes

A lens with a wider aperture will enable you to shoot get nice blurry backgrounds that are not always possible with a kit lens.

Prime lenses pros and cons

My first bit of advice, though, is to find a prime (non-zooming) lens that can accommodate your shooting style. If you take a lot of landscape and outdoor shots, you will likely want a wide-angle lens with a focal length of around 10-20mm (for cropped sensors, 15-35mm if you have full frame). For portraits, anything between 50-100mm is a good choice. Sports and wildlife shooters tend to use lenses that are on the telephoto end, such as 100-300mm. Remember the tradeoff between zooming and aperture I mentioned in the first paragraph? If you eliminate the zoom functionality you will find plenty of lenses with much larger apertures, which will let in much more light and allow you to use faster shutter speeds, as well as capture pictures in low-light situations that might not otherwise be possible without the use of a flash.

Church

Prime lenses can’t zoom, but you gain the ability to shoot in dimly-lit situations without the need for a flash because they often have large apertures.

It admit it can be a bit nerve-wracking to use a lens that can’t zoom in and out, but once you try it you may find a whole new world of photographic possibilities that you never knew existed, thanks to the larger aperture. Remember that you haven’t lost the ability to zoom, you can still move yourself around physically, which is another fantastic way to explore and stretch yourself as a photographer. You can often find prime lenses for a couple hundred dollars that will suit your needs exceedingly well, though even prime lenses with longer focal lengths could easily push the limits of your budget.

40mmPancake

It might be small, but Canon’s 40mm f/2.8 pancake lens packs a big punch.

If you would like to upgrade from your kit lens but are not entirely sure exactly what your individual needs are, I would recommend one of the following. All are fairly inexpensive as far as lenses go, and will suit a variety of photographic situations, though they are not the best for sports and wildlife due to their somewhat short focal lengths:

  • Canon 24mm f/2.8 – and the newly released pancake version at only $ 149 US
  • Canon 40mm f/2.8 (pictured on the right)
  • Canon 50mm f/1.8
  • Nikon 35mm 1.8G – get the DX if you have an APS-C or cropped sensor, get the ED if you have full frame.
  • Nikon 50mm 1.8G

Zoom lens options

You can buy prime lenses with longer focal lengths, but they can easily cost many times that of their cheaper counterparts. If you decide you absolutely cannot live without the zoom functionality, I would recommend going with a lens that covers one end of a focal range (i.e. wide-angle to medium telephoto) rather than one that covers both ultra-wide and ultra-telephoto. Of course this is all subjective, and there are as many opinions on this topic as there are photographers. In my experience lenses that try to cover as many focal lengths as possible are generally not as sharp as their more limited counterparts, unless you are willing to spend hundreds or even thousands of dollars. Lenses I would recommend include:

55 300mm

[caption: Nikon’s 55-300mm picks up where most kit lenses leave off and is a great option if you are interested in shooting sports and wildlife.

  • Canon 75-300mm f/4-5.6
  • Canon 28-135mm f/3.6-5.6
  • Canon 24-105mm f/4
  • Nikon 18-105mm f/3.5-5.6
  • Nikon 55-300mm f/4.5-5.6G

There are also many other really good third party options available. The options are almost endless so I’ve stayed with the two big brands here, but you can also look at Sigma and Tamron who both make some really good lenses also.

Deciding

The more you are willing to spend on a lens, particularly a zoom lens, the more features it will have like: image stabilization, higher-quality glass elements, weather sealing, and larger maximum apertures. These lenses are just the beginning. The sky’s the limit when it comes to upgrading your lens, and it’s important to not overlook options like simply borrowing one from a friend, buying older gear, renting, or even looking online for used equipment. Whatever you decide, it’s important that the lens is right for you and your photography goals, but chances are if the kit lens is too limiting there is a fantastic one out there with your name on it, waiting for you to come and explore what it can do for you.

The post Ready to Upgrade Your Kit Lens? Tips for Which Lens to Invest in Next by Simon Ringsmuth appeared first on Digital Photography School.


Digital Photography School

 
Comments Off on Ready to Upgrade Your Kit Lens? Tips for Which Lens to Invest in Next

Posted in Photography


6 Tips to Take Your Architecture Photography to the Next Level

18 Jul

Liams Seattle

Architectural photography may seem like an incredibly boring subject, but there is lots of creativity involved with shooting buildings, not to mention it’s a rather lucrative way to make a side income as a photographer. However, the rules of photographing a building versus a person are quite different. Whether you are a relatively seasoned architectural photographer looking to refine your approach, or a budding photographer curious about how to create impactful architectural photos, these tips should help take your photography to another level. This post is written for a photographer approaching an official architectural photography assignment, but the tips also apply to casual shooters.

1. Do your homework and see if there are any photos of the space online

Most buildings in the world have been photographed at least once thanks to Google. A quick Google Image search of the space you’re looking to shoot should pull up a variety of photos by both professionals and amateurs. Use the work of others to your advantage. Check to see what angles other photographers may have already shot, and which ones they haven’t. Examine the photos for any potential challenges that may arise, such as tall interiors or exteriors, or areas that look better when naturally lit by a sunset. Do what you can to anticipate your needs on site before you arrive.

Puerto Vallarta

2. Know the geographical aspect of your building

Speaking of natural light, this can be your friend or your foe. Many modern buildings today are being built with lots of features that offer natural light such as floor-to-ceiling windows and skylights. While these may seem great for the actual building occupant, these features can make or break your architectural photo shoot. More than ever, it is important to know the geographical aspect of the building you are shooting. Is it east-facing or west-facing? Depending on the time of day, it truly matters. Be sure to consider the geographical aspect in relation to the time of day you choose to shoot.

3. Always walk through the space first

There are a couple reasons why a walk through is essential. First, it is much easier to remove any clutter or unorganized elements. Two things to always look out for are trashcans and wrinkles in fabrics such as curtains or bed spreads. These are two things that are much easier to remove before you shoot rather than in post-production. Second, think of the walk through as your scouting mission. Look for any “special access” places such as nooks and crannies or elevated spaces, that you may be able to squeeze yourself into to get an alternative view of the space. In this day and age where just about everyone has a camera, capturing stand out photos is about finding the angles of a space that aren’t so obvious.

Hecho Seattle

4. See if the space has been styled

Before you walk through the space, check with your photography coordinator to find out if the space has been staged or styled by a designer. If so, you’re in luck! Staged spaces tend to look like they’re straight out of a magazine with furniture, artwork, and props carefully placed in the area, making your job much easier. If the space hasn’t been staged, you will have to put in more effort to figure out the architectural importance of the space and have these elements shine through in your images. Ask yourself, “without furniture, what is it about this space that makes it special?”. Perhaps it’s the exposed brick and wood beams, or the floor-to-ceiling windows. Whatever it is, make sure these elements become the focal points of your photos.

5. As you begin shooting, watch for vertical lines

When shooting architecture, you almost always want to use a wide-angle lens such as a Canon 16-35mm, but these lenses have a tendency to cause converging verticals. This happens when two parallel lines in an image appear as if they are leaning in towards each other. To make your photos appear more professional, and the architectural subject appear more structurally sound, it is important to correct these converging verticals. The easiest way is to simply change your perspective. Take a few steps away from your architectural subject, or elevate yourself until your vertical lines appear more parallel. Other ways to correct for converging verticals is to fix it in Photoshop, or if you have the budget, invest in a perspective control or tilt-shift lens.

Fairwinds Seattle

6. Elevate yourself

There are two main reasons why you want to get to higher ground while shooting a building. The first is to correct for converging verticals as mentioned above. The second reason is to strive for a different photographic perspective. If you’re lucky, the space you’re photographing may come with a balcony, staircase, or natural element that lets you rise several feet for a taller perspective. However, keep in mind that again this is an obvious element that many other photographers will make a beeline for. This is why in 90% of architecture photography situations it pays to have a foldable, portable ladder or step stool and a monopod with you always. Having these two relatively cheap and lightweight items will help you achieve different, elevated perspectives of interiors and exteriors from atypical angles. Keep them in the trunk of your car; you never know when they will come in handy.

EMP SFM Seattle

Architectural photography at face value may not seem like an interesting subject, but think of it this way: when you travel, how many buildings do you see that you end of taking a photo of? Use these tips not only for approaching a real estate photo job, but whenever you plan to take semi-professional photos of buildings or just for yourself.

Have any other tips you want to share, please do so in the comments below.

The post 6 Tips to Take Your Architecture Photography to the Next Level by Suzi Pratt appeared first on Digital Photography School.


Digital Photography School

 
Comments Off on 6 Tips to Take Your Architecture Photography to the Next Level

Posted in Photography


Retro-Modern Radio Ball Rolls its Way to the Next Station

17 Jul

[ By Steph in Gadgets & Geekery & Technology. ]

Radioball 1

Remember when searching for a good radio station was a process of discovery, slowly turning a knob to hear snippets of music or talk making its way through the static? The anticipation was part of the experience, not knowing just what you might hear as you made your way around the dial. A fun concept called the Radioball brings back that feeling with an interactive three-dimensional design marrying retro and modern technologies. You simply roll the ball to change the station.

Radioball 2

“Thinking back to the days of old analog radios, the magic of finding unexpected stations in the midst of fuzz was both enchanting and evocative,” says designer Ben Collette. “Compare that with today’s digital-based interactions of screens and tact switches; they give us exactly what we want when we want it, but leave no room to stumble onto alternative choices. The radioball prototype was built as a starting point for conversation about the need for richer, more spatial interactions.”

Radioball 3

A lightweight, 3D-printed urethane mesh forms a honeycombed ball shape, which is then fitted with electronic components like speakers. The sections of the ball and the components are held together using magnets, and the design team is playing with various colors and levels of transparency for the outer mesh.

Radioball 4

For version 2.0, Collette added a digital gyroscope to the control board so that a slow twist on any facet turns the volume up or down. It’s also got a larger battery and an easily accessible mini-USB slot for recharging the device.

Share on Facebook


[ By Steph in Gadgets & Geekery & Technology. ]

[ WebUrbanist | Archives | Galleries | Privacy | TOS ]


WebUrbanist

 
Comments Off on Retro-Modern Radio Ball Rolls its Way to the Next Station

Posted in Creativity


5 June, 2014 – The Next Big Thing

05 Jun

Every now and then one gets to observe, and if you’re lucky even participate in something that has the potential to be a game changer. This was the case in late May when I went to visit Mylo Development LLC, a Seattle-base software start-up. 

Heading up Mylo is David Vaskevitch, who was the number three man at Microsoft and their Chief Technology Officer. His founding partner is Moshen Agsen, previously a Microsoft Engineering Fellow. 

This ten minute-long video is an interview with David and Mohsen about what it’s like to create a software start-up. It also has some hints as to what Mylo’s product will be.


The Luminous Landscape – What’s New

 
Comments Off on 5 June, 2014 – The Next Big Thing

Posted in News


10 Portrait Tips to Take Your Photography to the Next Level

13 May

You have all the makings of a beautiful photograph: the perfect client, an overcast day for soft natural lighting and a gorgeous landscape as the backdrop. You’re taking photos but noticing that something’s not quite right. The photos look underwhelming. Believe me, I’ve been there. Here are 10 tips to take your portraits to the next level.

Cjust_tip1

Photographing Danielle LaPorte – author

Portrait of Danielle LaPorte - author

Portrait of Danielle LaPorte – author

Tip #1 – have your subject look up at you

It’s slimming and flattering (see images above). Bring a small step stool to stand on and photograph your subjects from slightly above their eye line. Watch double chins disappear. Keep a step stool in the trunk of your car so you don’t even have to think about adding it to the list of gear to bring when you prep the night before. It’s there, ready to go.

Tip #2 – capture the moments in between poses

Cjust_tip2

Personally this is a favorite of mine. If you’re noticing the images look too posed, or your subject is uncomfortable in front of the camera, shake things up. Ask them to do the most ridiculous pose or ask them to pretend to laugh really hard. Take that photo, but keep the camera up and wait. The moment after that photo happens you’ll find their guard will come down, they will laugh authentically or give you a moment that feels much more real.

Tip #3 – turn the subject’s body slightly

Have them turn their body slightly away from the camera and their face still looking straight at you. This is not only slimming, it also gives the photograph more depth.

Tip #4 – flattery

Always tell them how beautiful they look. It’s unnerving to have someone pointing a camera at you and not know what the photos look like. Tell them. It will help calm their nerves and you will notice a difference in the photos because they will feel more confident and attractive.

cj_tip9

Tip #5 – connection

This is the key to everything really. If there’s a connection between you and the person you are photographing, there’s a magic that happens that’s unexplainable. Sure, you can have the right lens, the right camera, and the right lighting, but an authentic connection between the two of you takes it up a notch. You can see it in their eyes. They connect with you, and it shows with a different authenticity that can’t be faked. Ask questions, become curious about who they are. Get to know them on a more personal level. Keep that conversation going throughout the photo session. Laugh with them.

cjust_tip6

Tip #6 – tell your subject to flirt with the camera

Ok, that sounds weird but it can work. Ask them what celebrity crushes they have. That changes the look in their eyes and on their face. Have them pretend that the camera is that person. Seriously. It makes them laugh, which goes with tip #2, and helps them loosen up as well. If they are in a relationship, ask them when they met, how they met, or some other stories about their partner that lights them up. Watch the shift happen and take photos throughout the conversation. You’ll capture moments that are real and off guard.

Cjust_tip7

Tip #7 – have them bring a playlist of their favorite music

I bring a portable wireless speaker and play their music, which creates a mood they are comfortable with. You can also play your own music. It helps give them something else to pay attention to and can lighten the mood. Get playful with it and dance around with them. Let them express themself and just pay attention with your camera ready. You can take photos of those moments as well. You can try a longer shutter speed while they dance for some variety and movement. A little blur can add more of a story to the series of images.

Tip #8 – clothing selection is important

Have them pick out clothing from their wardrobe that makes them feel like a rock star. It must be clothing that they feel comfortable in and which allows them to move easily. No crazy patterns or bright colors. The emphasis is on their eyes and their expression not the bold neon stripes on their top.

cjust_tip10

Tip #9 – lighting

If you’re outside, open shade is extremely flattering. This is best early in the morning, late afternoon and close to sunset, when shadows are being created from trees and buildings. Have your subject stand in the shade. A great place to explore this is in doorways. Try just inside an open garage door. Stairways inside parking garages can also provide a shade that’s not too dark, with the brightness outside reflecting on them perfectly. If you’re inside, you can still use natural lighting by turning off all the overhead lights and lamps and having your subject move close to the window. When it’s overcast it’s best because again, it will be even soft light on their face without any shadows or harsh light making them squint.

Tip #10 – break the rules

cjust_tip10b

Allow the flare from the sun to fill the lens. Use alternative cameras like a Polaroid SX-70 or your iPhone. Try out the iPhone apps. It helps you expand as a photographer when you stretch yourself in new unchartered ways. Only bring one lens to the photo shoot. Bring the one you know is the most flattering. My favorite portrait lens is the Nikon 85mm 1.4 lens. ( yep, I’m a Nikon girl ). Think of this as more than a portrait shoot but as a fine art project. Have your subject create a Pinterest board of their favorite portraits before the photo session and play with those ideas. Try unconventional poses. They can lead you to unexpected moments of greatness with your portraits.

Next steps

Allow yourself to go on a journey of exploration during the photo session. There are so many ways to go from ordinary to extraordinary. Paying attention to the basics of composition, lighting, posing can help. Incorporating your own authentic personality into the session will help your client be more relaxed and open to try new things. This will bring you better results in the end.

So, what is one tip you’ve learned along the way that has helped you create better portraits? Share it with us in the comments below.

The post 10 Portrait Tips to Take Your Photography to the Next Level by Catherine Just appeared first on Digital Photography School.


Digital Photography School

 
Comments Off on 10 Portrait Tips to Take Your Photography to the Next Level

Posted in Photography


It’s Not Travel Photography, But Photographing Travelers May Be Photography’s Next Big Thing

26 Apr

fly1
Photography: Paola Colleoni

On a trip to Paris with her best friend two years ago, Nicole Smith did what everyone does on vacation. As she and her friend stood at tourist sites, she would take out her phone, hold it at arm’s length and snap a few selfies. Sometimes the pair would buttonhole a passing stranger, hand over a camera and ask the passer-by to shoot a picture of them together. Not surprisingly, the results were, she says, always “meh.” Things changed though, when a friend in the city offered to photograph them in the style of a photojournalist as they wandered through the streets. The result wasn’t just a set of images that captured the spirit of her afternoon in a way that she could never have done alone, she says, but the beginning of a whole new business idea.

Two years later Flytographer now has professional photographers available to capture shots of vacationers as they tour the sites and sip cappuccinos in romantic cafes in 70 cities around the world.
fly2
Photography: Cadence Feeley

Customers can choose from three different kinds of shoots: thirty minutes in one location produces fifteen photos and costs $ 250; an hour in one or two locations generates 30 photos and costs $ 350; and two hours in multiple locations produce 60 photos for $ 600. The commission  earned by the photographer varies with the package but on average photographers can expect to receive 60 percent of the purchase price.

“It’s a fun, fast shoot.”

The photographers, though, only have to do the shooting. Flytographer will arrange the date, time and route of the booking, discuss the customer’s objectives and prepare a brief with all the details.

“It’s a fun, fast shoot and we usually capture the couple/family as they stroll around in a more candid, editorial-style,” says Nicole. “The photographer connects with the customer like a local friend.”

The question is how much demand there is for the attention of a professional photographer at a time when professional quality DSLRs are affordable to anyone who takes foreign travel, and when everyone is packing a camera in their pocket, complete with filters to turn even the worst of snaps into atmospheric mementos.

According to Nicole, Flytographer delivers a couple of important benefits that vacationers and travelers can’t produce alone.

The first is that everyone can be in the picture together, looking relaxed and at their best, (rather than at the end of an arm or having just rushed back into the frame.) The images are also more varied. Ask a local to shoot a picture and at best you’ll get a standard direct shot of you and you a friend standing in front of a building. At worst, you’ll get to watch a stranger running off with your iPhone or your Nikon. Flytographer’s photographers are expected to use different angles and vantage points to produce images that only a dedicated photographer can create. They’ll also be using their own equipment.

And those pictures will be high quality. They won’t be quick snaps but valued treasures that record a memorable experience.

fly3

Photography: Lauren Colchamiro

“People like ‘experiences’ vs more stuff and we are often told by our customers that their Flytographer photos were the ‘Best souvenir they’ve ever purchased,” says Nicole. “Too many people spend thousands of dollars planning a special trip only to return home in none of the photos, or if they are, someone else important is missing, or they are blurry etc. They also like that they can focus on soaking up the moment and being really present vs distracted trying to capture the moment through a camera.”

Photograph Honeymooners And Reunions

Customers tend to be couples and families but are often people making special, once-in-a-lifetime trips such as honeymooners or newly engaged couples, all-guy or all-girl vacations and multigenerational reunions. For the photographer, the shoot may sometimes have the same feel, and demand some of the same skills, as shooting a small event.

Altogether, in the year or so since the company’s launch, Flytographer has completed around 200 shoots across five continents. And the company is looking to expand, particularly in Hawaii, Orlando, Sandestin, Palm Desert, Scottsdale, Tremblant, Hong Kong and in the Caribbean, although it accepts applications from anywhere. Photographers in places with large numbers of tourists and small numbers of rival shooters will be in with a good shout of landing some useful extra work, and even photographers who travel a lot can find themselves shooting in different locations.

But you will need to impress. All of the company’s photographers are professionals with backgrounds that range from newspapers and magazines to corporate and fashion photography. Some are wedding and family photographers. Flytographer has also managed to land some adventure ski photographers who can capture shots of snowboarding clients as they fly down the slopes.

Nicole speaks with each of the photographers themselves, checks their background and makes sure that they have both solid technical skills and the ability to tell a compelling story through their shots. She also looks for people who have run their own business and understand the importance of delivering impeccable service. Applicants can apply at www.flytographer.com/join.

That Flytographer appears so far to have had little trouble either recruiting photographers or finding clients is pretty revealing. That there is plenty of demand among photographers to shoot quick, documentary-style images for fees that may work out, after travel and processing, to around $ 100 an hour, is hardly surprising. But the fact that so many people recognize that there’s a limit to what they can do with their iPhones and even their DSLRs is highly encouraging. People may think that they’re photographers but they are recognizing that quick snaps taken on phones tend to stay forever unseen on the hard drives while professionally taken images are viewed and treasured.

It’s also revealing, though, that while Nicole Smith has used professional photographers, she’s not a trained photographer herself. This was a business idea that came from a client of professional photographers. If clients can spot opportunities for photographers, why aren’t more photographers doing the same for themselves?


Photopreneur – Make Money Selling Your Photos

 
Comments Off on It’s Not Travel Photography, But Photographing Travelers May Be Photography’s Next Big Thing

Posted in Equipment