RSS
 

Posts Tagged ‘Natural’

5 Unposing Tips for Kids for More Natural Photos

12 Jun

Editor’s note: this week we will be featuring a series of articles on posing for portraits. Look for a new one each day. If you miss any make sure you subscribe to our newsletter and you’ll get a reminder of all our articles once a week.

Posing kids is a whole different thing from posing models (unless you’re photographing a child model, and then you might not need this article). My biggest goal when capturing kids is to help them look as natural as possible, so truly I want to “unpose” them. Stiff, awkward, posed shots aren’t really what anyone wants, but I want to take this even a step further and talk about capturing kids’ true inner selves.

159

Have you ever had a kid in front of your camera, and whatever you tell them to do ends up looking like the most unnatural position ever? Chances are, the kid is as baffled as you are. He doesn’t know what you want from him. He hasn’t been studying pinterest boards and kid’s clothing catalogues. He just knows his mom dressed him up and told him not to get dirty or mess up his hair, and now some stranger is telling him to put his hand there, look over here, bend his elbow like this. Most kids don’t understand this.

Let me share some unposing tips with you for helping kids to be more nature, so you and your little model can get some great shots!

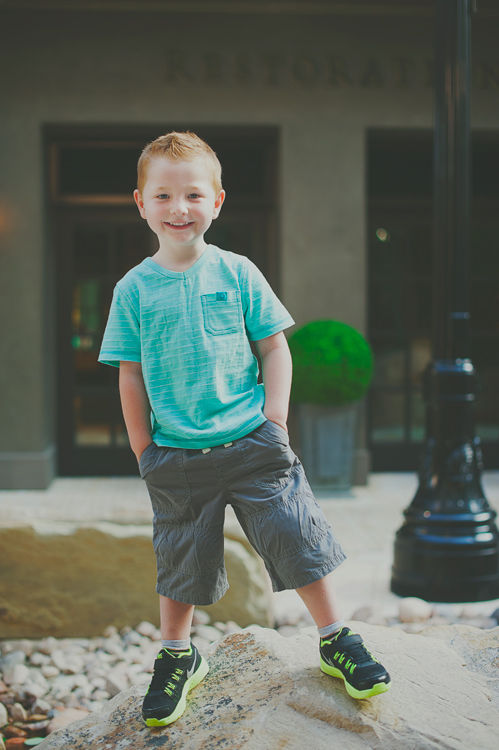
1. Kids don’t need much help to be adorable

135

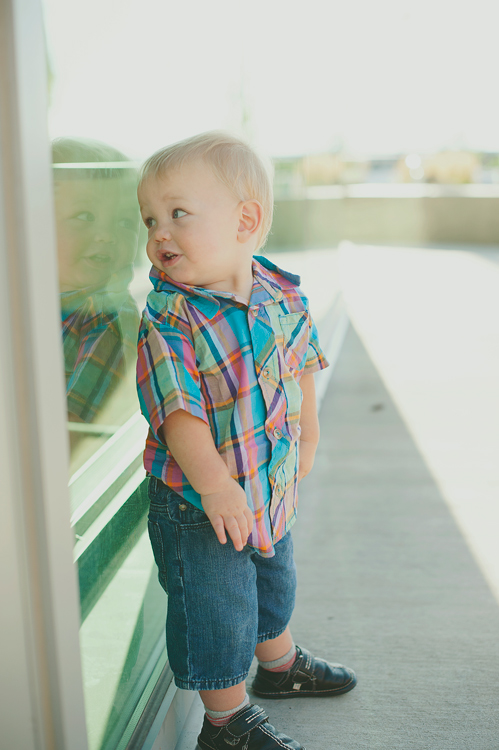
If you can just let a kid be themselves, and explore, sometimes the photos you get can be more adorable than anything you could think up yourself. Part of each session could be unstructured, no posing direction, kid-led, fun. Photos like the above could happen all on their own, or if the child is shy, you could ask them, “What’s in that window?” Make picture time into play time, and let kids be themselves.

Some props can be good, but sometimes they just add to the chaos, and you end up with a lot of canned, posed photos. I love kids’ cute faces, and that’s what I want to be the main focus of my photos. Don’t stress too much about making everything around the kid amazing. Like I said, kids don’t need much help to be adorable!

2. Let them be with a buddy

196

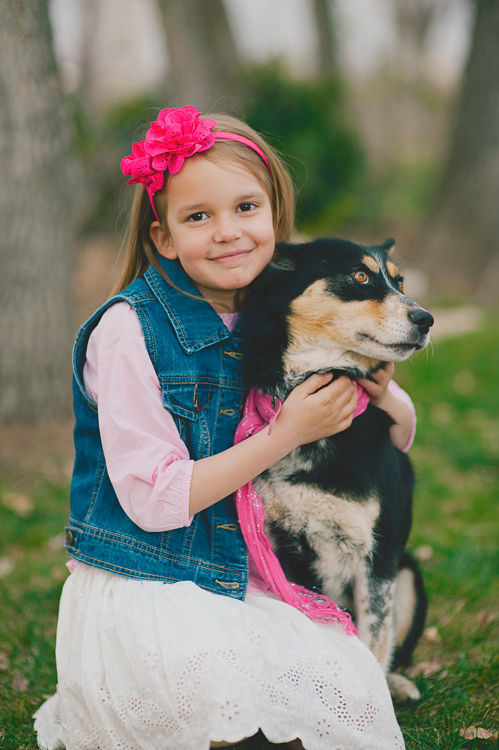
Sometimes kids are nervous and anxious about getting their photos taken. Letting them take a few photos with a beloved pet, favorite stuffed animal, or even Mom or Dad, can really help relieve the pressure, and help them feel comfortable.

186

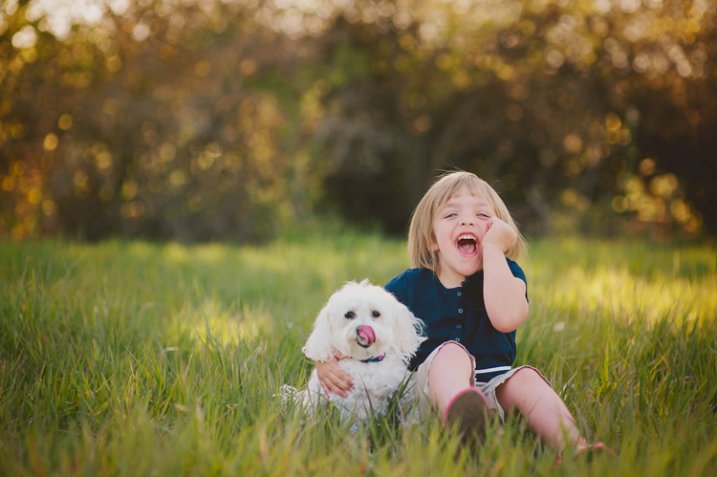
Sometimes the most spontaneous laughs, the happiest smiles, and the most relaxed poses, just happen when they’ve got their buddy with them in the photos. Adding a live wiggly friend can add extra work to getting a photo, but the payoff is often worth the work. Have Mom or Dad help you keep the pet under control, and be quick. Encourage a lot of interaction, and be ready for anything!

3. Work Quickly

161

Kids aren’t going to be patient with a lot of posing cues and tweaks. You can give general direction, and then shoot fast. You could give some quick commands, “Now laugh at the silly caterpillar on my head!”, but don’t take a long time moving their arm just so, or turning their heads just so. Most kids won’t respond well to that, and will quickly tire before you get any good photos.

Have your camera on a fairly fast shutter speed (I like mine at least 1/100th for kids), because they’re not going to hold very still for very long.

Kandice3

4. Some direction is good

You don’t want to stand there, staring the kid down, waiting for them to spontaneously be in a spot with great light, doing something amazingly photogenic. You’ve got to give some direction, but try to do it in a way that makes the whole experience fun and relaxed. Here are some phrases that you could try:

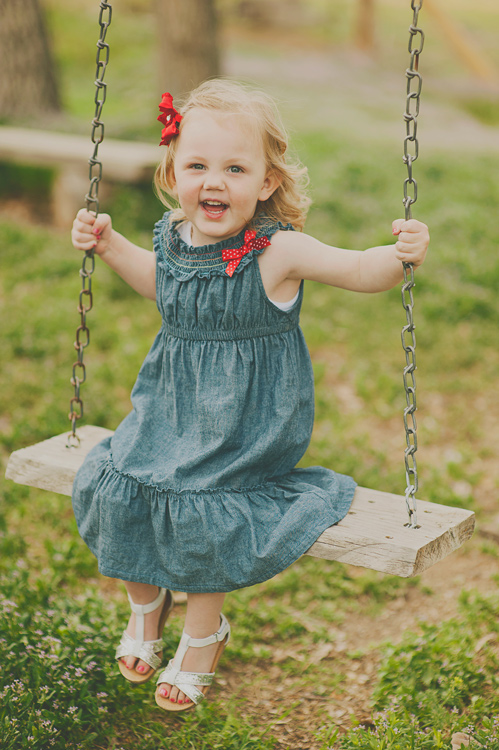
  • Could you come sit on my swing over here? Oh, you are so big! I didn’t know you could climb that high!
  • Can you sit here, criss-cross-applesauce? (Or whatever they call sitting cross-legged. You can ask them what they call it. Most kids learn this in preschool).
  • Let’s hug our freezing cold knees. Your knees say, thank you very much!
  • Where’s your tickle smile? Do I need to find your tickle smile? Is it hiding in your armpit?
  • Do you think you would be brave enough to stand on this rock?
  • Whatever you do, don’t smile. No, I said don’t smile! (Classic reverse psychology).
  • Where should we put your hands? We should put them away somewhere. Do they like pockets?
  • Could you hold this tree up with your back? Oh, thank you! That tree was getting tired of standing up by itself!
  • Let’s play copy-cat. Whatever I do, you do it too.

199

5. Pay attention to personality

Some kids love silly, others are pretty shy. Pay attention to how they react to you, and adjust accordingly. If they’re really rambunctious, you might want to dial down your silly a bit so you don’t get them too wound up. You can still have fun with them, but talk in a calm voice, and don’t ask them to do too many crazy things, because they’ll take what you say and bring it up a notch or two. Before you know it, you’ve got a kid running in circles that isn’t listening to a word you say.

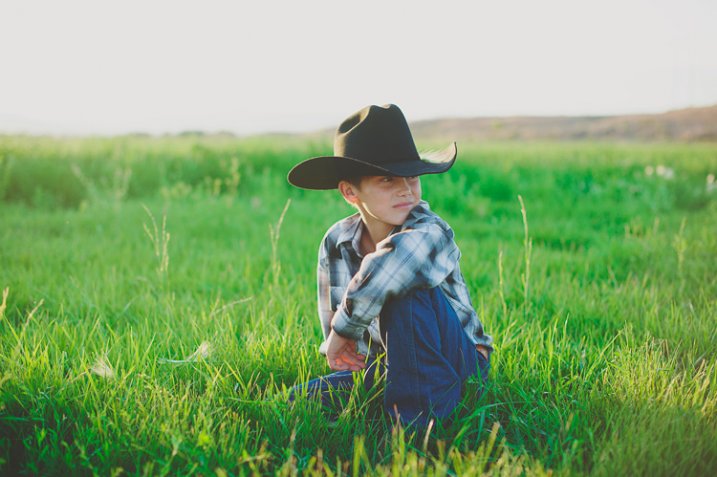
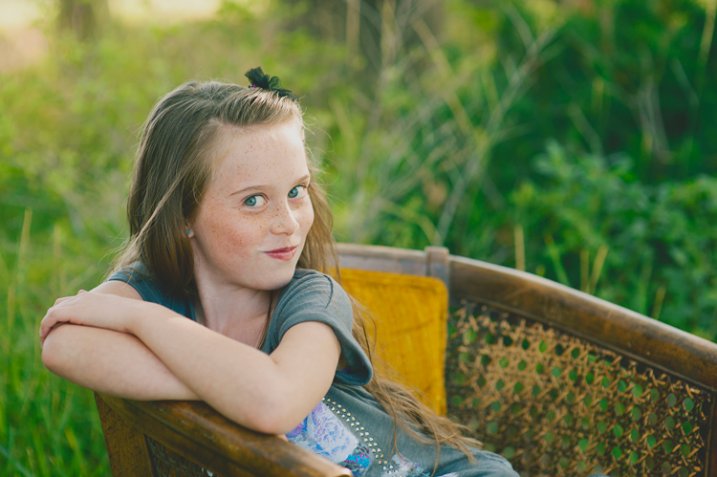
If they’re really introverted, you might want to try to capture more serious photos, and let them be contemplative. Don’t ask them to do things they are obviously uncomfortable with. When they’ve warmed up to you a bit, you may be able to give more requests, but really pay attention to the cues kids are giving you, and focus on capturing who they are, not the canned five poses that you do with every kid.

AB07

I would love to hear your tips for getting great unposed shots of kids! What are the fun things that you say to coax a smile? How do you get their attention, and make photo time fun?

Check out Portrait Posing Tips- How to Help People to Relax and Take Better Photos for more in the posing series.

googletag.cmd.push(function() {
tablet_slots.push( googletag.defineSlot( “/1005424/_dPSv4_tab-all-article-bottom_(300×250)”, [300, 250], “pb-ad-78623” ).addService( googletag.pubads() ) ); } );

googletag.cmd.push(function() {
mobile_slots.push( googletag.defineSlot( “/1005424/_dPSv4_mob-all-article-bottom_(300×250)”, [300, 250], “pb-ad-78158” ).addService( googletag.pubads() ) ); } );

The post 5 Unposing Tips for Kids for More Natural Photos by Melinda Smith appeared first on Digital Photography School.


Digital Photography School

 
Comments Off on 5 Unposing Tips for Kids for More Natural Photos

Posted in Photography


8 Tips For Baby Photography Using Natural Light

12 Jun

Babies. Do you find them a challenge to photograph?

They gurgle, spit, vomit, laugh, cry, smack their hands together… They do a whole lotta things that we don’t need to see forever in a photograph!

But in between all that uncontrollable baby-behaviour are those moments that parents see every day and would love to keep alive forever in beautiful photos – the big eyes, cute smiles, tiny fingers, soft skin, and round cheeks – all those wondrous little details that only come with brand new life. Those are the things that connect to a parent’s heart in the moment, they happen and what they long for once their children have grown up.

00 Copyright Beth Jennings Photography Digital Photography School Baby battle 5932

Ruby, 3 months – ISO 1600, f/2.8, 1/250th

It’s the reason why, in the whirl-wind madness of baby’s first year, that your friend or family member may call on you to ask you to photograph their beloved treasure.

Maybe on one hand you feel honoured to be asked, but also that dreadful, pit-of-the-stomach feeling – do you worry they expect you to swaddle their baby up Anne Geddes style, and photograph him or her with stunning studio lighting and an elaborate set? Do you feel the pressure to create something amazing in the small window of only a couple of hours that you’ll have with them?
How are you going to maximize on the time you’re given, while baby goes through his sleep-awake-feeding cycle?

How are you going to interrupt that cycle to create something amazing, when the last thing you want to do is disturb the baby, wake him up, move him too much and make him cry? How the heck are you going to do it at all?

01 Copyright Beth Jennings Photography Children Photography 2310

Cody, 2 months – ISO 200, f/2.8, 1/200th

Let’s assume you don’t have the studio lighting and equipment to set up in the parent’s home. All you have is you, and your camera, and you’ll work with natural, available lighting. It may sound like it’s not enough, but actually, it’s more than enough if you know how to make do with what you’ve got.

The formula to successfully capturing babies within a limited time frame, one camera and no additional equipment, comes in eight tips total:

02 Copyright Beth Jennings Photography Children Photography 2173

Eliette, 9 months – ISO 1000, f/5, 1/160th

Part 1 Planning

Plan well, and it sets you up for your best chances of success on the day. Follow these steps in the one to two weeks before your shoot:

Step #1 Timing

Babies set their own criteria that rotates around a 1-2 hour schedule of sleeping, eating, crying, playing and nap time. Find out from the parents what that current cycle is, and build your plan from there.

Step #2 Lighting

Will you be photographing at their home? If so, this can include where their baby sleeps in a dimly lit room, by a window in Mom’s arms, perhaps also out in the backyard through dappled light if your shoot will include play time. Stay out of direct sun and just work with soft, diffused lighting. Find out what time of day is best for available lighting in their home and backyard.

Step #3 Clothing

It’s special for the parents to have you there to photograph their baby because it’s something they can’t actually do themselves. Advise them on having their baby’s preferred outfit clean and ready in advance, and a back-up in case of accidents. In order to feel safe and warm, babies also do well with accompanying blankets, bottles, beanies and soft toys. Check that the items all marry well together in terms of colours. If you have some clashes on the day and can’t change it, then shoot anyway and consider black and white for post-production to help strip it back a notch.

Step #4 Schedule

03 Copyright Beth Jennings Photography Children Photography 2195

Anna, 8 months – ISO 400, f/2.8, 1/200th

As best you can, plan the order of mini-events that the parent would like captured. For example, at noon baby will wake up, so you’ll be there from 11:45 and be quietly ready. That will be followed by feeding in the kitchen, and then tummy time in the backyard. If it all comes undone on the day, that’s okay. Just go with the flow of what is presented to you in the natural order that it happens.

Part 2 On the Day

It’s likely you won’t have much time with your subject, so follow these steps to be as prepared as possible before you actually start shooting:

Step #1 Look for the light

See where it is coming from, and where it is falling. For each of the baby pictures in today’s lesson, take note of the light source. Look at the shadows, as they indicate where the light source is positioned. Also observe the catch light (the little reflected glint) in the baby’s eyes which gives life and character. Notice that the pictures here are all created inside by window light, or outside in shaded areas.

Step #2 Compose for the background

Once you’ve established where the best light is coming from, then think about your composition, building up from the background first. See the picture of Cody above? What surrounds him? The rug and white blanket, with small elements of his sister and mother protectively surrounding him.

Step #3 Set up your shoot flow

While the parent is still preparing their baby to be photographed, get your technicals for ISO, shutter speed and aperture established with a test shot, and quick histogram check, to ensure you are achieving technically beautiful captures. Once in place, they are unlikely to change much because the light is constant, and baby won’t move much unassisted. (Shoot Flow is my seven step process for setting up your camera correctly in manual mode).

Step #4 Time to shoot

Once you’ve covered steps one to three, then position the baby (with the parent’s help) in the scene. Time is of the essence now, but it’s also the part you can’t control. All you need to do is be calm and observe what’s actually playing out in front of you in real time. Remember you can move, so keep yourself flexible and mobile. Compose your images, one by one, and keep your camera near your eye, finger at the shutter. When you see something worth capturing, be quick and go for it. One stunning capture is worth so much more than 10 average ones. Imagine your budget is $ 1 a shot and take your time.

04 Copyright Beth Jennings Photography Children Photography 6370

Olivier, one month – ISO 100, f/3.2, 1/160th

What to do with a sleeping baby?

Sometimes you don’t have the luxury to control all the set-up elements. See baby Bent (it’s a German name) below? He was already placed in the stroller and sleeping beautifully, and it would have been cruel to wake him!

  • Where is the light coming from?
  • Is the light play pleasing? Yes it is. It’s soft and softly coats the baby’s face – so the moment is worth capturing.

Then compose the image for what you want to say – in this one, it’s all about those gorgeous cheeks and button chin, as well as the nestling, safe space of the bassinet. So come in close and make your composition for that.

05 Copyright Beth Jennings Photography Children Photography 8987

Bent, newborn – ISO 1600, f/2.8, 1/160th

Technical tips for successful baby photography

Have a look at the technical settings for all of the pictures in this article.

ISO – whatever the light gives you is what you’ll use for ISO. If you’re shooting indoors, place the child nearer to window light than away from it, watching all the time how the highlights are rendering (ie, keep the tones gentle and not too hot).

Aperture – isolating the beautiful child from the background is the perfect approach if you want to make your pictures about their gorgeous details.

Shutter speed – for easy mobility you will likely be hand held when photographing babies, so make sure you are at least using your safe shutter speed of 1/125. Remember that children move quickly, so a faster shutter speed like 1/200 is recommended if they’re up and actively moving around.

06 Copyright Beth Jennings Photography Children Photography 2478

Rupert, 1 year – ISO 1000, f/4, 1/160th

Three final notes for creative observations:

  • Look for the light: Where is it coming from and travelling to? How does it illuminate the subject and where are the shadows?.
  • Observe the composition: Close-up? Horizontal? Low camera angle? Why?
  • The decisive moment of capture: What was happening at the exact moment that the shutter actually fired?.

How do these three elements come together in each photograph?

Have you ever had a friend or family member ask you to photograph their baby? Were you pleased to be asked, or hesitant? How did you handle it? Let us know in the comments section below.

googletag.cmd.push(function() {
tablet_slots.push( googletag.defineSlot( “/1005424/_dPSv4_tab-all-article-bottom_(300×250)”, [300, 250], “pb-ad-78623” ).addService( googletag.pubads() ) ); } );

googletag.cmd.push(function() {
mobile_slots.push( googletag.defineSlot( “/1005424/_dPSv4_mob-all-article-bottom_(300×250)”, [300, 250], “pb-ad-78158” ).addService( googletag.pubads() ) ); } );

The post 8 Tips For Baby Photography Using Natural Light by Beth Jennings appeared first on Digital Photography School.


Digital Photography School

 
Comments Off on 8 Tips For Baby Photography Using Natural Light

Posted in Photography


Natural Luxury: Iceland’s Eco-Friendly Northern Lights Hotel

15 May

[ By Delana in Boutique & Art Hotels & Travel. ]

ion hotel iceland

Iceland has become quite the tourist destination for world travelers thanks to its ethereal landscapes, amazing history, unique culture, and unspoilt views of the Northern Lights. It’s the Northern Lights that draw eco-conscious travelers to the breathtaking Ion Hotel by Minarc Architects.iceland ion hotel

minarc ion hotel

earth friendly luxury ion hotel iceland

The hotel was designed to provide visitors with an unobstructed view of the otherworldy surroundings while itself blending into the landscape. Emerging from the mossy mountain like a natural rock outcropping, the Ion Hotel could almost be mistaken for a body of hardened lava extending out into the mountainous area.

scenic overlook ion hotel

northern lights hotel iceland

glass walled outlook ion hotel iceland

An abundance of floor to ceiling windows were designed to let in natural light while allowing an optimized view of the hotel’s settings. A glassed-in lounge at the building’s terminus lets visitors gaze out on the utterly exquisite Northern Lights after the sun goes down.

eco-friendly ion hotel iceland

locally inspired rooms ion hotel

ion hotel bar

But the Ion isn’t all about looks; it is also a decidedly Earth-friendly place to spend a vacation. The luxury hotel uses locally-sourced materials included repurposed natural materials like lava and driftwood. The huge windows cut down on the building’s electricity consumption by reducing the need for artificial lighting.

interior ion hotel iceland

brown trout ion hotel interior

iceland northern lights ion hotel

Local customs and culture inspired the interior design of the hotel; nods to the country’s history and notable features can be seen in every area of the building. When locally-sourced materials are not available, Fair Trade products are used instead. And as a truly exceptional feature, the hotel utilizes the abundant surrounding natural hot springs as a source of clean geothermal heating and hot water.

Share on Facebook


[ By Delana in Boutique & Art Hotels & Travel. ]

[ WebUrbanist | Archives | Galleries | Privacy | TOS ]


WebUrbanist

 
Comments Off on Natural Luxury: Iceland’s Eco-Friendly Northern Lights Hotel

Posted in Creativity


The Ultimate Guide to Natural Light Photography

22 Apr

Dps covers template 363x448

As a photographer, the most powerful tool you have is natural light

It may be free for the taking – but are you making the most of it to create beautiful images?

Today I’m pleased to announce the launch of our latest dPS eBook – Life in Natural Light by Rachel Devine.

Rachel is someone I have had come to photograph my family – largely because I love the way that she uses natural light to capture special moments of life – so when our team began talking about who we wanted to write this eBook Rachel was the first person to come to mind.

In this beautifully illustrated eBook Rachel reveals her secrets for finding and using natural light to tell unique visual stories, enhance mood and create quality images.

Knowledge, Advice and Inspiration

I love what Rachel and our team have done in producing this eBook. You’re going to come away from reading it with a few really important things:

  • a comprehensive understanding of the different types of natural light (because it’s something that is always changing)
  • practical advice on how to spot, control and harness the power of natural light
  • inspiration to get out and shoot having seen Rachel (and other photographers) beautiful images

What more could you want – theory, advice and inspiration that will transform your approach to this important topic!

NewImage

Our Early Bird Offer to dPS Readers

To celebrate the launch of Life in Natural Light we’ve put together a fantastic little bundle together for you. You’ll not only get this great eBook but bundled with it comes:

  • 16 Lightroom presets for you to use, optimized for natural light and custom-created by Rachel herself
  • A natural light printable worksheet, to use as a quick reference in the field

Normally this bundle would retail for $ 29.99 USD but for a limited time you can pick it up for just $ 19.99 USD.

Learn more about Life in Natural Light and grab your copy today here.

googletag.cmd.push(function() {
tablet_slots.push( googletag.defineSlot( “/1005424/_dPSv4_tab-all-article-bottom_(300×250)”, [300, 250], “pb-ad-78623” ).addService( googletag.pubads() ) ); } );

googletag.cmd.push(function() {
mobile_slots.push( googletag.defineSlot( “/1005424/_dPSv4_mob-all-article-bottom_(300×250)”, [300, 250], “pb-ad-78158” ).addService( googletag.pubads() ) ); } );

The post The Ultimate Guide to Natural Light Photography by Darren Rowse appeared first on Digital Photography School.


Digital Photography School

 
Comments Off on The Ultimate Guide to Natural Light Photography

Posted in Photography


Five Places for Perfect Natural Portrait Lighting

10 Mar

1 portrait lighting

Wouldn’t it be great if you could get beautiful, natural-looking portraits without ever having to use flash?

Well, perhaps you can. There are many different locations, often closer than you think, where you can find the right lighting for great looking portraits. Often they’re missed because we might not know where to look.

Generally, your best strategy is to look for what is called Open Shade. Ideally, you are looking for a situation where the stronger overhead light is being blocked by a structure, either man-made or natural.

2 open shade diagram

There are a lot of variables to pay attention to, but with a little practice you begin to recognize good natural lighting situations that are right in front of you.

1. Find a gazebo or front porch with a roof

This is a particularly good technique for you to use when it’s sunny outside in the middle of the day, but it can work on overcast and rainy days as well.

It’s often a bad idea to pose your subject out in the direct sun, particularly when it is up high in the ske. That kind of lighting can produce harsh shadows, as well as cause your subject to squint their eyes.

I use the front porch location quite a bit when photographing high school seniors in the middle of the day. An overhang of any sort can block strong overhead light and allows your subject to be lit with the softer surrounding bounce lighting.

3 front porch lighting

In the case above, I also used a large white collapsible reflector, off to the right side, to provide additional fill-light with this handsome young man. A large aperture was used to help create an out of focus background.

If you have no porch available you can get your model to help create a good lighting situation by using a prop like a wide-brimmed hat for a close-up head shot.

2. Under an umbrella

Andrew Menage

By Andrew Menage

Using an umbrella can work well to protect your subject from both the rain, and overhead lighting. Note that the color of the umbrella will have a significant effect on the color of the light that is illuminating your subject. A black umbrella is neutral in color and will block almost all of the light from above.

3. Near a window

Just because you may not be able to shoot outside doesn’t mean you still can’t use the outdoor light to create a natural looking portrait. There is a right way and a wrong way to do this.

5 window lighting

6 window lighting diagam

Make sure that most of the window is forward of your subject. The larger the window, the softer the lighting. The reflector can be any light colored object that is fairly neutral in color. The closer it is to your subject, the more fill light it supplies.

4. Find a bridge or an overpass

If you shoot in a more urban setting, you’ll likely have bridges or overpasses in your area. The photo below was taken at the entrance to a pedestrian underpass. Not only did we get good portrait lighting, we also got the model out of the wind and snow.

7 under bridge lighting

One important thing to remember is to watch your background. Although I was generally happy with the pose and the lighting, I could have done a better job controlling the background in this portrait.

5. Anywhere at sunset

This is one time when you do want the sun in the face of your subject. You only have a few minutes of this sweet light when most, or all, of the sun has disappeared below the horizon.

8 diffused portrait lighting sunset

Direct sun can be too bright at the beginning of sunset. You may have to wait until just after sunset to get a softer look. In the beach photo above, the light was nicely diffused by a few clouds on the horizon between my subjects and the setting sun.

More ways to find places with great natural portrait lighting

Similar to the way you use an umbrella, you can create your own overhead roof by having an assistant hold a light blocker above your subject. This could be anything lightweight, a large piece of cardboard, or even one of the a collapsible, panels like the ones shown below.

9 Photodiox diffusion panels

There are two factors that dramatically effect how well this technique works.

The first is how far back your subject is posed underneath the covering object. If you pose her too far back, you may not have enough light to get a nice photograph. If she is too far forward, you may get too much overhead lighting.

Secondly, how high the shading object is above your subject’s head affects how the light will illuminate their features. The best way to master this technique is to play around and experiment.

It’s always a great idea to shoot a few variations in several locations, and adjust exact placement of your subject. You’ll be able to learn a lot from your mistakes and your successes.

googletag.cmd.push(function() {
tablet_slots.push( googletag.defineSlot( “/1005424/_dPSv4_tab-all-article-bottom_(300×250)”, [300, 250], “pb-ad-78623” ).addService( googletag.pubads() ) ); } );

googletag.cmd.push(function() {
mobile_slots.push( googletag.defineSlot( “/1005424/_dPSv4_mob-all-article-bottom_(300×250)”, [300, 250], “pb-ad-78158” ).addService( googletag.pubads() ) ); } );

The post Five Places for Perfect Natural Portrait Lighting by Bruce Lovelace appeared first on Digital Photography School.


Digital Photography School

 
Comments Off on Five Places for Perfect Natural Portrait Lighting

Posted in Photography


The Natural Light Cycle for Photographers

08 Mar

Graphic showing best times of day for photography

Natural light is what landscape photography is made of. Other forms of photography rely heavily on flash, but most landscapes rely entirely on the sun’s rays as their light source. That natural light from the sun is changing every second of the day. A picture taken at 9:00 a.m. will look fundamentally different than picture taken at 7:00 a.m., even if it is a picture of the exact same subject, from the exact same angle, using the exact same camera settings and focal length. Therefore, understanding these changes that occur throughout the day is critical to improving your landscape photography. By understanding these differing lighting conditions, you will know how and when to be set up and ready to take your landscape photos.

These changes in natural light don’t just affect the overall lighting and exposure level of your photos, but also things like color and contrast. Different lighting will lend itself to different camera effects. So in this article we will take a quick walk through the times of day for the landscape photographer, focusing on the unique advantages and challenges of each.

Morning

Let’s start with the morning. An hour on either side of sunrise can be a bonanza for the photographer. Unfortunately for your sleep patterns, the photographer’s day does not start at dawn, but well before it.

Some of the best photo opportunities occur before the sun is up. During this time, the sky is beginning to brighten, but the sun is not yet over the horizon. You will initially need to overcome the low light levels, meaning you will need a tripod and a remote shutter release.

But with that hurdle overcome, there are distinct advantages to shooting before the sun comes up. You will not face overly harsh contrast, or a dynamic range problem since everything in your view will be somewhat dark. Further, because of the indirect angle of the sun’s rays, you will be treated to colors in the sky that you won’t see during the day.

Galveston

The indirect rays of the sun at sunrise and before can provide you with a sky full of interesting colors.

Twilight

This time before the sun comes up is commonly referred to as twilight. You will want to get to know it better if you aim to improve your photos. Twilight is a rather broad term that can encompass different conditions. so it is further broken down into three segments. The actual terms and specifics below are not that important to your photography, but what is important is that you understand what is coming up next as you are out shooting.

  • Astronomical twilight: During this time, it is still dark, but the indirect rays of the sun are just starting to brighten the sky. The sun will be between 12 and 18 degrees below the horizon. Stars are clearly visible and the sky is dark overall. To most of us, this will not be much different than nighttime. Therefore, when photographing during this time, you will definitely need a tripod and remote shutter release.
  • Nautical twilight: The is the period of time when everything is fairly dark, but it has brightened up enough that you can see the horizon. The sun is between 6 and 12 degrees below the horizon. You can still see some stars, but the sky is noticeably brighter, particularly near the horizon line. This is when you will often see a blue tinge to the sky. You will still need a tripod, but you can now probably capture detail in the foreground as well as the stars in the sky.
  • Civil twilight: This is the period of time just before the sun has come up (or just after at has set in the evening). It is when the sun is between 0 and 6 degrees below the horizon. The point for the photographer is that it is still before sunrise, but everything around you is pretty bright. You can see everything and you might not even need a tripod (although I would recommend you keep using it ).

Twilight

The times and durations of the phases of twilight will depend upon your location and time of year. There are a variety of apps that will give you the exact times.

Blue Hour

It is during twilight (typically during nautical twilight) that a phenomena called the blue hour occurs. At this time, the sun is still a good distance below the horizon. Most of the sun’s red rays are shot into space, but a relatively high percentage of the blue rays enter the Earth’s atmosphere. The indirect light takes on a predominantly blue color. This lasts about 30-40 minutes and ends about 15 minutes before sunrise. This is a treasured time for many landscape photographers, so make sure you are in position at least a half hour before sunrise.

During portions of twilight, there is enough light to see the foregound, but you can still see the stars and the moon.

Sunrise

After twilight comes sunrise, which needs no introduction. The landscape is brightened by this time, but the sun’s rays are tempered by the fact that portions of the sun are still behind the horizon and the rays are coming through a lot of the Earth’s atmosphere before they reach you. The sky will typically have a warmer color to it.

What’s more, you can often put the sun directly in your picture. You can also make the sun’s rays more clear and even add a bit of a starburst effect to the sun by stopping down your aperture. Make sure your aperture is at least f/16 and perhaps even f/22 (at the risk off some diffraction).

After sunrise

The hour or so after dawn remains a good time to photograph. During that time, the sun is still low in the horizon. Therefore, the sun’s rays are coming through more of the Earth’s atmosphere, which diffuses the rays and cuts down on harsh contrasts. So even though the sun is fully in the sky by this point, it remains a good time for photography.

Marina-2

After that, the sun is getting higher in the sky and you get into the problems of midday photography.

Afternoon

The late morning and most of the afternoon is considered by many to be the worst time for photography. Many photographers simply put their cameras away during this time. It is the time of harsh contrast and black shadows. But you need not give up entirely during this time. There are a few things you can do to improve your photos.

The first thing you can do is use a polarizing filter. Polarizers work by filtering out certain light rays that come to the camera at different angles. The light that enters your camera is often more diffuse and colorful. The best use for our purposes is making skies a rich, dark blue (although polarizers are also quite handy for cutting down on reflections). Polarizing filters actually work the best around midday when the sun is directly overhead. Be sure to rotate your filter to achieve its maximum (or desired) effect.

Ben-2

Mid-afternoon photos can often benefit from the use of a polarizing filter.

Another thing you can do to combat the afternoon sun is convert your photos to black and white. As mentioned previously, one of the primary problems with shooting during the middle of the day is the high contrast and harsh shadows it creates. However, high contrast is actually a benefit in black and white photography, so the harsh light of midday can sometimes work to your advantage.

Windmill-2

Photos taken during the middle of the day often benefit the most from a conversion to black and white.

If you must photograph in the middle of the day, oftentimes cloudy days work best. The clouds cut down on the harsh shadows, they also add some texture to the sky. Try to work them into your photos.

Evening

The evening is where you will encounter some of the best conditions for photography. It is essentially the same as you experienced in the morning around sunrise, but in reverse order. It starts with the sun dipping into the horizon, which results in some interesting changes in light quality.

The light in the late afternoon often starts to take on a yellow or reddish appearance.

Golden hour

As the Sun begins to set, the light you are receiving must travel through more of the Earth’s atmosphere to reach you. It is therefore more diffused by the time it reaches you. The light also takes on a warmer, more golden quality.

The culminates just before sunset, which is called the Golden Hour. Actually it is not really an hour, but usually last about 30 -40 minutes (length varies depending on your location relevant to the equator). It starts just before sunset and ends about 20 minutes after the sun is down. Photographs taken during this time benefit from having plenty of light, but it is more diffused and softer to avoid harsh shadows. As the name suggests, the light has a warmer hue that can make for dramatic photos.

Sunset

Sunset is another time that photographers intuitively want to photograph. The conditions are well-known to everybody, so here I just want to focus on a few things you can do to make your sunset pictures look better.

The first thing you can do is slightly underexpose your photos. That will be welcome news if you are not using a tripod, since you are rapidly losing light during this time. Underexposing will allow you to shorten your shutter speed and avoid camera shake (hopefully), and will generally make the colors in the sky much more vibrant.

At sunset, due to the angle of the sun’s rays, there is usually no longer any direct light on the foreground. That tends to make everything black. You can deal with that in one of two ways, either by accepting it, or compensating for it:

  • You can accept the black foreground by creating silhouettes. This is commonly done with people, but it can work with a variety of subject matter. To do this, just meter the light of your scene from the sky. The brighter sky will be properly exposed and the foreground elements will be black.
  • You can attempt to compensate for the lack of direct light on the foreground by using a graduated neutral density filter. This filter will darken the sky without affecting the foreground. Inevitably, you will need to compensate by adding exposure to the whole picture (since the filter made the sky darker and the foreground was already dark). The upshot is that this filter will tone down your sky and cause the foreground to brighten.

After sunset

It is a huge mistake, which I see lots of photographers make, to pack up and head home right when the sun dips over the horizon. After sunset, you will continue to be treated to favorable light conditions, and in fact, some of the best conditions may follow. These will be the same as already discussed in the Twilight section above. You will also be treated to another Blue Hour, when the sun is considerably over the horizon and the diffused blue rays dominate.

Lakehouse

In the final stages of twilight, the scene often looks very much like a night shot.

Night

Finally, don’t forget about night photography. It is half of the day, after all. Some of the most dramatic pictures can be taken during this time. Further, you do not really need to worry about changing light conditions, making this a more relaxing time to photograph.

If you want to capture stars or otherwise needed to be true night time, be sure to wait a couple of hours after sunset. It will take a while for the sun’s rays to fully disappear from the atmosphere.

Conclusion

Photography is all about anticipation. It is about putting yourself in the best position possible to get a great shot. When it comes to landscape photography, much of that anticipation has to do with changes in the light. Those changes come remarkably quickly, especially around sunrise and sunset. By understanding the constantly changing conditions addressed here, you will better be able to anticipate the light and put yourself in the best position to get that great shot. I hope this discussion helps you get it.

googletag.cmd.push(function() {
tablet_slots.push( googletag.defineSlot( “/1005424/_dPSv4_tab-all-article-bottom_(300×250)”, [300, 250], “pb-ad-78623” ).addService( googletag.pubads() ) ); } );

googletag.cmd.push(function() {
mobile_slots.push( googletag.defineSlot( “/1005424/_dPSv4_mob-all-article-bottom_(300×250)”, [300, 250], “pb-ad-78158” ).addService( googletag.pubads() ) ); } );

The post The Natural Light Cycle for Photographers by Jim Hamel appeared first on Digital Photography School.


Digital Photography School

 
Comments Off on The Natural Light Cycle for Photographers

Posted in Photography


How to Get More Natural Smiles in Child Photography

05 Mar

A natural smile – the holy grail of child photography.

Angie baxter 001

A genuine, heartfelt smile is more than just turning up the corners of the mouth. A real smile radiates from your whole face, and particularly for children, is often felt with the whole body. Not only is a forced and fake smile easy to spot in photographs – we know that wearing a fake smile and having it photographed doesn’t feel too good at the time, and it doesn’t feel great for children either.

So while we want to photograph a child’s beautiful smile, we also want them to enjoy the process of being photographed. And as the photographers, we want to have a good time photographing them too.

Angie baxter 004 1

There is so much to discover with children – all their favourites, their take on issues big and small, how they feel about themselves, their family and this funny old world. Children are cheeky, fun, creative, enthusiastic and curious – they are also clever and can tell when someone is not genuinely interested. So make sure your heart and intention is in the right place.

If your small subject is feeling uncomfortable it will be impossible to garner a sincere smile. Placing emphasis on creating an honest connection with children so they feel at ease will lead to them sharing their best selves – most of the time.

Angie baxter 006

Following are four conversations that I love to have with kids that always result in joyous laughter and real smiles.

#1 Discovering their favourite toy or character

Favourite toys and security items are often important for small children. If your subject has a special toy (i.e. “Bunny”), I will use that as part of our conversation.

  • Does Bunny have a mouth?
  • Does Bunny have a belly button?
  • I wonder where Bunny sleeps. Does she sleep in this shoe? (holding up their shoe)
  • Hmm, does she sleep in the fridge?
  • I know, she must sleep in bed with Mummy and Daddy?

Angie baxter 005 1

or alternatively, Buzz Lightyear may be their favourite character.

  • Does Buzz Lightyear have Weetabix for breakfast?
  • Does Buzz go to school?
  • Does Daddy have Buzz Lightyear underpants?

Closed-ended questions are great for this age group so they don’t have to think too hard and can just nod or shake their head, and smile and giggle along.

#2 Animals

Angie baxter 003 1

Animals are something kids can easily relate to. I like to make the questions silly and fun.

  • If you could have any animal as a pet, what would it be?
  • What are all the things you know about this animal?
  • What would be a good name for this pet?
  • If you had a pet donkey, what would you name him?

I play around with lots of animals for that last question – if you had a pet giraffe, or caterpillar, or hippopotamus. Choosing animals that are not usual pets.

#3 When you grow up

Angie baxter 004 1

Conversations about jobs, growing up, and the work their parents do always get good reactions. Your questions can be light-hearted or more serious, depending on the child’s age and personality.

For the more carefree child, I might start with:

  • When you grow up would you rather be a ballerina or a princess? (for boys)
  • When you grow up would you rather be a mum or a dad? (for girls)
  • When you grow up would rather be a frog or a snake?

Angie baxter 007

For an older, more serious child you can ask things like:

  • Who has the best job in the world?
  • What job would be the most boring job?
  • What does Dad do when he gets to work?
  • When you grow up, would you rather be a chef or a dancer? Or, a builder or a truck driver?

It can be easier for kids if you give them an either/or question rather than just saying, “What do you want to be when you grow up?” Asking kids to think of a detailed answer on the spot can be a bit difficult for them.

#4 Family rules

Angie baxter 008 Angie baxter 009 1

This is also a really fun conversation topic – particularly for the parents who are listening in.

  • If you were in charge of your family, where would you eat dinner every night?
  • If you had to set the bedtime, what time would you go to bed?
  • If you had to choose the family breakfast, what would you have?
  • Who is the boss of your family?”

When photographing children, take your time and enjoy being with them. The time spent before you even pick up your camera is invaluable to gauge their personality – are they outgoing, reserved, tired, hyperactive, shy, giggly? Make intuitive decisions as to which conversation style will work best for each child. This gets easier with experience, so spend as much time with children as you can ,and fun conversations with them will soon become effortless.

googletag.cmd.push(function() {
tablet_slots.push( googletag.defineSlot( “/1005424/_dPSv4_tab-all-article-bottom_(300×250)”, [300, 250], “pb-ad-78623” ).addService( googletag.pubads() ) ); } );

googletag.cmd.push(function() {
mobile_slots.push( googletag.defineSlot( “/1005424/_dPSv4_mob-all-article-bottom_(300×250)”, [300, 250], “pb-ad-78158” ).addService( googletag.pubads() ) ); } );

The post How to Get More Natural Smiles in Child Photography by Angie Baxter appeared first on Digital Photography School.


Digital Photography School

 
Comments Off on How to Get More Natural Smiles in Child Photography

Posted in Photography


How to Make an Architecture Space Look and Feel Natural in a Photo

24 Feb

The New Age of Architectural Photography

Gone are days of interior photos looking like furniture showrooms. So, too, are the days of exterior photos being full of uplighting accents and HDR effects.

NewAge2

Today, architectural photography is all about lifestyle. The appeal of luxury has shifted away from the material luxury and flashy spaces of high society to an intangible luxury that transpires during quiet moments with loved ones. It’s more about quality of life than quality of goods.

When shooting interiors, your goal as photographer is to create a space that makes the viewer want to be there. You want them to imagine themselves in that space, and most importantly, to escape to it.

As a photographer, you not only have to read a space for its light, material, and flow, but you also need to feel the space. Consider a sleek urban condo in a downtown high-rise versus a historic Victorian house in family neighborhood versus a new construction in a suburban development. Each architectural development stirs up different feelings, and these are what you want to capture in your photography.

So how do you transfer these feelings into your images? Here are four steps to get you started.

1. Set the Stage

Focus on the personality and live-ability of the space. Luxurious bouquets of roses set in an empty room at sunset won’t do the trick. Instead, emphasize the day-to-day moments — an open book and some cushions on the seat of a bay window, a comfy throw blanket draped over the couch, or jewelry laid out on the dresser of a walk-in closet.

NewAge1

2. Mixing Cleanliness with Reality

Yes, the space should be clean. Yes, it should be cleaner than usual. However, it shouldn’t feel sterile. You want it to feel lived in, but not dirty.

All flat surfaces should be wiped down and cleared, except for staging items. Every light fixture should be in working order since they’ll be turned on to ensure the space has adequate lighting. Floors should be mopped or vacuumed. Any areas where the carpet or hardwood floors look old and worn, such as in high traffic areas, should be covered up with inexpensive area rugs. Be aware of any clutter that we get used to in our day-to-day life. A small pile of clutter goes a very long way in photos, and so all those stacks of mail, magazines, and books should be tucked away out of sight.

NewAge3 2

3. Use Optimal Lighting

A well-lit space is crucial! You want to create a look that feels natural, happy, and real, so use all of the light resources available to you. Photos should be shot during the day so you can take advantage of any soft sunlight that pours in.

As a secondary light source, be sure to turn on all of the lights. Yes, all of them. They’ll be turned on to give the space a warm and inviting feel. Long exposures shot on a tripod help brighten up shadows a bit, but you can also use a flash to bounce light off walls and ceilings to fill in shadows.

NewAge4

4. Vary the Photo Set

Wide shots are vital and dramatic and show the overall space well. However, details can be just as compelling.

Materials and traditional luxuries themselves are not important to show in detail. Rather, you must show the personality in the details. Staged items are perfect for shooting close-ups and setting the tone.

That pen and paper on the desk. The pastry and coffee cup on the side table next to an arm chair. The puzzle in progress by the bay window with a view. The tea kettle steaming with boiling water on the stove. These touches take your shots from a simple set of interior photos to the story of a lifestyle.

What are your tips for giving architectural photography a natural look and feel? Share your thoughts and photos in the comments section below.

googletag.cmd.push(function() {
tablet_slots.push( googletag.defineSlot( “/1005424/_dPSv4_tab-all-article-bottom_(300×250)”, [300, 250], “pb-ad-78623” ).addService( googletag.pubads() ) ); } );

googletag.cmd.push(function() {
mobile_slots.push( googletag.defineSlot( “/1005424/_dPSv4_mob-all-article-bottom_(300×250)”, [300, 250], “pb-ad-78158” ).addService( googletag.pubads() ) ); } );

The post How to Make an Architecture Space Look and Feel Natural in a Photo by Natalia Robert appeared first on Digital Photography School.


Digital Photography School

 
Comments Off on How to Make an Architecture Space Look and Feel Natural in a Photo

Posted in Photography


Keep Your Night Light Looking Natural

20 Feb

Just ’cause the sun disappears after a certain time of day doesn’t mean your camera has to!

If you prefer using natural light in your photos, then shooting after dark (both indoors and out) can feel a little intimidating.

That’s why we’re here with four solutions for tricky nighttime lighting! You’ll make friends with flash, tripods, and everything else you need so your photo-taking can continue late into the night.

Say goodbye to camera curfews. Night owls, rejoice!

4 Tips For Taking Photos After Dark

(…)
Read the rest of Keep Your Night Light Looking Natural (536 words)


© Taylor for Photojojo, 2015. |
Permalink |
No comment |
Add to
del.icio.us

Post tags:


Photojojo

 
Comments Off on Keep Your Night Light Looking Natural

Posted in Equipment


Natural Looking HDR in Photoshop and Lightroom in 5 Easy Steps

06 Feb

HDR (High Dynamic Range) photography was developed out of necessity to overcome limitations of photography equipment, mostly in digital cameras’ sensors. From the beginning, the technology was intended to make photographs as close as possible to human experience by bridging the gap between what the human eye perceives, and what the digital camera can actually capture.

NaturalLookingHDR Photo 1

Montreal, Canada – HDR processed, five exposures, tripod.

Think of HDR as a sophisticated, software based, ND (Neutral Density) filter. Instead of placing it in front of the lens at the moment of capturing photos, HDR allows you to accomplish it in post-processing. It sounds practical and convenient, right? There is no need for extra equipment and you can work on extending the dynamic range of the scene without rush, at your own pace, in the comfort of your home.

NaturalLookingHDR Photo 2

Montreal, Canada – HDR processed, three exposures, hand-held.

Why is HDR photography getting such bad press lately?

I believe that the main reason for this is the misconception in defining what HDR actually is. Somehow, there is a notion, that HDR is a new style in photography, which is completely false. HDR is not a style or genre; it is a technique of post-processing. It is a tool. The way the final photo looks is absolutely up to you, as you have full control over the entire process.

There are many different tools and techniques for creating HDR photographs and each one has its own advantages and limitations. If you are going for a surrealistic, edgy look in your images, Photomatix is your best friend.

But, if you are like me and your main goal is to achieve images that are as natural as possible and reflect the best aspects of the original scene, I definitely have a solution for you – one that I’ve successfully used for years and love.

On my blog, dedicated to travel and landscape photography (see my bio below for a link), you can find a detailed breakdown of my shooting and processing techniques for almost every photograph. In most cases where I used this technique, it is not easy to tell if the photo was processed as HDR unless you read the description. They look that natural.

NaturalLookingHDR Photo 3

Big Sur, California – HDR processed, three exposures, tripod.

The technique is somewhat underappreciated, but it is very powerful and easy to master. The beauty of it is that you do not have to learn additional software and there is no learning curve. You use familiar and powerful Adobe tools, Lightroom and Photoshop, and nothing else.

NaturalLookingHDR Photo 4

Cayo Coco beach, Cuba – HDR processed, three exposures, tripod.

This technique leverages the power of 32-bit processing in Photoshop HDR Pro, the module of Photoshop that was established in version CS3.

Below is the infographic that illustrates the schematic view of the entire process, from the time you take the photo to the moment you are ready to save the final image.

NaturalLookingHDR Photo 5

The Technique

1. Bracketing Photographs

Before you can start processing photos for HDR you need to take a series of bracketed shots with different exposure values. Normally, you take between three and five shots in each series but, in extreme lighting conditions (example: shooting directly into the sun), you might need to take anywhere from seven to even nine shots.

Ideally, you take multiple shots on a tripod but, since Photoshop has an extremely effective alignment tool, it is possible to take hand-held photos and let Photoshop align them.

2. Lightroom: Preprocessing

This is very simple step that should not take longer than one to two minutes. Import photos into Lightroom and only apply the following adjustments in the LENS CORRECTIONS panel:

  • Enable Profile Corrections. Lightroom detects the model of your lens and applies corrections to fix any type of distortions.
  • Remove Chromatic Aberration. Lightroom automatically cleans the edges in your photographs.

3. Photoshop: Tone Mapping

This is an almost completely automated process and should not take longer than two minutes.

In Lightroom, select the bracketed photos that you want to merge to HDR. Right click (option click on Mac) and go to Edit In > Merge to HDR Pro in Photoshop.

NaturalLookingHDR Photo 6

Your bracketed photos will open in Photoshop and will be placed on separate layers. Immediately, the complex algorithm will be applied in order to align the layers. This comes in handy if you took the photos hand-held, without a tripod.

Next, the HDR Pro interface is triggered. All you have to do here is select the tone mapping mode. Opt for the 32-bit option to ensure that you preserve as much information as possible from the original images. Click OK.

NaturalLookingHDR Photo 7
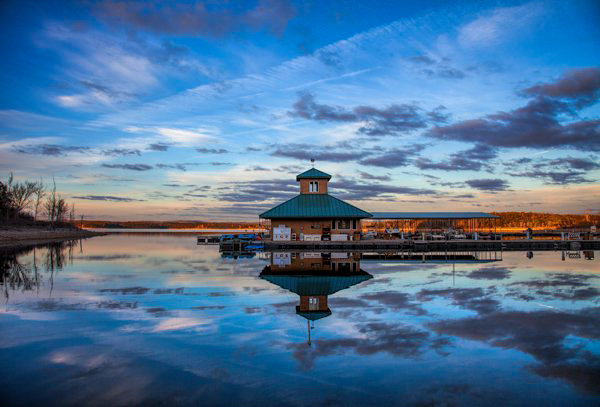
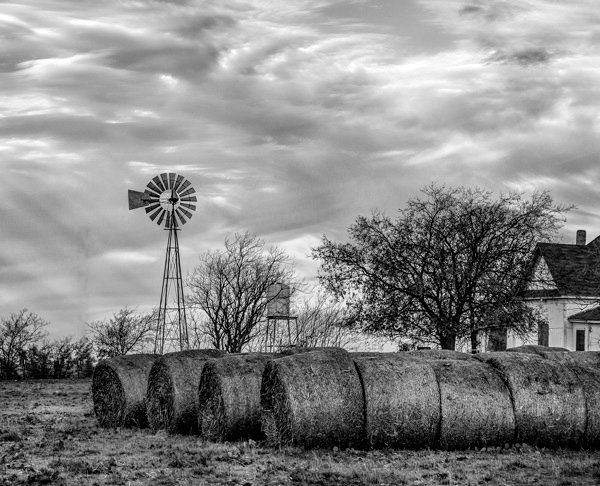
HDR Pro will merge the bracketed photos into a new 32-bit image and open it in Photoshop’s main interface. The tone mapping is complete. All you have to do now is save the document (File > Save). The new HDR image will be saved and automatically imported back into Lightroom. You can find it next to the original bracketed photos.

4. Lightroom: Main Processing

This is the most exciting step. You edit the newly tone mapped HDR image with enormous bit depth (32-bit) to give it the desired look and feel you want. Use standard Lightroom workflow to achieve your artistic vision.

Here is the photograph I took in Cuba and processed using this technique. Below the photograph, you can find a screenshot of the Lightroom interface with all of the adjustments I performed in order to achieve the final look.

NaturalLookingHDR Photo 8

Cayo Santa Maria, Cuba – HDR processed, three exposures, tripod.

NaturalLookingHDR Photo 9

At this point, HDR processing is done. If you are happy with the way your photo looks, you can save it as a JPEG directly from Lightroom (“Export” in Lightroom).

5. Photoshop: Final Touches (Optional Step)

In some cases, HDR photos require additional edits, such as selective sharpening, noise reduction and HDR artifacts cleaning. Photoshop is your best friend for selective editing.

Select the HDR photo in Lightroom, right click and select Edit > Edit in Adobe Photoshop. In Photoshop, do what is necessary to improve your final photo. In the majority of cases, all you will need is to reduce noise and nothing else.

That is it. This is how you achieve natural looking HDR images in five easy steps or less.

NaturalLookingHDR Photo 10

Manhattan, New York – HDR processed, three exposures, hand-held.

PROS of 32-bit HDR processing in Photoshop HDR Pro

  • It does not require stand-alone HDR software
  • The learning curve is minimal
  • Tone mapping and editing are completely two separate processes and it is easy to achieve a natural look
  • This technique takes advantage of 32-bit editing

CONS of 32-bit HDR processing in Photoshop HDR Pro

  • In some cases when there are multiple moving objects in the scene (trees, leaves, water), it can cause artifacts that require additional cleaning.

Have you tried this method before? How do you process your HDR images? Please share in the comments below.

googletag.cmd.push(function() {
tablet_slots.push( googletag.defineSlot( “/1005424/_dPSv4_tab-all-article-bottom_(300×250)”, [300, 250], “pb-ad-78623” ).addService( googletag.pubads() ) ); } );

googletag.cmd.push(function() {
mobile_slots.push( googletag.defineSlot( “/1005424/_dPSv4_mob-all-article-bottom_(300×250)”, [300, 250], “pb-ad-78158” ).addService( googletag.pubads() ) ); } );

The post Natural Looking HDR in Photoshop and Lightroom in 5 Easy Steps by Viktor Elizarov appeared first on Digital Photography School.


Digital Photography School

 
Comments Off on Natural Looking HDR in Photoshop and Lightroom in 5 Easy Steps

Posted in Photography