Tag: most

  • Our Most Popular Gifts From Christmases Past

    OooOooo, the Ghost of Photojojo Christmases Past here.

    I came to show you gifts that are guaranteed to be crowd pleasers. In fact, they already are (have been/will continue to be).

    Our most popular gifts from Photojojo Christmases past!

    To prove that I am a friendly ghost. I’m going to unlock *FREE USA SHIPPING* FOR EVERYONE! But, only if 1000 people visit the Shop at once, by noon PST. Visit Photojojo.com to boost the visitor count and see how close we are to free shipping.

    Smartphone Spy Lens

    Take photos on the sly with this 90° periscoping lens. → More

    TiPhone Light Studio

    Dial up any color under the sun with app controlled LEDs. → More

    Smartphone Film Scanner

    Scan 35mm film directly to your phone to edit and share. → More

    Pop-up Flash Bounce

    Turn your nasty pop-up flash into lovely even lighting. → More

    Phone Stabilizer and Tripod

    The SlingShot is a stand + handle for crisp photos + vids. → More

    The Polaroid z2300

    This digital camera makes prints at the push of a button. → More

    Rotating Camera Stand

    Take pro-quality 360° timelapse videos w/ the Camalapse. → More

    Zigzag Camera Strap

    A jaunty addition to any photographers ensemble. → More

    iPhone Instant Cam Decal

    Your iPhone = analog awesome w/ an easily applied decal. → More

    Ring Flash Adapter

    Turn your regular ol’ pop-up flash into a defused ring flash. → More

    iPhone SLR Lens Mount

    Use your DSLR’s lenses on your phone. ON SALE! $ 70 off → More

    Macro Lens Band

    Taking stunningly detailed super close shots on any phone. → More

    Camera Lens Mugs

    Drink your very favorite bevvy out of your favorite lens. → More

    Jelly Camera Phone Filters

    Add starburst, prism & wide angle FX. ON SALE! $ 8 for 3 → More

    Instax 210 Wide Camera

    An Instant Camera that makes big ol’ wide prints. → More

    Polaroid SX-70 Cameras

    Iconic polaroid cams in prestine working condition. → More

    Magnetic Photo Ropes

    Hang your 8 best photos anywhere with just one tack. → More

    White Balance Lens Caps

    The simplest way to white balance your photos. → More

    Seat Belt Camera Straps

    Recycled seat belts, keep your camera safe. → More

    Photojojo! The Book

    A book full of insanely great photo projects and DIY ideas. → More


    Polaroid Z340 Cam

    $ 249

    $ 199 BUY!


    Holga iPhone Lens

    $ 30

    $ 25 BUY!


    iPhone Video Slider

    $ 95

    $ 60 BUY!


    Photoshop Magnets

    $ 25

    $ 20 BUY!


    Vintage Camera Mobile

    $ 35

    $ 25 BUY!


    Pennant Party Box

    $ 25

    $ 20 BUY!


    See 100+ more amazing gifts…


    © laurel for Photojojo, 2013. |
    Permalink |
    No comment |
    Add to
    del.icio.us

    Post tags:


    Photojojo

  • Our 21 Most Viral Photography Tutorials This Week

    This week has been a busy week on our social media accounts with unprecedented amounts of sharing of dPS articles. In fact the last couple of weeks have seen us smash our previous traffic records.

    So we thought it might be fun to do a wrap up of the most viral dPS photography tutorials being shared on our different accounts. As you’ll see the lists are quite different depending upon which social media account you follow!

    Top 7 FaceBook Shares – Follow dPS on Facebook

    Facebook-logo-ICON-02

    1. 21 Settings, Techniques and Rules All New Camera Owners Should Know
    2. 17 Forced Perspective Technique Examples
    3. Five Photography Bad Habits to Quit Today
    4. Beauty and Portraits on a Budget
    5. 9 Crazy Cross Eye 3D Photography Images and How to Make Them
    6. 10 Tips to Take Great Family Portraits
    7. 30 Popular DSLR Lenses Among Our Readers [November 2013]

    Top 7 Pinterest Shares – Follow dPS on Pinterest

    Pinterest-Logo-Vector-by-Jon-Bennallick-02

    1. Posing Guide: 21 Sample Poses to Get You Started with Photographing Couples
    2. The Ultimate Guide to Learning how to use Your first DSLR
    3. Advanced Tips for Tack Sharp Images
    4. DIY Lighting Hacks for Digital Photographers
    5. Three Lenses Every Photographer Should Own
    6. 6 Techniques for Avoiding Camera Shake
    7. How to Photograph Snowflakes

    Top 7 Twitter Shares – Follow dPS on Twitter

    Twitter-Logo-Icon-by-Jon-Bennallick-02

    1. 3 Lightroom History Tips
    2. 10 MORE Quick Composition Tips
    3. 16 Digital Photography Tips for Christmas
    4. Start To See Photographically In Six Easy Steps
    5. 3 Ways to Improve Your Images With Composition
    6. “Does my butt look big in this?” – What Clothes to Wear in Portraits
    7. 5 Tips for Building Your Photography Portfolio

    I hope you enjoyed this quick round up of what’s being shared around the web from dPS. Thanks to everyone for your engagement and shares!

    The post Our 21 Most Viral Photography Tutorials This Week by Darren Rowse appeared first on Digital Photography School.


    Digital Photography School

  • Photographing the World’s Most Secluded Tribes: Before they Pass Away

    Got 12 minutes? Check out this TED talk by photographer Jimmy Nelson who tells the story behind his amazing project ‘Before they Pass Away‘. A project where Jimmy sets out to photograph 35 of the world’s most secluded tribes.

    In this video Jimmy shares 3 lessons (through story) that he’s learned through meeting and photographing these tribes.

    Learn more about Jimmy’s project and meet the tribes he photographed at his website and grab a copy of his book of the same name to see the amazing images he’s created.

    Post originally from: Digital Photography Tips.

    Check out our more Photography Tips at Photography Tips for Beginners, Portrait Photography Tips and Wedding Photography Tips.

    Photographing the World’s Most Secluded Tribes: Before they Pass Away

    The post Photographing the World’s Most Secluded Tribes: Before they Pass Away by Darren Rowse appeared first on Digital Photography School.


    Digital Photography School

  • The 13 Most Popular DSLRS Among dPS Readers [November 2013]

    It has been a few months since we last shared a ‘Popular DSLR’ post here on dPS and with many of our readers considering purchasing a camera in the lead up to the Holiday sales we thought it might be a good time for an update.

    Following are the most popular DSLRS purchased by our readers in the last 4 months on Amazon*.

    As usual the list is dominated by Canon and Nikon who always prove popular among our readers – however this time there are a few new additions including Panasonic and Sony Cameras.

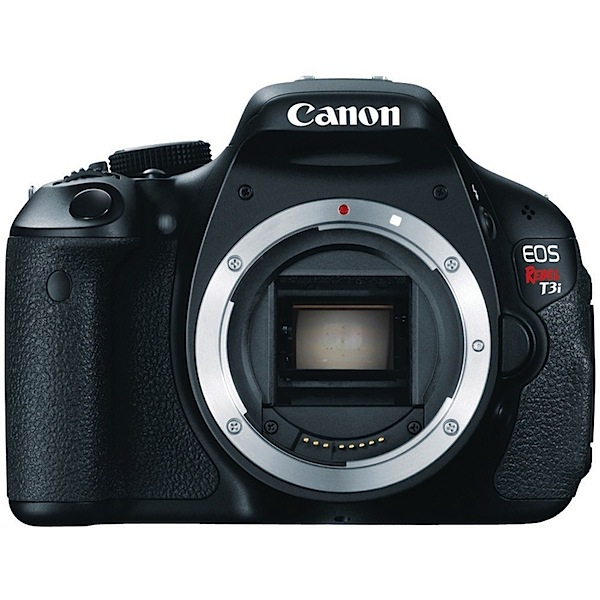
    1. Canon EOS Rebel T3i

    NewImage

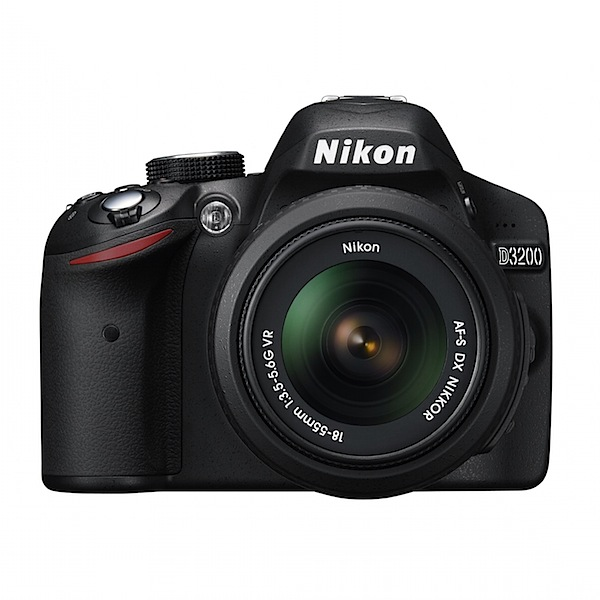
    2. Nikon D3200

    NewImage

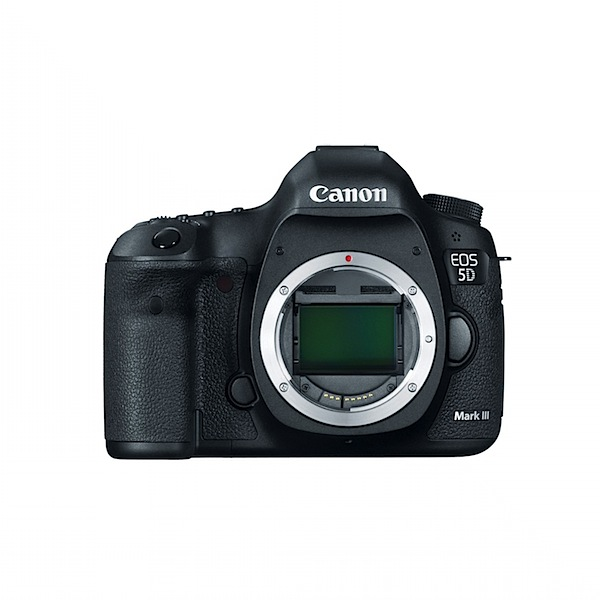
    3. Canon EOS 5D Mark III

    NewImage

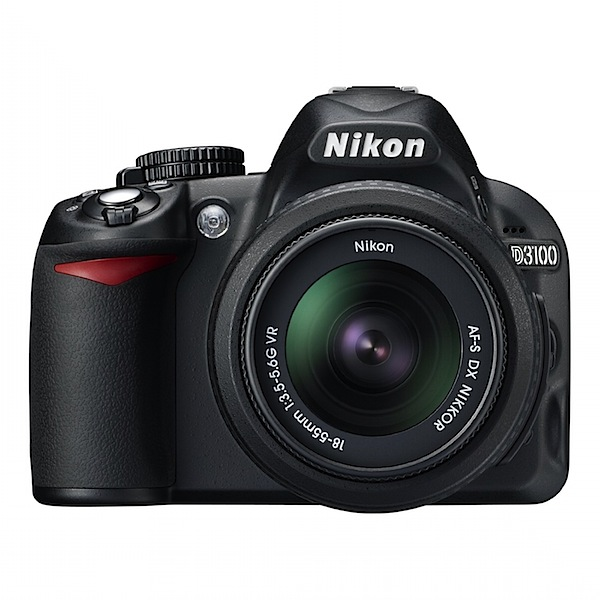
    4. Nikon D3100

    NewImage

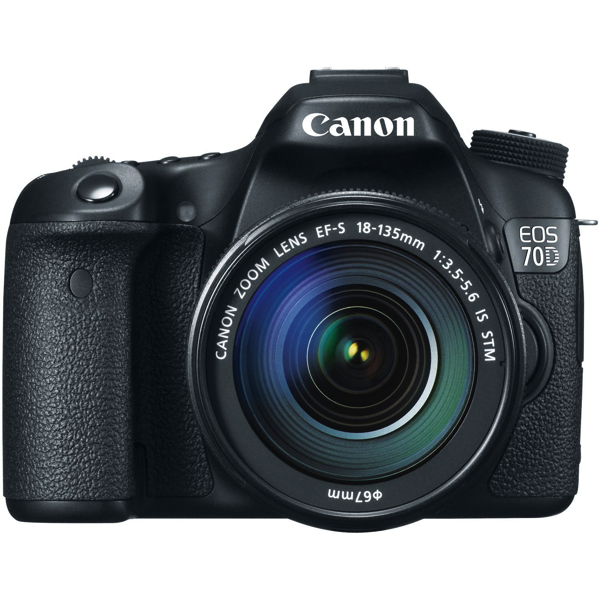
    5. Canon EOS 70D

    NewImage

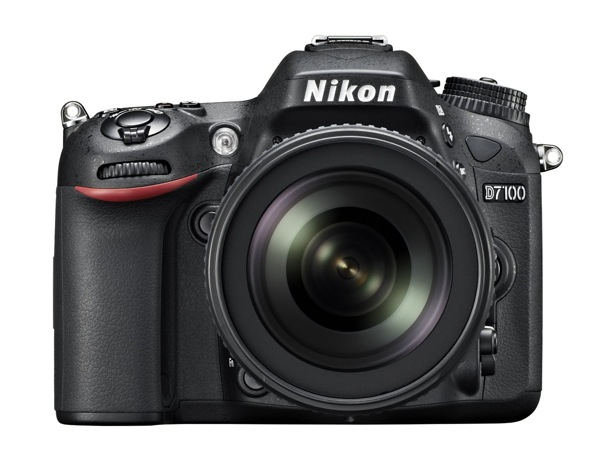
    6. Nikon D7100

    NewImage

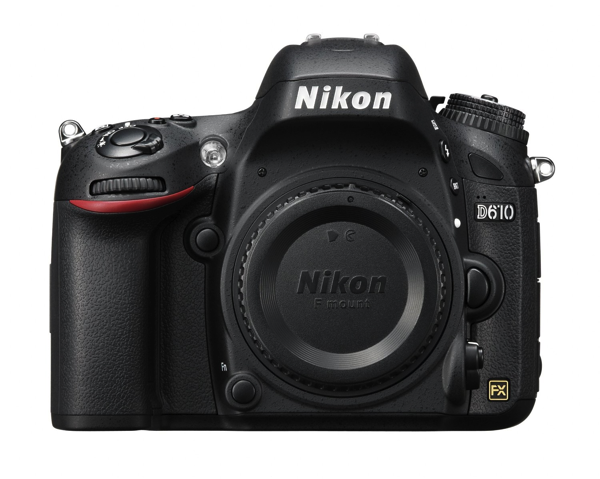
    7. Nikon D610

    NewImage

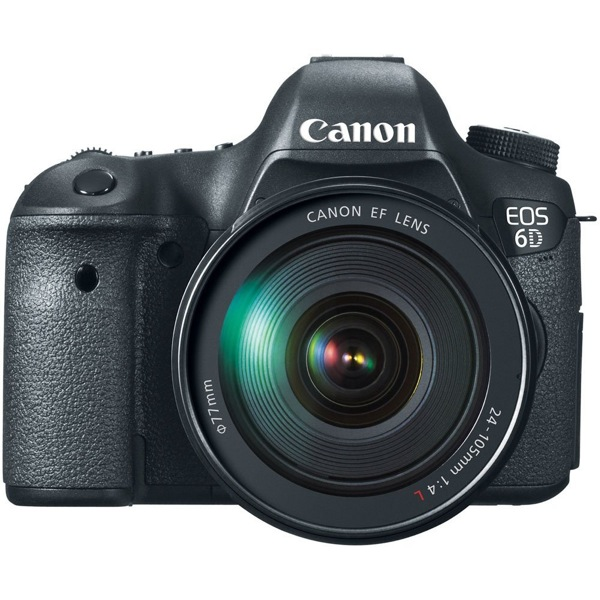
    8. Canon EOS 6D

    NewImage

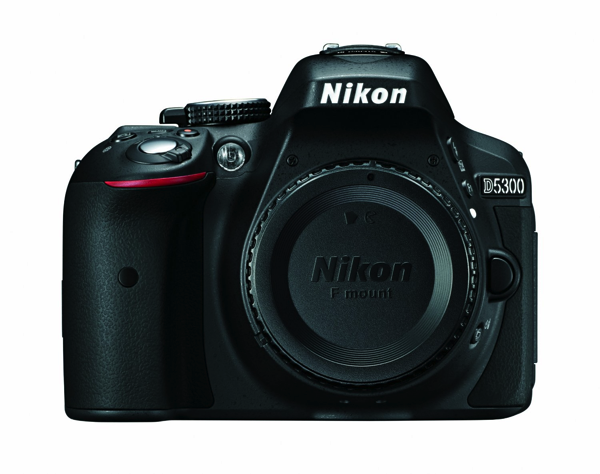
    9. Nikon D5300

    NewImage

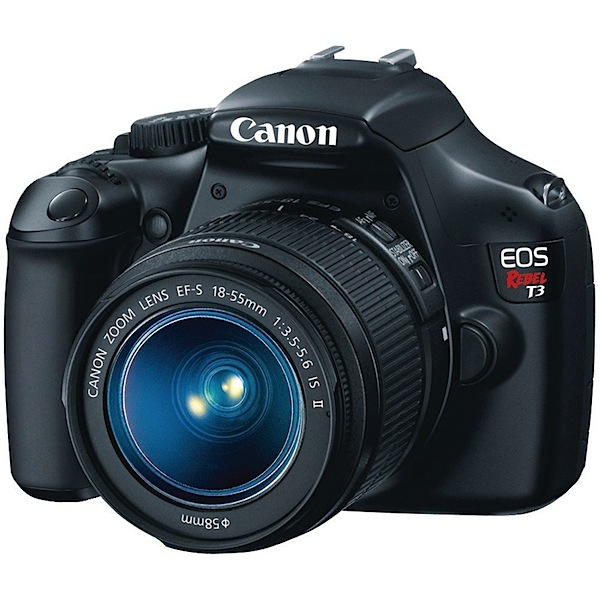
    10. Canon EOS Rebel T3

    NewImage

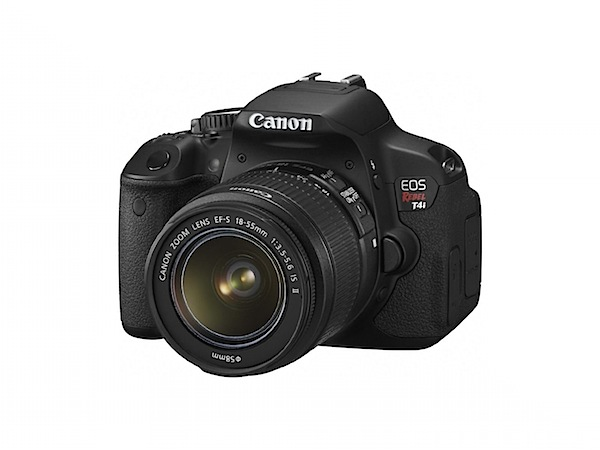
    11. Canon EOS Rebel T4i

    NewImage

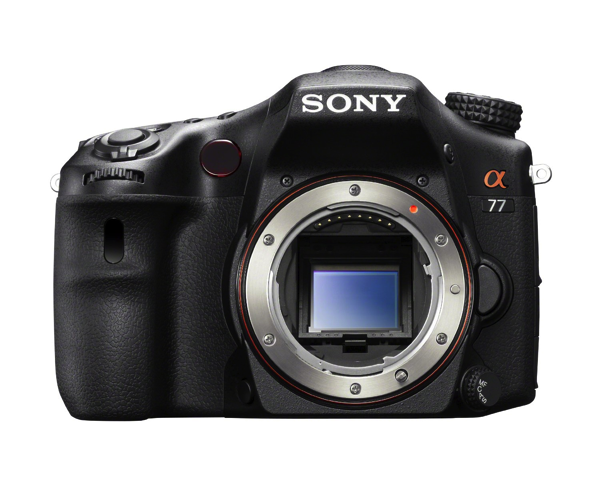
    12. Sony Alpha SLT-A77

    NewImage

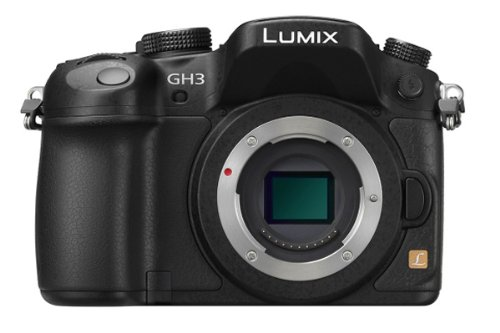
    13. Panasonic Lumix DMC-GH3K

    NewImage

    As usual, this list isn’t a list of the ‘best’ cameras – just what people are buying on Amazon right now.

    Remember – if you are buying gear right now to check out our new Photo Nuts and Gear Guide to buying the right camera and accessories for your needs (it’s guaranteed to save you money).

    *Note: this list was compiled from reports supplied to us from Amazon.com where we are affiliates. One of the ways dPS is able to cover its costs and be a sustainable business is that we earn a small commission when readers make a purchase from Amazon after clicking on our links (including those above). While no personal details are passed on we do get an overall report from Amazon about what was bought and are able to create this list.

    Post originally from: Digital Photography Tips.

    Check out our more Photography Tips at Photography Tips for Beginners, Portrait Photography Tips and Wedding Photography Tips.

    The 13 Most Popular DSLRS Among dPS Readers [November 2013]

    The post The 13 Most Popular DSLRS Among dPS Readers [November 2013] by Darren Rowse appeared first on Digital Photography School.


    Digital Photography School

  • Don’t Tag Me Bro: The World’s 9 Most Vandalized Landmarks

    [ By Steve in Art & Drawing & Digital & Street Art & Graffiti. ]

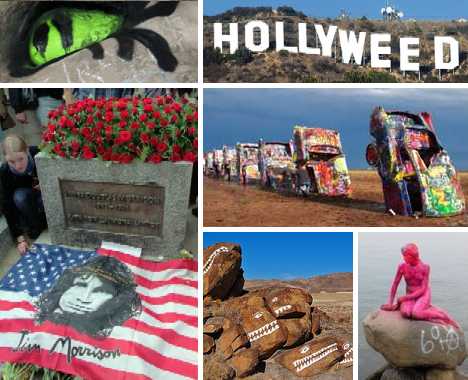
    vandalized graffiti landmarks
    These 9 famous international public landmarks, artworks and tourist attractions attract vandalism and graffiti that’s usually (but not always) unwanted.

    Jim Morrison’s Grave – Paris, France

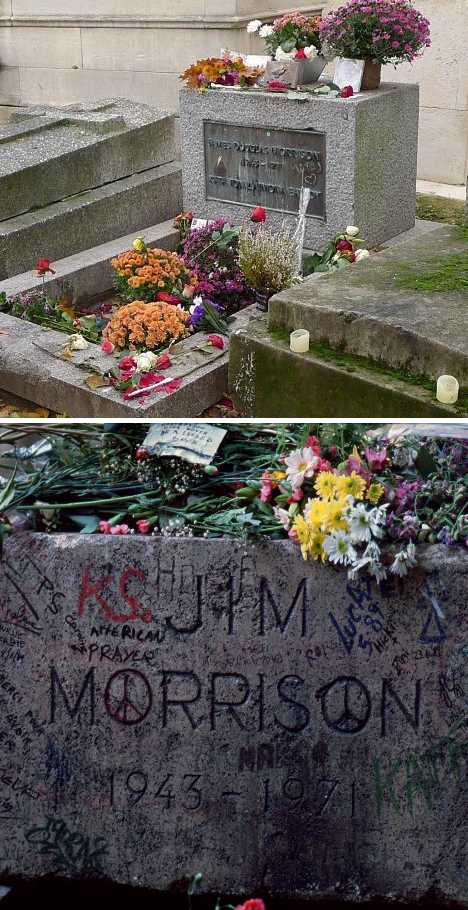
    Jim Morrison's grave Paris(images via: Ultimate Classic Rock/Mark Bowman and Arayatours)

    One of the founding member’s of rock music’s “27 club“, Jim Morrison of The Doors was buried in Père Lachaise Cemetery in Paris after his untimely death due to a drug overdose on July 3rd, 1971.

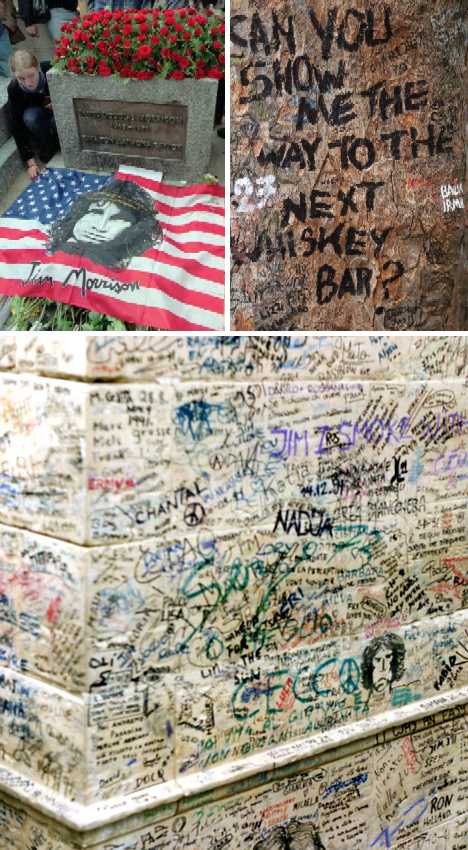
    Jim Morrison's grave graffiti Paris(images via: David Estrada, Paris On Demand and Jim Morrison: The Lizard King)

    The gravesite, though unmarked until 1973, rapidly became a place of pilgrimage for Morrison’s fans who left flowers, letters and mementos on the grave. They also left an abundance of graffiti – at first on Morrison’s grave but spreading to adjoining graves, trees and cemetery infrastructure due to the sheer volume of visitors over the years.

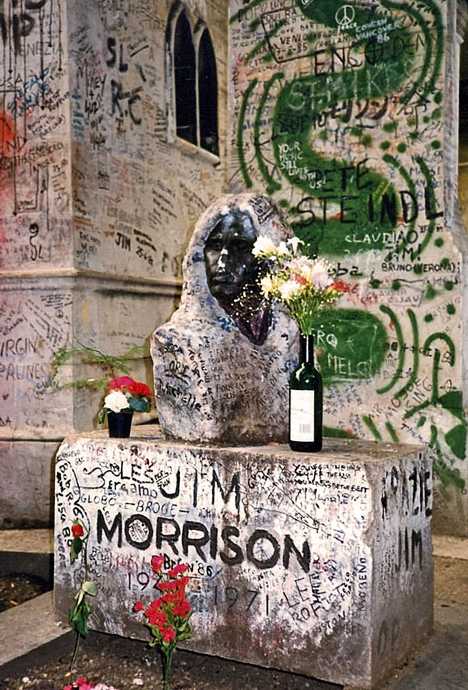
    Jim Morrison's grave Paris(image via: TrekEarth/Kevin KL)

    One of the iconic symbols of Jim Morrison’s gravesite was a plaster bust of Morrison sculpted by Croatian artist Mladen Mikulin. In 1981 the bust, along with a new gravestone engraved with Morrison’s name, was added to the grave to mark the 10th anniversary of Morrison’s death. As with any other solid infrastructure at or near the actual grave, the the bust was extensively decorated (some prefer the term “defaced”) in colorful graffiti until 1988, when it was stolen. Kudos to Kevin KL of Winnipeg, Manitoba, Canada who snapped, processed and posted the remarkable image above showing Jim Morrison’s grave as it was in 1987.

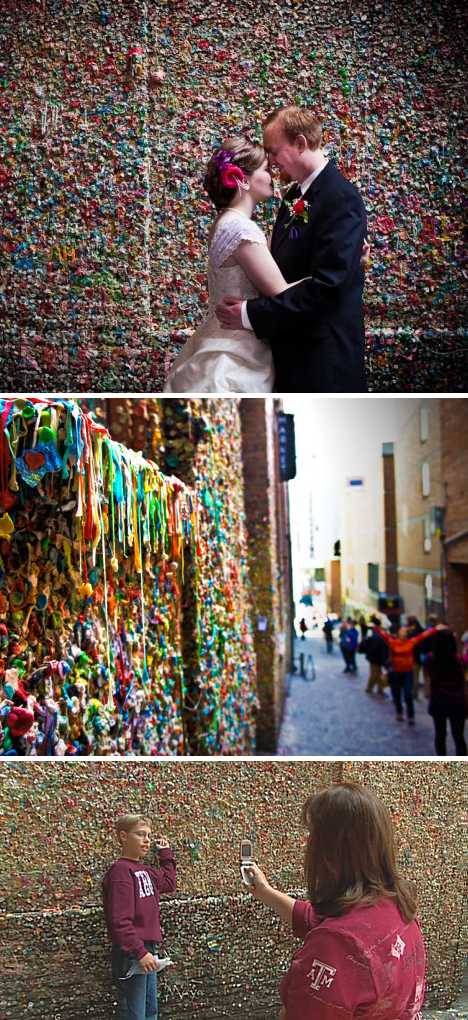
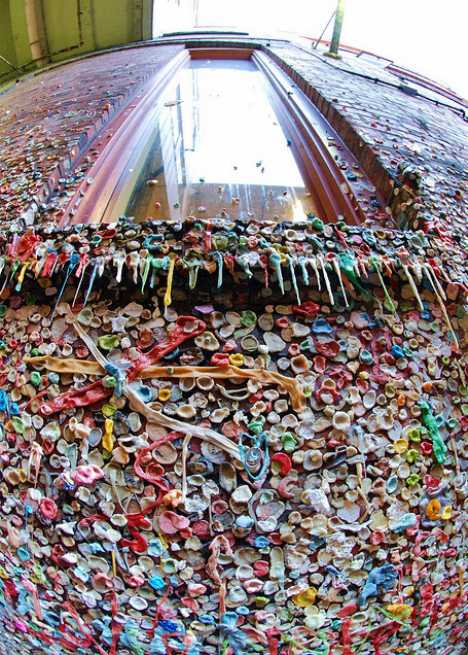
    The Seattle Gum Wall – Seattle, WA, USA

    Seattle Gum Wall(images via: Seattle Wedding Photographers | Red Box Pictures, Huffington Post/Matt Ambrey and KOMO News)

    Seattle’s Gum Wall rose from the humblest of beginnings: theater patrons annoyed by having to wait in long lineups began sticking their worn-out chewing gum on the nearest wall. What began as simple, messy vandalism evolved into a bonafide artwork, especially after 1999 when theater attendants gave up scraping away the gum. It’s one of the few art exhibits where vandalism is, if not exactly encouraged, required to maintain the piece’s status.

    Seattle Gum Wall(image via: photosbyjerry)

    Located in Post Alley under the Park Place Market, the Seattle Gum Wall continues to grow as the theater remains popular enough to cause long lineups outside. As for the gum-chewing patrons, they can hardly complain about the sickly sweet aroma of gum cooking away in the summer sun, though they might want to hold their breath while they wait: Trip Advisor ranks the Gum Wall as the second-germiest tourist attraction on Earth, just after Ireland’s Blarney Stone. A tip of the hat to Flickr user photosbyjerry for the vertigo-inducing image above.

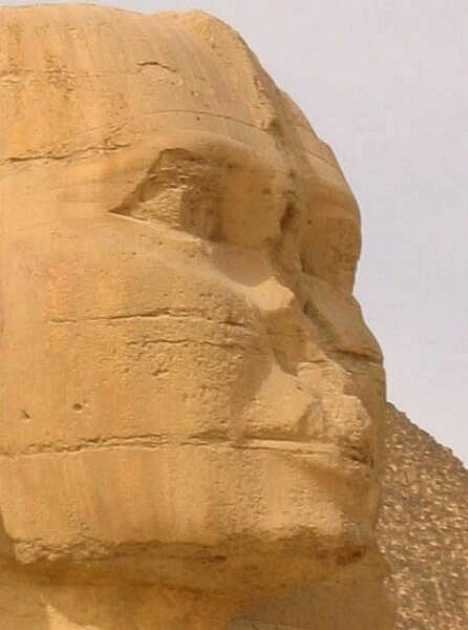
    The Sphinx – Giza, Egypt

    Great Sphinx Egypt vandalized nose Napoleon(images via: Sacred Sites, Above Top Secret and Smithsonian)

    The Great Sphinx of Giza is one of the world’s oldest monuments, and as such is also one of the most mutilated by vandalism and marred by graffiti. Legend has it the Sphinx’s notably missing nose was shot off by a French cannon during Napoleon’s 1798 invasion of Egypt but this is not the case; sketches made decades before clearly show the noseless aspect of the ancient statue.

    Great Sphinx Giza nose(image via: Travel.hat.net)

    The actual act of vandalism occurred in AD 1378 when Muhammad Sa’im al-Dahr, an iconoclastic Sufi Muslim, chiseled off the nose after noticing that area farmers worshiped the monument in hopes of reaping a good harvest. For his troubles, al-Dahr was lynched by the angry locals.

    Next Page:
    Dont Tag Me Bro The Worlds 9 Most Vandalized Landmarks

    Share on Facebook


    [ By Steve in Art & Drawing & Digital & Street Art & Graffiti. ]

    [ WebUrbanist | Archives | Galleries | Privacy | TOS ]


    WebUrbanist

  • 5 Most Memorable Photography TED Talks That You Have to Witness!

    Ever heard of TED Talks? If you like photography, you should! For those of you who are unfamiliar with TED (Technology, Entertainment, Design), know that it is a global series of conferences that’s owned by the Sapling Foundation, which is a private non-profit organization. TED’s whole concept is to spread ideas about science and culture, which are delivered by their Continue Reading

    The post 5 Most Memorable Photography TED Talks That You Have to Witness! appeared first on Photodoto.


    Photodoto

  • Behind The Scenes of Three of My Most Popular Landscape Photos

    In the following post I’m not going to remind you again that you need to bring your tripod with you. I’m not here to warn you that weather is unpredictable and you should check the latest forecast before heading out the door.

    Nope this post won’t cover the fact that you should bring a flashlight and a few other miscellaneous tools just in case something goes wrong. And of course I won’t be telling you that you should tell someone where you’re going and when you’ll be back incase you do get lost, hurt or otherwise incapacitated and need help getting home.

    Instead of rehashing the basics or providing some motivational tips to get you off the couch I’m going to show you three ‘behind the camera’ photographs that I took with my iPhone, share the final shot, and talk a bit about how I made each image.

    Sound good? Okay let’s start!

    First Up – A Small Cascade Near Trap Falls in Ashby MA
    IMG_1902

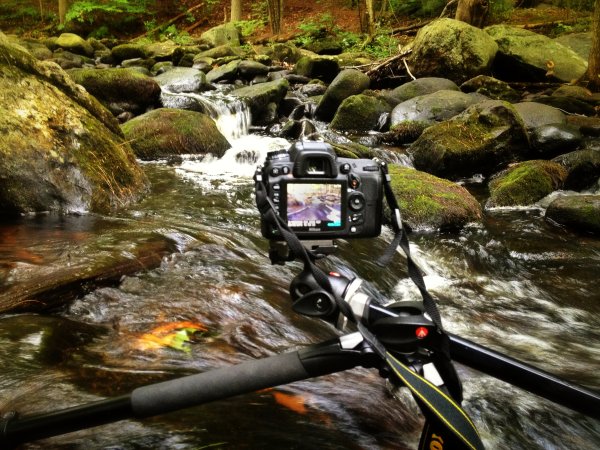
    As you can see the camera was positioned as close to the water as I could comfortably get it – one wrong move and it’s all over for me and my love of photography.

    So does the fear of putting my camera in the drink stop me from attempting to grab a photograph? Not in the least!

    p1637190443-4-650x365

    This shot was something I saw from 100 yards up the bank of the river. I noticed the cascade and knew that it’d be the perfect place to set up my D7000 and Tokina 11-16mm, but how was I going to get into the middle of the river?

    As I got closer to the scene I noticed that there were a few wet stones no larger than an iPad leading out into the middle of the river – right where I wanted to be. All I needed was a little balance and some luck and both my camera and I would make it back to the shore dry and one ‘keeper’ richer.

    Standing on a rock in the middle of the river the size of an iPad is no easy task and trying to fiddle with camera settings and frame a shot doesn’t make it any easier. I used the Manfrotto’s center-column design, which allows you to swing the center column out so that it is parallel to the ground, to get as close to the water as I could, and I used the live view feature on my DSLR to frame the shot and achieve perfect focus.

    After taking a few test shots and fine tuning my exposure I settled on the following settings for the shot: ISO 100, 11mm, f/14, 13.0 seconds. (Note: There is also an ND filter in play here which allows for the longer exposure time).

    Next Up – A Stunning Sunset at Stony Brook in Norfolk MA
    IMG_1713

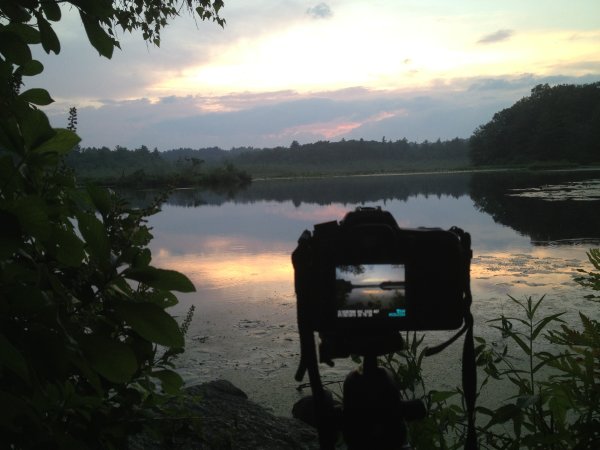
    Okay so this photograph probably isn’t even close to as dramatic as the one above, but it is still able to show you a bit about my thought process when capturing photographs. I could have photographed this scene further back from a nice easily accessible lookout, but I clambered over rocks and got as close to the shore as I could.

    By positioning the camera on the tripod I was freely able to adjust the settings and fine tune the exposure and composition of the shot. The settings I used here were: ISO 100, 36mm, f/10, 1/160.

    sunset at stony brook

    Finally – Capturing Lightning Out Of My Window

    Here in south eastern New England we don’t get all that many storms and due to the tall trees and densely populated urban areas it’s not easy to get a clear view of the sky when they do occur.

    After hearing my phone alert me to a sever thunderstorm watch that was in effect until well after dark and a quick look at the radar confirmed that it looked like it would pan out. I quickly decided to get a plan together to capture my first lightning bolts as a photographer.

    IMG_1571

    With a couple hours of notice I was able to get really creative with my set up. I found a piece of cardboard and some duct tape to make a makeshift shelter for my room and the rest of my camera. I knew I wanted to open the window and the screen to get as clear a sight line as possible, but I didn’t want the rain or mosquitos to get into the house. (If you’re curious I finished sealing the cardboard after I took this photo).

    I made sure to set my focus while I still had daylight to work with as it would get difficult to do so when darkness hit. I used my ND filter to lengthen the shutter speed which would hopefully allow me better chances to capture bolts of lightning and locked down my settings as follows: ISO 100, 13mm, f/9.0, 20.0 seconds.

    Once everything was set up all that was left to do was wait for the storm to get close. As soon as I heard the first crack of thunder I set the Nikon’s intervolometer to capture an image every 25 seconds for about an hour or so, turned out all the lights in my house, and went to bed.

    A few hours later, after the storm had long passed, I woke up curious to see if my trap had worked. The end result was a handful of lightning bolts frozen in time – this is one of my favorites.

    lightning photo

    Do you have any behind the scenes stories to share?

    Tell us about how you captured one of your favorite shots in the comments below!


    Post originally from: Digital Photography Tips.

    Check out our more Photography Tips at Photography Tips for Beginners, Portrait Photography Tips and Wedding Photography Tips.

    Behind The Scenes of Three of My Most Popular Landscape Photos


    Digital Photography School

  • Natural Light: Making the Most of Hard Light

    Hard light

    In a previous article I explored ways of taking photos in soft light. Today, I’d like to look at the opposite of that, and discuss the idea of taking photos in hard light.

    In the earlier piece I wrote about matching the light to the subject. That’s an important concept to understand – especially when it comes to hard light, a type of lighting considered by many photographers to be unsuitable for most types of photography.

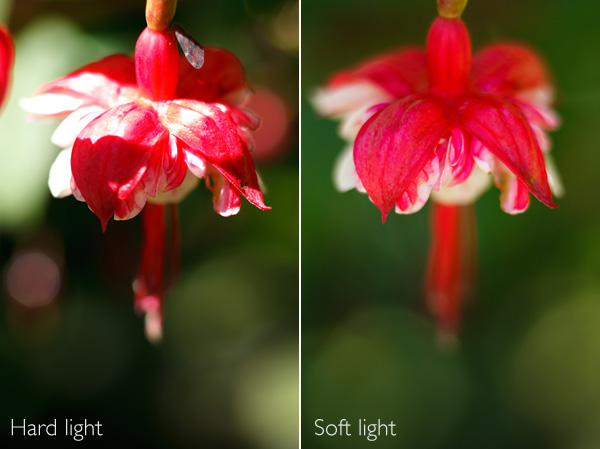
    I’m not saying those photographers are incorrect. Hard light doesn’t suit every type of subject, and if you’re trying to take a photo in hard light that you really shouldn’t be taking, then nothing you can do is going to work. Here’s an example from the earlier article:

    Hard light

    The flower had to be lit by soft light for the image to work. In hard light, there was too much contrast. The light didn’t suit the subject.

    What is hard light?

    Hard light comes from a light source that is relatively small compared to the subject. It creates strong, clearly defined shadows.

    For example, hard light is cast by the sun when it is high in the sky on a cloudless day. The light gets softer as the sun dips towards the horizon at the end of the day. If clouds appear, or the air is hazy or polluted, that may also soften the light.

    If you use portable flash you will also know that the light from an unmodified flash unit is very hard. That’s because the light comes from a relatively small light source – the flash head isn’t very big. That’s why photographers use lighting modifiers with flash units, to effectively make the source of the light larger, which makes the light softer. You can read more about using portable flash here and here.

    Now, let’s look at how you can make hard light work for you, with some practical examples:

    Hard light

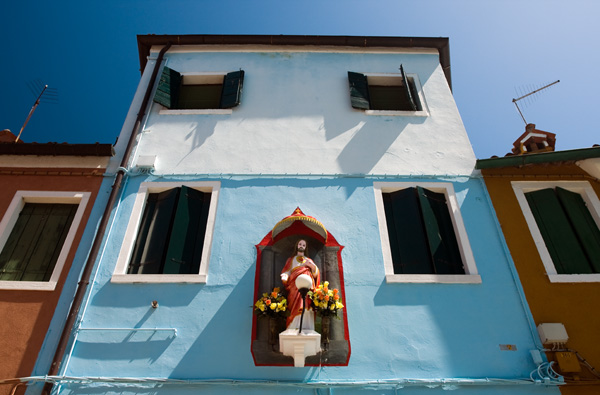
    I took this photo in Burano, an island near Venice, at around 2.30pm in summer. The light was very hard. But look at the long shadows on the wall of the building. The sun was nearly overhead, and a little to the right. From that position, the light rakes over the surface of the building, picking out the texture (I also used a polarising filter to deepen the colours). Noticing scenes like this, and recognising the photo opportunity, is just a matter of training your eye to see where the light is falling.

    Architecture is an ideal subject when the light is hard. If you are in a city or urban area during the middle of a sunny day, you can often take good photos of the buildings.

    Convert to black and white

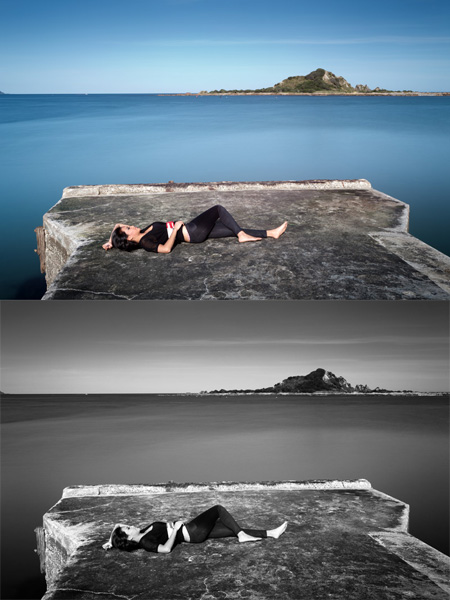
    Photos taken in hard light are often more interesting in black and white than colour. Colour photos may look bland when illuminated by hard light from the overhead sun.

    Here’s an example of long exposure photography that I took around 2pm in the afternoon. I used a nine stop neutral density filter to obtain a shutter speed of 30 seconds. It looked a little boring, so I converted it to black and white.

    Hard light

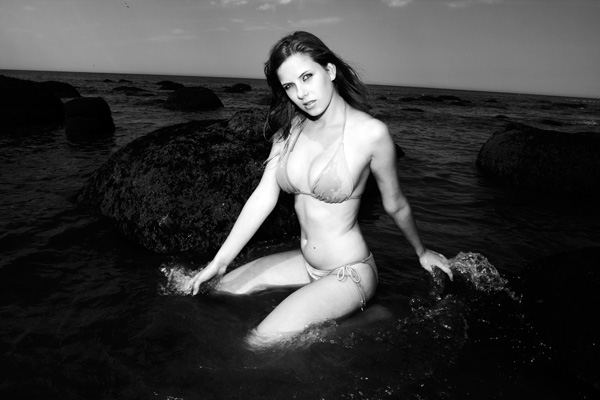
    Finally, here’s a photo taken at around 2.30pm in the middle of summer:

    Hard light

    We were on the beach and the light was very hard. There was no way that I could take a portrait using natural light alone. I used an on-camera portable flash unit (itself a hard light source) and used that to overpower the light from the sun. It acted like a powerful fill light, filling in the shadows cast by the sun. Compare that to this portrait (from my article about soft light):

    Hard light

    Two different types of light, two completely different effects. Bear in mind that hard light plus flash won’t be flattering to everybody, and will generally work better with men than women. Again, it comes back to the idea of matching the light to the subject.

    Mastering Photography

    Hard light

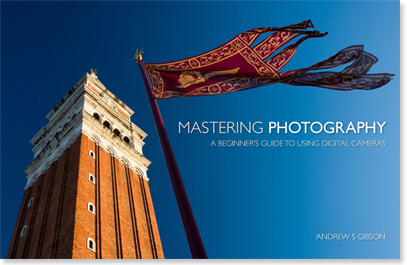
    My latest ebook, Mastering Photography: A Beginner’s Guide to Using Digital Cameras introduces you to digital photography and helps you make the most out of your digital cameras. It covers concepts such as lighting and composition as well as the camera settings you need to master to take photos like the ones in this article.

    Post originally from: Digital Photography Tips.

    Check out our more Photography Tips at Photography Tips for Beginners, Portrait Photography Tips and Wedding Photography Tips.

    Natural Light: Making the Most of Hard Light


    Digital Photography School

  • Splendid Fall Photography Tips and Tricks to Make The Most Of This Gorgeous Season
    Fall is indeed a magical time for everyone. With the air becoming clean and crisp, you get to dust off your overcoats and walking boots. You’ll hear the chopping of the wood that will see everyone though the winter months. But there is nothing more recognizable with the season of autumn than the colors associated with the falling of the Continue Reading

    The post Splendid Fall Photography Tips and Tricks to Make The Most Of This Gorgeous Season appeared first on Photodoto.


    Photodoto

  • Sanna Dullaway Adds Color to the Most Iconic Photos in History

    Screen_Shot_2013-08-13_at_6.14.49_PM.png

    General-interest blog The Roosevelts has posted a selection of artist Sanna Dullaway’s colorized images, showing what iconic images might have looked like to the photographer that captured them. Among the (exceeding well-done, it must be said) adjusted images are Malcolm Browne’s iconic shot of monk Thich Quang Duc’s self-immolation, Alfred Eisenstaedt’s famous image of the kiss in Times Square on VJ Day, and Anne Frank’s haunting 1942 portrait. Click through for a selection of shots, and links to both the full article and Sanna’s website.

    News: Digital Photography Review (dpreview.com)