RSS
 

Posts Tagged ‘most’

How to Make the Most of Your Hard-Earned Vacation Time Photography Wise

20 Nov

Image 1

You are looking forward to that vacation you have wanted so much? You are not the only one. Amidst our work, family and everything else, we all need a little getaway at times. I travel extensively throughout the United States and based on my experience, I am going give you some tips to make the most of your hard-earned vacation time. Please be advised that I speak from a photographer’s perspective but most of what I say applies to any kind of vacation, not just a photo trip.

Plan, Plan and Plan

I cannot overstate this. Whether you are traveling across the ocean or a place only a few hours from home, the better you plan, the more time you will have on your hands when you arrive. Plan for the time of the year and time of the day.

Allow for more time during peak tourist seasons and in the middle of the day. Most people sightsee between 9 a.m. and 5 p.m. Photographically, that time generally doesn’t yield good light (do not give up, read on) so if you are wondering why the fall colors do not look awesome in your pictures, that is why.

Image 3 1

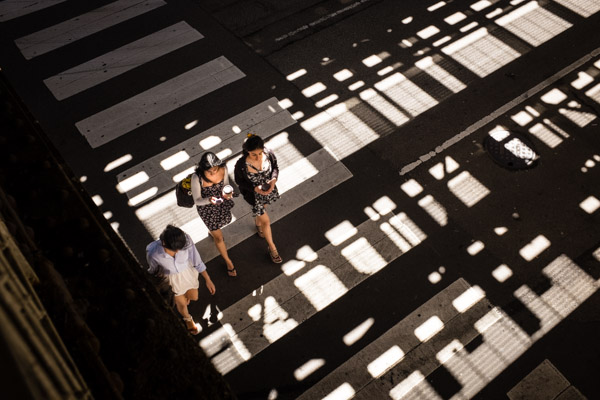
You could use midday for visiting indoor attractions like museums, cathedrals, barns, checking out the downtown or perhaps do some street photography. I should clarify – I do not mean to say that street photography does not benefit from great light – however, you can often pull off a shot in diffused light or just based on the emotion of the people involved.

If you are into Infra-Red (IR) photography, you have a great advantage over those who are not. IR can be shot in strong daylight, often requiring long exposures even in the sun.

We live in an age where you can find more information about a place with a few clicks, than was possible by visiting that place twenty years ago. Put Google maps to work for you. Check out sites like Trip Advisor for first hand information from other travellers. Ask questions in forums. If the place you are traveling to offers tourist guides and maps, order those ahead of time and use them in your planning. If you are planning to shoot a famous landmark, check out sun and moon positions for best light. One app I use for that is The Photographer’s Ephemeris (TPE). Look at other photographers’ images made at these locations. I am not suggesting that you plagiarize, but there is nothing wrong in drawing inspiration from well-acclaimed work.

Keep an Eye, or Two, on the Weather

Image 4

Weather plays a crucial role in any outdoor photography, especially landscape. Human beings have yet to invent a softbox that could light a mountain or a diffuser that could soften the harsh light on a forest.

Weather also dictates the choice of subjects. On overcast days, you are better off shooting intimate forest scenes and waterfalls than, say, rocky shorelines. The greenery in the forest can literally glow on overcast days. Break open a polarizer and you have a winner.

Image 5 1

Moving water can be shot with slow shutter speed (long exposure) to get that milky effect. Depending on the available light, you may have to use a neutral density filter to achieve a slower shutter speed.

Bad weather can make for some very compelling images where the ominous clouds, play of light and shadows create a mood and drama that are not found under clear sky.

Even if it is raining, you do not need to give up. Unless it is pouring cats and dogs, you could add some macro shots to your portfolio. Colorful storefronts also make great rainy day subjects where you could literally shoot from inside the car letting those raindrops on the windows add drama to the scene.

Be Prepared to Adjust the Plan

Perhaps this is a continuation of what I said earlier about planning, but it is so important that it deserves separate mention. It’s all good if you have a great plan but you cannot control Mother Nature. She may decide to throw a curved ball at you and if you are not ready, it could cause big disappointments. Roads may close unexpectedly, rain could kick in suddenly, and sites could be closed due to increased wildlife activity. Things could happen that are beyond your control. Be open to shuffling your itinerary, adding things that you thought you would not be able to do or see, and giving away on some others. The point is, being flexible is key when you are traveling.

Know Yourself

Image 6 1

This may sound a little odd, allow me to explain. To be able to fully enjoy your time off, you should be very clear about the things that you like to do and those that you do not. If the word “vacation” means to you sleeping in, relaxing by the fire with a drink or taking a boat ride, you may not be happy to pack seven mile hike, rock climbing, or canoeing into your schedule. On the other hand, if you are an outdoor buff, staying indoors could seem like a terrible waste of time. When traveling with family, it is important to know everyone’s preferences, then if they are different, strike a balance amongst them all.

When traveling with a companion, it is a great advantage to have similar likings. That does not only mean way of living. Meal habits are very important too. Perhaps you are one who does not like to spend a lot of time looking for an Italian restaurant in an unknown place. Your companion, on the other hand, could be a strict vegetarian and very picky about where they eat. Unless you are conscious about those differences, you could be spending time resolving conflicts instead of doing what you are there for.

Have Extra Cash Available

Image 7

When you are traveling, being a Scrooge is often not the best way to go. I am not suggesting that you splurge but most vacation spots make their money from seasonal tourism. Thus, everything will be more expensive than usually justified, and that means everything from food, to room rent, to souvenirs. If you are constantly counting pennies, it will occupy your mind, rather than important things. Keep some budget for unforeseen expenses and when those happen, do not sweat it. Enjoying your time matters more than money.

Do not Take it too Hard

Image 8

Sometimes unfortunate things happen even after the best of planning. You cannot do anything about that. I hope not, but should you run into any such situation, just take it in strides. During my trip to the Acadia National Park, I took a fall, twice. I got several deep cuts, hurt a finger so bad that I was afraid that I might have broken it (luckily not), worst of all my camera gear was damaged. I did not lose heart or cancel my vacation. I just dealt with it; got the injuries checked out at an urgent care, did first aid, took painkillers and did what I was there to do – photography. The point is, bad things happen; it’s not the end of life but rather, part of it. Have fun!

The post How to Make the Most of Your Hard-Earned Vacation Time Photography Wise by Abhijit Sarkar appeared first on Digital Photography School.


Digital Photography School

 
Comments Off on How to Make the Most of Your Hard-Earned Vacation Time Photography Wise

Posted in Photography


The Fall’s Most Exciting New Cameras

05 Nov

Fall is an exciting time for photography and it’s not just because of the scenery that comes with the season. The newest enthusiast and professional cameras tend to arrive on shelves in the fall and, even if you’re not in the market for a new shooter, the latest gear announcements are worth a peak just to see what new technology is being introduced.

While a lot of new announcements are mediocre updates, the fall of 2014 has brought in several new cameras that are more than marginal. Canon has released a new DSLR with amazing burst speeds, while Nikon has announced the first full frame DSLR with both a tilting LCD screen and Wi-Fi. All mediocrity aside, here are the most exciting cameras hitting the shelves this fall.

Canon EOS 7D Mark II

Canoneos7dii

DSLRs have a lot of equipment inside that has to move every time an image is taken, so burst speeds of three to five frames per second are pretty typical until you hit the $ 4,000+ price range. Canon’s EOS 7D Mark II is boasting a 10fps burst speed, a huge accomplishment for a DSLR that’s priced under $ 2,000.

The speed is making sports photographers take note, as well as shooters who often photograph active kids. To accomplish such high speeds, Canon has built-in not one, but two processors. Shutter speed is also quick at a maximum of 1/8000th of a second.

The speed isn’t the only plus on the camera either, the Canon EOS 7D Mark II sports a 65-point autofocus system as well. As you’d also expect from Canon, there’s 1080p HD video at 60fps with smooth autofocusing. All of these features are wrapped up in a durable magnesium alloy body.

Perhaps the biggest downside to the 7D Mark II is that the price is closer to that of a full frame camera, yet it only offers an APS-C sensor. The speed clearly points it towards sports shooters however, and the crop sensor means it’s easier to achieve telephoto zoom lengths over a full frame.

The Canon EOS 7D Mark II is expected in stores November 28 for a list price of $ 1,799 USD. Pre-orders are currently available through several online retailers.

Nikon D750

NikonD750

The announcement of the Nikon D750 took many by surprise, it’s been years since the D700 was introduced without any updates in between. The highlighting feature is that it’s the first to offer Wi-Fi and a tilting screen in a full frame DSLR, but it has several other features boasting image quality and getting the camera high marks in early reviews.

The tilting LCD and Wi-Fi are more usability features than image quality changers; they’re paired with a lightweight body and an excellent battery life of 1,230 shots. Dual control wheels, two SD card slots, and a second screen at the top of the camera also look to make this new shooter fun and easy to use.

It’s not all about usability, however. The D750 uses the same processor that’s inside the D810 and D4s. It doesn’t quite have the resolution of the D810 and still uses the optical low pass filter, but it also sits at about $ 1000 less. The D750 actually has a faster burst mode than the D810, thanks to the slightly smaller resolution, with a 6.5fps burst mode (the D810 has a 5fps burst). The D750 also offers 1080p HD video at a smooth 60fps.

For not a whole lot more cash, the D750 offers quite a few more features than the D610. It’s available now for a list price of $ 2,296.95 USD.

Samsung NX1

Samsungnx1

It’s hard to pick out one headlining feature of the new Samsung NX1, since the mirrorless camera has quite a bit going for it. Backlit sensors are nothing new, their design improves the light gathering ability of the sensor, making them better in low light conditions. But backlit sensors are typically reserved for cameras with sensors an inch or smaller. The NX1’s APS-C sensor is backlit—technology that could potentially expand to more camera models in the future.

4K video isn’t brand new to cameras, but in the past, recording shots of this resolution has required extra recording equipment. Samsung has built a compression method that keeps the resolution but reduces file sizes, so 4k video can be recorded directly to the SD card. Again, a new feature by Samsung that may expand to other models in the future.

Last but not least, the NX1 has a 15fps burst mode. Since mirrorless cameras don’t have as much equipment to move as a DSLR (hence the name mirrorless) they’re typically faster, but 15fps with an APS-C sensor is unheard of. The Nikon 1 line rivals this speed, but is able to do so because the one inch sensor means much smaller files to process.

The NX-1 is heading to shelves and online retailers on October 27, listed at $ 1,499.99 USD

Noteworthy Compacts

Manufacturers have also introduced a handful of compacts hitting the market this fall:

  • The Canon G7 X is a smaller version of their popular G1X Mark II advanced compact. It sports a one-inch sensor, an f/1.8 lens for solid image quality, and a 180 degree tilting touchscreen with Wi-Fi for selfie enthusiasts. This small shooter became available on October 17th and starts at $ 699 USD.CanonPowershotG7X
  • The Panasonic Lumix LX100 is a retro-style, advanced compact, with a Micro Four Thirds sensor and an f/1.7-2.8 lens. It’s turning heads with a leaf-style shutter that achieves shutter speeds of 1/16,000 and burst modes up to 6.5fps. There’s no automated modes, so it’s not for the average consumer. It’s available November 1st for $ 899.99 USD.Panasoniclx100

New gear announcements are always exciting, but what’s really generating buzz this fall are the new features that could become more widely available (and more affordable) a few years down the road. Canon’s idea to use two processors creates faster burst speeds. Nikon has managed to fit both a tilting LCD screen and Wi-Fi into a full frame DSLR that’s smaller than the older models. Samsung proved backlit sensor design isn’t just for the small shooters anymore.

This fall sees a few dozen new cameras heading to stores, but a handful have features that make them more than mediocre updates that can give you a good idea where camera technology is headed.

Tell us in the comments which ones are you excited about?

The post The Fall’s Most Exciting New Cameras by Hillary Grigonis appeared first on Digital Photography School.


Digital Photography School

 
Comments Off on The Fall’s Most Exciting New Cameras

Posted in Photography


Most Massive Murals: 14 Large-Scale Works of Urban Art

04 Nov

[ By Steph in Art & Street Art & Graffiti. ]

Large Murals Asia's Tallest 1

Human faces loom over the city on the sides of skyscrapers, colorful characters cover industrial silos and Boeing airplanes and entire neighborhoods serve as canvases for optical illusions in some of the world’s largest-scale murals. Taking up hundreds of thousands of square feet in some instances, these massive works of urban art required an astonishing amount of paint to produce.

World’s Largest Mural in Berlin
Large Murals Berlin Apartment 1

Large Murals Berlin Apartment 2

Believed to be the world’s largest mural, this project in Berlin measures as astonishing 236,800 square feet and consists of imagery inspired by the nature in a nearby zoo. Completed by the French mural company CiteCreation, the work spans three buildings of an apartment complex and appears to significantly best the current Guinness World Record holder, the 178,200-square-foot Pueblo Levee Mural Project in Colorado.

Tribute to Architect Oscar Niemeyer by Eduardo Kobra
large murals kobra niemeyer 1

murals kobra niemeyer 2

Nearly the entire height of a skyscraper in Sao Paulo, Brazil pays colorful tribute to architect Oscar Niemeyer in honor of what would have been his 105th birthday. Muralist Eduardo Kobra completed the 170-foot-tall work of art in early 2014 with the help of four other artists.

Boeing 737 Mural by Os Gemeos
Large murals boeing os gemeos 1

Large murals Boeing 737 2

It took 1,200 cans of spray paint to complete this incredible mural on the outside of an entire Boeing 737. Brothers Otavio and Gustavo Pandalfo, known as Os Gemeos, painted their signature yellow characters on the plane that carried the Brazilian national football team during the World Cup, completing the project in just a week.

Shepard Fairey’s 14-Story Paris Mural
Large murals Fairey 1

Large Murals Fairey 2

Known best for his iconic political portraits, artist Shepard Fairey also works in larger scales, with this 14-story mural in Paris being a notable example. Working in conjunction with Mairie du 13e, Butterfly and Mehdi from Galerie Itinerrance, Fairey completed the mural for a community art project called Street Art 13.

Asia’s Tallest Mural by Hendrik Beikirch
Large Murals Asia's Tallest 1

Large Murals Asia's Tallest 2

A 230-foot-high building standing in the foreground of Daniel Libeskind’s glimmering Hauendaue i’Park building in Busan, South Korea, this mural by German artist Hendrik Beikirch depicting a fisherman stands as a reminder of the nation’s working class.

Next Page – Click Below to Read More:
Most Massive Murals 14 Large Scale Works Of Urban Art

Share on Facebook


[ By Steph in Art & Street Art & Graffiti. ]

[ WebUrbanist | Archives | Galleries | Privacy | TOS ]


WebUrbanist

 
Comments Off on Most Massive Murals: 14 Large-Scale Works of Urban Art

Posted in Creativity


Posts With The Most: 12 Cool & Creative Traffic Bollards

29 Sep

[ By Steve in Art & Street Art & Graffiti. ]

Traffic Bollards Leicester 1
Never mind the bollards? Uh-uh: these traffic stoppers halt wayward vehicles like no traffic cone can. The best bollards, though, are designed to look great!

Traffic Bollards Leicester 2

Traffic Bollards Leicester 3

Leicester City Council faced a conundrum in early 2014: children walking to and from Whitehall Primary school were endangered by vehicular road traffic. The street had no sidewalks; only a row of metal traffic bollards. The council’s ingenious solution was to modify the bollards to look like children, many wearing the school’s red uniforms. Kudos to Flickr user KiranParmar for capturing these kinda creepy “Stepford Children” in their native habitat.

Traffic Bollards Leicester 4

Traffic Bollards Leicester 5

Traffic Bollards Leicester 6

Not only do the modified bollards remind drivers to be aware of pedestrians, the scheme is much cheaper than laying down sidewalks. One would hope older ex-students don’t try to re-enact the infamous mailbox scene from the 1993 film Dazed and Confused… a metal bollard beats a wooden baseball bat every time.

Lean Design

Leaning Tower Pisa Traffic Bollard

“When life gives you lemons, make lemonade,” and when traffic tilts your traffic bollard, make it look like the Leaning Tower of Pisa of course! Kate McGovern snapped this tilted but still functional bollard somewhere in Philadelphia. Compromised or not, the bollard seems in better shape than the surrounding pavement while providing some unexpected visual interest.

Minions Of Bollards

Traffic Bollards Penang Malaysia 1

Traffic Bollards Penang Malaysia 2

Traffic Bollards Penang Malaysia 3

Who knew the 2010 movie Despicable Me was so popular… in Penang, Malaysia! Located on Soo Hong Lane off Armenian Street in Penang’s inner George Town neighborhood, the charming street art installation was painted by Lithuanian-born artist Ernest Zacharevic early in 2013 as part of a city-sanctioned campaign to beautify Soo Hong Lane. Unfortunately, Zacharevic had to be recalled to repaint at least one of the not-so-despicable bollards which was defaced – literally – by vandals.

LEGO My Bollard!

LEGO Man Traffic Bollards Le CyKlop Paris 1

LEGO Man Traffic Bollards Le CyKlop Paris 2

LEGO Man Traffic Bollards Le CyKlop Paris 3

LEGO Man Traffic Bollards Le CyKlop Paris 4

One popular bollard design features a narrowed area near the top to facilitate the attachment of ropes, chains and the like. Coincidentally, these particular bollards bear a cursory resemblance to LEGO men… and a little artistry (plus some yellow paint) enhances the effect even more. The oddly one-eyed LEGO men bollards above come to us courtesy of French street artist Le CyKlop (which explains much) and can be found along the Canal de l’Ourcq in Paris

Next Page – Click Below to Read More:
Posts With The Most 12 Cool Creative Traffic Bollards

Share on Facebook


[ By Steve in Art & Street Art & Graffiti. ]

[ WebUrbanist | Archives | Galleries | Privacy | TOS ]


WebUrbanist

 
Comments Off on Posts With The Most: 12 Cool & Creative Traffic Bollards

Posted in Creativity


Making the Most out of the Photography Stuff You Have Already

21 Sep

Several years ago I had a studio for about six months. It was really nice to have a space that I knew was always there, waiting for me to shoot in, should the need arise. The problem was that most of my shoots took place outdoors or on location, and when my trial lease period was over, I couldn’t rationalize staying on at the monthly rental rate. What didn’t occur to me at the time was that I had a perfectly good, albeit small, basement at my disposal. Due to the low, 80″ (6.6 foot) ceiling, the narrow, 10’x20′ shooting area, and the generally dark ambience of an unfinished basement, the thought of shooting down there had never crossed my mind. It wasn’t until I moved out of my studio and no longer had a place to store my gear, that I even ventured down there with my equipment.

IMG 8174

The setup began simply enough, with me doing little more than editing at a table down there. Over the months that followed, I did the occasional head shot or product shoot, quickly realizing that I didn’t need as much space as I originally thought. Sometimes a problem would arise, like when I needed to shoot a full body portrait of a guy who was over six feet tall. I began modifying the space accordingly, such as adding white panels to the overhead joists to reflect light.

I wanted a white seamless set up, but the backdrop stand legs were too wide to allow for the 8 foot wide white vinyl roll. Instead, I discovered that I could run a rod from the top of the air condition duct to a C-stand and just barely fit it in the space, pulling the sweep just out to the edge of my desk. This allowed a depth just long enough to light the subject and background separately, which meant I could accomplish a pure white background (if the space was any more shallow, the subject would be stepping in to the backdrop light, blowing them out with the light).

Tumblr navcq2zXA81qzpmooo1 1280

The other issue with a small shooting space is that you don’t have the space to back your lights off of your subject. As you may know, if you want soft light on your subject, you need to make your light source large and diffused or indirect. The problem was that if I added even an smaller umbrella to my strobe stand it meant that I’d have to lower the light the length of the radius of the umbrella, leaving my light at a max height of around five feet (too low). The narrow width of the shoot space also meant that I couldn’t simply hang up a white sheet and shoot through it, which is a common workaround in making a small light source larger.

IMG 8294

I eventually figured out as a solution which was to place a 40″x60″ white board on my desk, beside where the subject usually stands, and shoot light into the board, several feet in front of the subject. By securing a credit card, or something of a similar size and opaqueness, to the side of the strobe, and zooming the flash in to 105mm, I was able to get my light stand out of my view of the subject as well as create a large, reflected light surface, that ran all the way up to the ceiling. This large light source was fantastic in creating a giant catchlight in the subject’s eyes, sunglasses or any reflective surface. I also added a small, white v-flat to hide the background light, which also served in reflecting some of the light onto the opposite white wall, helping to further light the subject.

IMG 8288

IMG 8290

Keep in mind that within the small confines of this setup, the subject is pretty much fixed in one spot. If they were to move forward at all, the crosslight will create odd shadows on their face, or if they move backward, they would get caught in the harsh background light.

Tumblr navcq2zXA81qzpmooo4 1280

What sorts of innovations have you come up with to work within your space or equipment limitations? Share in the comment section below.

Links to other DIY projects for you:

  • DIY How to Build and Use a Reflector to Take Better Portraits
  • Light Tent Comparison – DIY Versus Kit Tents
  • A project for the New Year: How to make a DIY Ground Pod
  • 27 Amazing Macro Snowflake Images Shot with a DIY Camera Set Up

The post Making the Most out of the Photography Stuff You Have Already by Nick Fancher appeared first on Digital Photography School.


Digital Photography School

 
Comments Off on Making the Most out of the Photography Stuff You Have Already

Posted in Photography


Typographic Shelter: Most Obvious City Bus Stop in the World

01 Sep

[ By WebUrbanist in Art & Sculpture & Craft. ]

bus stop art baltimore

If you cannot spot this giant  bus shelter in Baltimore, you may have bigger problems than missing the bus and getting to work on time.

bus shelter spells design

bus city street stop

Standing 14 feet high, the signage-plus-bus-stop spells out B-U-S in big capital letters, providing spaces to sit (on all three characters) as well as overhead protection from the rain (in the B and S). Each letter is also seven feet wide.

bus stop urban shelter

Created by mmmm, “BUS is a place to enjoy, interact, and meet while waiting for the bus. It is a leisure space in the middle of the rhythm of the city, a fun place for the inevitable waiting at a bus stop. BUS is made with wood and steel, materials that are typically used to build urban furniture.”

bus stop letters shelter

The idea is to work with simple, conventional and durable materials to create something both functional but potentially iconic – a place that anyone will know when you mention it. Like other guerrilla bus stops and functional urban shelters, it certainly stands out, but also seems more straightforward and civic.

bus stop design concept

“The three letters of BUS are big enough to accommodate two to four people each and protect them from rain, sun, wind, and inclement weather. They allow people to assume different postures of sitting or standing while waiting for the bus. The S allows people to lie back while they wait, and the B provides shelter.”

bus stop typographic installation

From their website, this is “a permanent public art project supported by Creative Alliance and Southeast Community Development Corporation in conjunction with the Baltimore Office of Promotion and the Arts, the European Union National Institutes for Culture (EUNIC), and SPAIN arts & culture. It is part of the initiative TRANSIT, Creative Placemaking with Europe in Baltimore.”

Share on Facebook


[ By WebUrbanist in Art & Sculpture & Craft. ]

[ WebUrbanist | Archives | Galleries | Privacy | TOS ]


WebUrbanist

 
Comments Off on Typographic Shelter: Most Obvious City Bus Stop in the World

Posted in Creativity


How to Get the Most out of your Pocket Camera

24 Aug

If you have a pocket camera, you might have spent hours pouring over reviews, spec sheets, and comparisons trying to find something better like a DSLR or Micro Four Thirds camera. Too often we dismiss our humble pocket cameras because they don’t have big lenses, flash mounts, custom exposure controls, or even enough buttons on the back to do what we really want. While there are certainly good reasons for shelling out hundreds of dollars for a fancier camera, chances are your pocket camera can do a lot more than you might think. Let’s explore a few tips that you can use to get the most out of it, and even take some professional-style shots without spending another dime on new gear.

Bird in flight

Use the Zoom, but not for zooming

Many pocket cameras have a significant advantage over DSLRs because they often come with a built-in optical zoom that covers a much greater focal range than a standard kit lens. And while this can be nice for, say, shooting closeups of trees or buildings that are far away, it actually has a much more practical feature that is often overlooked. Instead of using your camera to get nice and cozy with faraway objects, you can actually use it to get professional-style shots of things that are much closer to you.

Pocket headshot

In the shot above I used my old Panasonic ZS7 point-and-shoot to take a portrait by standing about 10 feet away from my subject and zooming in as far as the camera would go. Because the background buildings and foliage were so far away from her, it created a very shallow depth of field. Of course you can only do this if you have a great deal of available light, since pocket cameras are much less sensitive to light than their larger counterparts, but if you have never tried this technique you might be surprised at the results you can get. It also helps to have a tripod since it can be difficult to keep the camera steady on a single subject when zoomed in that far, or you can simply place your point and shoot on a hard surface like a bench, railing, or brick wall.

Turn on the flash during the day

When it comes to camera flashes, we usually think about how they can be used to brighten up a dark scene – particularly if you are using a pocket camera, most of which are already not very sensitive to light. But flash can also be used to enhance a perfectly well-lit scene, and produce some very good results that you might not expect. Shooting in the daylight can cause harsh shadows to appear on your subject, which is why many photographers like shooting during what’s called the golden hour – the time right after dawn and right before dusk.

Most pocket cameras allow you to force the flash to fire, even when there is plenty of light available. This is a technique known as “fill flash“, and it is a great way to eliminate some of the shadows from harsh lighting that can often happen during the bright afternoon sun. You can also use it to help get better photos when your subject is backlit, as often happens during the daytime. In these situations your camera takes a look at the overall scene and thinks there is enough light, so it won’t fire the flash. But since you know better than your camera just what type of picture you want to take, overriding the camera’s decision and forcing the flash to fire can help you get much better results.

Magnolia noflash

Magnolia flash

Using fill flash takes a bit of practice. But once you get the hang of it, you will find creative ways of using it to get a lot more mileage out of your pocket camera than you might have thought possible. Alternatively, you can instruct your camera to keep the flash off even when it thinks it must be turned on. Remember, you know better than your camera what kind of picture you want to take, and somehow all you need to do is give it a little nudge in the right direction.

Wwii memorial

When I took this photo of the World War II Memorial in Washington, D.C., I wanted to capture the arcs of water as they shot out from the fountainheads. To do that, I left my pocket camera in Auto and told it to keep the flash off. In order to compensate for the lack of light, my camera left the shutter open longer which gave me the exact image I was looking for.

Use the camera’s built-in scene modes

By far the most utilized shooting mode on pocket cameras is Auto; in which the camera does its best to evaluate things like the amount of light, as well as the movement of your subject, to pick the optimal exposure settings. The camera also decides whether it thinks a flash should be used, unless you have specifically told it to do otherwise. And for the most part, Auto can produce some good results. But a camera is only a tool, and it can only take its best guess as to what you really want to photograph. It doesn’t see a flower, a tree, a child, a car, a birthday candle, a waterfall, or anything else. It only sees bits of light hitting its sensor, and tries to capture the incoming light as best as it can given the information it has to work with. This is why Auto sometimes works, and sometimes produces a blurry mess.

Landscape

However, there is something you can do about this even if you aren’t familiar with exposure settings and how to adjust them. Almost every camera today, whether it’s a tiny compact model or a big DSLR, has built-in scene modes that are little icons on your camera that look like a face, a mountain, a tree, a child, and more. Camera manufacturers pour millions of dollars and years of researching user behaviours into developing scene modes, so the next time you pull out your pocket camera, try switching to one of the little icons based on what you are shooting. Utilizing these scene modes is a way for you to give your camera a bit of help in interpreting the incoming light, so it can try to take the picture you really want instead of the picture it thinks you want.

Flower

Let’s say you are photographing a youth soccer game, and using Auto because it generally gives you decent photos. The problem is, your camera doesn’t know you are at a soccer game! It only sees bits of light, not a green field of grass with individual players and a ball. But if you use the scene mode to tell your camera you are photographing a sports event, it will tweak its own internal exposure algorithms by increasing the shutter speed, widening the aperture, etc., to give you better results. The same principle applies when you are shooting a portrait, a flower, a beach, or the nighttime sky: by using the scene modes, you are essentially making your camera a little bit smarter, which can make a big difference.

Bottle

While pocket cameras have physical limitations, such as tiny image sensors and low ISO sensitivities, that will always put them in a class below DSLRs, Micro Four Thirds, and other more expensive cameras, this doesn’t mean they can’t produce amazing results. Hopefully using these tweaks will help you get even better pictures with the camera you already have, without spending a dime on new equipment.

Editor’s note: Do you have any other tips to share? Please do so in the comments below. Do you take your compact camera along on vacation too, for those times you just don’t want the big DSLR? I do!

The post How to Get the Most out of your Pocket Camera by Simon Ringsmuth appeared first on Digital Photography School.


Digital Photography School

 
Comments Off on How to Get the Most out of your Pocket Camera

Posted in Photography


Crowdsourced Data Reveals Most Beautiful Urban Walking Routes

14 Jul

[ By WebUrbanist in Destinations & Sights & Travel. ]

best walking routes study

Using a mapping algorithm coupled with citizen reviews of sights and scenery, a team of researchers has developed a way to choose paths through cities based on beauty, quiet and happiness rather than simply the shortest distance between two points.

shortest or beautiful route

The project employed Google Street View and Geograph as well as Flickr images and their metadata to build out an initial estimation of probable best paths, then solicited human feedback (to check and enhance the results) from a group of participants on the website UrbanGems (shown above).

london main sites map

The study, published by Cornell University’s arXiv, came up with a number of route suggestions in Boston and London and contains a number of interesting findings. For starters, the ‘beautiful’ routes were only slightly longer than the shortest routes, and significantly shorter than typical tourist-oriented directions and guided-tour paths. As the algorithm improves, it is increasingly able to generate paths through new cities via metadata alone, reducing reliance on input from people.

beauty and shortest boston

boston main sights map

The project’s creators included Daniele Quercia and Luca Maria Aiello of Yahoo Labs in Barcelona and Rossano Schifanella of the University of Torino, Italy. From their abstract: “When providing directions to a place, web and mobile mapping services are all able to suggest the shortest route. The goal of this work is to automatically suggest routes that are not only short but also emotionally pleasant.

beauty walking route london

shortest walking route london

The assessments are not simply qualitative value judgments, but a hybrid of human and machine input: “Based on a quantitative validation, we find that, compared to the shortest routes, the recommended ones add just a few extra walking minutes and are indeed perceived to be more beautiful, quiet, and happy.”

happy walking path london

quiet walking route london

From UrbanGems: “Buildings and neighbourhoods speak. They speak of egalitarianism or elitism, beauty or ugliness, acceptance or arrogance. The aim of UrbanGems is to identify the visual cues that are generally associated with concepts difficult to define such beauty, happiness, quietness, or even deprivation. The difficult task of deciding what makes a building beautiful, or what is sought after in a quiet location is outsourced to the users of this site using comparisons of pictures. With a comprehensive list of aesthetic virtues at hand, we would be more likely to systematically understand and re-create the environments we intuitively love.”

Share on Facebook


[ By WebUrbanist in Destinations & Sights & Travel. ]

[ WebUrbanist | Archives | Galleries | Privacy | TOS ]


WebUrbanist

 
Comments Off on Crowdsourced Data Reveals Most Beautiful Urban Walking Routes

Posted in Creativity


The Most Valuable Photography Tips Ever – Results of a Social Media Survey

10 Jun

I recently asked the following question on social media: “What was the most valuable photography tip you ever received?” Needless to say, I received a plethora of really useful tips from the audience. Some were spot on, others were debatable. I thought it would be fun to post a few here and expand on them briefly.  Let’s get started with the most valuable photography tips ever.

The best zoom lens is your own feet

That is often true but please don’t try it if you are photographing a polar bear and her cubs or a bulky football player running for touch down. Get the right tool for the job! On the other hand, I must say that on any given photography workshop, the day my students do their best work is when they use a fixed focal length lens. I really believe in the power of limitations.

Look for the light

The day I understood how to see the light and how to harness it, is the day my photography took a leap forward. There is no bad light, learn to assess the quality and quantity of light and work with. It’s all about learning to use it to your advantage.

See the light and use it to your advantage. ©Valerie Jardin

See the light and use it to your advantage.
©Valerie Jardin

Get close. Then Get Closer

Okay, I had to smile because this one came from one of my former students. I could hear myself say that exact same sentence. Learn to see photographically and make stronger images. Photographers tend to leave too much ‘stuff’ around their subject. The viewer gets lost in the chaos and doesn’t know where to look. Less is often more. It’s important to learn to crop in camera and using a prime lens is a great way to learn to see photographically. Learning to remove distracting elements from your frame before your press the shutter is essential to improving your photography.

Get close. Then get closer! ©Valerie Jardin

Get close. Then get closer!
©Valerie Jardin

Stop thinking and shoot

Before you press that shutter you should know why you composed the way you did. Using the ‘spray and pray’ approach will certainly get you some lucky shots but not much satisfaction. You obviously stopped because you saw something that grabbed your attention, work the scene and follow your instinct. Don’t over analyze at the risk of making a technically perfect image with no story or feeling. Perfection is not always the goal.

Never stop practicing

There is no better way to improve your craft than by exercising those ‘visual push-ups’ daily. You don’t even need to leave the house. Experiment with anything, make an ordinary object look extraordinary. Go ahead and use your camera phone even. The tool doesn’t matter, your vision does.

Don’t use the flash

Okay, I have to use a ‘Sammonism‘* here and remind you to “Turn the darn flash off!” This tip applies to your camera or your phone.

After you’ve taken the shot, look behind you.

For sure! If you are photographing another sunset, the scene lit by the golden light behind you may be even more spectacular.

Look behind you! Everyone was looking at the sun setting over the river Seine in Paris, I looked back and was struck by the beautiful golden light hitting the bridge posts.  ©Valerie Jardin

Look behind you! Everyone was looking at the sun setting over the river Seine in Paris, I looked back and was struck by the beautiful golden light hitting the bridge posts. – ©Valerie Jardin

Shoot in manual mode

That may not always be your best choice. If you are shooting landscape then I would say yes, by all means, shoot in manual and take full control. If you are shooting street photography for example, shutter priority or aperture priority may be better choices. There is no coming back to get the shot again, so let the camera do some of the thinking for you or you’ll miss the moment.

Lighten your load and expand you creativity

A comfortable photographer is a happier photographer. Take one camera, one lens and let those creative juices flow.  It will save your back too.

Shoot for yourself. Don’t try to get approval of others.

So true, unless you need to please a client, of course. If photography is a hobby, why should you care what other people think of your pictures, as long as you like them? That said, having a critique of your work in order to improve on it is one thing, and I would highly recommend it. But, the need for gratification via ‘likes’ on social media is something you should try to learn to live without. If that is the goal then I would recommend posting a daily kitten picture to get your fix. Then just shoot what you love (if it’s kittens, then it’s a win-win). In all seriousness, not every genre of photography will get ‘Oohs and Aahs’ on social media. For example, street photography is not understood and appreciated by the general public like landscape photography. Is that a reason to shoot landscape if your heart is in street photography? I hope not or you’re a photographer for the wrong reasons. Follow your heart and your work will shine!

Stop reading and start clicking

It’s good to read about photography and get inspiration online and in books but that should not replace your time behind the camera. You are not going to get instantly better after reading an article or watching a tutorial. You are only going to get better if you shoot often. Period.

Slow Down

Having unlimited shutter clicks without a cost factor attached is both good and bad. Good for the learning curve. Bad because it tends to make us lazy. Start shooting as if you were shooting film, make every shot count and you will have more keepers at the end of the day. Slow down and know why you are about to press the shutter.

Practice, practice, practice. Any ordinary object can be a great learning subject to exercise those 'visual push-ups' ©Valerie Jardin

Practice, practice, practice. Any ordinary object can be a great learning subject to exercise those ‘visual push-ups’  ©Valerie Jardin

Never pack your camera away until you are back home

You never know what is going to cross your path. Keep that camera handy, and always on.

Take the lens cap off

Better yet: Leave it at home.

Happy shooting!

Please share some tips that made a difference in your photography in the comment section below.

*In reference to our friend and photographer extraordinaire Rick Sammon

The post The Most Valuable Photography Tips Ever – Results of a Social Media Survey by Valerie Jardin appeared first on Digital Photography School.


Digital Photography School

 
Comments Off on The Most Valuable Photography Tips Ever – Results of a Social Media Survey

Posted in Photography


dPS is 8 Years Old [And Here are Our Most Popular Tutorials Ever]

24 May
Image by Ryan Pendleton

Image by Ryan Pendleton

Last month dPS passed it’s 8th birthday. While we usually have a little celebration at dPS HQ on such milestones we were so busy that week that not a single one of us noticed!

So today I took a few minutes to reflect on the journey since our first post on 17 April 2006 – and what a ride it has been.

When I hit publish on that first post I did so in the hope of helping a few of my family and friends improve their photography by writing down the tips that I found myself regularly telling them about how to use their cameras better.

I had no idea that 8 years later the site would have published over 4500 tutorials, 19 photography eBooks, have a staff of writers, editors, designers, developers, producers, customer support and marketers running it and would have been visited by over 275 million people!

Thanks so much to our wonderful community for sticking with us for another year here at dPS and a huge thanks to the dPS team for all your hard work!

This past year we’ve seen a complete overhaul of our design and the addition to our team on numerous fronts. We hope you continue to enjoy what we do and are excited about the year ahead – we have some special stuff planned!

While we’re in a mood to reminisce I thought I’d take a look back at the most tutorials we’ve published and I’ve compiled a list of our most popular 15 tutorials for those of you who might have joined us recently (or for those who want to look back).

Many of these are from the early days but are still very relevant for today. Each tutorial has been read by over 1,000,000 readers (and up to 4,000,000).

Enjoy!

  1. 10 Ways to Take Stunning Portraits
  2. Introduction to ISO Settings in Digital Photography
  3. How To Make Digital Photos Look Like Lomo Photography
  4. Learning about Exposure – The Exposure Triangle
  5. Wedding Photography – 21 Tips for Amateur Wedding Photographers
  6. Rule of Thirds
  7. How to Make An Inexpensive Light Tent – DIY
  8. Long Exposure Photography: 15 Stunning Examples
  9. Introduction to Aperture in Digital Photography
  10. Introduction to Shutter Speed in Digital Photography
  11. Posing Guide: 21 Sample Poses to Get You Started with Photographing Women
  12. 21 Settings, Techniques and Rules All New Camera Owners Should Know
  13. 11 Surefire Landscape Photography Tips
  14. How to Photograph Fireworks Displays
  15. DIY Lighting Hacks for Digital Photographers

The post dPS is 8 Years Old [And Here are Our Most Popular Tutorials Ever] by Darren Rowse appeared first on Digital Photography School.


Digital Photography School

 
Comments Off on dPS is 8 Years Old [And Here are Our Most Popular Tutorials Ever]

Posted in Photography