Tag: More

  • Dress Down: Wild Women’s Dresses Made of Trash, Trees & More

    [ By WebUrbanist in Art & Sculpture & Craft. ]

    state new york dress

    State of Dress is part fashion, part art and part personal mission, an attempt to capture the essence of all fifty States in the US through a series of site-specific dress designs tailored to each location. Robin Barcus Slonina is the multi-disciplinary artist behind this project and the star of an upcoming documentary of her travels and work.

    state dress ny nevada

    Some, like the New York City garbage bag dress, are intentionally humorous, referencing absurd couture mixed as well as ubiquitous street-side trash bags. Others, like the Nevada casino chip gown, are plays on local pastimes – in this case: the gaming and gambling cultures for which the state is most well-known.

    state dress grass leaves

    state dress pine cones

    While artificial materials make up some of the dresses, others are constructed from local organic elements, like Iowa’s prairie dress and Minnesota’s corn dress, each set in (and seeming to spring up from) an apt natural landscape.

    state dress natural materials

    state dress willow wyoming

    Other states with lots of nature likewise ended up with environmental materials, from willows in Wyoming to pine cones in Maine and pine trees in Wisconsin.

    state garbage dress design

    The creation of each piece of apparel comes with its own story. Here is a bit more from the artist about the making of the NYC trash bag dress: “The first time I ever visited New York as a young artist was during a massive garbage strike, and it left a lasting impression on me to see mountains of garbage piled so high on busy city sidewalks. To me, the sanitation workers that mange these tiny mountains every week are the true heroes of the city.”

    state nyc trash bags

    “However, by no means did I mean any disrespect or want to create something ugly for this metropolis of art, beauty and fashion. I therefore strived to create a jet-black, fashionable New York dress, that just happened to be made from garbage bags. To me, this piece represents all the dramatic contrasts inherent to New York: wealth and poverty, art and homelessness – beauty and trash. To fill the bags, I used another New York icon – crumpled-up New York Times newspapers.”

    Share on Facebook


    [ By WebUrbanist in Art & Sculpture & Craft. ]

    [ WebUrbanist | Archives | Galleries | Privacy | TOS ]


    WebUrbanist

  • Photokina 2014: Fujifilm interview – ‘Over the past few months I’ve been getting more confident’

    DPReview attended the Photokina trade show last week in Cologne Germany, and as well as stand reports and hands-on looks at the major new products we also sat down with executives from several of the major camera manufacturers. In this interview, we speak to Toshihisa Iida, Senior Manager of Sales & Marketing in Fujifilm’s Optical Device & Electronic Imaging products division. Click through to read more

    Articles: Digital Photography Review (dpreview.com)

  • Photokina 2014: Sony interview – ‘we still need to create more lenses’

    At Photokina last week we sat down with Shigeki Ishizuka, the global head of Sony’s Imaging Business. As well as talking us through Sony’s current Alpha strategy, Ishizuka-san also explained why the name ‘NEX’ was dropped and told us a little about how Sony’s sensor business works. Click through for the full interview

    Articles: Digital Photography Review (dpreview.com)

  • 5 Psychology Studies to Make Your Photography Business More Effective

    The vast majority of marketers are not psychologists, but they do know how to apply psychology studies to attract and engage customers. This is not some kind of special knowledge or secrets of the Mayans – it’s quite obvious things you might have never been thinking about. I’ve been putting together five psychology studies and wanting to make us better marketers Continue Reading

    The post 5 Psychology Studies to Make Your Photography Business More Effective appeared first on Photodoto.


    Photodoto

  • When Every Inch Counts: 14 More Clever Small Space Hacks

    [ By Steph in Design & Furniture & Decor. ]

    Small Space Hacks Compact Kitchen 3

    Making a tiny living space comfortable and practical means integrating multi-purpose furniture, custom built-ins and lots of other clever space-saving tricks. These 14 (more) small space hacks include a few DIY projects that can be achieved with components purchased at Ikea.

    Incredibly Compact Kitchen
    Small Space Hacks Compact Kitchen 1

    Small Space Hacks Compact Kitchen 2

    Starting as a narrow dining table, this ultra-compact kitchen swings open to reveal an induction cooktop, oven, refrigerator and storage space with a sink and a work surface. Slide it under the white table unit when not in use or pull it out into its own little island – perfect for the minimalist cook working in a small space. Check out 15 more modular & multipurpose kitchens for small spaces.

    Spaceflavor Mobile Cube: Office/Tea House in One
    Small Space Hacks Spaceflavor Cube 1

    Small Space Hacks Spaceflavor Cube 2

    Feng Shui expert Liu Ming created the Mobile Cube to compartmentalize his personal space in a live/work apartment that has to accommodate over 30 students during classes. The entire cube is on wheels, with a lower portion that can contain a bedroom or an office, and a loft that functions as meditation space, a sleeping area or a tea room (as he uses it.) It measures just eight feet square and has hidden stairs that double as drawers, as well as cabinets, closet space and translucent roller shades.

    Fold-Out Picnic Table
    Small Space Hacks Fold Out Table 1

    Small Space Hacks Fold Out Table 2

    This picnic table offered by a Brazilian furniture store has enough seating for six people, yet folds completely flat against the wall when not in use, opening up the floor for other purposes.

    IKEA Closet Makeover
    Small Space Hacks Closet 1

    Small Space Hacks Closet 2

    A cluttered closet in a small Brooklyn apartment now has a dedicated space for everything from shoes to handbags courtesy of an IKEA makeover. While the overall size of this closet would be luxurious in most small spaces, the setup could easily be customized to your own needs while maintaining organization.

    DIY Murphy Bed
    Small Space Hacks DIY Murphy Bed 1

    Small Space Hacks DIY Murphy Bed 2

    If you’re an ambitious DIYer, you can attempt your own murphy bed, like this one at a sustainability camp in Maryland. DIY Network has plans for a simpler version, or you can try an Ikea hack with sliding doors over at Instructables.

    Next Page – Click Below to Read More:
    When Every Inch Counts 14 More Clever Small Space Hacks

    Share on Facebook


    [ By Steph in Design & Furniture & Decor. ]

    [ WebUrbanist | Archives | Galleries | Privacy | TOS ]


    WebUrbanist

  • Carry Less – Photograph More: Elevate Your Travel Photography

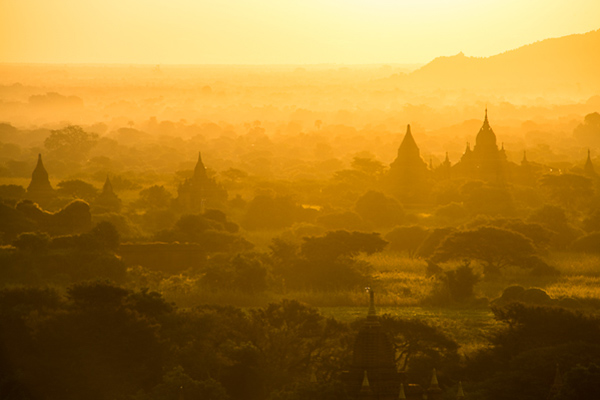
    20131206_Bagan_563b

    As a travel photographer, either on assignment or shooting a personal project, capturing great quality images that represent the spirit of a place and its people is key.

    Looking to achieve that was a priority for me, so I always traveled with a bag full of gear, including at least two DSRL bodies, three or four lenses, flash, tripod, batteries, etc. It was a heavy load, and it slowed me down. I am a Nikon shooter, so my first approach to unload weight was to carry an all-purpose lens. I got the Nikon 28-300mm, and along with this, I’d carry the 14-24mm for wide-angle shots. Now I needed a backup camera or second body. I debated whether to keep carrying another Nikon body or to try something more compact. Finally I decided to get myself a mirrorless camera; enter the Fuji X system. My first mirrorless camera was the Fuji X-E1 with the kit lens, the wonderful Fuji 28-55mm. That camera was a turning point for me, and after my first trip I was sold on the system. Yes, I still shoot Nikon, but I just don’t travel with those big guns anymore.

    The mirrorless technology is now really advanced – gone are the days when the image quality was not up to par with DSRLs and the availability of lenses was scarce. There are similar options from different manufacturers: Sony, Olympus, and Panasonic all have systems that eliminated the reflex portion and bulkiness of the typical DSRL. Please understand that I am mentioning Fuji because that’s the camera I use, but this is not an article to discuss a specific camera or brand. What you should consider is that for the most of us, the image quality of these cameras nowadays is amazing.

    20131212_Inle_Lake_535b

    I’d say I’ve switched, at least for travel. Fuji is now my go-to system for everything on the move, including photo walks. If you are planning to invest in a camera system, you should at least give mirrorless consideration, and here is why:

    1) Travel Light

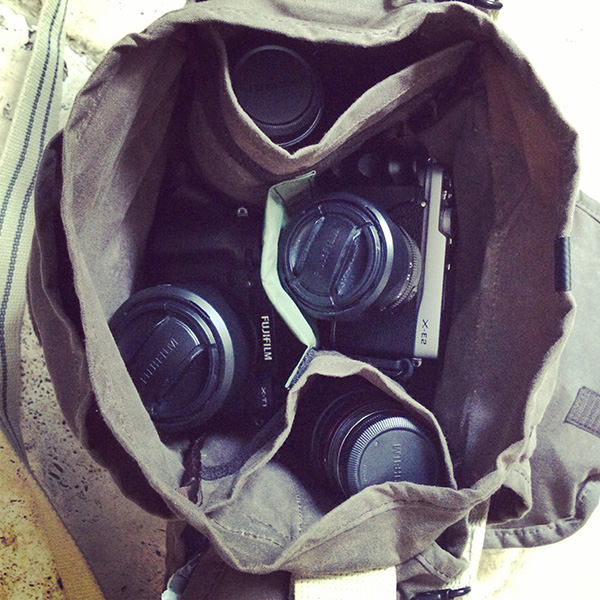
    When using a mirrorless system, traveling light doesn’t mean that you’ll be out of options in the field. In just a small camera bag, you can fit a lot. This Domke F-3X Super Compact bag contains two bodies, five lenses, a flash, four extra batteries, radio triggers, a GPS for geotagging and SD cards. What I have here in terms of camera are the Fuji X-T1, Fuji X-E2, Fuji18-55mm zoom, Fuji 55-200 zoom, the 23mm and 35mm primes and an 8mm fish-eye from Rokinon. Believe me, I can carry this all day long without putting strain on my back, which brings me to the second point.

    CAMERA BAG

    2) Shoot all day

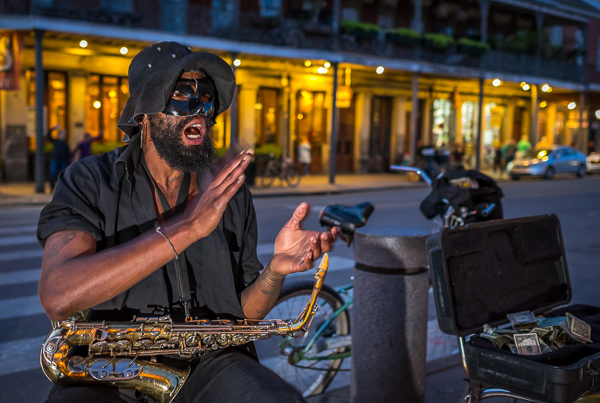
    Wandering light means you can wander more. A small and light kit won’t wear you out and you can pretty much shoot all day long. With these cameras you can always have one on you, even if you are not carrying a camera bag. There are plenty of options where you can take them on your belt and even inside the pocket of a jacket. Having a camera with you all the time brings more opportunities to capture the people and places where you are traveling. The photo below was taken my first day in New Orleans; after a long flight I just went out for a walk with the Fuji X-E2, the 23mm prime and a flash in my pockets, and when the opportunity presented itself I was able to shoot it.

    Street performer at night in New Orleans

    3) Be invisible, blend in

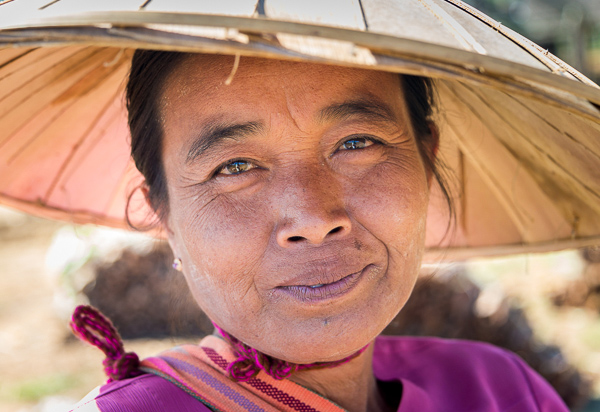
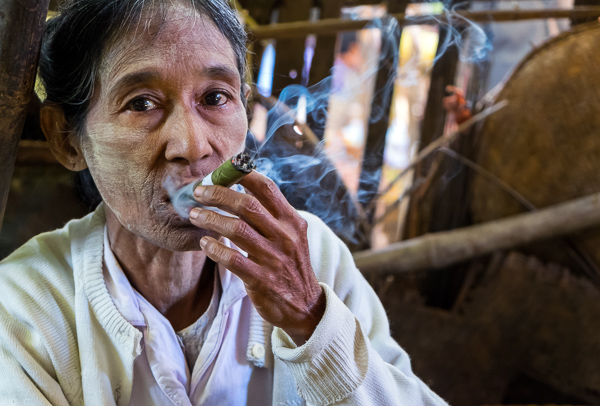
    There is nothing more annoying than people being scared of you. Trying to stick a big lens or camera in front of people in public spaces, or even worse, in remote locations where you don’t speak the local language, is a formula for disaster. There is also a difference if they see you as a pro photographer or just another tourist. When you carry a small camera, you’ll most likely go unnoticed or they won’t feel as intimidated as they would when they think you are pro shooting for a magazine. I personally love to shoot markets: these places, away from big cities, are one the best ways to explore local cultures. I’ve noticed a big difference since I started to shoot with the Fujis on my trips. I can blend in more, I can aim the camera, smile, and get a photo with no problems, whereas before many times I’d have people turning their faces down or away from me. Just consider this fact alone and the difference it can make in your photography.

    Old Burmese woman smoking a cigar

    Another great feature besides what is mentioned above is how easy it is to work with an electronic viewfinder. Imagine being able to see exactly what are you getting in your viewfinder before making the shot. You can quickly adjust camera settings and see the changes on the fly. Seeing where your whites are clipping or how the shooting mode will affect the result of the image without having to move your eyes out of the viewfinder is phenomenal. I could go on an on about the benefits, but I am not a technical person.

    If you like to travel and go places, in my opinion this is the way to go. The future is even brighter, as manufacturers continue to develop their lineups. Mirrorless is versatile and delivers excellent results. Touring light will make your travel photography better and you’ll be able to enjoy your trip more.

    Any other mirrorless fans here? Show us your photos and tell us about it.

    The post Carry Less – Photograph More: Elevate Your Travel Photography by Daniel Korzeniewski appeared first on Digital Photography School.


    Digital Photography School

  • Dancing Traffic Signal Makes Crossing the Street More Fun

    [ By Steph in Art & Installation & Sound. ]

    dancing-traffic-signals

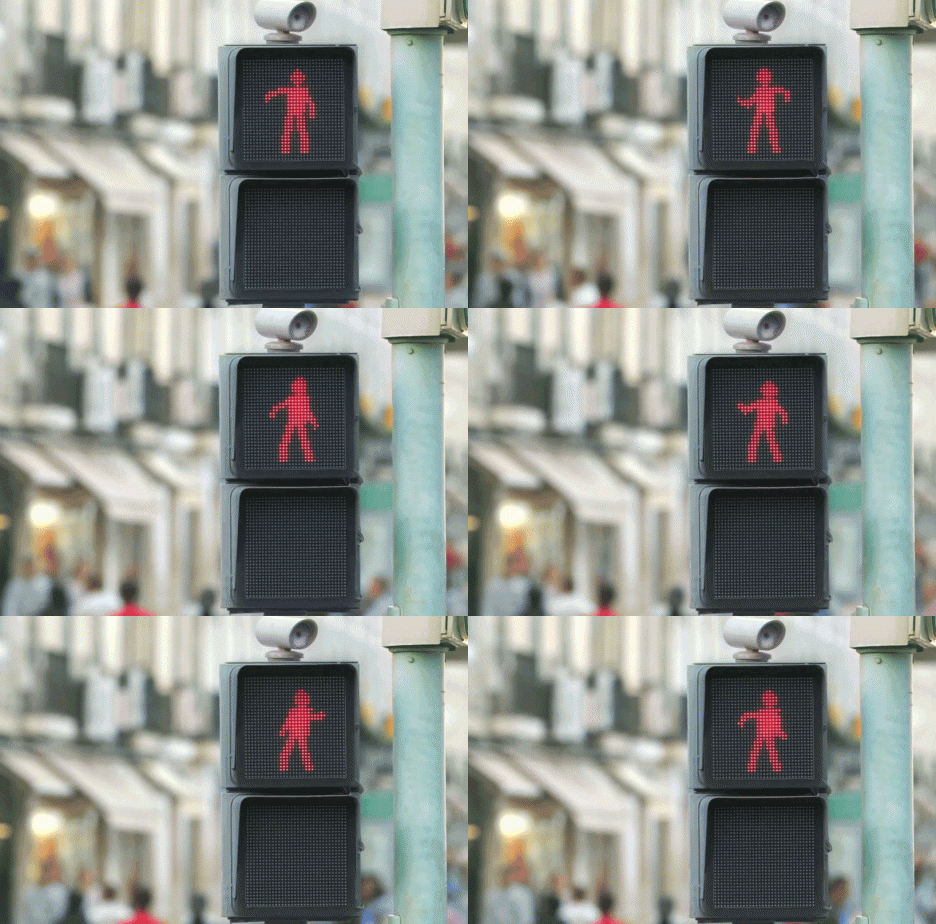
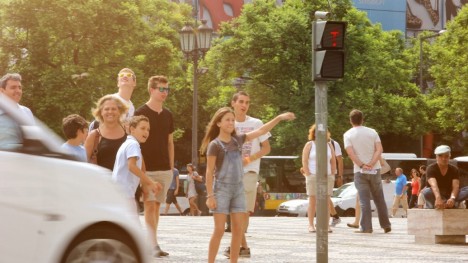
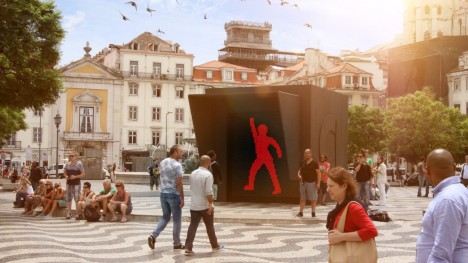
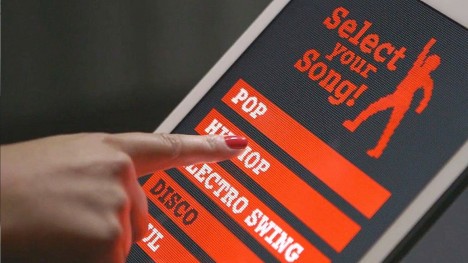
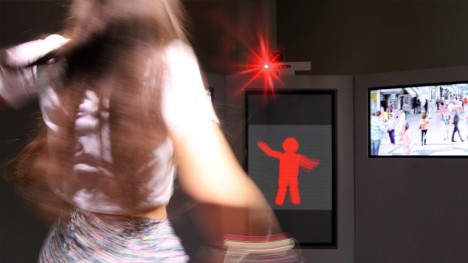
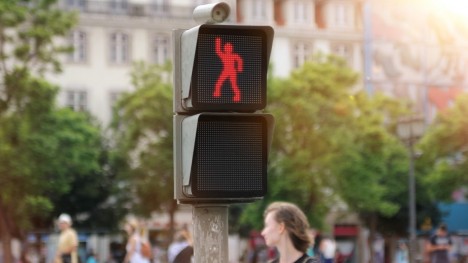
    Impatient pedestrians eager to get across the street stop, point and laugh when they realize that the usually-static human figure in the crosswalk signal is dancing maniacally, waving its arms and legs. Not only is the figure dancing, it’s mimicking the real-time movements of passersby in a nearby booth.

    Dancing-traffic-signals-5

    Dancing-traffic-signals-4

    The ‘WhatAreYouFOR’ campaign by Smart aims to make intersections safer by providing some attention-getting entertainment.


    The people waiting to cross often can’t help dancing right along with the little figure, unaware that a real person is busting moves in an adjacent plaza, their dancing captured on camera and translated into the red pixelated silhouette.

    Dancing-traffic-signals-2

    Dancing-traffic-signals-3

    dancing-traffic-signals

    As a result, according to the creators, 81% more people stopped at the red light, increasing safety all around. “And they even had more fun doing so.”

    Share on Facebook


    [ By Steph in Art & Installation & Sound. ]

    [ WebUrbanist | Archives | Galleries | Privacy | TOS ]


    WebUrbanist

  • 14, September, 2014 – Beauty Is More Than Skin Deep


    We have published a few articles on medium format lately.  So, today we take it down a notch and share an article by Olaf Willoughby.  He re-visits the Leica T and his experiences as a user.  You can read test reports and reviews but using a camera is the bottom line.  Olaf digs right down to the heart of it in “Beauty Is More Than Skin Deep – Thoughts On The Leica T”. 

    It’s Photokina time and I am publishing this article from the Delta Lounge at the Atlanta Airport.  The show opens Tuesday and Michael and I will be there covering all the new announcements and possibly a few new surprises.  We’ll be providing daily updates on what we see.  We also have some appointments for interviews and these should be interesting.   So, check back on a regular basis as we bring you the 2014 Photokina Report.


    The Luminous Landscape – What’s New

  • 6 Tips for More Unique Travel Photos in Busy Tourist Locations

    Imagine this: you’ve scrimped and saved for months for your dream vacation, and a snazzy digital camera, hoping to capture some unique travel photography images along the way, only to be flustered by the hordes of other tourists with the same intentions. With the increased accessibility of cameras on devices of every kind, this is becoming a common scenario that can frustrate many photographers, both professional and amateur. But don’t lose hope! With these tips, I’ll show you some ways to think of travel photography in a new light so that you can take unique travel photos in busy tourist locations.

    DPS Travel Photography 03

    1. Take shots from different angles

    To get a unique photo, consider your subject from a wide variety of angles. Get down on your knees and shoot from below, or step up on a bench, or use a monopod to shoot from on high. Do whatever you can, within reason, to shoot from different perspectives; this will greatly increase the odds of capturing a unique image.

    2. Time your visits to outdoor attractions to coincide with the most ideal natural lighting available

    One of the biggest challenges to shooting outdoor attractions can be harsh shadows due to lack of lighting control. You obviously don’t want to bring strobes and excessive flashes with you when you travel, so it’s best to use the sun to your advantage. Do your research with apps, such as The Photographer’s Ephemeris, to see where the sun will be, and plan your trip accordingly. Sunrise and sunset are probably among the most ideal times, but be aware that you’ll likely get competition from other photographers thinking the same thing (see image above).

    3. Go where the crowds aren’t going

    DPS Travel Photography 05

    If the crowd in a tourist attraction is fixated on one particular part, turn around and see what is behind them. Look for details that are being passed by and not given attention. This gives you less competition, in addition to increasing the odds, of capturing a unique image that everyone else is overlooking. While you’re shooting in the opposite direction, this also gives you something to do while waiting for the crowd to thin out so that you have more time to capture a clean shot of the main attraction. Having patience, and waiting for breaks in the crowd, is also a key to shooting unique images.

    4. Pull out your zoom lens and focus in on details

    Challenge your photography skills and creativity by shooting exclusively with a macro, or zoom lens, for a while. Shooting with a longer focal length will encourage you to take in the intricate details of a place; something that is usually overlooked by other tourists who likely focus on taking selfies and wide-angle shots. There’s beauty in details, and zooming in close eliminates most of the risk of having other people block your shots.

    DPS Travel Photography 04

    5. Make other tourists part of your shot

    Instead of viewing the hundreds of other tourists around you as burdens, why not make them a part of your photo? Pull a fast one on other shooters by pointing your camera in their direction. Many tourists will likely duck or move out of your way, so act fast to catch them in natural poses. The point is, think like a photojournalist, or marketing photographer, and consider the idea that conveying the idea of a full, and popular, tourist attraction is a photo-worthy moment in itself.

    DPS Travel Photography 01

    6. Take candid shots or portraits of the locals

    In and around many tourist attractions, you’ll likely find lots of locals in the forms of security guards, vendors, taxi drivers, and more. If you’re searching for truly unique photo subjects, consider pointing your camera at some of these people who help run the tourist attraction, and making them a part of your photo. You could even get bold and approach some locals for a portrait. This might be tricky if you’re in an area where language barrier is a problem, but if you get creative with your body language, it’s fairly easy to get your point across. Portraits not only give you more opportunities to get creative, but also provide opportunities to chat with people, and perhaps find out other unique photo ideas in the area.

    DPS Travel Photography 02

    Have you got some great photos from crowded tourist locations? Please share them and your tips in the comments below.

    The post 6 Tips for More Unique Travel Photos in Busy Tourist Locations by Suzi Pratt appeared first on Digital Photography School.


    Digital Photography School

  • 20 More Photography Tips Every Travel Photographer Must Know

    Pick up Oded’s new SnapnGuide (a dPS sister company) Snapn Travel here for only $ 7, a lifetime of travel memories in a snap. Traveling is fun and rewarding, but sharing memories of your journeys with friends, family, and the world through your own beautiful images can be even better.
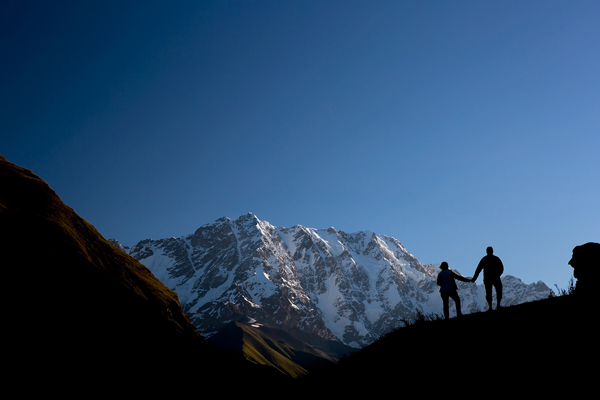
    Traveltips Georgia 2

    Georgia (the country)

    Here are 20 more tips for great travel photography:

    (You can read Part One 20 Photography Tips Every Travel Photographer Must Know here)

    Before you go:

    1. Make the visual decisions

    For most of us, deciding where and when to go is based on many decisions, not necessarily related to photography. But there are some small decisions you can make to turn an ordinary trip into a photo-worthy one. For example, let’s say you are going on a business trip. You can squeeze a few hours of photographing between meetings. But a much better option would be to take a day or two off and spend this extra time photographing on location.

    Or when planning your next family vacation, add a little visual research before the trip. Is there a nice festival or a market worth visiting at your destination? Is there something unique like an interesting ethnic group or unusual landscape that’s worth documenting? These small visual decisions can make a huge difference in your photographic experience during your trip.

    2. Build a shot list

    A “shot list” is a term from the movie industry. It’s a list of shots that are planned for a specific day. Want to come back home with better travel photography results? Then the shot list is your tool for the job.
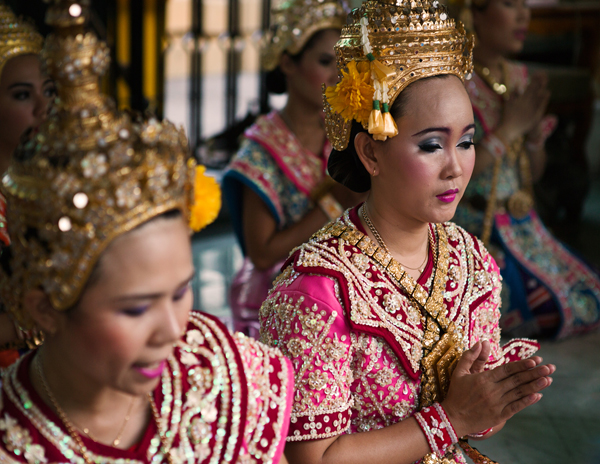
    Traveltips thailand 2

    Thailand

    First, make a list of visual ideas as your “I won’t come home without” image list. Combine the iconic images with more creative ideas. For example, if you’re going to Paris, don’t skip the Eiffel tower. As a true symbol of Paris, it should be on your list. But make sure to add creative visual ideas, such as boutique wine shops, farmers markets, or anything to your liking. The shot list is there to help you, not restrict you. When you’re on the road, with so many new sights and smells competing for your attention, the shot list will keep you organized and be a continual inspiration for creating the next shot.

    3. Smart gear choice

    Don’t take all of your equipment with you! Match the gear to the destination. Do you really need that flash on the beaches of Thailand? Or that 50 mm prime lens for the safari trip to Tanzania? Choose wisely and you’ll worry (and carry) a lot less.

    4. Photo boot camp

    If you’re not making images on a daily basis, it will probably take you a few days on location just to “get in shape”. Get a jump-start by warming up at home by creating a daily photography routine at least one week before departure. This will make sure you’re at your best as soon as you step off the plane.
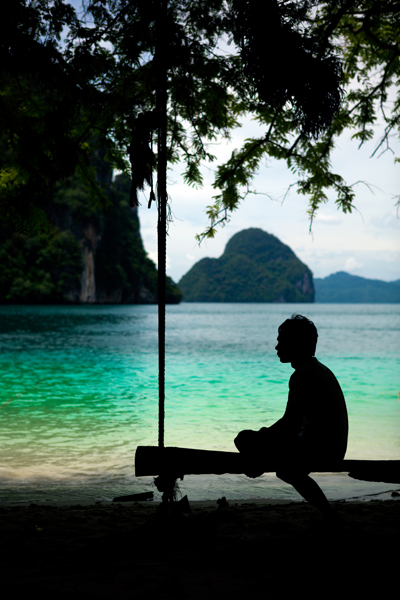
    Traveltips thailand 1

    Thailand

    5. Coordinate expectations

    Apart from our photographer’s “hat”, we all wear other hats, such as “father,” “spouse,” or “friend”. When traveling with others, we must wear many other “hats”. You must coordinate expectations with your travel partners to make sure the importance you’re placing on your photography during the trip won’t cause problems. Think and plan together about places you all can visit that would be great for even those who don’t take pictures: vantage points with scenic views, colorful markets, religious centers, etc.

    When you get there

    6. Location scouting

    This is another movie industry term. It means that before even taking out your camera, it is wise to get familiar with your surroundings. Take at least a few hours to learn the area. Understand if there are any interesting places around your hotel, visit one or two places that are on your shot list and adjust it accordingly.
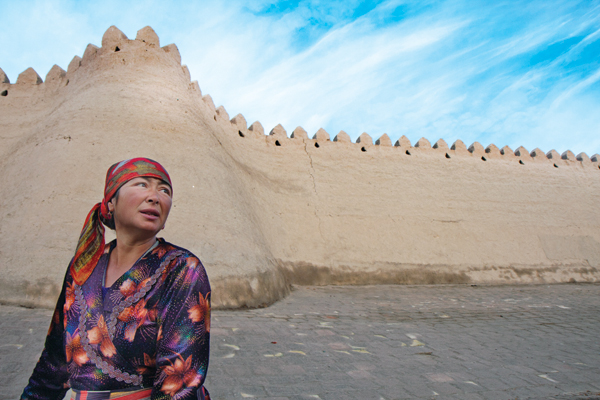
    Traveltips Uzbekistan

    Uzbekistan

    7. Get up early

    Yes I know, this one is a crazy ratings downgrade. But hey, travel photography is not for the lazy! The most precious thing on a trip is your time. Do not waste the hours of golden light of morning (or afternoon) on sleeping. Especially if you are traveling with non-photographers, it’s your time to do your best shots. You can save sleeping in for weekends at home.

    8. Markets first!

    Colors, food, local people, culture; markets are a photographer’s paradise. It’s always better to visit open markets (for the daylight) rather than covered ones. Some of the best markets I visited happen only once a week, be sure to be there.
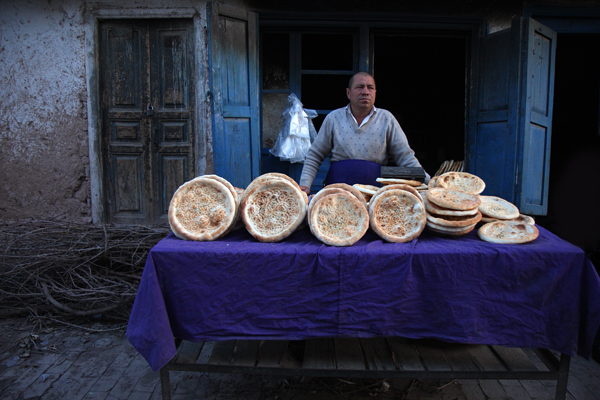
    Traveltips china

    China

    9. Diversify your shoots

    You took a landscape photo with a wide lens? Excellent, now do it again with a telephoto lens.

    You’ve got the main square in daylight? Wonderful! Come back at night with a tripod and shoot long exposures. Make the most out of your once-in-a-lifetime trip as your diversify your shoots and portfolio.

    10. Get out of your comfort zone

    We all have places that are less comfortable for us, but visiting a new place is an excellent opportunity to get out of your comfort zone. Do you not have the courage to approach strangers in the street in order to take their portrait? This is an excellent opportunity. You might be surprise how easy and fun it is to do this with strangers.
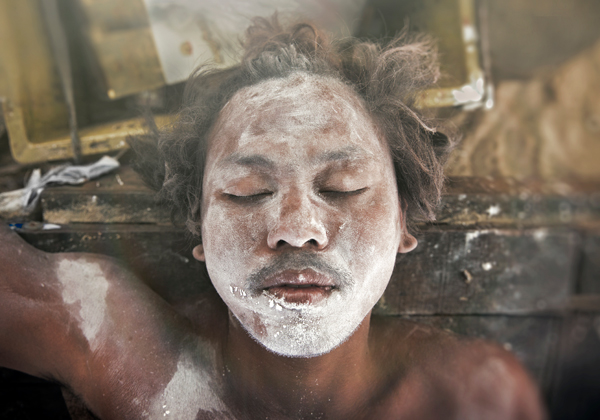
    Traveltips thailand 3

    Thaliand

    11. Go iconic – but from a different point of view

    We all know how Times Square, The Taj Mahal, and the Eiffel tower look. Don’t come back with the same, “we’ve seen it all before” images. You don’t have to skip those iconic places, they usually are truly worth the visit. But think of new and fresh ways to feature them. Try using a fish-eye lens, creative editing process, or reflections – the sky is the limit.
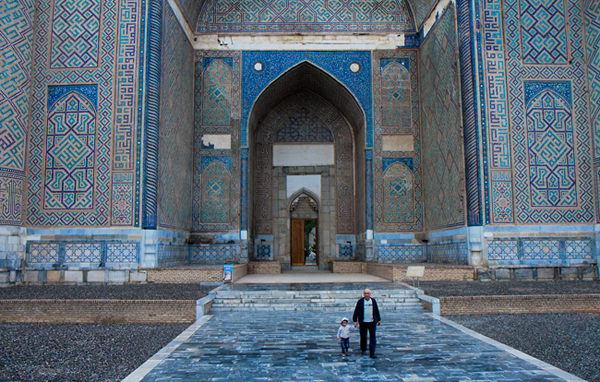
    Traveltips Uzbekistan 2

    Uzbekistan

    12. Get inspired!

    When I’m on a photography assignment, I always try to pay a short visit to a local gallery. Yeah, it sounds bit snobbish, but seeing the photography, paintings, or any other local art forms acts as a huge inspiration for my travel photography. We all want to create different and unique images. This is great way to do just that.

    13. Setting a trap

    I love this technique. Instead of jumping from place to place, looking for interesting subjects to photograph, I suggest to stay put and start building your frame with the background. Find an interesting vantage point on the street. You can even do this sitting at a sidewalk café. Establish your frame by determining the composition and exposure setting. Then wait for something interesting to enter your frame.
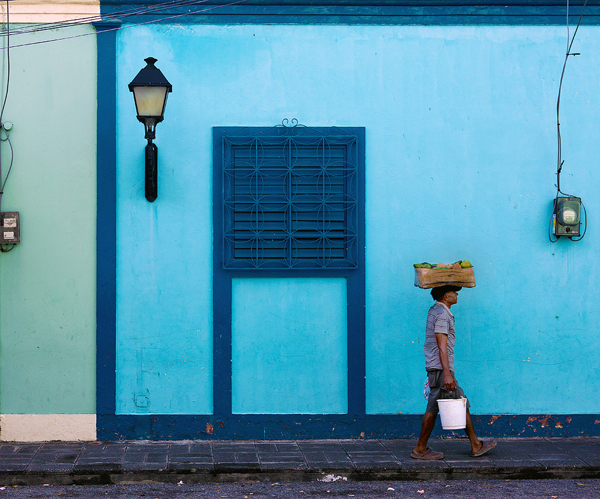
    Traveltips Dominican Republic 4

    Dominican Republic

    14. Join forces with a local

    From experience, in travel photography, there is nothing like working with a local photographer. Use a social platform (Facebook, Flickr, couchsurfing) and find a local photo enthusiast like yourself, who can show you all the best places to photograph. Of course, there are always risks when meeting strangers from the internet. Use your common sense and don’t meet them somewhere secluded at first.

    Coming back home

    15. Backup

    I cannot stress how important this tip is. Don’t wait until it’s too late. Laptop, hard drive, cloud storage, you name it. Backup your images on more than one source.

    16. Clean your gear

    Before you store your stuff, you should clean it. Sea salt, sand, or even just fingerprints on the lens, can damage your gear. Keep your equipment in good shape and you will enjoy it for many years.
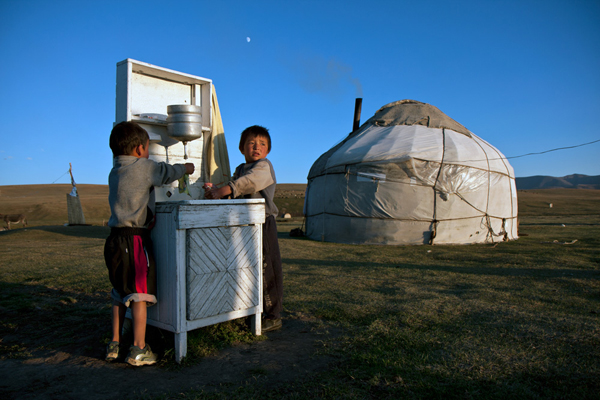
    Traveltips Kyrgyzstan 3

    Kyrgyzstan

    17. Have a successes and misses notebook

    In the past, I was recording a notebook of all my “almost got it” frames. Those fuzzy, overly bright, and “what the heck is this thing in the background” images.

    I kept this notebook in order to learn how to not repeat my mistakes (and because we photographers like to be angry at ourselves from time to time). Then, I realized that it is just as important to understand why I failed as it is to understand why I succeeded. So, even today, after every assignment, I write ten things to keep and ten things to work on until the next trip.

    18. Rest from it

    I know it’s tempting, but resist the urge to filter, edit, and post-process your images the minute you get home. Give yourself at least a week before you do so. We tend to emotionally connect to our images, usually by the degree of investment and hard work we put into creating them. Give yourself time to disengage yourself from the experiences of your journey. This will help you see your images with less bias.
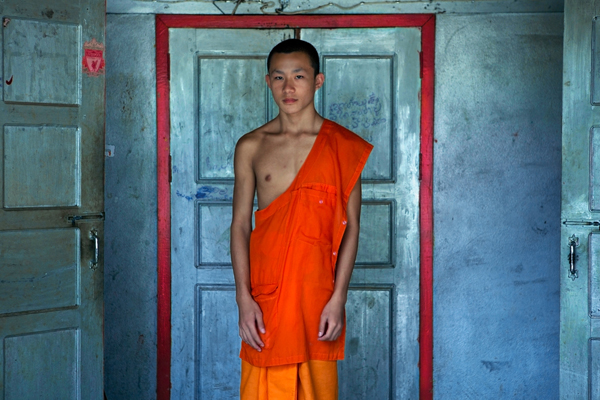
    Traveltips laos 2

    Laos

    19. Get feedback

    After learning from your successes and mistakes by yourself, use the help of someone else. Choose a friend, (preferably one with tact) and get his/her opinion on the images. It doesn’t matter if they’re a photographer or not. They should be honest, sincere and non-competitive with you.

    20. Get it out to the world

    Now, after resting from it, seeing it again with a new perspective, and hearing someone else’s advice, it’s time to get your art out to the world.

    Choose up to 15 photos (not more). It is important to pay careful attention to the opening and closing images. Each image must stand on its own and together as a set. Add some text and post it to the world.

    Note: the author would like to thank Nicholas Orloff for his help in writing this article.
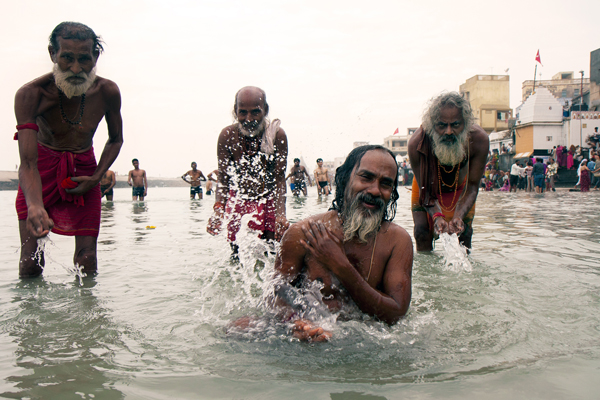
    Traveltips India

    India

    The post 20 More Photography Tips Every Travel Photographer Must Know by Oded Wagenstein appeared first on Digital Photography School.


    Digital Photography School